Suggested readings: AMP for Emails, AMP Registration Form, AMP Carousel for Emails, AMP Accordion for Emails
You can now leverage AMP forms to allow users to leave comments and submit feedback directly in emails. This way, you can collect five times more user reviews and feedback with no coding skills.
With the AMP-form:
- You do not need to add any AMPHTML code elements to email header.
- No coding skills required — you use an already prepared element.
- You can collect answers with a predefined data service, or with your own.
This guide answers the following questions with detailed instructions:
- How can I build the AMP form?
- How can I build a fallback for other recipients?
- How can I preview and test the form?
Build the AMP form
You can add AMP forms to your emails only for the recipients whose email clients support AMP. The other recipients will see a traditional form.
You can follow three ways: Form block or pre-built AMP modules
Form block
To add AMP forms to your emails, follow these steps:
1. Drag the AMP-form block into your email.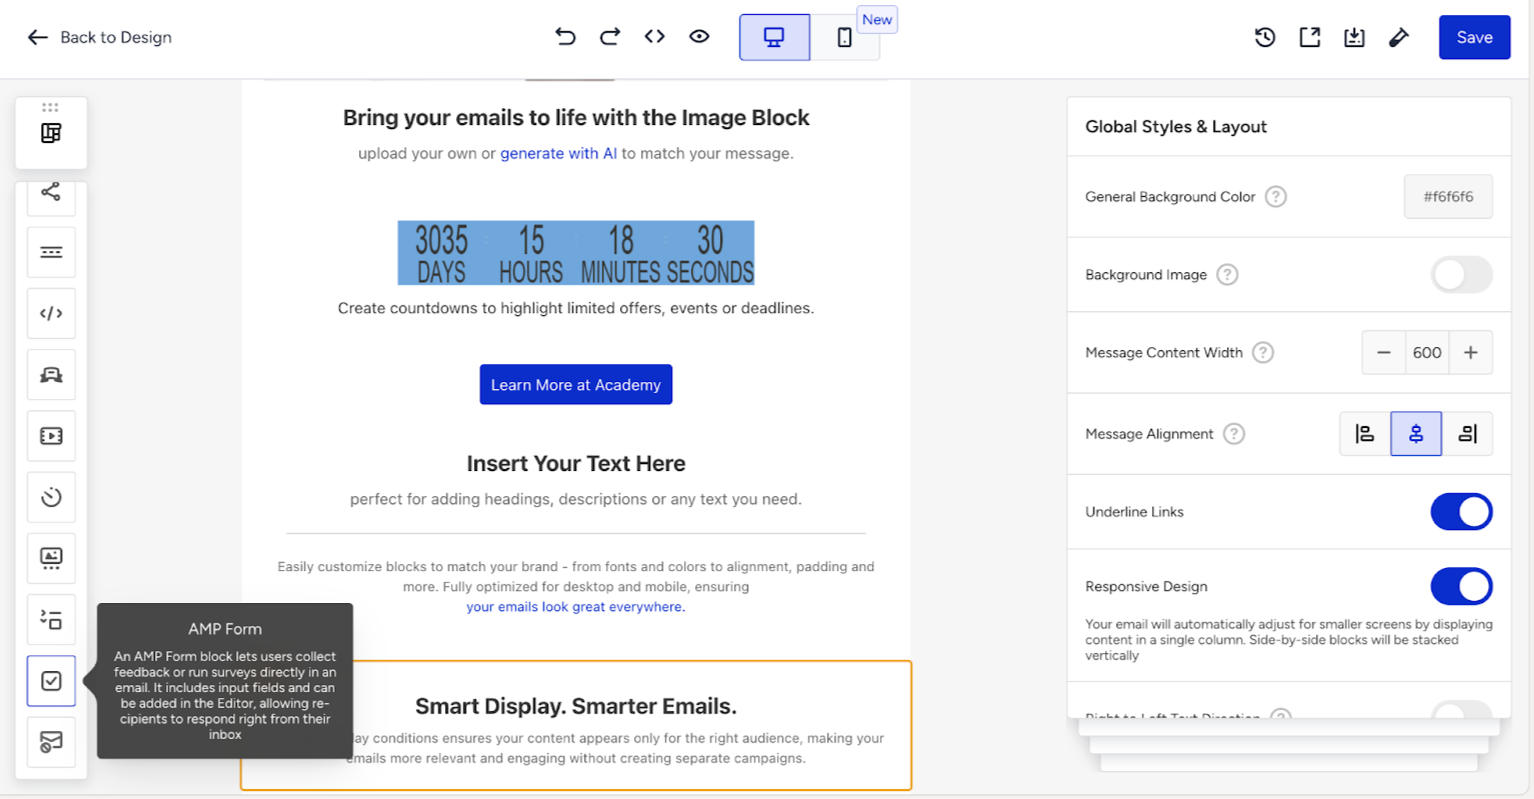
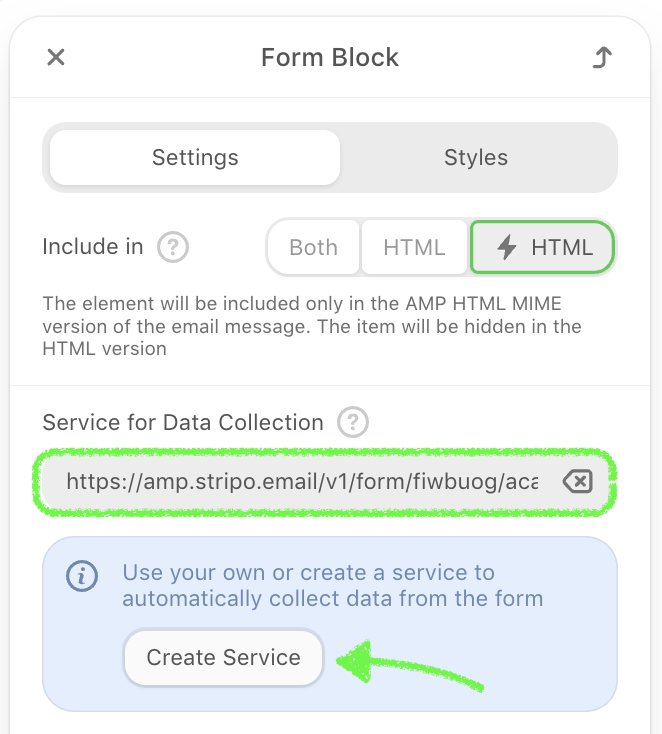
2. In the Settings panel, create your service for collecting data or add a link to the storage manually.
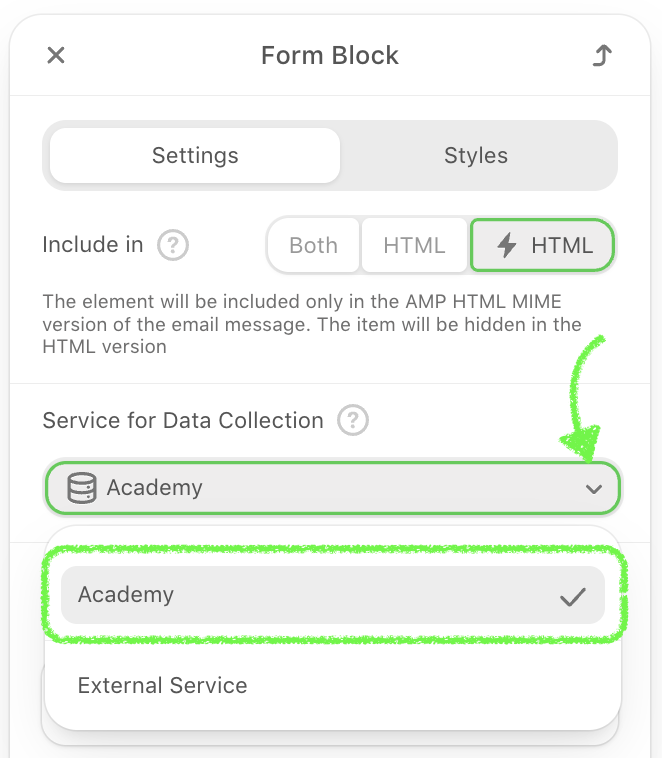
3. After you create your first storage, you can choose it in the form-block from the drop-down list.
4. Then click the Add form element and select Input.
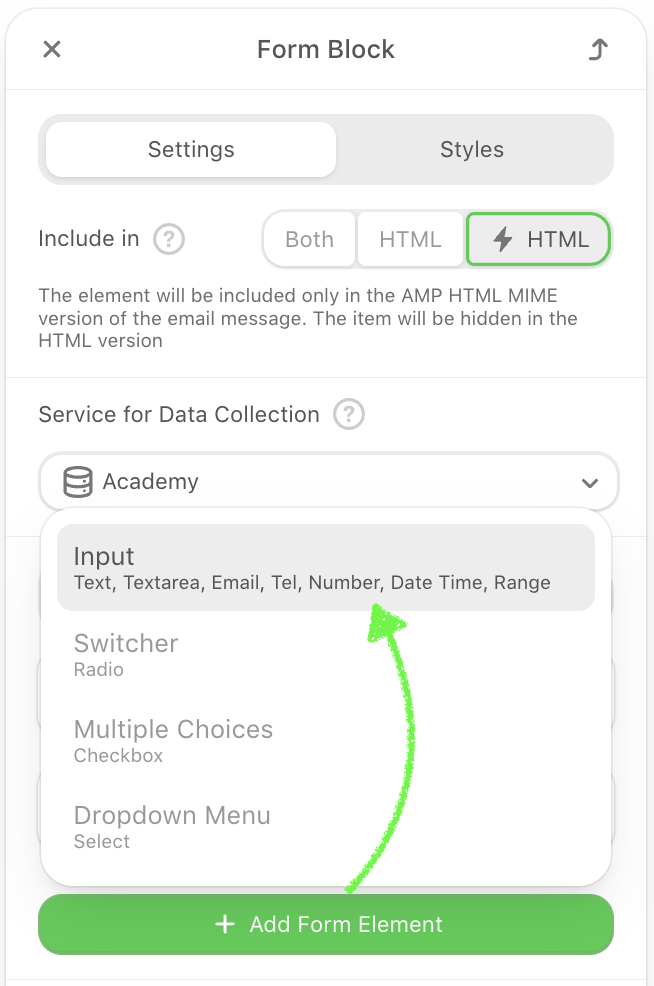
Each input field represents one form element, such as name, email, or message. You can add multiple input fields depending on what data you want to collect.
Now let’s take a look at how to configure each input field individually.
5. To configure an input, click on the three dots next to the element and choose Options.
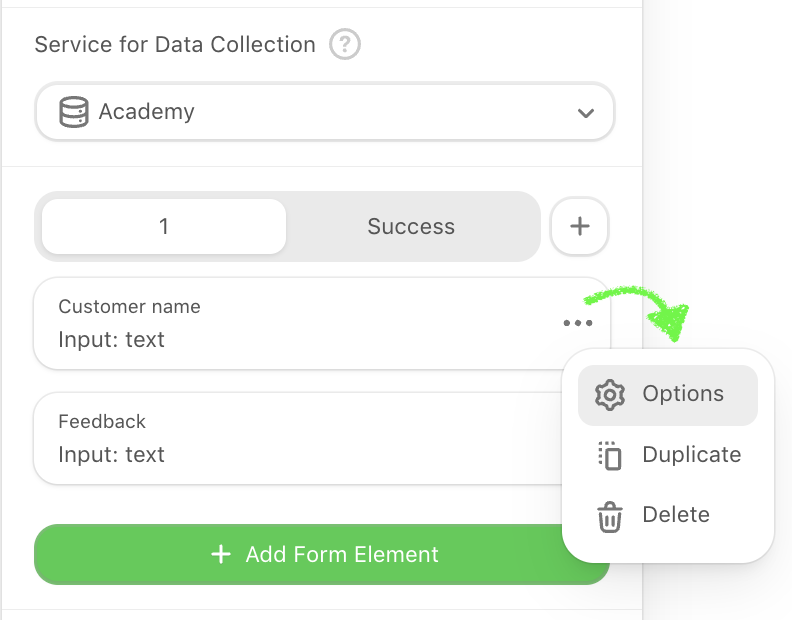
6. In the Type tab, you can select the field type from the following: Text, Email, Number, Phone, Text area, etc.

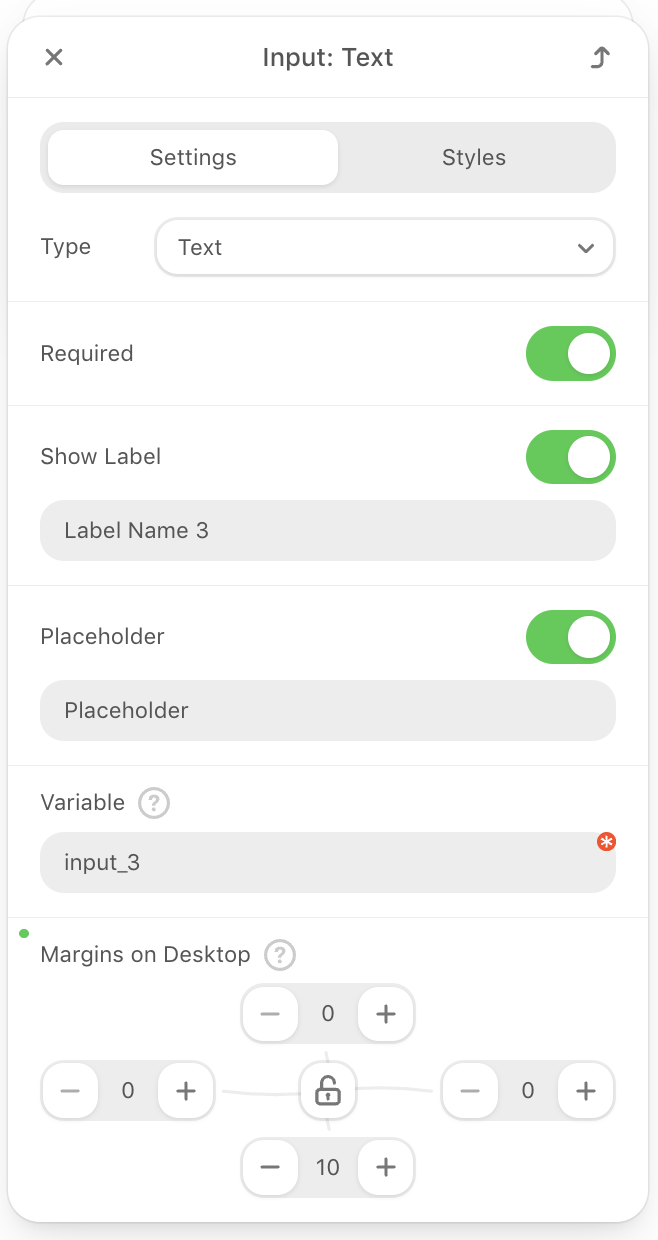
7. Once you've selected the input type, continue configuring the field in the settings panel.
- Set the input type (e.g., text, email, number).
- Mark the field as required.
- Show or hide the label, and customize its text.
- Add placeholder text inside the field.
- Assign a variable name to pass data to your backend. It must be a unique and valid name.
- Adjust margins for the desktop view.
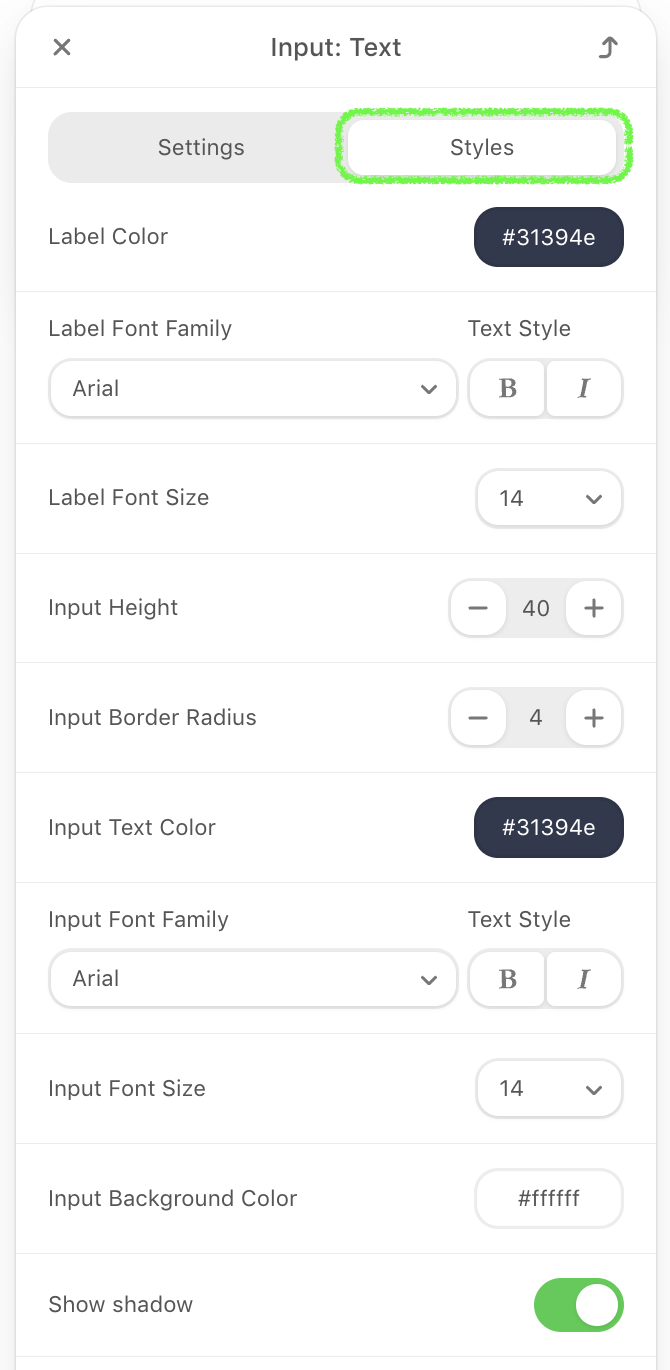
8. Switch to the Styles tab to customize the appearance of your input field.
- Set label font, size, and text style.
- Adjust input height and border radius.
- Set input text color, font, and font size.
- Choose a background color for the input field.
- Enable or disable shadow.
- Set border width, color, and style as solid, dashed, or dotted.
- Apply border to all sides or only to the bottom.
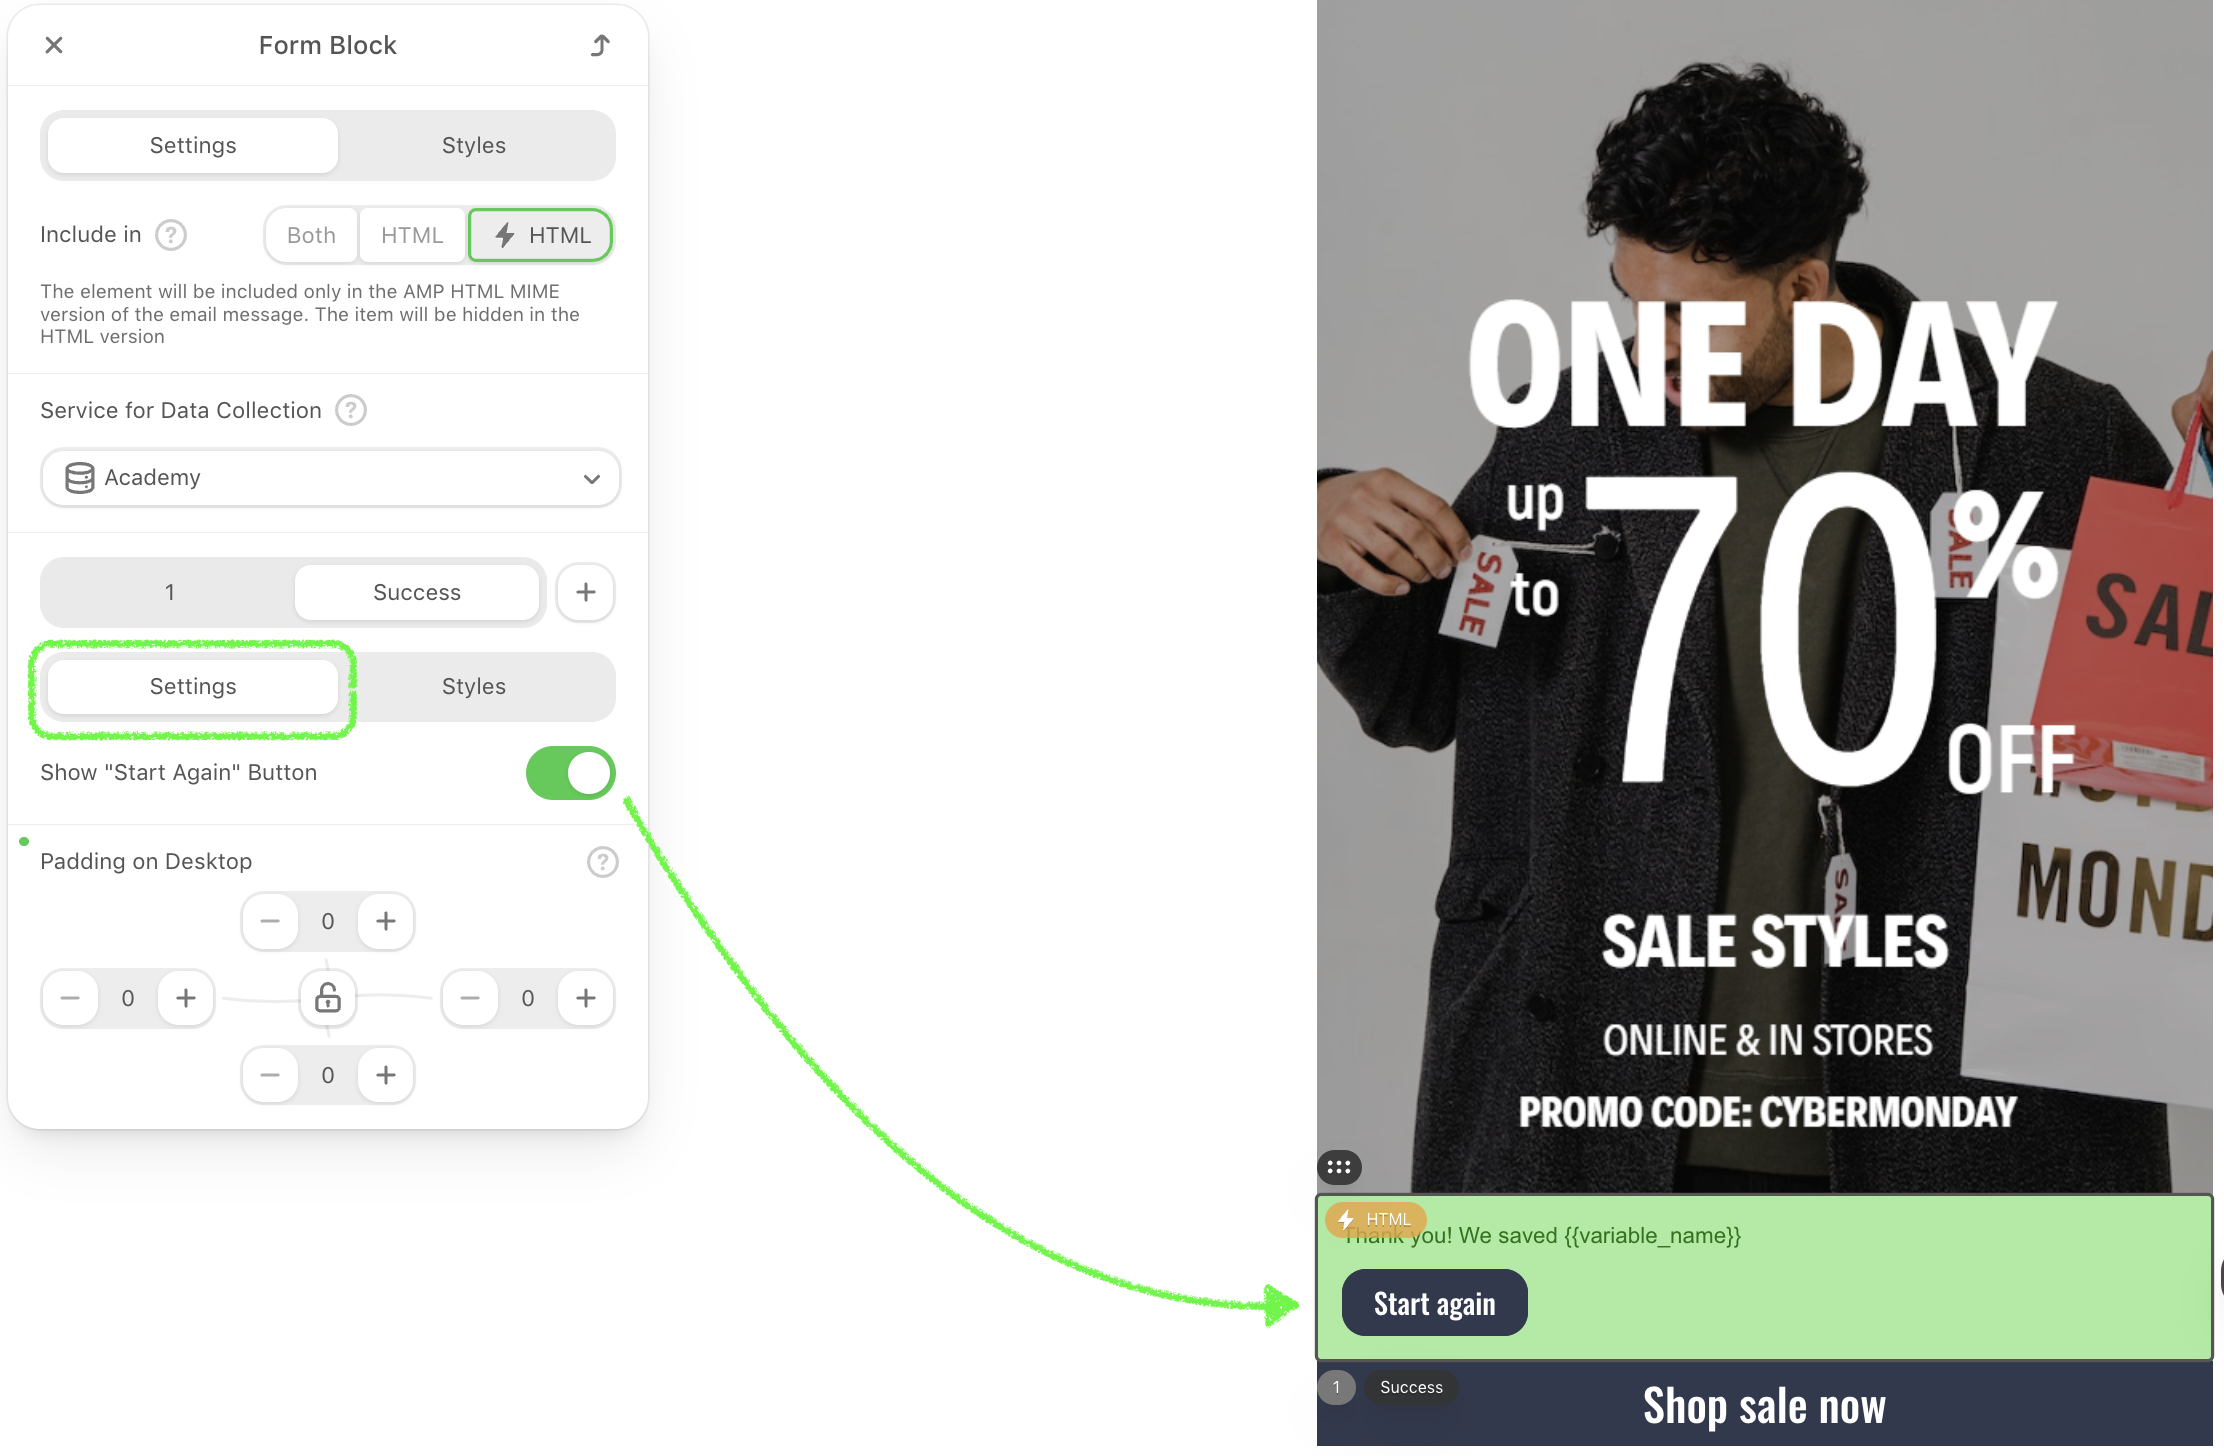
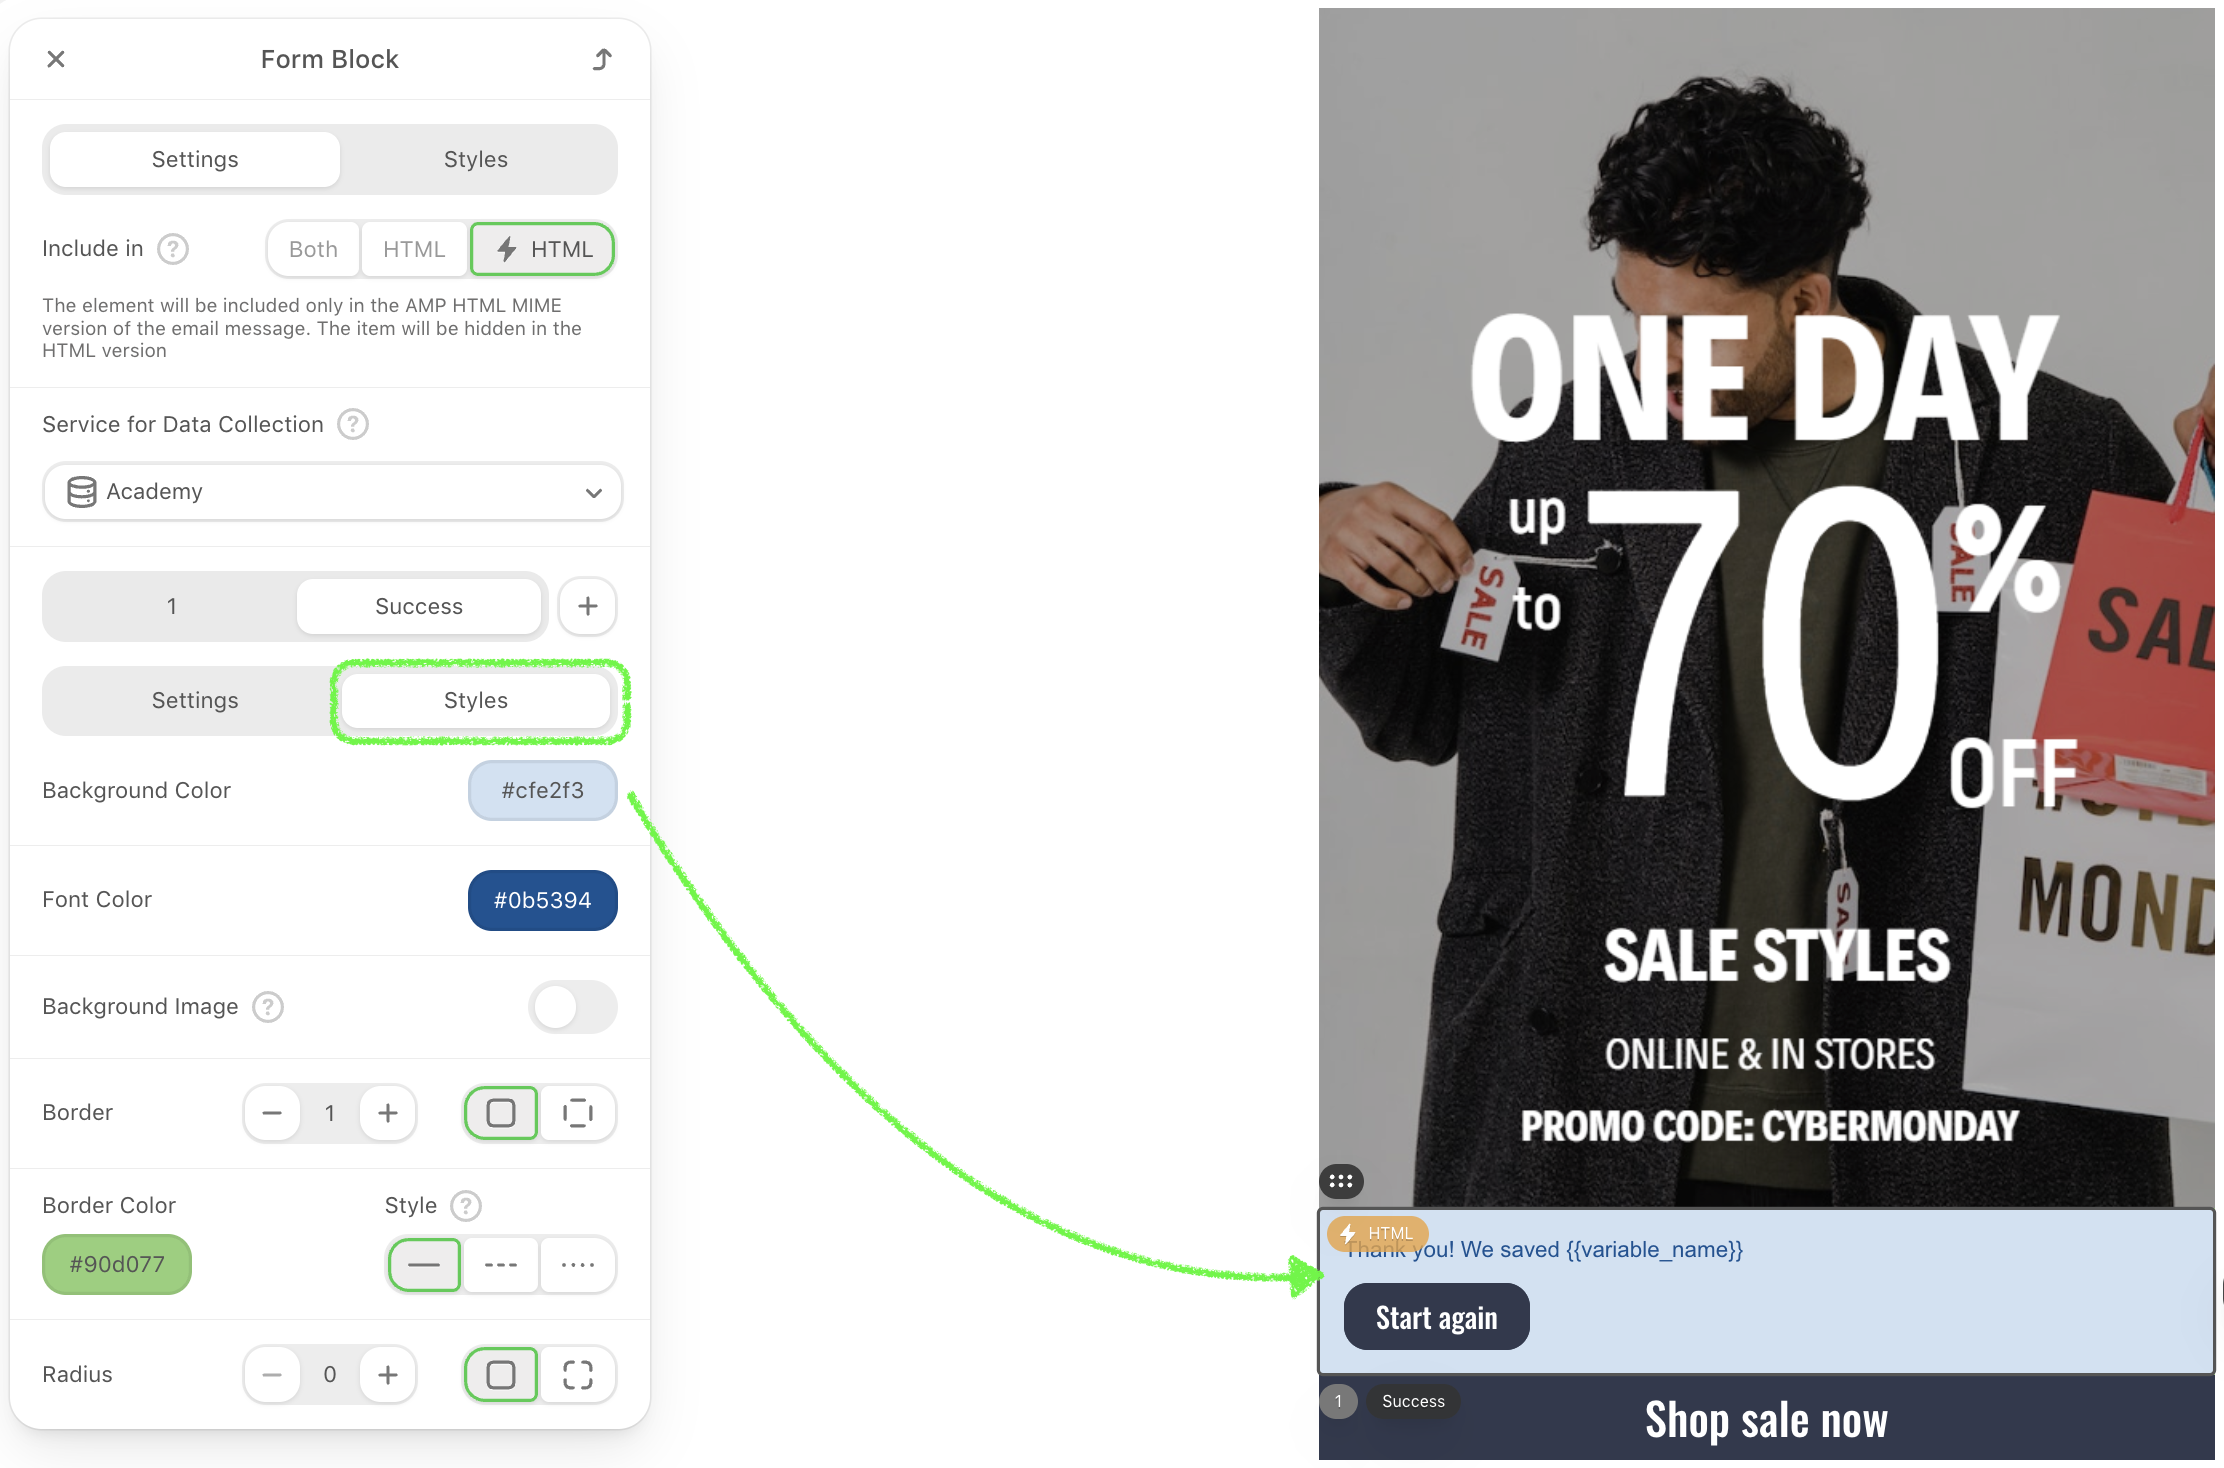
The Success tab is available only in AMP forms and lets you customize the message displayed after a user successfully submits the form.
9. In the Settings section, toggle the Start Again button on or off to allow users to submit the form again. Adjust padding on desktop.
10. In the Styles section, you can:
- Set the background color and font color.
- Optionally add a background image.
- Customize the border size, border radius, and layout.
Pre-built AMP modules
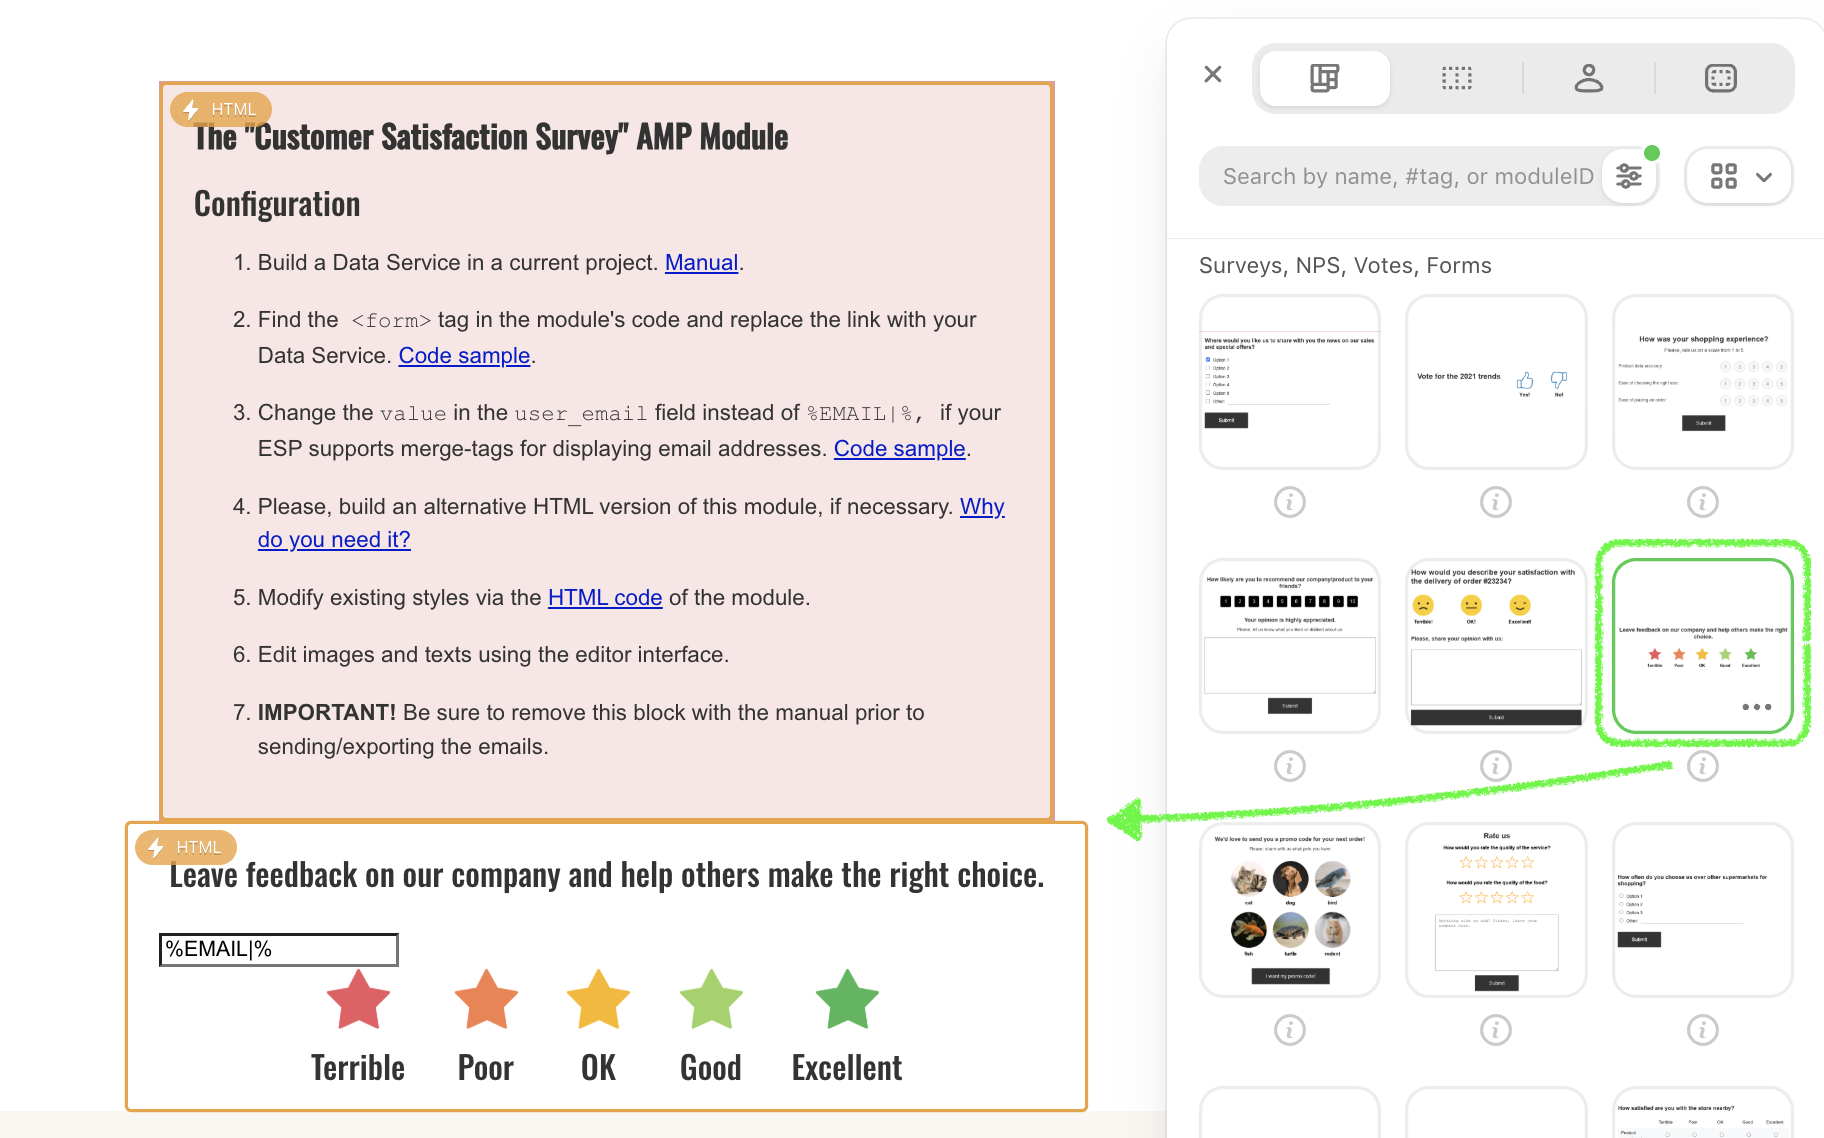
1. Go to the General modules section, click the Categories selector, and choose the Surveys, NPS, Votes, Forms categories.

2. Choose the more suitable module for you and drag the AMP-feedback module into your email template. Edit the module's content as you need.
If you want to use the NPS AMP module but don't know how, each module includes instructions for configuring it at the top.
You will see this element will have the ⚡HTML sign near it. This element will be shown in AMP emails only and hidden in email clients that do not support AM
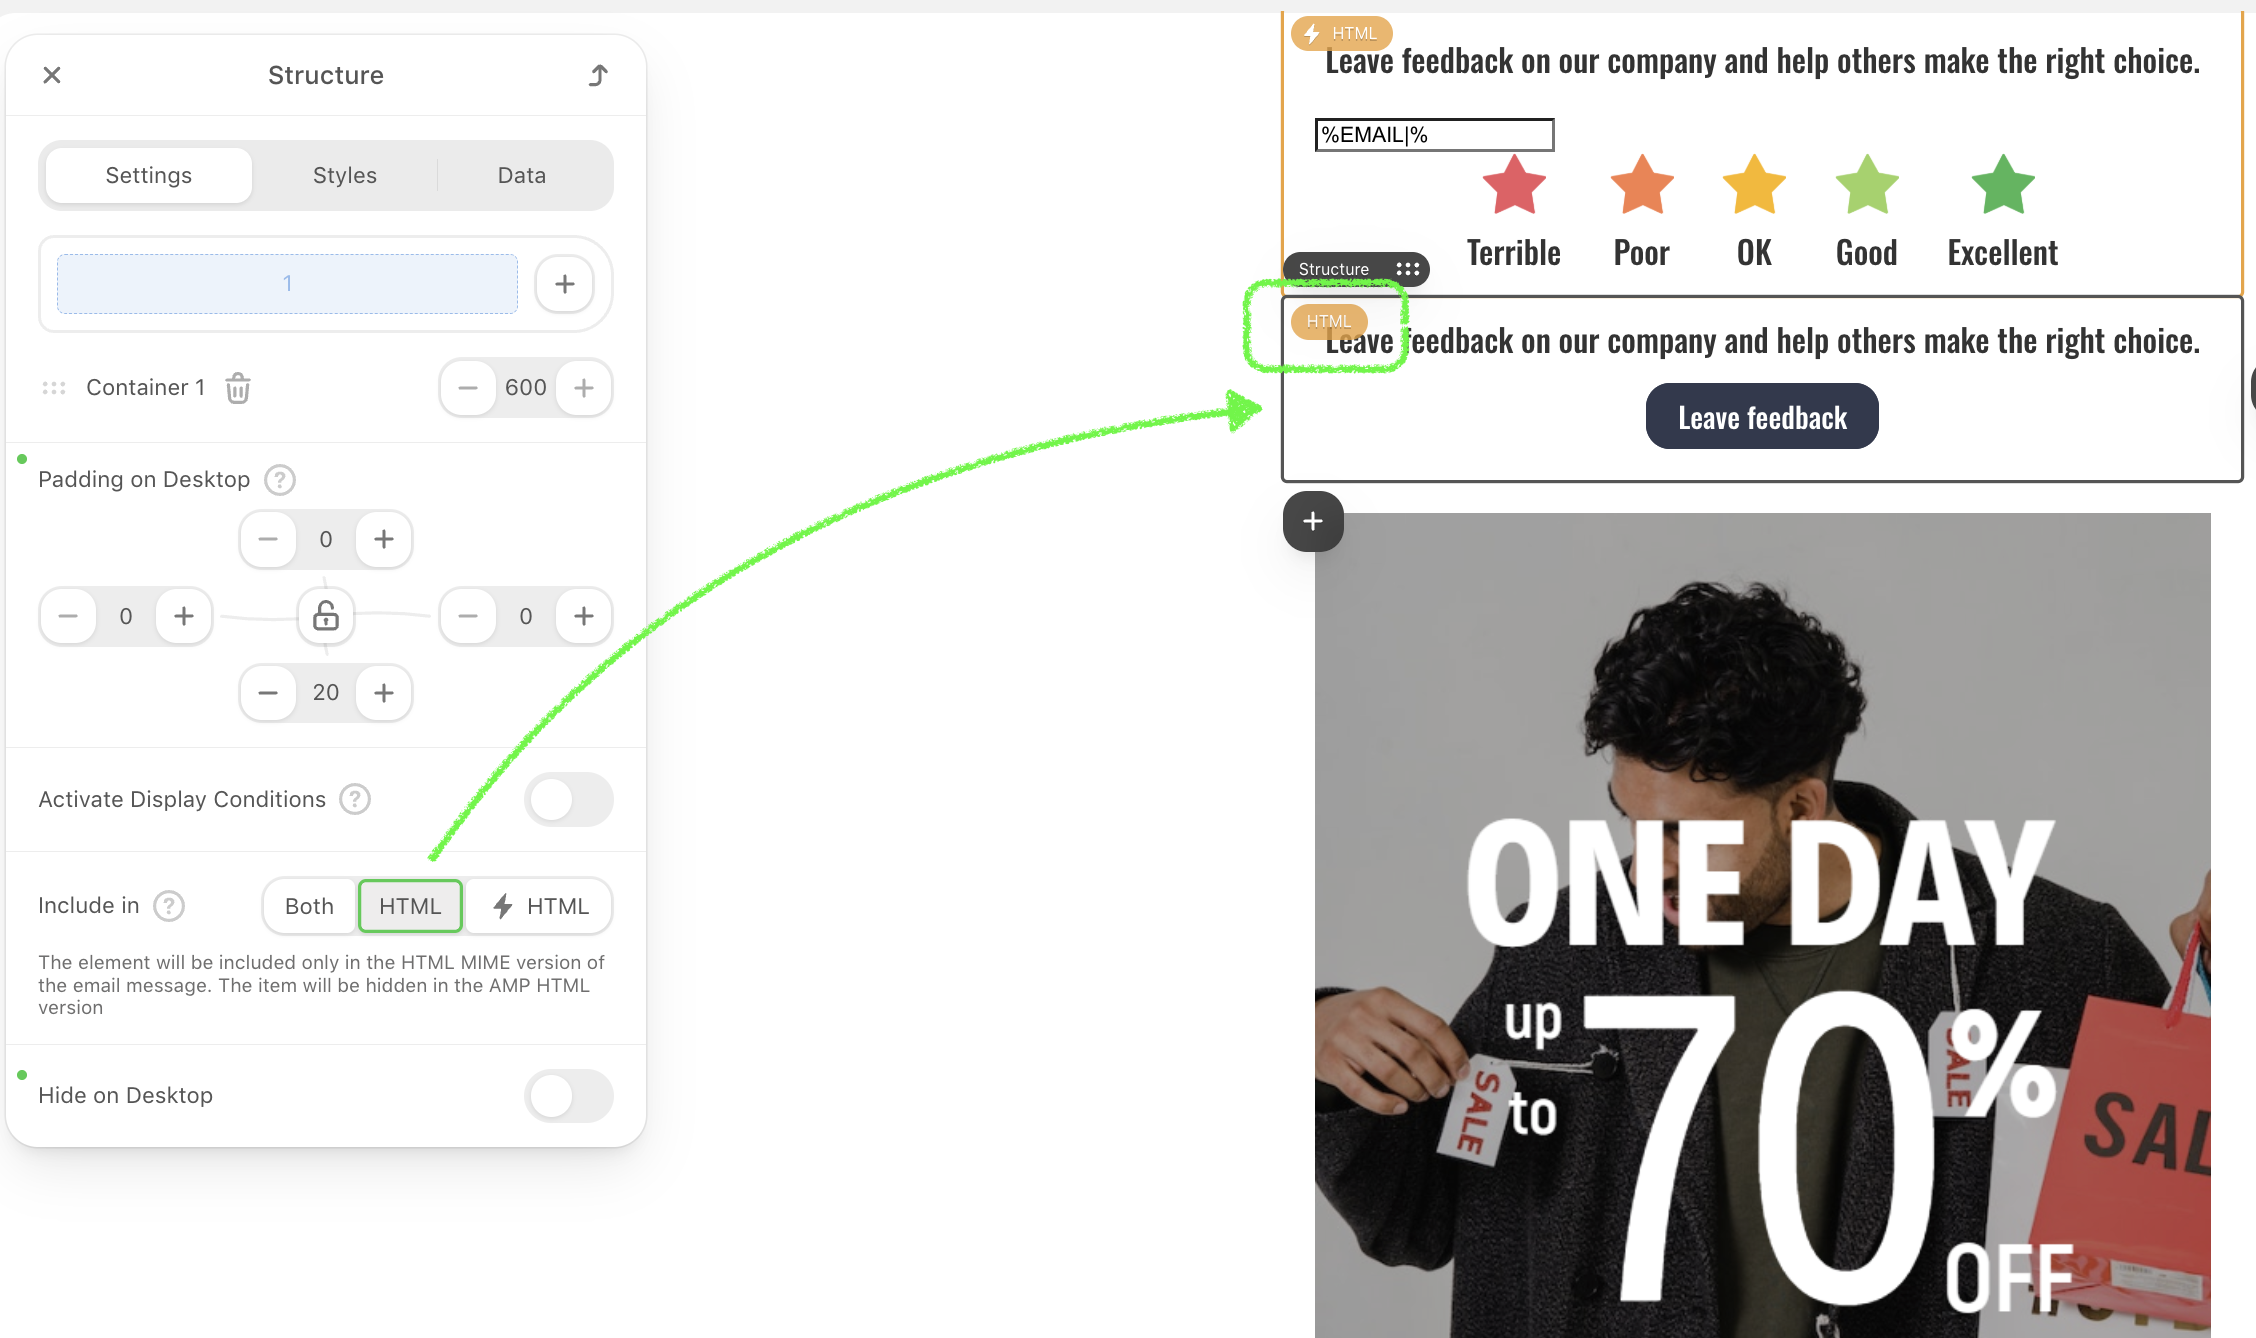
Build a fallback for other recipients
For other users, you need to build a fallback. This could be an image with a link to the site where a customer can leave feedback.
Remember to enable them for the HTML version of your email only; you need to turn on this option.
Preview and test the form
To preview your AMP form, you should get your sender whitelisted with Google. Once you complete designing your email, you can send a test message to your email address with the Test Message button on the Design or Launch step.

To test this form:
1. Open the test email, and leave a comment or a few in the form.
2. Then you can see it in the exported replies, or check it on your data collection service if applicable.
3. Check if your answers are recorded in the report.
Keep in mind
To make sure that your recipients see your AMP emails, you need to:
- Get whitelisted with Google.
- Fix all the bugs if any occur. The editor shows if you have any in emails and even recommends how to fix them.
- You have fallbacks for those customers whose email clients do not support AMP for emails.
- Make sure your ESP/CRM can send AMP emails.
- Keep in mind that currently only Gmail (both the web and mobile apps on all OSs) and Mail.ru can render AMP emails. Yahoo will join the list soon.
- AMP emails lose their AMP components if you forward them.