Once you reach the Design step in the enhanced mobile template, you can customize it using the available styling options.
This guide explains how to customize the Responsive Layout Banner.
To start with designing your template, follow these steps:
- Configure the banner position
- Add elements and layout
- Edit the layout
- Edit elements
- Configure advanced settings
- Save your campaign
1. Configure the banner position
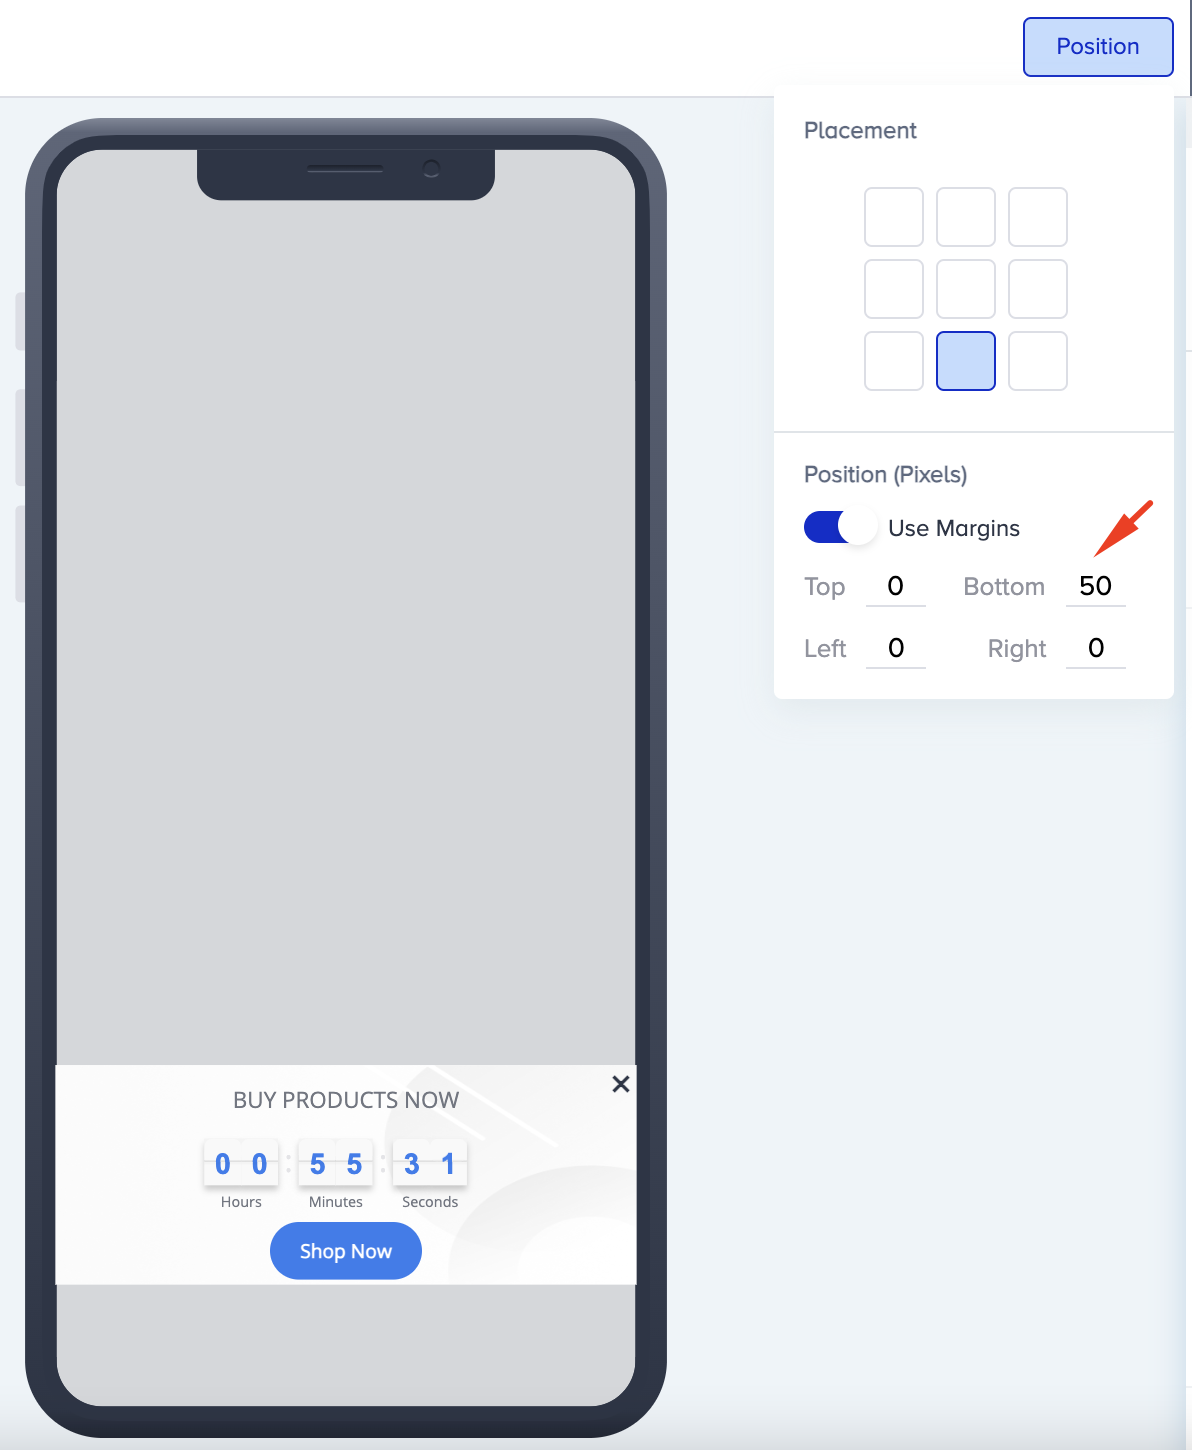
1.1. Click the Position button at the top of the page to locate your banner on the screen.
.gif)
1.2. On the Position window, toggle on the Use Margins to set the position of your banner in pixels. For example, you can add 50 pixels on the bottom margin to position it.
Enable Shake Gesture
The Shake Gesture lets users trigger a redirect to a specific link or page by shaking their mobile device. To enable the Shake Gesture, follow these steps:
1. Open the Shake Gesture menu on the template settings to view its settings.
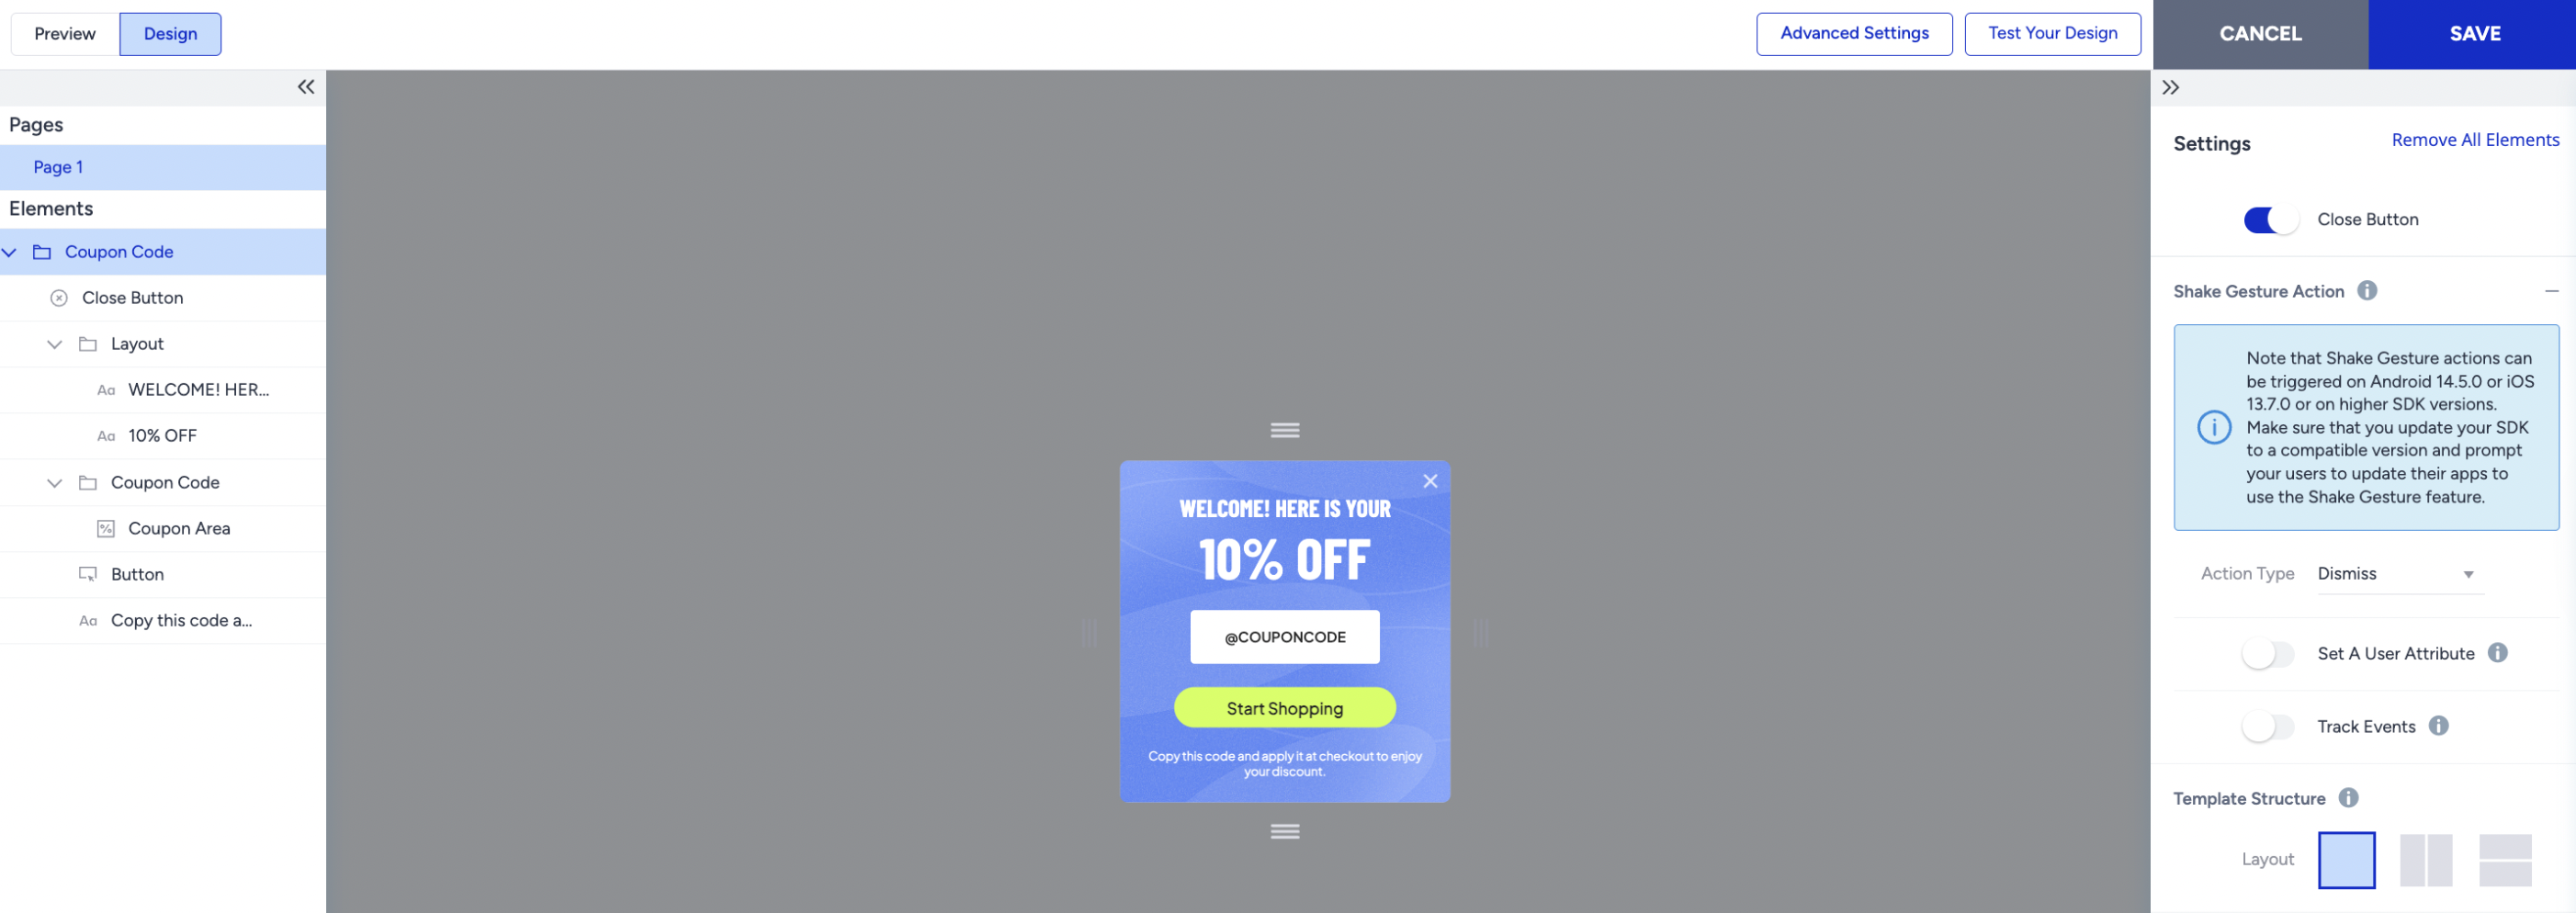
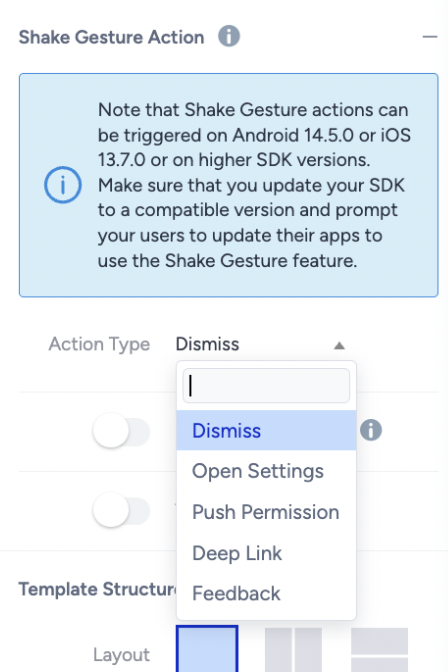
2. Select an action from the dropdown: Dismiss, Open Settings, Push Permission, Deep Link, or Feedback.
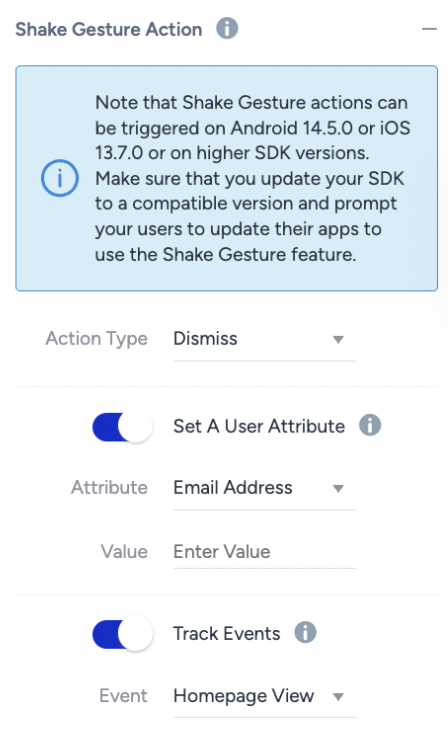
3. Enable Set a User Attribute or Track Events if you want to assign an attribute or event to users who shake the device.
2. Add elements and layout
On the left-hand screen, you can see the elements that come by default on the banner. These elements are Layout, Text, Countdown Elements, Button, and Close Button. You can add more elements or a layout, or change the banner's existing layout.
To add an element or a layout:
2.1. Hover on the banner itself to see the + (plus) buttons appear where you can add an element or a layout to your canvas. Select the element you want to add: Text, Image, Coupon Code, or Button.
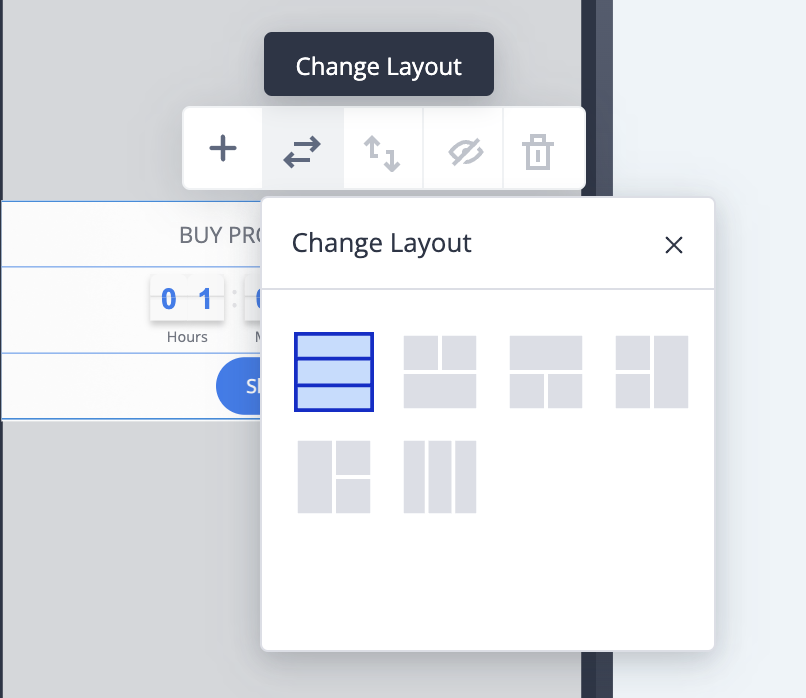
When you select the Layout element from the left menu, you can change the Element Layout with the layout options displayed on the right-hand screen. You can also see a toolbar that lets you add an element directly to the banner.
.gif)
To change the layout, click the Change Layout button on the toolbar to select your preferred layout.
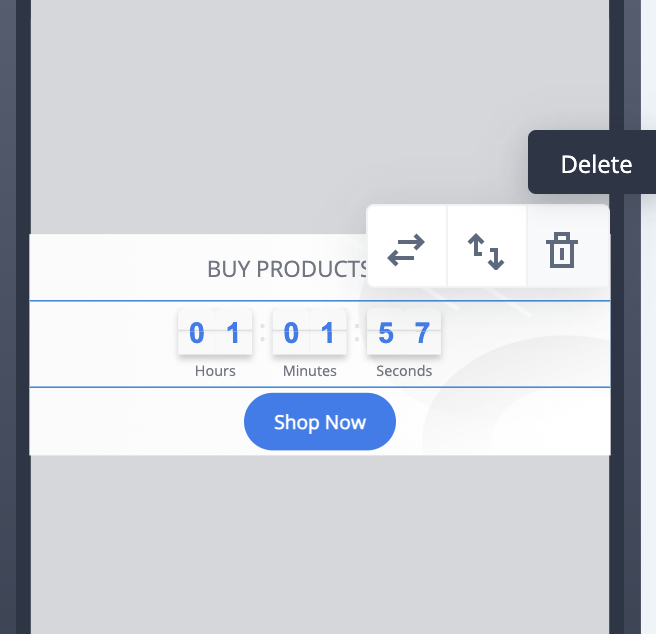
2.2. To change the order of the elements, click the Switch Order button to switch it with the previous or next element. You can also drag and drop the elements in the left menu to change their order.
2.3. To delete an element, select it and click the Delete button. You can delete all the elements till one element remains.
3. Edit the layout
To customize the look of your layout, you can:
- Change the width and size of the entire banner.
- Change the position of its default background image, or replace it with a new image you upload or an existing one from the Image Library. The file size should be no larger than 500 KB.
- Change its background color.
- Add borders and change their color.
- Add an overlay behind the banner. Keep in mind that the overlay for lead collection templates cannot be disabled for now. You can set your overlay to be at 0% opacity if you do not want users to see it.
.gif)
Clicking on the Layout element on the list, you can also apply the same Style changes to your entire layout.

4. Edit elements
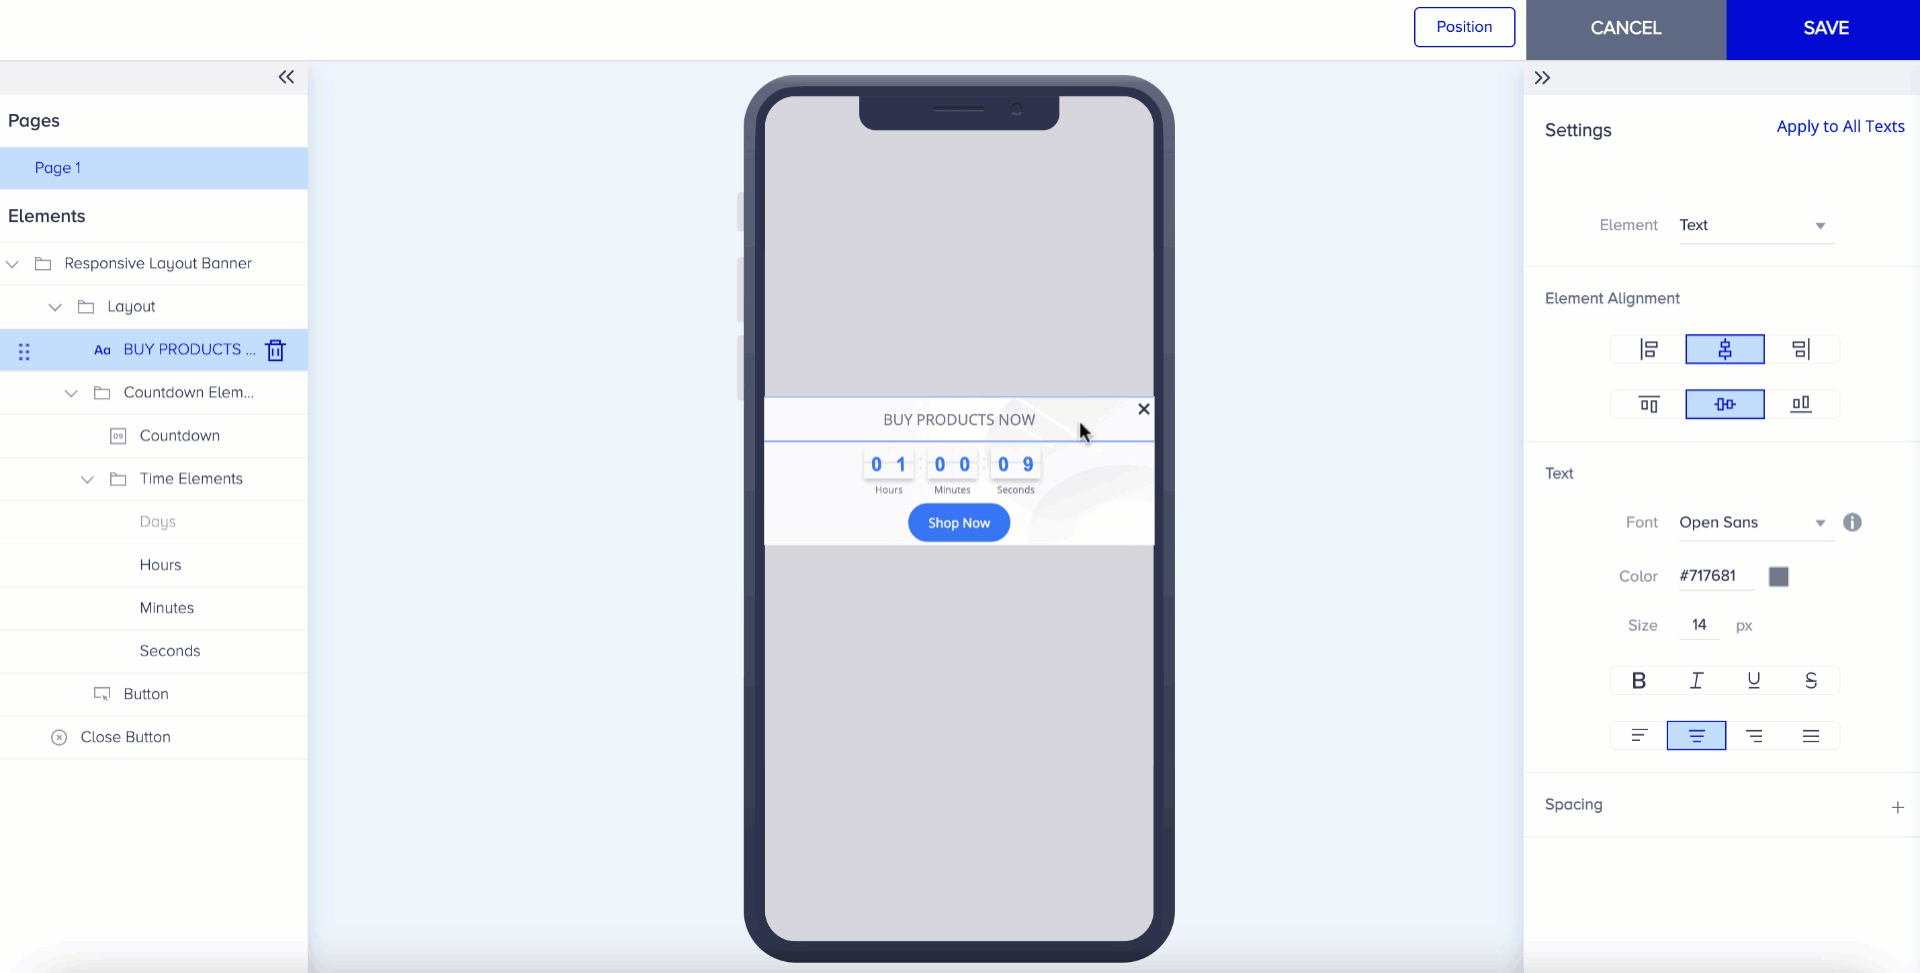
4.1. You can edit the text on your banner and configure its alignment and text settings.
You can position your text left-aligned, centered, or right-aligned. You can change the font family, text color, font size, font weight, text decoration, and text alignment of your copy.
Lastly, you can add spacing to your text. If you want these changes to be applied to all text elements on your campaign, you can click the Apply to All Texts button in the right corner.
.gif)
4.2. You can change the alignment of the parent Countdown Element vertically or horizontally.
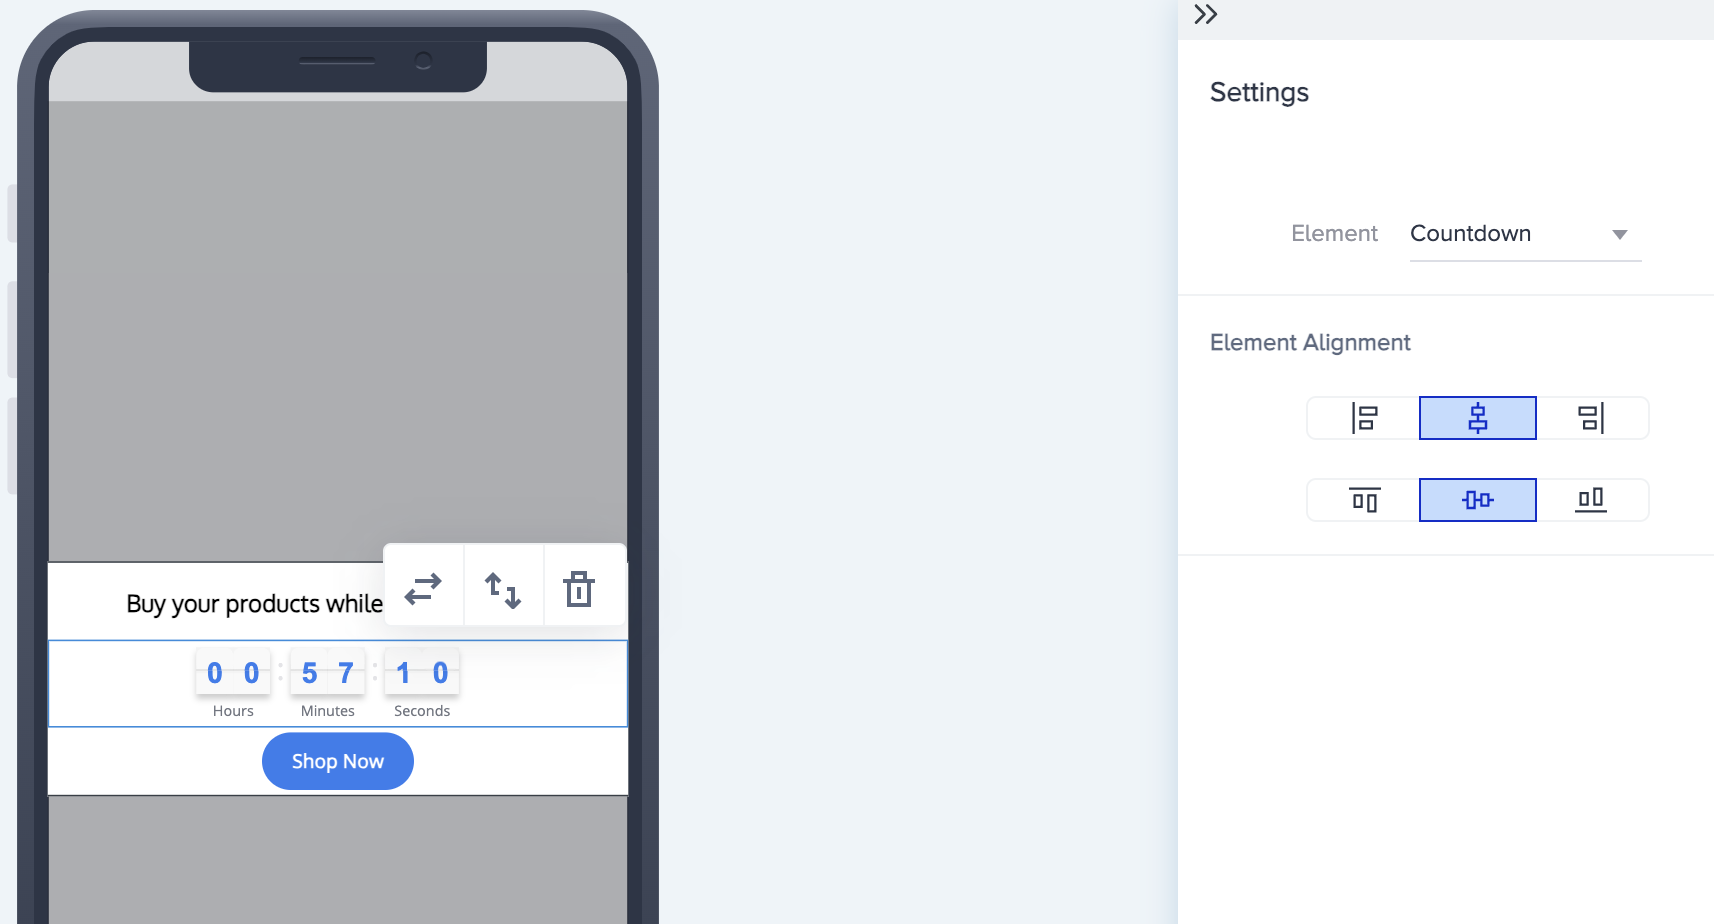
4.3. You can select a Countdown design and define if it should have a separator.
Once you select your design, you can customize its color, text color, number color, spacing, and border. You can adjust your countdown as a Date. Accordingly, you can set the duration, and decide if it should show seconds, or hide the days information when they reach zero.
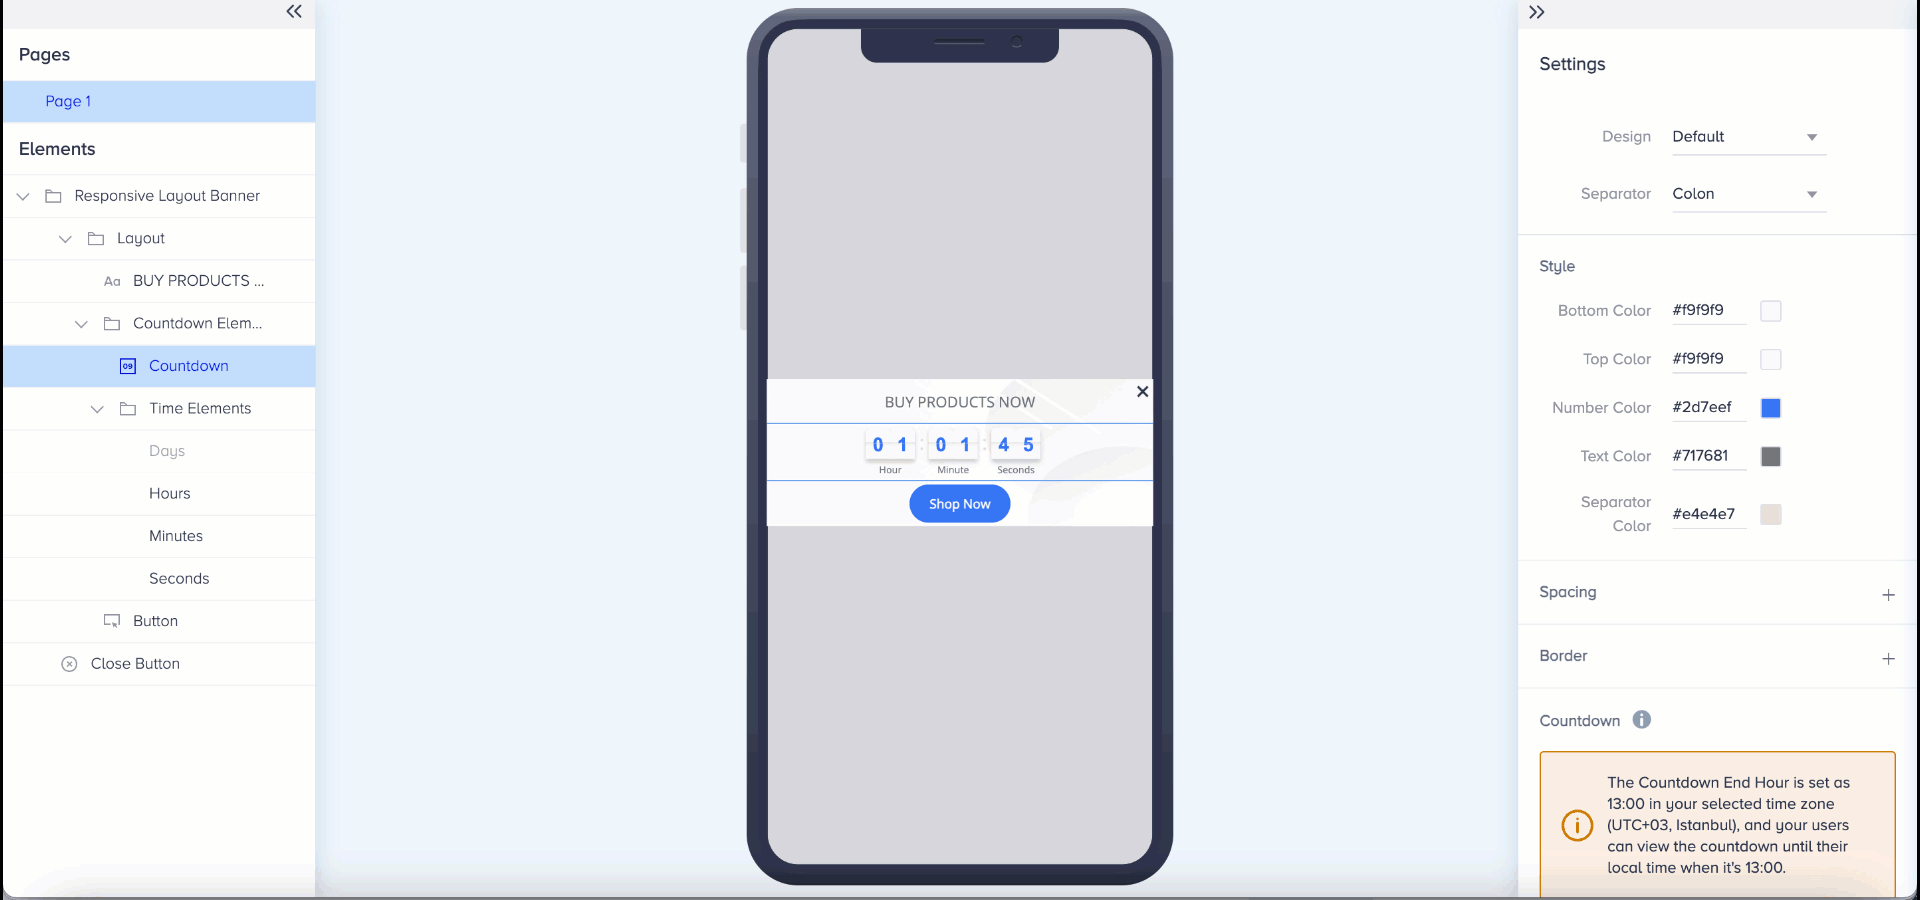
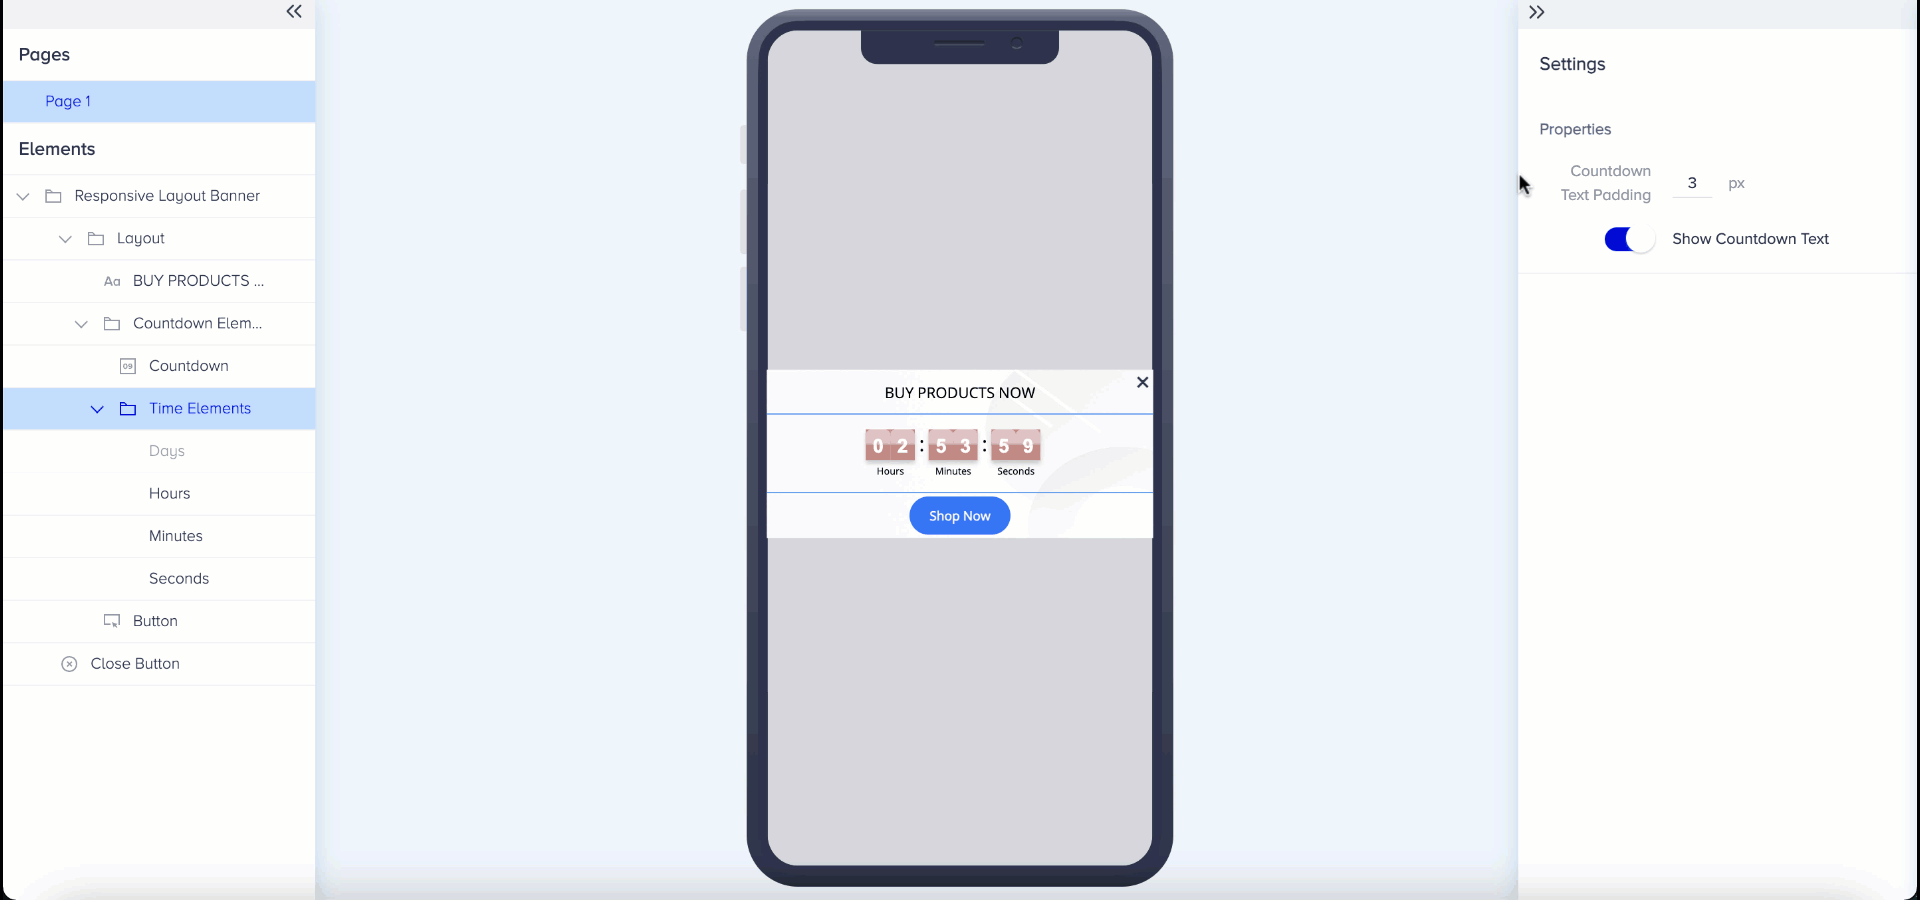
4.4. You can enable/disable the countdown text (days, hours, minutes, seconds). If the text elements are enabled, you can change their font family, text color, font size, font weight, text decoration, and text alignment.
4.5. If you have a button on your banner, you can:
- Align your button vertically or horizontally,
- Change its style in color and border, or add a background image,
- Change its font family, text color, and font size,
- Add spacing and border to its sides,
- Define its action with one of the available options: Close on Tap, Open Settings, Push Permission, Deep Link, and Feedback,
- Set a user attribute you select,
- Track an event you select.
.gif)
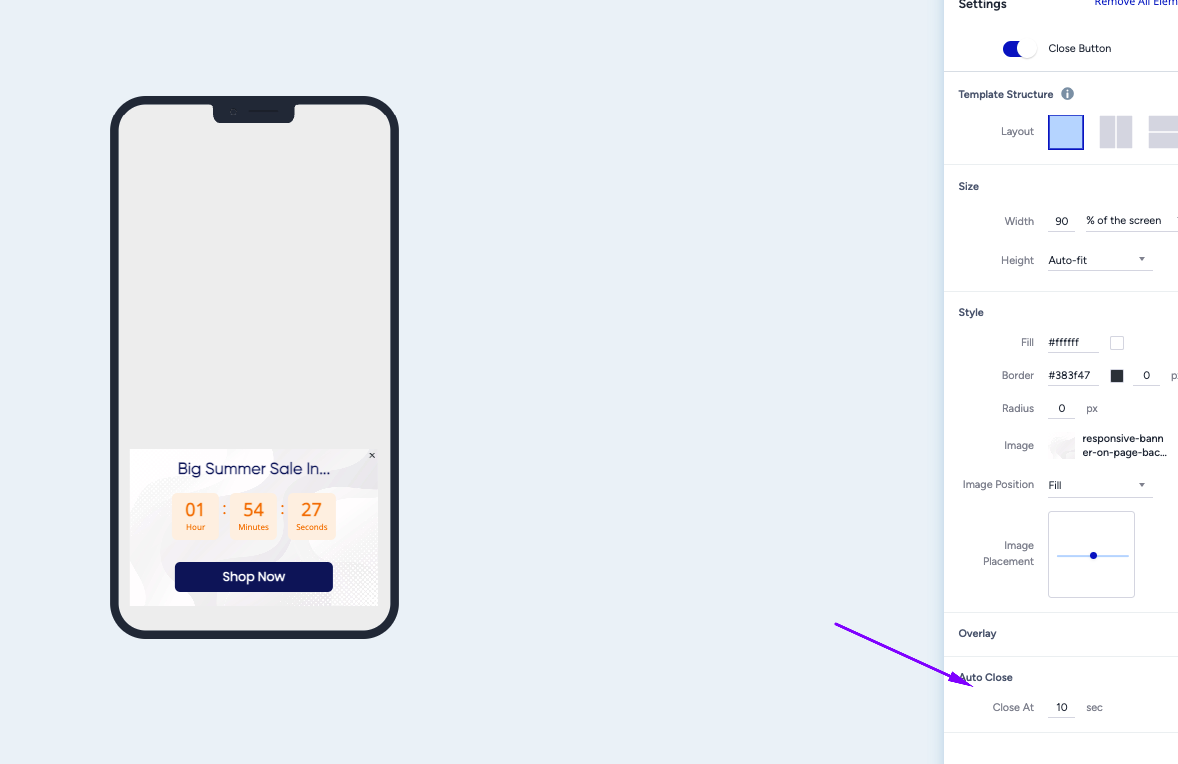
4.6. If you enable the close button, you can change its text color and font size.
.png)
The banner can also auto-close. If you set a duration in seconds, the Inapp will be automatically closed in that time.
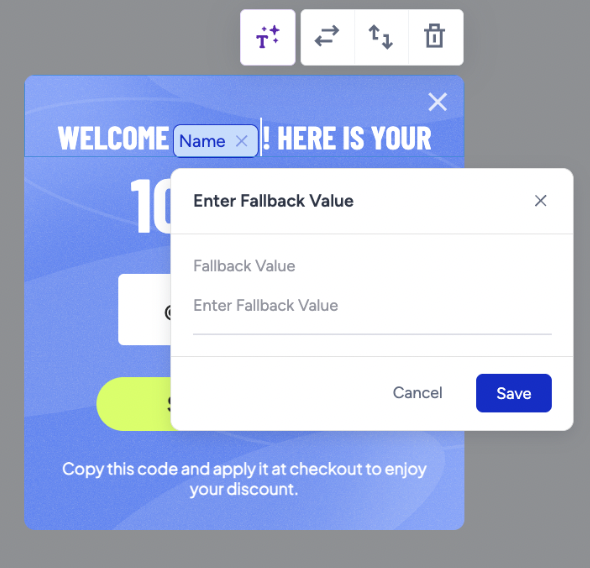
Add dynamic content
You can customize your design with various dynamic content elements and individualize your campaign.
1. Double-click a text element in the design.
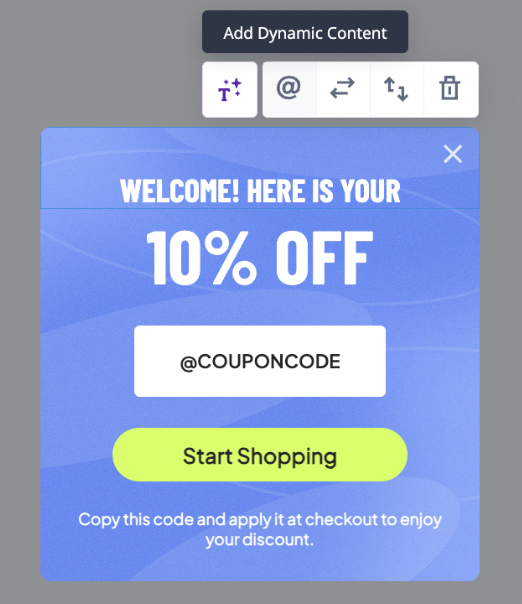
2. Click the @ shortcut to open the Dynamic Content menu.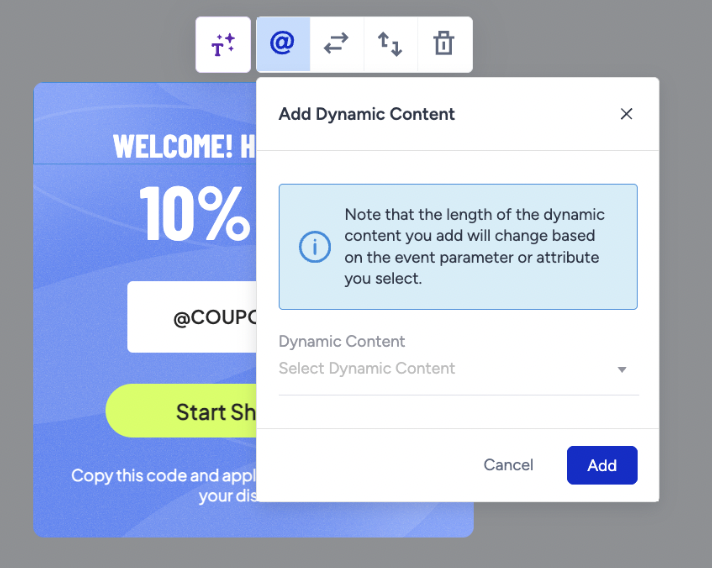
3. Select the type of dynamic content you want to display: Default Attribute, Custom Attribute, or Event Parameters.
4. After filling out the input field, you can set a fallback value if you want.
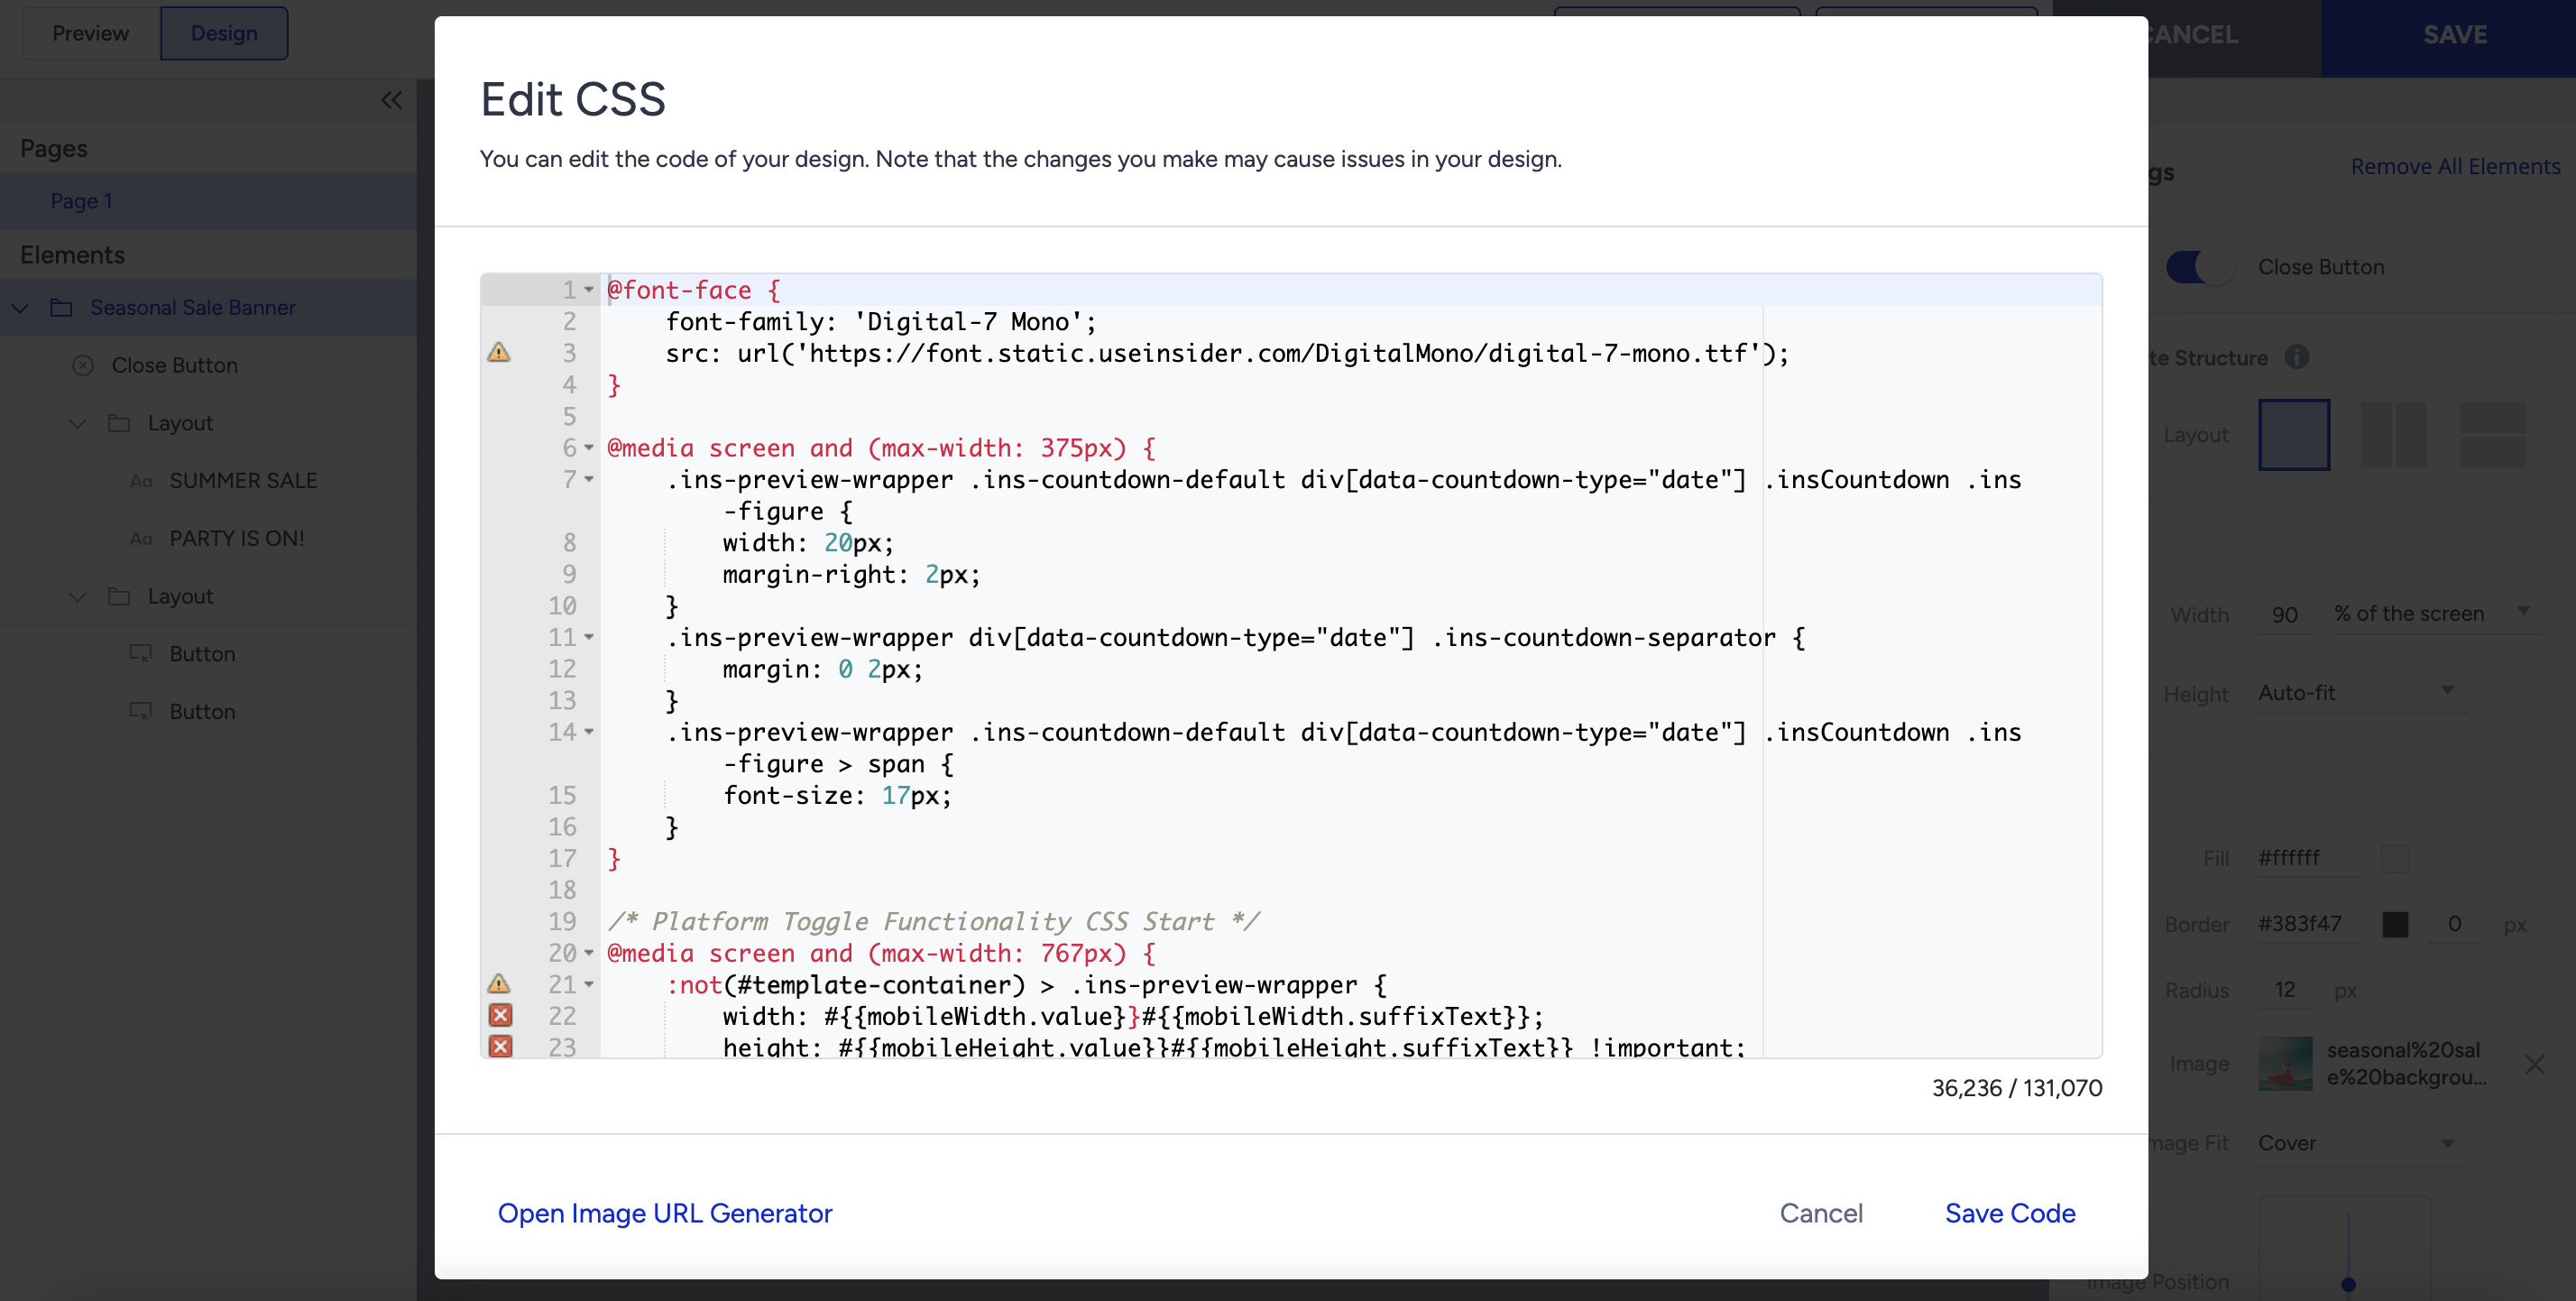
5. Configure advanced settings
The Advanced Settings on the top bar allow you to edit the HTML, CSS, and JS of your app template.
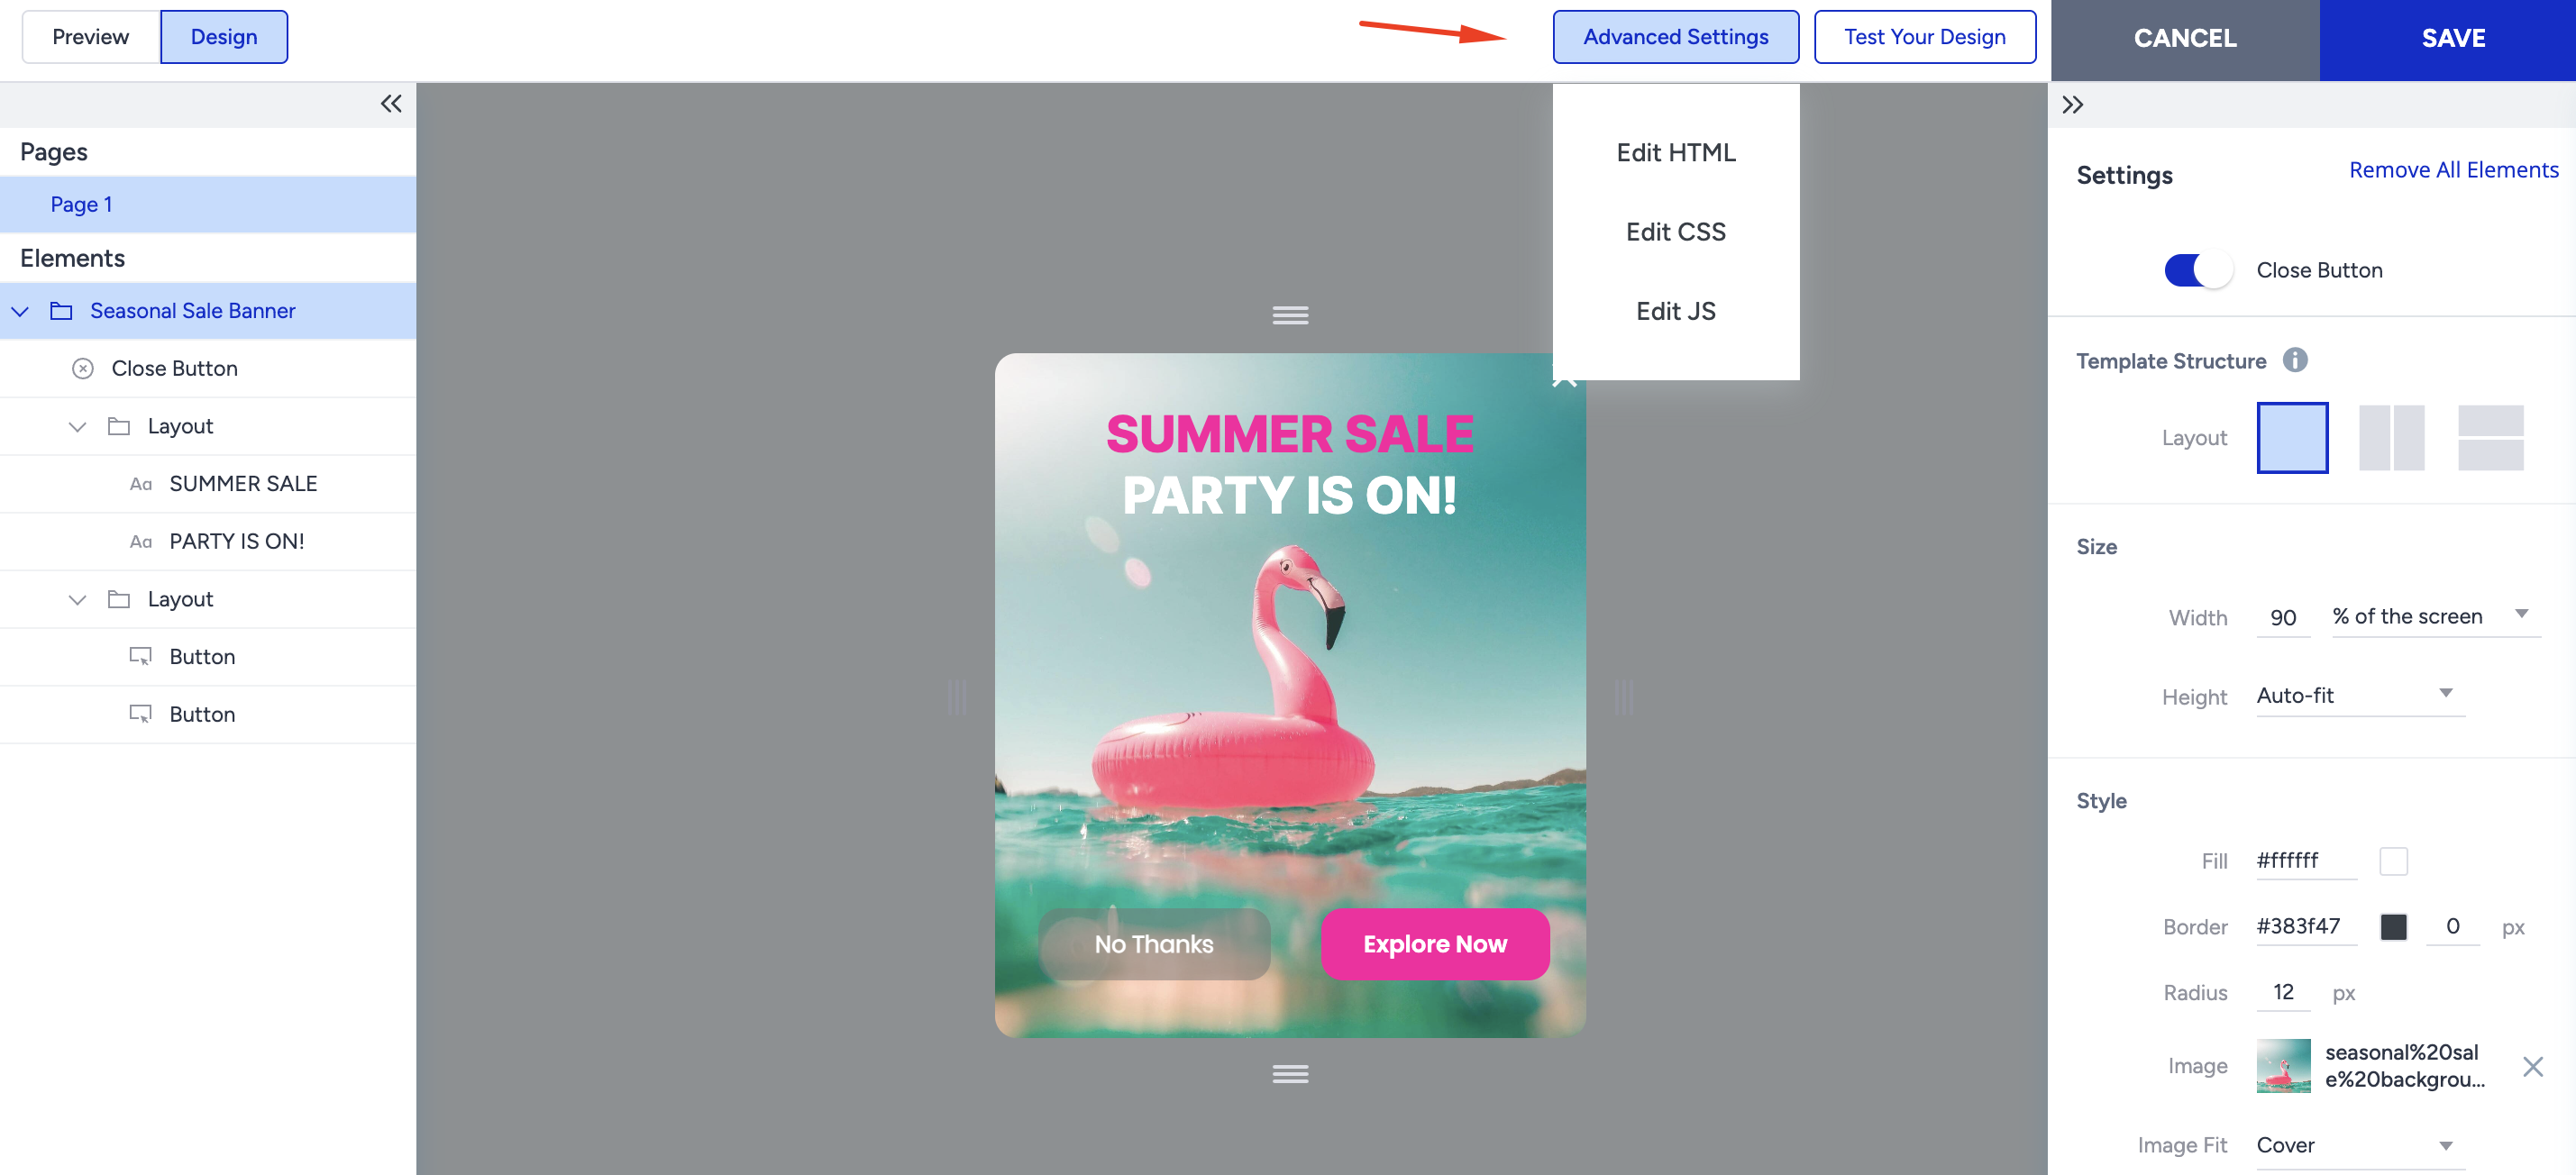
5.1. Click the HTML, CSS, or JS option.
5.2. Edit/add your code and click the Save Code button.
6. Save your campaign
Once you complete designing your banner, click the Save button in the top right corner to proceed with the following steps: