WhatsApp Settings is located on the campaign listing page and allows you to manage account integrations and messaging preferences.
Click the Settings button to proceed. 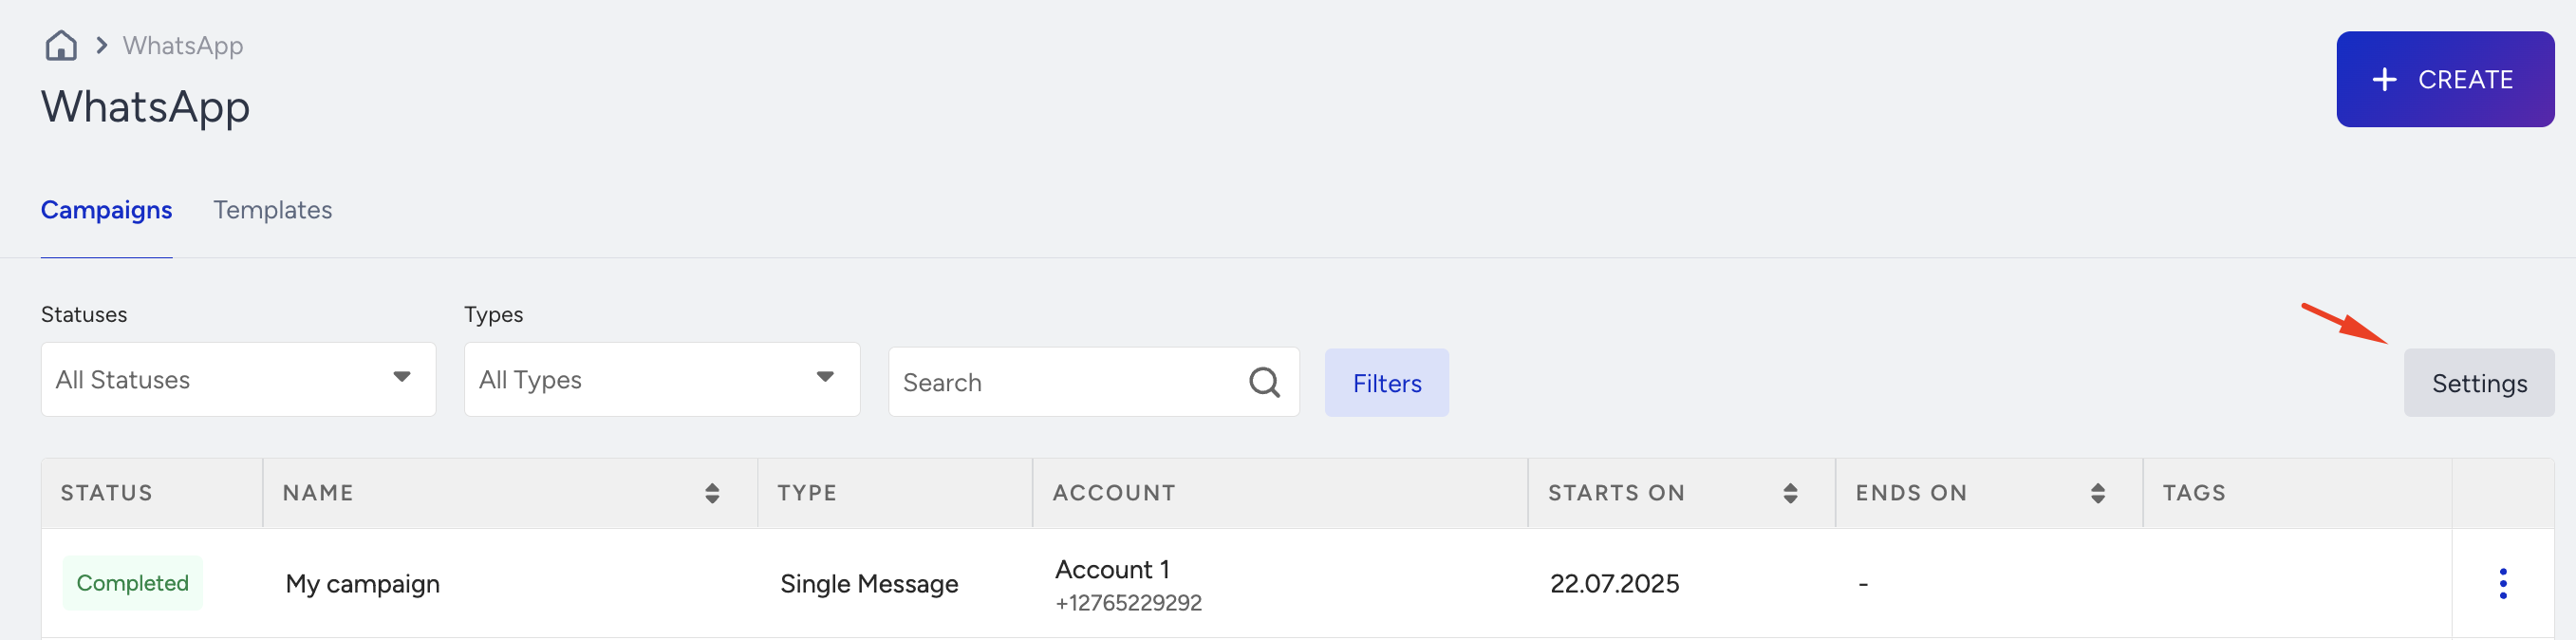
Business Verification
Meta business verification helps increase your WhatsApp messaging limits and grants access to additional WhatsApp Business features. You can complete the entire verification process directly from the WhatsApp Settings page in InOne.
While standard business verification requests are typically completed within 24 hours, verification requests submitted through InOne's partner-led business verification flow are usually reviewed much faster, and might be completed within approximately one hour.
For more information about the partner-led business verification flow, refer to Meta’s guide.
For more details on Meta’s business verification flow, refer to the following guides:
To start the verification process in InOne,
Hover over the Unverified status label and click Verify Account.

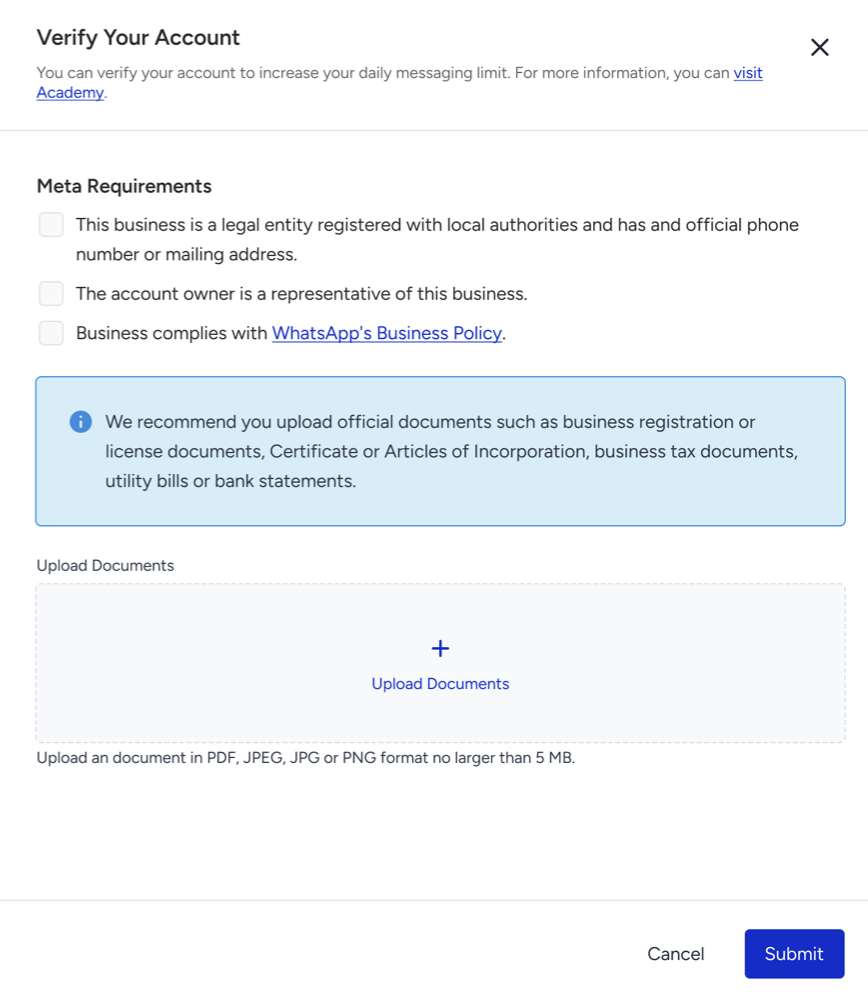
In the drawer that opens on the right, review the Meta requirements and select all required confirmation checkboxes.
Click Upload Documents and upload the required business verification documents. You can upload up to three documents in PDF, JPEG, JPG, or PNG format, with a maximum file size of 5 MB per document.
Click Submit to send your verification request.
After you receive the message “Your account verification has been submitted to Meta successfully,” your account status changes from Unverified to Pending. Once Meta completes the review and approves your verification request, the status changes to Verified.
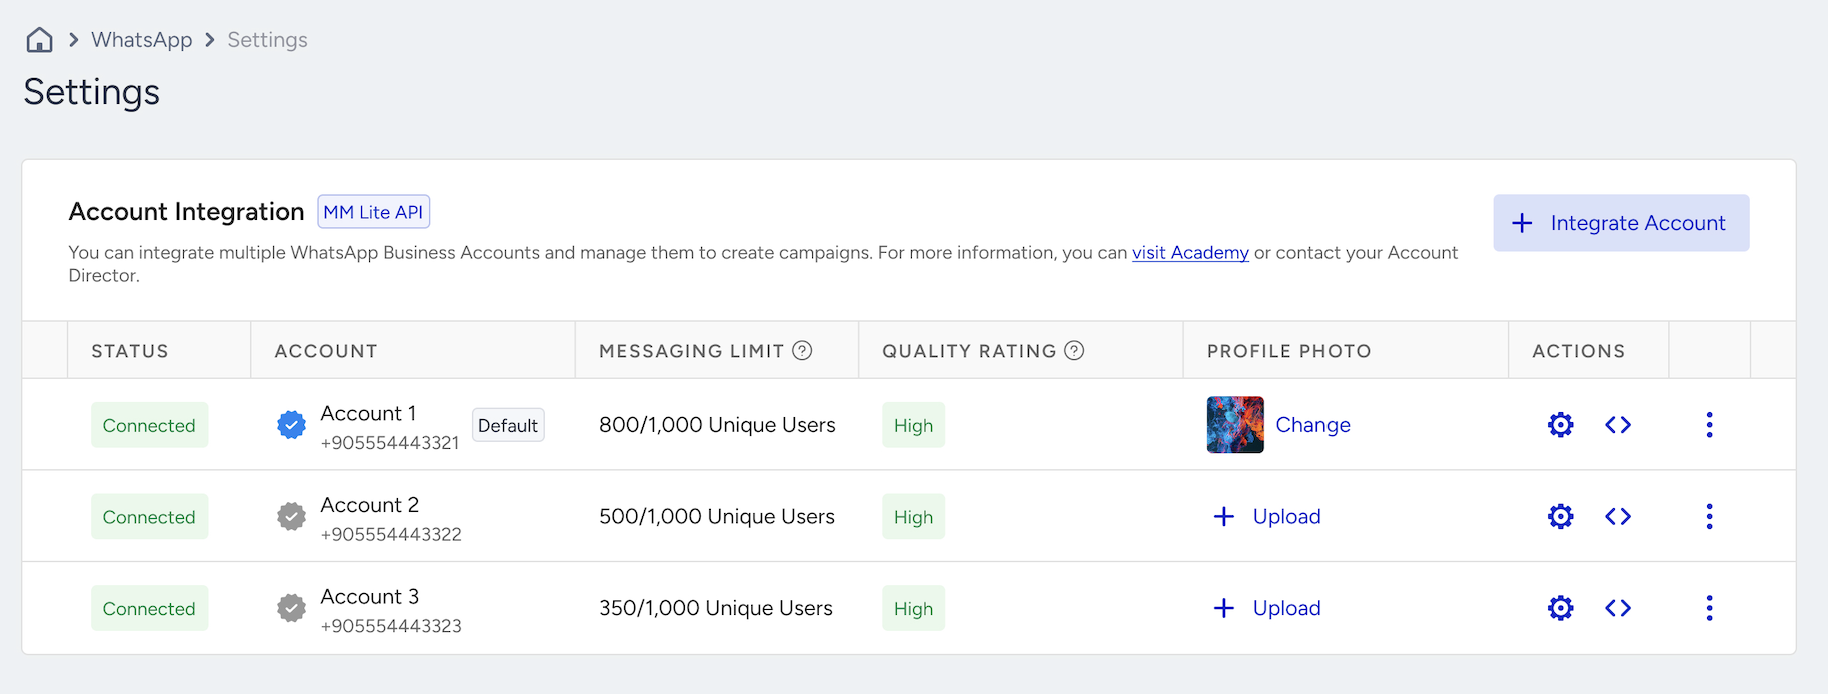
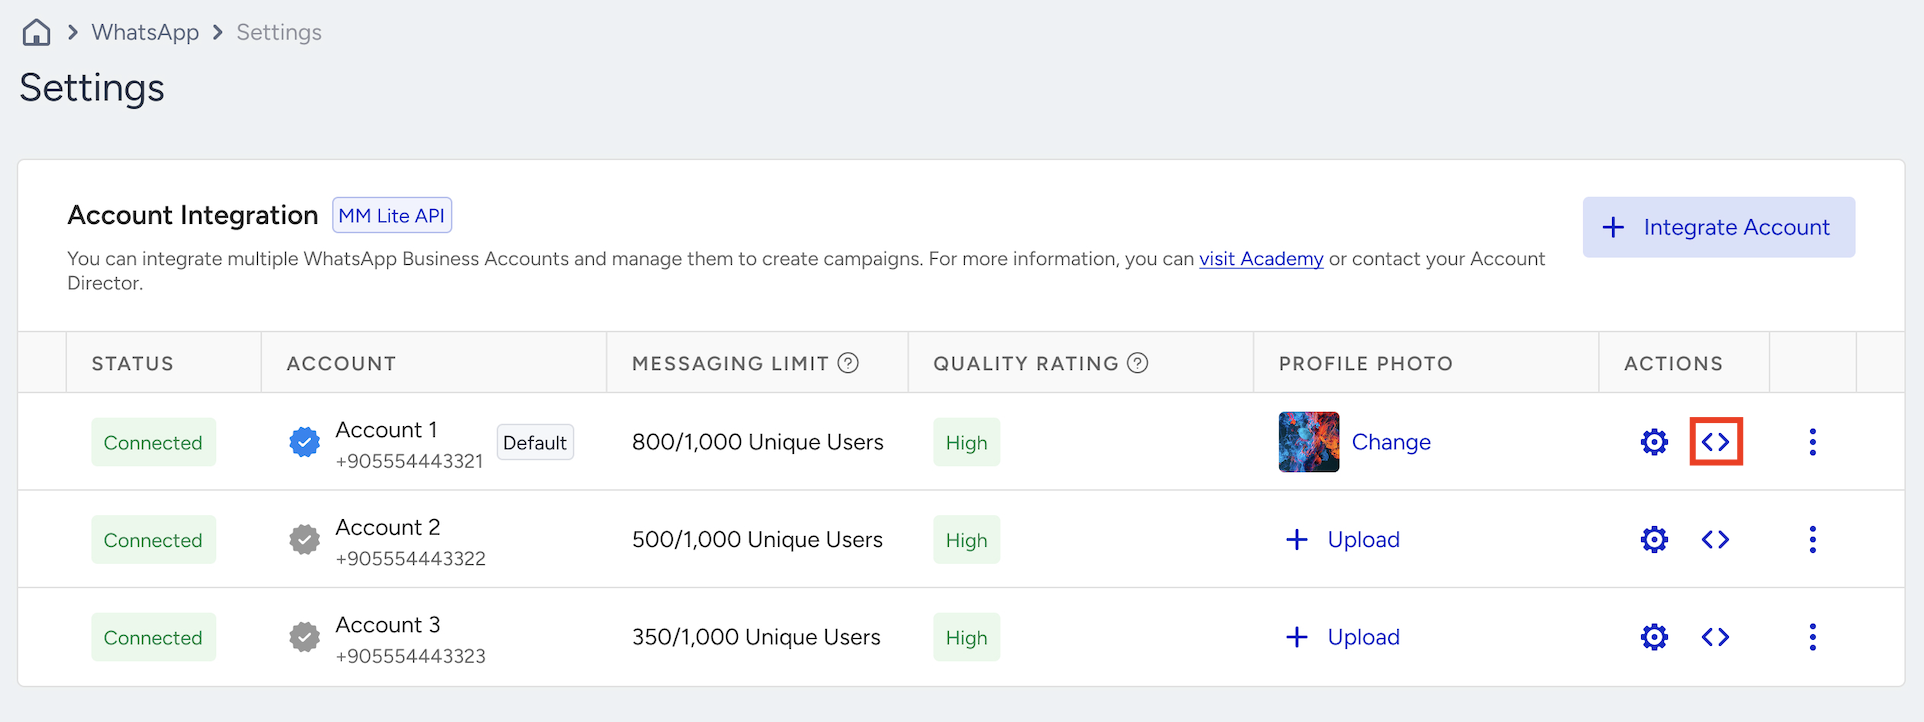
Account Integration
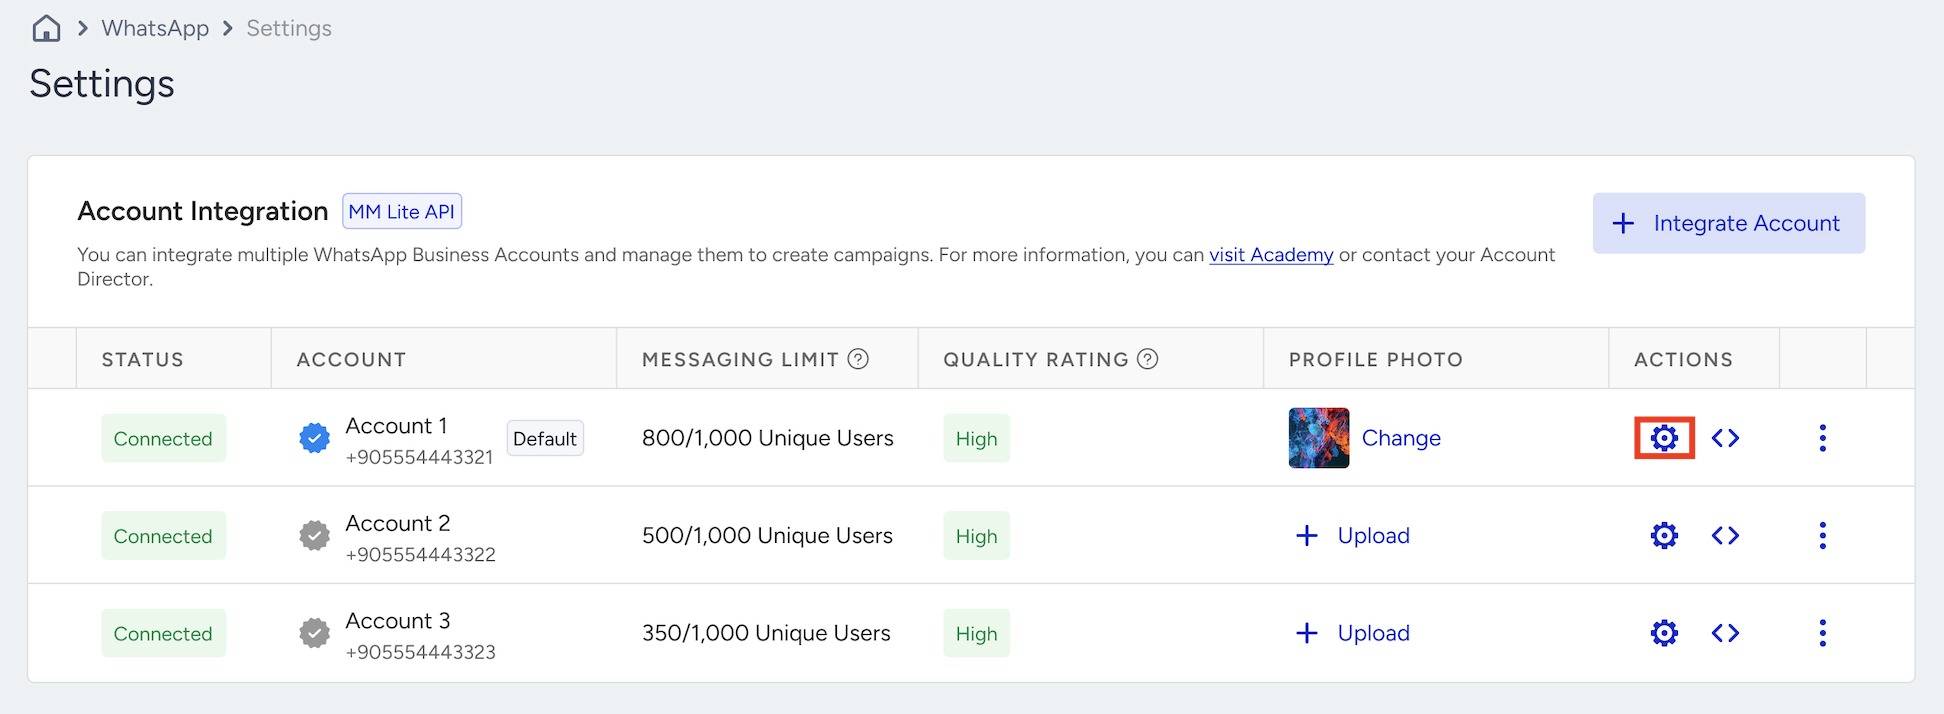
Account Integration allows you to check and manage your WhatsApp account’s related information easily. Also known as the WhatsApp Account Hub, it includes the Official Business Account (OBA) application, status tracking, phone quality rating, messaging limit management, and profile picture updates for each account.
To add multiple phone numbers, click the +Integrate Account button. You’ll need to complete the integration process individually for each number.
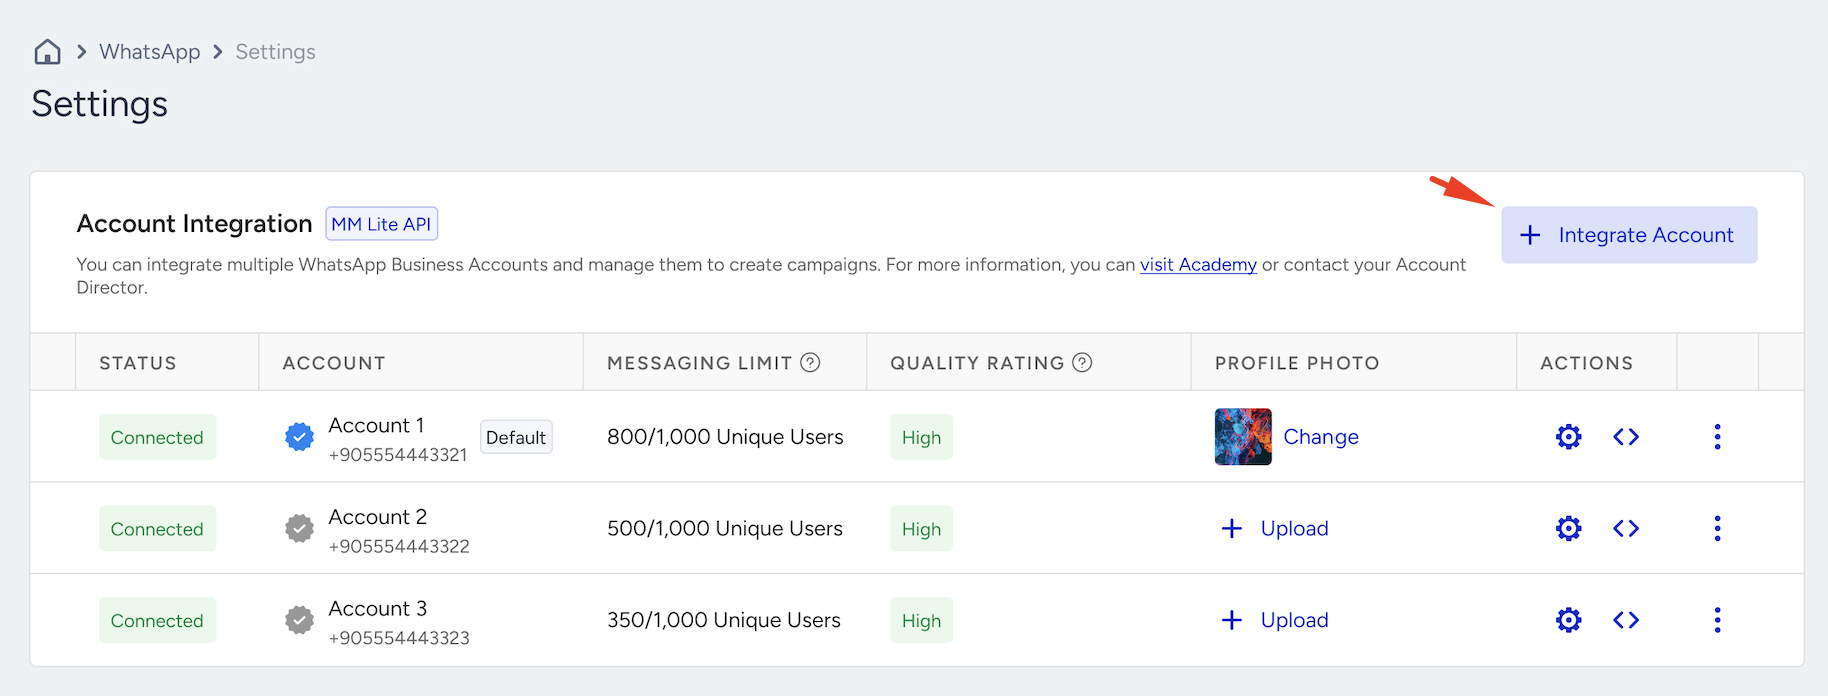
Refer to Multi-Number Support on a Single Panel for WhatsApp for further information.
To delete a number, click the three-dot menu next to the relevant account and select Delete Account. Then, confirm the deletion.
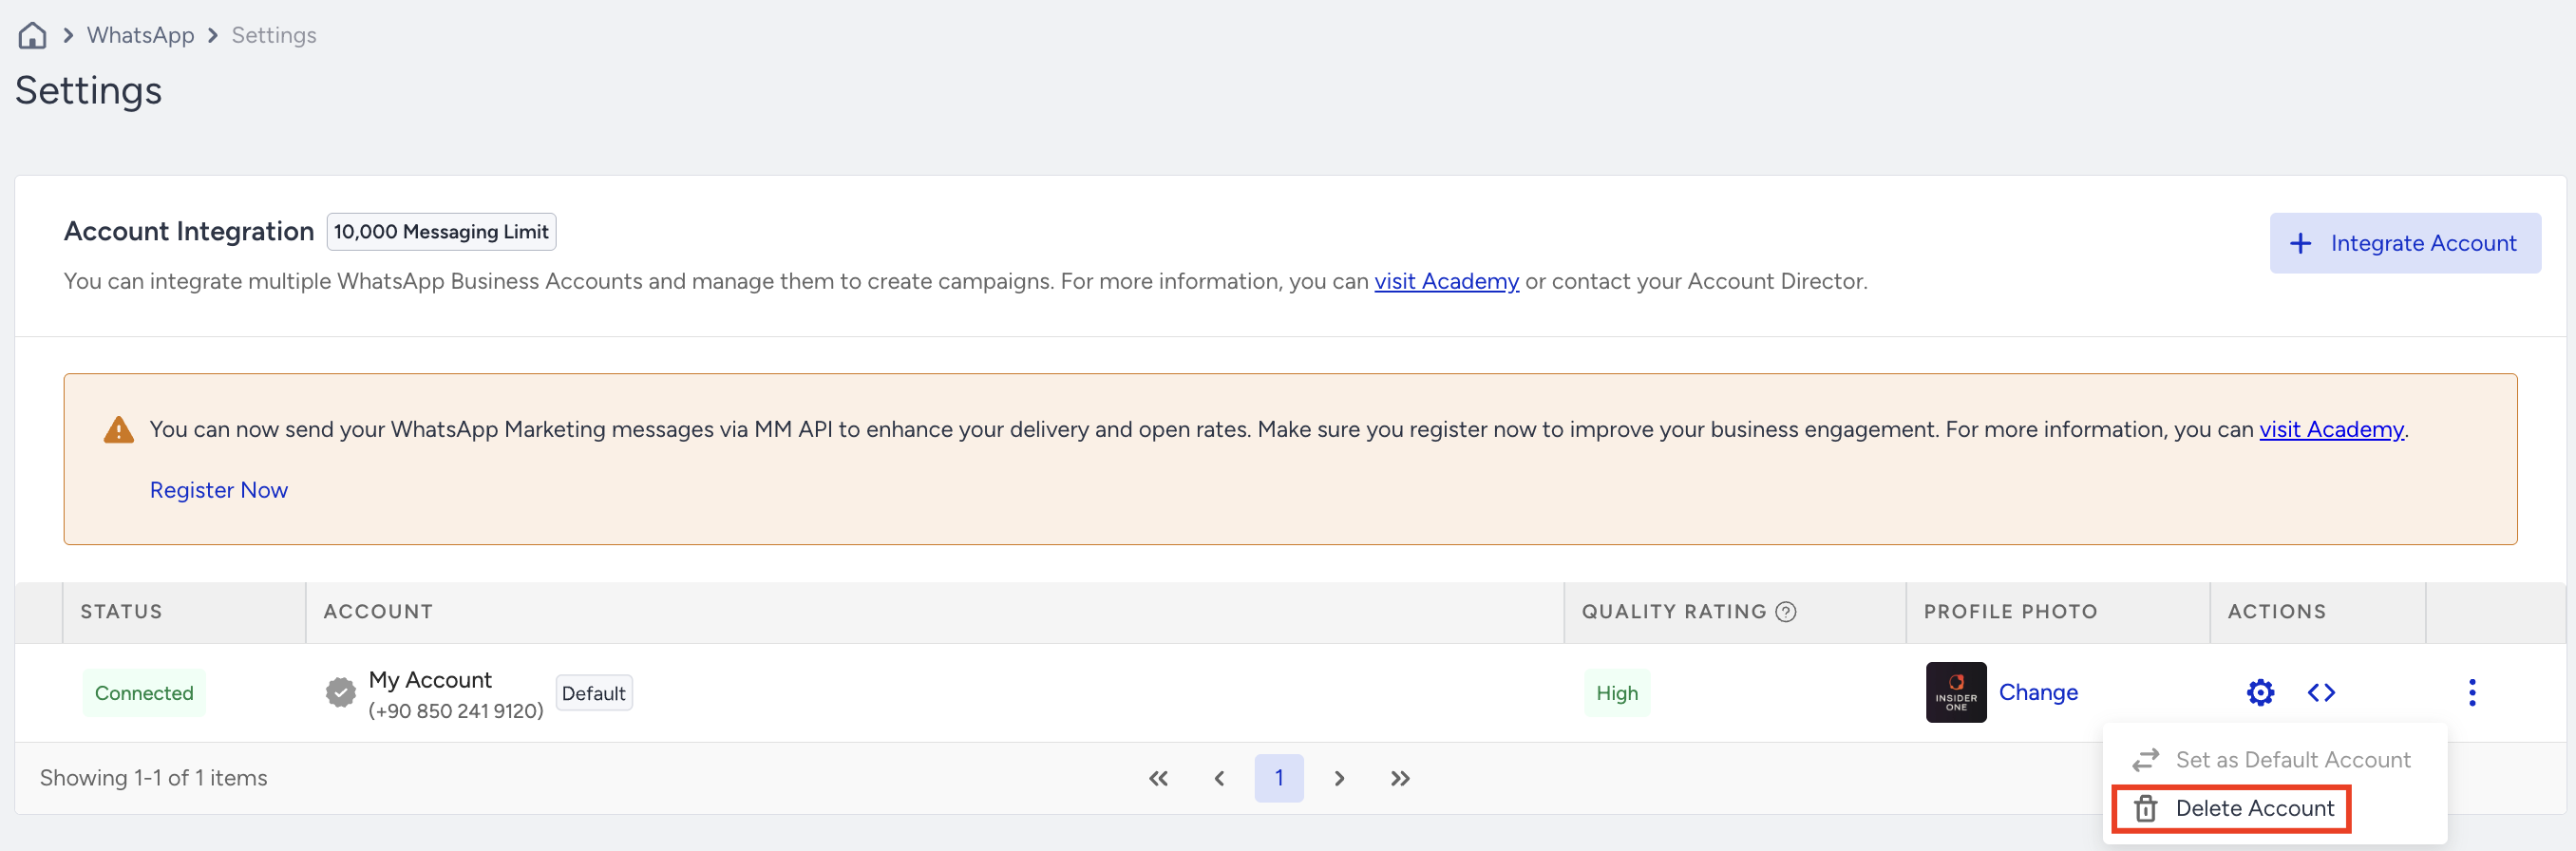
You cannot delete the account that is currently set as the default account. To remove it, set another account as the default first using the Set as Default Account option. Once the default account has been changed, you can delete the previous account.
Under the Actions column, you can configure messaging preferences, keywords, auto-replies, short URLs, and API settings for each account.
Account Preferences
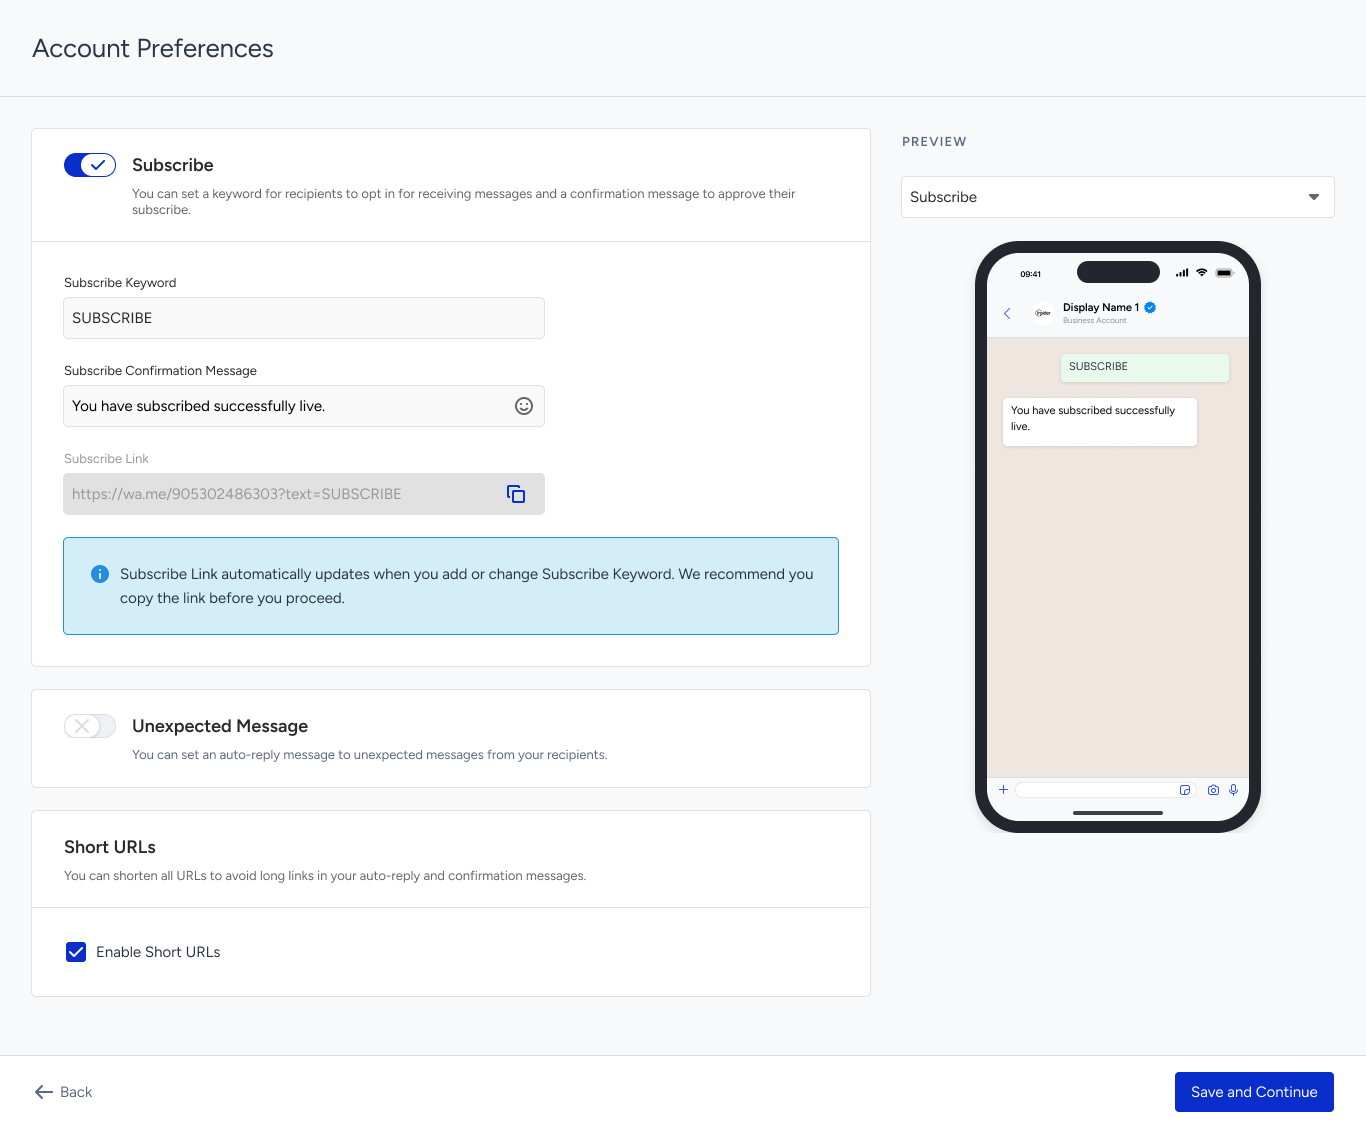
The Account Preferences page enables you to customize key messaging behaviors, including setting opt-in keywords, confirmation messages, and automated replies to unexpected messages.
Click the Account Preferences icon to proceed.
Subscribe
The Unsubscribe Keyword applies globally across all numbers, while the Subscribe Keyword can be customized per number. You can define a unique keyword for users to opt in and set a confirmation message to approve their subscription.
To set your unique Subscribe Keyword, enable the Subscribe toggle. Enter your Subscribe Confirmation Message, and after setting your Subscribe Keyword, you can preview it.
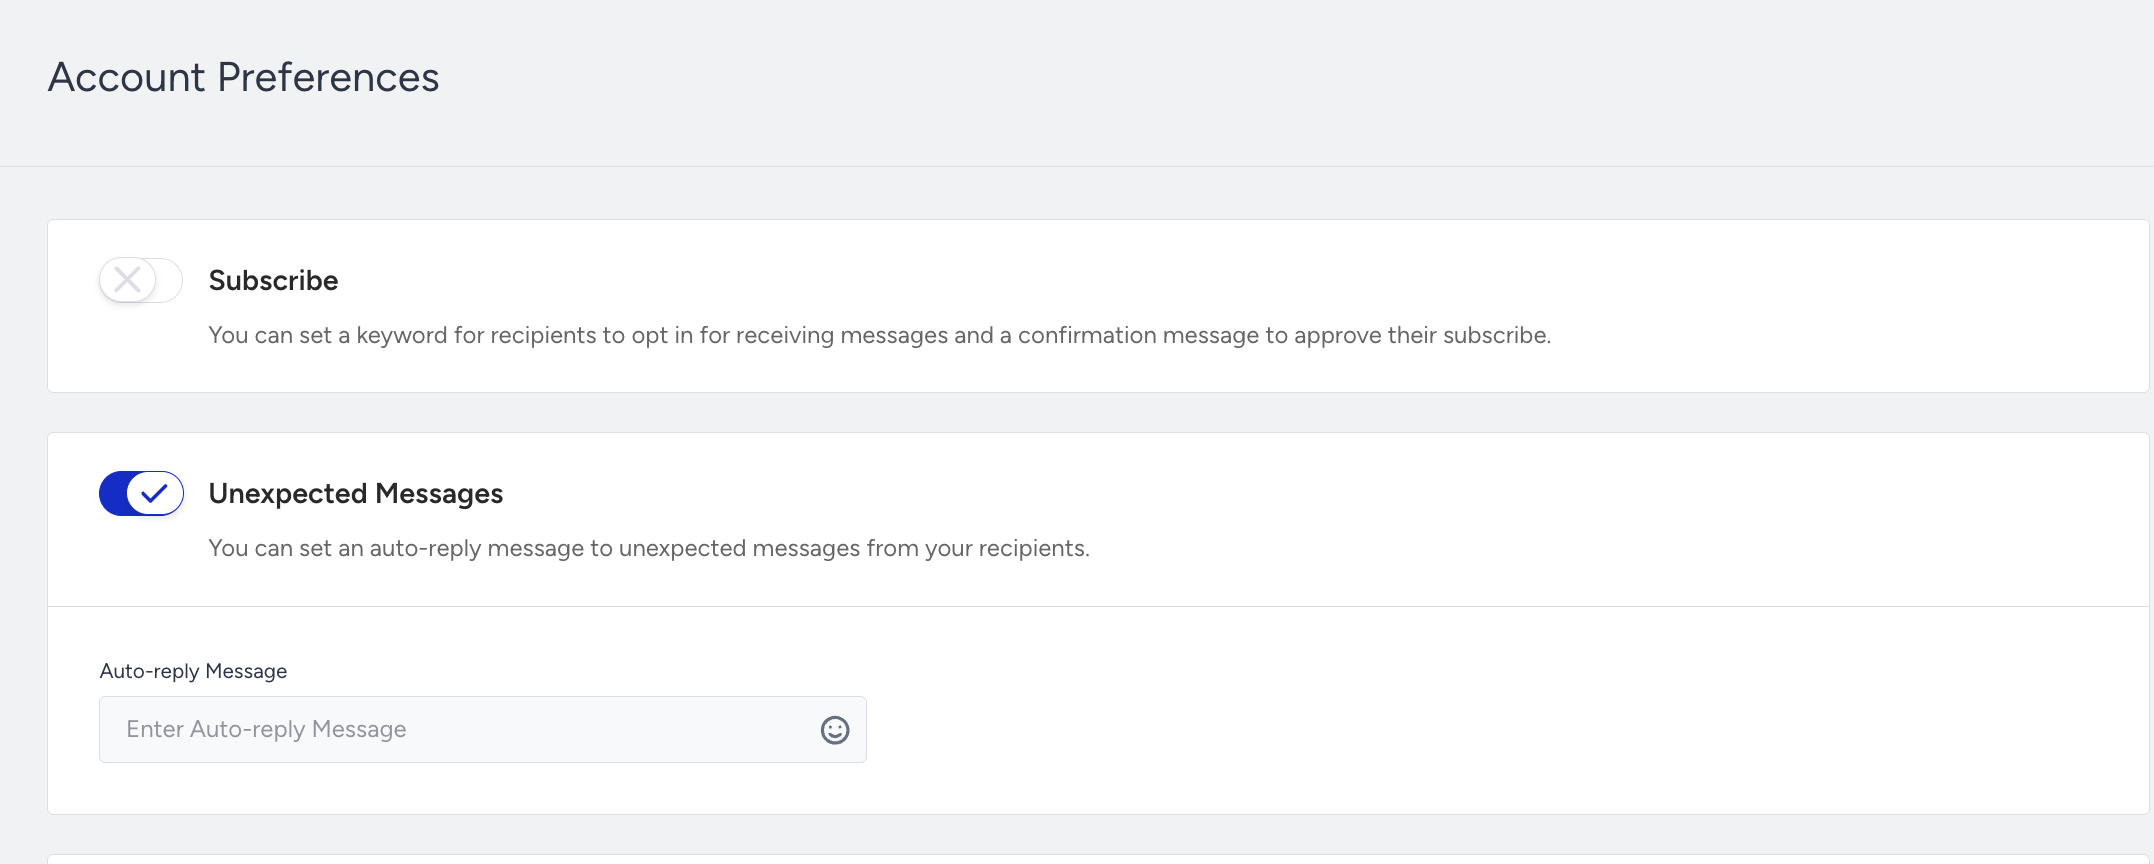
Unexpected Messages
You can reply to users who message your WhatsApp account with unexpected messages and redirect them to a support channel.
To use the Unexpected Messages feature, enable the Unexpected Messages toggle and create your message.
When the user sends another unexpected message within an hour, they don't receive the auto-reply message. After an hour, they can receive the second auto-reply message.
The Unexpected Messages (auto-reply) option is managed at the phone number level. Even if the Conversational API is enabled for your account, this option remains available unless a Conversational webhook URL has been configured for the selected phone number. If the Conversational API is active and a Conversational webhook URL has been added for that number, this option will appear disabled and cannot be turned on. If it was already enabled when a Conversational webhook is added, it will be automatically turned off.
Short URLs
You can enable the Enable Short URLs checkbox and shorten URLs in your messages to avoid making them longer in your unexpected and confirmation messages.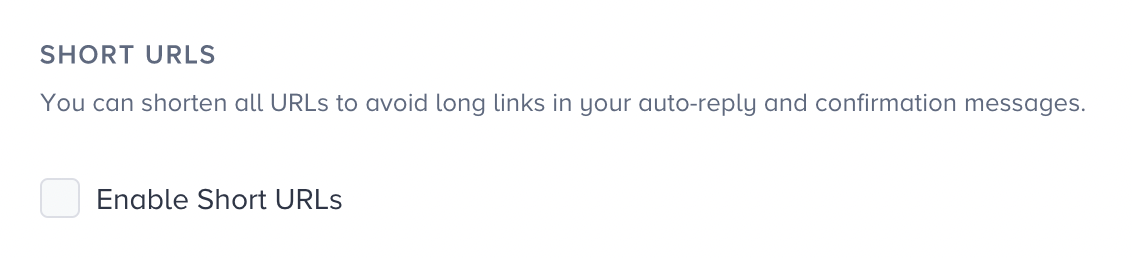
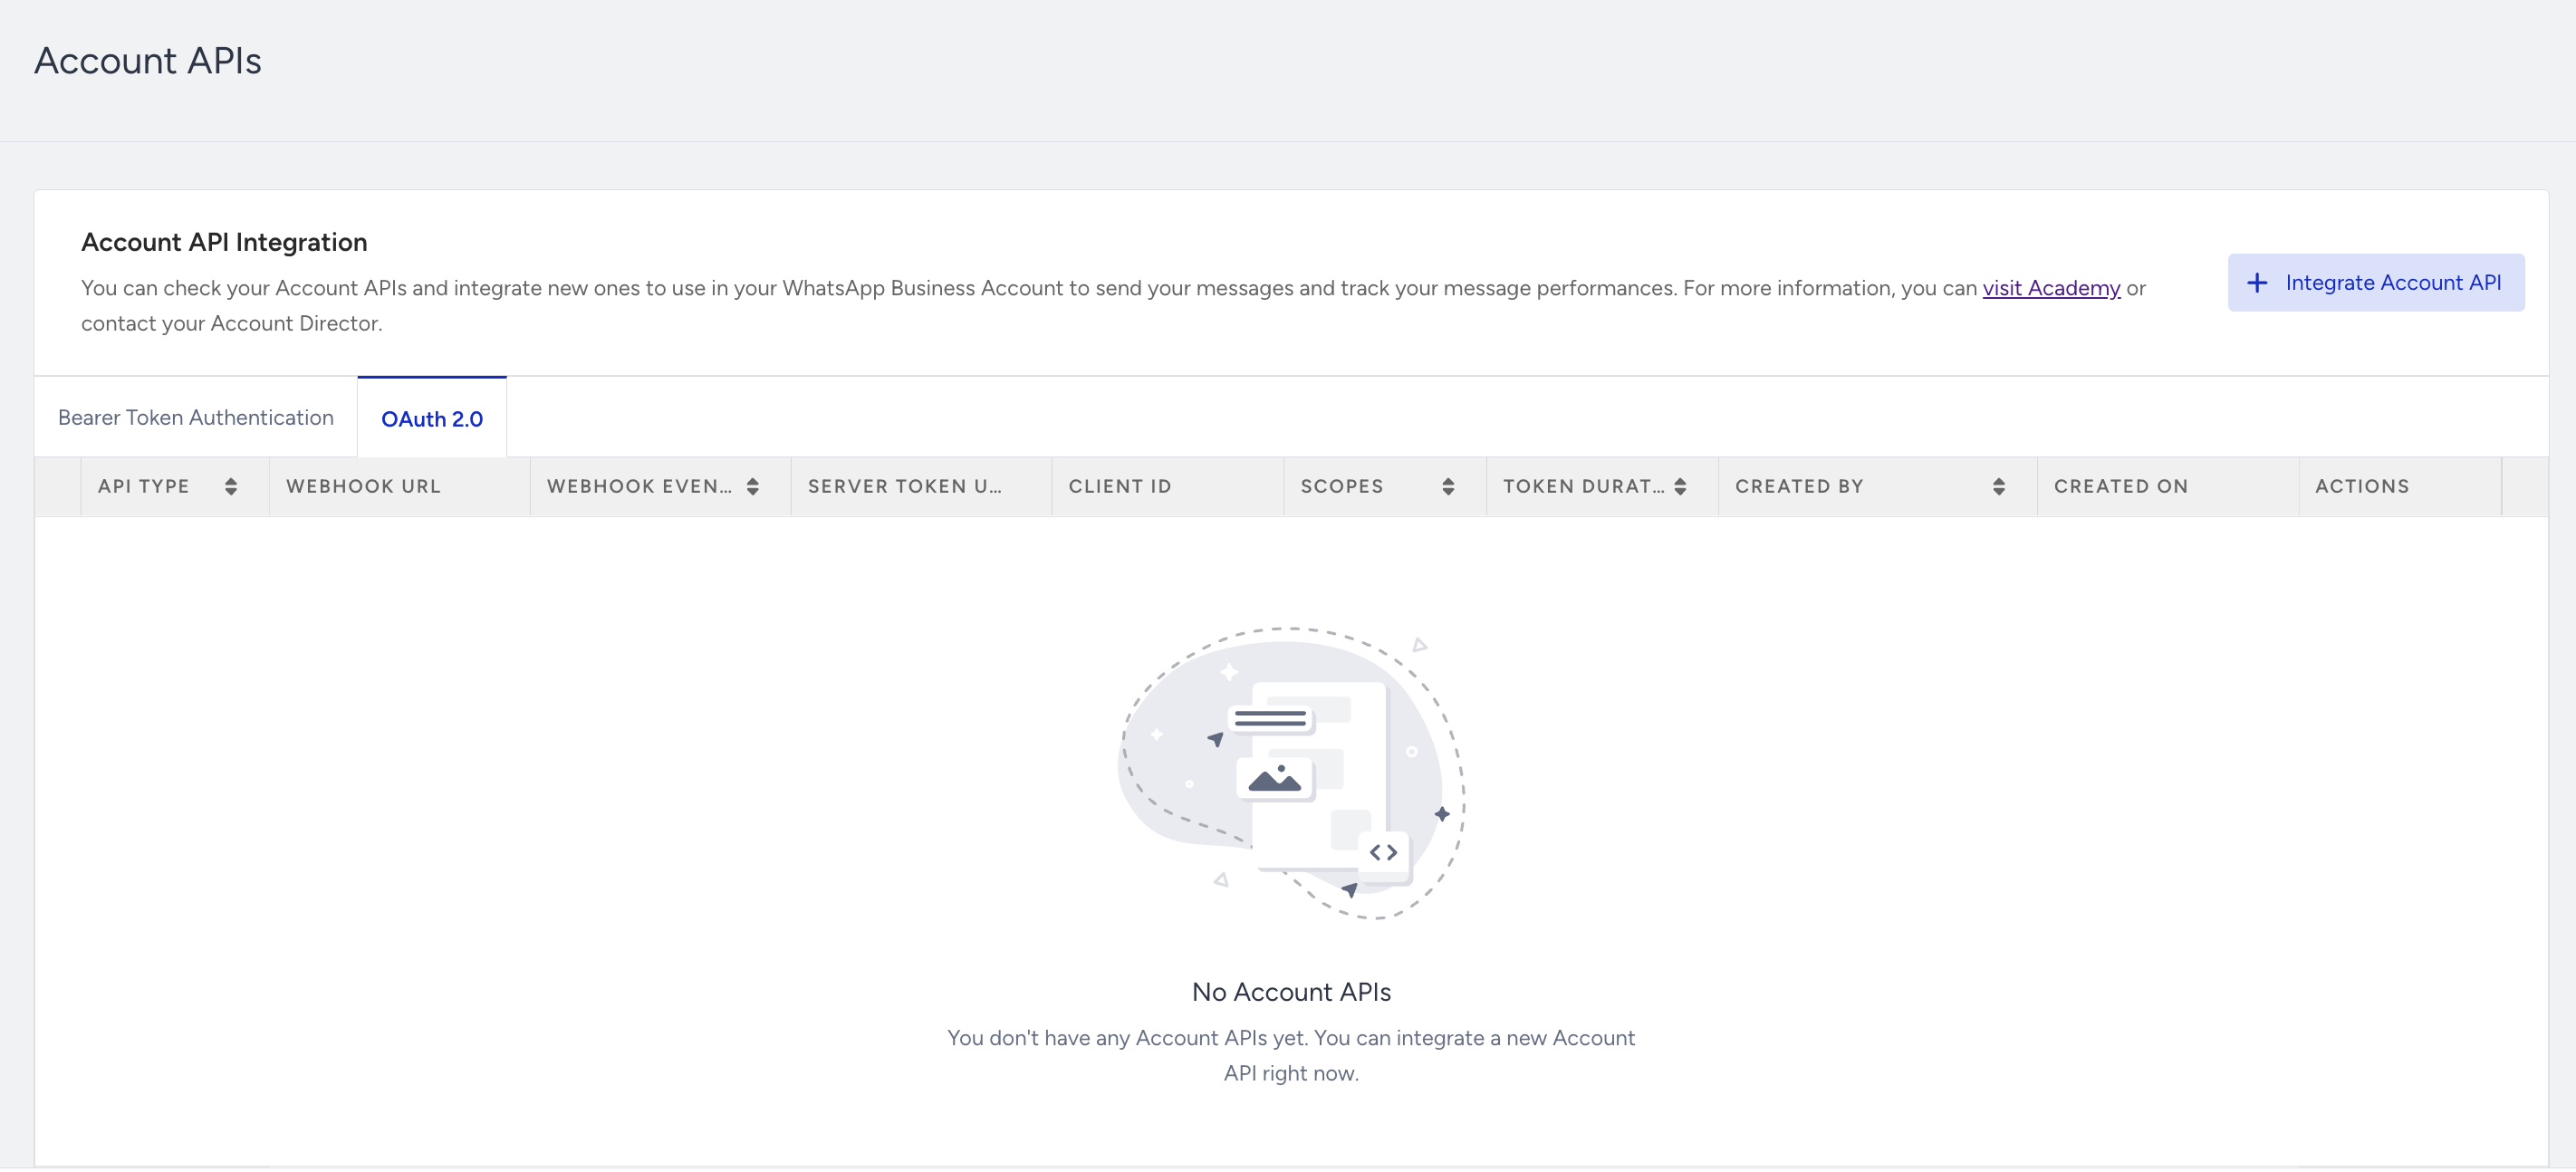
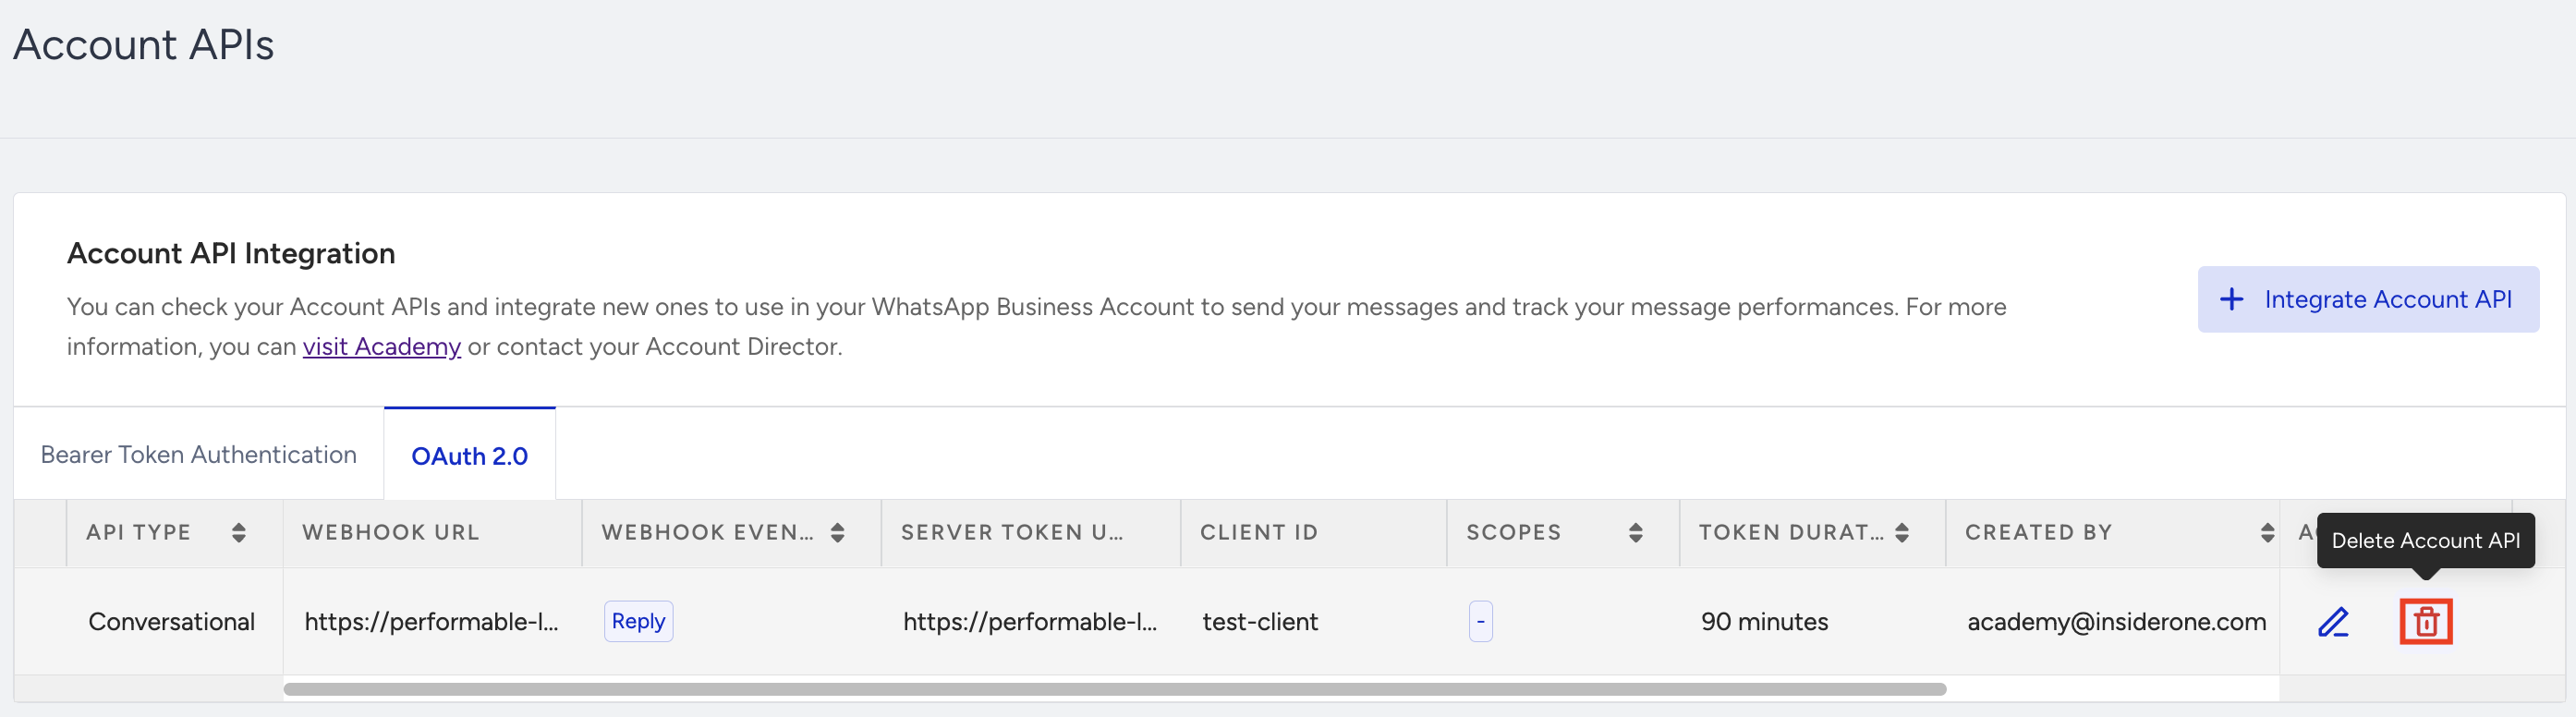
Account APIs
To configure your API Management, navigate to the Account APIs under the Actions column.
Set up a webhook
To integrate a new webhook, click the + Integrate Account API button.
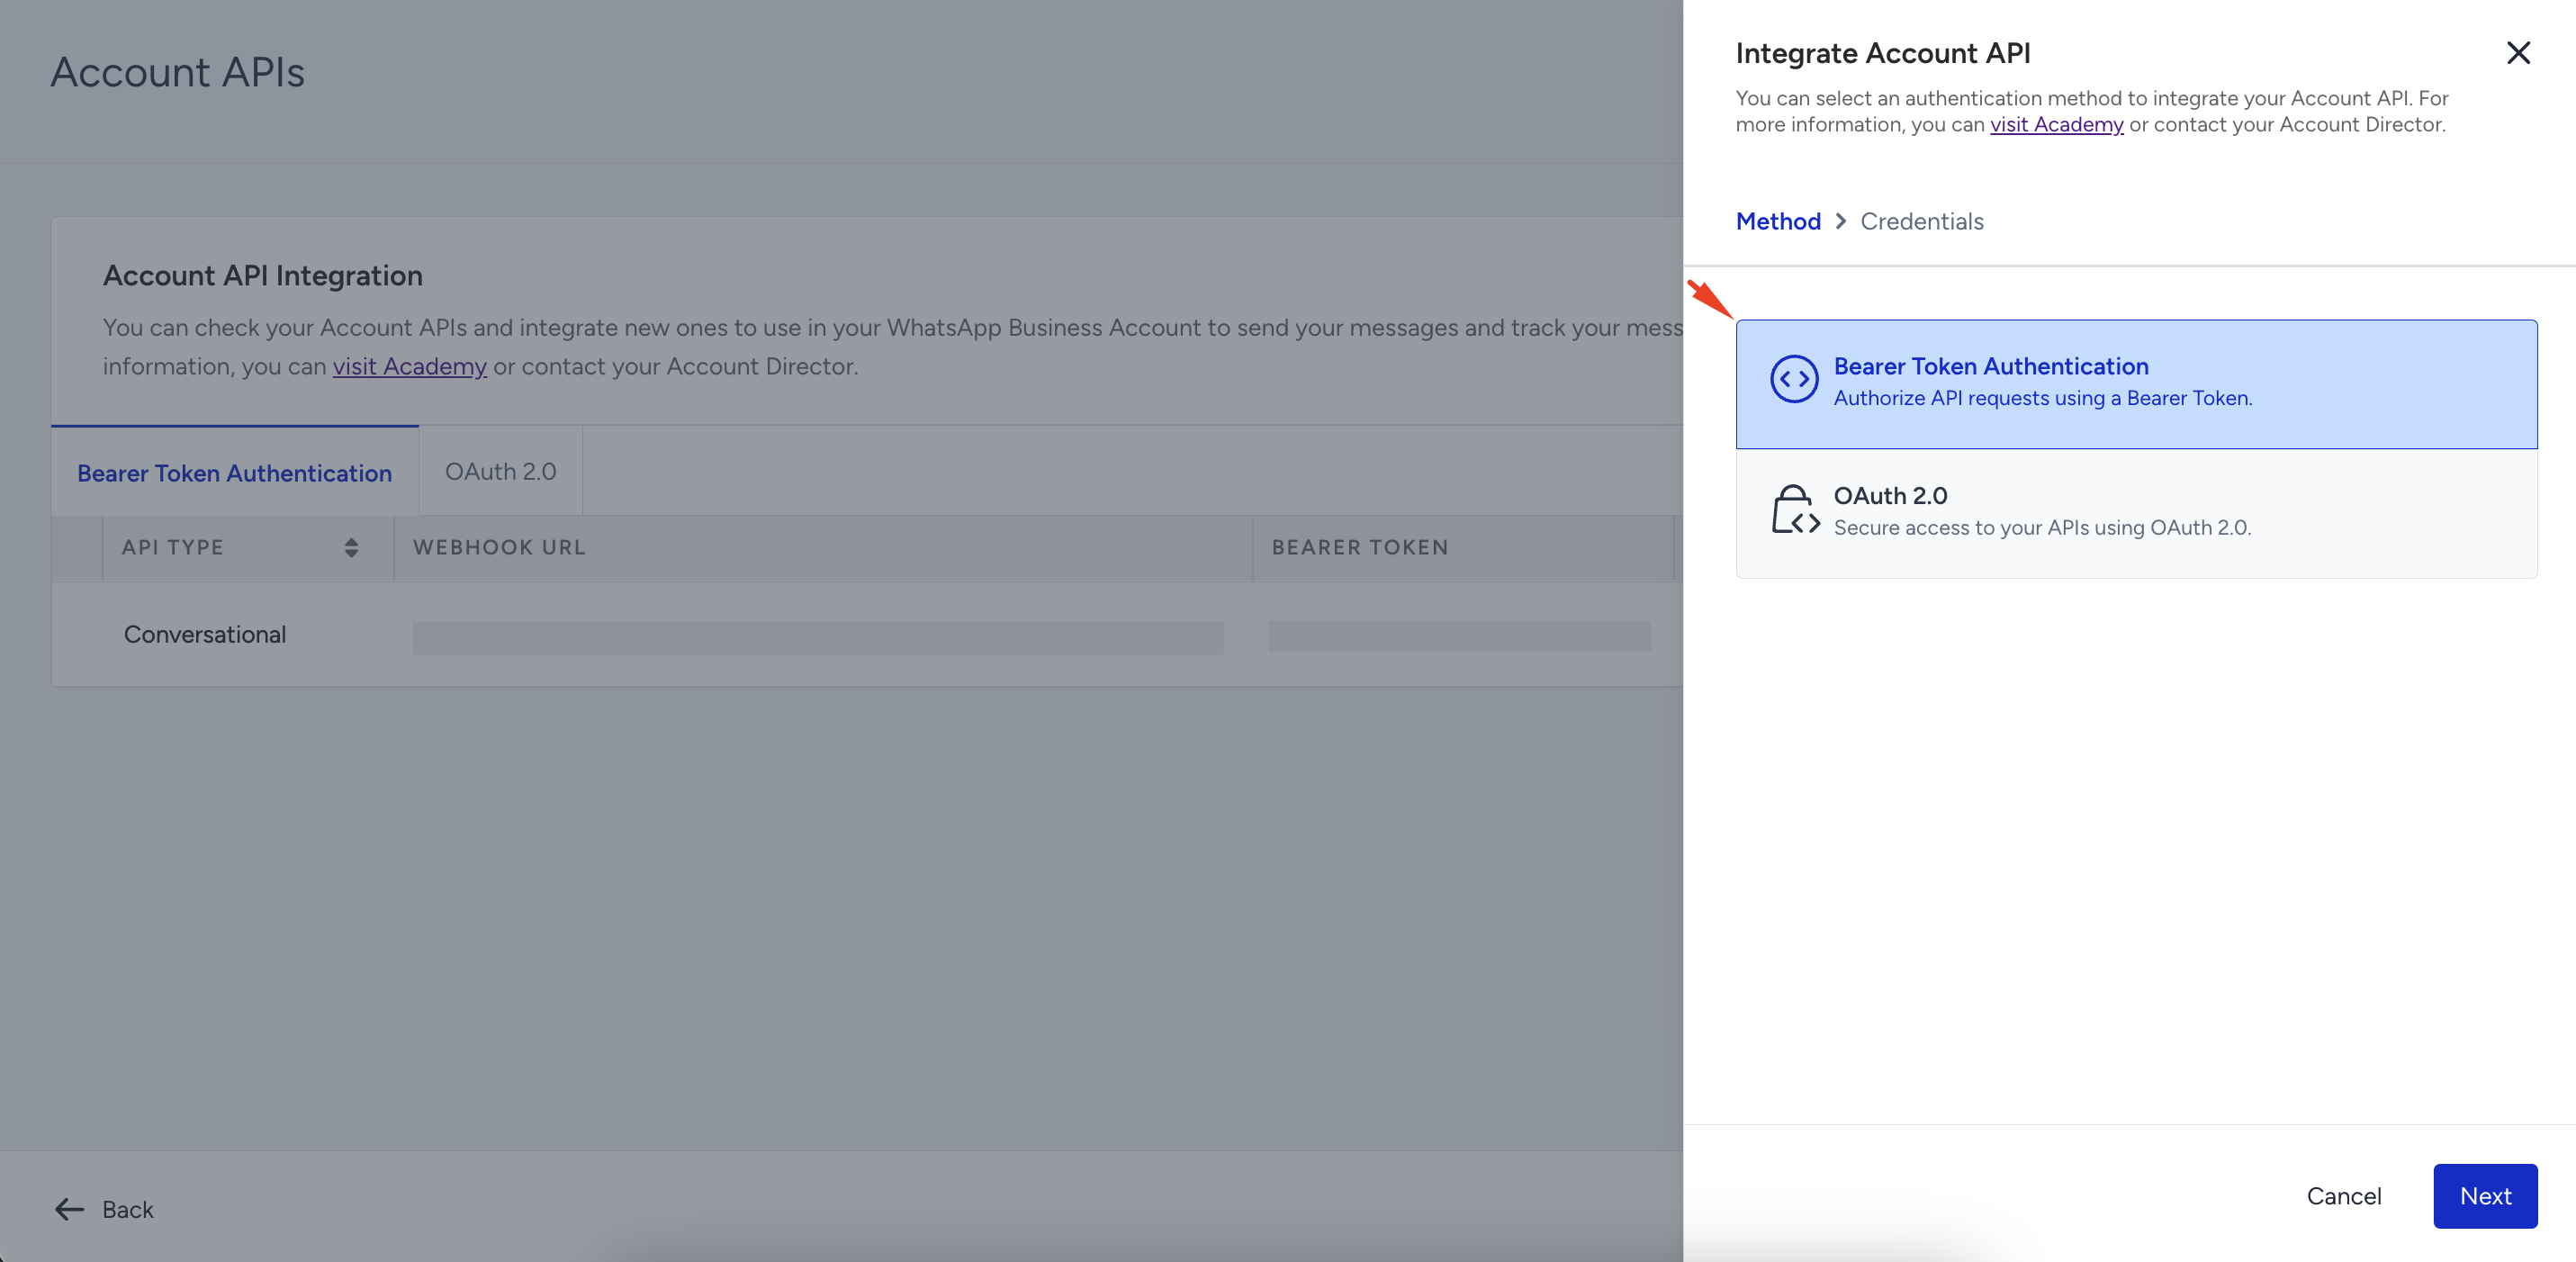
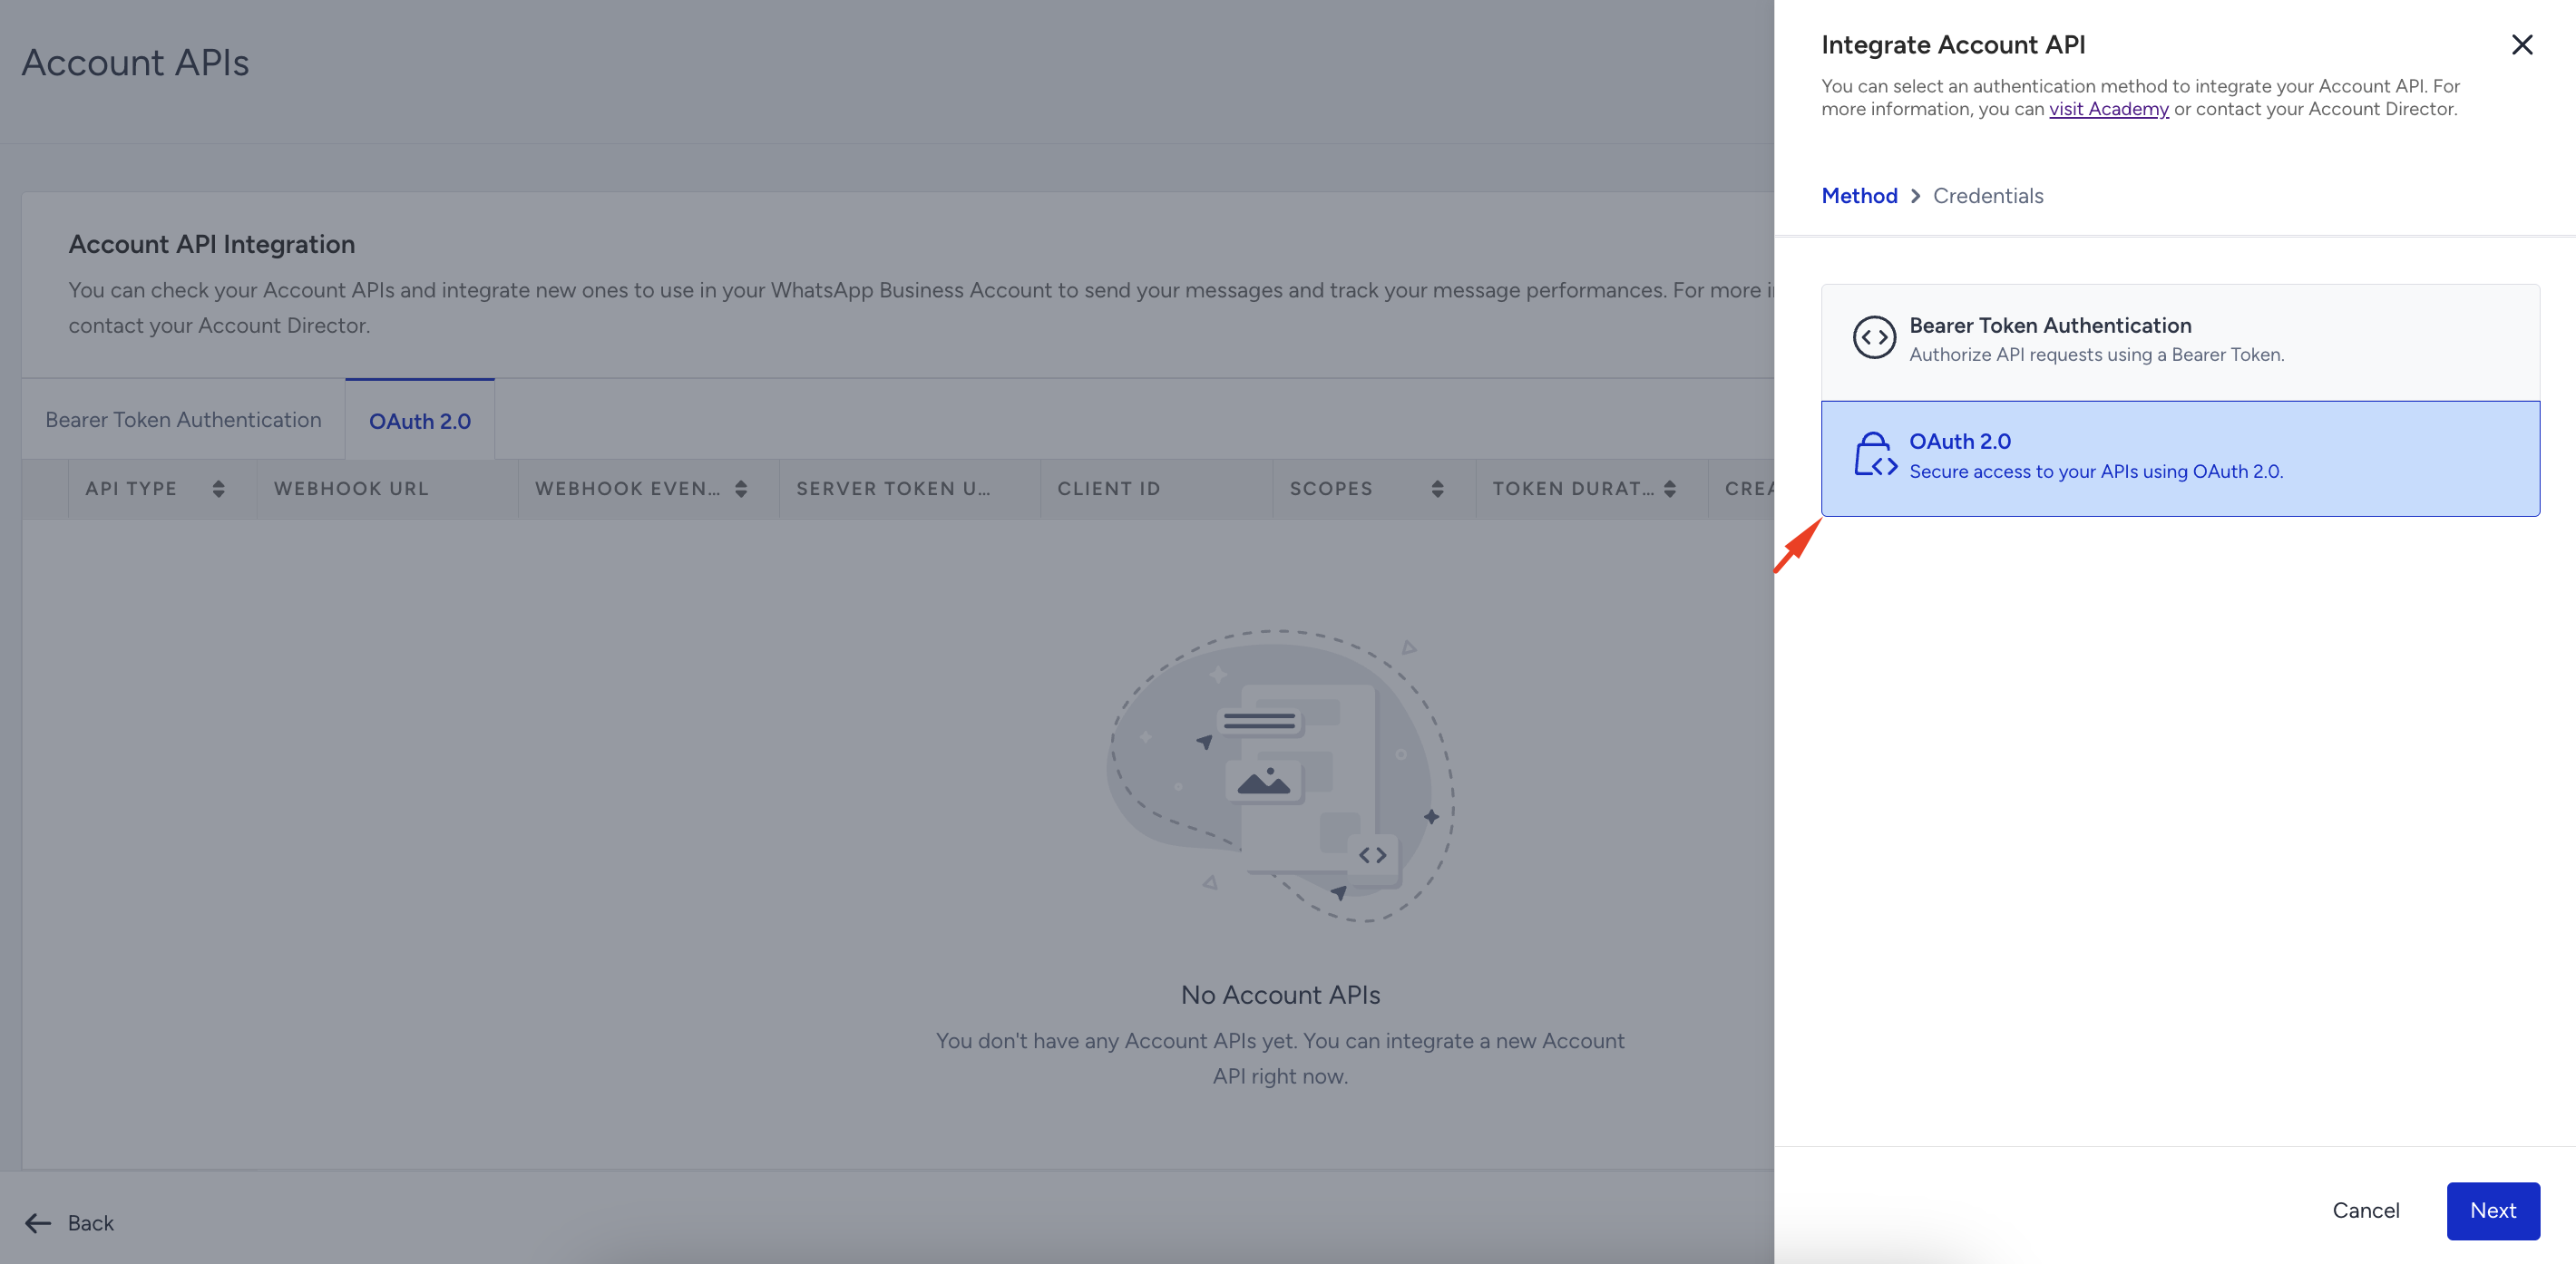
Choose an authentication method:
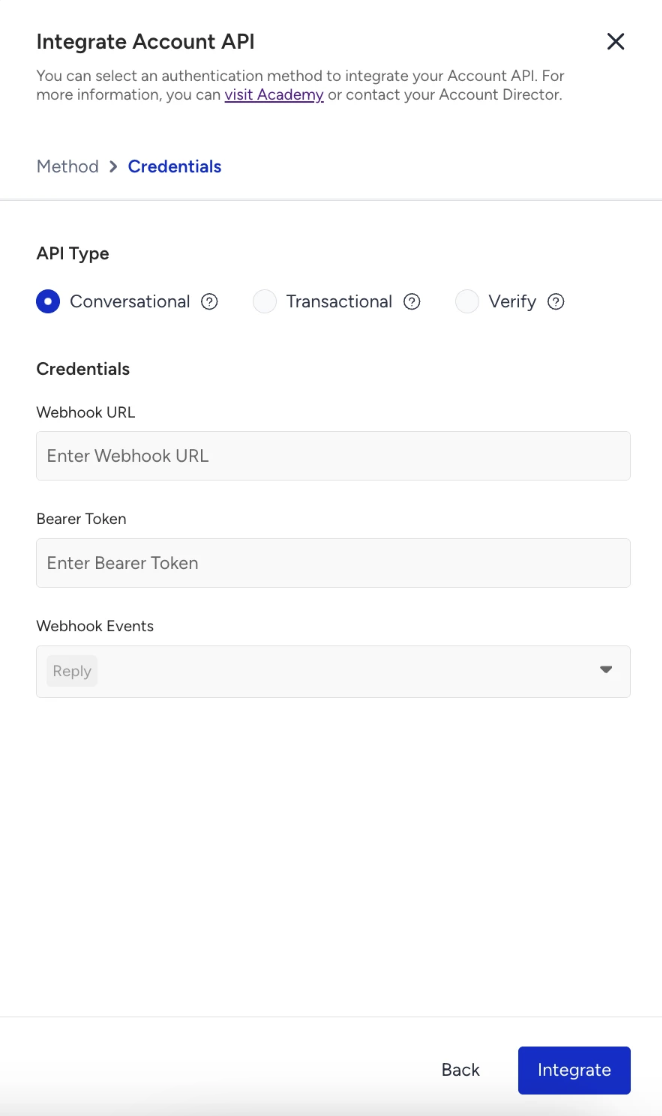
Bearer Token Authentication: Authorize API requests using a Bearer Token. Enter your Webhook URL and Bearer Token, then select the Webhook Events you want to receive (Sent, Delivered, Read, Reply, Failed). You can add up to 10 Bearer Token webhooks per account.
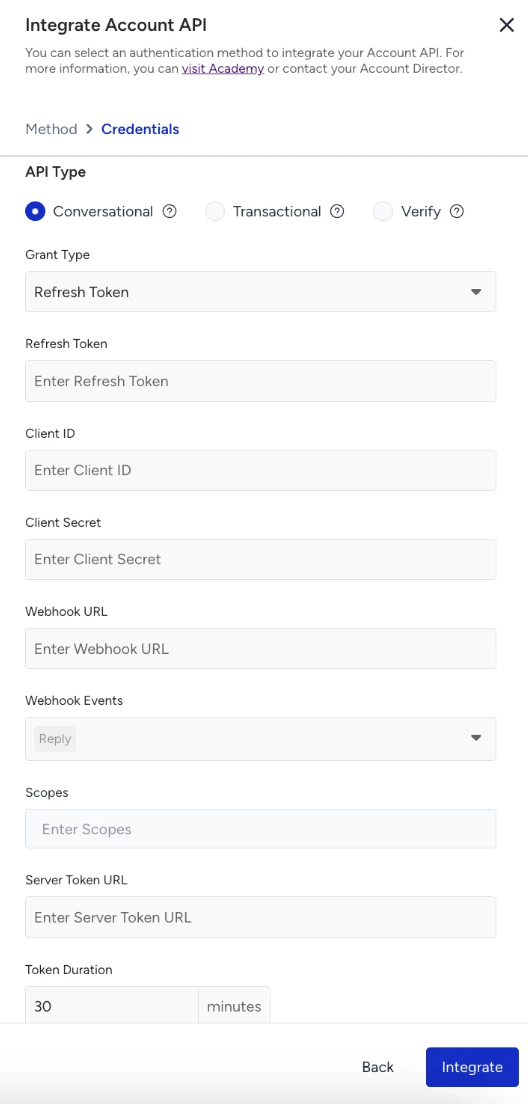
OAuth 2.0: Secure access to your APIs using OAuth 2.0. Enter your Webhook URL, Server Token URL, Client ID, Client Secret, and configure your Webhook Events. You can add up to 10 OAuth 2.0 webhooks per account.
To authorize API requests using a Bearer Token,
Select Bearer Token Authentication.
Select your API Type: Conversational, Transactional, or Verify. Fill in the required fields and click the Integrate button.
To secure access to your APIs using OAuth 2.0,
Select OAuth 2.0 as your method and click Next.
Select your API Type: Conversational, Transactional, or Verify. Fill in the required fields and click the Integrate button.
To edit your integration, click the pencil icon.
The API Type cannot be changed after a webhook is created.
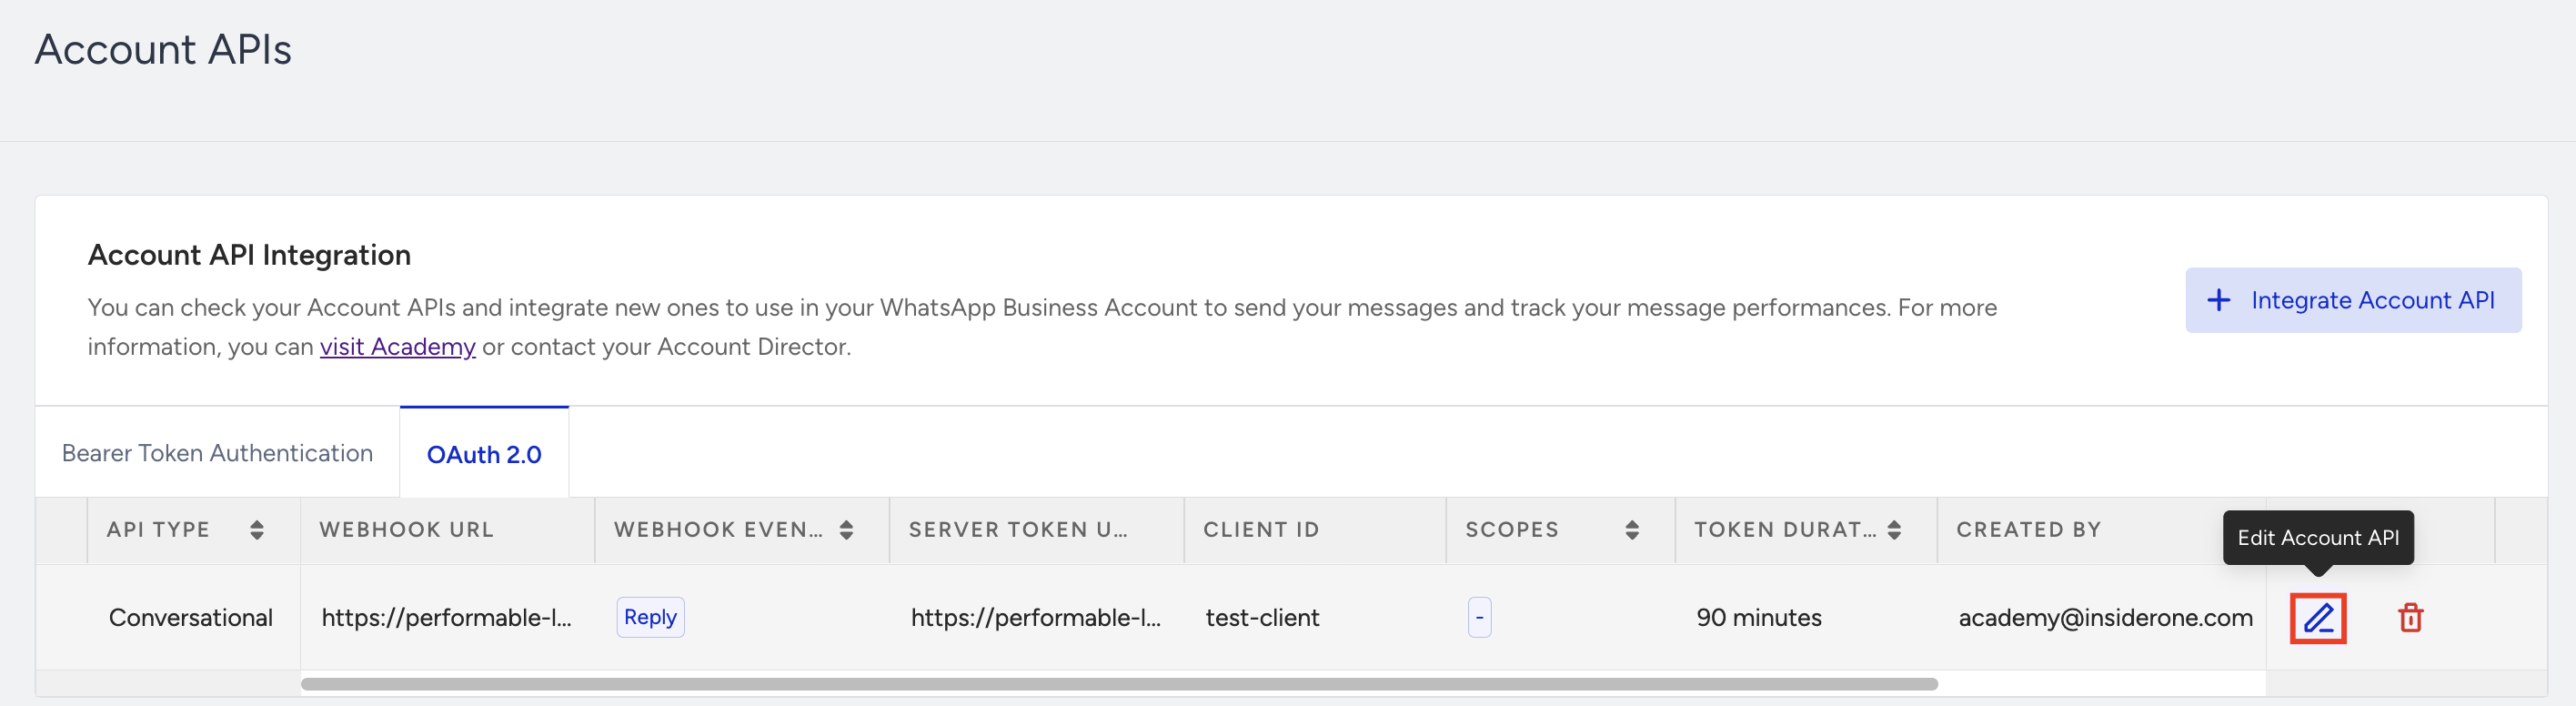
To delete your integration, click the trash icon.
Manage webhooks
You can edit or delete each webhook entry independently without affecting others.
For Conversational webhooks, the Reply event is mandatory and cannot be removed.
For Verify webhooks, the available webhook events are Sent, Delivered, Read, and Failed. The Reply event is unsupported for the Verify API type.
A maximum of 20 webhook URLs can be added in total; up to 10 for Bearer Token and up to 10 for OAuth 2.0.
Duplicate webhook URLs are not allowed.
Important:
When you change your webhook URL, any existing chatbot or automation flows connected to the previous webhook will immediately stop working.
Changing the webhook effectively disconnects your previous bot logic. Before switching, ensure that the new webhook is fully configured and includes all required handlers to process incoming requests correctly. This prevents message delivery issues or automation failures caused by missing event handlers.
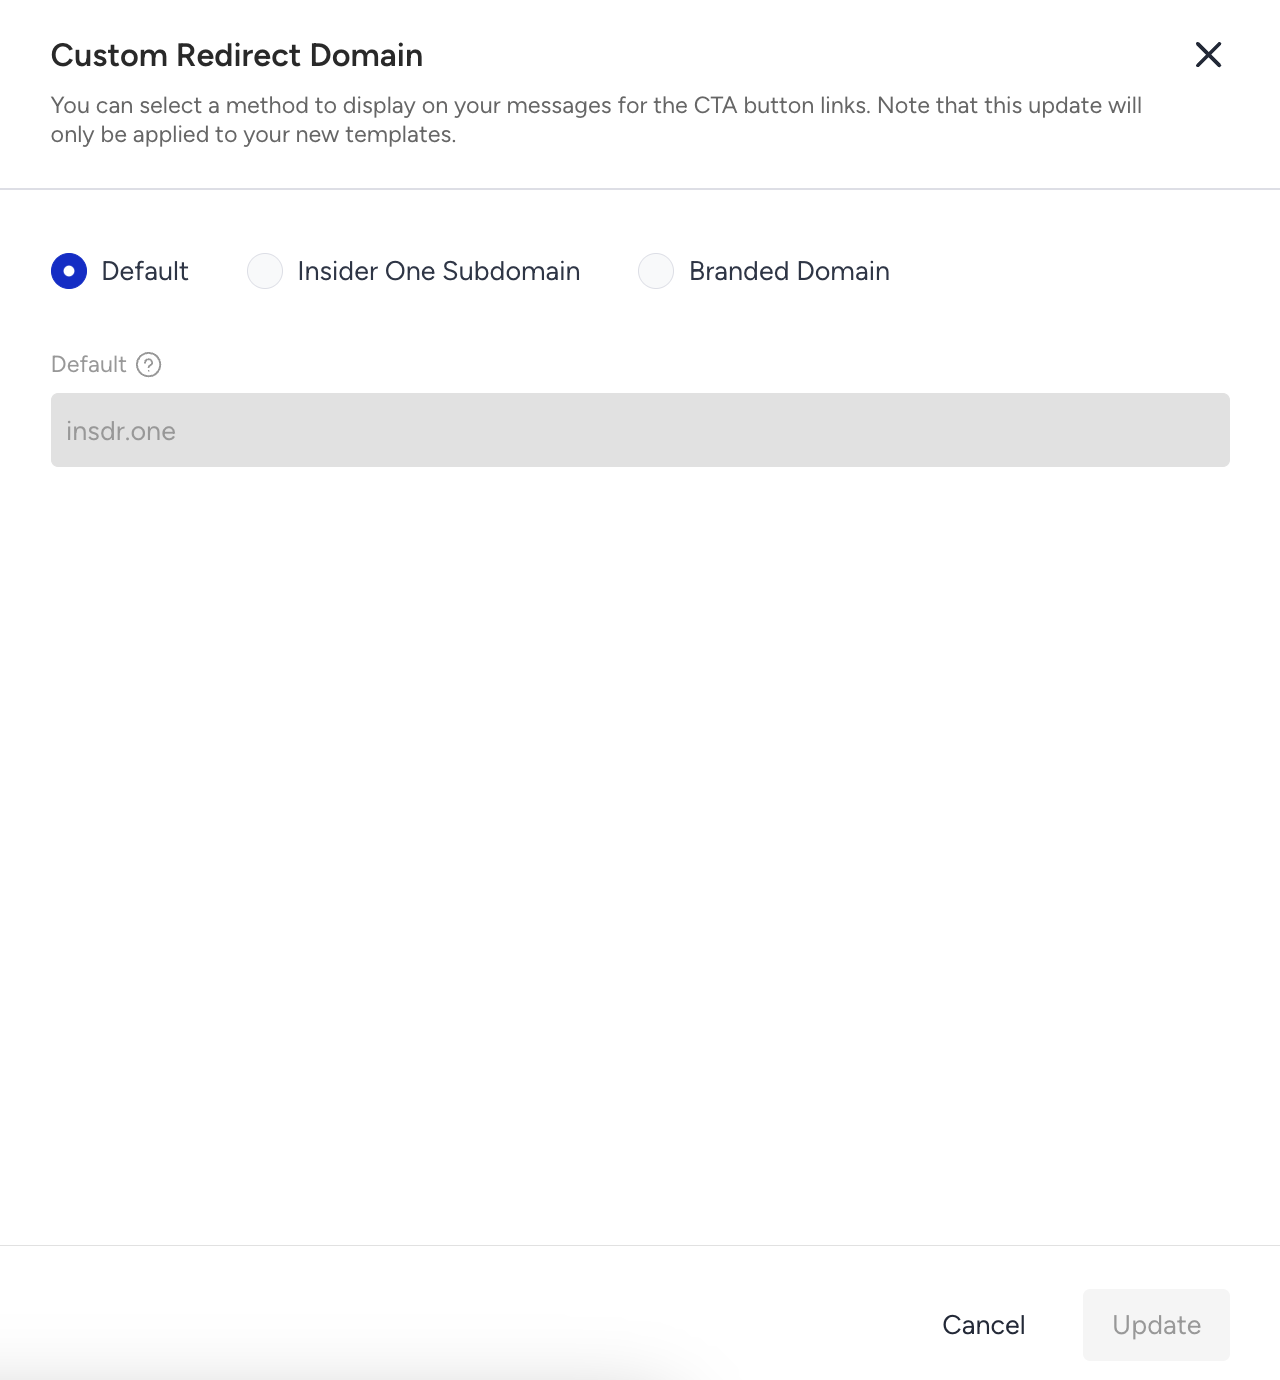
Custom Redirect Domain
This feature enables you to customize the domain displayed in the tappable preview header, ensuring your messages reflect your own branded domain.
To edit your custom redirect domain, click the Edit Domain button.

You can choose from three available options below:
Option 1: Default domain (No action required)
You can skip all customization and use the default insdr.one domain as-is.
Option 2: Custom Insider One subdomain (No preparation required)
You can enter a preferred subdomain name in the panel.
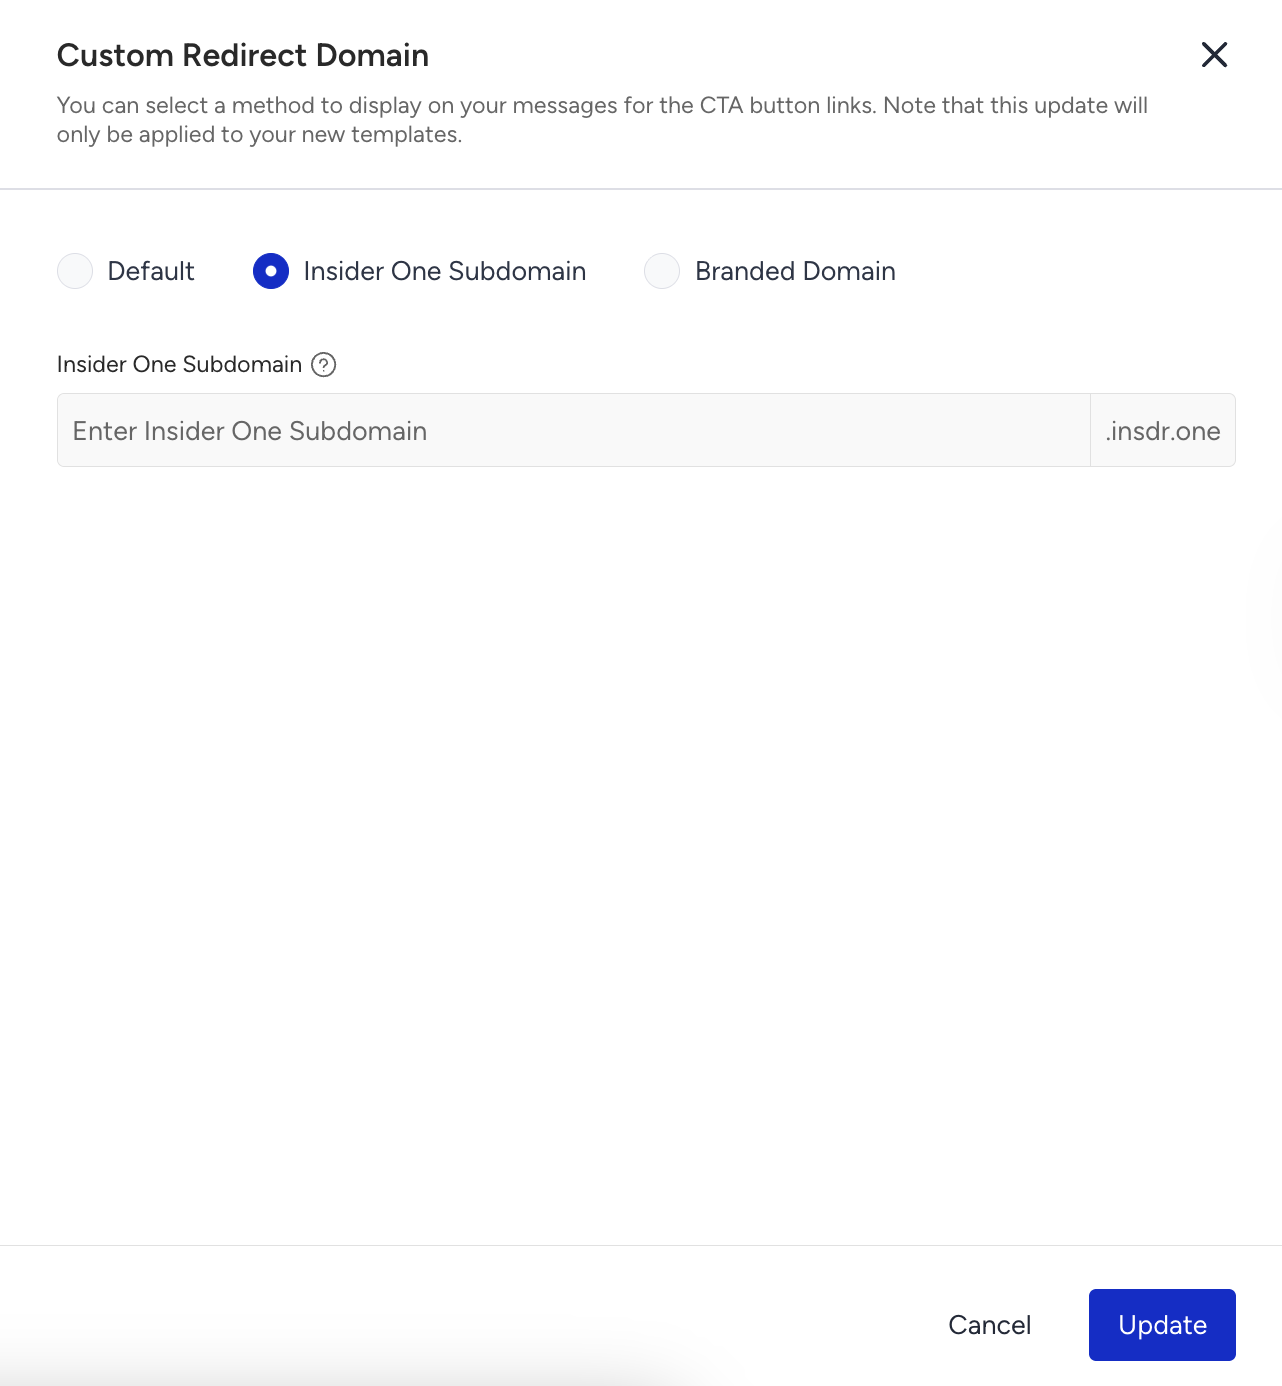
The system auto-generates: {{partner_name}}.insdr.one
For example: posh.insdr.one
This subdomain will automatically be used in the tappable preview header.
No advance setup or action is required from you for this option.
Option 3: Branded domain (Requires advanced preparation)
Important
Using a branded domain requires advanced preparation and setup on your side.
Acquire an unused domain (if you don't already have one)
Configure a redirect to
insdr.one.Complete all required domain configurations before proceeding.
After your setup is ready, create a support ticket with the Insider One team. Once the required checks are completed, the team will share a step-by-step configuration guide with you.
You can use your own domain or a branded short URL in the preview header to maintain brand consistency in your messages.

Requirements:
The domain must redirect to:
insdr.one
Examples:
wht.posh.com→insdr.oneposh.io→insdr.one
After configuring the redirect, enter the domain in your panel settings.
Critical requirement: The domain must be dedicated to this setup only. Do not use it for hosting a website, landing pages, or any other purpose.
What doesn't work
If the root domain (for example,
yourbrand.com) is actively used as a website, it will not work. Even if the root domain itself is not in use, having URLs such asyourbrand.com/productxxused elsewhere will also cause issues.Using third-party shorteners (for example,
bit.ly)Using the same domain for any purpose other than this redirect setup
If the domain is used elsewhere, messages will still be delivered, but the link will only redirect to the last configured destination. Tracking will not work properly, which means users might not reach the correct URL, and click data will not be captured.
If you need to change the branded domain later, the old domain must remain unused (not pointed anywhere) for at least 3 months. Otherwise, links in previously sent messages using the old domain might stop working.
Insider One recommends using a dedicated subdomain (such as msg.yourbrand.com or links.yourbrand.com) exclusively for this purpose. This keeps your branding consistent under the same parent domain while isolating the tracking setup.
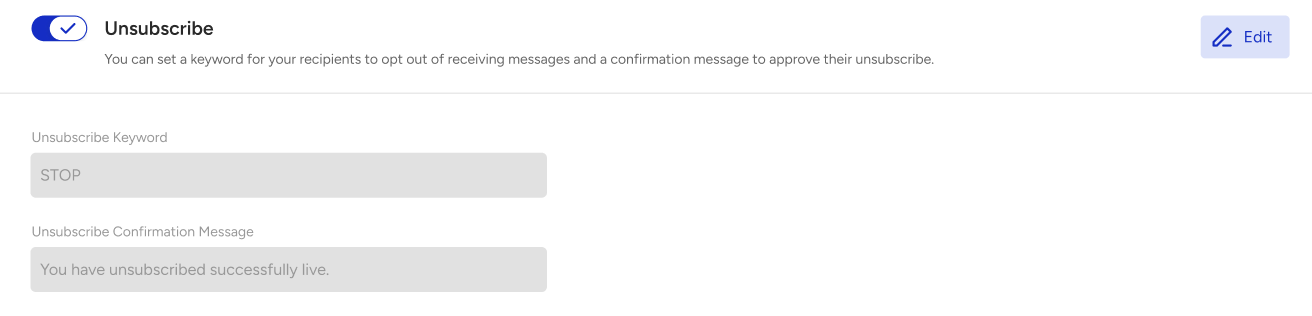
Unsubscribe
You can set a keyword for recipients to opt out of receiving messages, along with a confirmation message to acknowledge their unsubscription. The Unsubscribe Keyword applies globally across all numbers.
To create your Unsubscribe Keyword and Confirmation Message, enable the Unsubscribe toggle.
Since Meta does not allow footers in Carousel templates, you can include your Unsubscribe Keyword directly in the message body so recipients can easily opt out.
The keyword used for unsubscription in WhatsApp settings and the end-conversation keyword in Mindbehind chatbot settings must be different. If the same keyword is used for both, the user will trigger unsubscription while simply trying to end the conversation. Therefore, these keywords should always be set differently.
The unsubscribe keyword match is case insensitive, so
STOP,stop, andStopare all treated as the same keyword.