You cannot make any changes to External Platform Integrations without having either an Administrator or an Editor with PII access in InOne. Refer to User Roles for further information.
Insider One’s Shopify Custom Web Pixel enables you to track completed purchase data from your Shopify store for analytics and segmentation.
Shopify restricts third-party scripts from running directly on checkout pages. As a result, the standard Insider One Tag does not load on these pages as it does on your storefront. This is expected behavior and does not indicate an issue with the integration.
To track completed purchases on Shopify checkout pages, Insider One uses the Shopify Custom Web Pixel. Follow the setup and testing steps in this guide to configure the pixel and verify that purchase events are tracked correctly.
Create a Custom Pixel Code
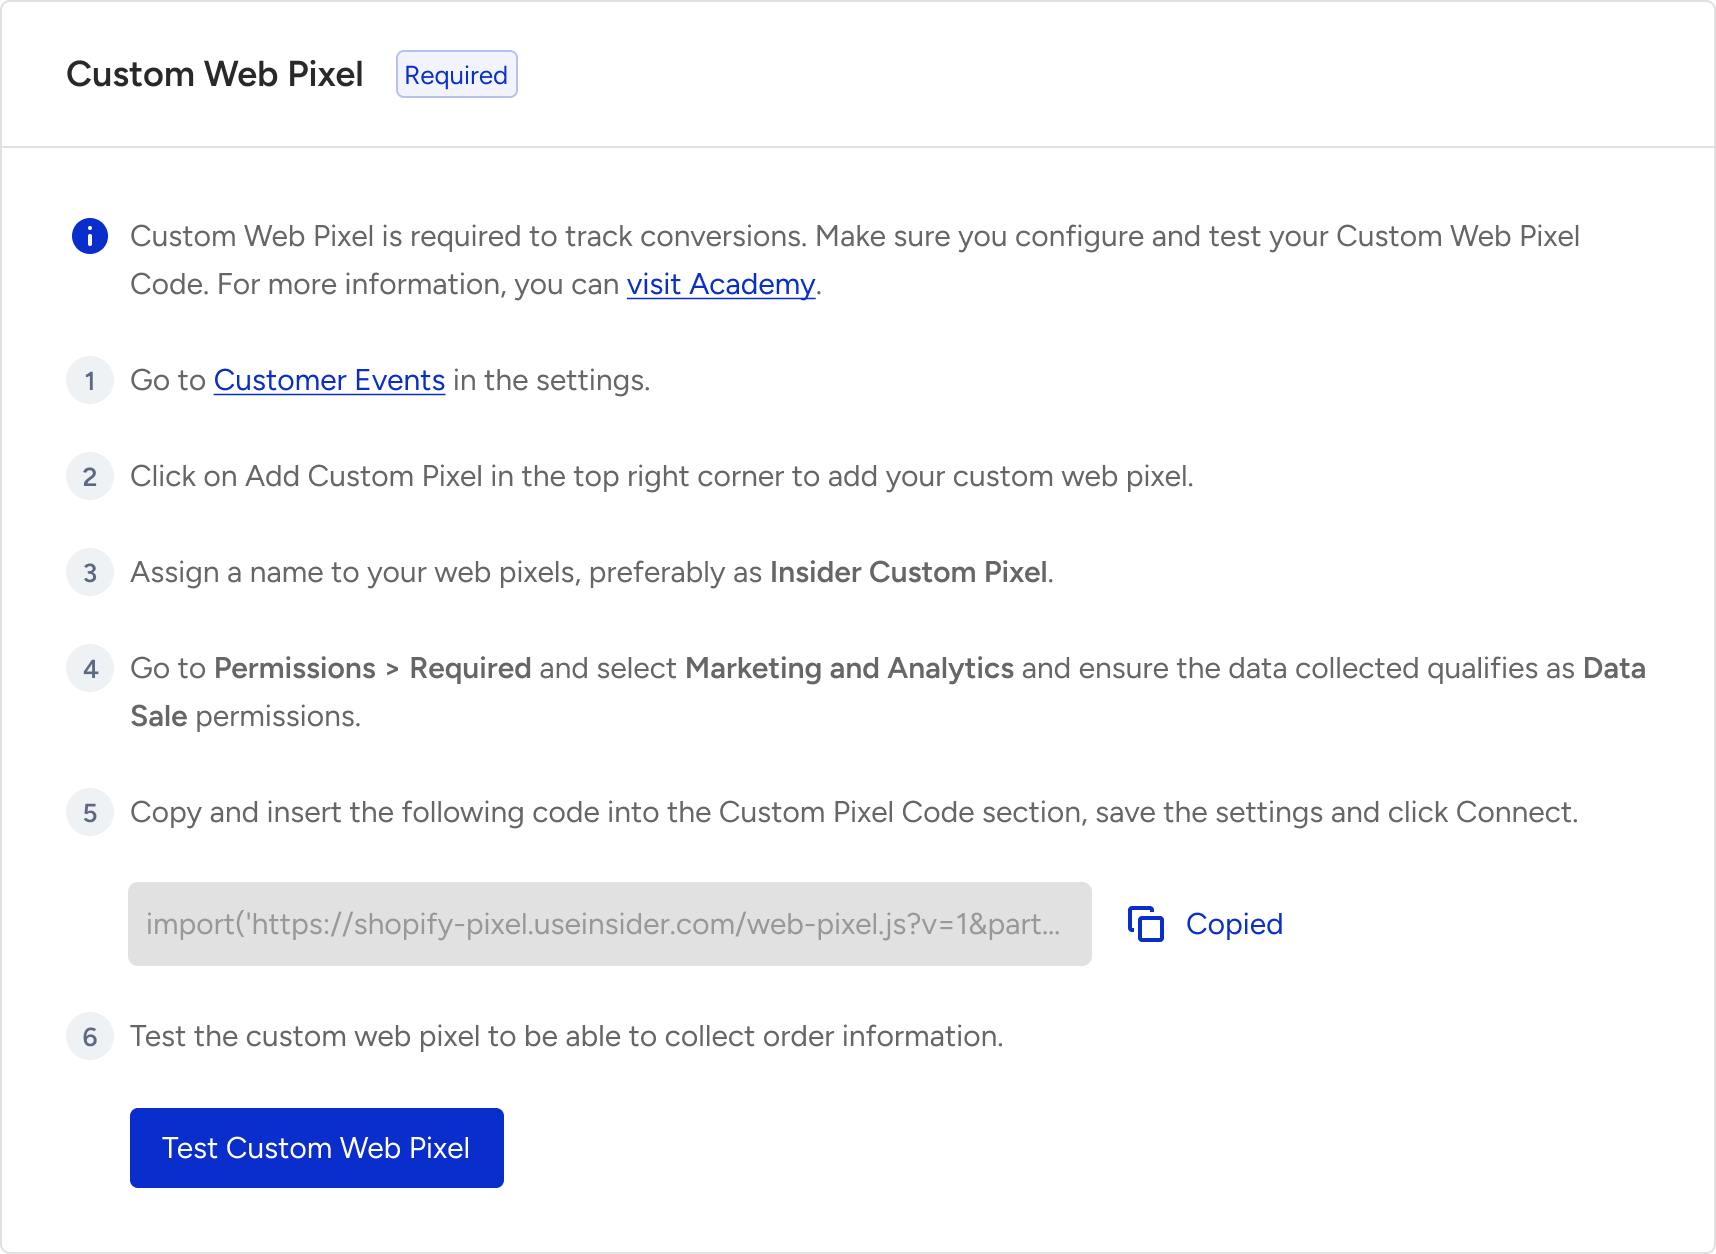
Go to Shopify App settings on Insider One's InOne panel.
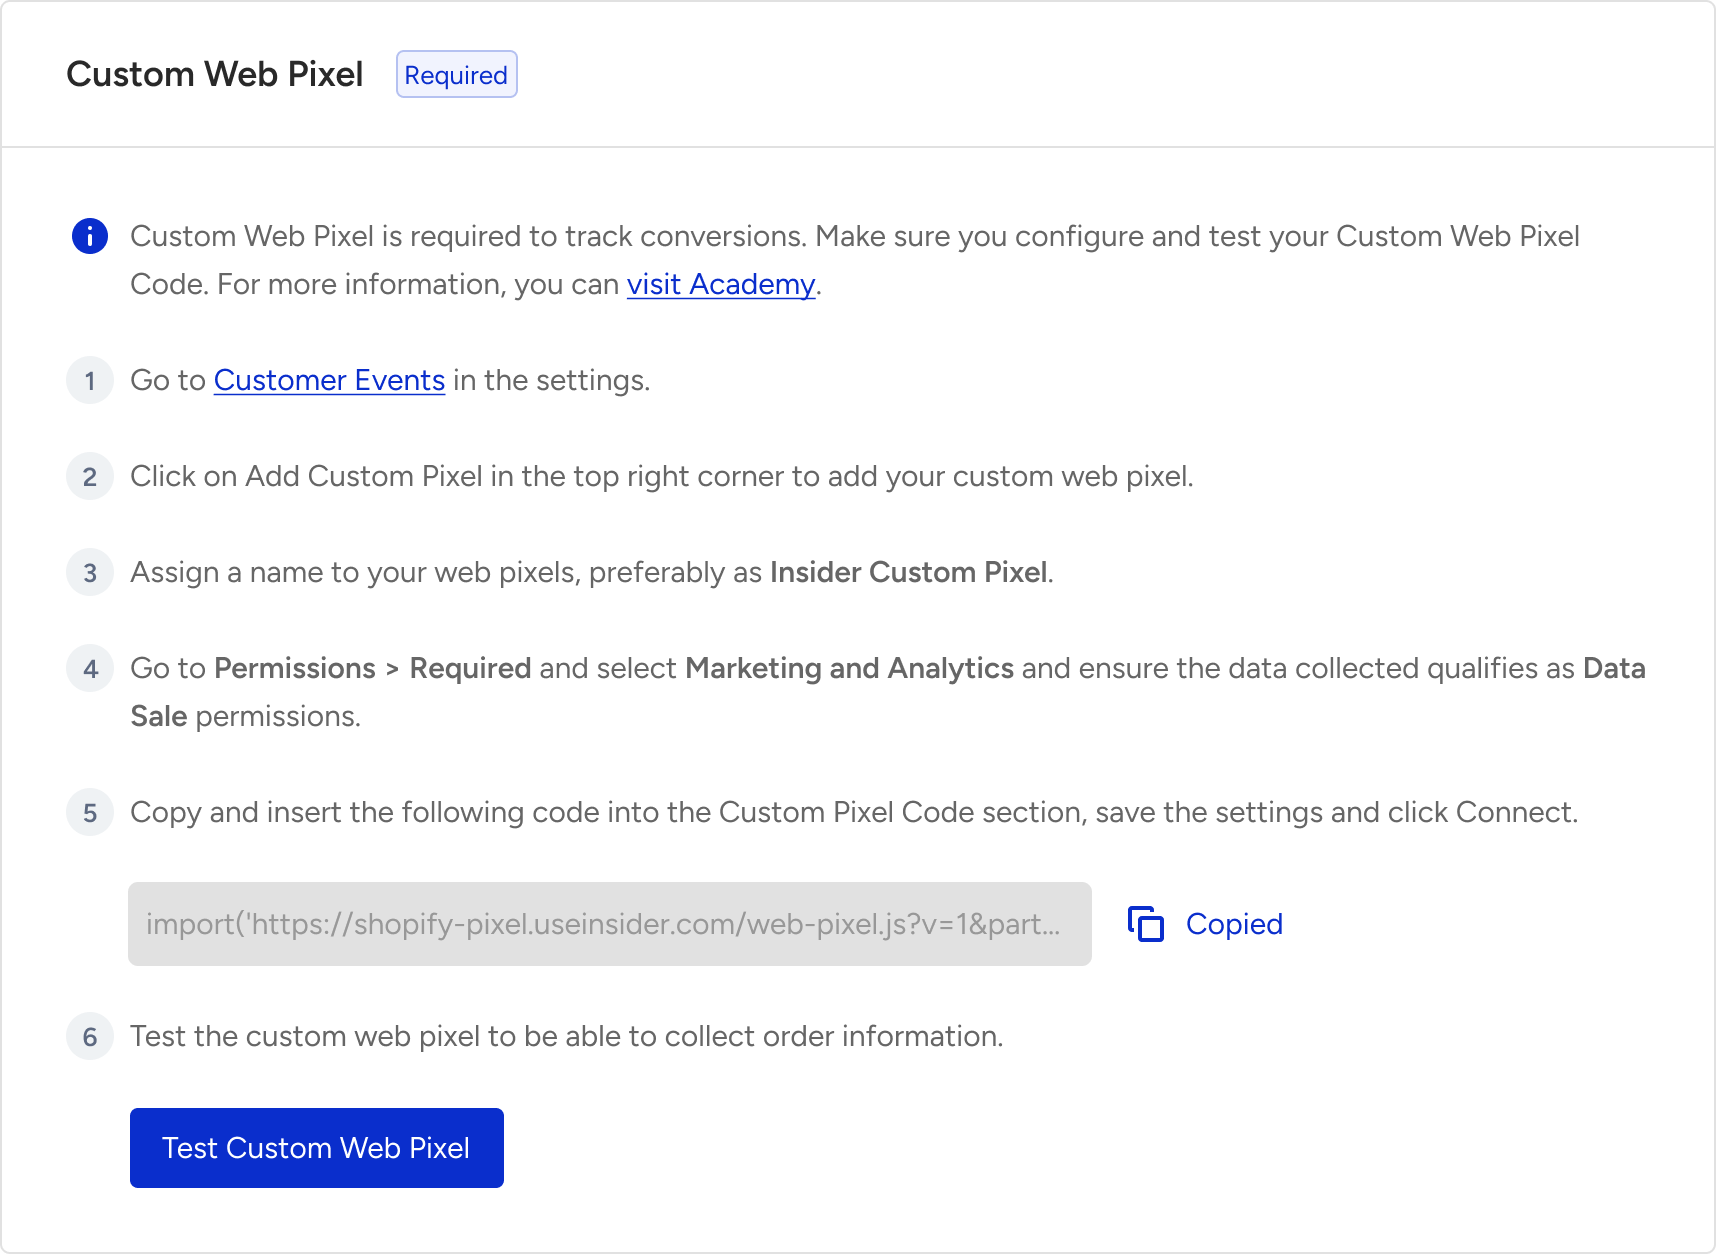
Copy the code to implement the custom web pixel.
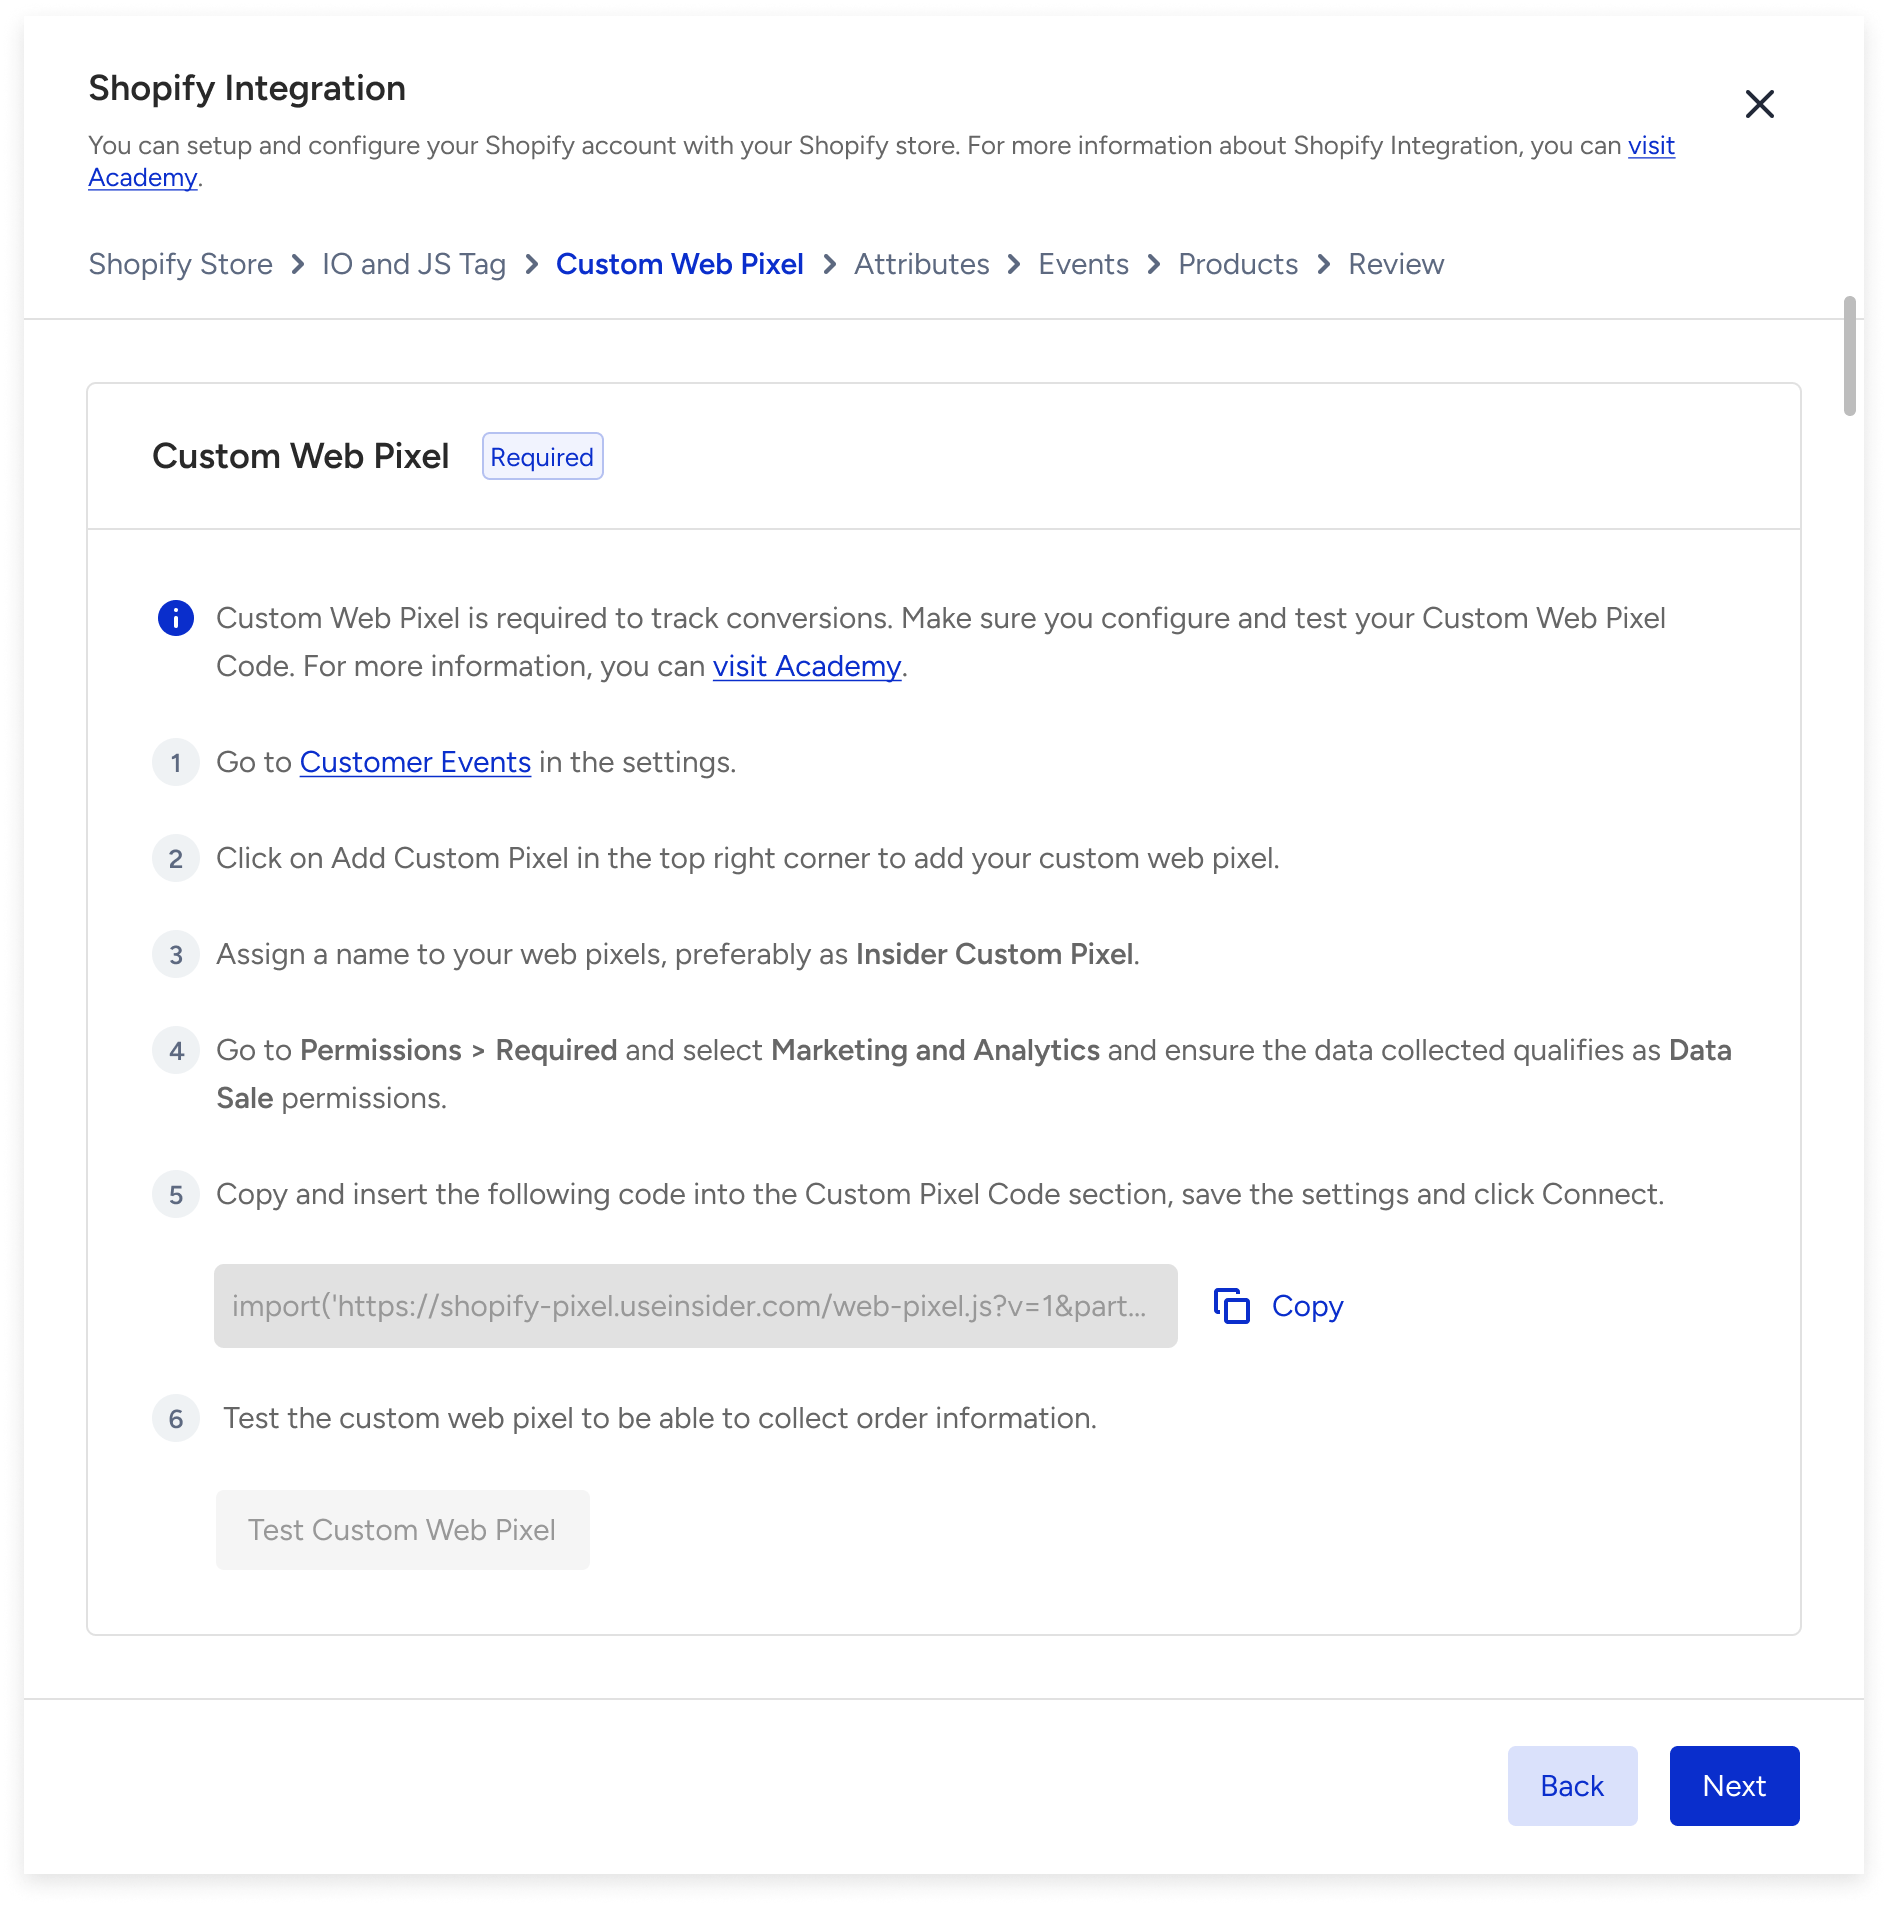
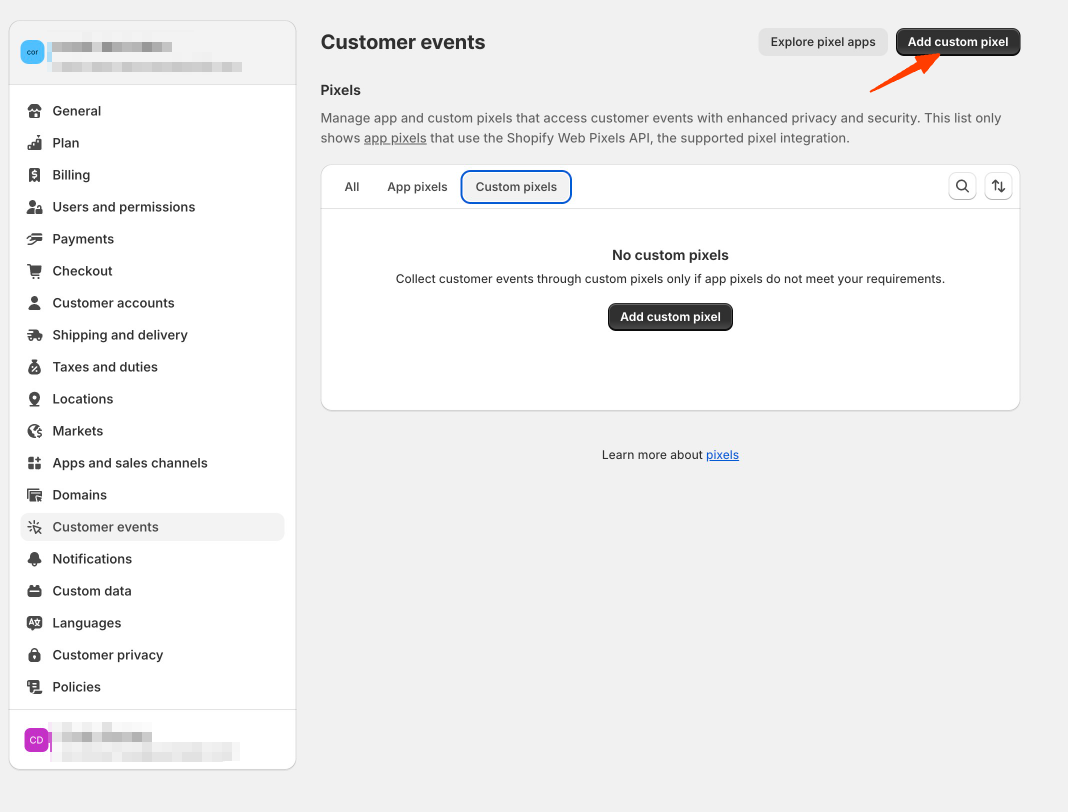
Go to Shopify Settings > Customer Events and click the Add custom pixel button.
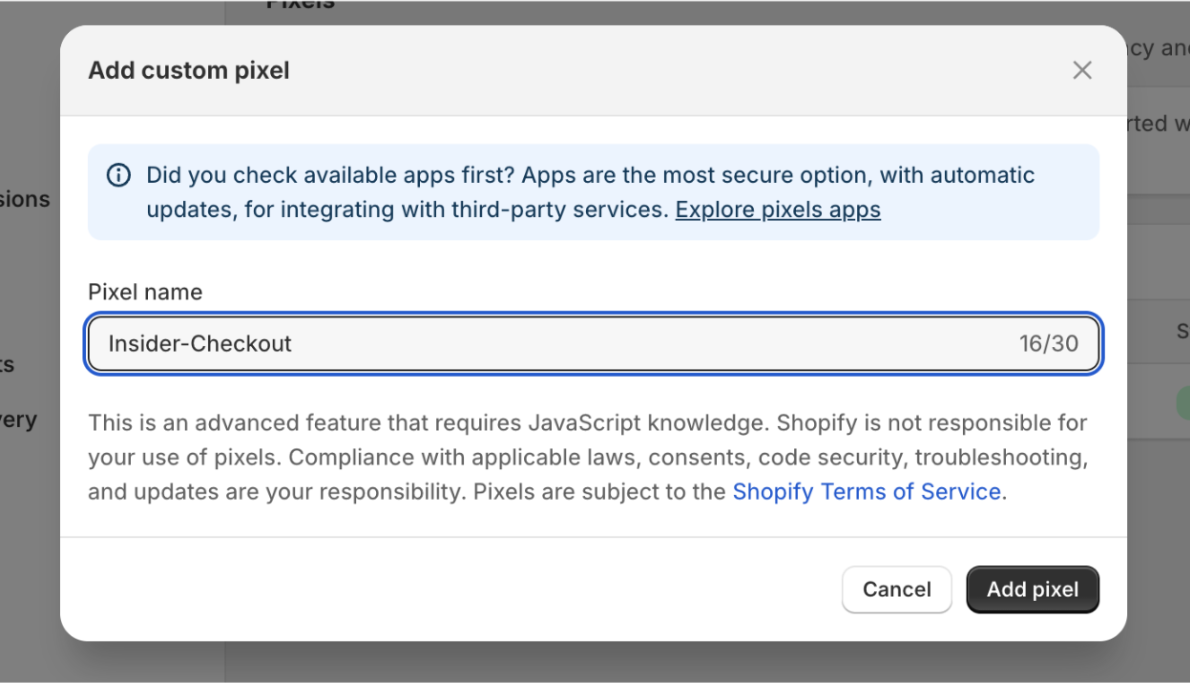
Name your pixel app; you can preferably name it Insider Order Status Custom Pixel.
Select the following permissions from the settings page.
Marketing and Analytics permission
Data collected qualifies as a data sale
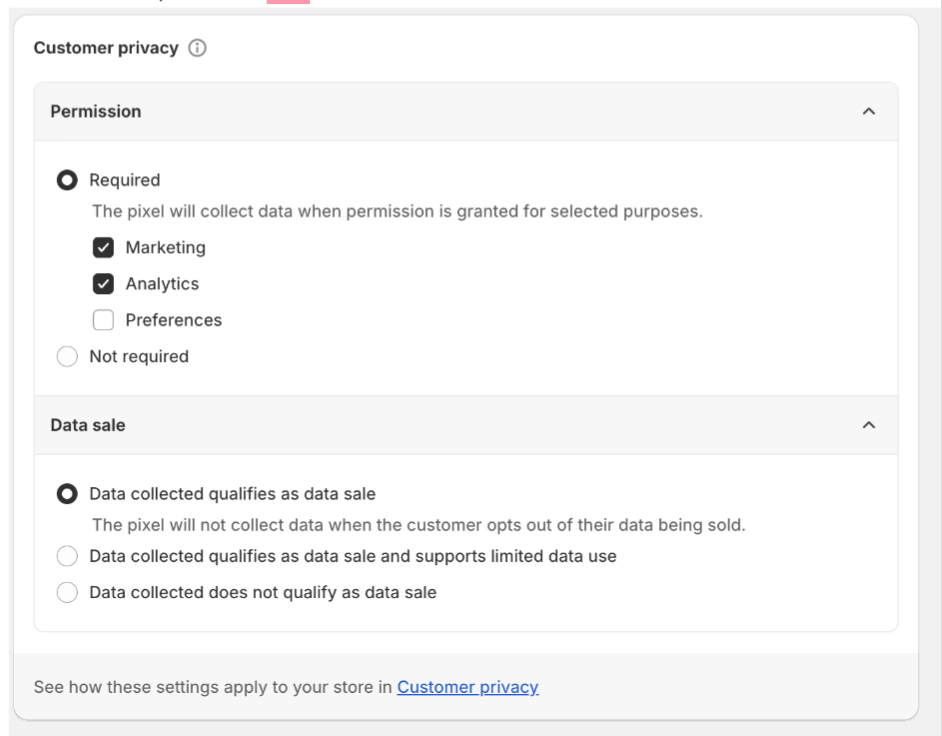
If you use Shopify’s cookie consent, Shopify will load Insider One’s pixel according to the given permissions after a website visitor accepts the cookie consent.
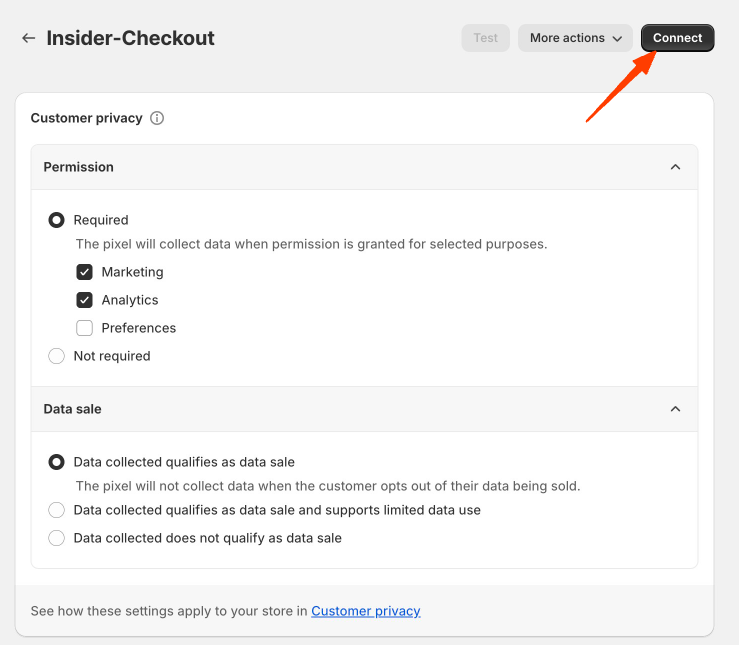
To save settings, click the Connect button to connect the pixel.
Return to the InOne panel and click the Test Custom Web Pixel button to verify your pixel.
Use the Custom Web Pixel code copied from Insider One without changing its event subscriptions. A Purchase event must be recorded only after checkout completion. Mapping Purchase to checkout_started can create Purchase events for unfinished checkouts and inflate Journey entry counts.
Test Insider One integration in the Order Status Page
You can start to perform tests to confirm the order flow.
Complete a test purchase from your store’s website.
Go to the User Profiles page on Insider One's InOne panel and search for your user.
Click the user to open the details page. Under the Events tab, you can see the purchase information for your test user.
If you encounter any errors, please contact the Insider One team.
Complete the full test purchase and reach the order status page. Then, confirm that:
One Purchase event appears in the user's Events tab.
The event contains the correct order ID and purchase details.
Starting the checkout without completing the order does not create a Purchase event.
Use Webpixel with Shopify Checkout in an App’s Web View
If your mobile app displays Shopify’s checkout page via a web view, Insider One’s custom Webpixel might track purchase events from your app, though with lower accuracy. To prevent Webpixel from collecting these purchases, you need to pass a specific parameter to Insider One.
This parameter enables Webpixel to differentiate between transactions made on a standard web platform and those completed within the app’s web view.
Configure Webpixel for WebView
To ensure accurate tracking of purchase events, you need to update cart attributes before sending the user to the checkout page. This involves adding a specific parameter to the cart attributes.
You can add any cart attribute and inform the Insider One team to use it to differentiate the source of the purchase.
Here is an example note attribute object:
"note_attributes": [
            {
                "name": "Platform",
                "value": "ANDROID"
            },
            {
                "name": "log_state",
                "value": "Logged In"
            },
            {
                "name": "Channel",
                "value": "Mobile App"
            }
        ],
To find out how to update cart attributes, refer to the following articles:
- If you are using the Shopify theme editor, refer to Update cart attributes.
- If you are using Shopify Hydrogen, refer to the Confirmation Page View (Purchase) section.