After you complete the integration process, you can follow the steps below to start creating web push notifications in your journeys:
1. Add web push channel on canvas
- Click the + button on the path you want to add the web push channel to your journey.
- Click Channel > Web Push.

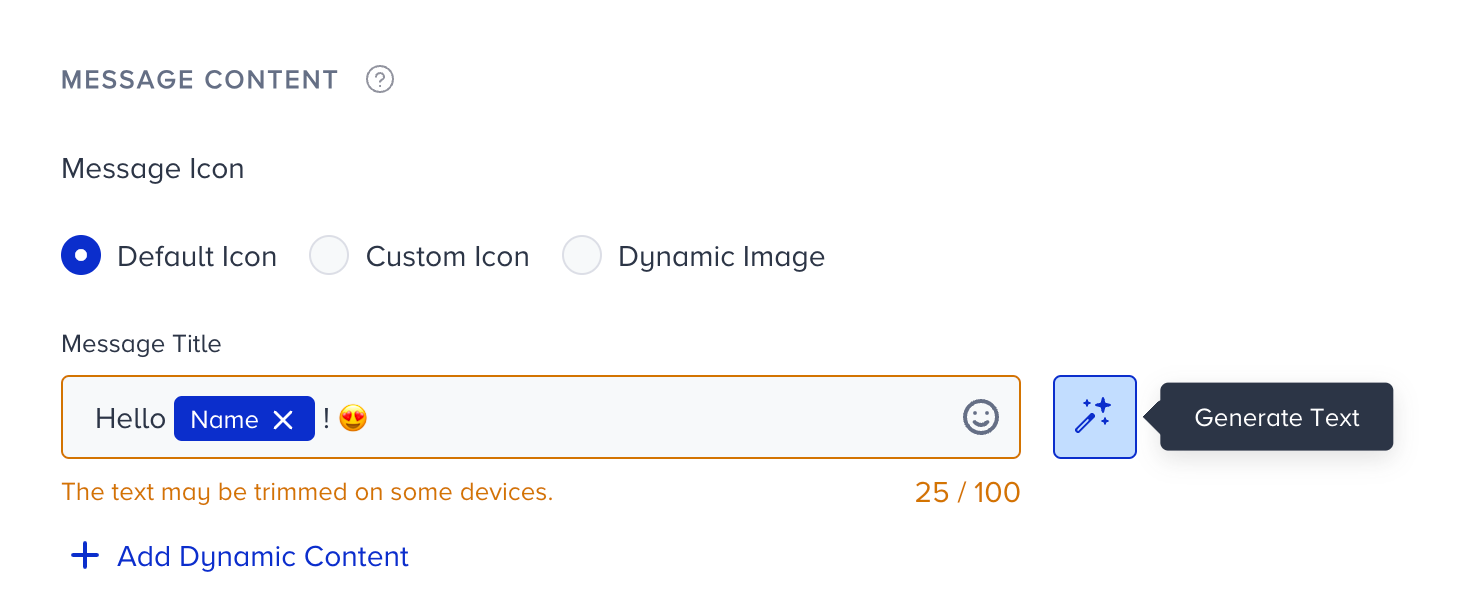
2. Set Message Icon
You can set a push icon in 3 different ways.

Read more on adding icons to web push notifications.
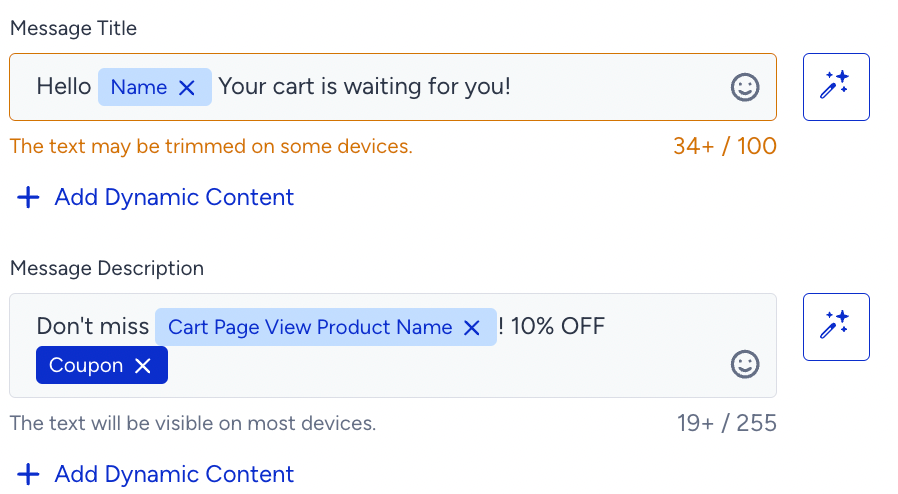
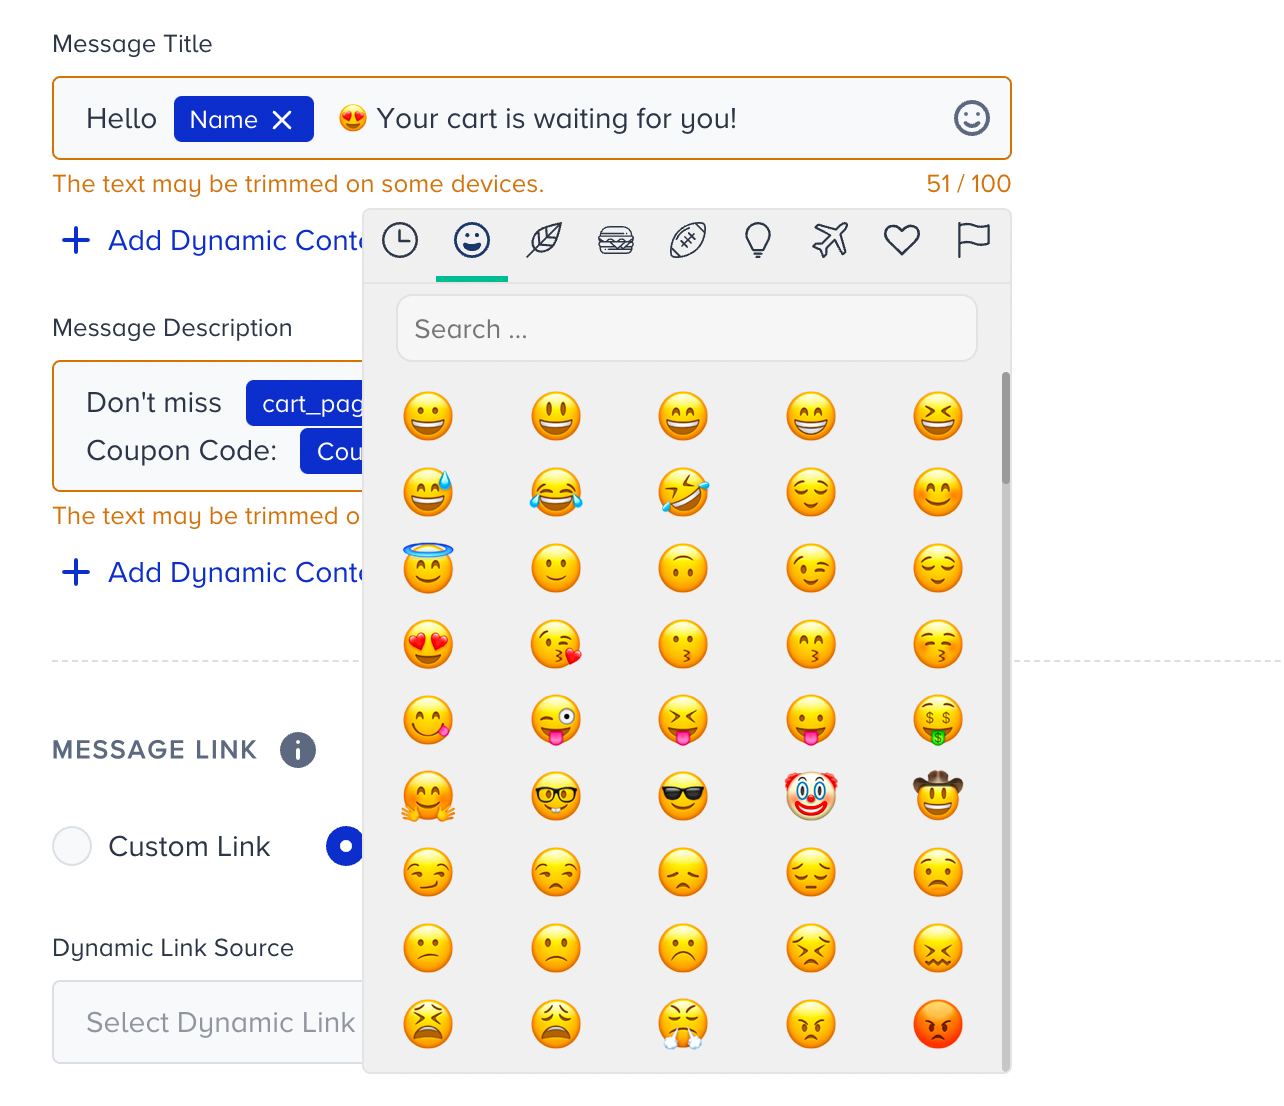
3. Add Message Title and Description
Add the title and description you want to send to your users.
If you need inspiration or assistance when creating your title and message, you can always use the Generate Text option.
To use an AI-generated text:
1. Click the Generate Text button to see the side modal.
2. Enter a prompt you want to generate the text about.
3. The language option will be the default selected language of your panel.
4. Select your industry and use case to define the context for generating the text.
5. Click the Generate Copy button.
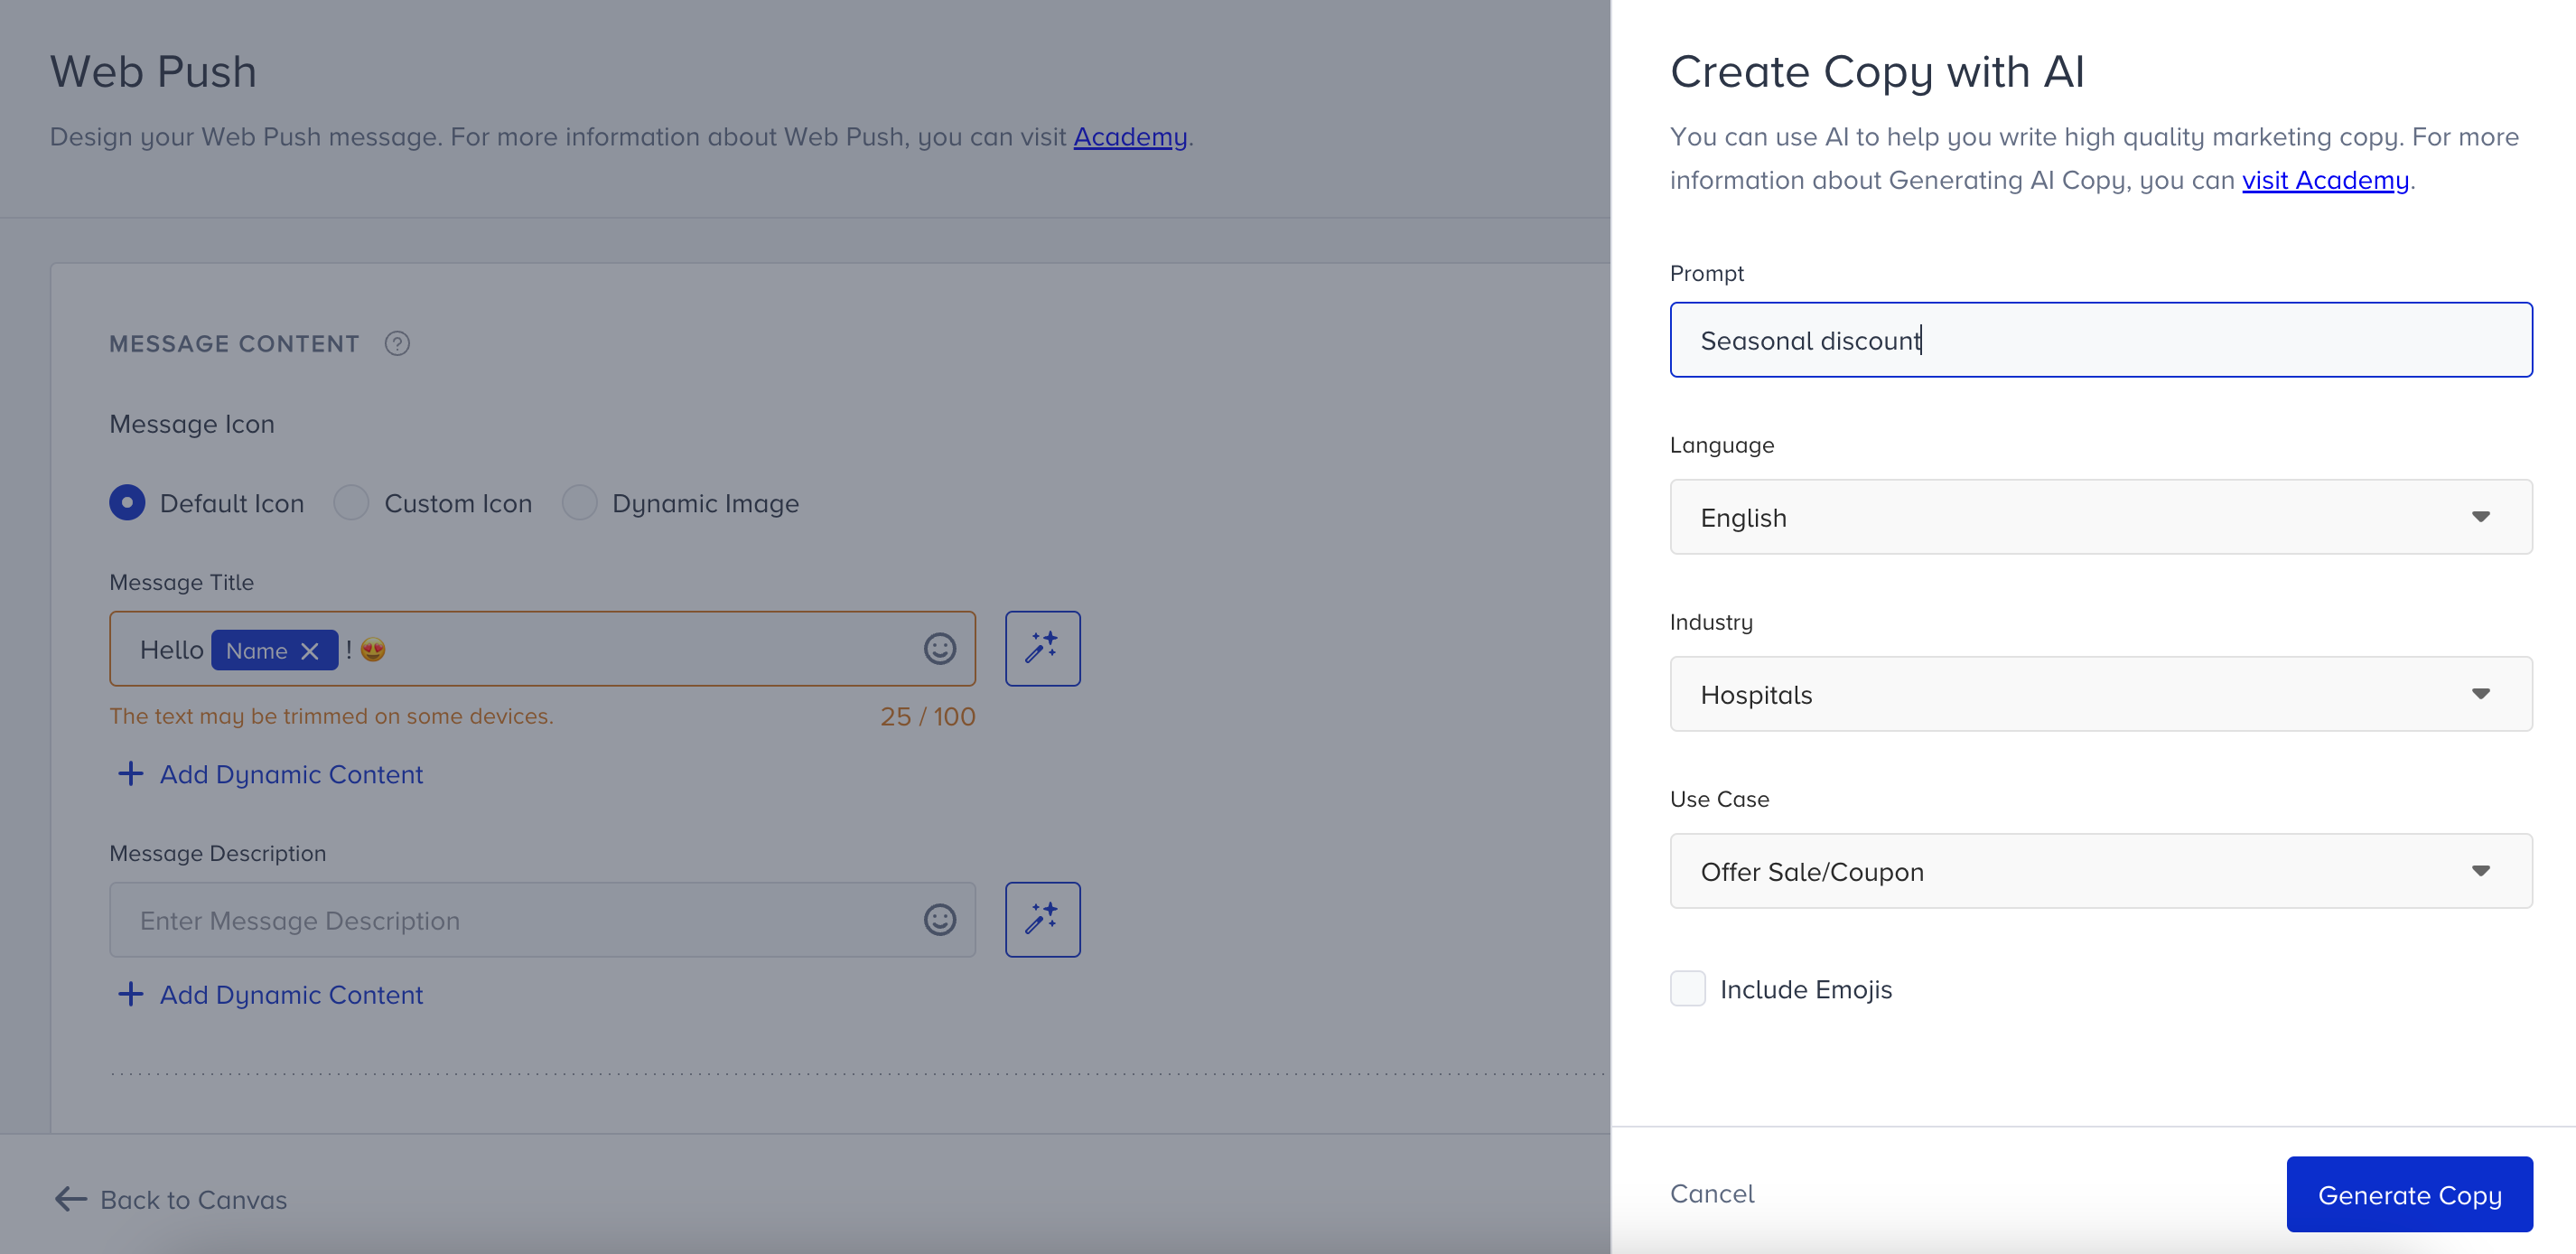
If you want to include emojis in your copy, you can check the "Include Emojis" box.

The modal displays five suggestions. To see more, you can click the Generate More Suggestions button.
To use any suggestion, you can select it and click the Apply button, or copy it via the Copy button against the suggestion you want to use.
Once you click the Apply button, the copy will be added to the respective field.
You can use default and custom user attributes, event parameters, and coupon codes in the content to personalize it for your users. You can send a new coupon or previously assigned one. Read more on dynamic content.
For users who do not have a value for the dynamic content, you can add alternative text (fallback) by clicking on the content tag.

Architect excludes dynamic content from the character limit calculation. When you add any dynamic content, it does not have an impact on the character count. When you assign a fallback value to the dynamic content, it will be displayed to the user if the dynamic content's value is empty for that user. In this case, the character count includes the fallback value.
The plus sign in the character count indicates that dynamic content will receive a value upon message delivery to the end user.
Also, you can use emojis in your messages to increase the open rates.
4. Configure coupon settings
You can enable the coupon settings when you add a coupon to your web push. Before adding any dynamic content to your message, you will see the settings section below.
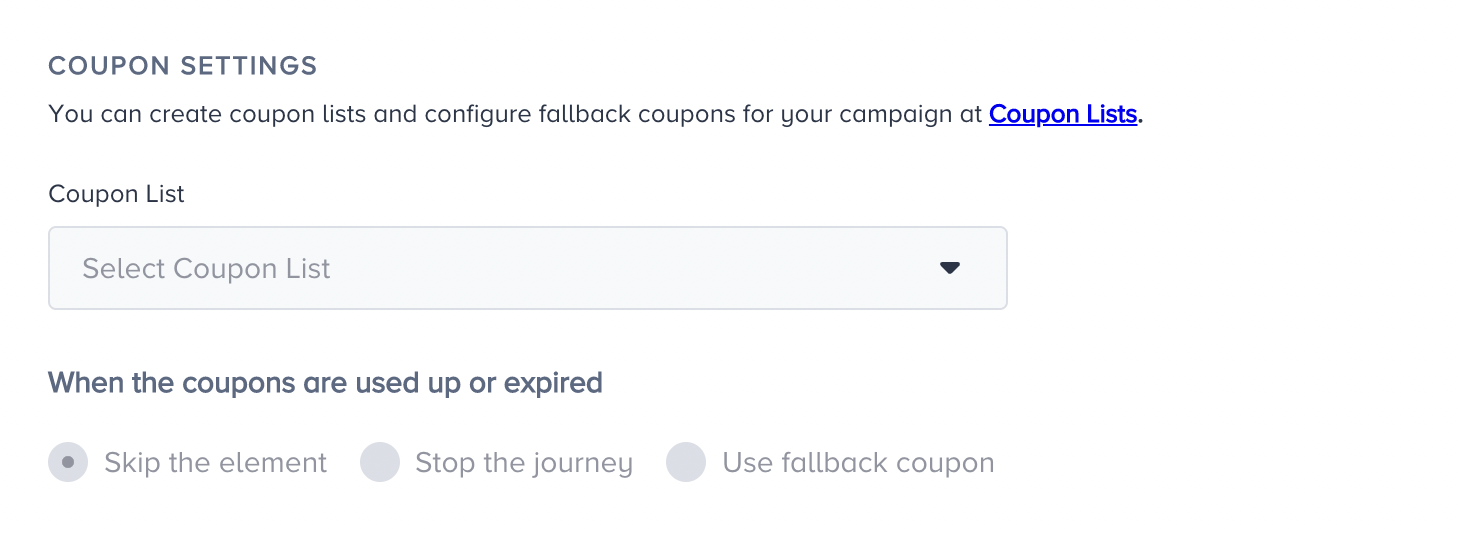
Using the Coupon Code attribute, you can add a coupon code to your web push message.
Once you add your coupon and save the design, the coupon settings will be enabled. Select a coupon list to proceed.
.png)
Select the action you want your journey to take when the coupons are used up or expire. You can skip the element, stop the journey, or use a fallback coupon.
.png)
You can also set coupon reminders for your coupon lists. Refer to Coupon Usage Reminder for further details.
.png)
5. Add Message Link
You can set a link in your web push notifications in two different ways.
- Custom Link: Manually typing the desired URL. Make sure that you type a valid and secure URL.
- Dynamic Link: You can select a dynamic link URL based on the user’s action, such as “Last Abandoned Product URL” or URL type event parameters.

Read more on link types here.
6. Add UTM parameters
You can configure UTM settings to keep track of web push performance on your Google Analytics.
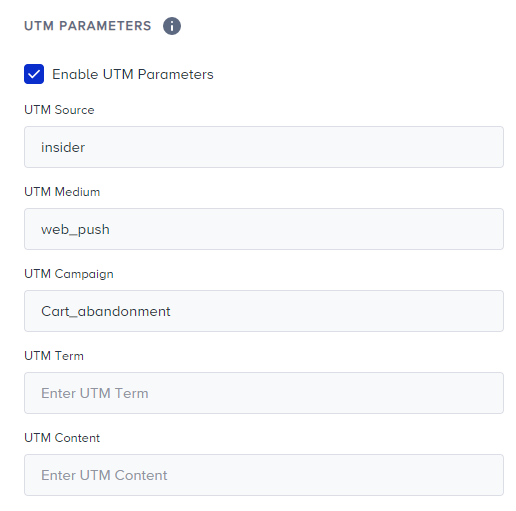
Read more on UTM settings here.
7. Add Message Action Buttons
You can use call-to-action buttons in your web push notifications to increase user interaction.
You can have two buttons if you would like to show users. You can type the URL of Buttons or select dynamic link as you do for the Link section. You can choose URL type attributes or event parameters.

Read more on action buttons here.
8. Using rich push
You can upload a rich push image on your web push notification to offer more visual content. You can either upload an image or provide a dynamic source for the rich push image.
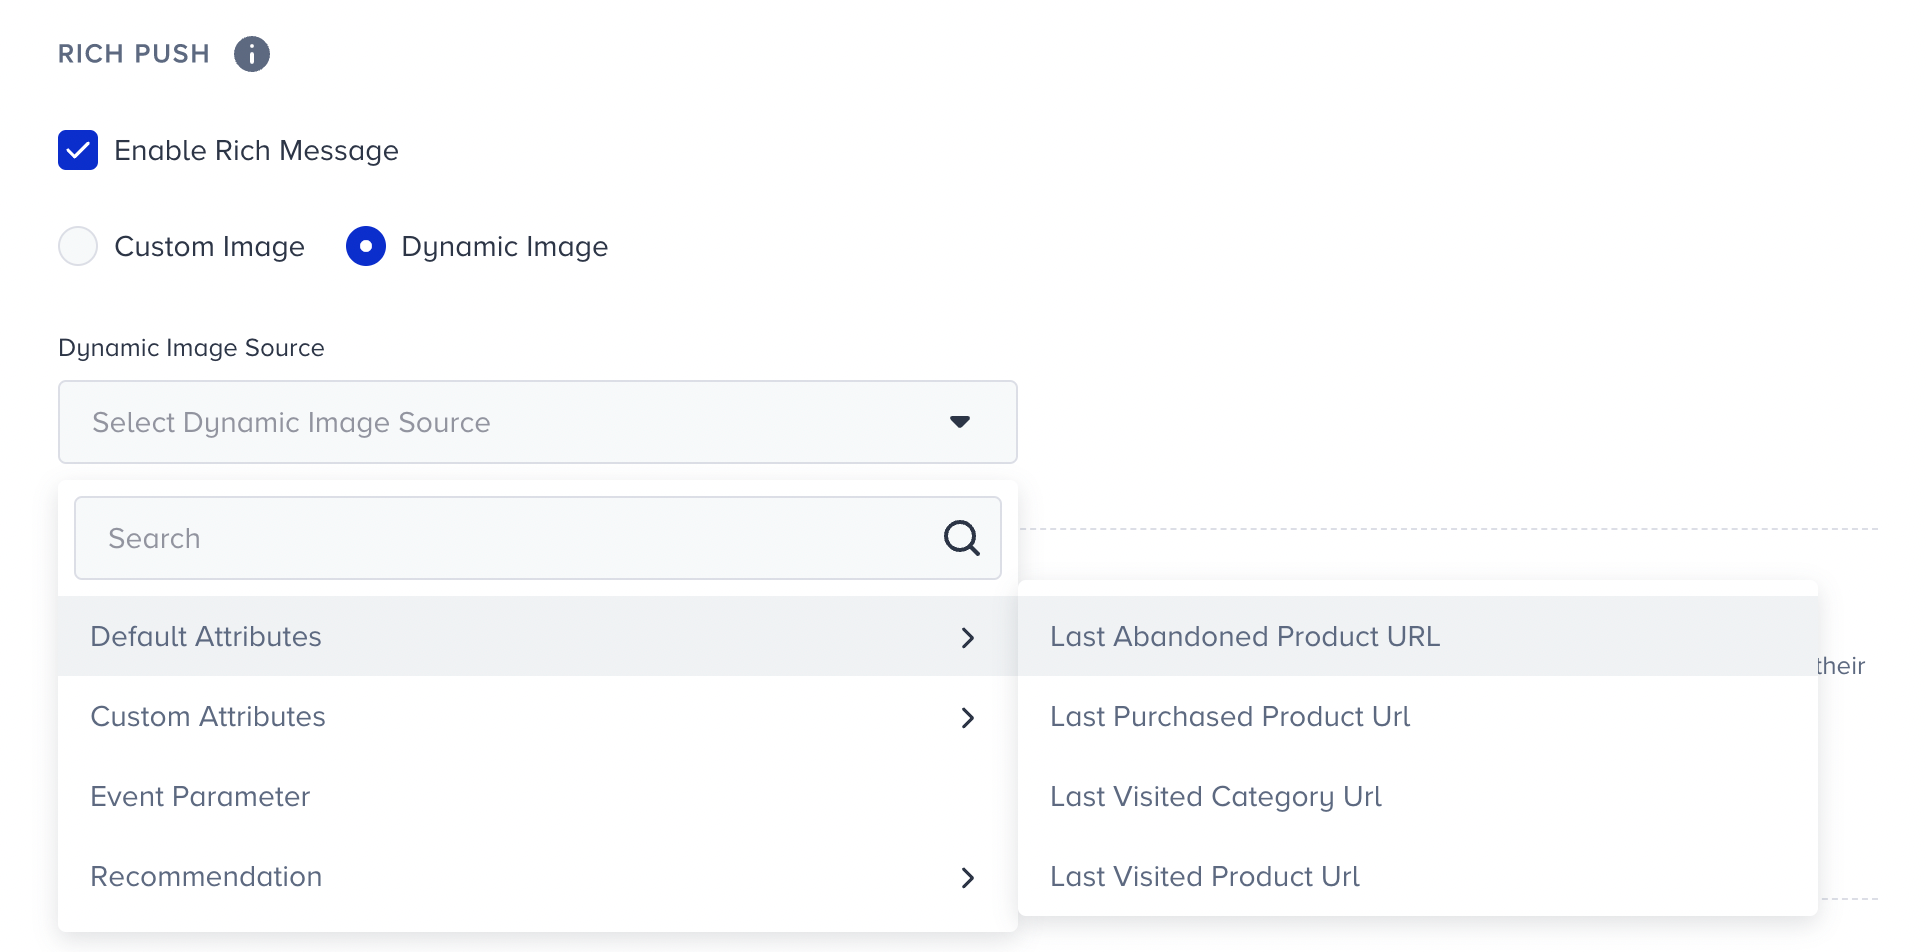
Read more on rich push.
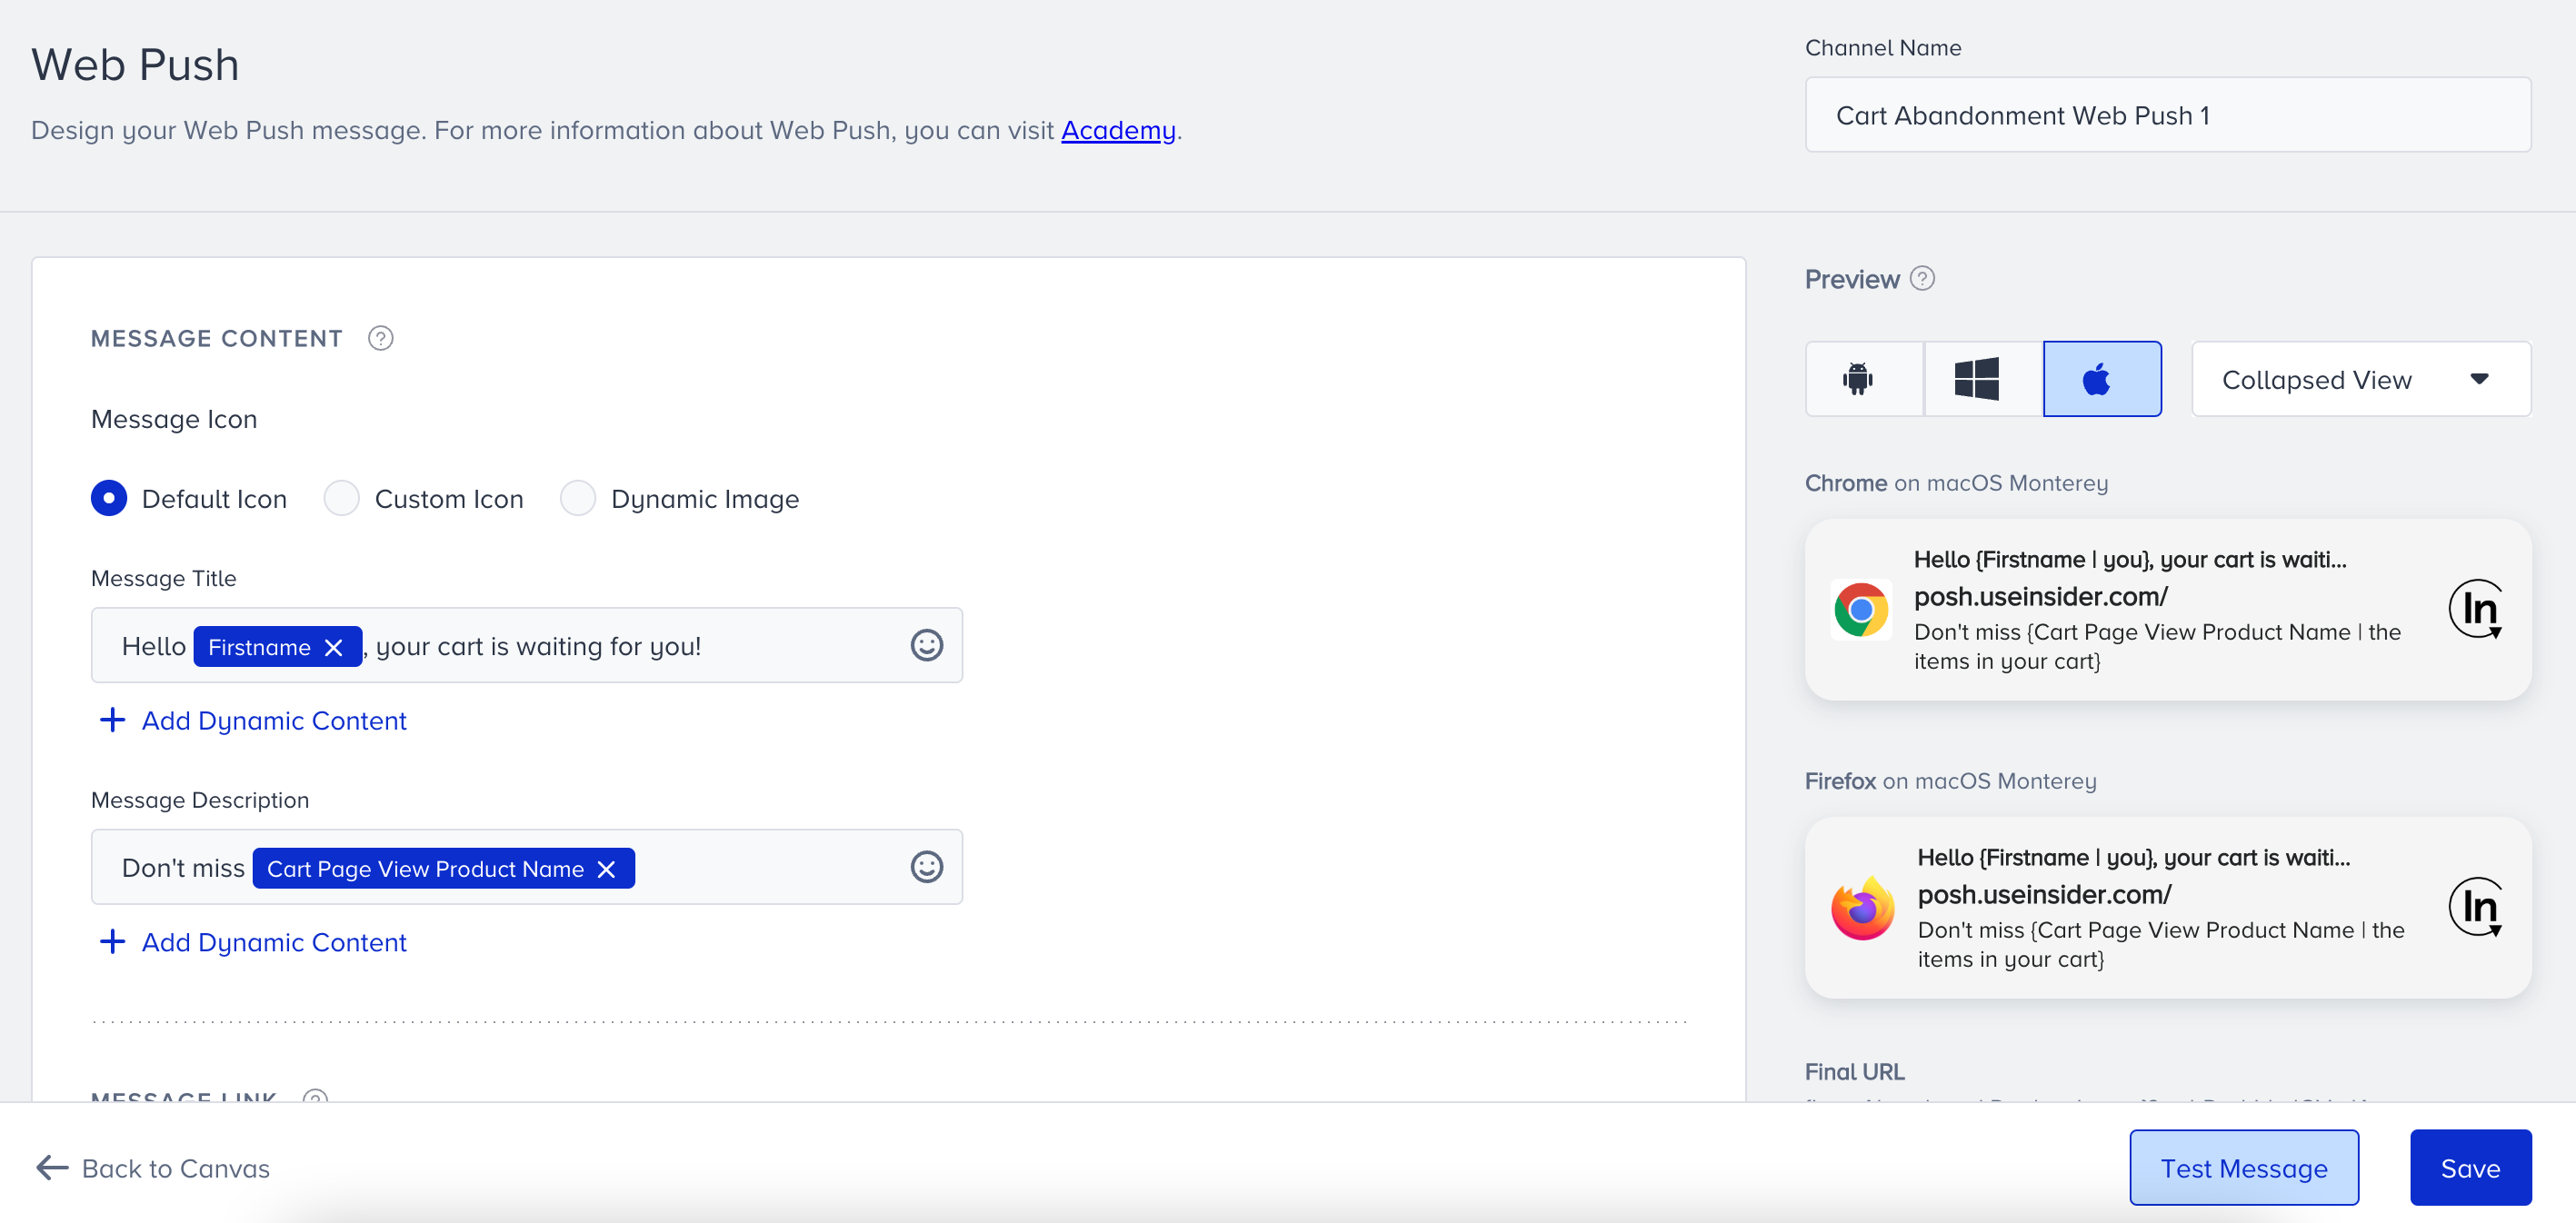
9. Preview your content
You can preview your web push before you send it out. The preview, placed on the right side of your screen, shows the text, image, icon, link, button elements, and UTM parameters. No dynamic content can be previewed, as you do not have any value for these attributes at this step.
You can view how your web push will look in operating systems and browsers:
- Android
- Chrome
- Samsung Internet
- Windows
- Chrome
- Firefox
- iOS
- Chrome
- Firefox
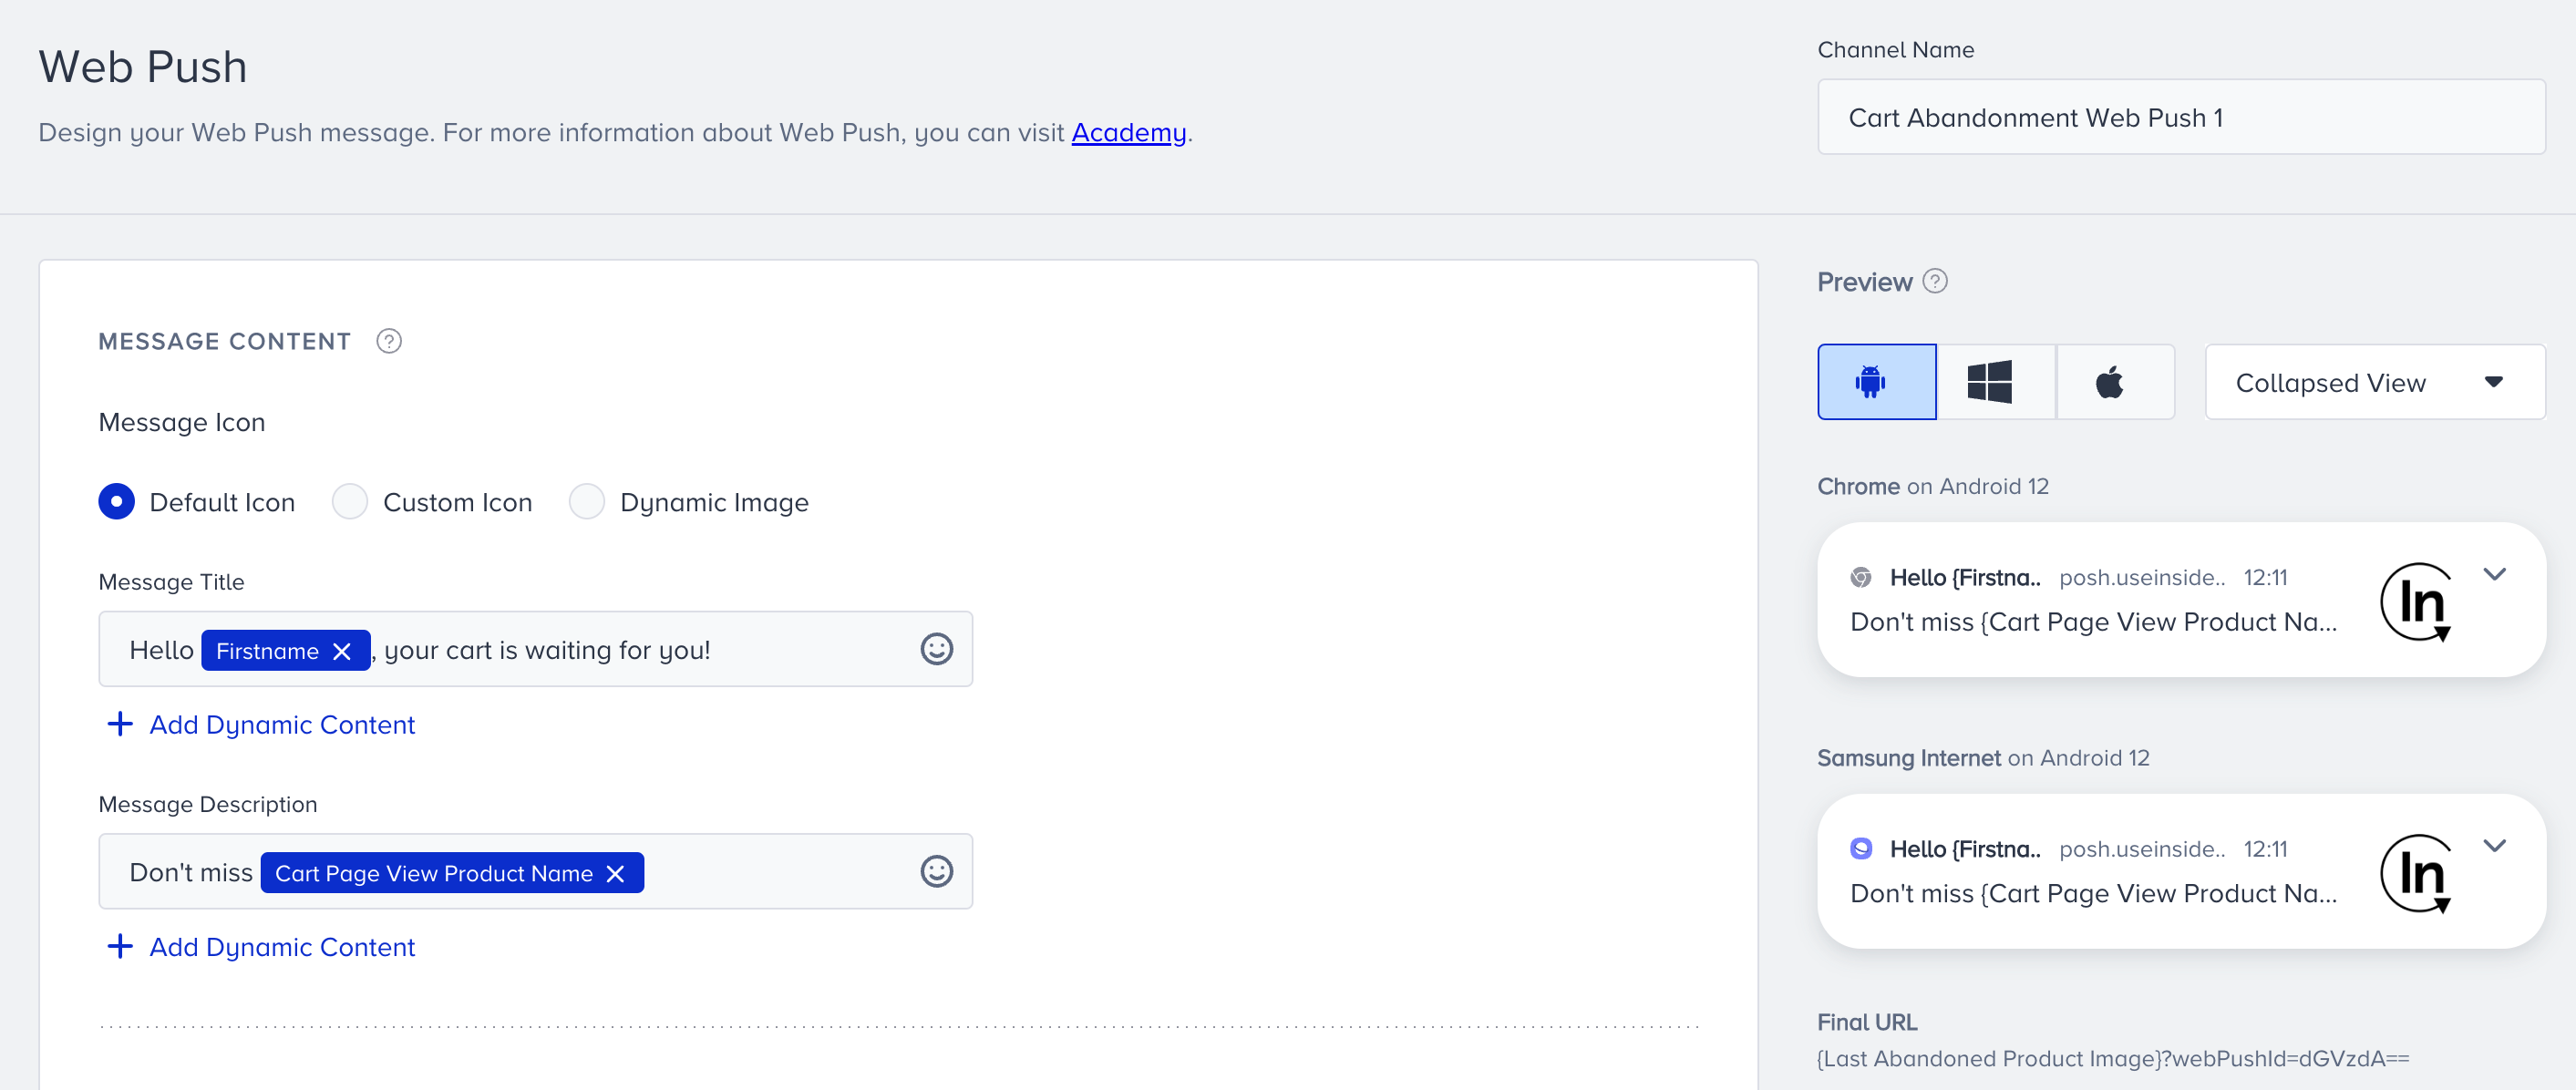 You can also switch between collapsed and expanded views from the dropdown.
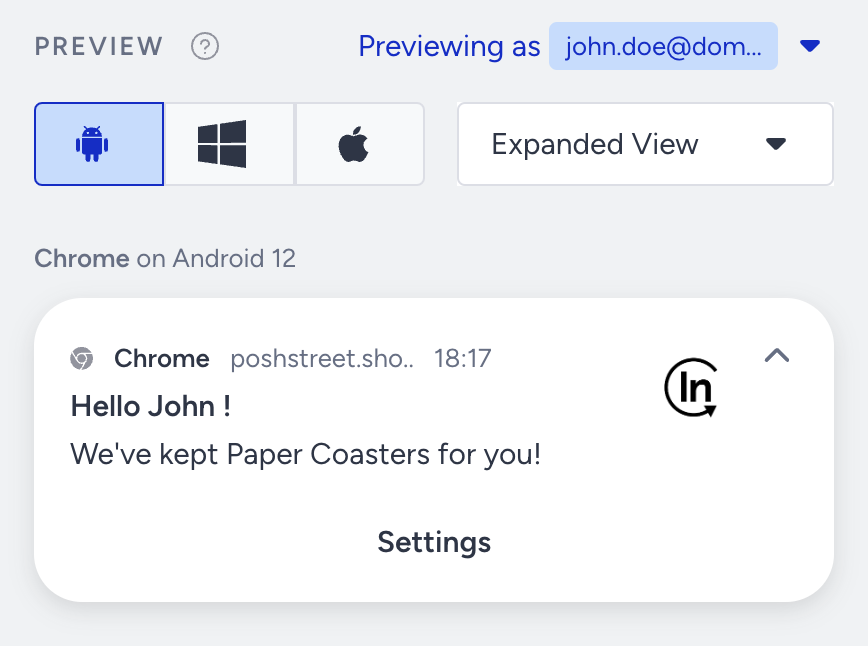
You can also preview the dynamic content in your messages as a user. Click the Preview as User button to preview your message with real values of the dynamic content.
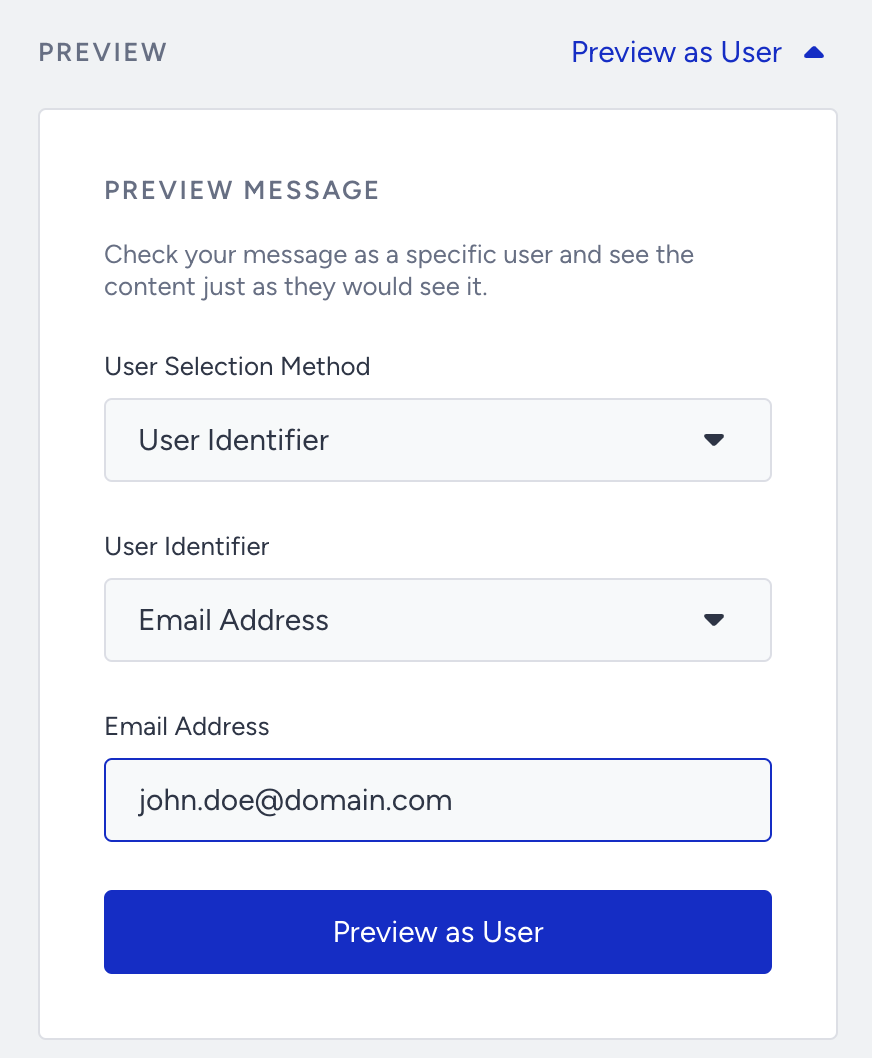
You can select one of the two User Selection Methods: User Identifier or Recent User. User Identifier will let you search for a user with Profile ID, Email Address, or Phone Number identifiers. Recent User will list the 10 recently searched users for you to choose from.
Once you select your user, click the Preview as User button to load the channel preview with real values of dynamic content for the user.
10. Enable Send Time Optimization
You can optimize the time it takes to deliver your messages to the end-users. This helps you engage your users more effectively and draw their attention when they are most likely to interact with your messages.
 If you set Channel Frequency Capping before, when you enable Send Time Optimization, Bypass Channel Frequency Capping will be automatically enabled.
11. Bypass Channel Frequency Capping
Architect enables you to override global web push frequency capping if you have configured any.

Journeys are for real-time cases and they require users to receive notifications based on their actions. Therefore, you may want to override your global frequency capping for your web push notifications.
If users reach the limit of the web push notifications they can receive, they will proceed to the next step without receiving another one when they arrive at the web push channel in the journey.
12. Set time to live
Time to live enables you to set a period in which the system can send a notification to the user.
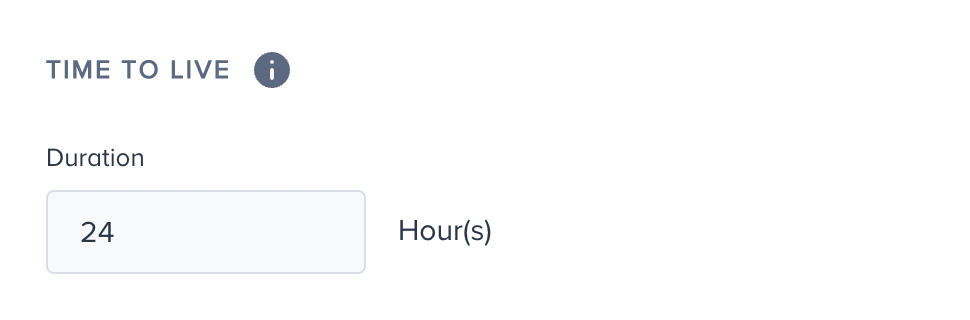
Make sure to set your time to live accordingly.
13. Test your web push notification
You can click the Test Message button at the bottom right corner of the page to send a test web push notification to your device.
14. Rename Channel Name
The Channel Name is generated by default based on the journey name and channel type. If you want to give it a different name, you can rename it at the top right corner. 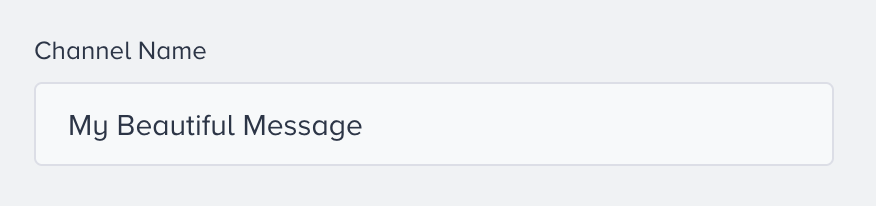
15. Save web push element
After configuring web push settings, you can save the web push page.
Click the Save button, as this page does not have autosaving—autosaving functions only on the canvas page.
Live Actions and User Interactions
Live Actions
You can keep users on the flow until they click, close, or view the web push notification. To use this live action, you can select “On Click,” “On View,” or “On Close” actions right after the web push element. The default action is “On Send”. You do not need to set any if you do not want to use this feature.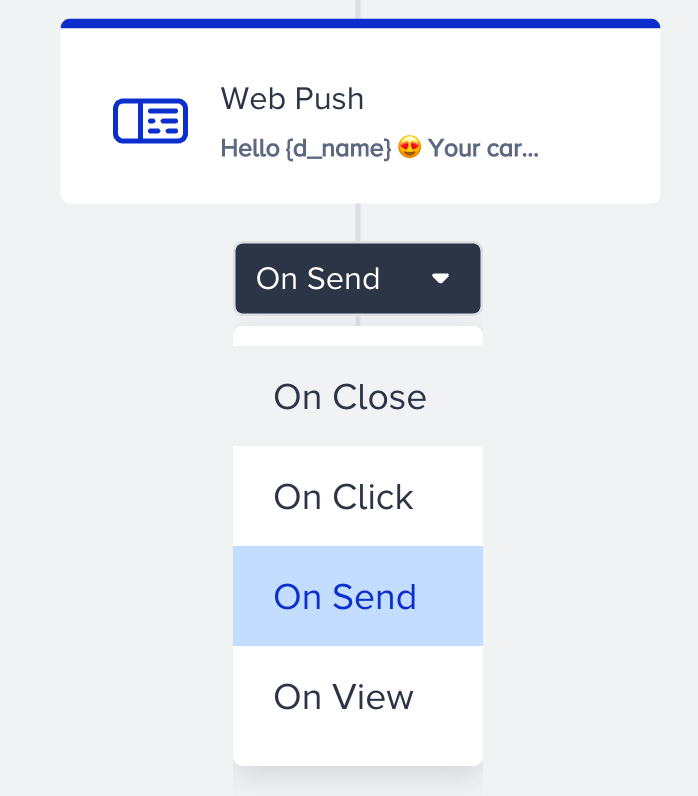
User Interactions
After the web push element, you can take another action via branching your flow according to user interactions on the web push notification after a while.
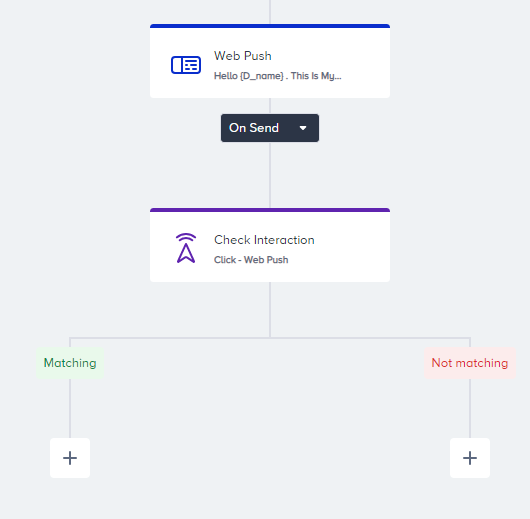
Read Check Interaction for further details.