Double Opt-In must be activated for your account before you can use it in the InOne panel. Reach out to the Insider One team for your activation request.
To be able to use the Double Opt-In feature,
Navigate to Inone Settings > Email Settings and scroll down to the Double Opt-in section.
Check the Enable Double Opt-in settings box. Once you enable it, Double Opt-in will be required for all emails you send.
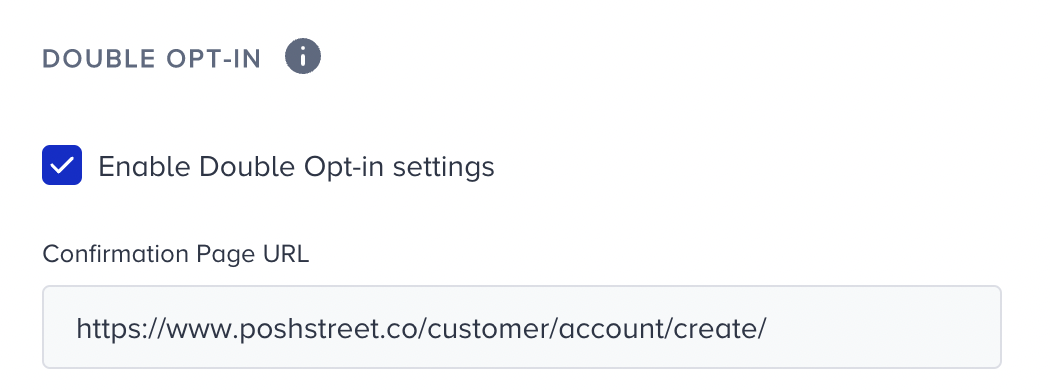
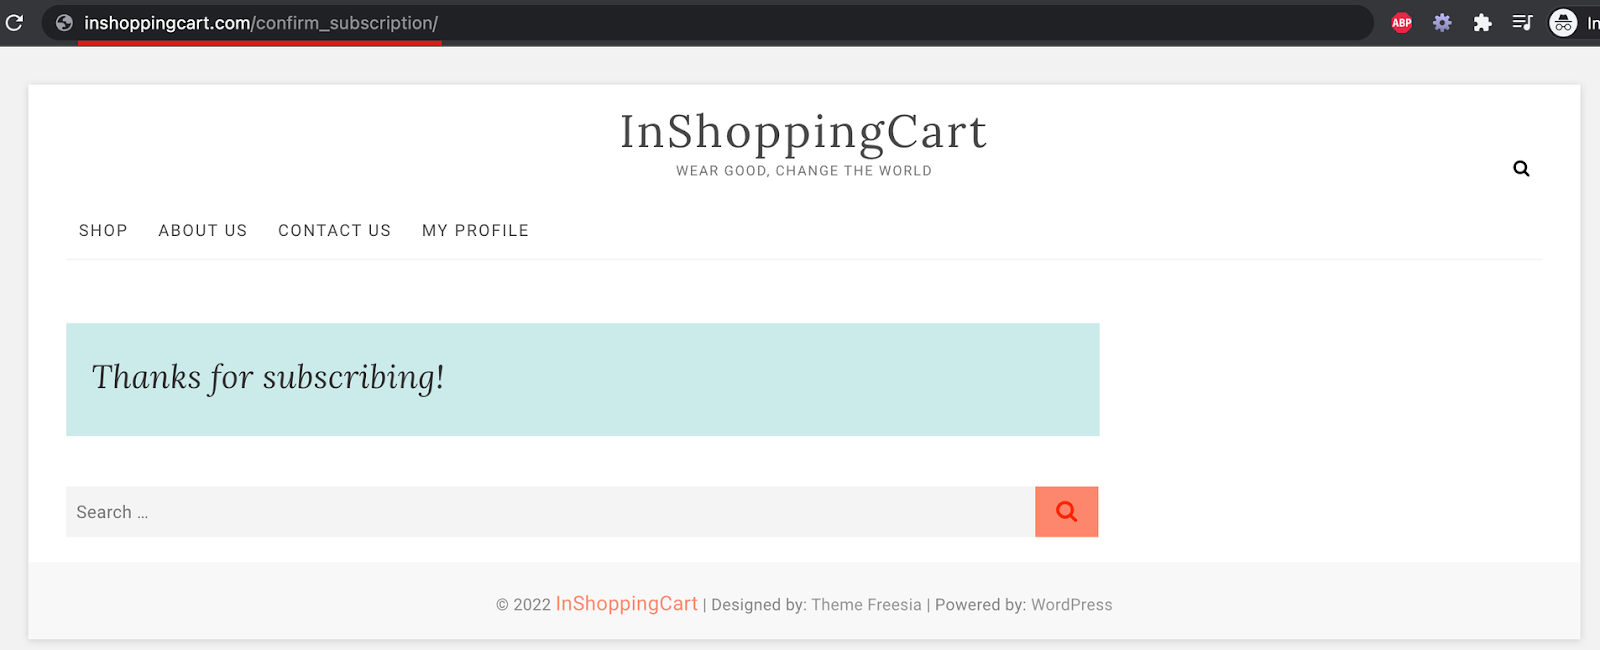
After marking the checkbox, you need to add a confirmation page URL. This is the page where users will land after clicking the double opt-in confirmation button in the email. The URL can be any link from your website or a dedicated landing page designed for the Double Opt-In confirmation. Here’s one example of what a confirmation landing page usually looks like:
If you don't want to create a dedicated landing page, you can alternatively set up your confirmation page scenario by creating a pop-up on your website via an OnSite campaign and greeting your double-opt-in users. You can state that page’s URL in the Confirmation Page URL section.
Finally, from Email settings, you must choose what level of opt-in your email campaigns will require to be sent out to users via the ‘Campaigns would have following default opt-in’ setting:
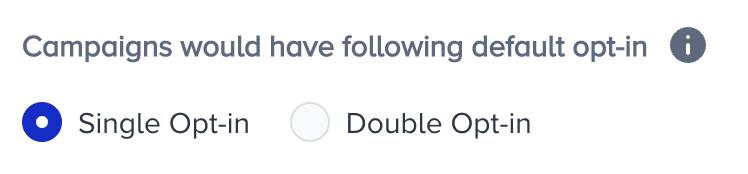
Single Opt-in: If you choose this option, it means all future campaigns will be sent to users who have either Single opt-in or Double opt-in on their profile.
Double Opt-in: If you choose this option, it means all future campaigns will only be sent to users who have Double opt-in on their profile. Single opt-in emails will not receive your campaigns.
Click Save to have your double opt-in preferences reflected in the InOne panel.