To enable and manage Double Opt-in flows, you’ll need to use the Architect product. Architect allows you to:
Send Lead Collection campaigns that trigger Double Opt-in emails
Send Bulk Email campaigns that include confirmation steps when required
This ensures reliable delivery and tracking of subscription confirmations within your Double Opt-in setup.
Double opt-in is a two-step consent method that helps ensure the validity of email subscriptions and compliance with regulations, such as the GDPR.
If your company obtains your users' consent in compliance with the local regulations, make sure to pass the GDPR opt-in field to Insider One. If you want to stop collecting and processing the data of an identified user, GDPR opt-in field should have the false value. Insider One cannot be held liable if these obligations are not fulfilled and reserves the right to seek compensation from your company.
To set up your Architect journey for double opt-in,
Navigate to Campaigns > Architect.
Click the Create button, choose a name for your journey, and proceed.
Scroll down or use the Search bar to find the Double opt-in journey template.
In the template preview page, click Use this template to access its settings.
Set up the Architect journey for Double opt-in
A Double opt-in Architect journey requires three core components, and each plays a distinct role in validating consent and updating subscription status.
Journey starter
The journey starter is the event that triggers execution of the Double opt-in flow. The specific configuration depends on your business use case. Examples include:
newsletter subscription
account creation
preference center update
form submission
Any event can be used as the journey starter, provided it reliably represents a user’s initial opt-in action.
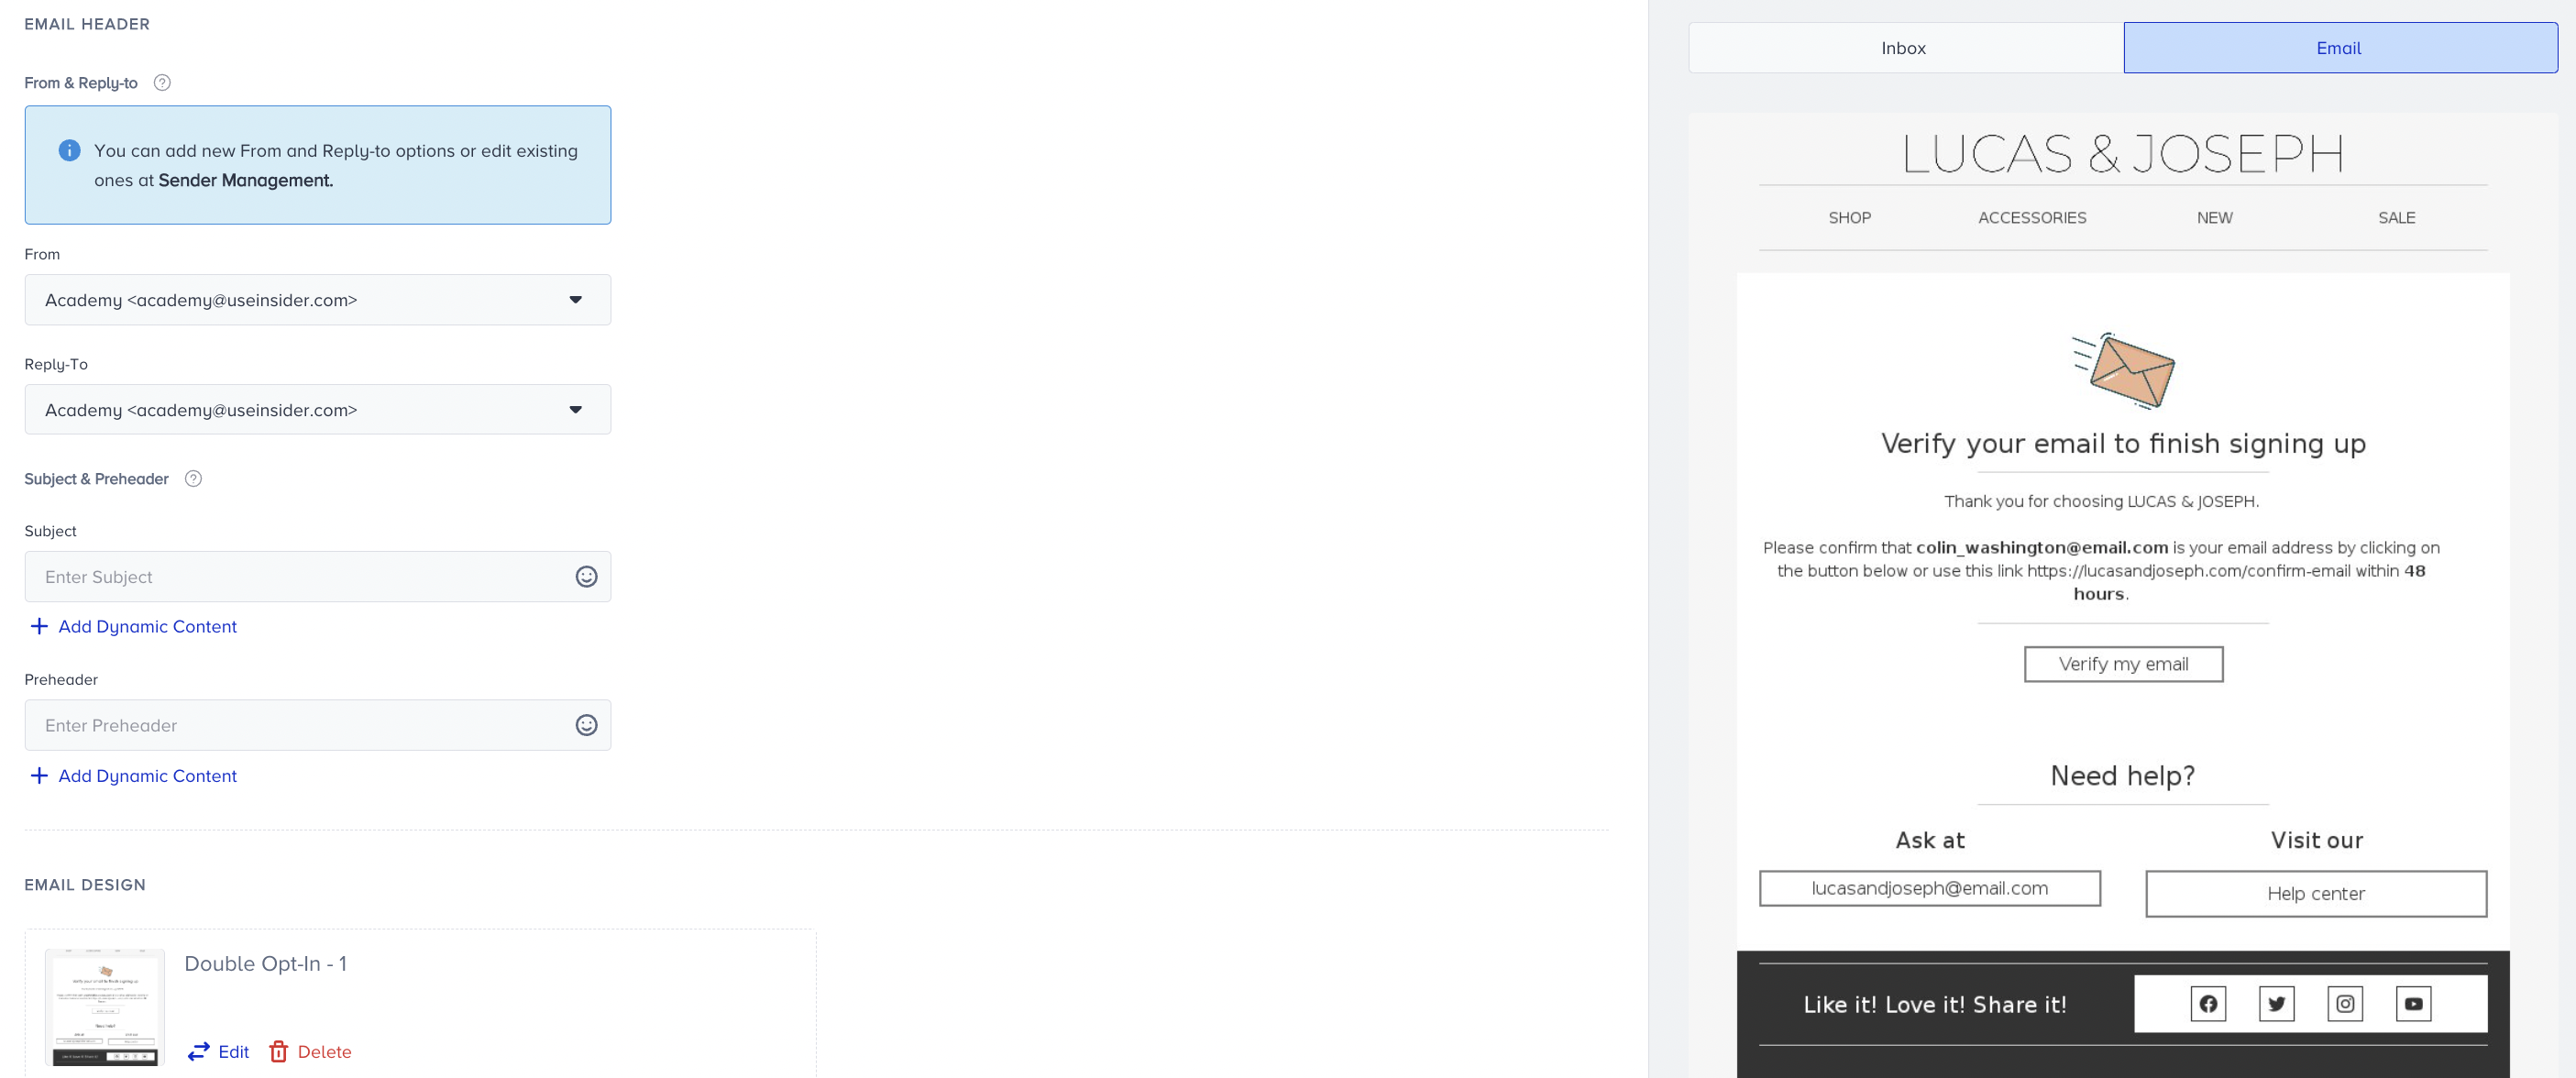
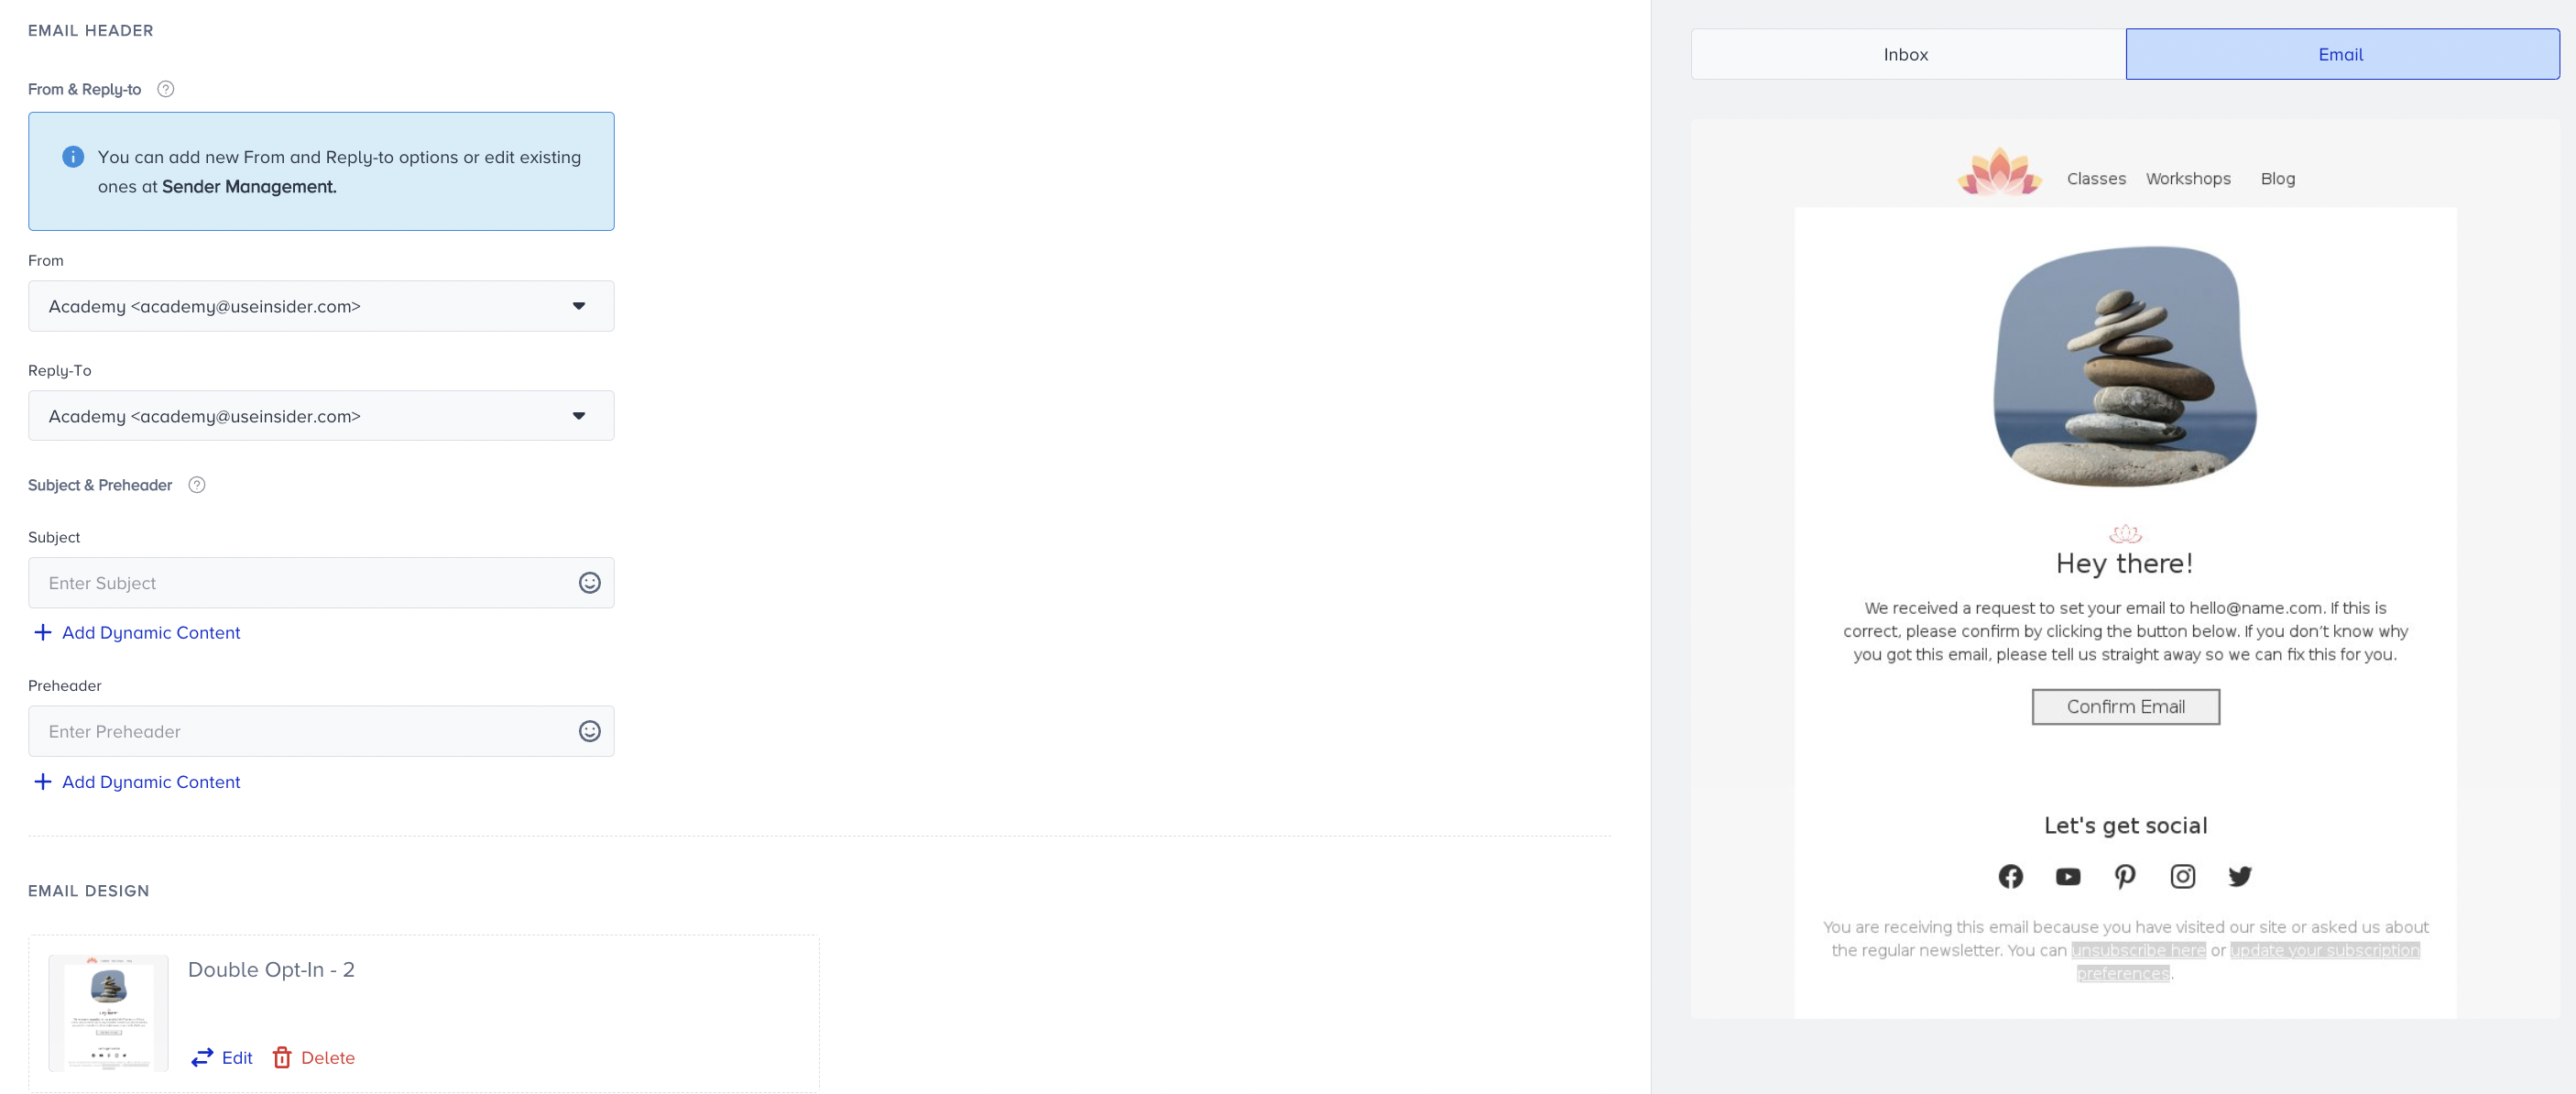
Email element settings
Within the Architect Canvas, the Email element is used to design the confirmation email that asks users to verify their subscription. Regardless of the specific use case or template design, attach the Double Opt-In Tag to the subscription confirmation button. Adding this tag ensures that:
Users are automatically redirected to the confirmation page defined in your account settings.
Users are marked as double-opted-in within the system.
This tag is required to complete the legal and functional Double opt-in process.
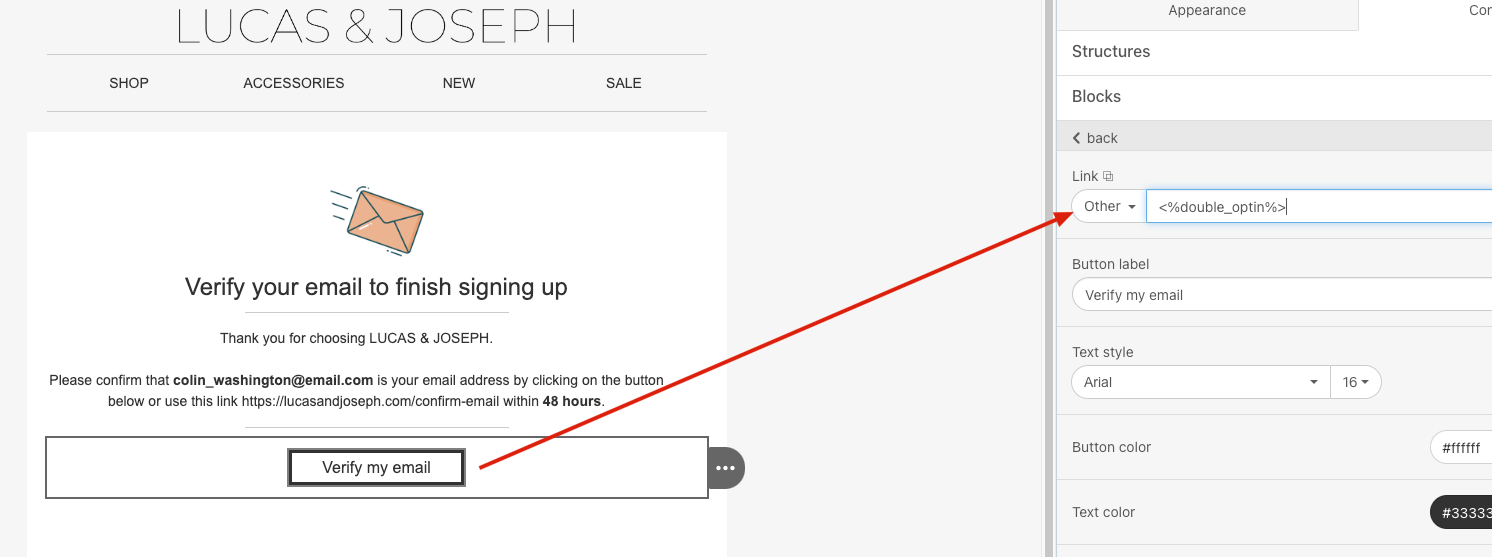
To add the Double opt in tag:
Click on the Confirmation button element in your email.
In the Blocks section, locate the Link setting.
From the dropdown, choose Other and paste the following value in the field: <%double_optin%>
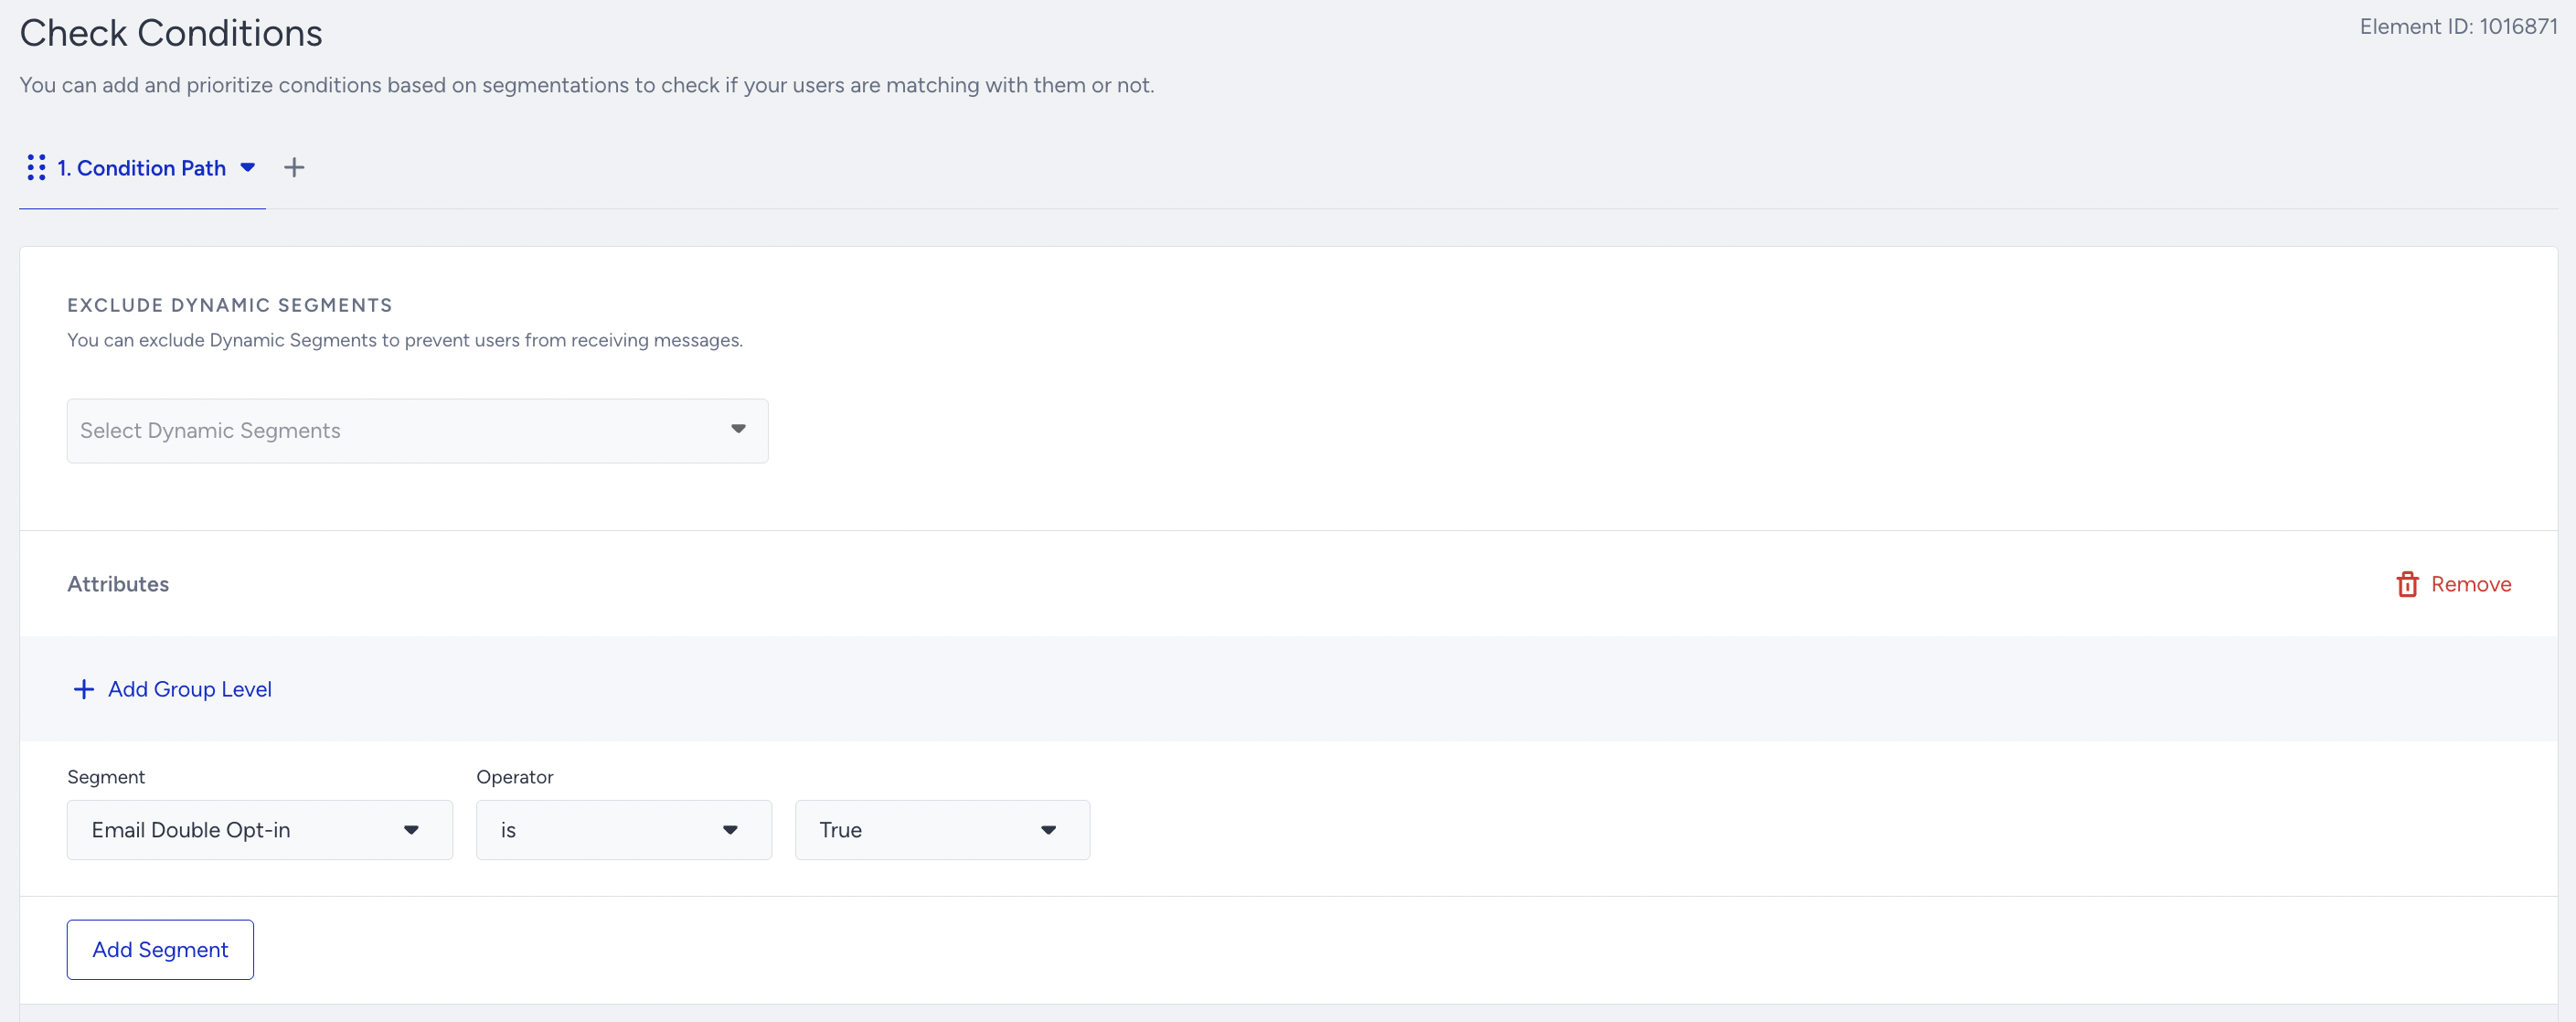
Check conditions element
The Check Conditions element is used in the Double opt-in journey to verify whether the user has clicked the subscription confirmation button in the email. In other words, it checks if the user has completed the confirmation action required to finalize the Double opt-in process.
Double Opt-in journeys based on use case
Lead collection campaigns
Use the configuration below when you want to send a Double opt-in confirmation email followed by campaign emails to users who submit their email address through a lead collection form:
.png)
Under the On Event starter, define the Double Optin event that you want to use to trigger the journey.
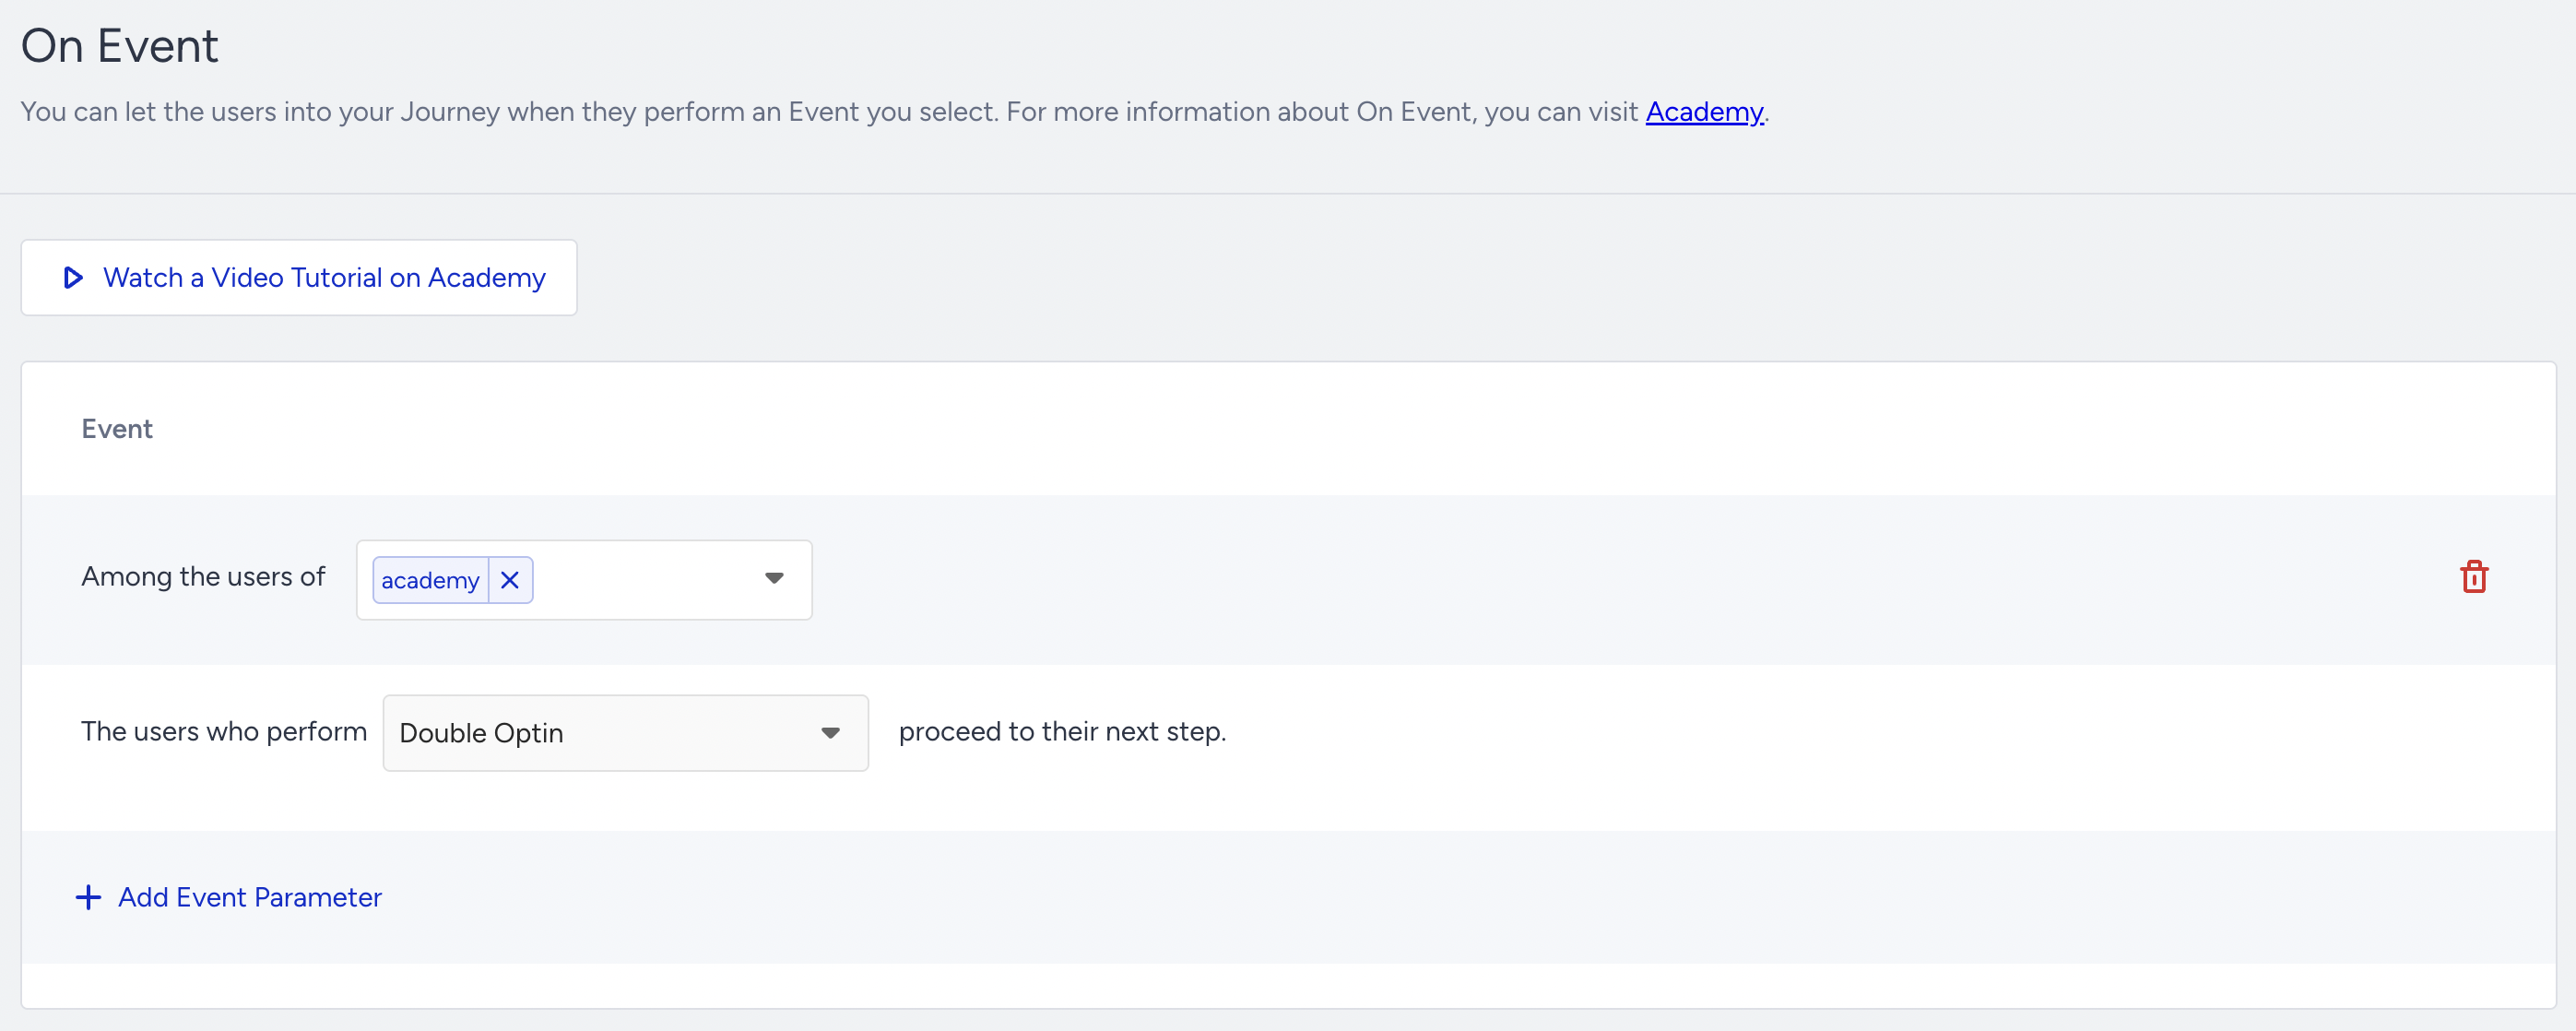
When configuring the event starter, you may choose any event to initiate the journey. The event used to start the journey does not need to be the Double opt-in event itself.
The Check Conditions element should be defined, and it should verify that the Email Double Opt-in attribute has been set to TRUE.

If there is no Email Double Opt-in for the user, they will receive a double confirmation email (the double opt-in email).
Send Bulk Email
You can use the email double opt-in architect flow below to send bulk emails. This setup allows you to trigger the sending of confirmation emails to users who have provided you with their email addresses in the past, but have not yet confirmed their subscription.
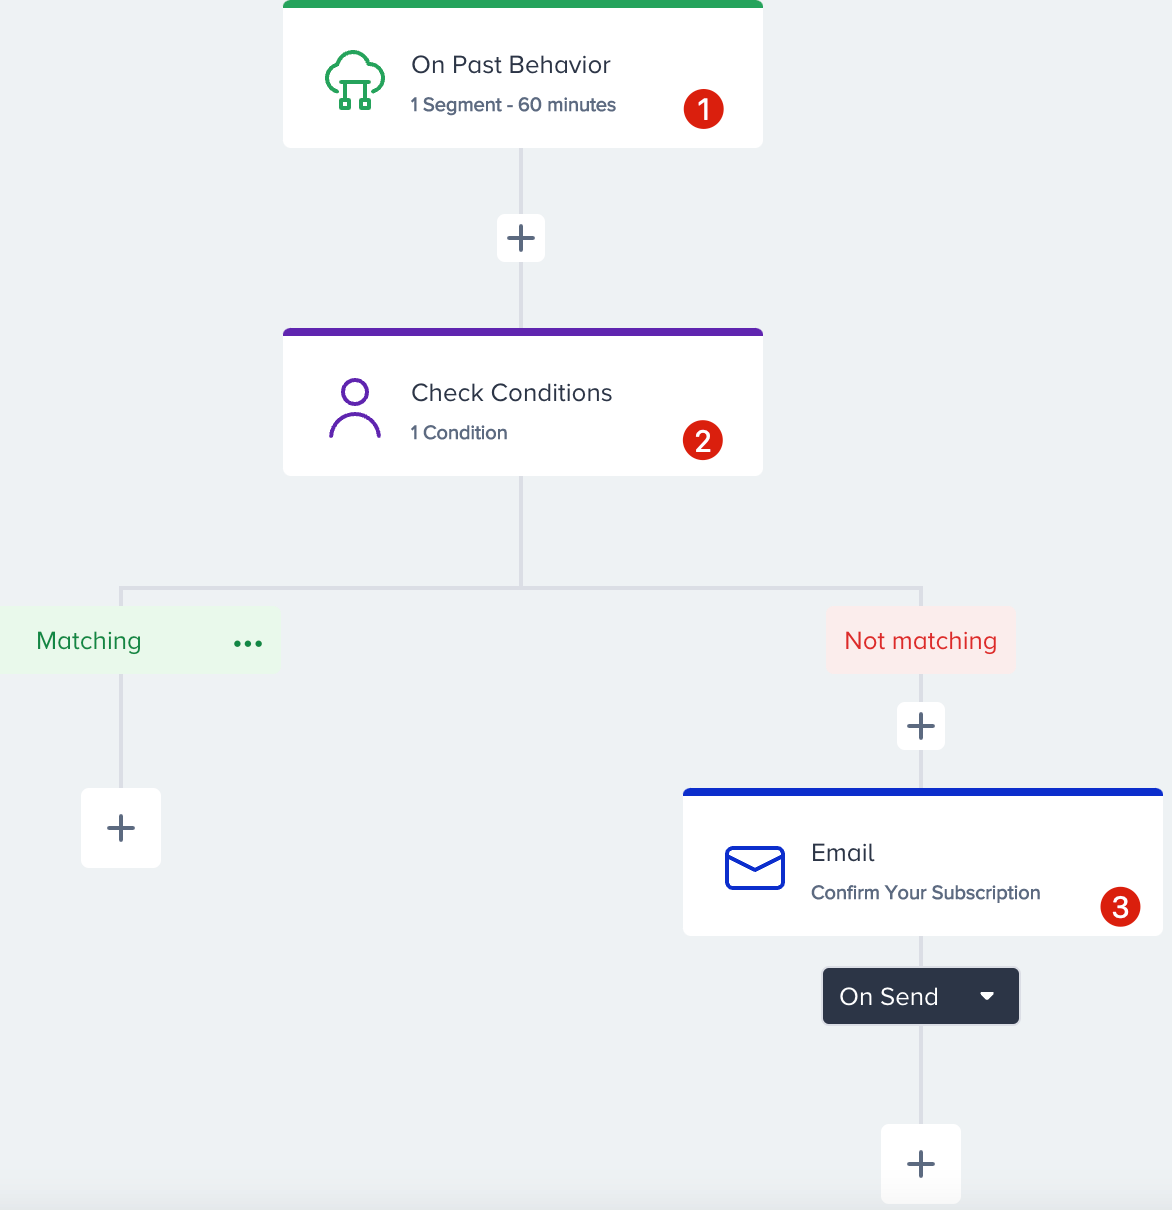
Select the segment you want to target from the On Past Behavior starter.
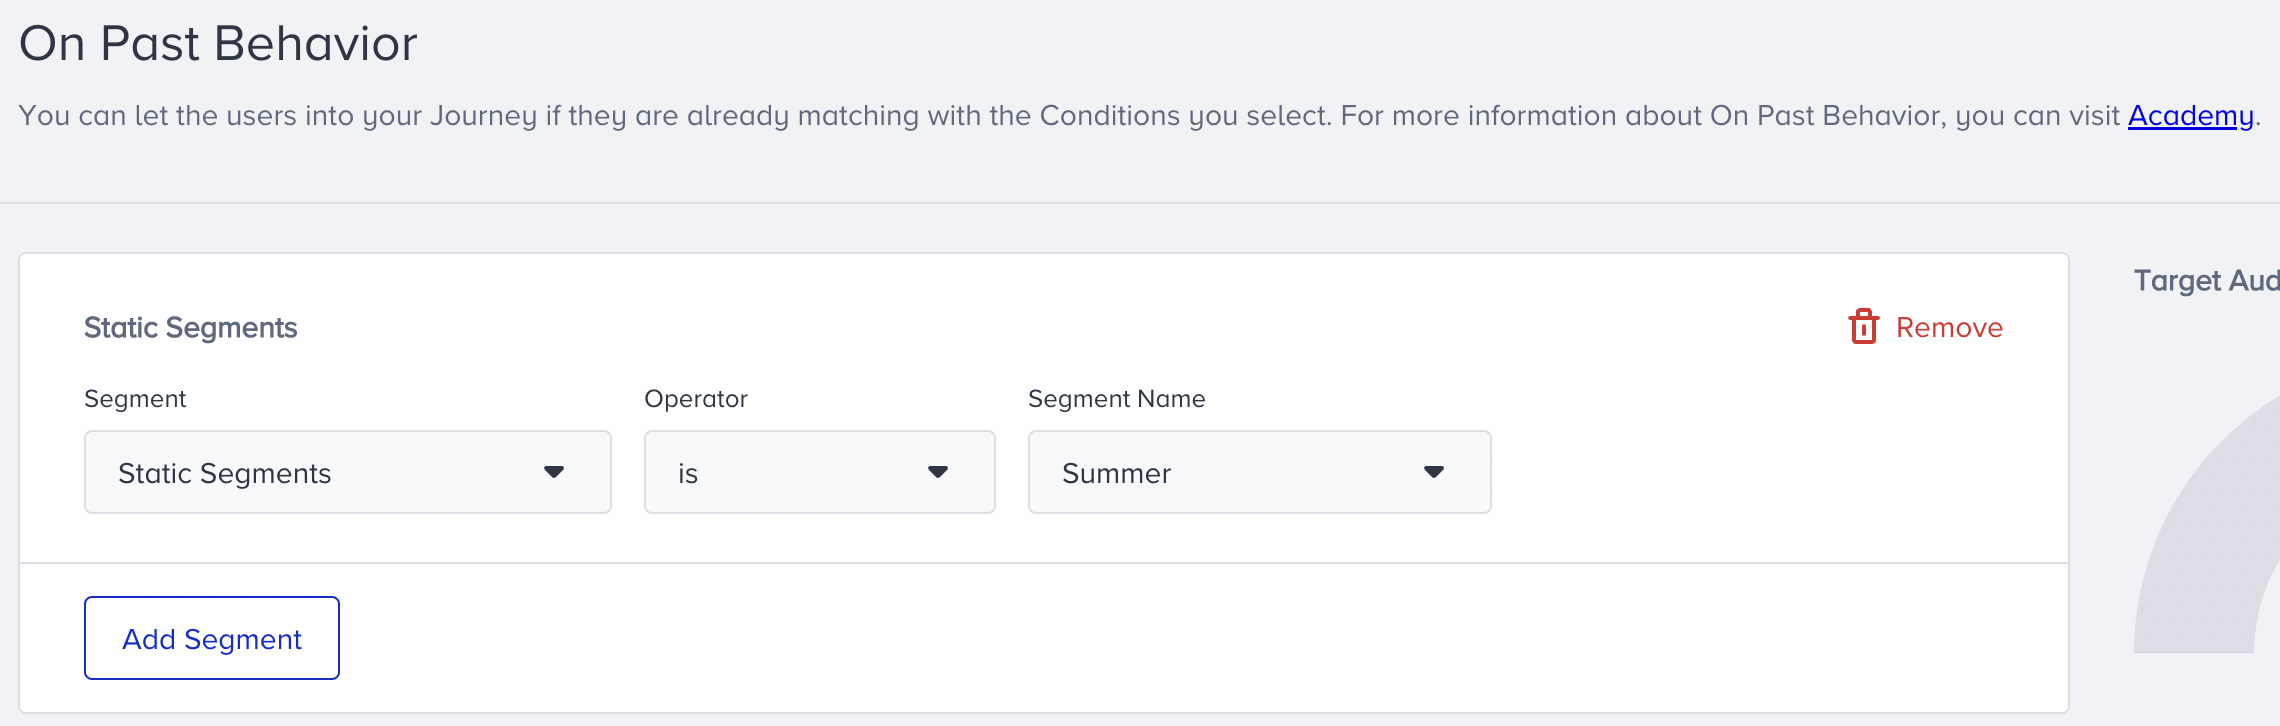
The Check Conditions element should be defined in a way that verifies the Email Double Opt-in attribute’s value. For example, if the Email Double Opt-in attribute’s value is True, the user proceeds to the “Not matching” phase of the journey, where you can send them a campaign email.
If there is no Email Double Opt-in for the user, they will receive the double confirmation email (the double opt-in email) instead.
You should maintain only a single active Double opt-in journey in Architect at any given time. Running multiple Double opt-in flows concurrently may result in users receiving duplicate confirmation emails.
You should set the Architect to work only once for one user.
Since double opt-in emails are classified as transactional emails, you do not need to put an unsubscribe button in them. Instead, you can have disclaimers in your emails.
In the Email Double Opt-In Flow, you must use the Transactional Email Sender Address for the logic to work correctly. Selecting the Promotional Sender Address will break the flow.
When you finalize your campaign configuration, test your campaign using a lead collection or a bulk email sending flow.