Web InStory offers content familiar to your users and that attracts their attention. You can also improve engagement metrics, including average time on page, average session duration, bounce rate, pages/sessions, and pageviews.
Requirements
Complete the Initial Website Integration before starting to use Insider One's InStory product.
To create a Desktop Web InStory campaign,
Navigate to Campaigns > Optimization > InStory.
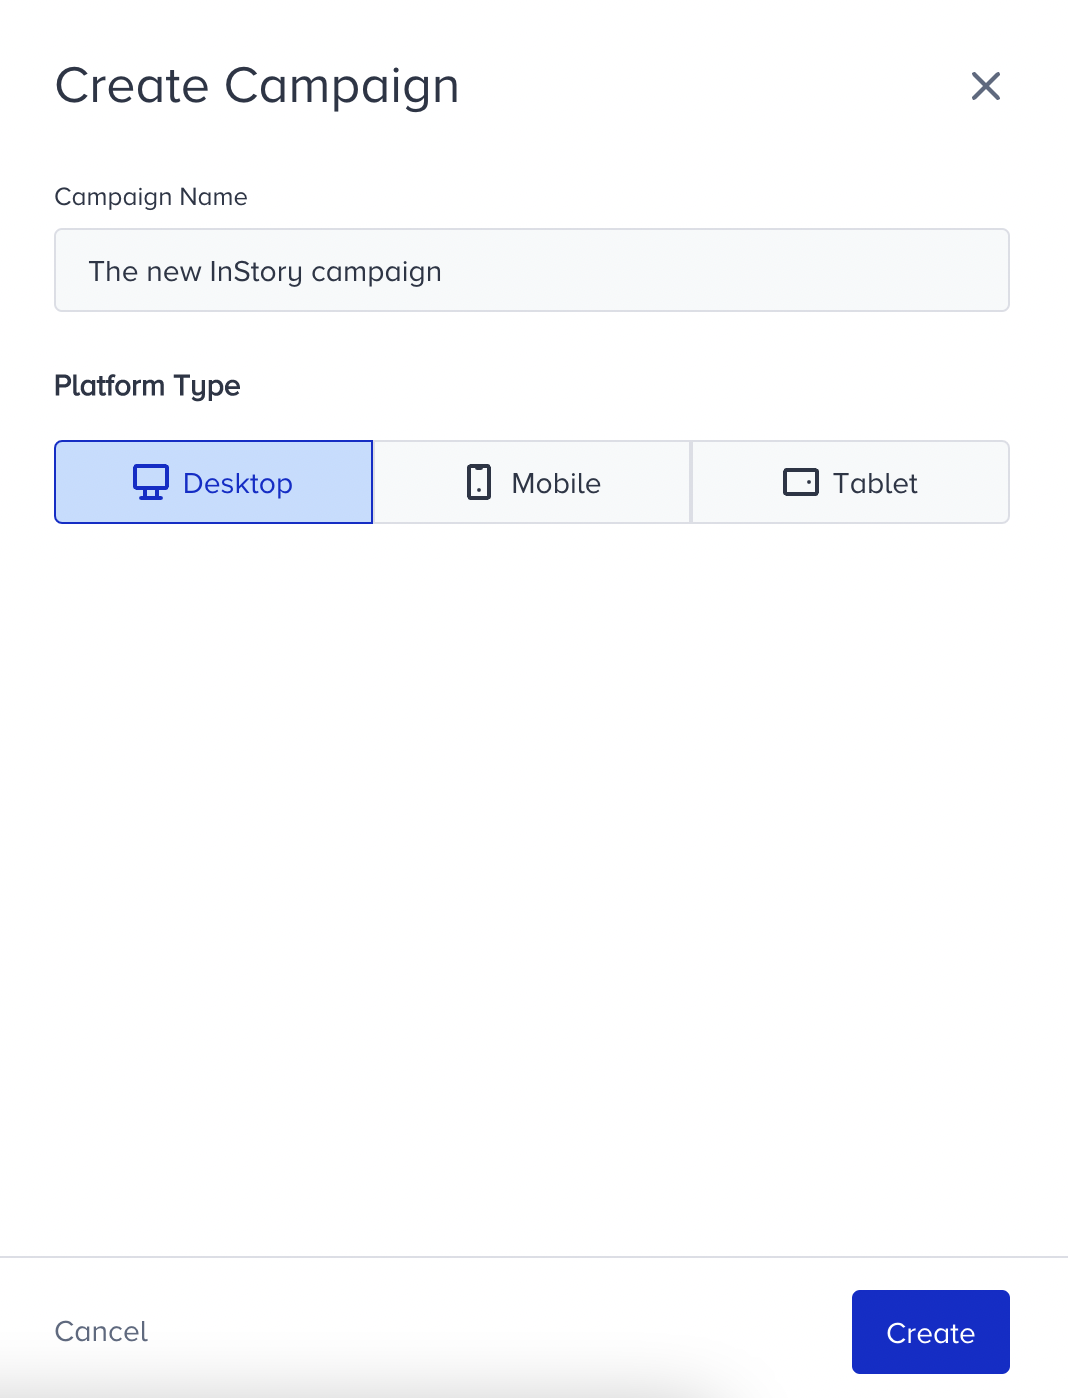
On the listing page, click the Create button. Name your campaign, choose the platform type, and click the Create button.
Configure your segments to define your target audience.
Select your rules to decide when to show your campaign to your target audience.
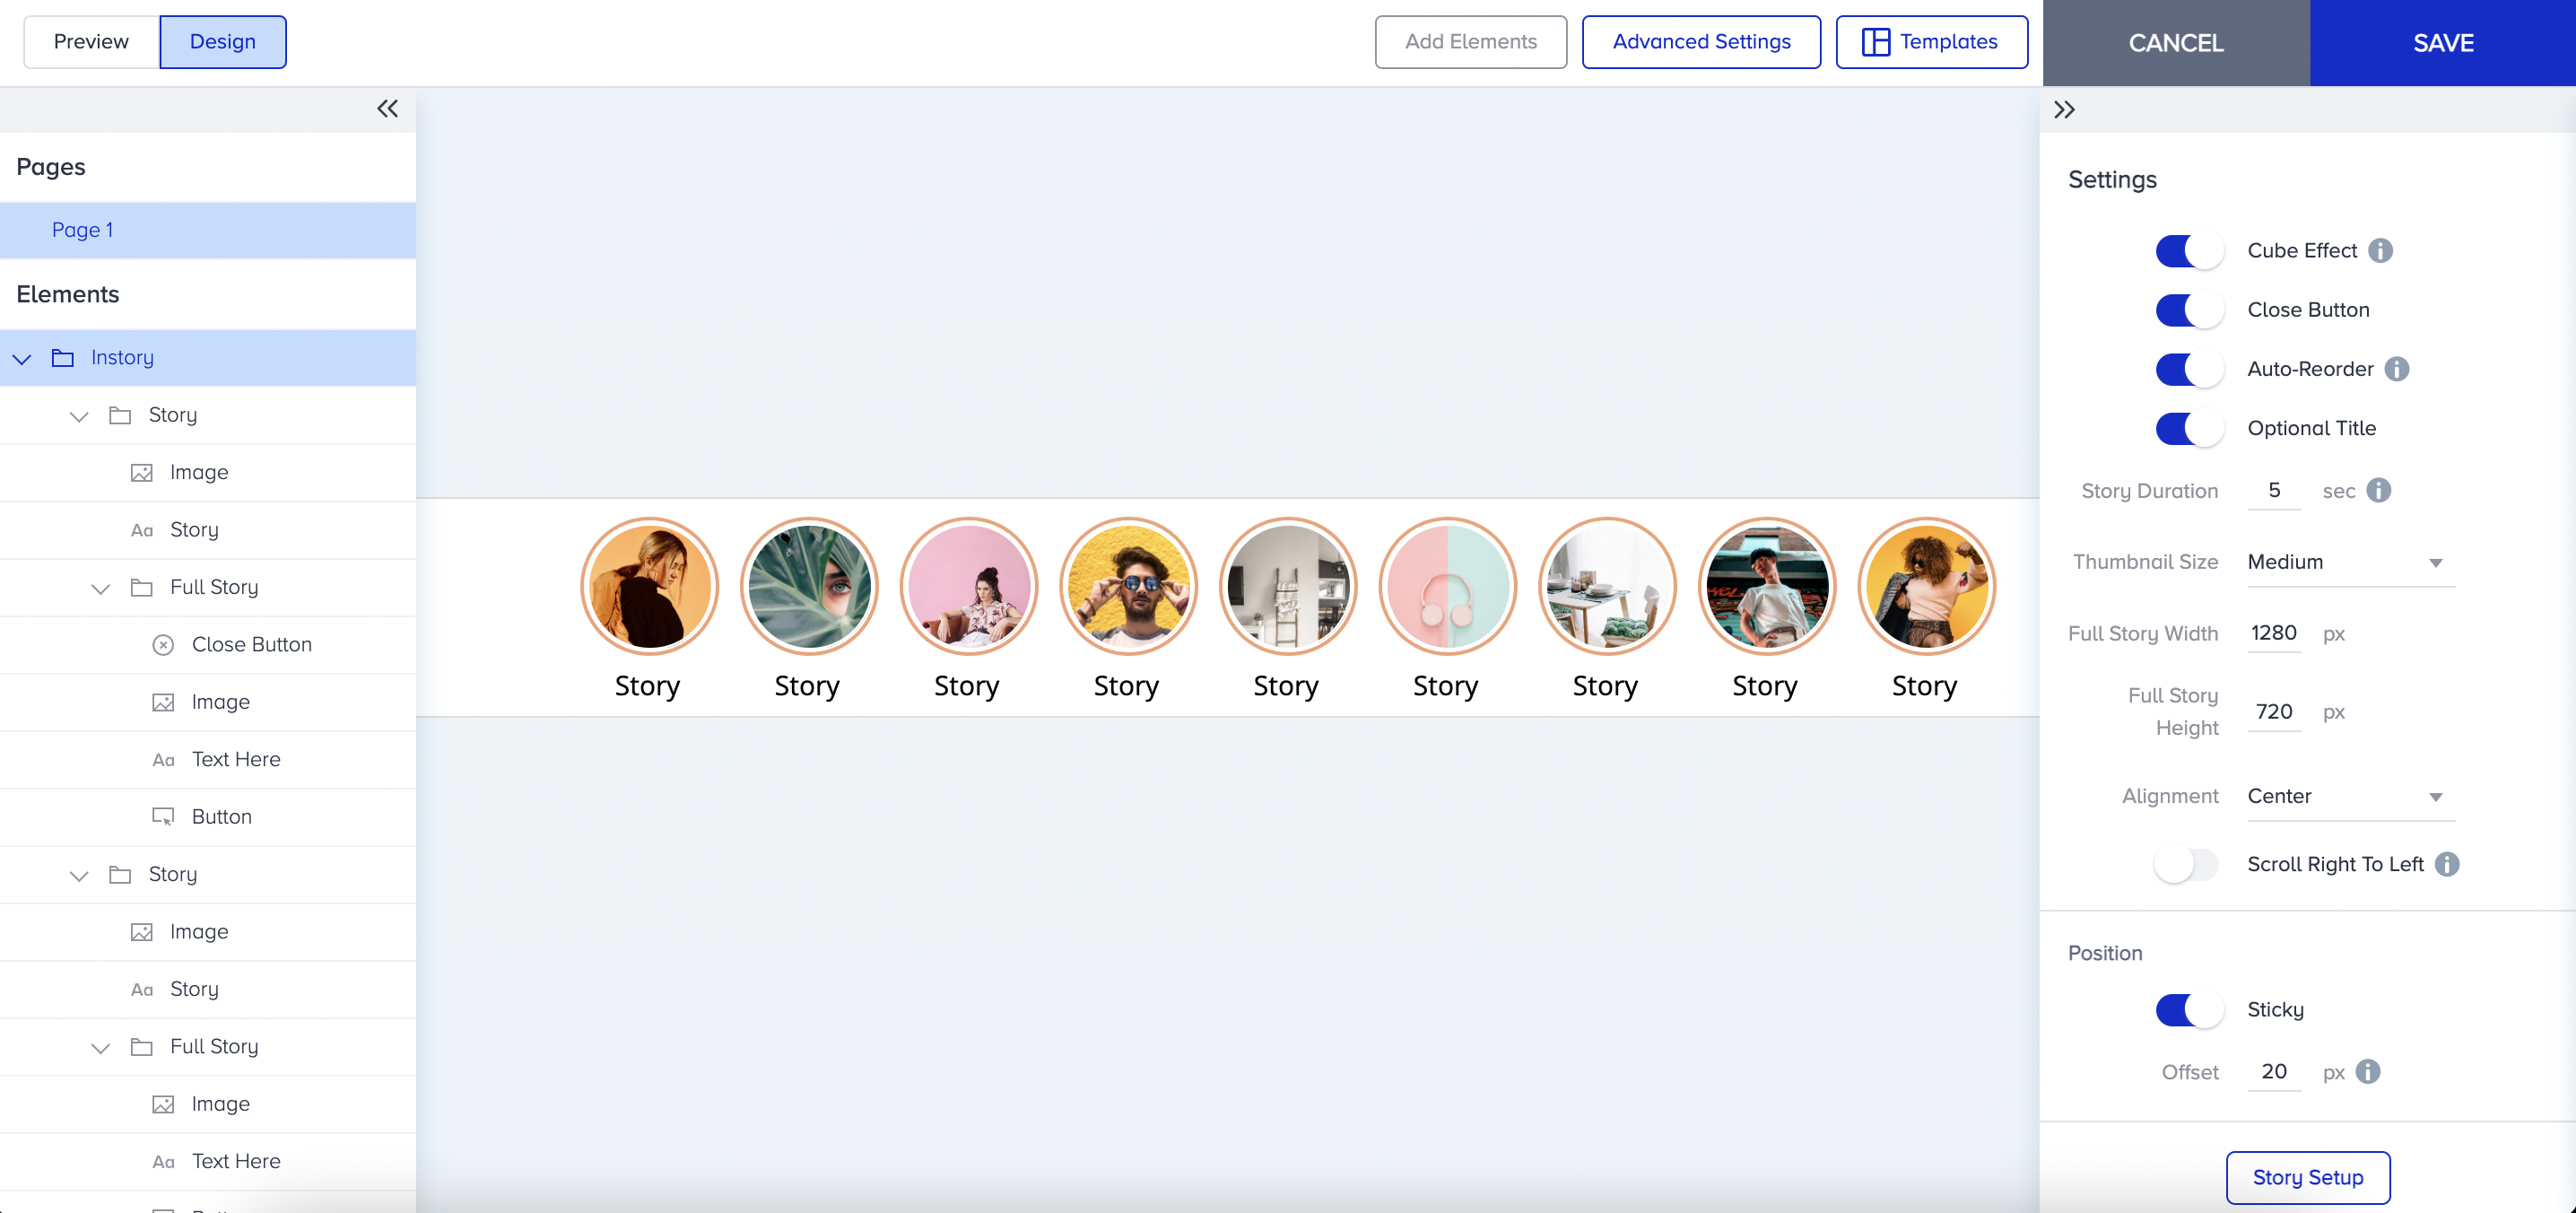
In the Design step, click Add a new variant to start designing your version of the campaign to display.
Choose your template to design your InStory campaign. Then select your element to insert the template.
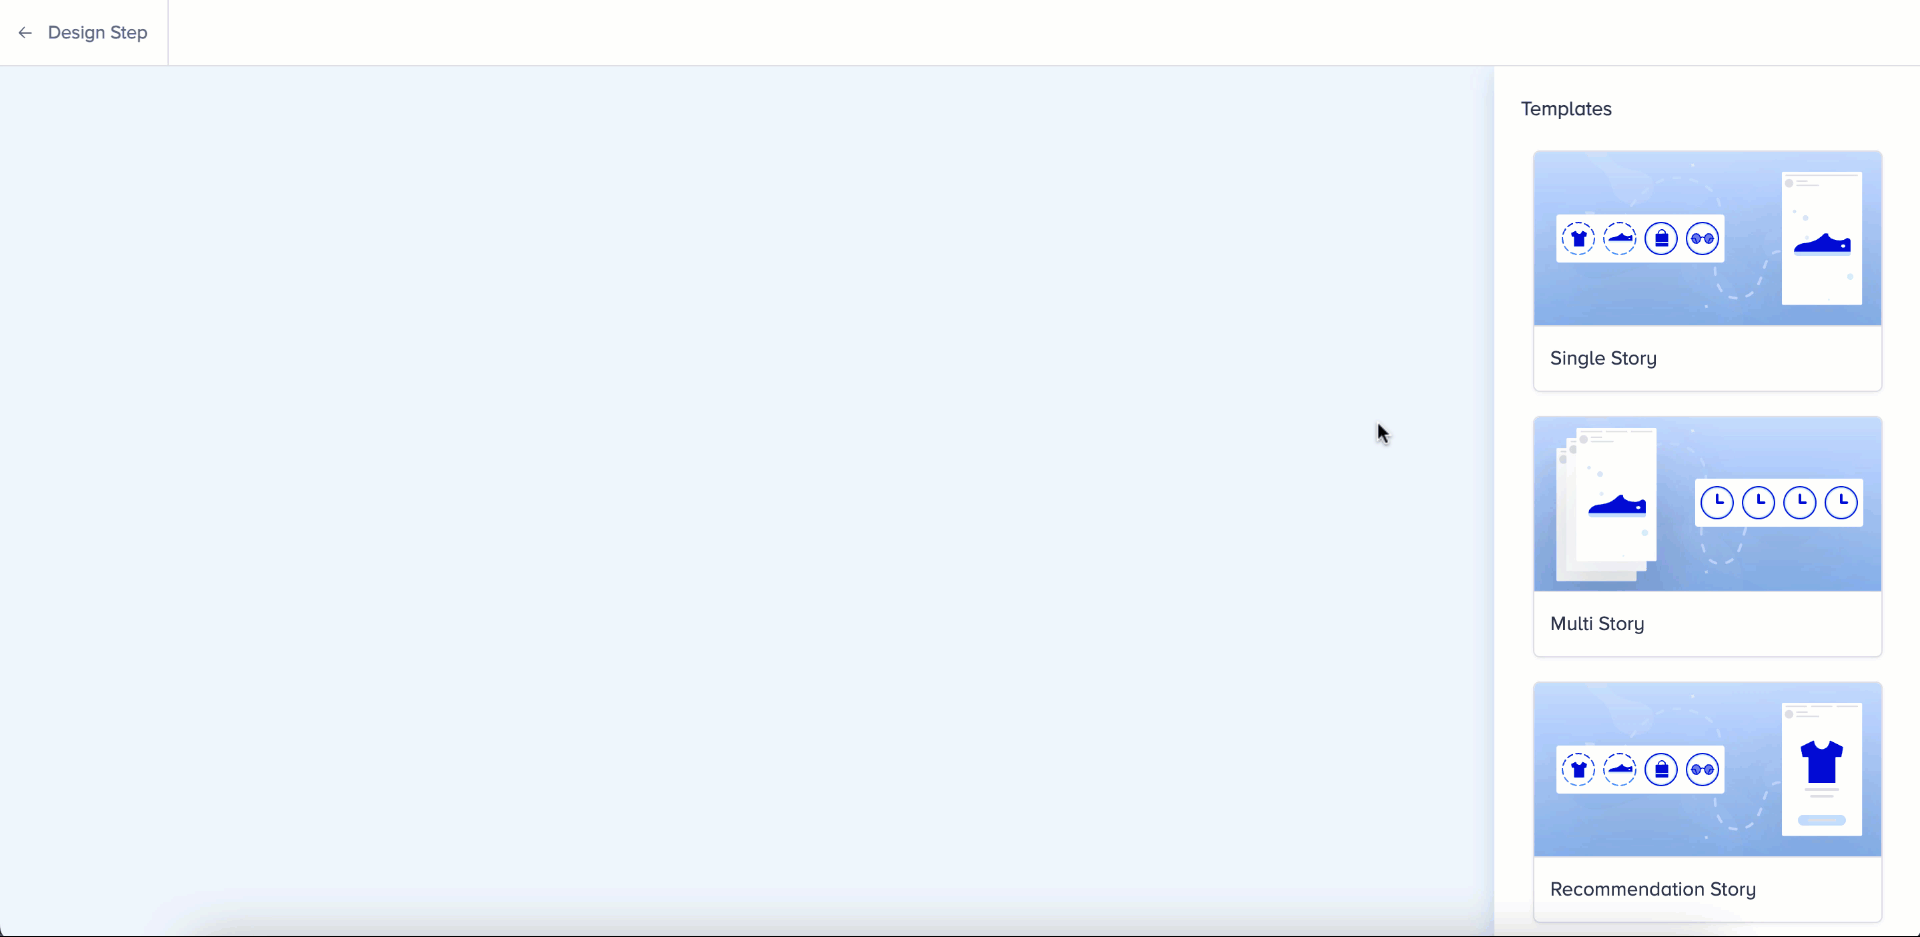
Single Story template is the only one-story template. You can select Single Story to show one story in each bubble.
Multi-Story template is a more advanced version of the Single Story template, allowing you to add up to five stories in each bubble.
Recommendation Story template is a more interactive version of Smart Recommender products. It helps you recommend products in the story format based on the algorithms you select.
Thumbnail Story template is the no-full story format. You can customize the thumbnail images for bubbles and redirect users to specific URLs when they click them.
Customize the image, text settings, and style. You can also add elements to your story and design its full version. Once you finalize your design, click the Save button. Allocate its traffic amount on the Design page.
Set your goals to track the performance of your campaign.
To launch your campaign, select the language, set the activation time, and configure display settings and advanced settings to receive the results. You can activate or deactivate your campaign, or save it in Test mode to test it before launching it.
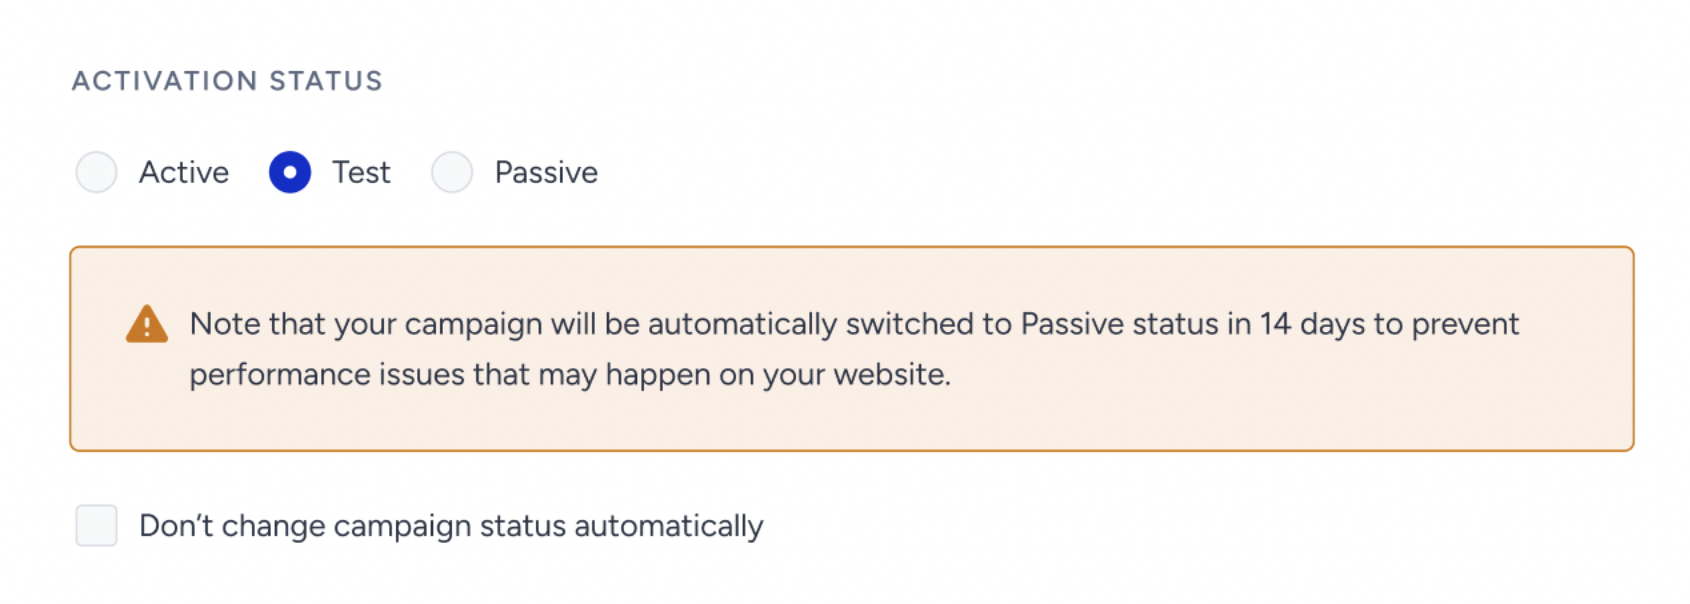
As of February 19th, 2025, Test campaigns will be automatically deactivated after 14 days if their status is not updated. To prevent this, you can select the appropriate option in the Launch step.
This change applies only to newly created campaigns. Existing campaigns will not be affected.
When selecting the Test status in the Launch step, a warning message will indicate that the campaign will be deactivated in 14 days.
To disable automatic deactivation, simply check the box below the warning.
For campaigns that remain in Test status beyond 14 days, an informational message will appear in the Details Modal on the listing page.