The On Past Behavior starter is the most capable starter you can select in the journey. 'On Past Behavior' takes users into a journey based on the following segments:
| Events | Visit History | Predefined Segments |
| Attributes | Predictive Segments | Saved Segments |
| Purchase History | RFM Segments | Email Engagement Segments |
This article explains the following concepts:
The On Past Behavior starter can take users from every platform, such as websites, mobile applications, static segments (upload), and also when data comes from the Upsert user data. The same users can perform events or have attributes across the platforms. In this case, On Past Behavior considers the last action or the last updated attribute of users. For example, you select a product page view event and also select purchase history, as the purchase count is 1, and the user visited the product page on the mobile app but made a purchase on the website. The user will still enter the journey since the condition is met, even if the user did this on different platforms.
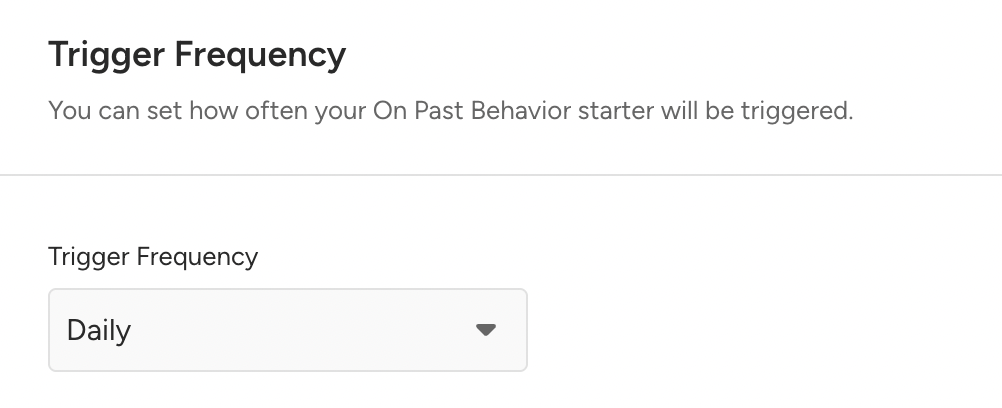
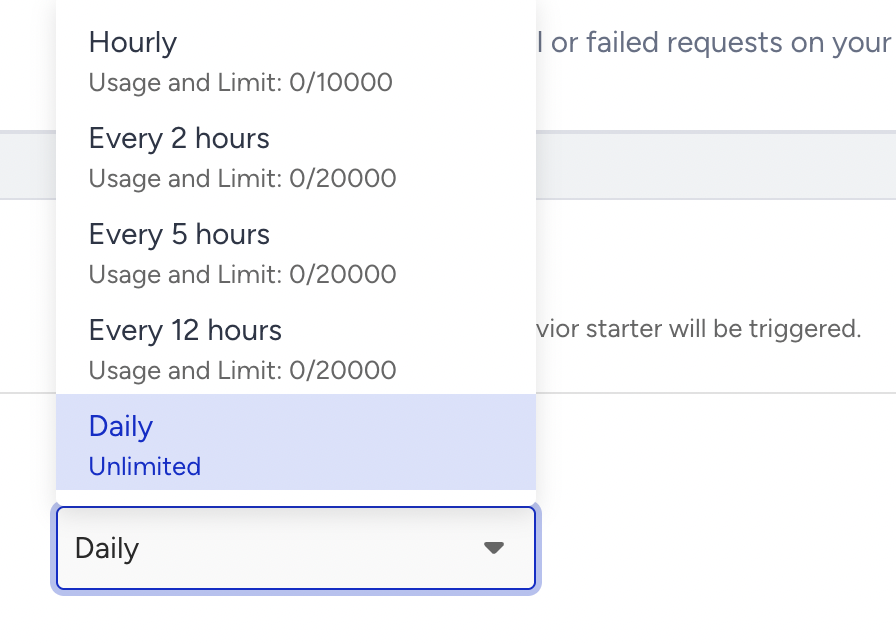
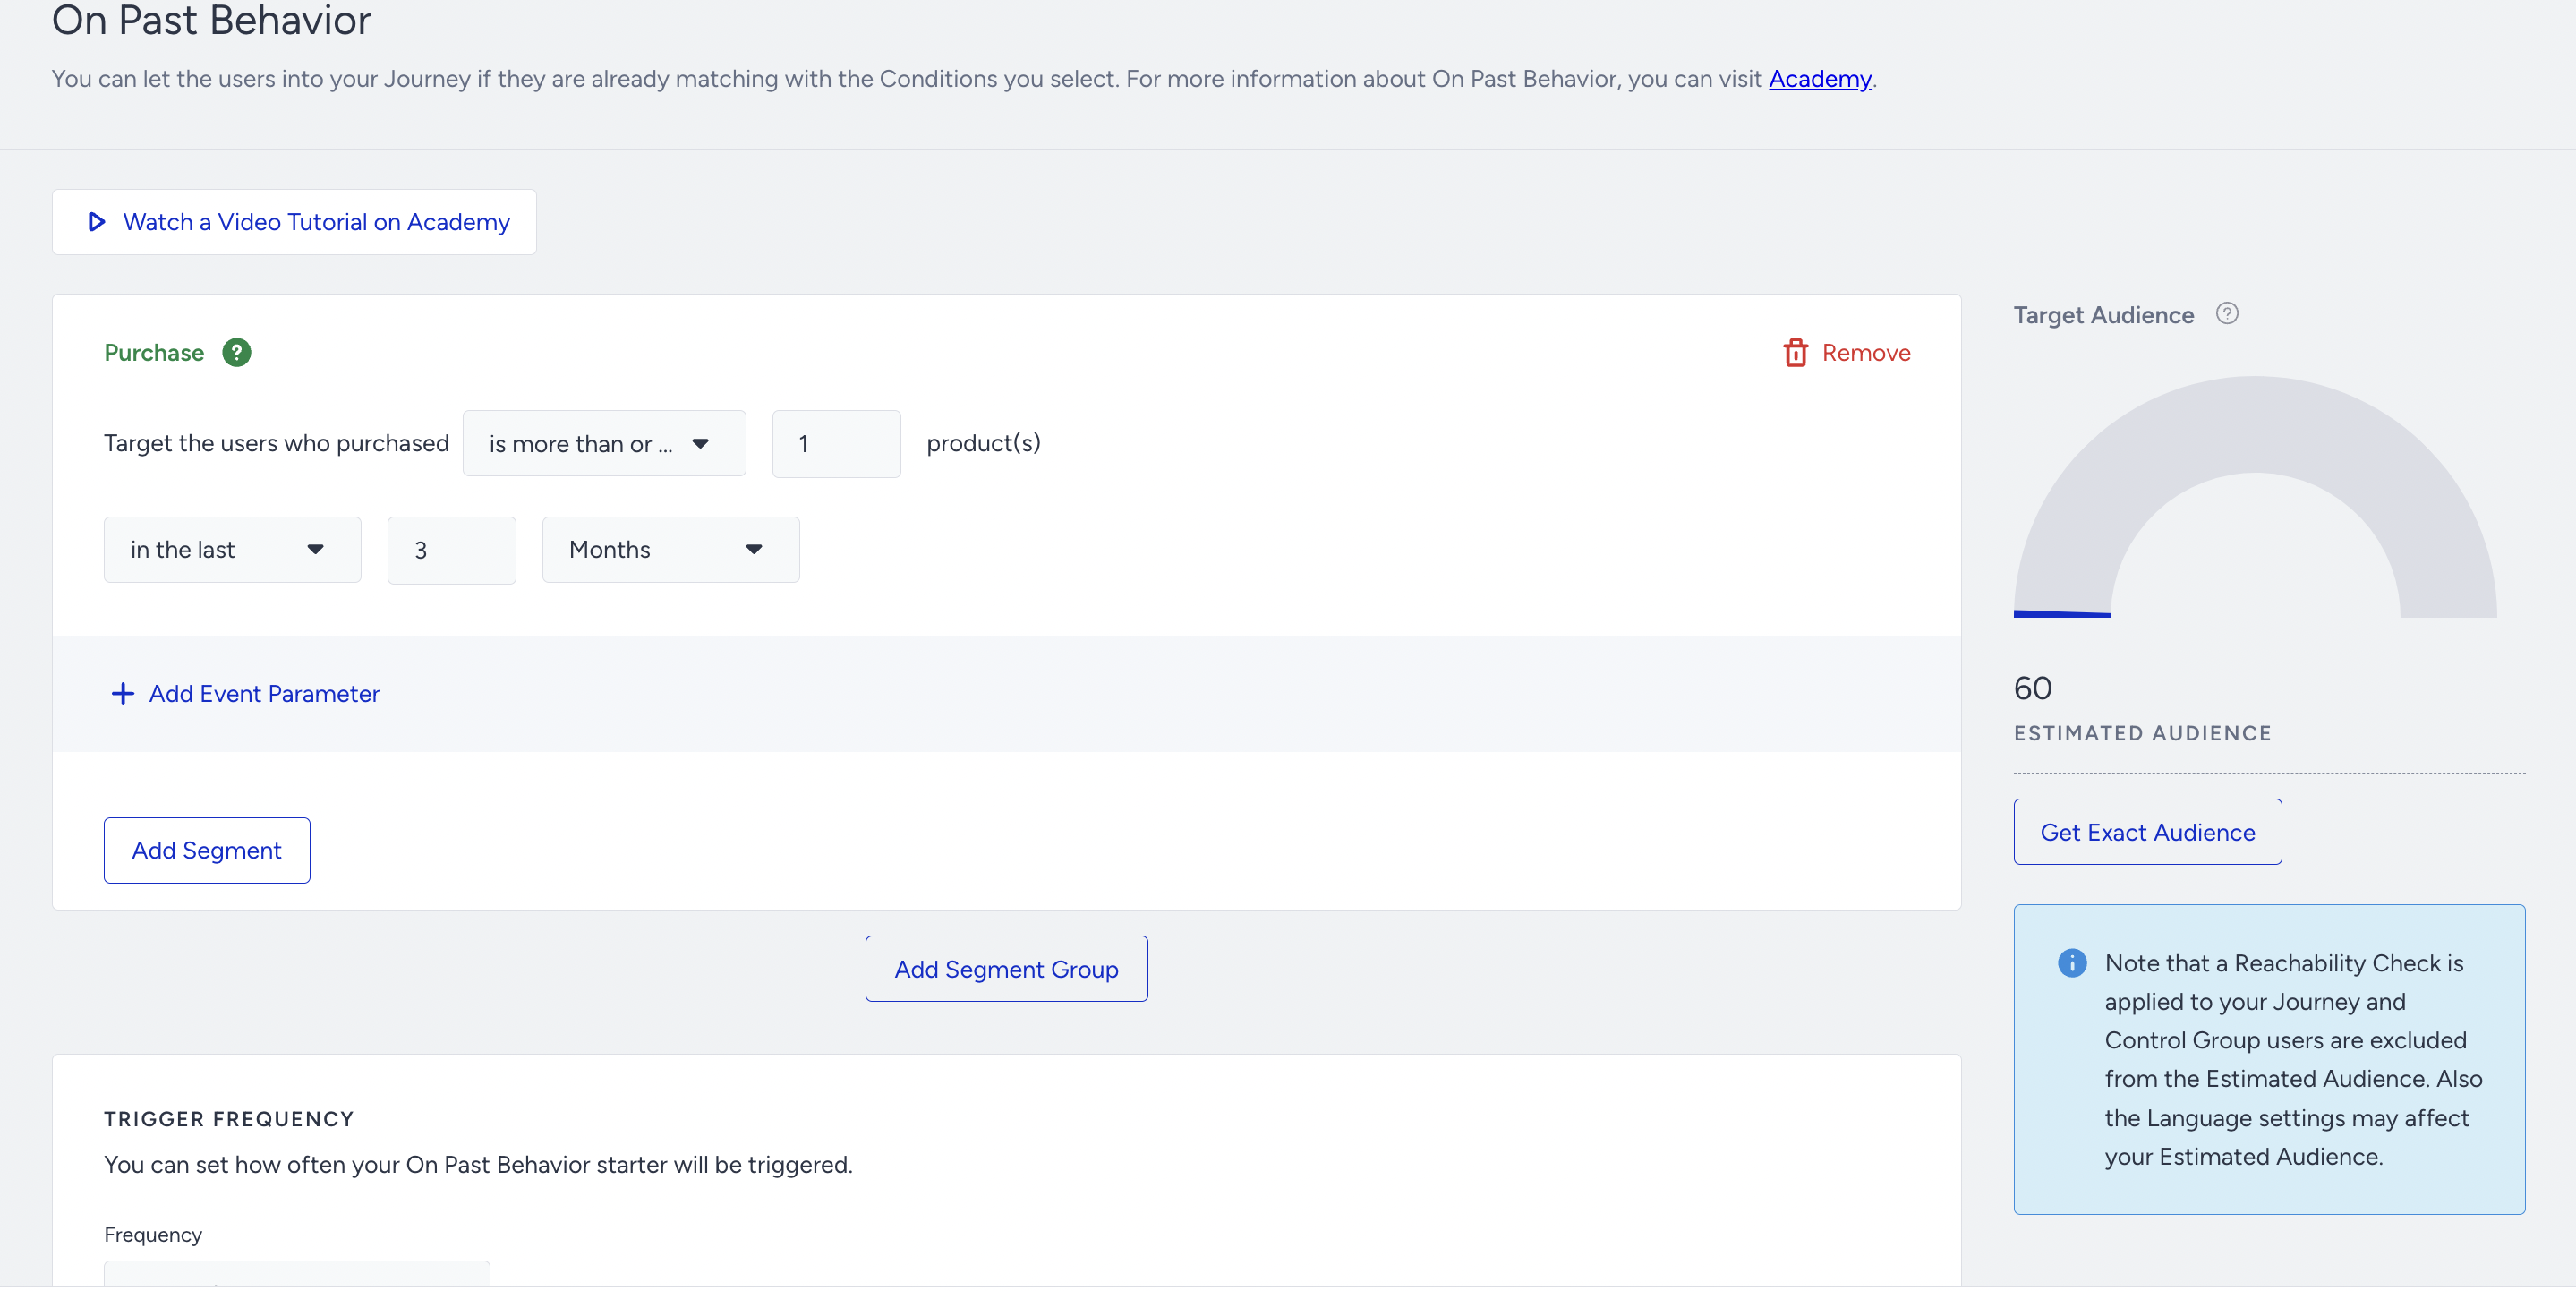
The On Past Behavior triggers users based on the selected trigger frequency, which can be a minimum of 60 minutes. Also, according to your launch time, it starts to work at the nearest time, 8, 23, 38, or 53 minutes past the hour. For example, if you set the frequency to daily and a user comes to this step at 10:05, it will run at 10:08.
The slot assignment is determined based on the existing On Past Behavior journeys for the same customer and their trigger time distribution across these slots. Architect selects the most available slot, defined as the slot with fewer journeys triggering at that time within the customer's usage.
For example, you select a 60-minute trigger frequency in the On Past Behavior. Based on the trigger times of your previously launched On Past Behavior journeys, Architect assigns a trigger time slot to your journey. You launch your journey at 10:05,and Architect can assign the trigger time as either one of the slots. If the assigned slot is 10:53, the first trigger happens at 10:53 and the next iteration happens at 11:53.
- If the trigger frequency is 60 minutes, it takes 200K users for an hour.
- If the trigger frequency is 2 hours, it takes 200K users every 2 hours.
- If the trigger frequency is 5 hours, it takes 200K users every 5 hours.
- If the trigger frequency is 1 day, it takes 200K users for 1 day.
The default limit shown here is a standard baseline. If your use case requires higher capacity, feel free to reach out to the Insider One team — we can adjust it to fit your needs.
Let's say you aim to send an email message to a group of 850,000 users, and want all of them to receive the message at the same time (e.g. 10 am). To do this, you can use the Wait until a Time Slot element within your journey following the recommended practices below:
1. Adjust journey schedule: You can schedule your journey to start no later than 5 am. This allows you to allocate a maximum of 5 hours for user collection before the intended send time.
2. Set trigger frequency: You can set the trigger frequency of the On Past Behavior to 1 hour. This ensures that each segment of users, up to 200,000, is processed once per hour.
3. Incorporate Wait until a Time Slot element: You can place the Wait until a Time Slot element after the On Past Behavior starter and before the message you intend to send. Set the wait period to cover the desired send time window (e.g. 10 a.m. to 11 a.m.).
4. Achieve user group collection: Over the course of five hours, the On Past Behavior starter will process five segments of users, accumulating in the “Wait Until a Time Slot” element.
5. Simultaneous message sending: At the designated time (10 a.m.), the Wait until a Time Slot element releases the collected user group, sending them as a cohesive unit to the subsequent message element.This way, you can ensure that the large user group is collected and engaged simultaneously, and achieve your goal of synchronized message delivery. While it requires careful planning and coordination, this approach maximizes the utilization of the current system and provides an efficient solution for targeting larger user segments.
Architect automatically eliminates users from entering the journey if they would be immediately dropped, providing more accurate reporting and reducing misleading drop rates. For example, if they are not reachable on the first channel they encounter in the journey.
If you use Architect-level control group, the control group users will also be excluded from this estimate, as they will not enter the journey.
Also, if the User Eligibility is set to Once or Multiple, the count bubble in the New Version Draft will exclude users who already entered the Current Version of the journey. When you build a new version of your journey, now you will have a more realistic view of how many users will enter your journey. For Multiple User Eligibility cases, the users will enter the New Version once the re-eligibility duration ends.
 How does the reachability check work?
Architect automatically eliminates users from entering the journey if they drop immediately after entering due to not being reachable on the first channel they face for better and more precise reporting. However, you can ensure how many users will enter your journey on the Launch step. You will see the estimated and exact audience counts on the Review and Launch Steps.
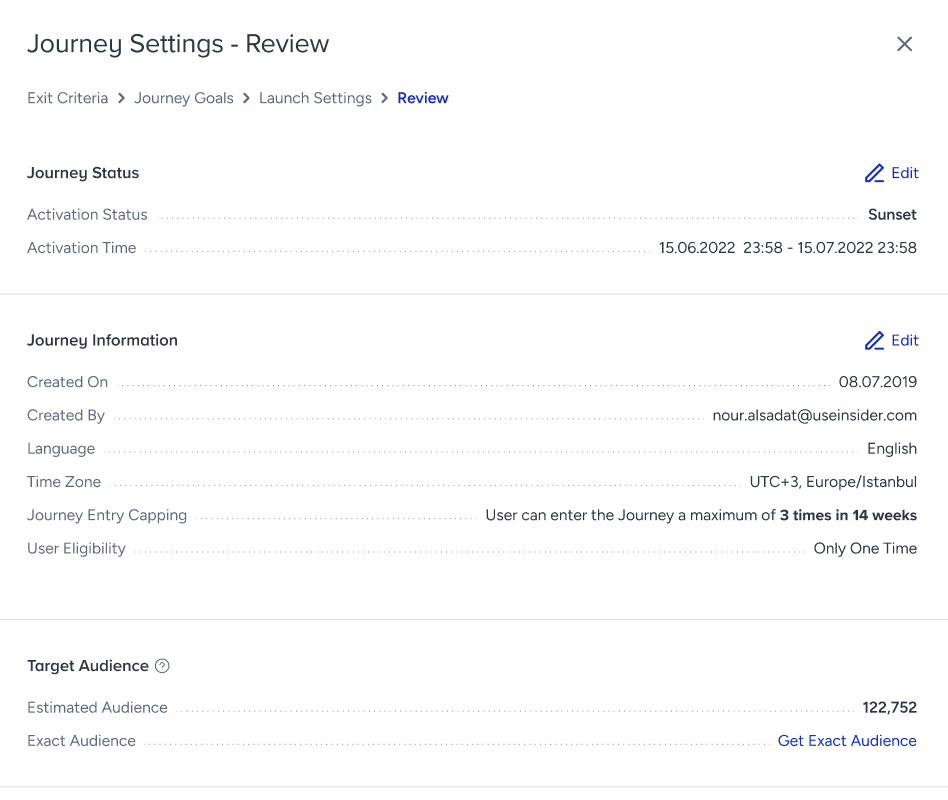
Before launching your journey, click the Get Exact Audience button to see the exact number of users in your segment.

Below are some examples of this logic.
Case A
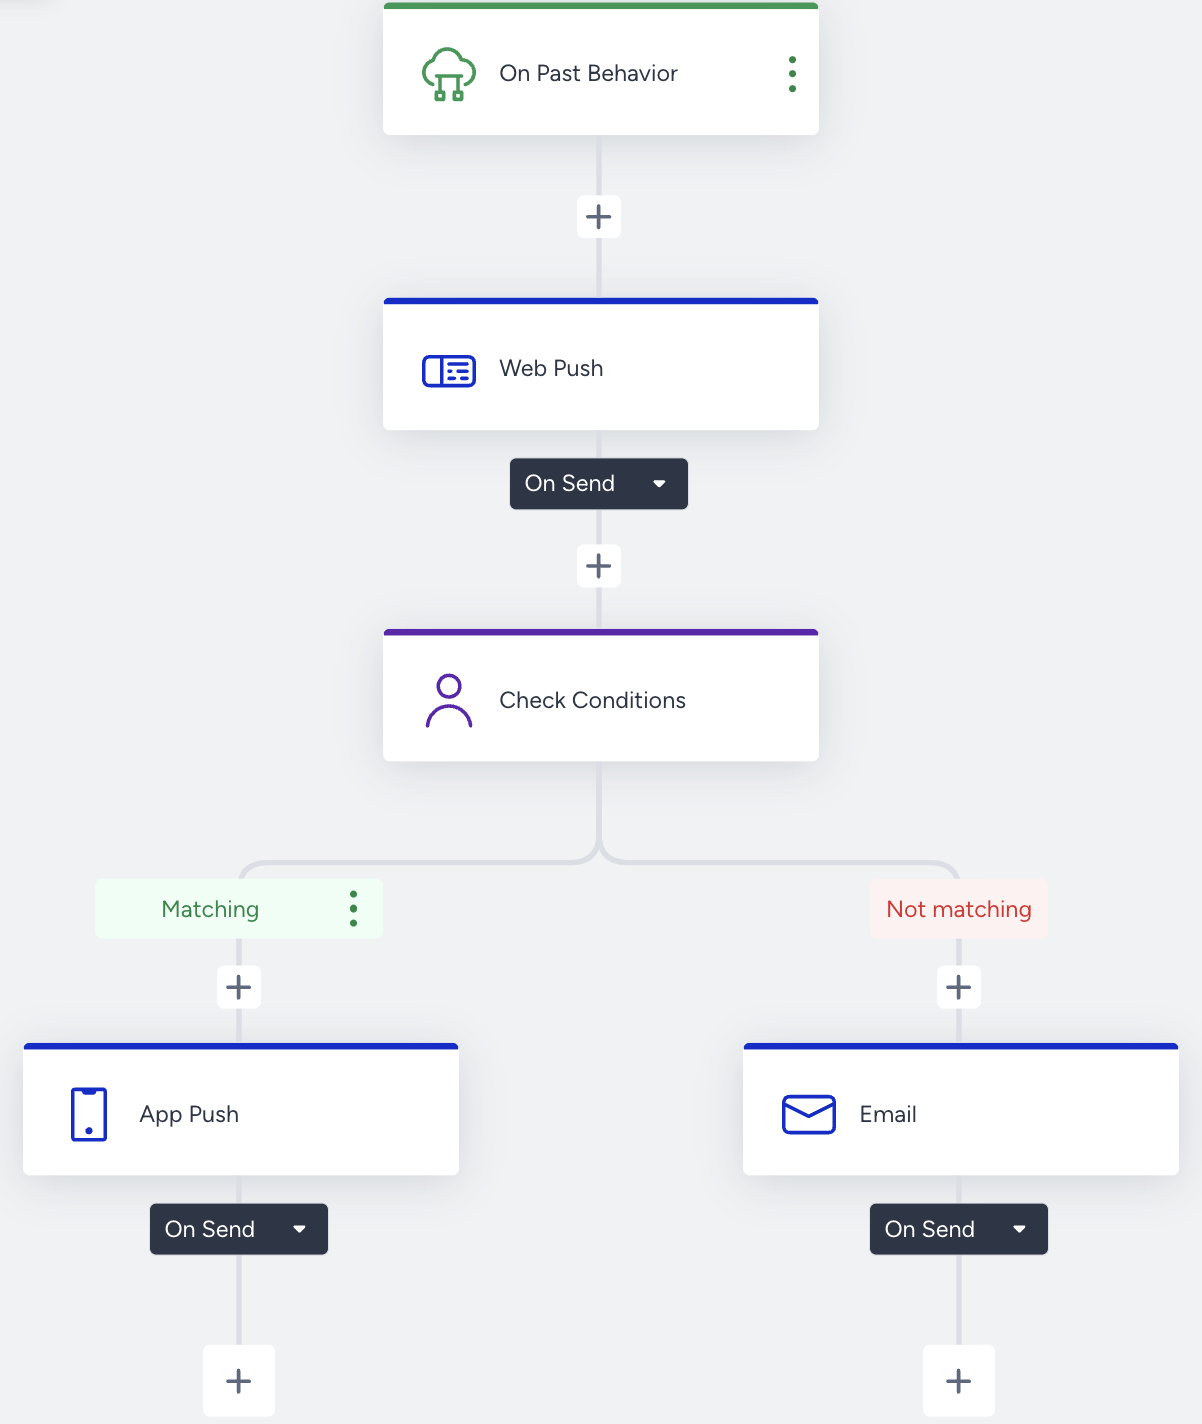
Let’s say you have the Web Push channel in the first step and multiple channels after that. If your user is not reachable on the Web Push channel, but for Email or App Push, Architect will not let them enter the journey, as they will be dropped in the Web Push channel.
Case B
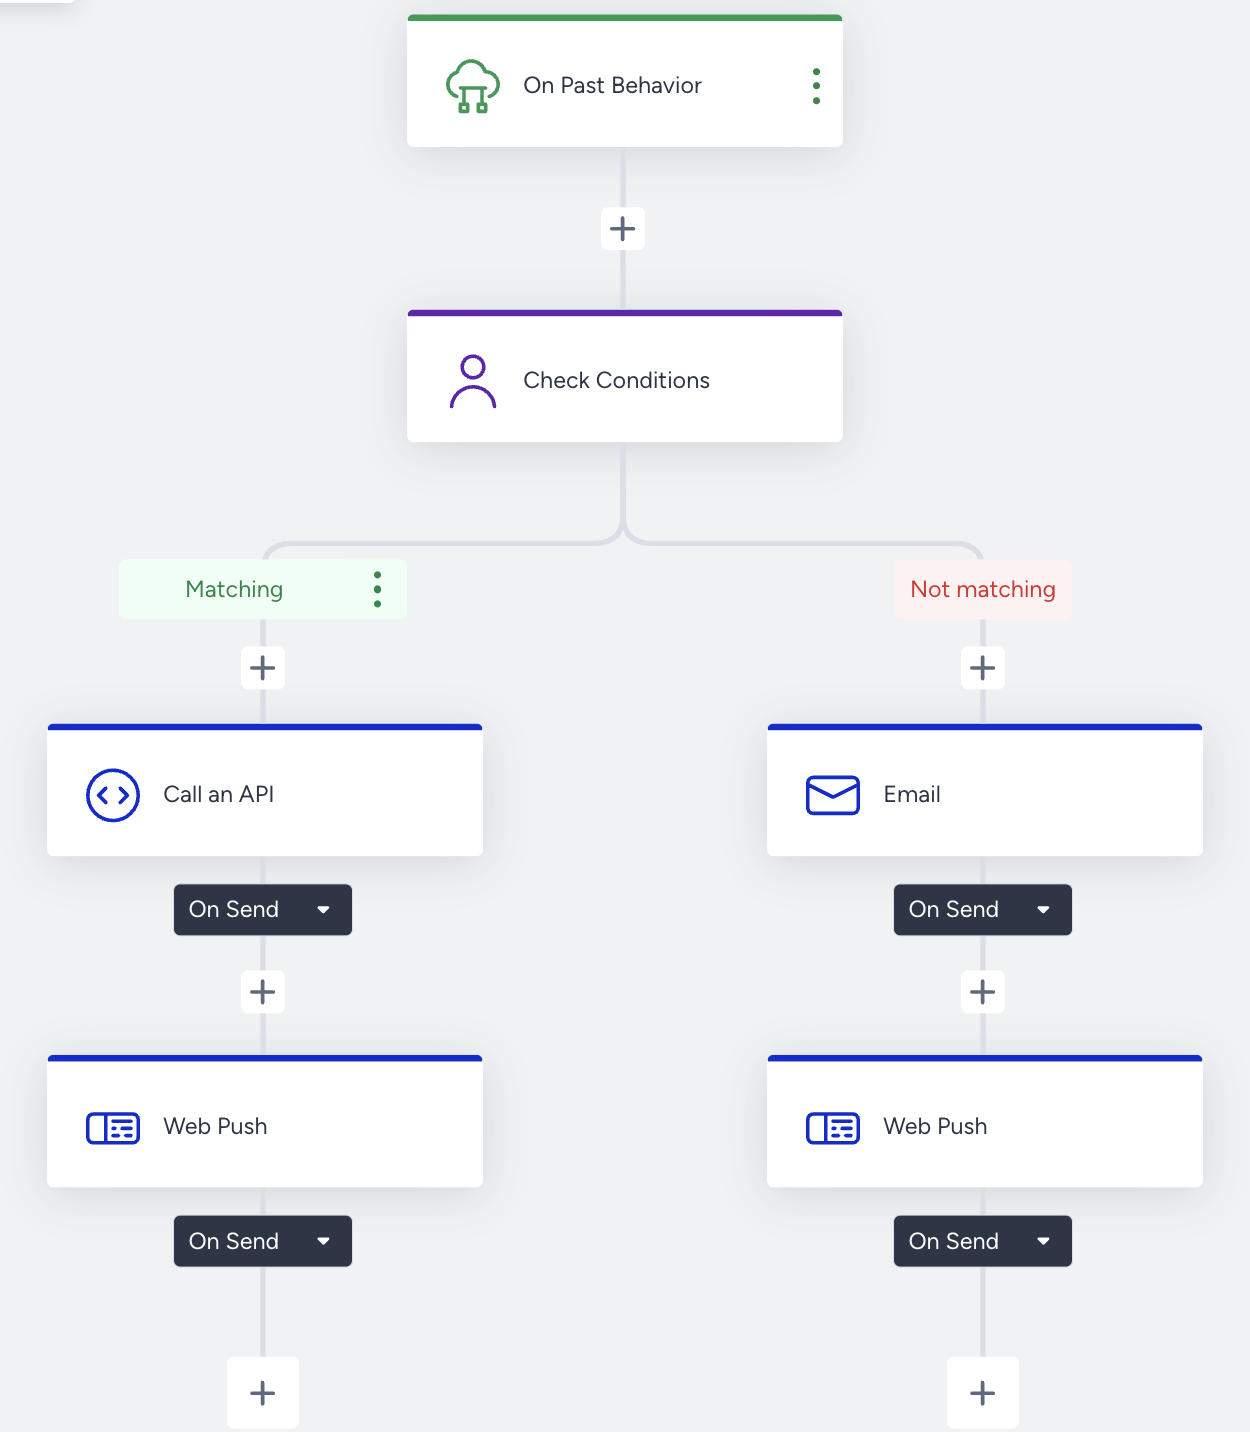
Let’s say you have App Push and Email channels in the first layer of your journey, and your users will first face these channels during the flow. If your user is not reachable for App Push or Email but for Web Push, they will not enter the journey, as they will drop into the first layer without receiving any messages. However, if your user is eligible for App Push or Email, they will enter the flow. It is enough to be eligible for one of the channels in the first layer, as the logic works with an OR connection.

Case C
Some exceptions apply to this logic. Let's say you have a journey with the Call an API channel, and it is placed before the first layer of the channel in the journey. Since the requests that will be sent through this channel might vary, this logic does not apply in this case. This means that all users will enter the journey. The same rules apply for OnSite, InApp, and Action elements like Update User Attribute and Update User Segment.
Tips and tricks
- Segmented users might come from Upsert User Data API, an offline environment, or any other source and might lack language information. That’s why we suggest selecting the “All Languages” option on the launch popup.
- You can use the Predefined Segments without the need to select any attributes.
 If you want to use the Lead Generation segment, make sure your lead generation campaign is active. Otherwise, it will not be listed on the event parameter Campaign Name list.
 - You can combine events with attributes.
- You can take users based on uploaded static segments.
- You can use event parameters to narrow the segments and target your audience better.
- You can use custom events in this starter. You can also create custom events manually.
- You can use Default, Custom, CRM, Mobile App attributes in 'On Past Behavior'.
- You can filter your users based on their channel reachability. This way, you do not need to take users who are not already reachable on the channel.

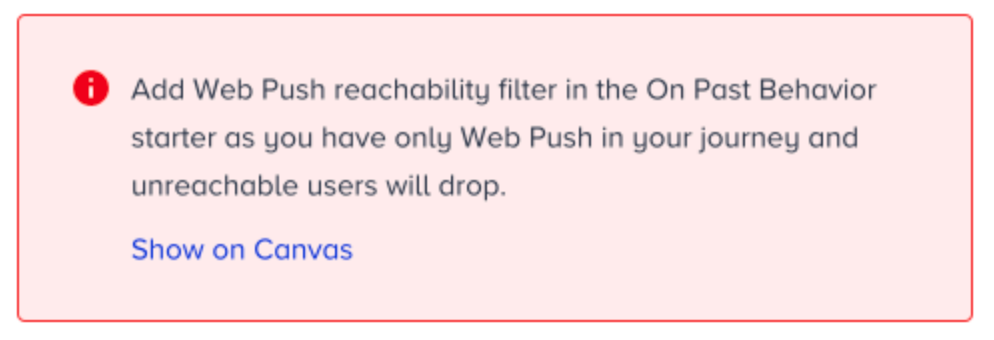
- There is only one type of channel in the journey.

- There are different types of channels in the journey, but there are the same types of channels in the first branch.
.png)
- There are different types of channels in the journey, but there is a channel element until the first branch.

Use cases
With the On Past Behavior starter, you can:
- Target users who didn't make a purchase in the last 30 days.
- Target users who clicked on an app push and have a high discount affinity.
- Target users who visited applications between 10.03 and 10.04 and visited more than 5 product pages.
- Target users who submitted the lead collection form and added items to their cart but didn't make a purchase.
- Target hibernating or potential loyalist users.
- Target users who are in the static or dynamic segment.
- Target users who are likely to purchase.
Requirements
- Insider Tag integration should be completed.
- SDK integration should be completed for mobile app data reading.
- Insider should map your website.
- Events should be activated.
- Events should be sent from the website, mobile app, Upsert User Data API, or offline environment.