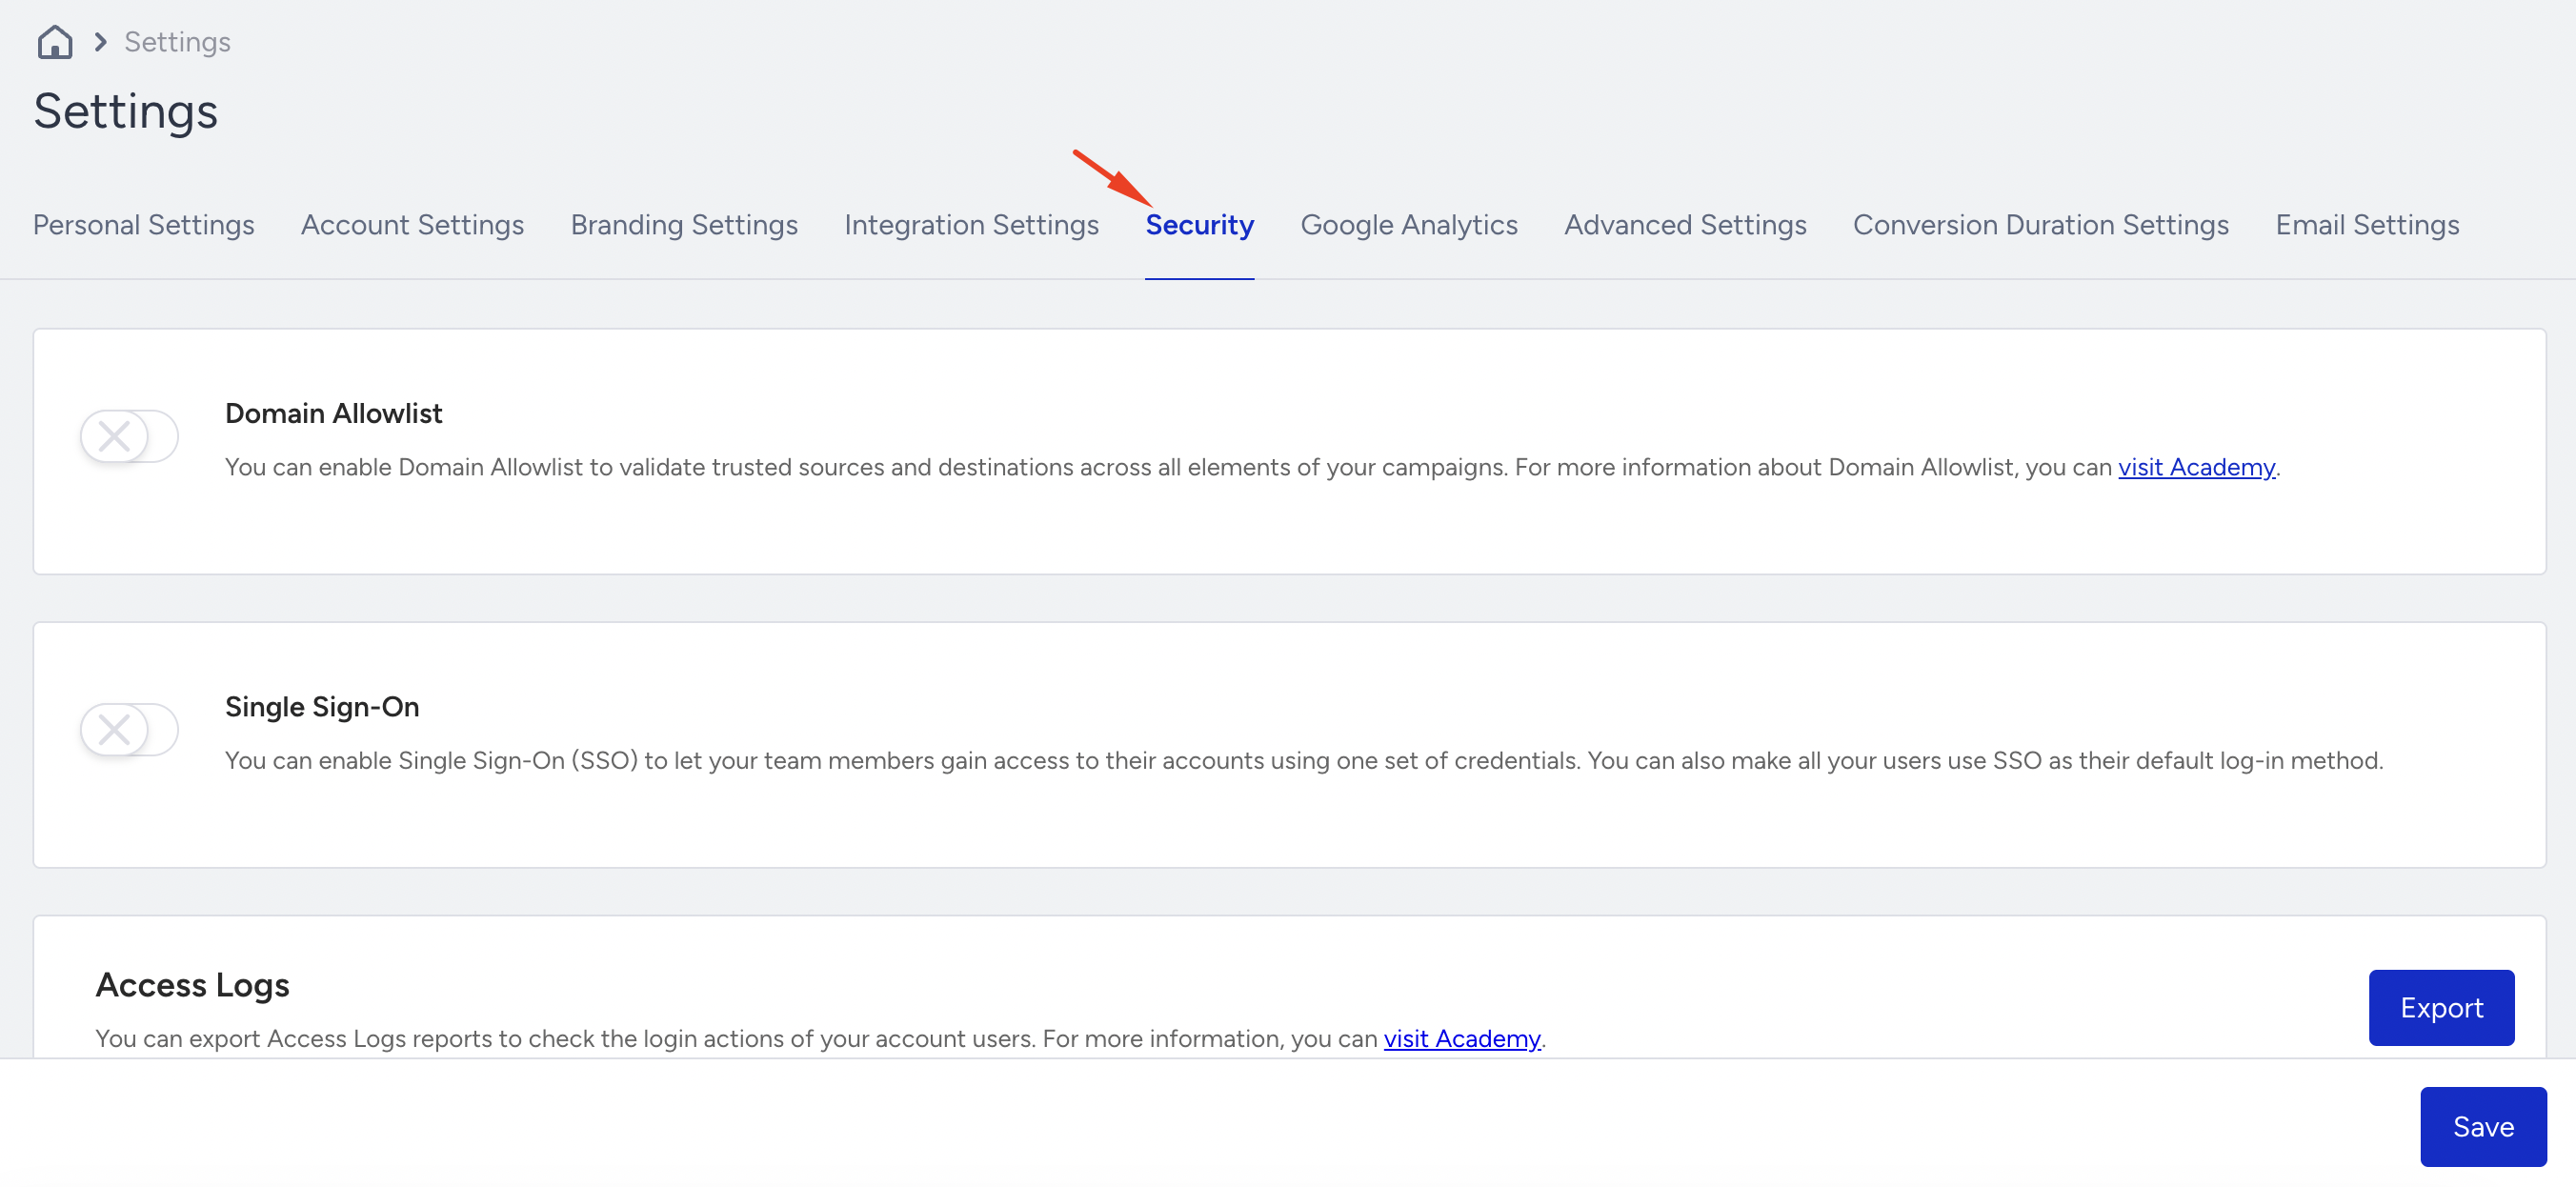
Security Settings enable you to manage Domain Allowlist, Single Sign-on (SSO) settings, and retrieve Panel Access Logs.
Click your username > Settings > Inone Settings to navigate to this page.
If this tab is not accessible in your account, you can contact the Insider One team for access.
Domain Allowlist
The Domain Allowlist is a security feature that ensures only approved domains can be used in your campaigns, rules, and other configurations within InOne.
Its key benefits are:
Protects against errors caused by typos, misconfigurations, or unauthorized usage.
Ensures that all links and URLs in your panel come from trusted sources.
Gives admins full control over which domains are allowed in InOne (URLs, links, sources).
Flags any unapproved domains already in use, so they can be corrected.
What is a “domain”?
A domain is the core part of a website’s address. For example, in the URL https://my.example.com/docs/guide,
https:// is the protocol,
my.example.com is the full domain where
my is the subdomain,
example is the second-level domain,
.com is the top-level domain,
/docs/guide is the path.
To use this URL in InOne when the allowlist is active, you would need to add either my.example.com or example.com to your Verified list.
You need to have the Administrator role to activate and configure an allowlist. Refer to User Management for further details.
To activate and configure your allowlist,
Enable the Domain Allowlist toggle to activate the feature.
Activating the feature will initiate a Scanning Process that examines everything on InOne to identify the domains you currently use.

Scanning Process will take time according to how many campaigns, rules, settings you have to be scanned.
How Domain Allowlist works after activation
Once the feature is activated, all domain usage in your panel is immediately secured.
Until the scan completes and you verify domains, you can only use the Domains Allowed by Default in new campaigns.
Existing campaigns that already include unverified domains will continue to run without impact.
However, unverified domains cannot be used in new campaigns until they are allowlisted.
To avoid disruption, review all unverified domains promptly and allowlist the ones you trust.
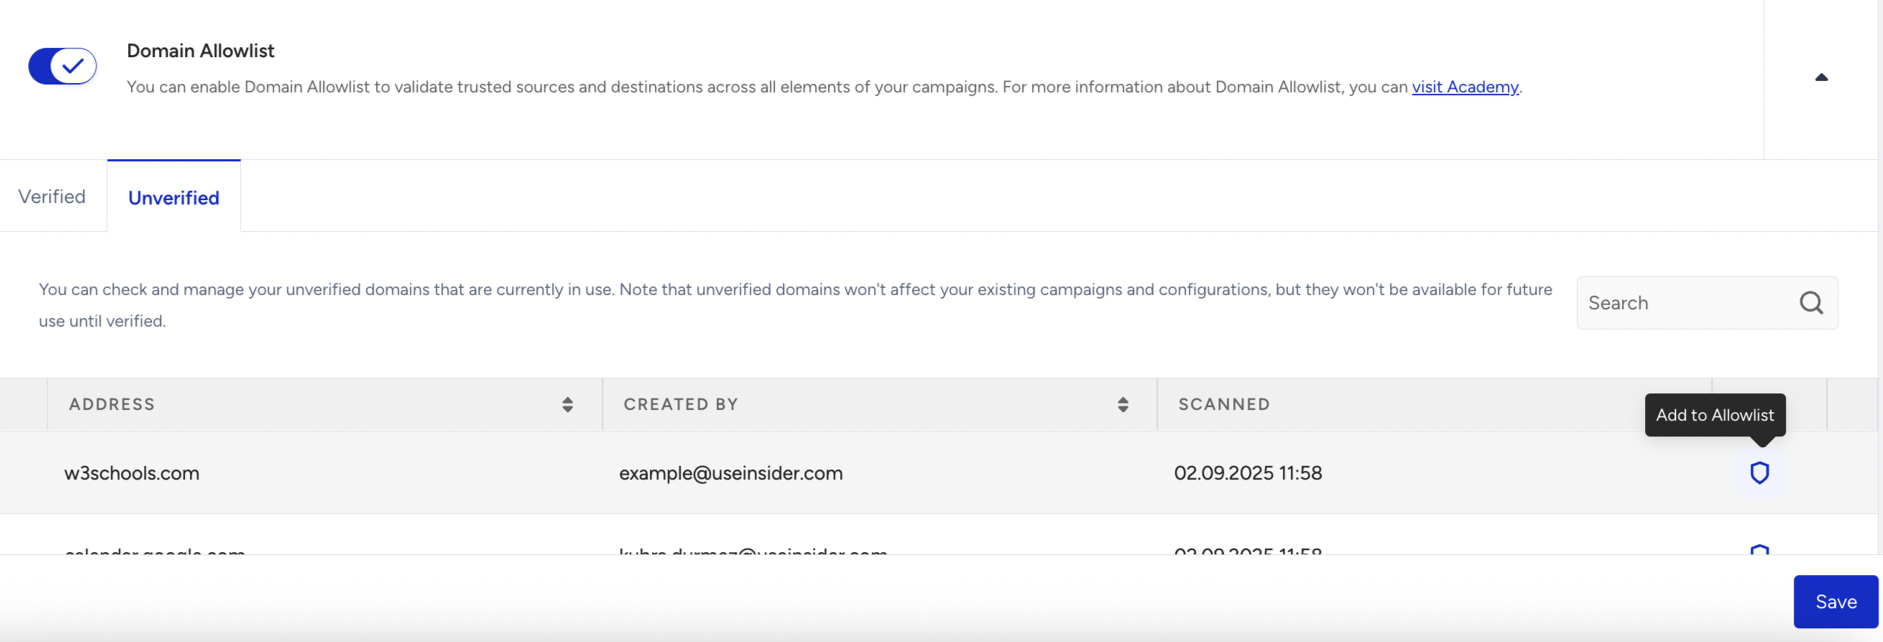
When the scanning process is complete, all domains currently used in your panel are listed in the Unverified tab. Any configurations (your campaigns, rules, integrations…) you have with these domains won’t be affected. From this list, select and allow/verify the ones you trust to use them in the future.
The domains you approve in the Unverified tab will automatically move to the Verified tab, together with the domains that are allowed by default. If you still have additional domains to approve, you can configure them by using the Add Domains button.
Unverified
The Unverified tab displays all domains currently in use within your InOne account that have not yet been approved by administrators. These domains may come from old active or passive campaigns, or from unused custom rules. You can review the list and choose which domains to approve for future use. If you remove every configuration that relies on a specific unverified domain, that domain will automatically disappear from the list.
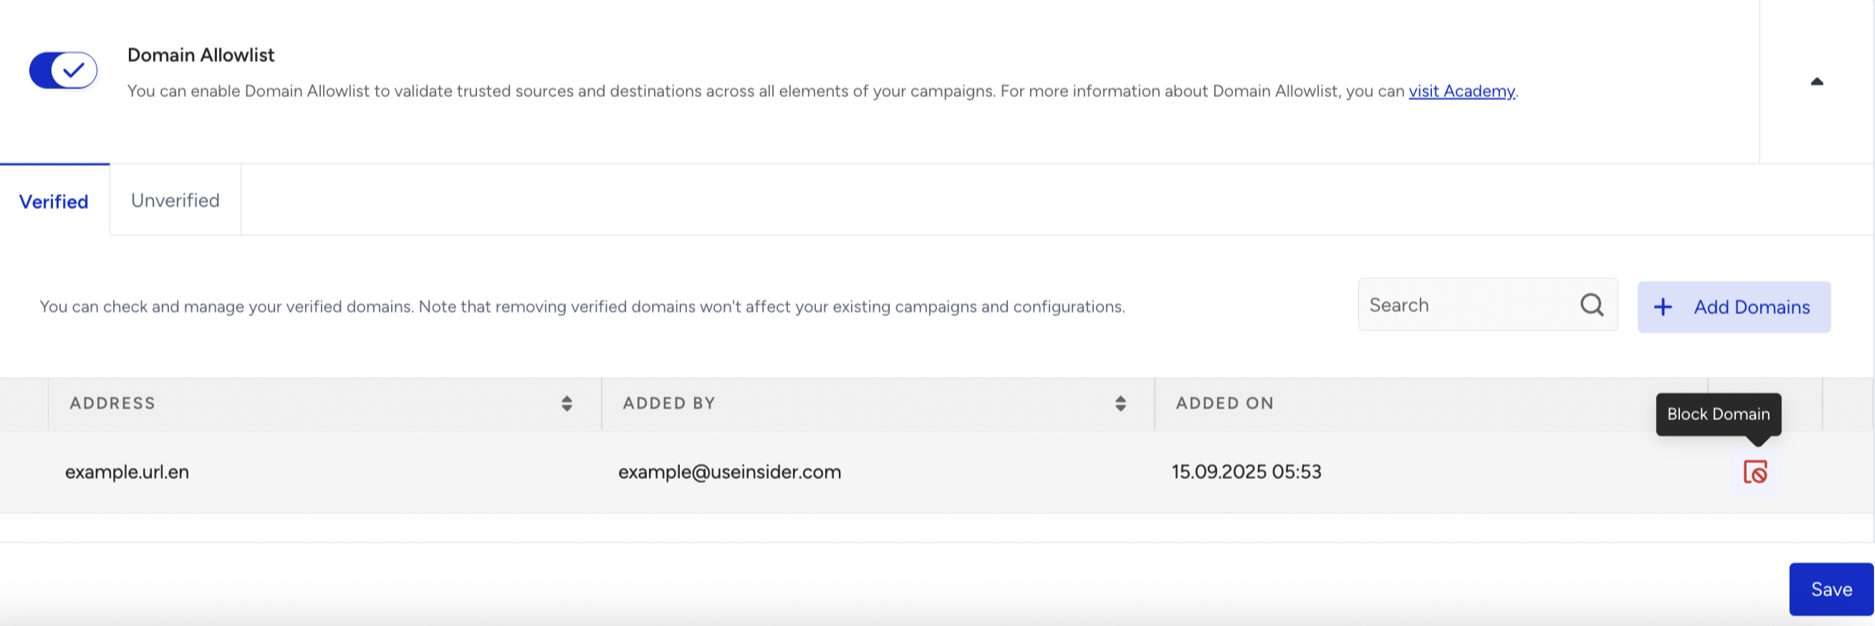
Verified
The Verified tab lists all domains that are approved for use, including both the default domains and those you have manually verified. While the Domain Allowlist is active, you can only use domains from this list when creating or editing campaigns and rules. From here, you can add new domains to your verified list or block existing ones, but remember that only correctly defined domains can be added.

Blocking a Domain
When you click the Block button for a domain on your Verified list, here is what happens:
Existing campaigns are safe.
Any active campaign or rule that already uses the blocked domain will continue to run without interruption.
New usage is prevented.
You will not be able to save any new campaigns, rules, or edits that include the blocked domain.
The domain is moved to Unverified list or removed.
If the domain is currently being used somewhere in your account, it will be moved to the Unverified list.
If the domain is not used anywhere in your account, it will be removed completely.
Domains allowed by default (Autoverified Domains)
When you activate the Domain Allowlist feature, certain domains are automatically allowed. These domains are already trusted by Insider One and are considered critical for your experience:
Your own domain is registered to your InOne panel.
(if any) Your other domains are registered to the Multi-Domain system:
useinsider.com
insdr.io
googleapis.com
whatsapp.net
w3.org
Allowance and prevention for URL usage
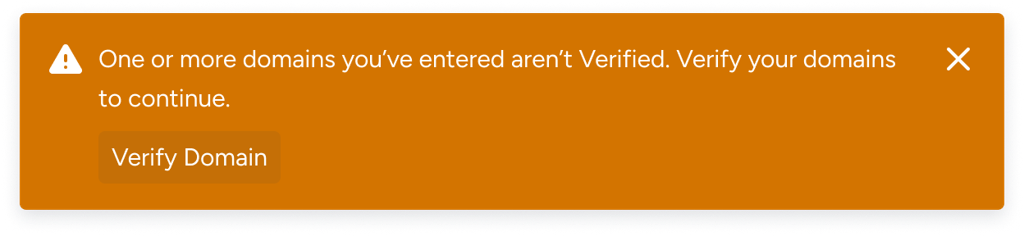
When you attempt to save a configuration (such as a campaign design or custom rule code) that contains a link or URL from a not-allowed domain, the system will block the save and display a toaster notification. Administrator users will then have the option to add these domains to the allowlist as verified.

When you try to use a URL, the system checks its domain against your allowlisted domains, starting from the right end of the domain to ensure an absolute match. For example, if you allow my.example.com,
URL you can use | URL you cannot use |
|---|---|
https://my.example.com/images/drc | https://example.com/images/drc |
https://www.my.example.com/sec/is=d | https://www.example.com/sec/is=d |
http://my.example.com/tgi?f=0 | http://my.example.com.uk/tgi?f=0 |
https://security.my.example.com/u/gd | https://security.example.com/u/gd |
https://my.example.com/edit#page=id.123 | https://my.example.uk/edit#page=id.123 |
https://my.example.com/edit#page=id.321 | https://my.example/edit#page=id.321 |
http://as.long.as.my.example.com/allgood | http://if.my.not.example.com/notgood |
In these examples, you see similar URLs side by side, with the sections that determine whether they are allowed or not highlighted in bold for easy comparison. A URL is considered allowed if its domain fully includes an allowed domain, starting from the right end.
Let’s assume you have created a new Web Templates campaign and are trying to save your design with the URL https://insider.example.com/docs/example-link inside. If the Domain Allowlist feature is active, the system will extract the domain insider.example.com from your content.
Next, it will check your allowlist to verify if this domain is approved. To use insider.example.com, you must have allowed either insider.example.com directly or its parent domain example.com.
If one of these domains is on your allowlist, you can save the design safely.
If not, you will see a prevention toaster, depending on your user role.
Available InOne Features
Below, you can find the list of InOne features to which the Domain Allowlist capabilities apply:
System Rules and Custom Rules
API and JS Settings
Visual Settings
Custom User & Product Attributes
XML Integrations for Product Catalog
Webhook for Email Events (InOne Settings > Email Settings)
Email Double Opt-in Confirmation Page URL (InOne Settings > Email Settings)
Deep Links for Mobile App
API Preferences for Architect’s Call an API
Webhooks in External Integrations
Single Sign-On
You can manage Single Sign-on (SSO) settings using Microsoft Azure AD as your Identity Provider.
Click the "Enable SSO" checkbox to enable Single Sign-on.
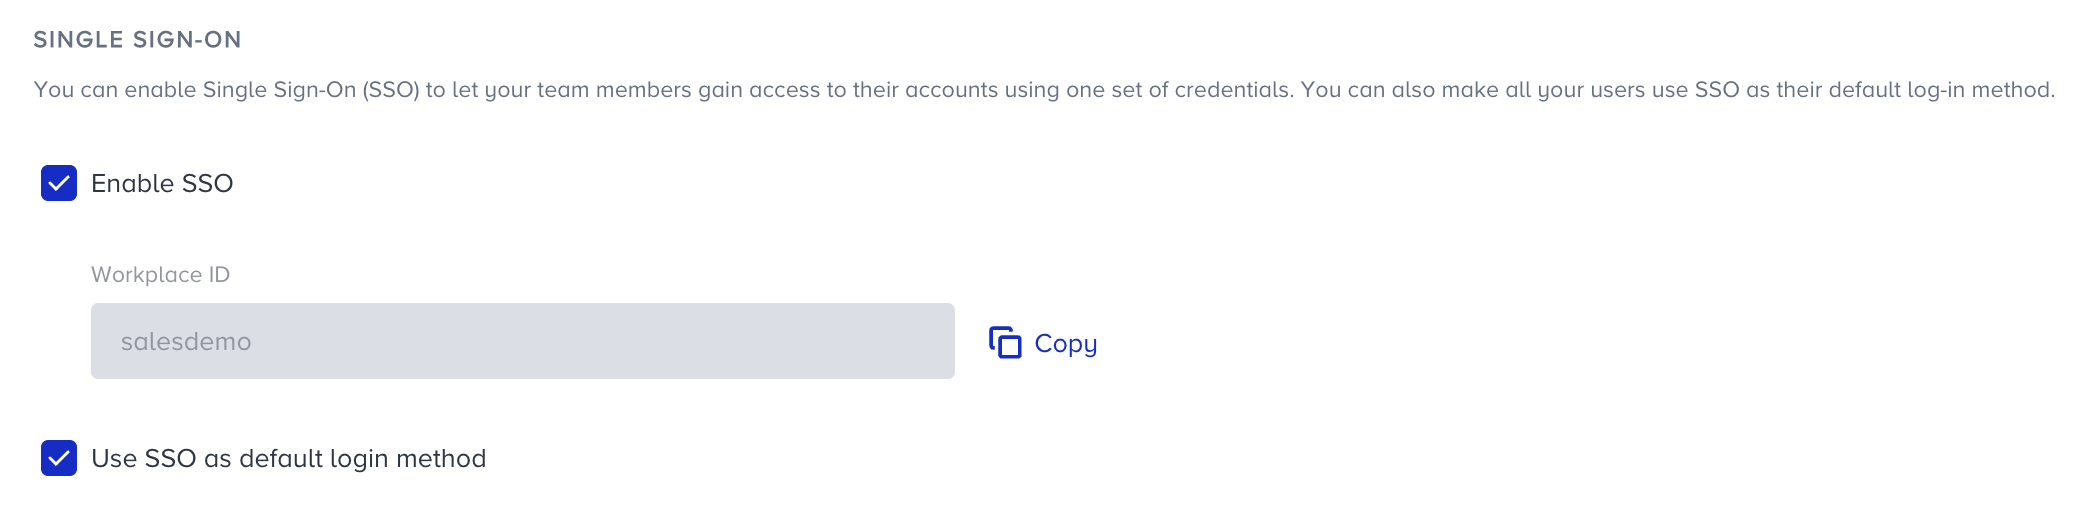
Users will use the workplace ID given to enter the InOne panel when they first sign in with SSO. This ID is the same as the panel name.
If you want to force all your users to enter the panel via SSO, check the “Use SSO as default login method” checkbox. Once you have checked this, your current users will no longer be able to use their insider-specific usernames and passwords.
Finalize the settings on your Microsoft Azure AD account and save them.
To save the settings, you should successfully pass the SSO connection test. Test SSO Connection on the InOne panel.

When you pass the test, save the settings to set up SSO for your panel users.
Access Logs
The Panel Access Logs let you download access logs directly from the InOne panel. These logs provide greater transparency and traceability over which users have accessed their accounts, and when.

Only users with the Administrator role can export the report.
The logs you will see are:
Invalid Login Attempt
User Login
User Logout
User Logged In With Backup Code
Exceeded Invalid Login Attempt
Login Attempt from a Different IP
Password Reset
Invalid 2FA Attempt
Blocked IP Address
You can also see the logs about the user management:
Added New User
Edited PII Access
Edited User Role
Edited Access Type
Deleted Existing User
Edited PII Access
Edited Restricted Products
Expired Access
Edited Groups
User invite, edit, and delete logs
Temp access logs
PII access logs
Group-level access logs
Restricted products logs
You can download the data up to 3 times per panel per day, but it will only be available for the last 3 months.
You receive the report via email, and it will be available for download for only 24 hours. After 24 hours, the download link in the email will expire.
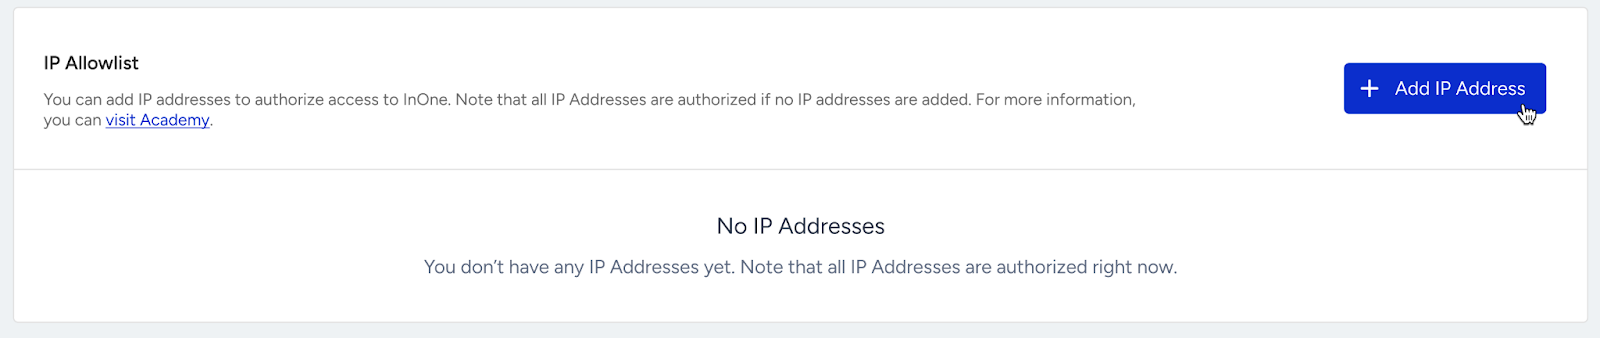
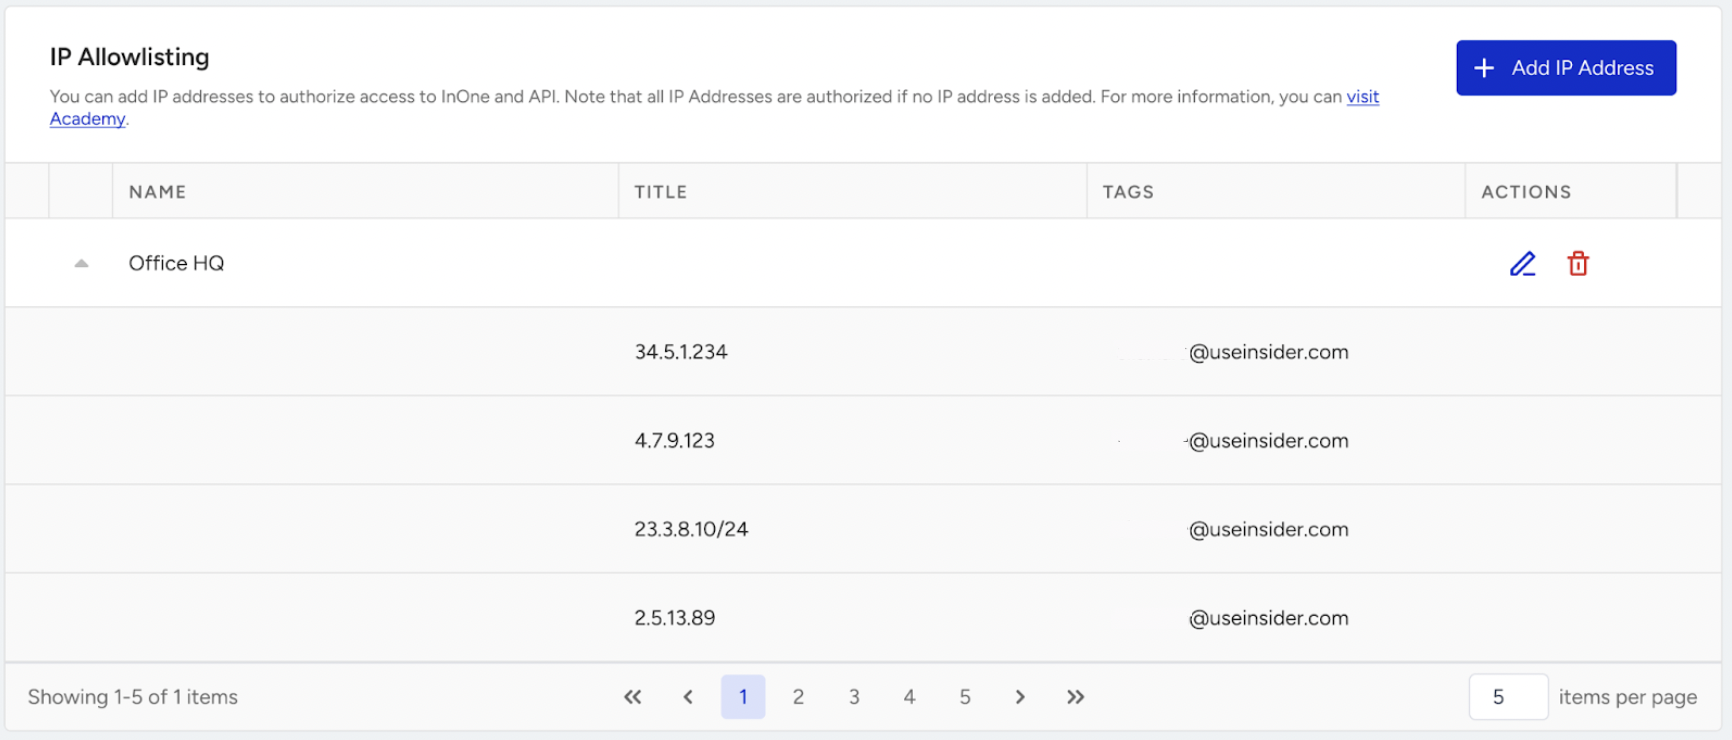
IP Allowlist
IP Allowlisting is a security feature that allows Admin users to define specific IP ranges or addresses permitted to access the InOne panel. Any login attempts from unlisted IPs will be blocked by default, adding a layer of protection at the network level.
You can allow access to the Inone Panel by authorizing specific IP addresses or CIDR ranges. All IP addresses are permitted to access the InOne panel when no IP addresses are added.
You need to have the Administrator role to create a channel. Refer to User Management for further details.
To configure the IP Allowlist,
Scroll down and click the Add IP Address button.
Name your IP Group, add IP addresses, and click the Add button.
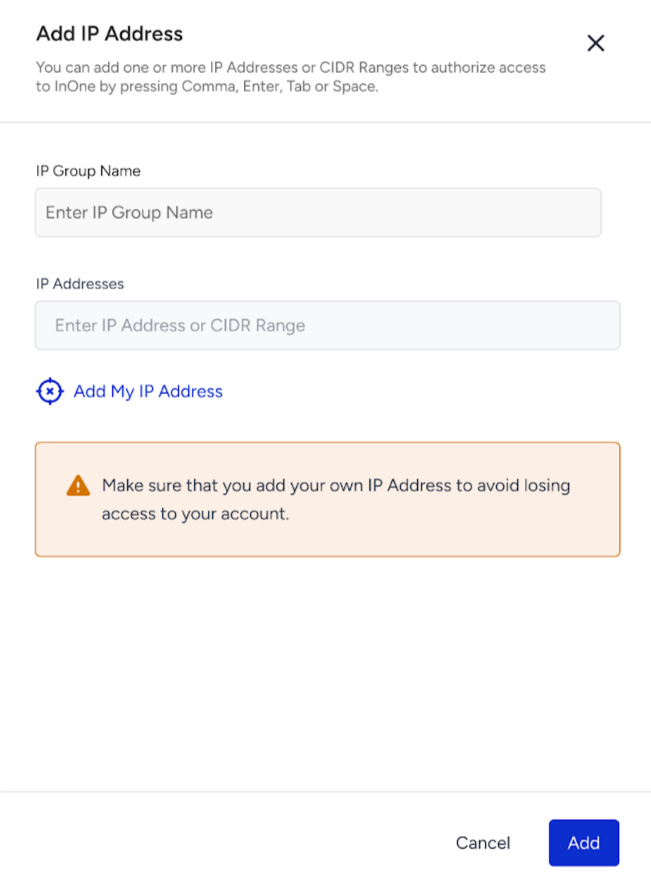
Ensure you add your own IP address to prevent blocking yourself from the InOne panel. You can use the Add my IP Address button to add your own IP address directly.
You can input one or more (up to 10) IP Addresses or CIDR ranges in an IP Group.
You can input IPv4, IPv6, or CIDR* ranges.
*CIDR stands for Classless Inter-Domain Routing. It’s a way to represent a group of IP addresses using a base IP address and a suffix that defines the size of the range. For example, 192.168.1.0/24 indicates that the base IP address is 192.168.1.0, and the first 24 bits of the address are fixed, while the remaining 8 bits can vary. This range encompasses all IP addresses from 192.168.1.0 to 192.168.1.255. That's 256 possible IP addresses in one range.
Click the Add button on the modal to confirm the IP addresses.
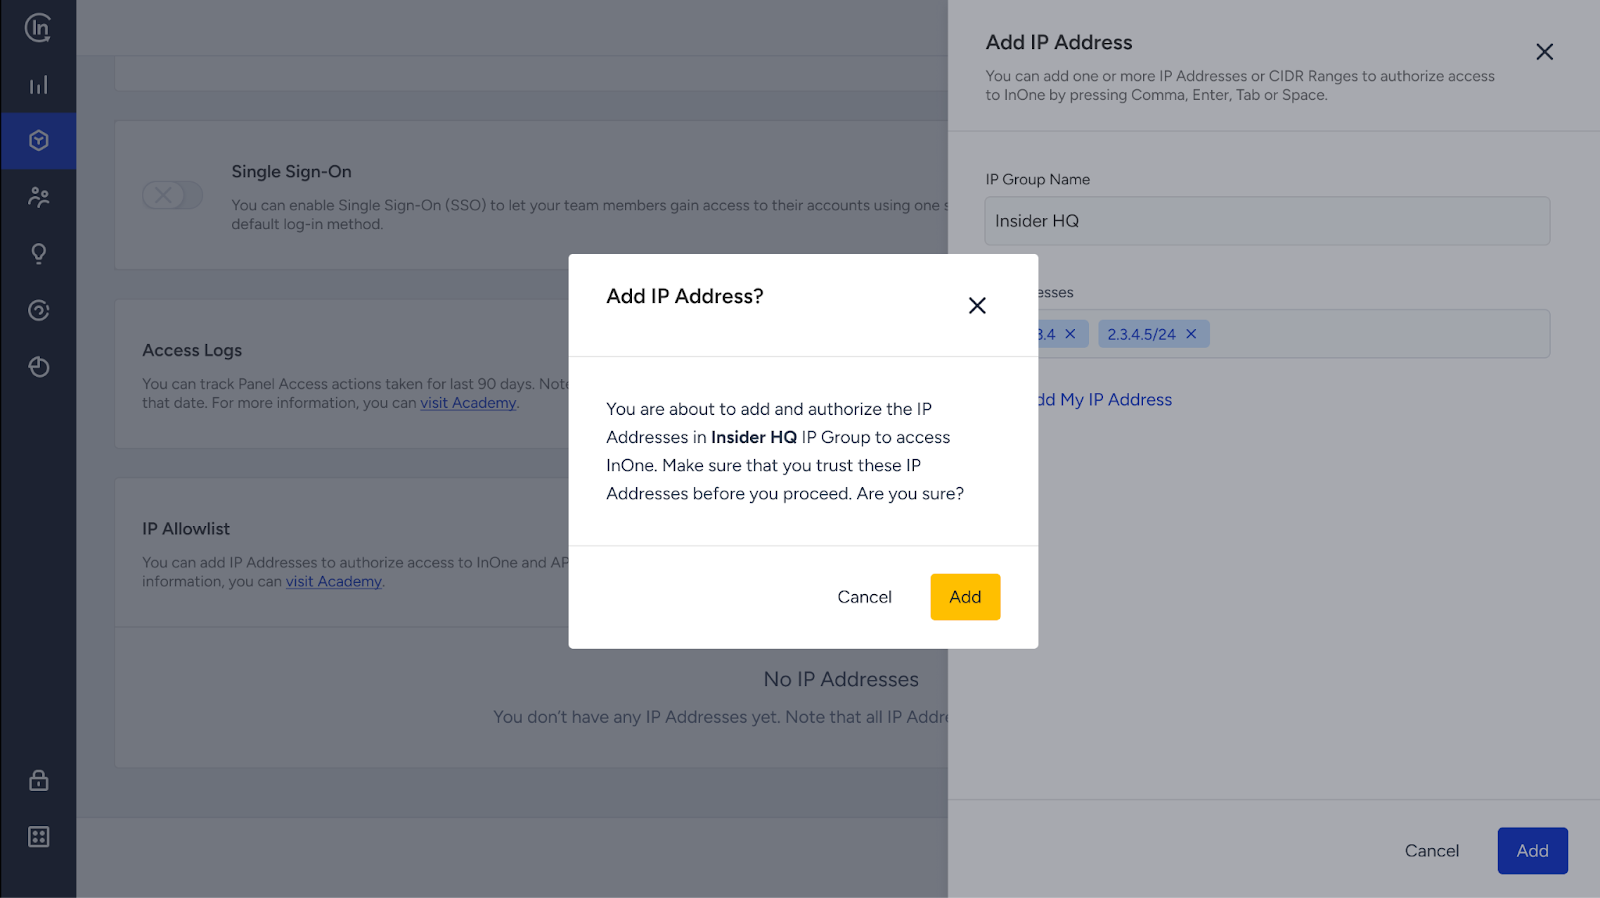
Once you add the IP Addresses from the modal, they will be allowed.
You can edit an IP Group to add or remove IP Addresses. Also, you can delete an IP Group entirely.
When a user is blocked, they will be directed to the Account Selection on the login screen.
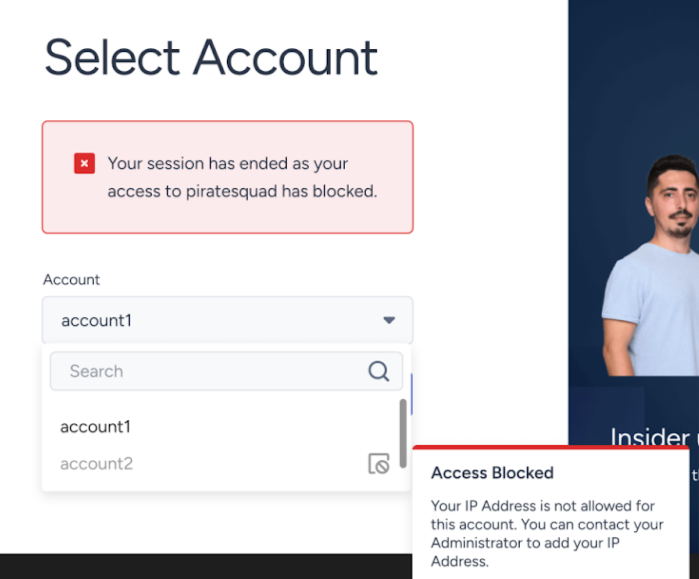
Users can access the InOne panel when their IP Address is included in the Allowlist.
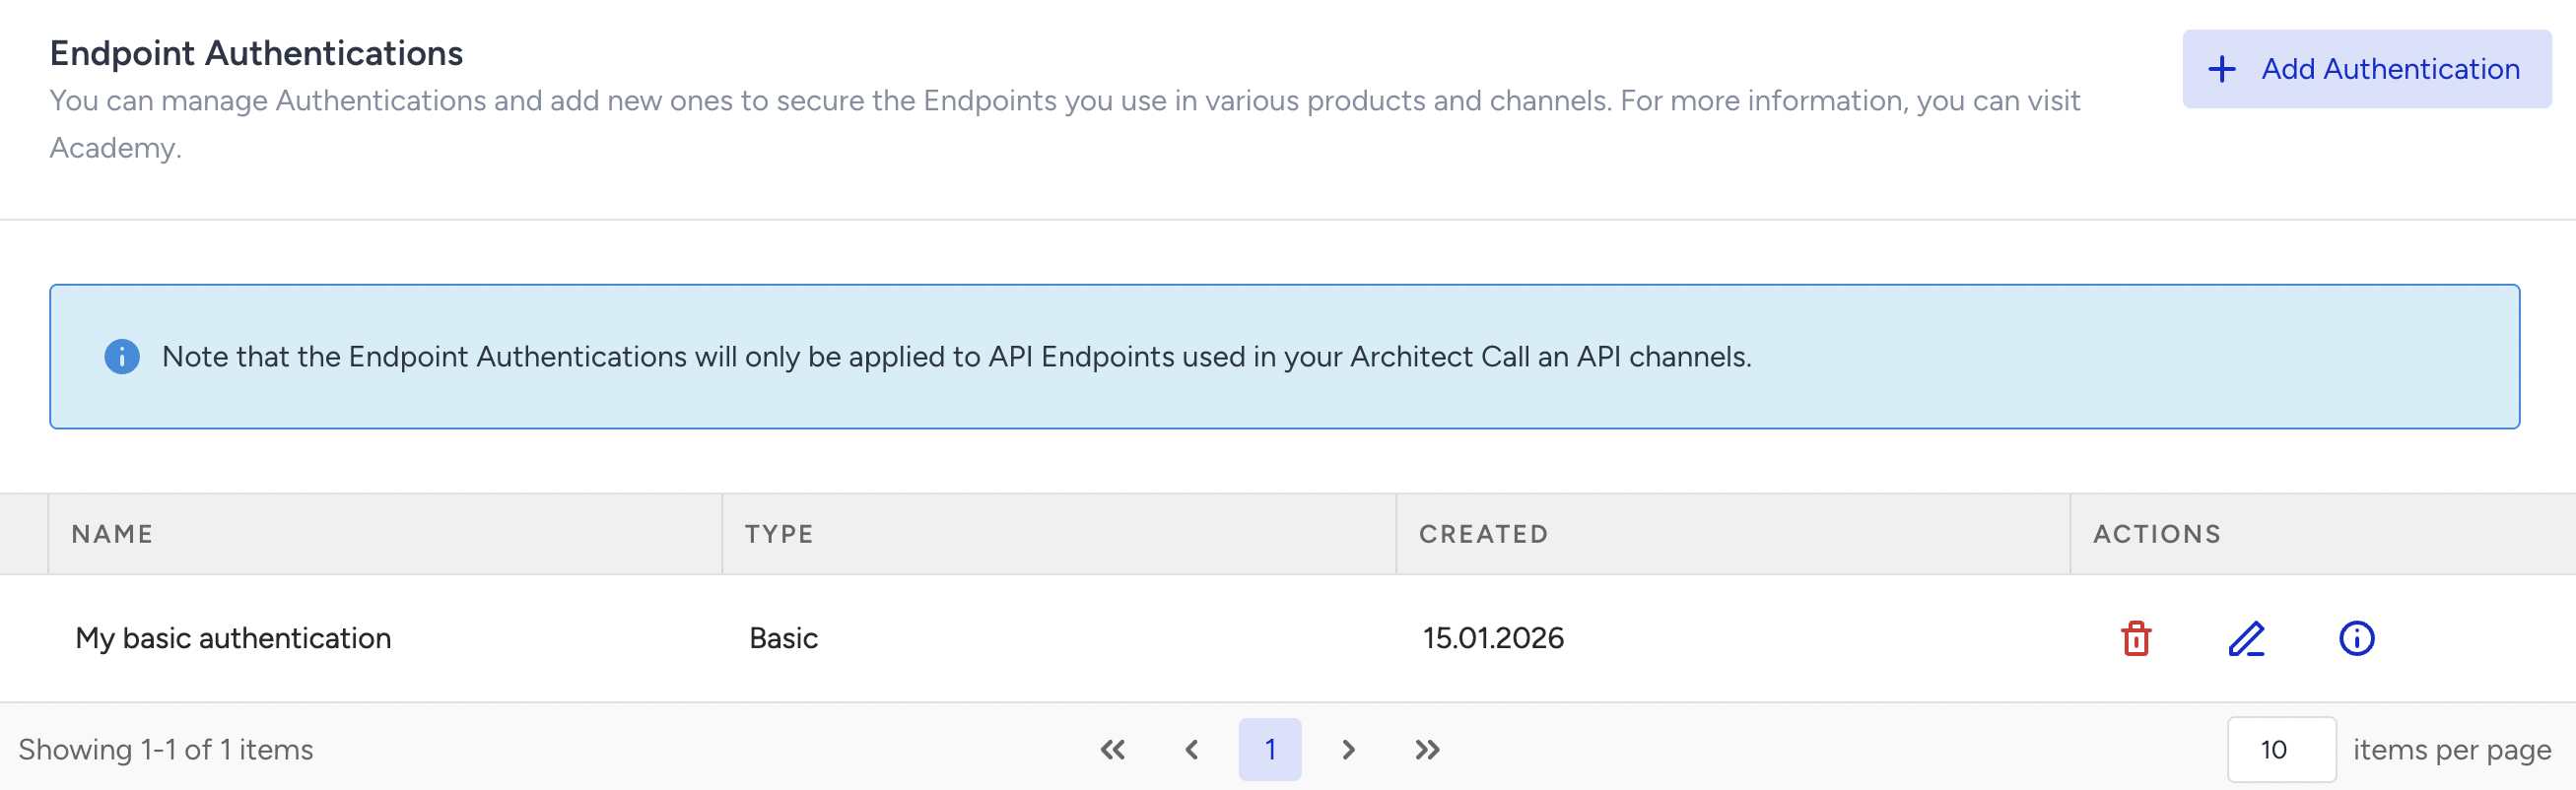
Endpoint Authentications
You can manage authentications and add new ones to secure the endpoints you use in various products and channels.
Authentication models
OAuth 2.0
OAuth 2.0 is a token-based authentication mechanism widely adopted by modern and enterprise APIs. Instead of sending static credentials with every request, the system authenticates using short-lived access tokens issued by an authorization server.
Insider One retrieves access tokens from the customer’s authorization server.
Tokens are stored securely and reused until they expire. The Insider One system only refreshes the expiration duration/frequency and is not responsible for the token expiration duration.
When a token expires, the system automatically refreshes it without user intervention.
Tokens are attached to outgoing API requests at runtime.
This approach eliminates the need to hardcode credentials in requests, significantly reduces security risk, and supports scalable, long-running integrations.
OAuth 2.0 is the recommended authentication method whenever supported by the external system
Supported OAuth 2.0 flows are client credentials and password credentials.
Basic Authentication
Basic Authentication sends static credentials, such as username/password or API key pairs, with every API request, typically encoded in the request headers.
Basic Authentication is intended for:
Legacy systems
Internal services
APIs that do not support OAuth 2.0
While simpler to configure, it does not provide token rotation or automatic expiry handling. For this reason, it should be used only when OAuth 2.0 is not available.