Integration Settings hosts integration-related activities. To navigate to this page, click your username > Settings > Inone Settings.
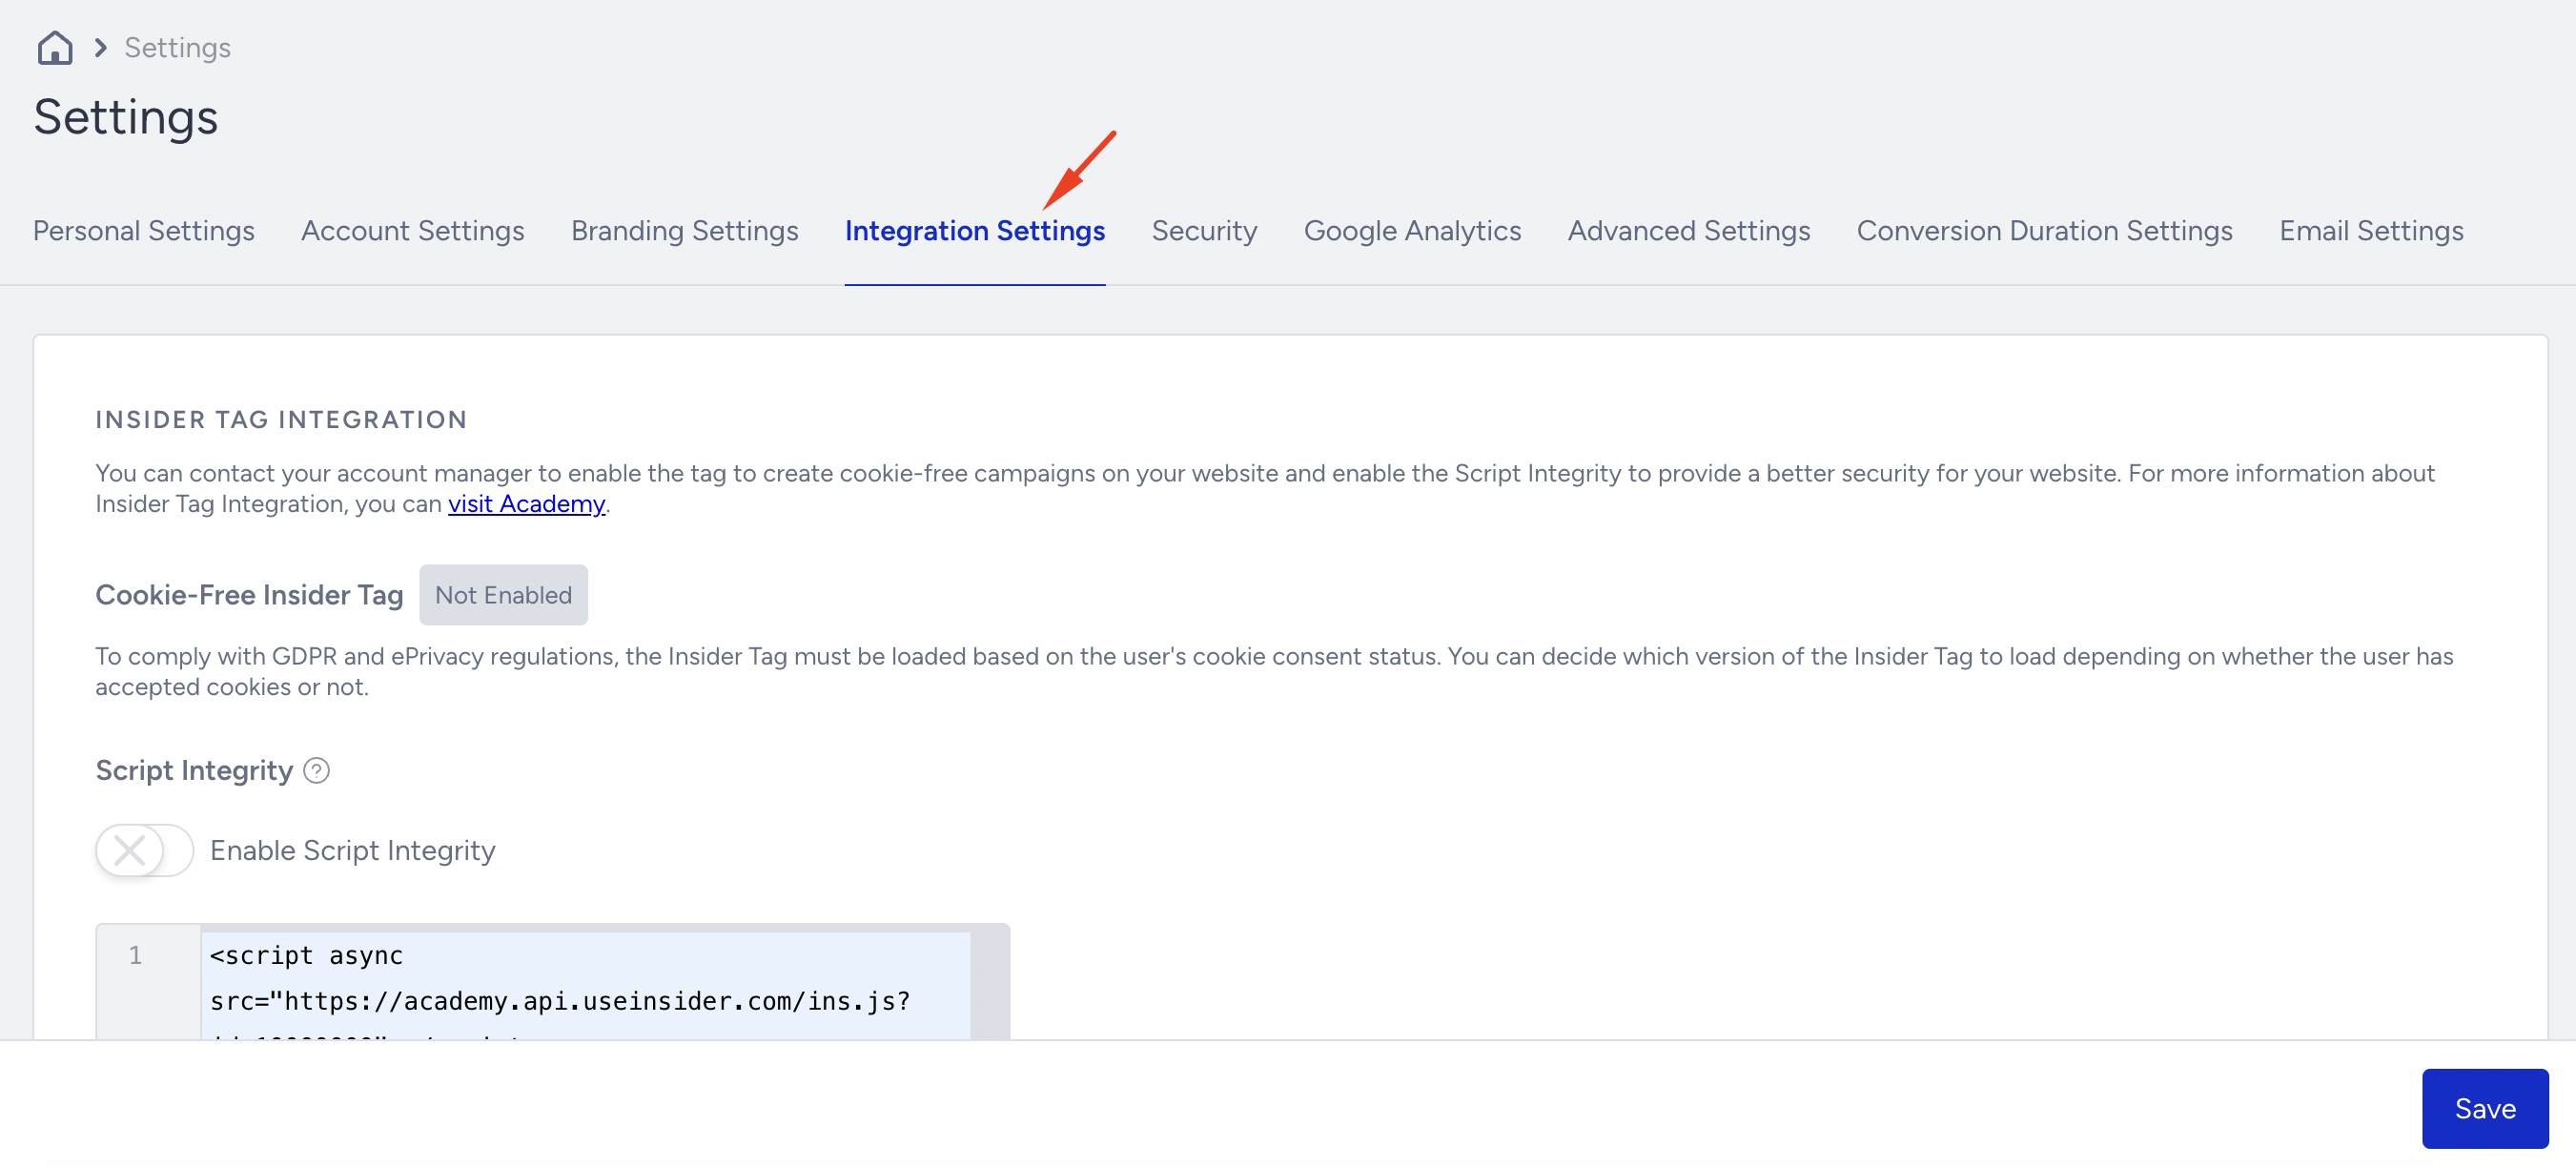
Insider Tag Integration
Under this section, you can see the script you need to integrate for Insider Tag Integration. You can click Copy Code to get the code for your account.
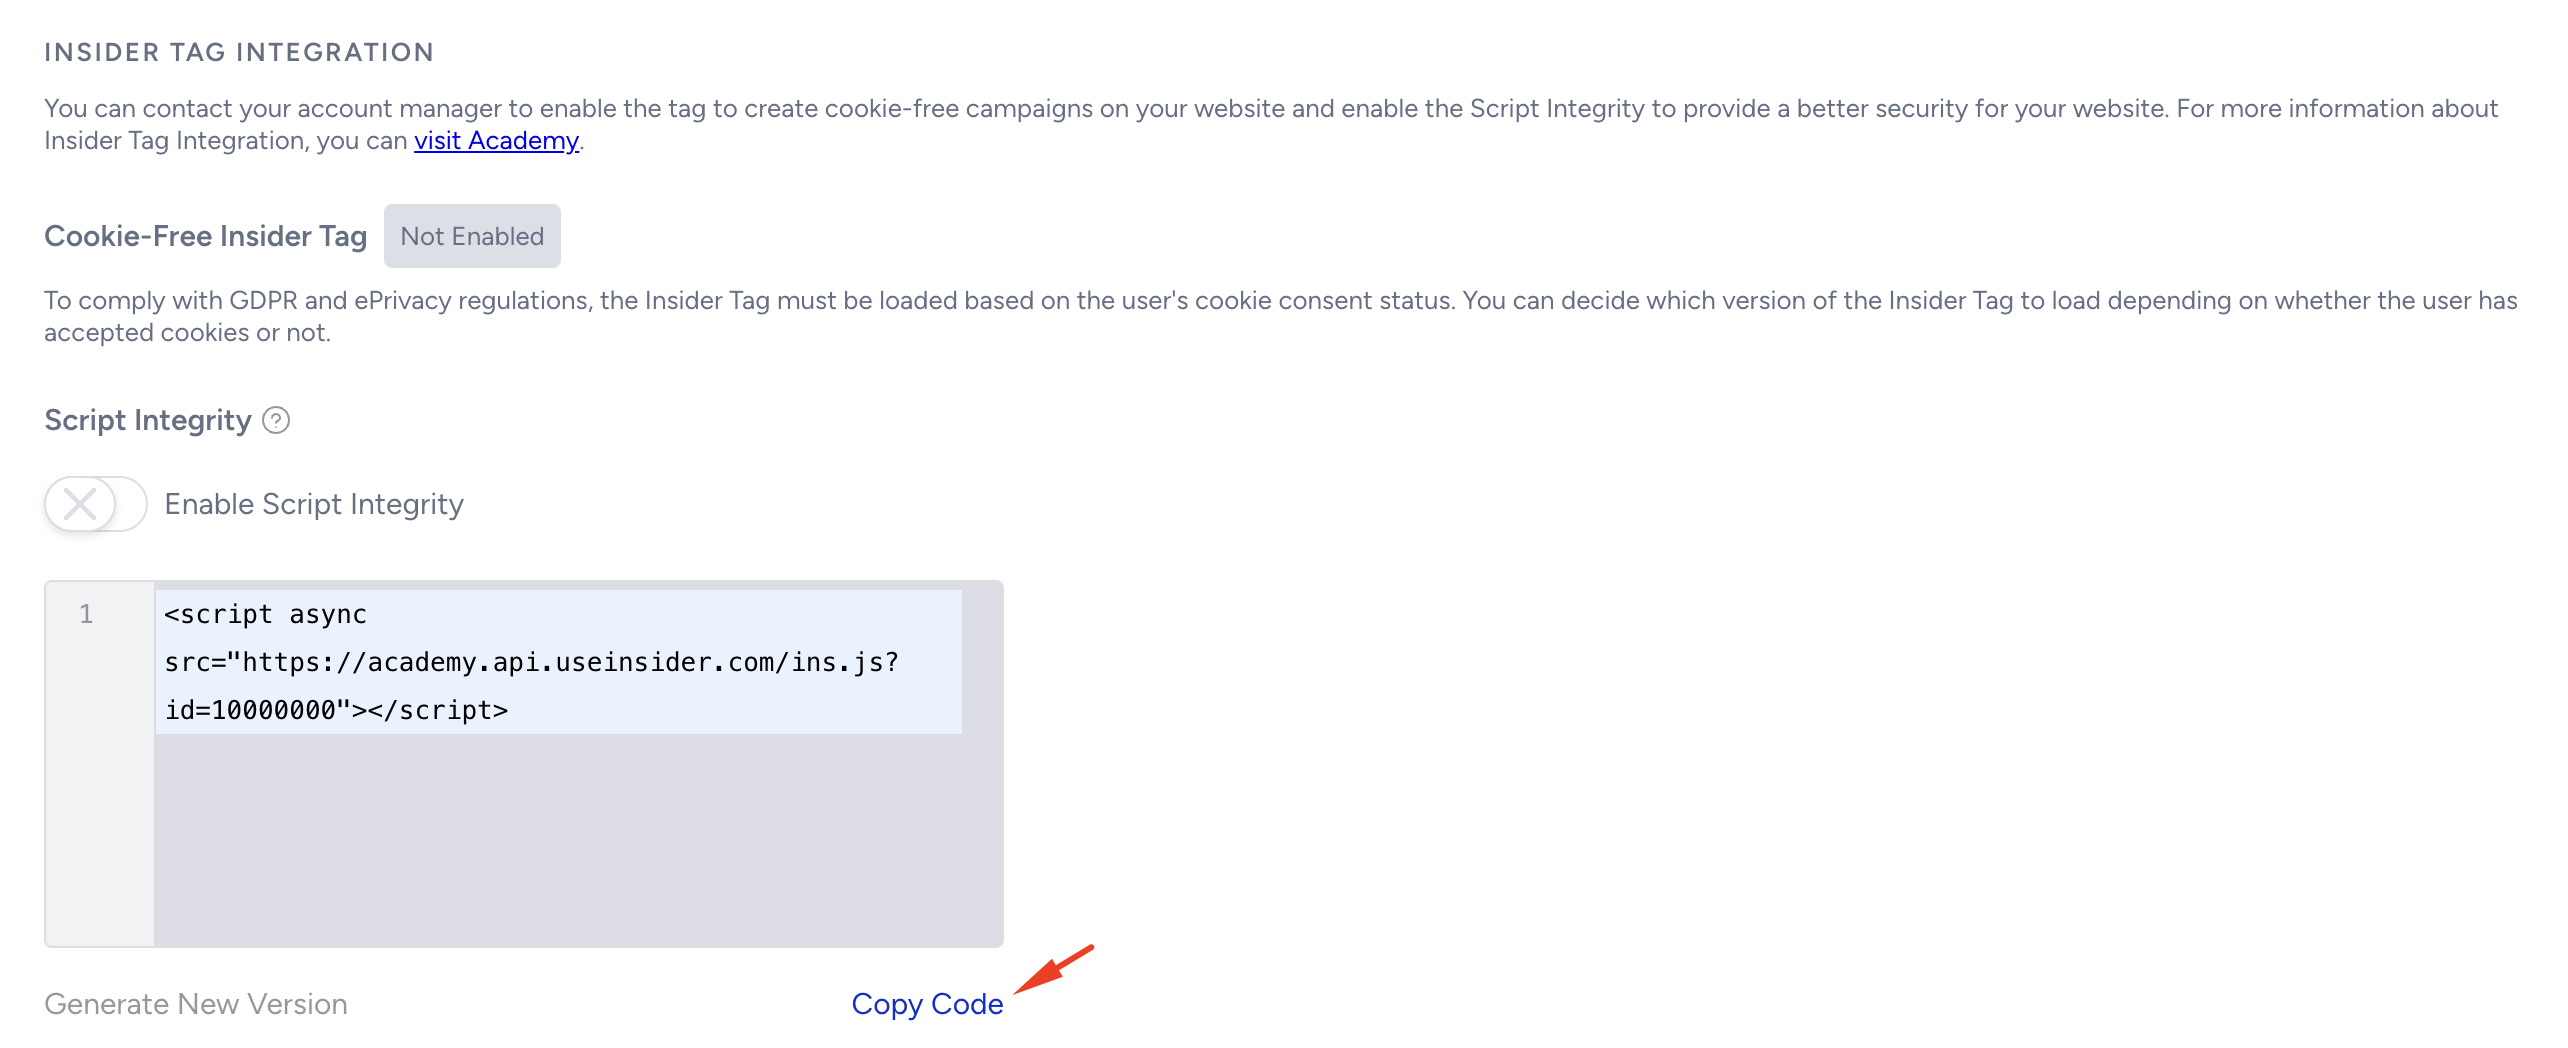
Script Integrity
Script Integrity is a feature that helps you use the Insider Tag more reliably and under greater control.
When enabled, it generates a protected version of the integration code (tag). You can create and manage different versions of this code and easily copy a safer, approved version to your website.
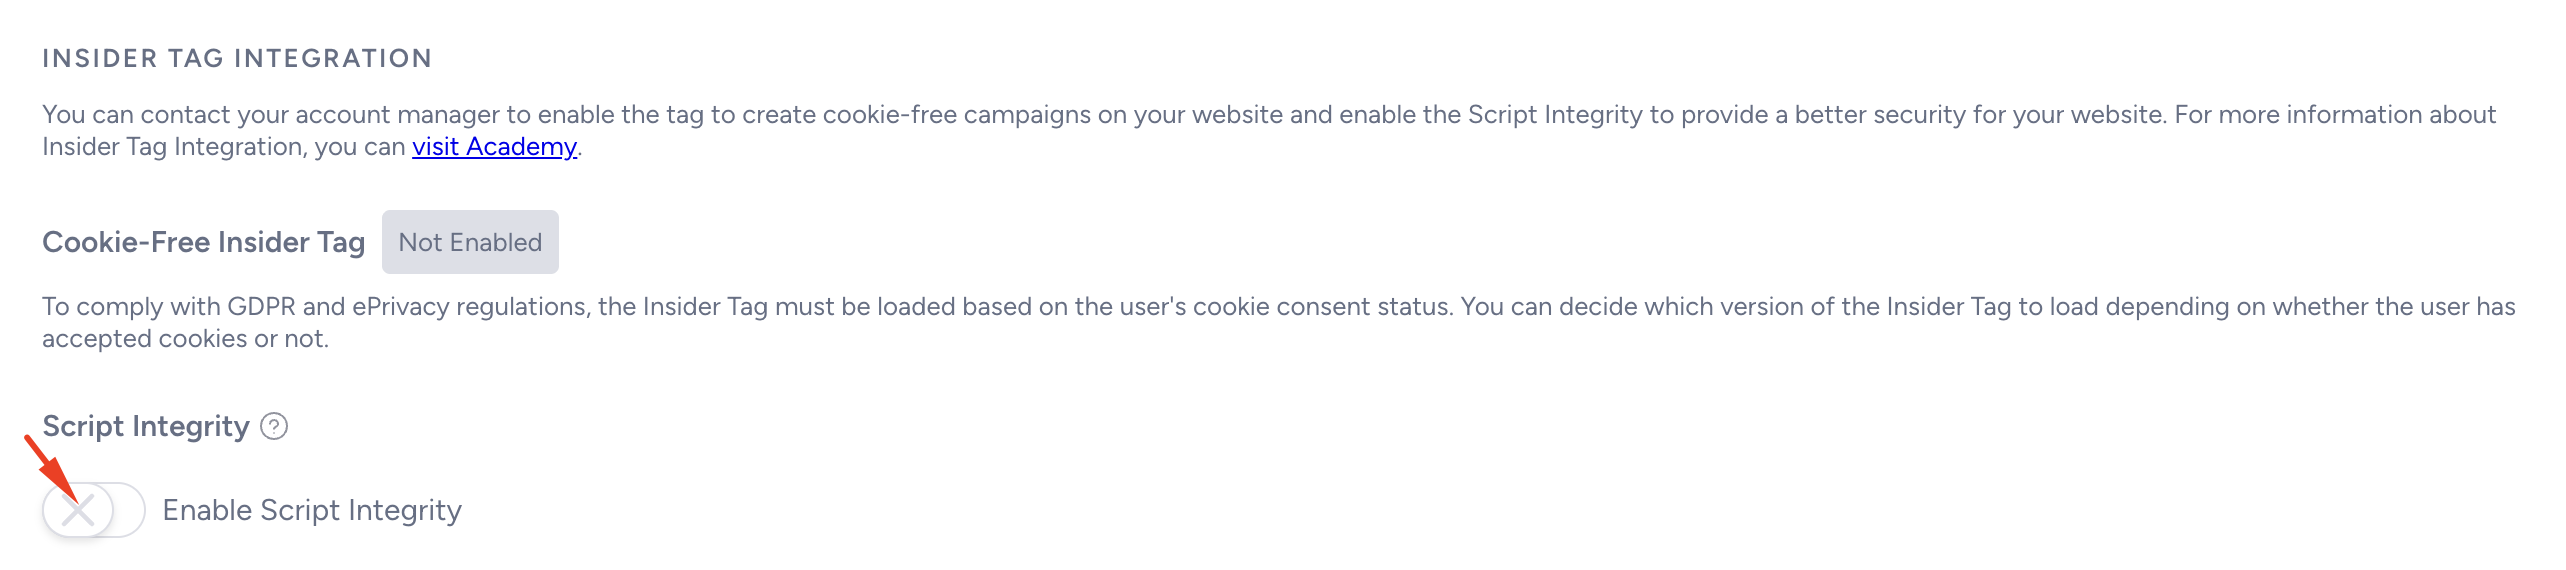
To enable Script Integrity,
Activate the “Enable Script Integrity” toggle.
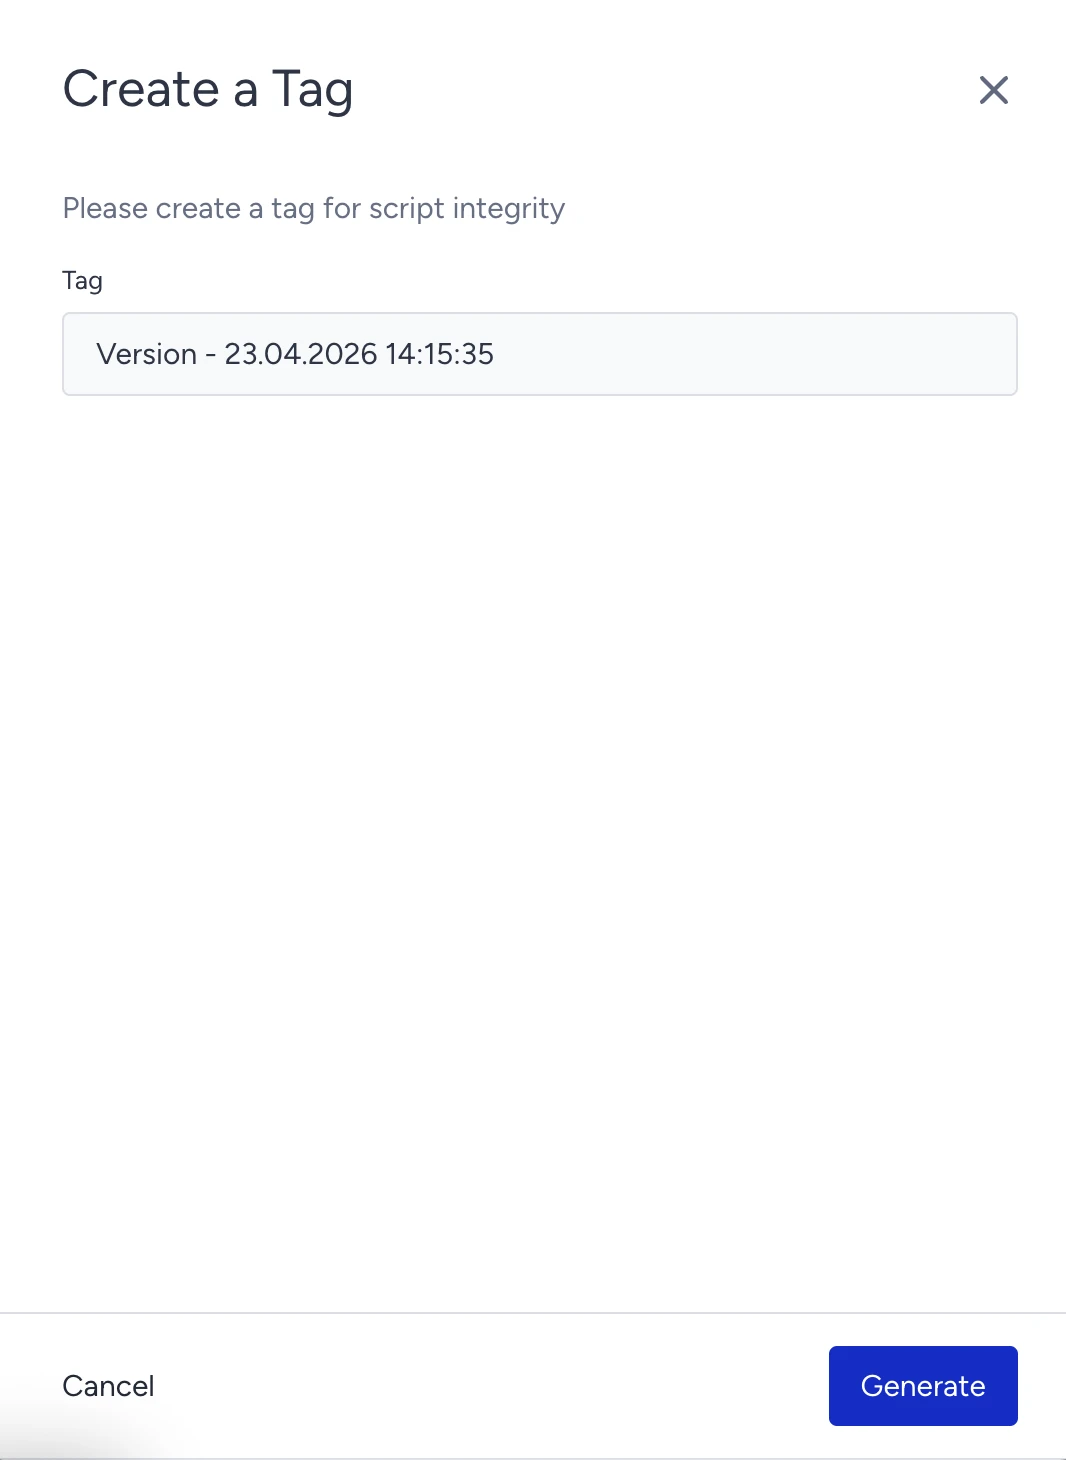
Once activated, a drawer will appear. You can rename the tag if needed. Click Generate to create the first version of the tag.
After generation, the first version of the tag will be displayed.
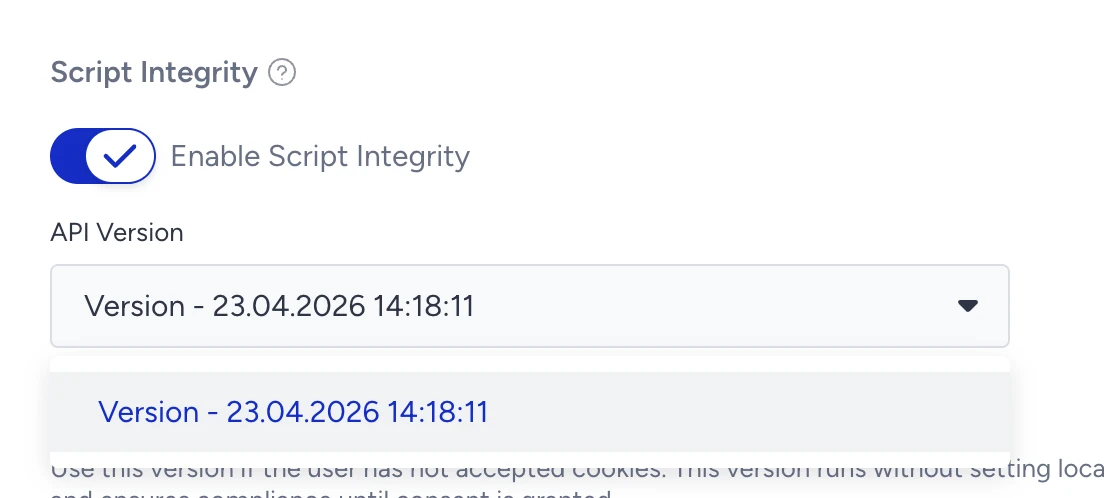
Copy the tag and add it to your website.
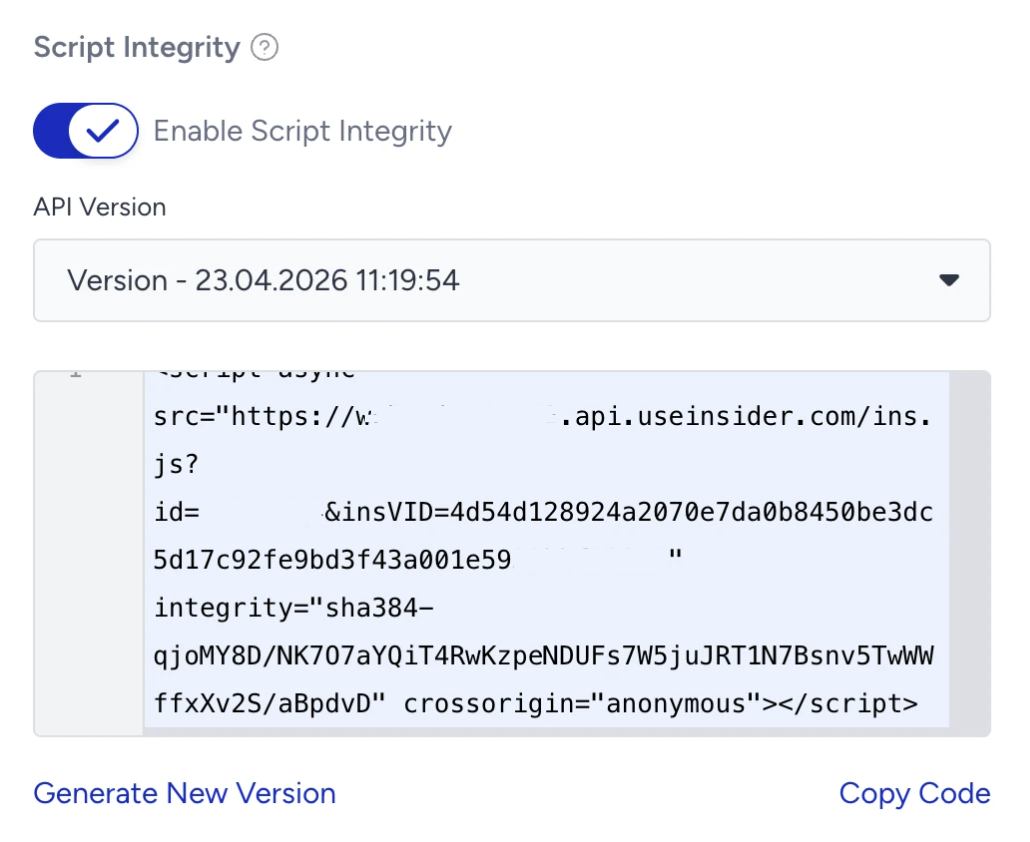
To update the tag, click Generate New Version and replace the existing one on your website.
When Script Integrity is enabled, the standard Generate flow on the Insider panel does not apply. The Insider Tag on your website remains static and will not update automatically under any circumstances.
Whenever you make a change to your setup, such as creating or updating a campaign, you must manually generate a new tag version from the Script Integrity page and update it on your website.
Integrations
Google Ads, Facebook Ads, TikTok Ads, and Yotpo Integrations
You can connect your Google Ads, TikTok Ads, and Facebook Ads accounts to create custom audiences. For Yotpo, you will be redirected to the External Platform Integrations page. You can also select the matching attribute to identify your users and route them to the appropriate remarketing channel.

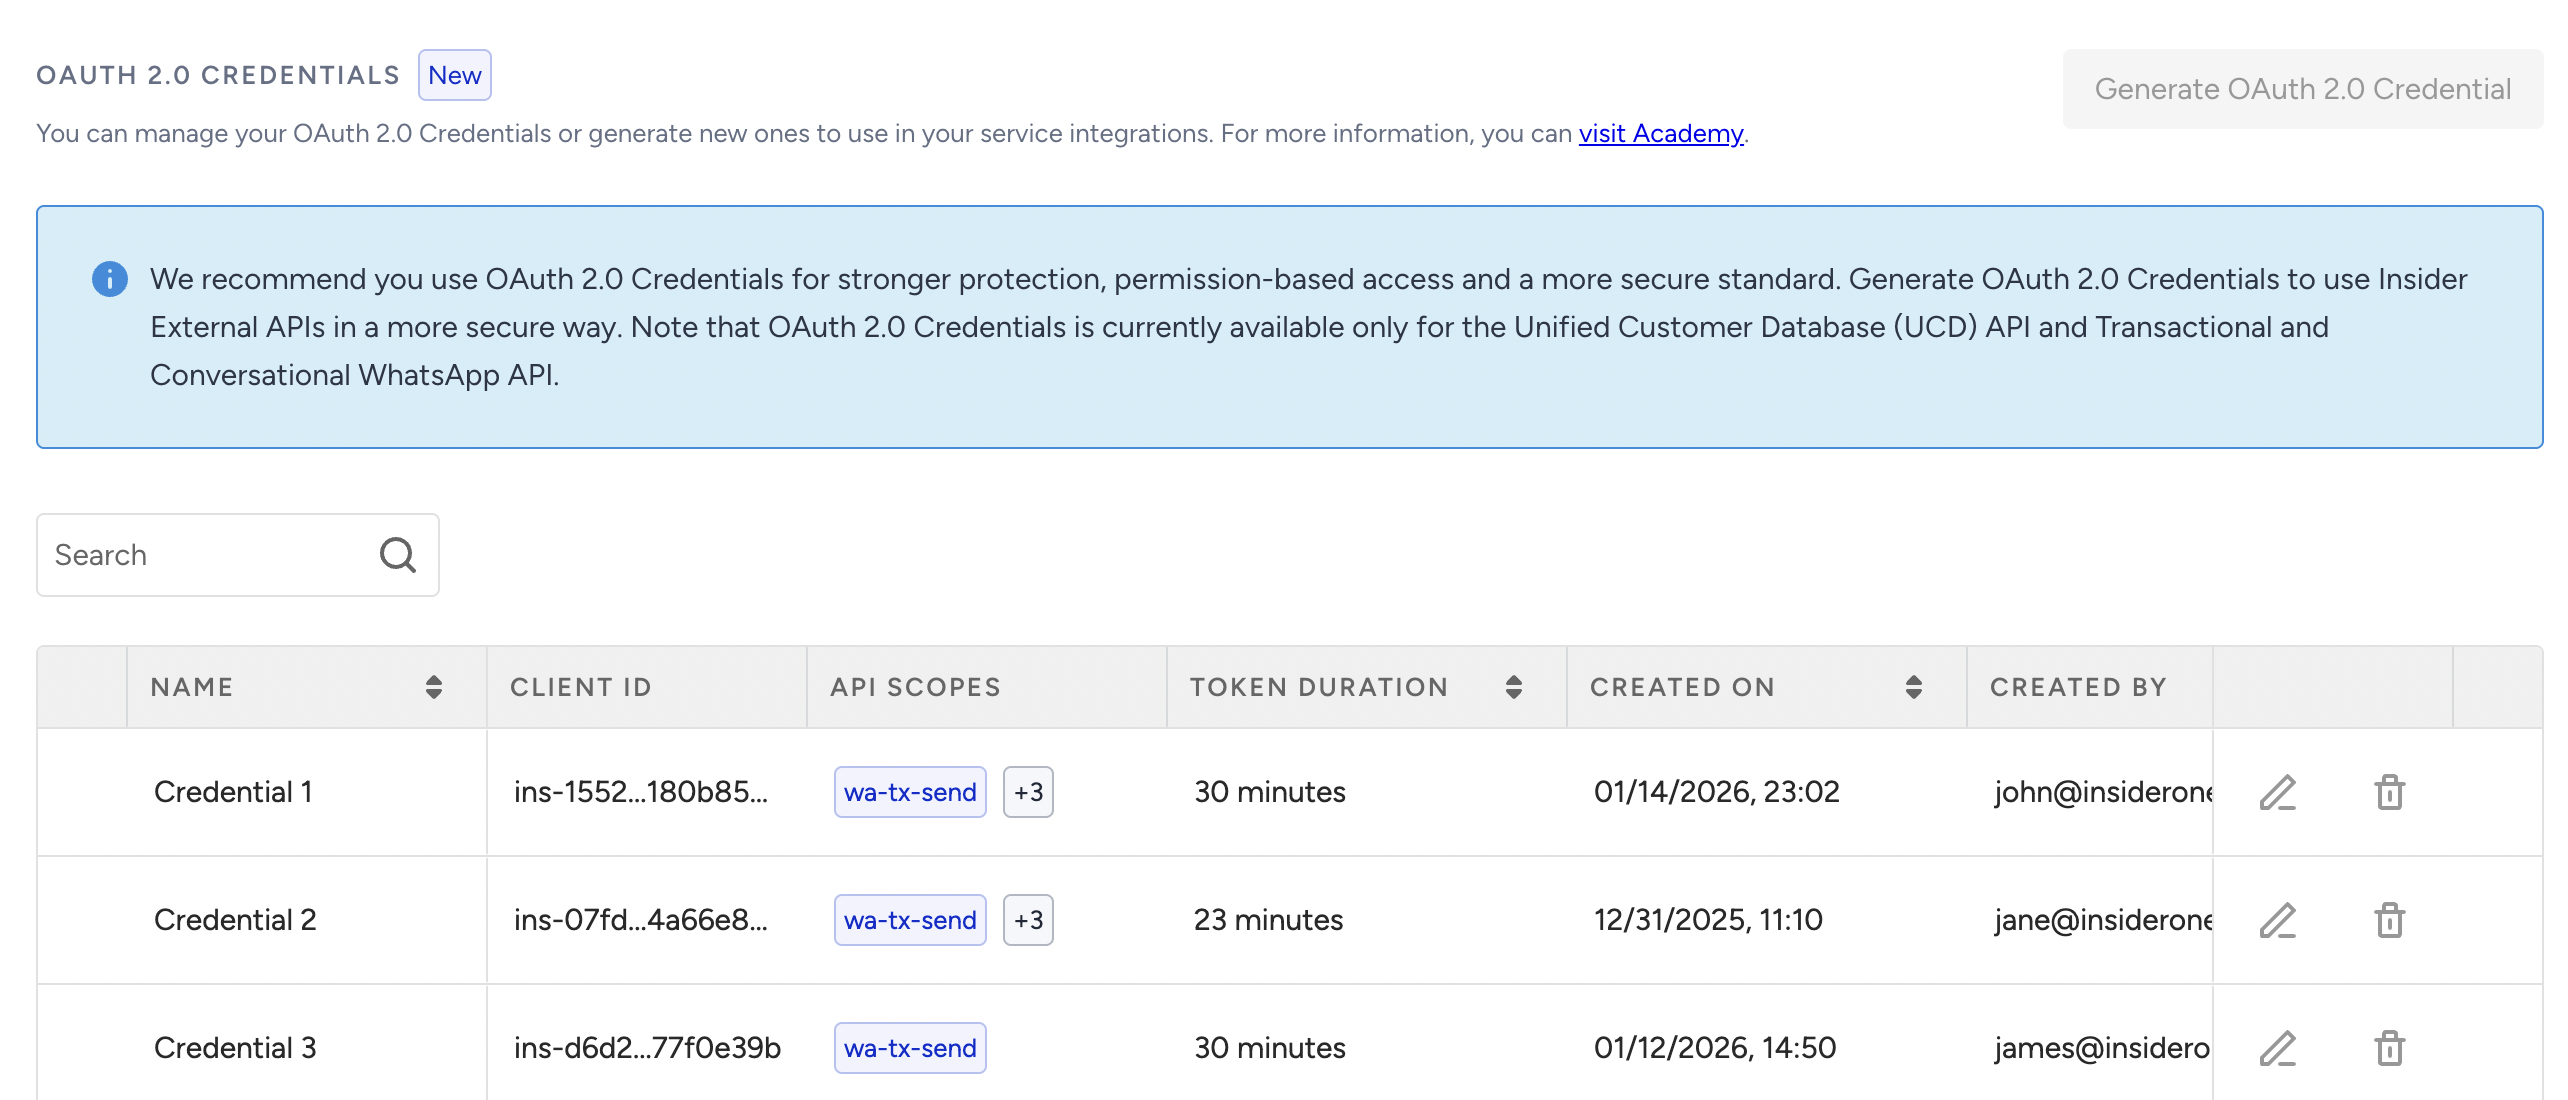
OAuth 2.0 Credentials
You can manage your OAuth 2.0 credentials or create new ones to use in your service integrations. For further details, refer to the OAuth 2.0 Credentials article.
API Keys
You can manage your API keys or generate new ones for your service integrations. For further information, refer to the Generate API Key article.
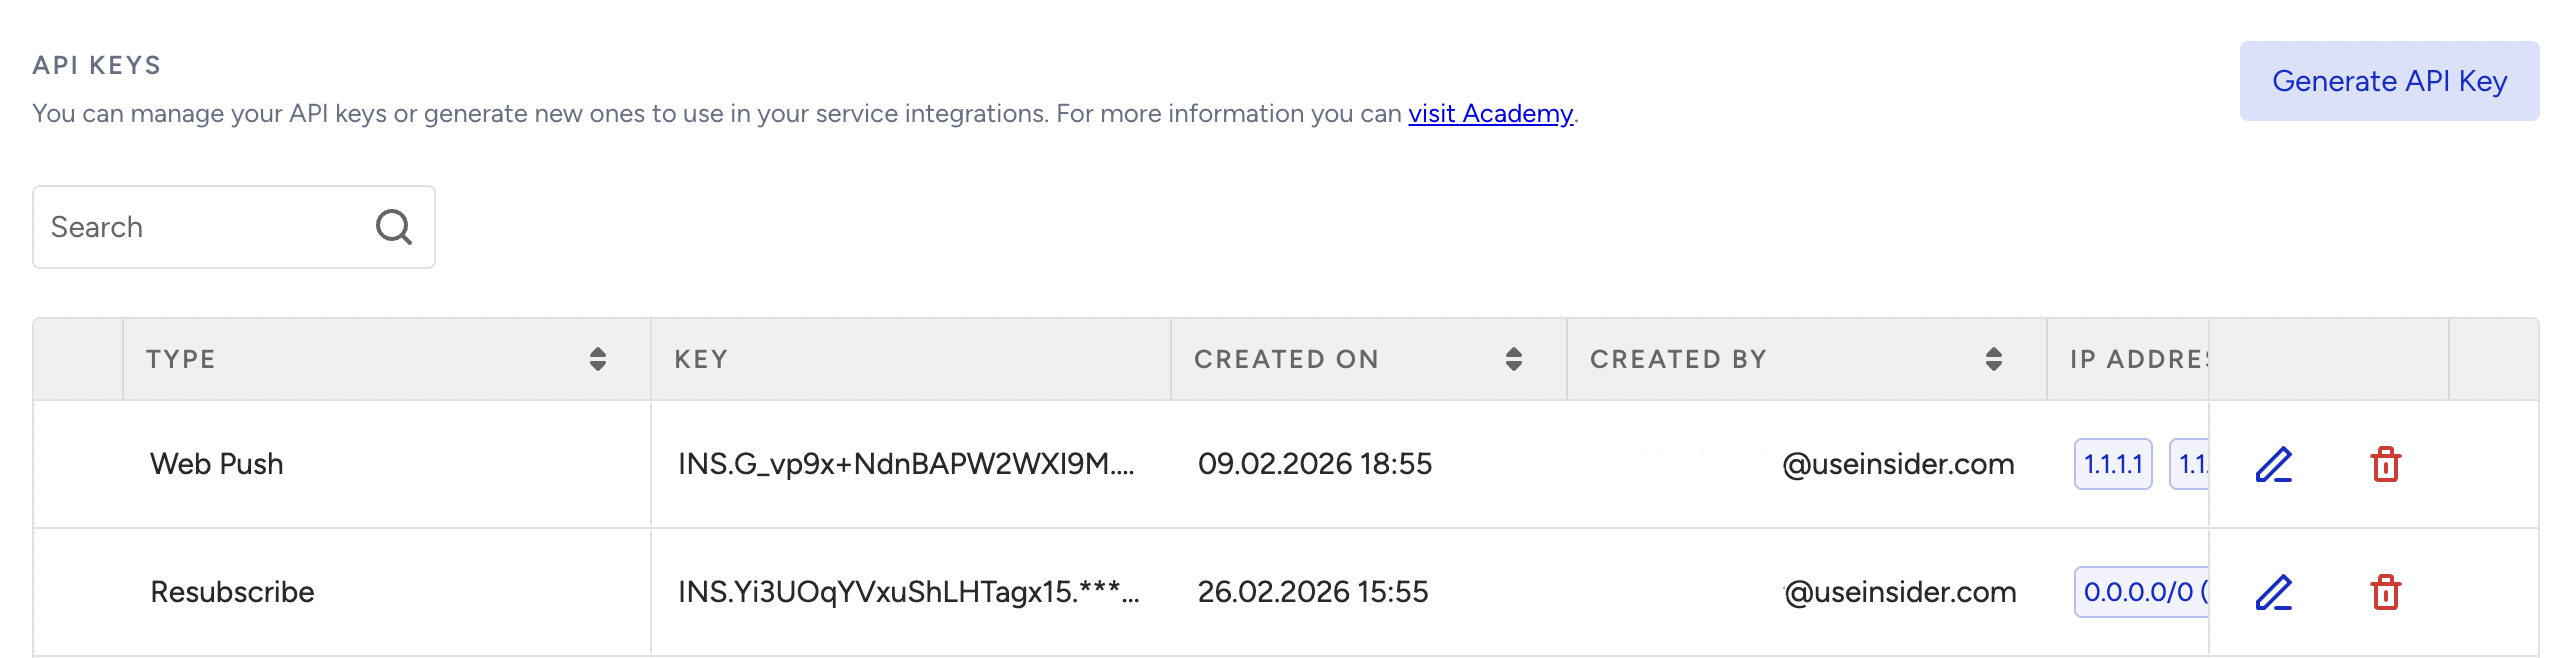
You can either authorize only trusted IP addresses or Classless Inter-Domain Routing (CIDR) ranges or allow access from all IP addresses.
Applying IP Restriction is a simple way to strengthen API access security without changing your overall integration flow.
IP Restriction is currently available for supported API key types such as Email, Mobile App, SMS, Web Push, WhatsApp, UCD, Campaign Analytics, Global Unsubscribe, Resubscribe, Product Catalog, Smart Recommender, Eureka Search, Verify API, Business Event Trigger, and Transactional Architect.
Configure IP authorization for new API keys
When you create a new API key for a supported API, you configure IP authorization during key generation.
By default, Trusted IP authorization is selected. If you keep this option, you must add at least one IP address or a CIDR range before generating the key.
If you prefer to allow unrestricted access, switch to All IP addresses.
Navigate to InOne > Settings > Integration Settings > API Keys.
Select Generate API Key.
After selecting your API Key type, you will see the IP Address Authorization step.
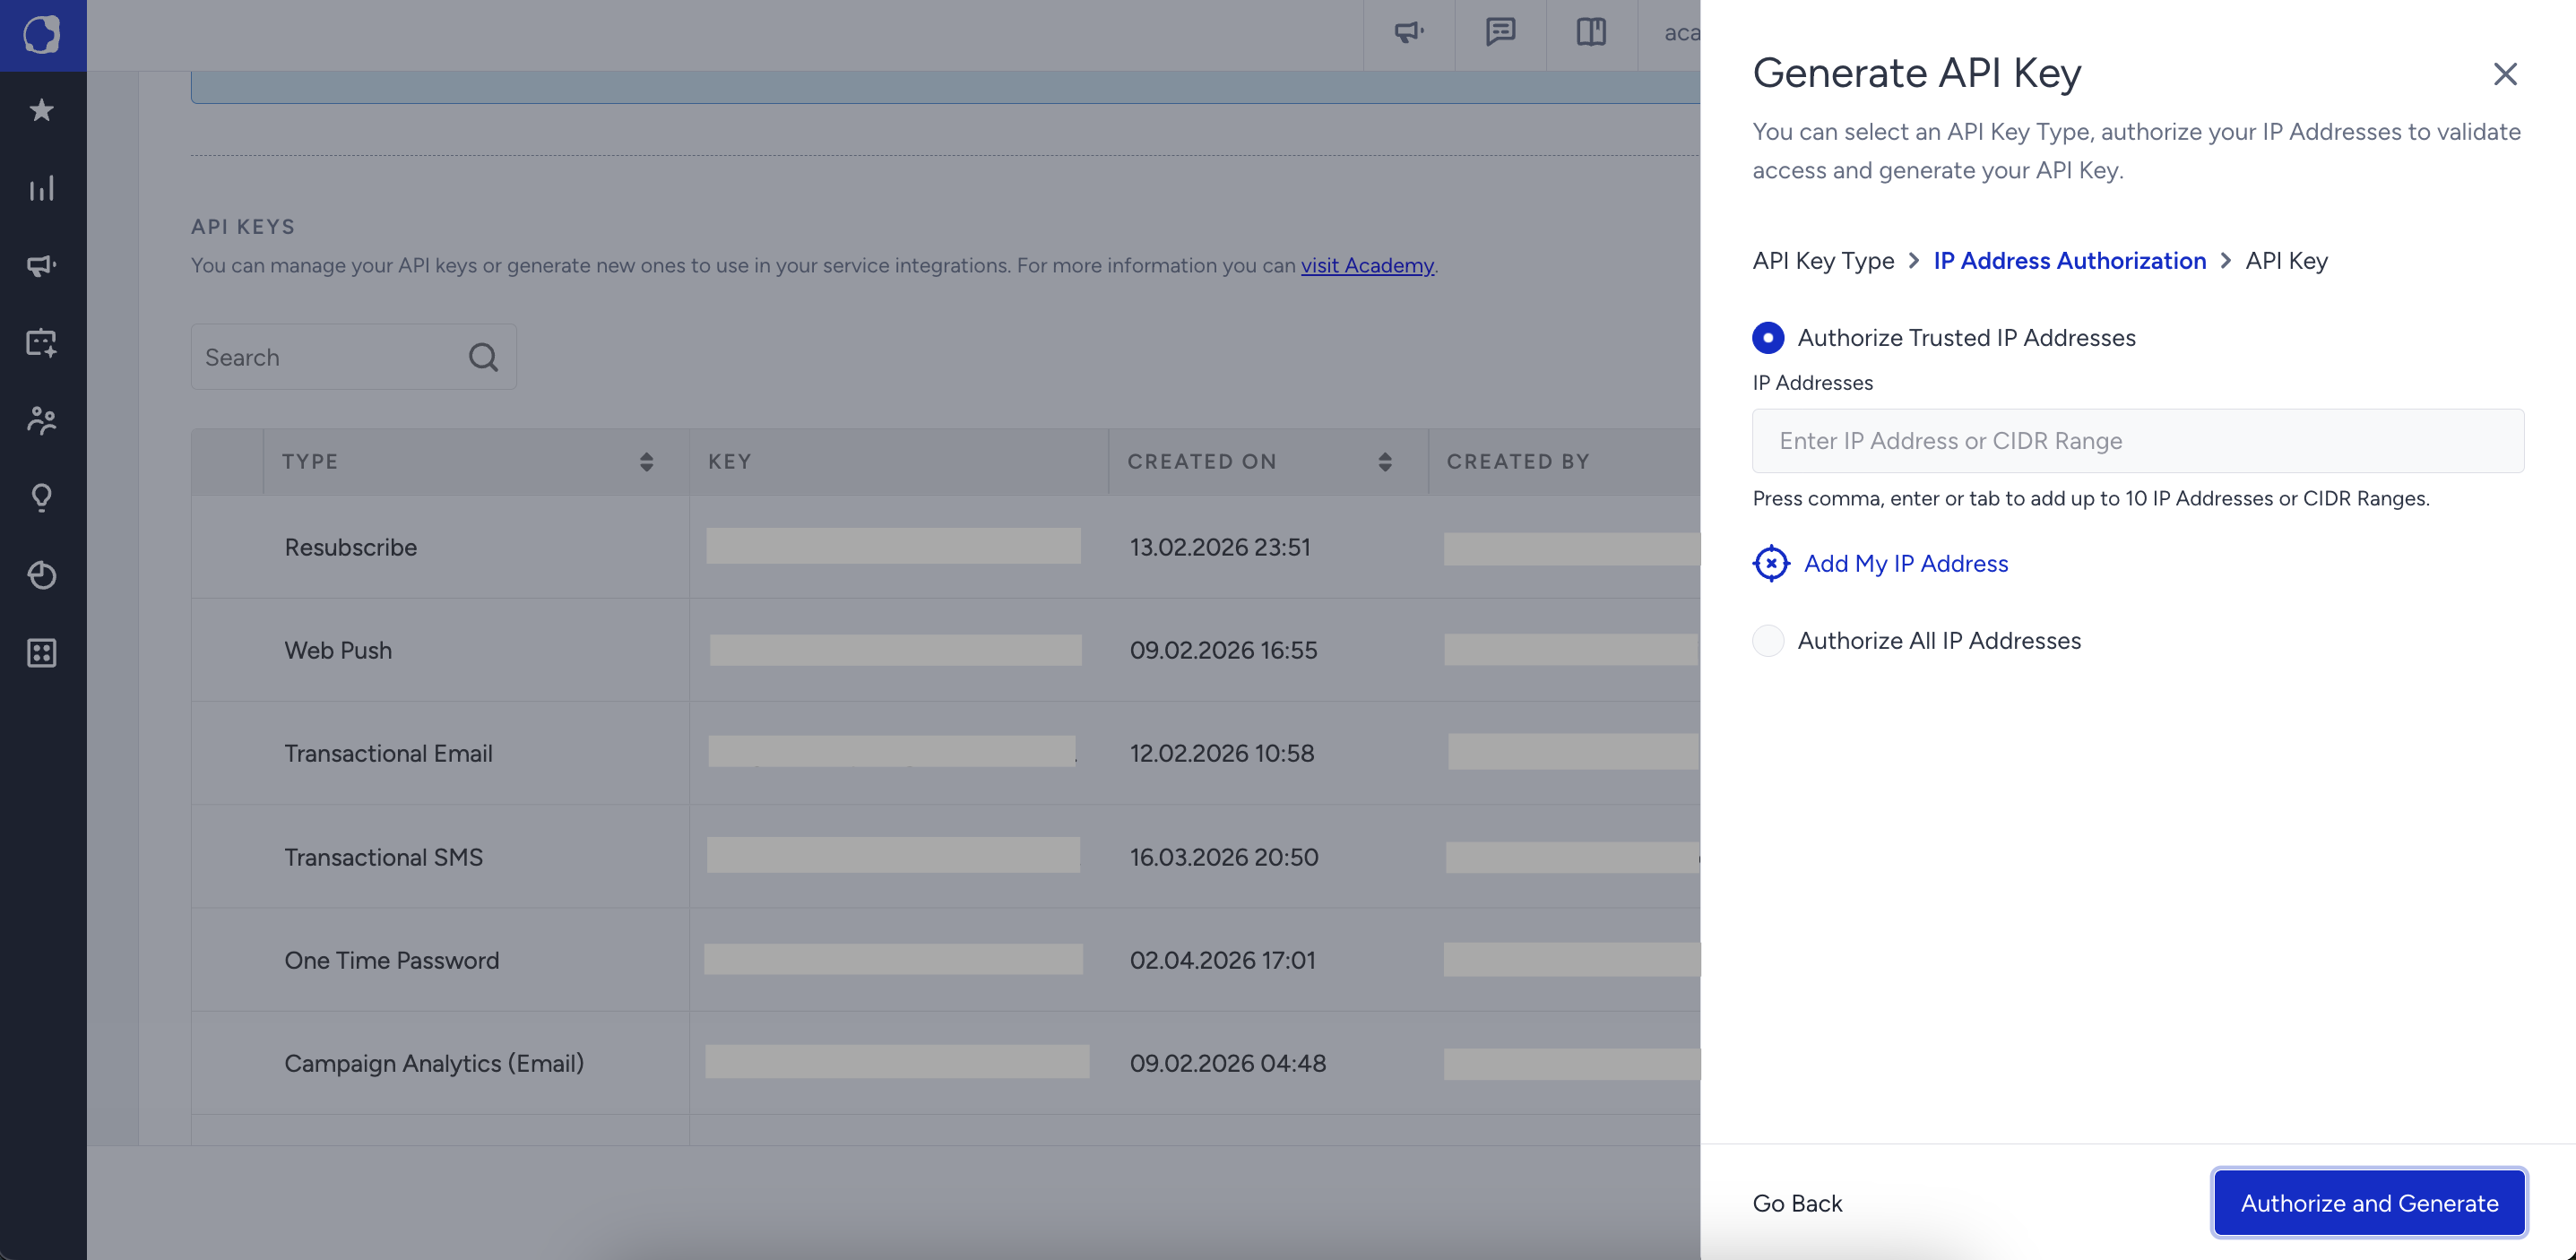
In this step, choose one of the following:
Add individual IP addresses
Add IP Groups
Select All IP addresses to allow unrestricted access
Only users with the Administrator role can perform this action.
Configure IP authorization for existing API keys
If no IP restriction is configured for an existing API key, it continues to work as is. All IP addresses remain authorized until you update the configuration.
To improve security, review your existing API keys and restrict access to trusted IP addresses where possible.
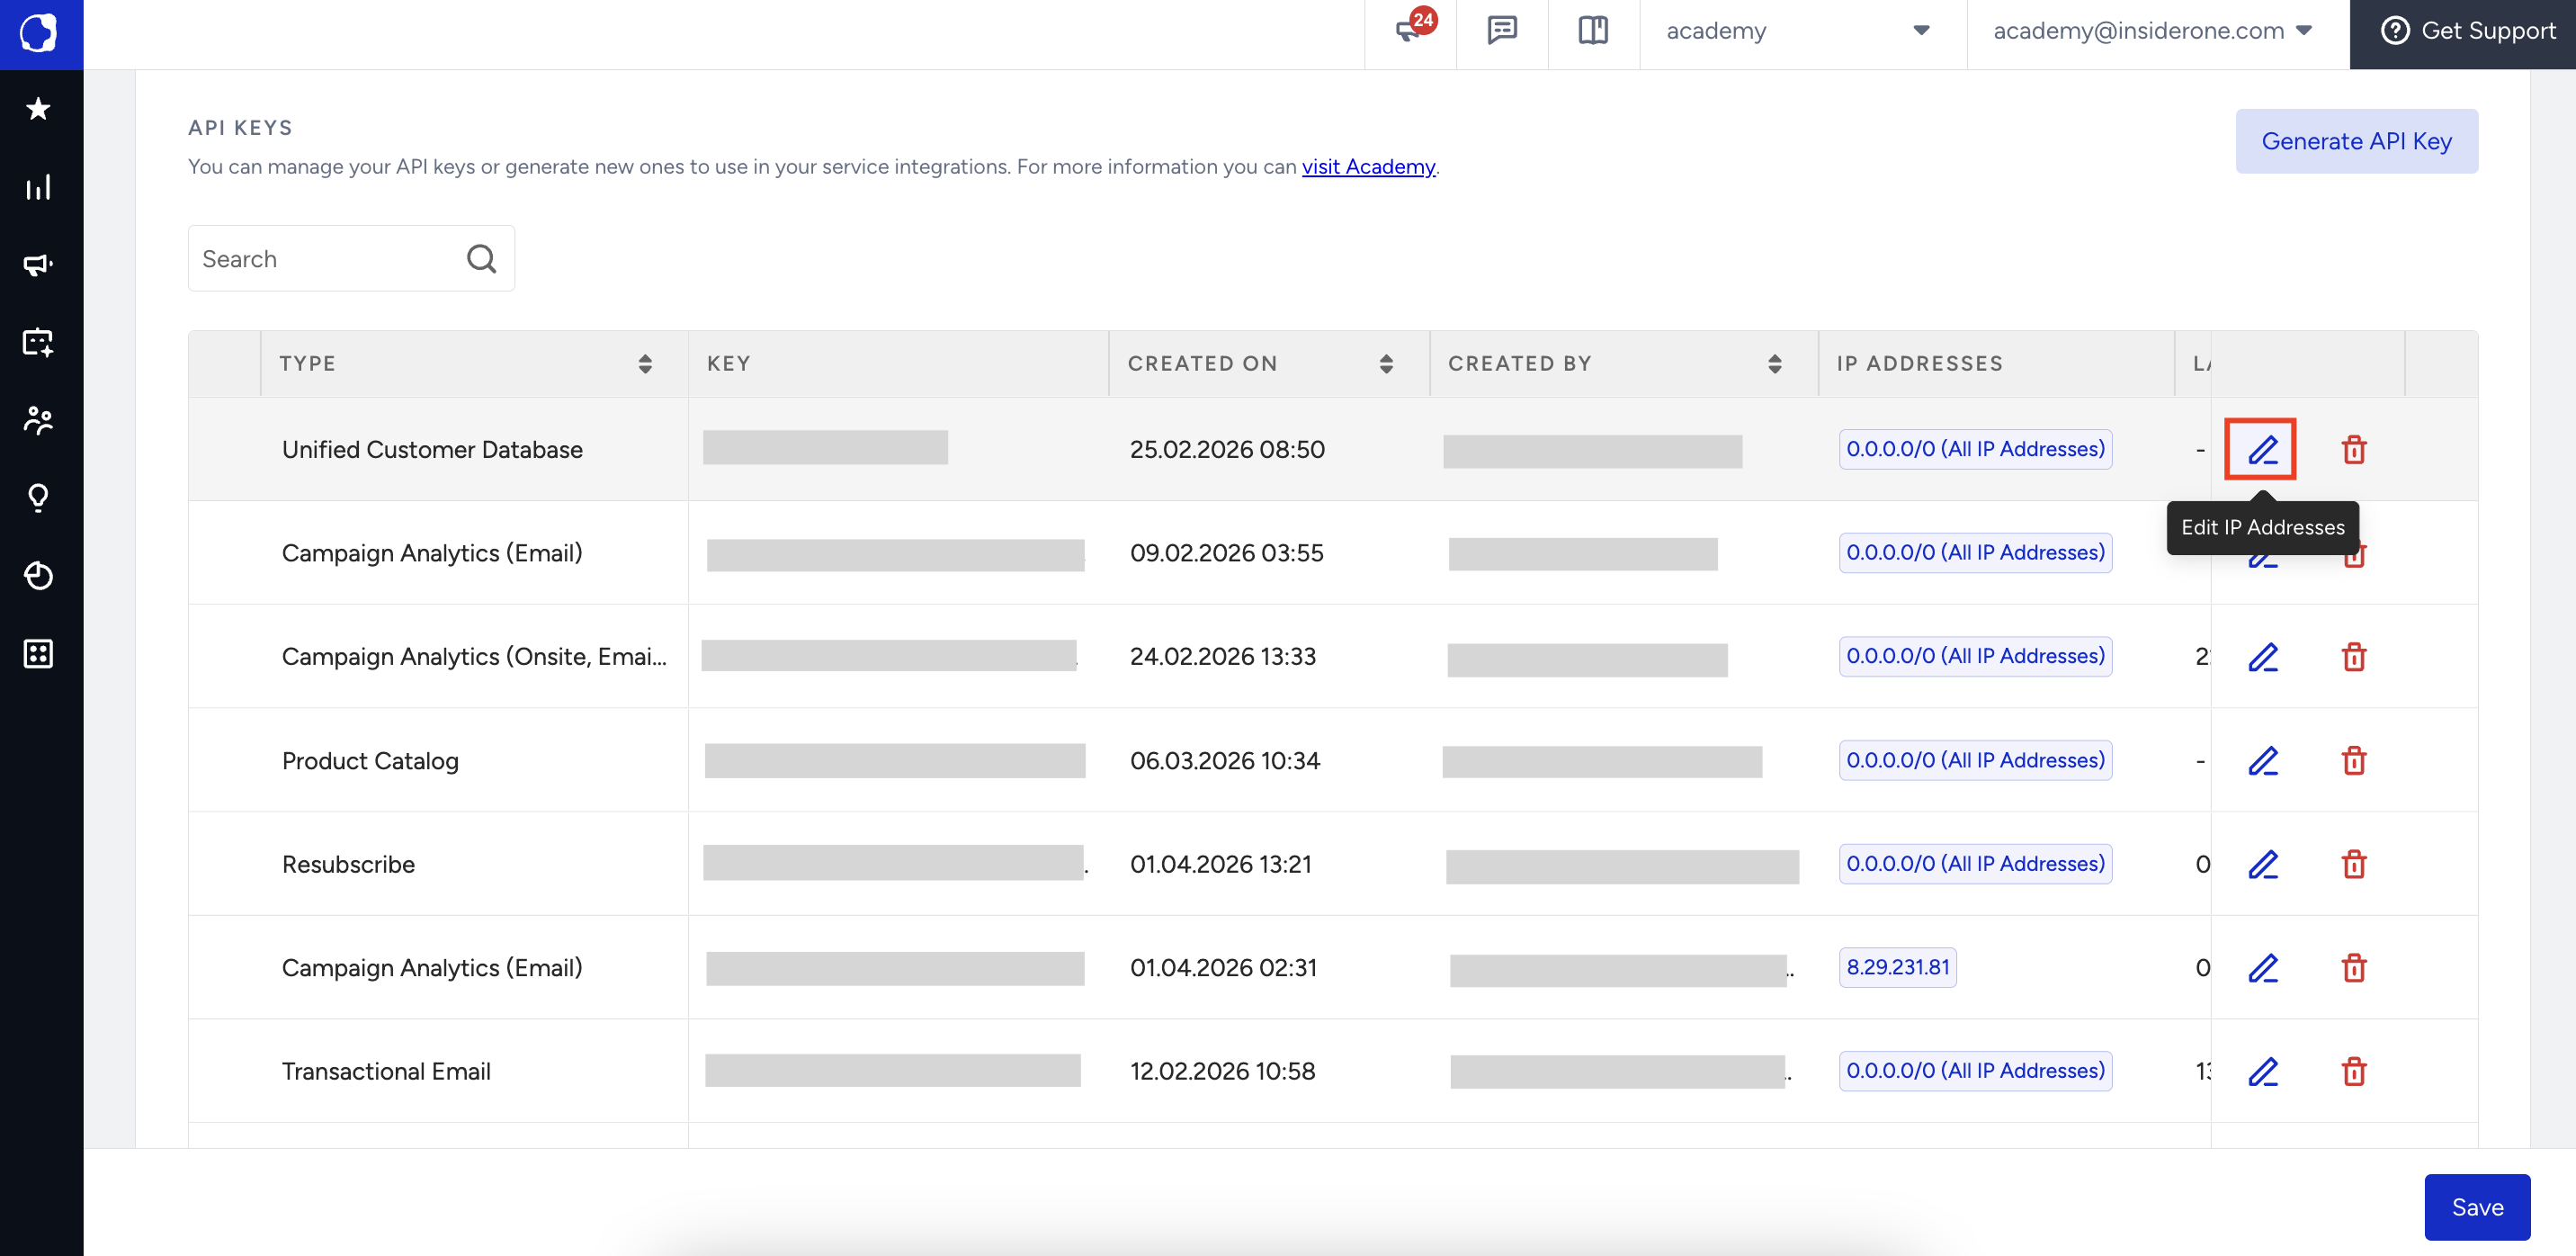
To update IP restrictions, users with the Administrator role can click the Edit IP Addresses button on an existing API key and add IP addresses or IP Groups.
Field Encryption Key
Field Encryption Key lets you give Insider One the encryption settings your provider uses. This way, Insider One can decrypt the encrypted values your provider sends, such as encrypted email addresses.
You enter the encryption algorithm, mode, padding, key, and initialization vector (IV) issued by your provider. Then you test them with a real encrypted value and save them once the test passes. Insider One uses the saved settings to decrypt the incoming data.
Self-serve setup: Enter and manage your encryption settings from Integration Settings without a support request.
Test before you save: Insider One saves your settings only after they decrypt a sample value into exactly the value you expect.
Hidden key: After you save, the key and IV are masked and cannot be viewed again.
Field Encryption Key is enabled on request. If you do not see the Field Encryption Key section in Integration Settings, contact the Insider One team.
Only users with the Administrator role can test, save, and replace the encryption settings. Other users can view the section.
Before you start
Get the following information from your provider (the platform that encrypts the data before sending it to Insider One):
The encryption algorithm (AES, DES, or 3DES)
The encryption mode (CBC or ECB)
The padding (PKCS7, ISOIEC7816_4, or ZEROS)
The encryption key, as a Base64-encoded value
The IV, as a Base64-encoded value, if your provider uses a fixed IV
One encrypted value from your provider and the plain value it decrypts to, for the test
Your provider must encode data as UTF-8 before encrypting it.
Supported settings
Setting | Options | Default |
|---|---|---|
Encryption Algorithm | AES, DES, 3DES | AES |
Encryption Mode | CBC, ECB | CBC |
Padding | PKCS7, ISOIEC7816_4, ZEROS | PKCS7 |
Character Encoding | UTF-8 | UTF-8 |
The key and IV lengths depend on the encryption algorithm. Lengths are counted in Base64 characters, including the = padding characters at the end.
Encryption Algorithm | Encryption Key length | IV length |
|---|---|---|
AES | 24, 32, or 44 characters (AES-128, AES-192, or AES-256) | 24 characters |
DES | 12 characters | 12 characters |
3DES | 32 characters | 12 characters |
Set up the Field Encryption Key
Click the Field Encryption Key section to expand it.
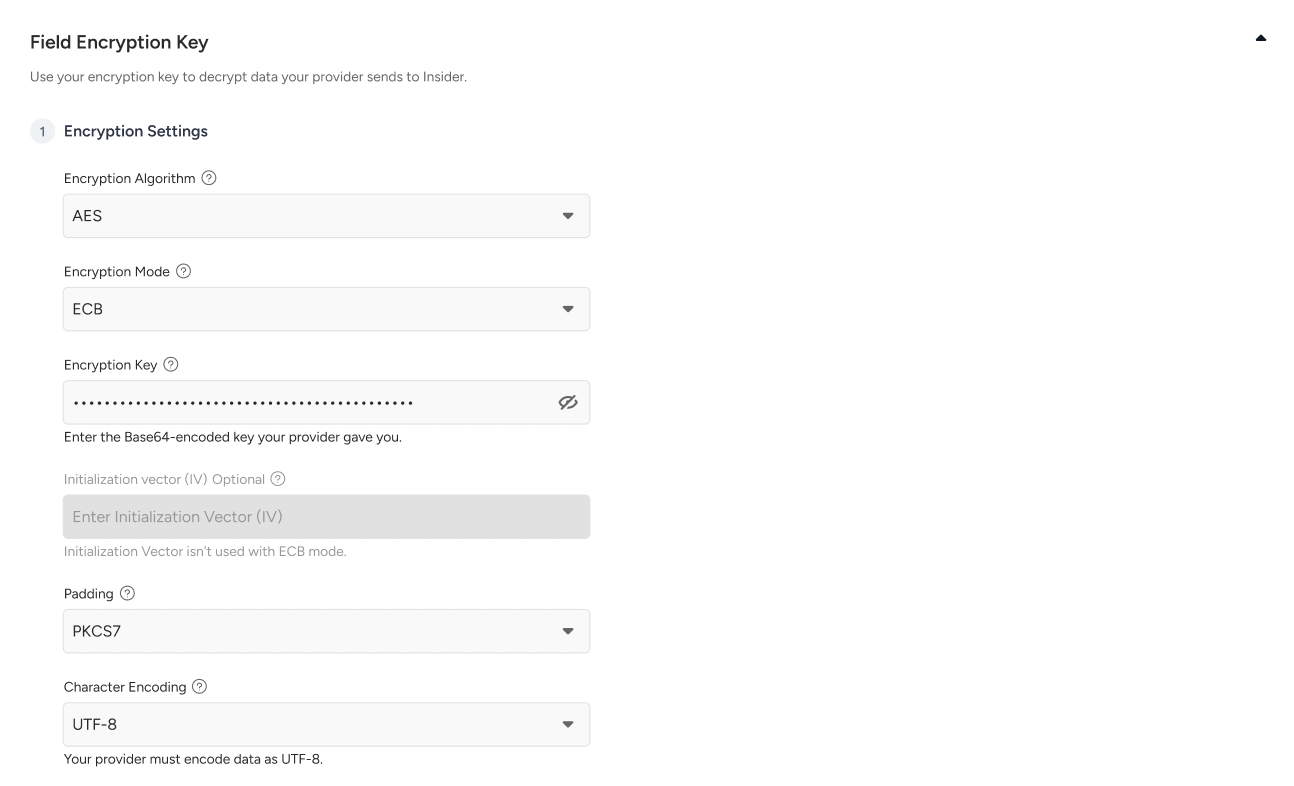
Under Encryption Settings, fill in the following fields with the values from your provider:
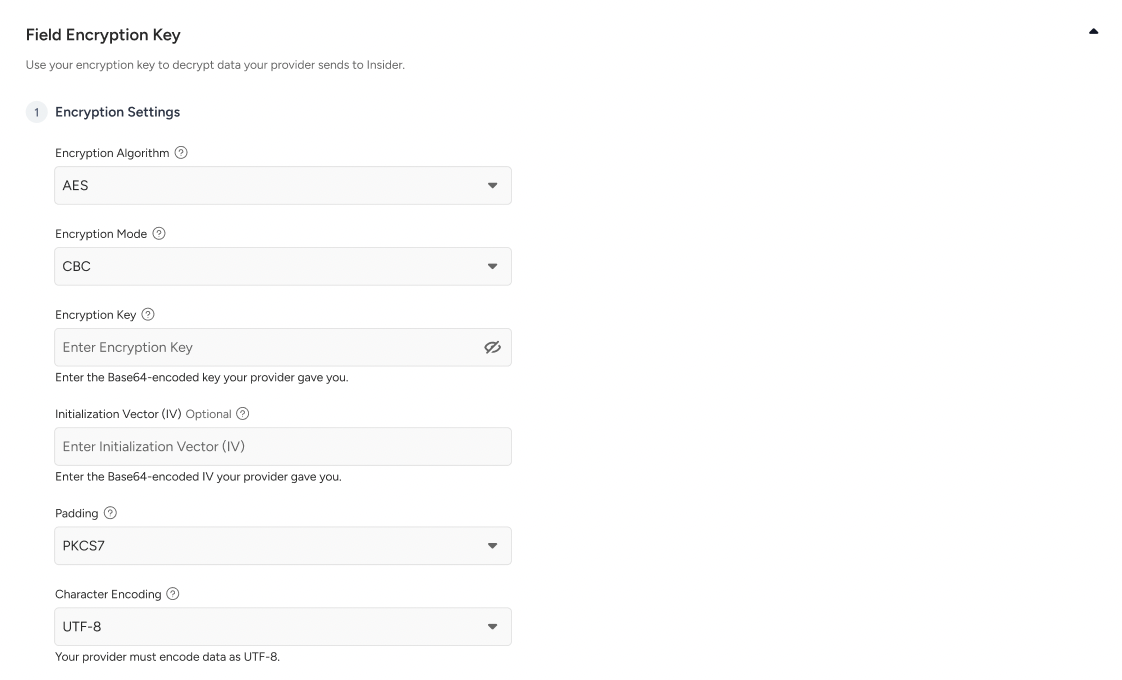
Encryption Algorithm: The cipher your provider uses to encrypt the data before sending it to Insider One.
Encryption Mode: How the cipher chains encrypted data blocks together.
Encryption Key: The secret Insider One uses to decrypt your provider's encrypted data. Enter the Base64-encoded key from your provider. Click the eye icon to show or hide the value while you type.
Initialization Vector (IV) (optional): The value that makes each encrypted value look different, even with the same key. Enter the Base64-encoded IV from your provider.
Padding: How your provider fills data to fit the cipher's block size.
Character Encoding: The rule that converts characters into bytes before encryption. Select UTF-8.
ECB mode does not use an IV, so the Initialization Vector (IV) field is disabled when you select ECB. In CBC mode, if you leave the IV empty, each encrypted value from your provider must carry its own IV in its first block.
Under Test Settings, fill in the following fields:
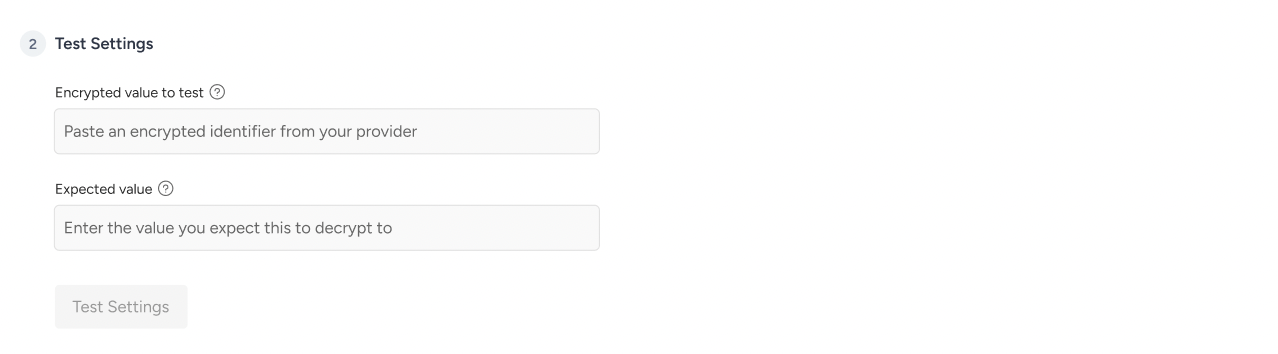
Encrypted value to test: Paste an encrypted value from your provider.
Expected value: Enter the value the encrypted value should decrypt to.
Click Test Settings. Insider One decrypts the encrypted value with your settings and compares the result with the expected value. The test passes only if the two match exactly.
When the test passes, click Save at the bottom of the page.
You can save the Field Encryption Key settings only after a test passes. If you change any field after testing, run the test again before you save.
Test results and messages
Message | What it means | What to do |
|---|---|---|
Test successful. This decrypted to the value you expected. | The settings decrypt the encrypted value into exactly the expected value. | Click Save at the bottom of the page. |
The settings do not decrypt the value | The key, IV, algorithm, mode, or padding does not match your provider's settings, or the result does not match the expected value. | Check every setting and the expected value with your provider, then test again. |
Enter a valid Encryption Key to continue. | The key is not a valid Base64 value. | Copy the key from your provider again and make sure it contains no spaces. |
Enter an Encryption Key of {N} characters to continue. | The key length does not match the selected encryption algorithm. | Check the key length in the Supported settings table and confirm the algorithm with your provider. |
Enter a valid Initialization Vector to continue. | The IV is not a valid Base64 value. | Copy the IV from your provider again and make sure it contains no spaces. |
Enter an Initialization Vector of {N} characters to continue. | The IV length does not match the selected encryption algorithm. | Check the IV length in the Supported settings table. |
Enter a valid encrypted identifier to test your settings. | The encrypted value to test is not in the expected format. | Paste the encrypted value from your provider again. |
View your configured settings
After you save, the Field Encryption Key section shows your settings in a read-only state:
The Encryption Key and Initialization Vector (IV) are masked and cannot be viewed again.
The Encryption Key field shows when the settings were last updated and by whom.
The algorithm, mode, padding, and character encoding appear as saved.
Your current key stays active until you enter, test, and save a new one.
Replace the Encryption Key and IV
When your provider issues a new key, replace the key and IV together. They work as a matched pair.
In the Field Encryption Key section, click Replace Key & IV.
Read the confirmation and click Replace Key & IV.
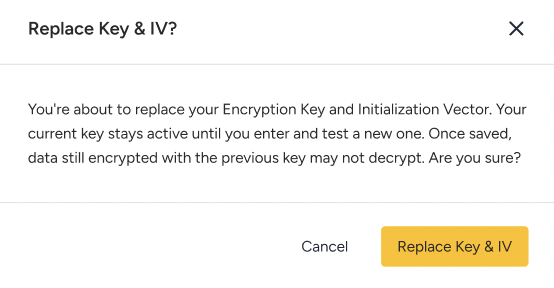
After you save the replacement, Insider One cannot decrypt data encrypted with the previous key. Coordinate the switch with your provider so they start using the new key at the same time.
Enter the new Encryption Key and Initialization Vector (IV). The algorithm, mode, padding, and character encoding are prefilled with your saved settings, and you can change them if needed.
Fill in Test Settings with an encrypted value that uses the new key, and click Test Settings.
When the test passes, click Save at the bottom of the page.
Your previous key stays active until you save the replacement. If you click Cancel, your saved settings stay as they are.
Limitations and considerations
Topic | Details |
|---|---|
Key visibility | The key and IV cannot be viewed after you save them, in the InOne panel or anywhere else. Keep a copy with your provider. |
Removing settings | To change your settings, use Replace Key & IV. To remove them, contact the Insider One team. [VERIFY: removal path] |
Key and IV | The key and IV are replaced together. |
Character encoding | Only UTF-8 is supported. |
ECB mode | ECB mode does not use an IV. |
Permissions | Only users with the Administrator role can test, save, and replace the settings. |