Requirements
To start using the geofence push, you need to complete the following requirements.
- Integrate the basic SDK version
- Integrate the Geofence Method (Android, iOS, React Native, Flutter, Cordova)
- Add the necessary keys and values required by location permissions into your plist file as described in the Configure Cocoapods Installation step.
- The mobile push opt-in must be true for the user to receive app push notifications.
- Your account must have at least one certificate uploaded.
Suggested readings: Geofence Settings, App Segments: Geofence, FAQ about Geofence App Push
Use Cases
To get a better understanding of how and when to use the geofence app push, refer to Use Cases for Geofence App Push.
A geofence push helps you send push notifications to your users when they enter or exit a specific location.
You should complete the following steps to launch a campaign with the geofence push:
- Create a campaign
- Select a segment
- Design your message
- Test your campaign
- Select goals
- Configure the launch
- Check analytics
1. Create a campaign
You can follow the steps listed below to start creating your campaign.
1.1. Navigate to Campaigns > Messaging > App Push.
1.2. Click the Create button to start creating your campaign.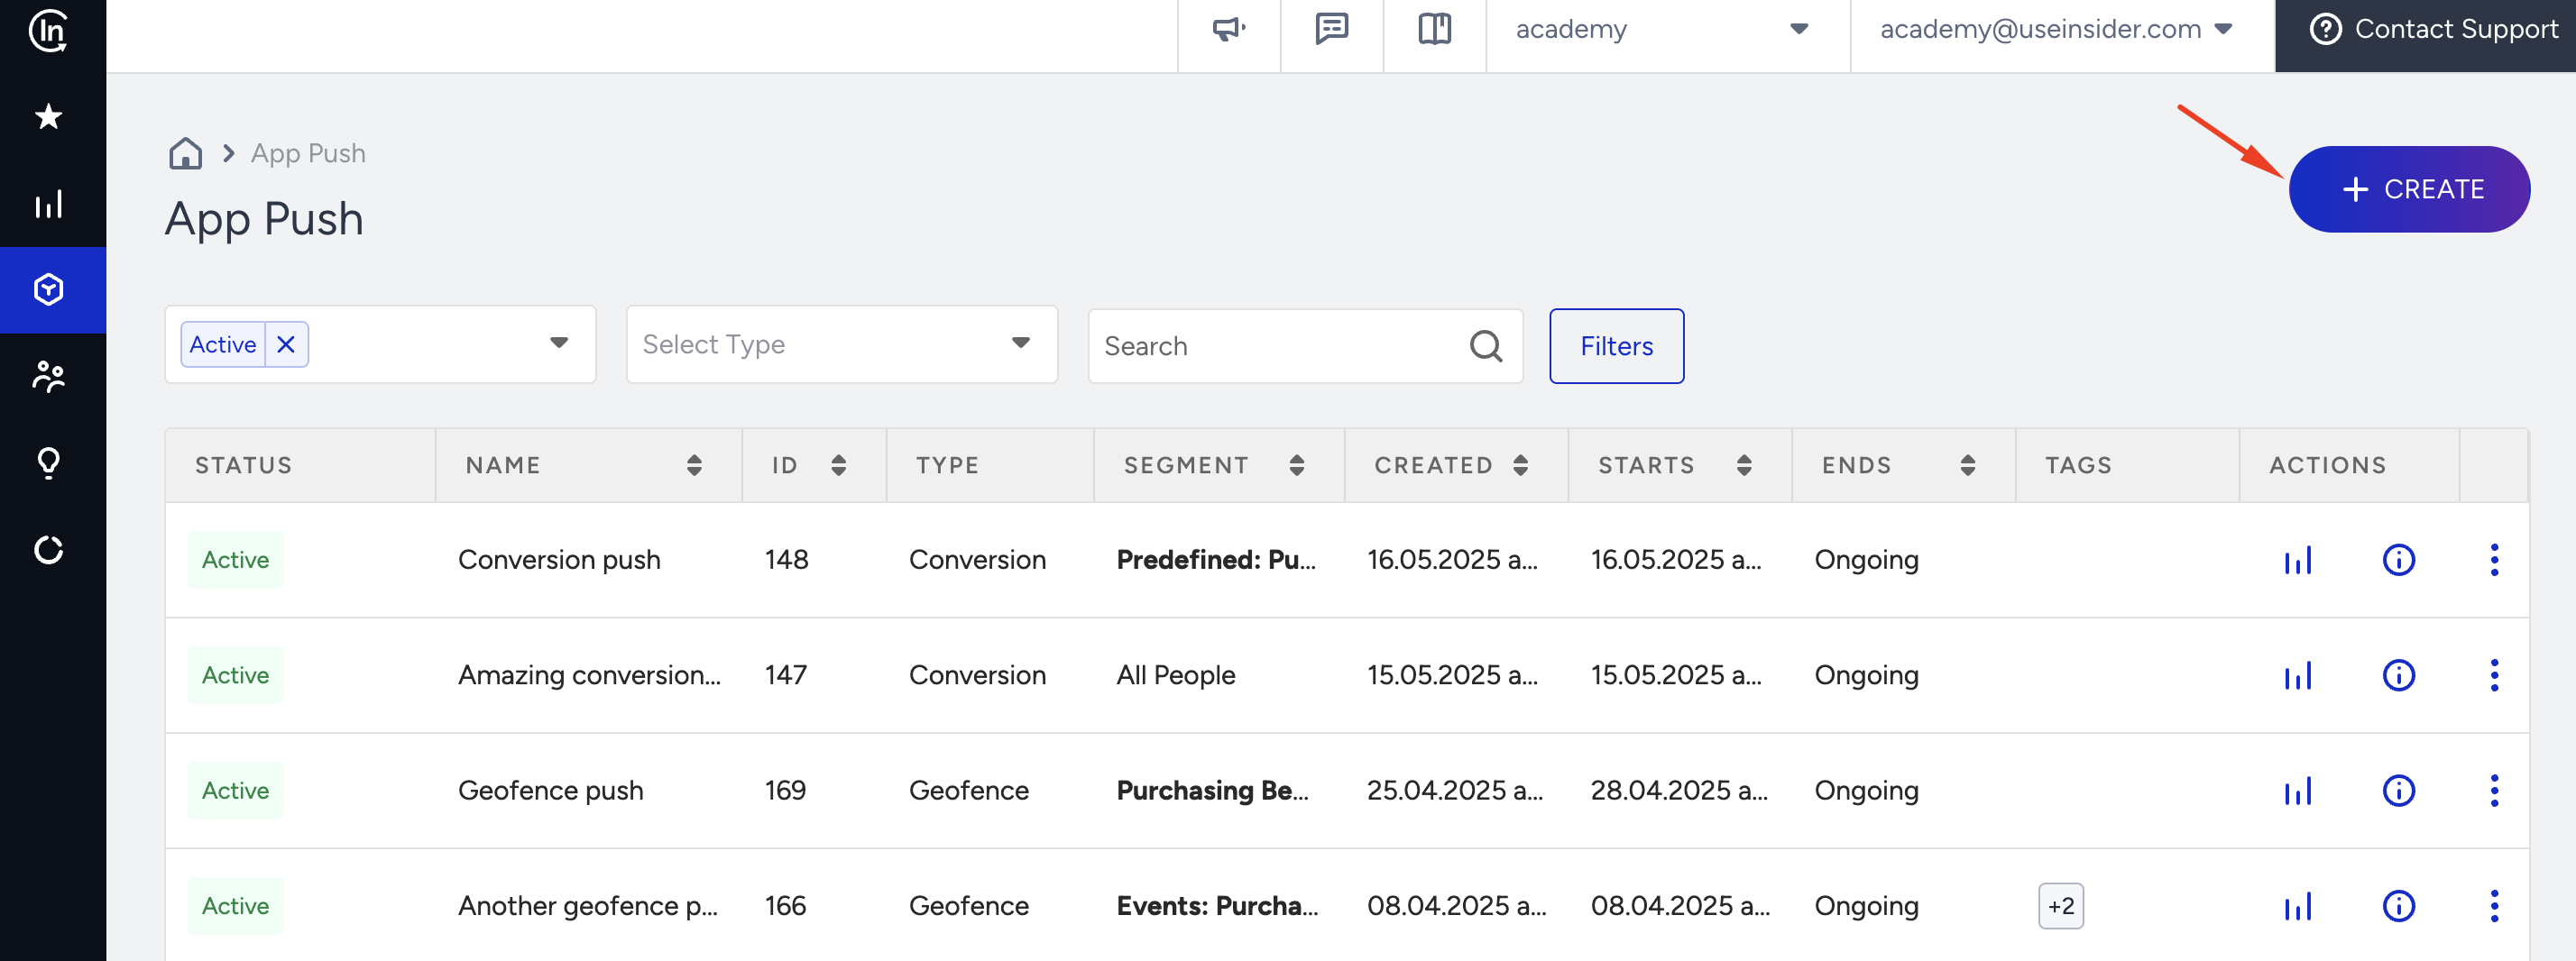
1.3. Select the Geofence push and click the Create button.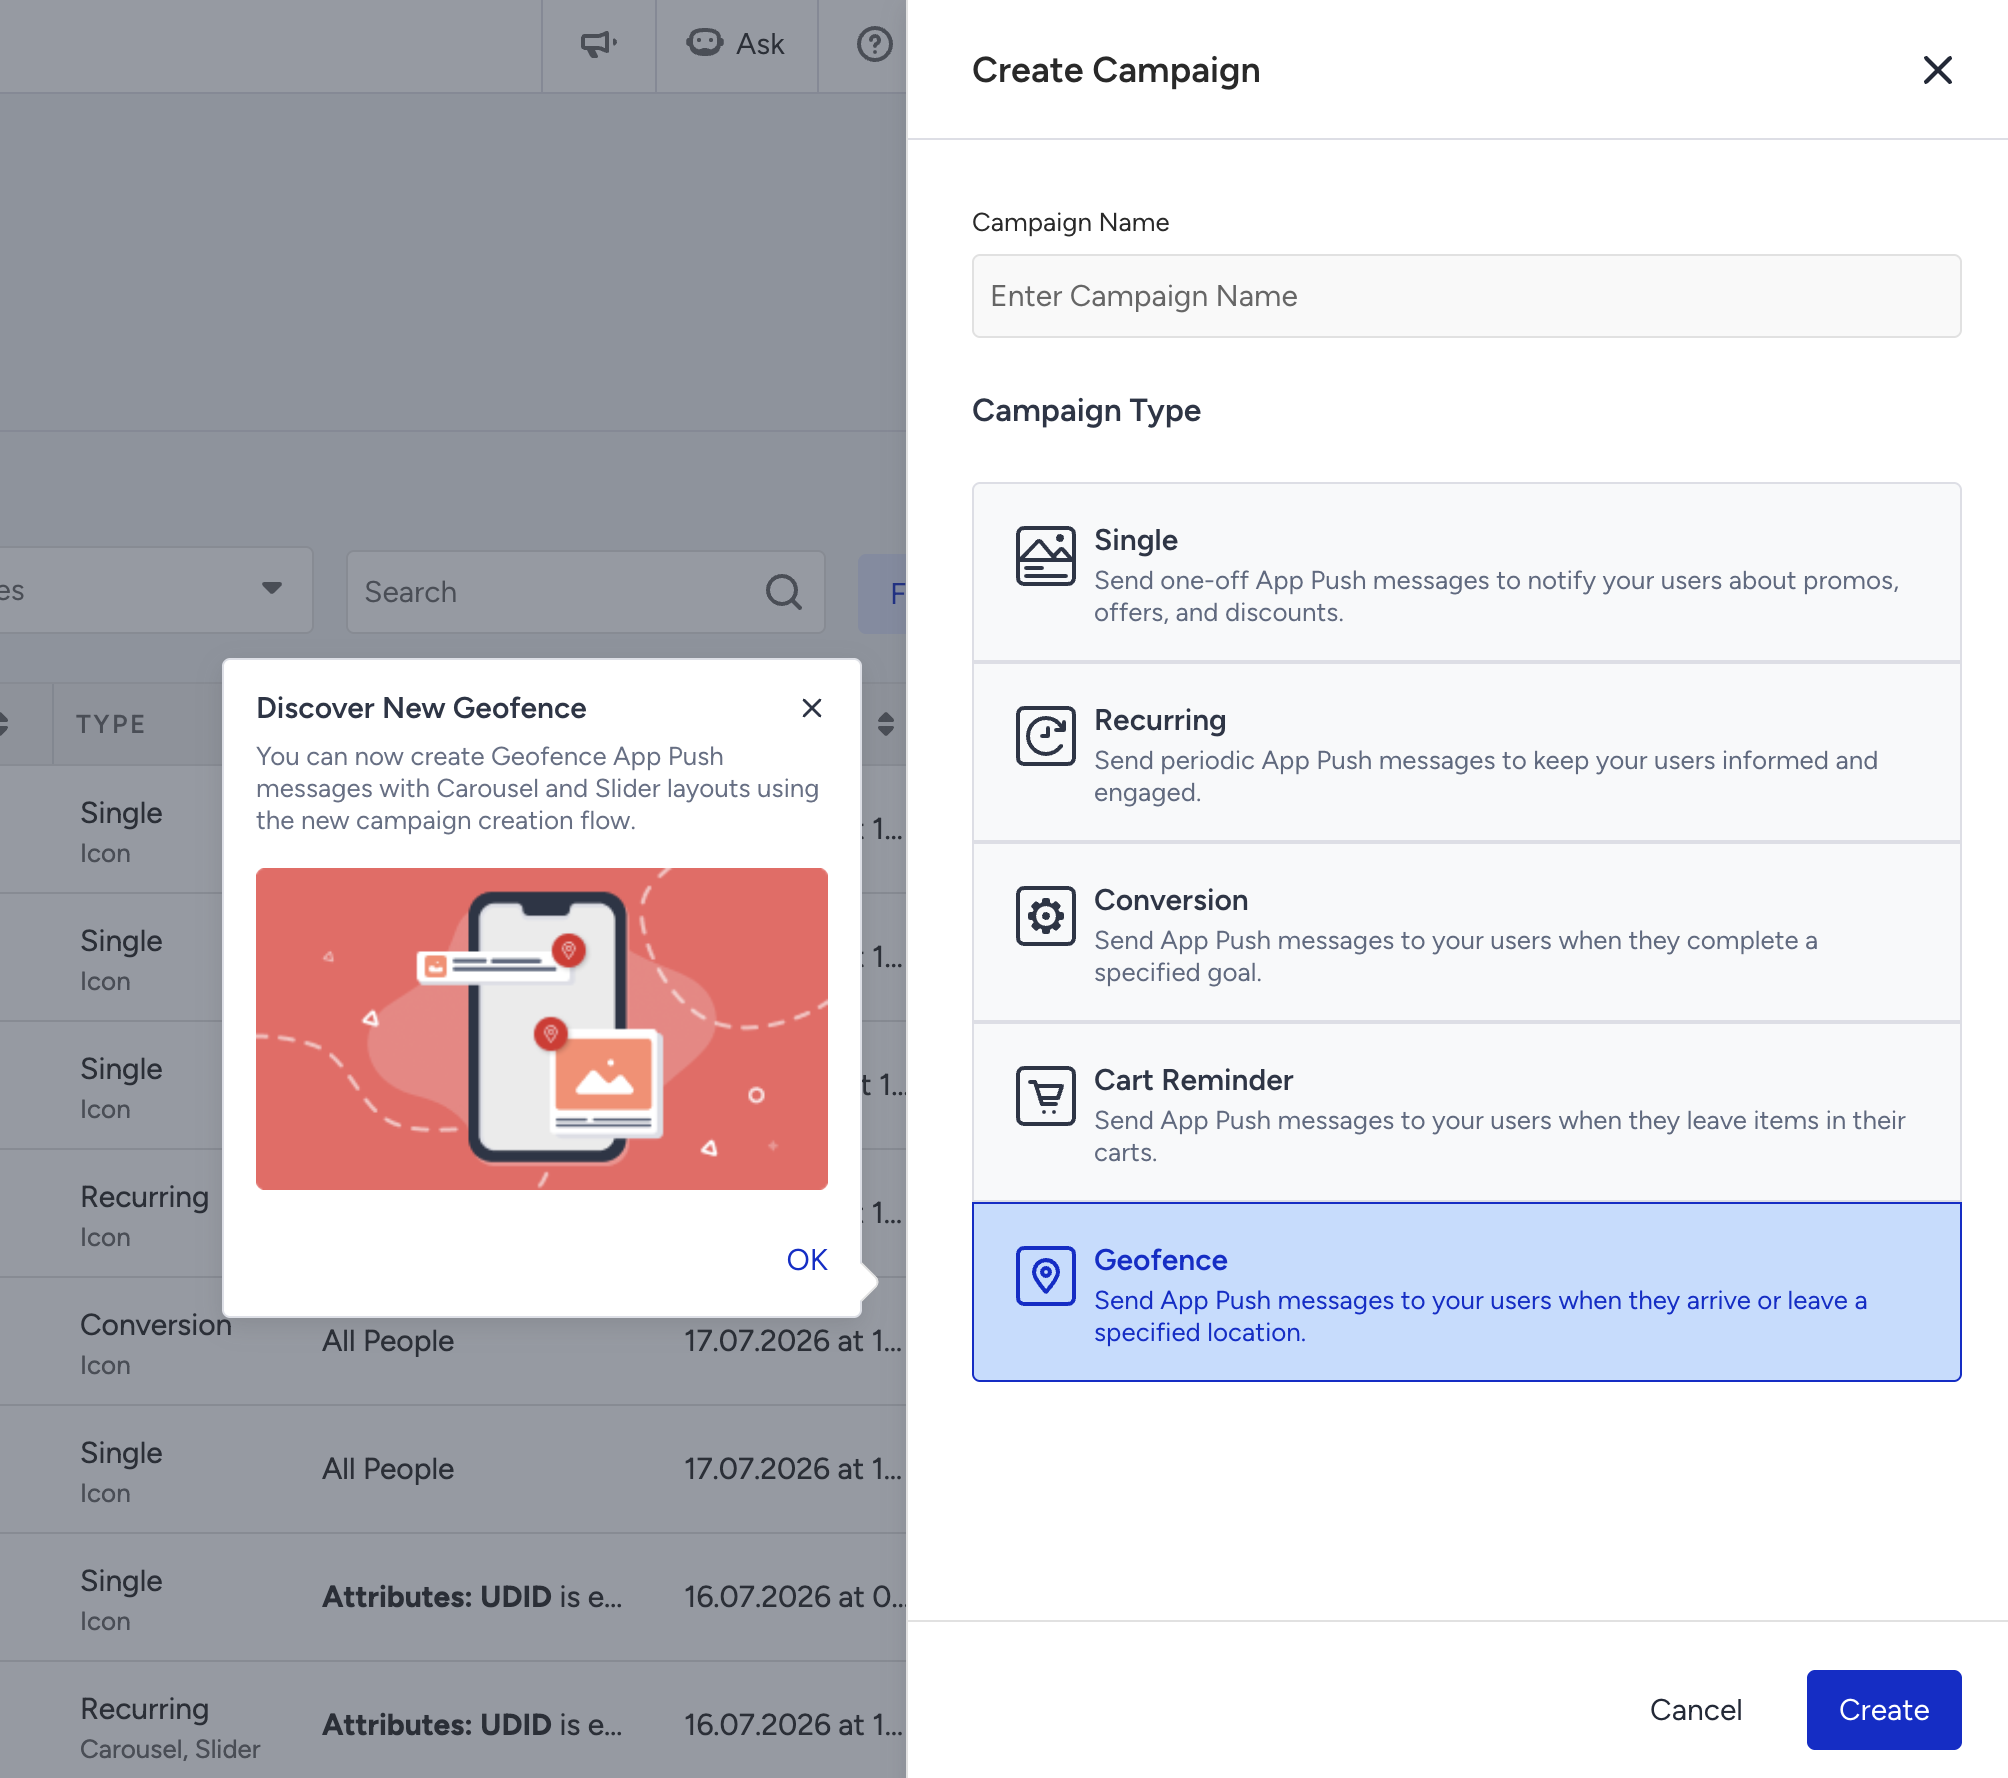
2. Select a segment
To select the group of users to send your push notification to, refer to Segments to see the steps that you should complete.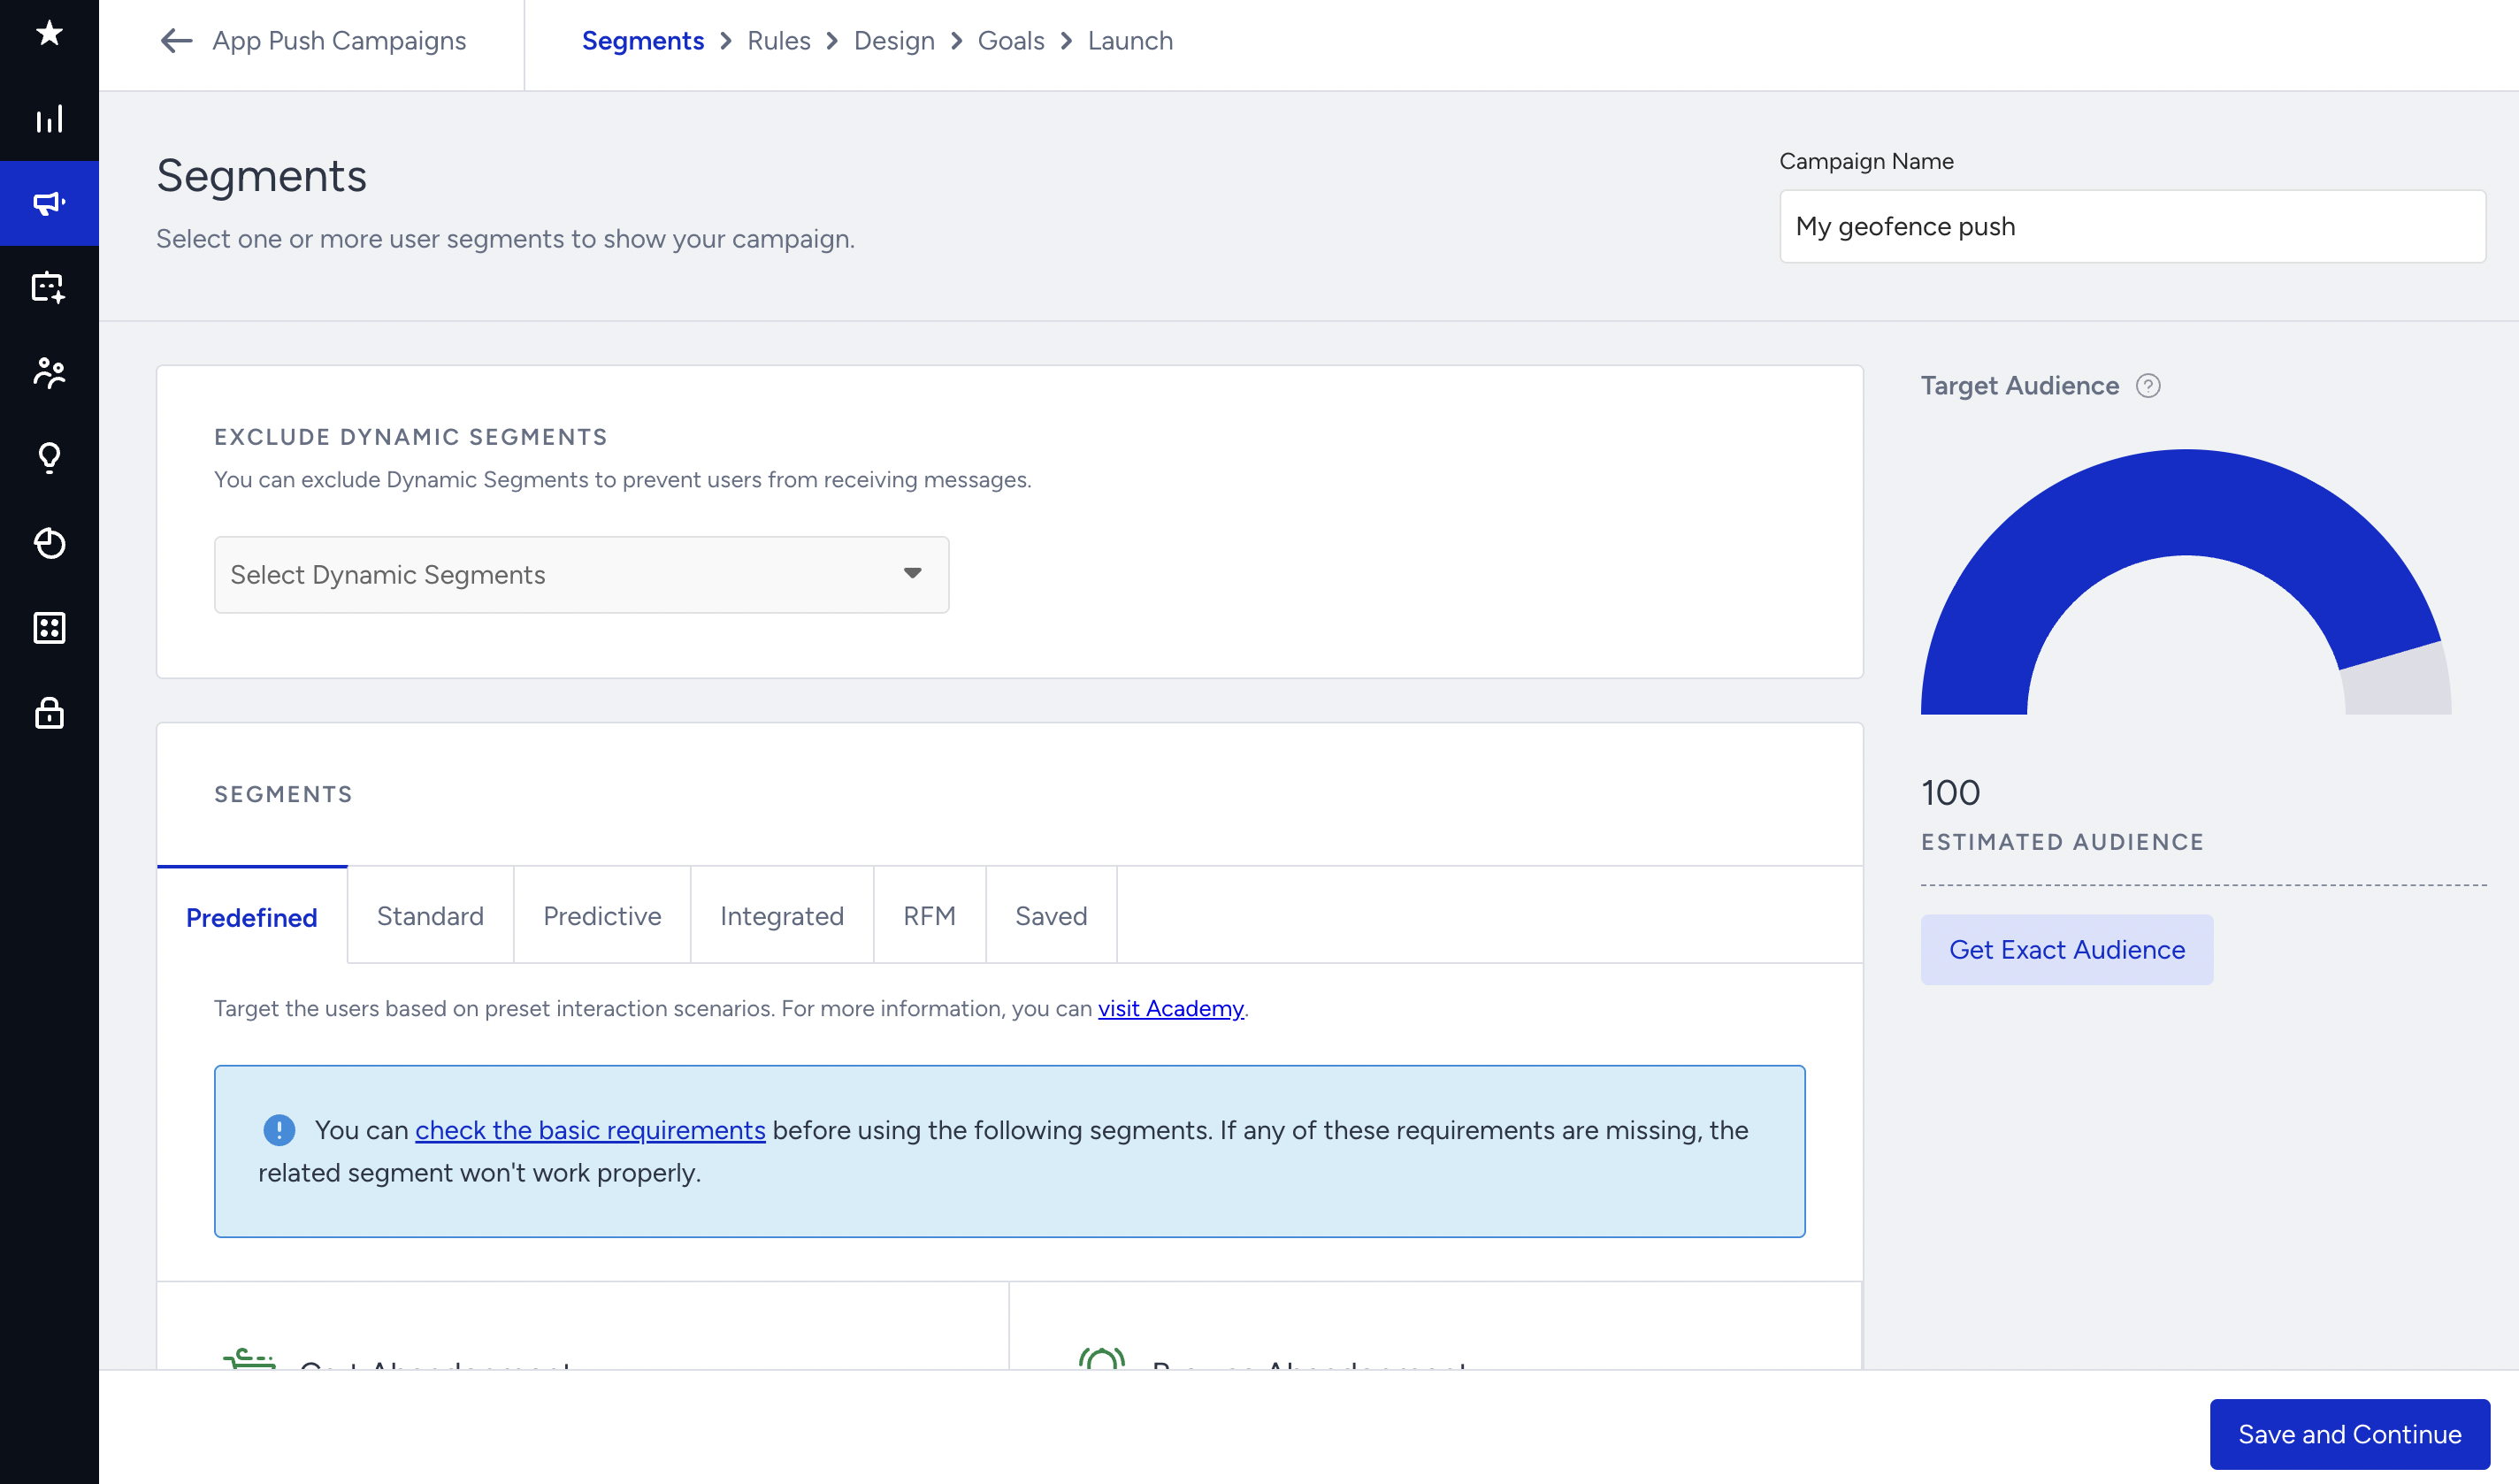
You can select from Predefined Segments, Standard Segments, Predictive Segments, Integrated Segments, RFM Segments, and Saved Segments.
3. Select a geofence
3.1. Select an existing geofence or create a new one on the prompt.
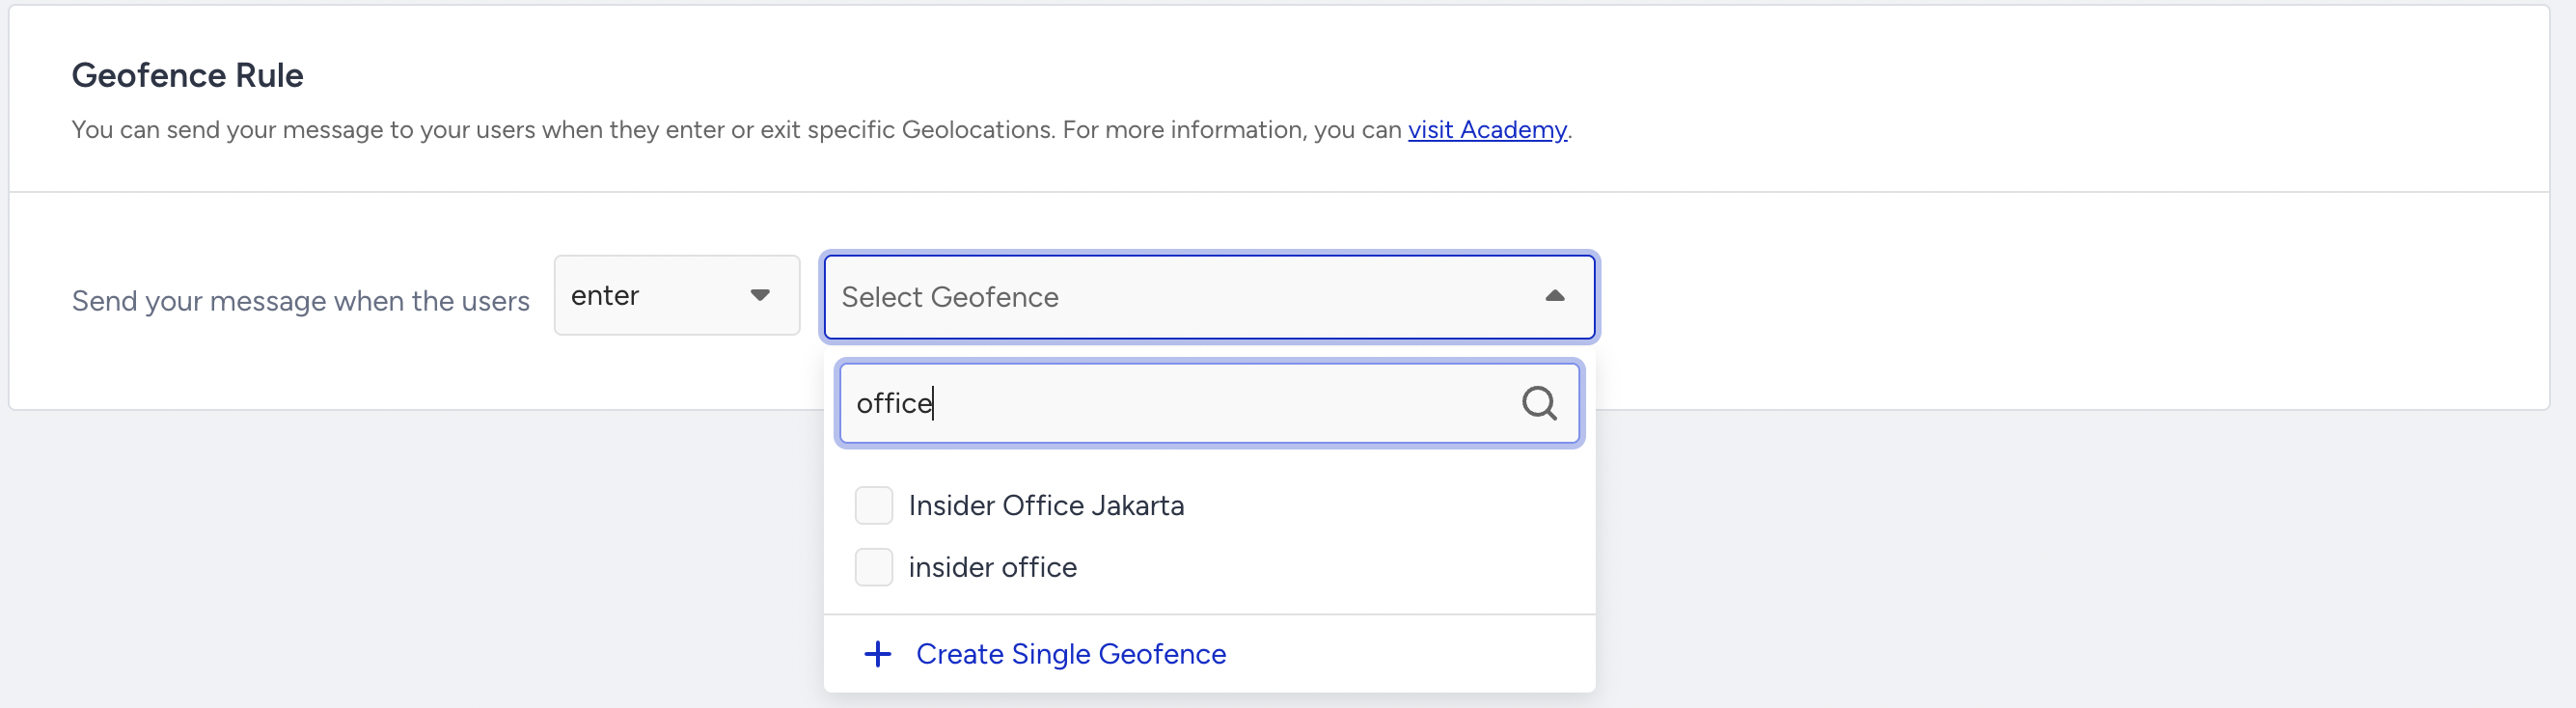
3.2. Select whether to trigger the push on enter or exit.

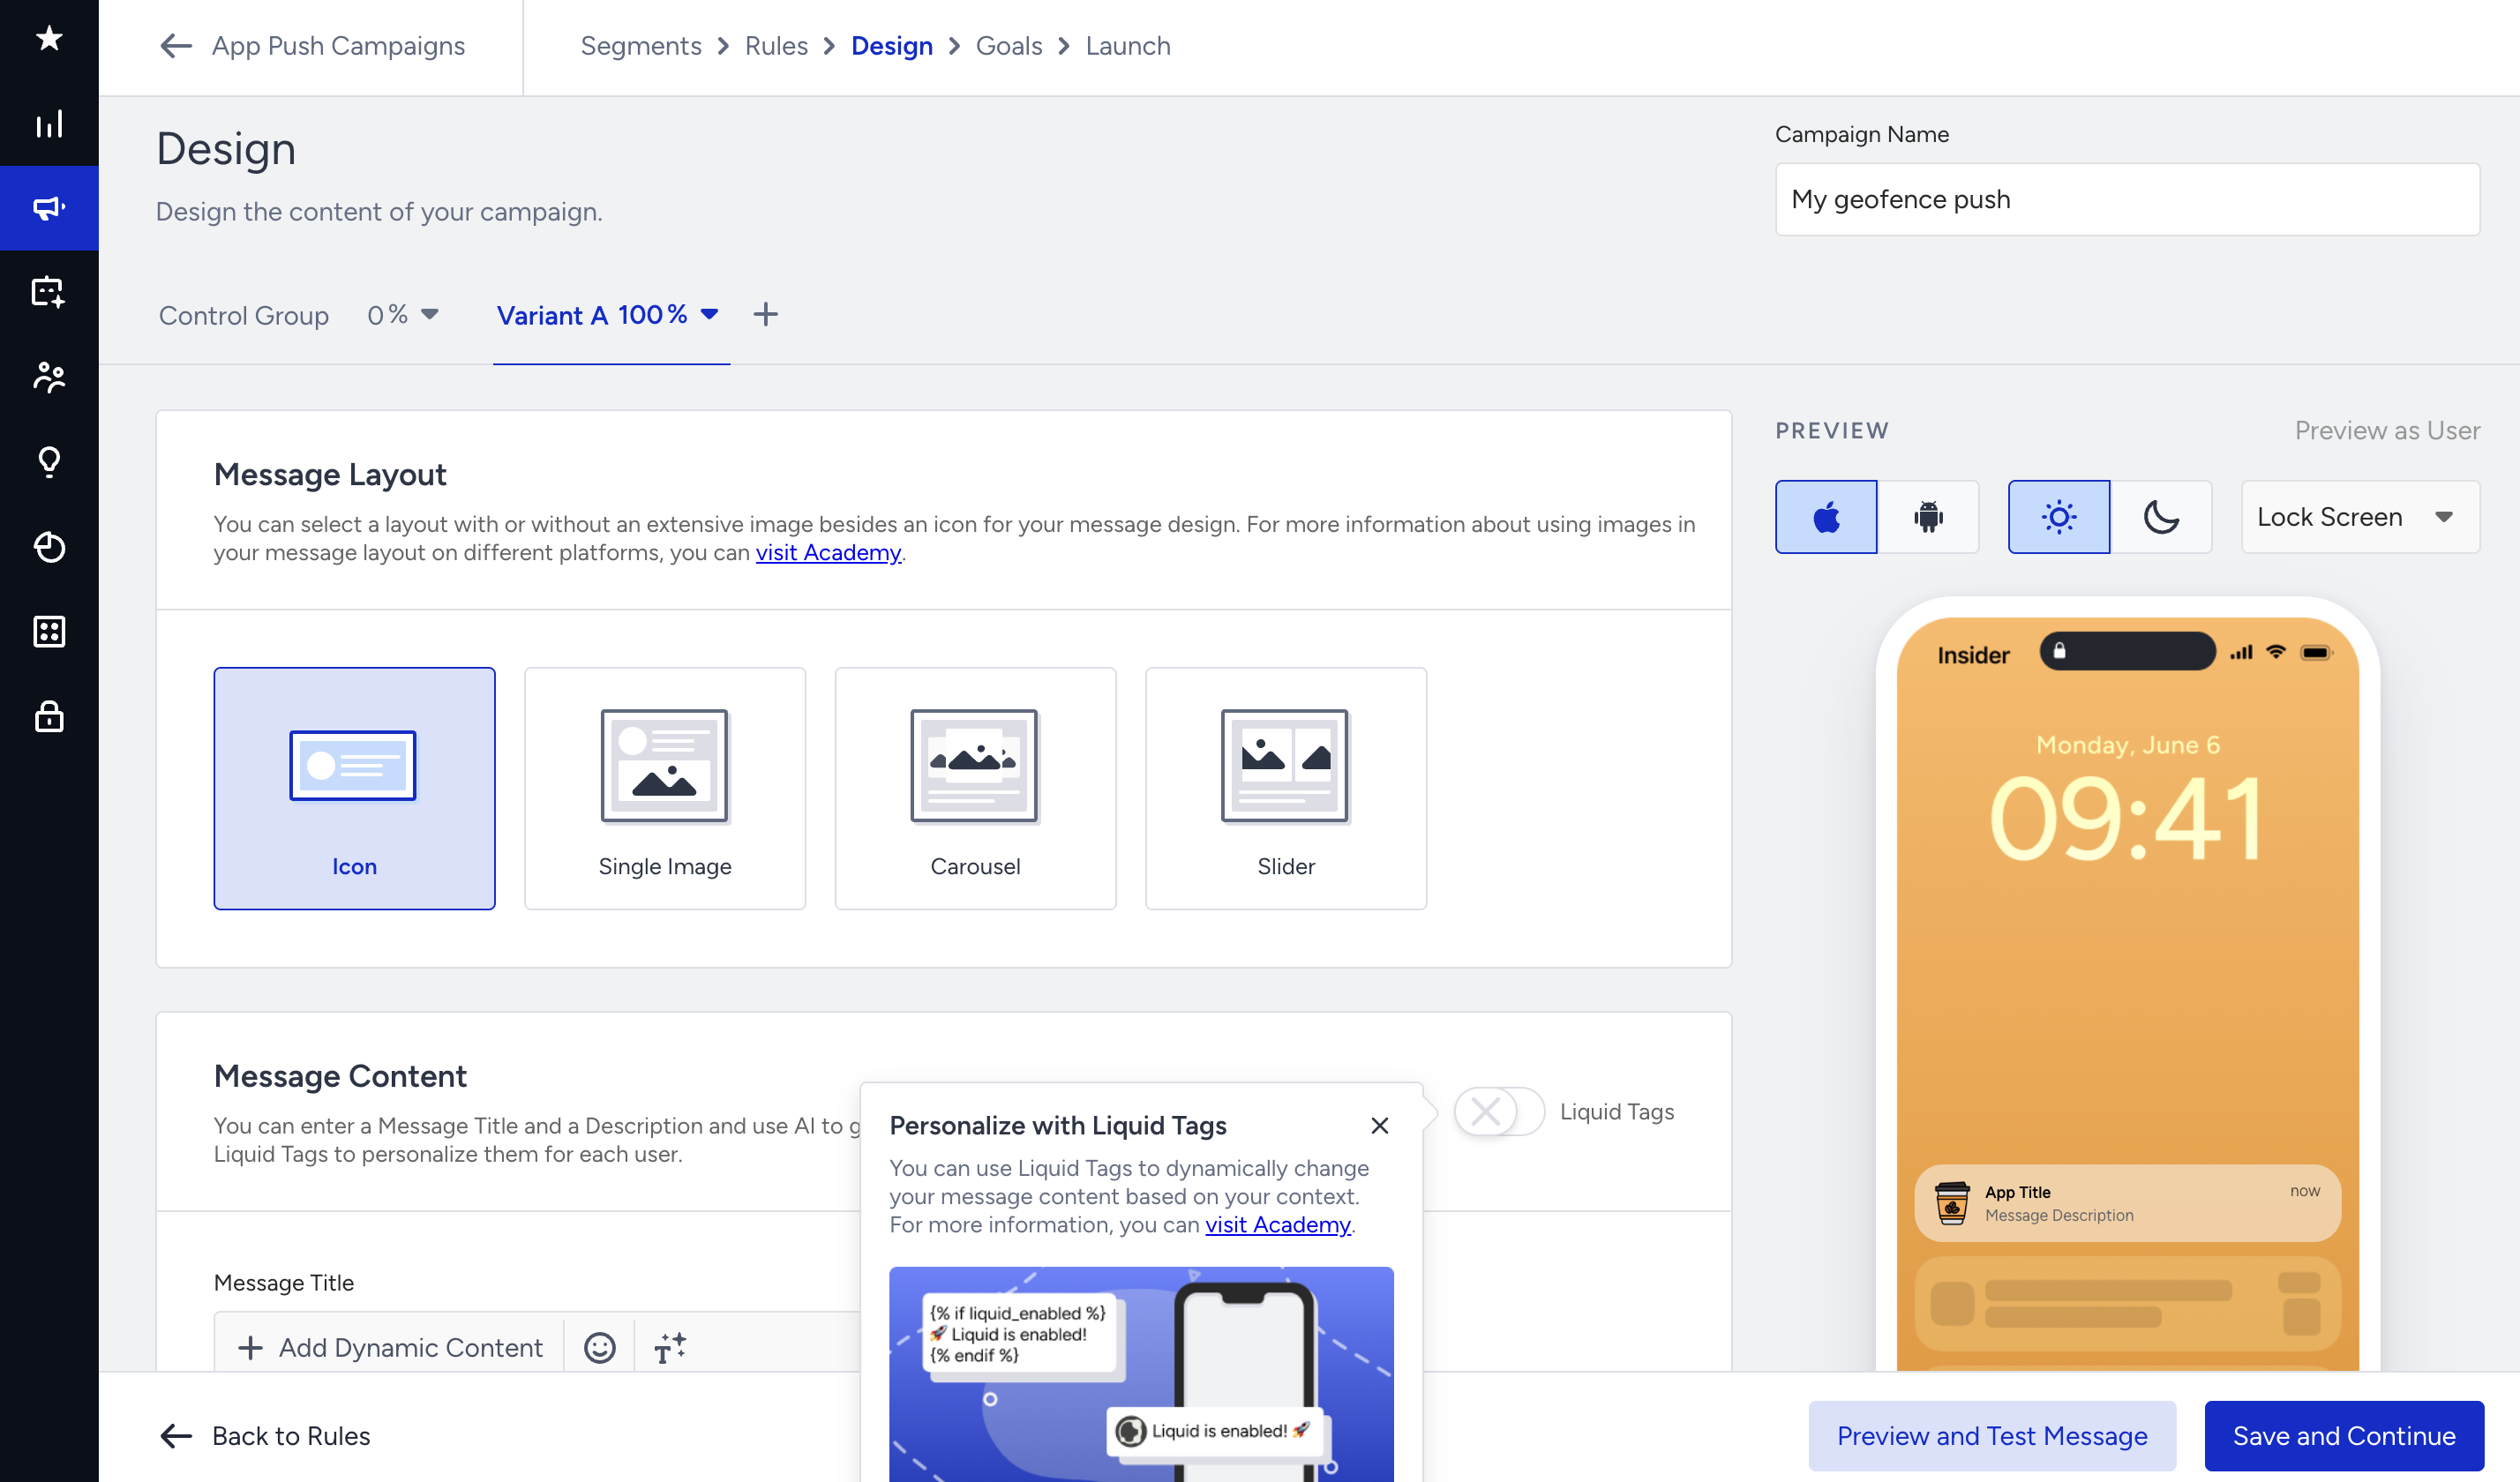
4. Design your message
Icon/image
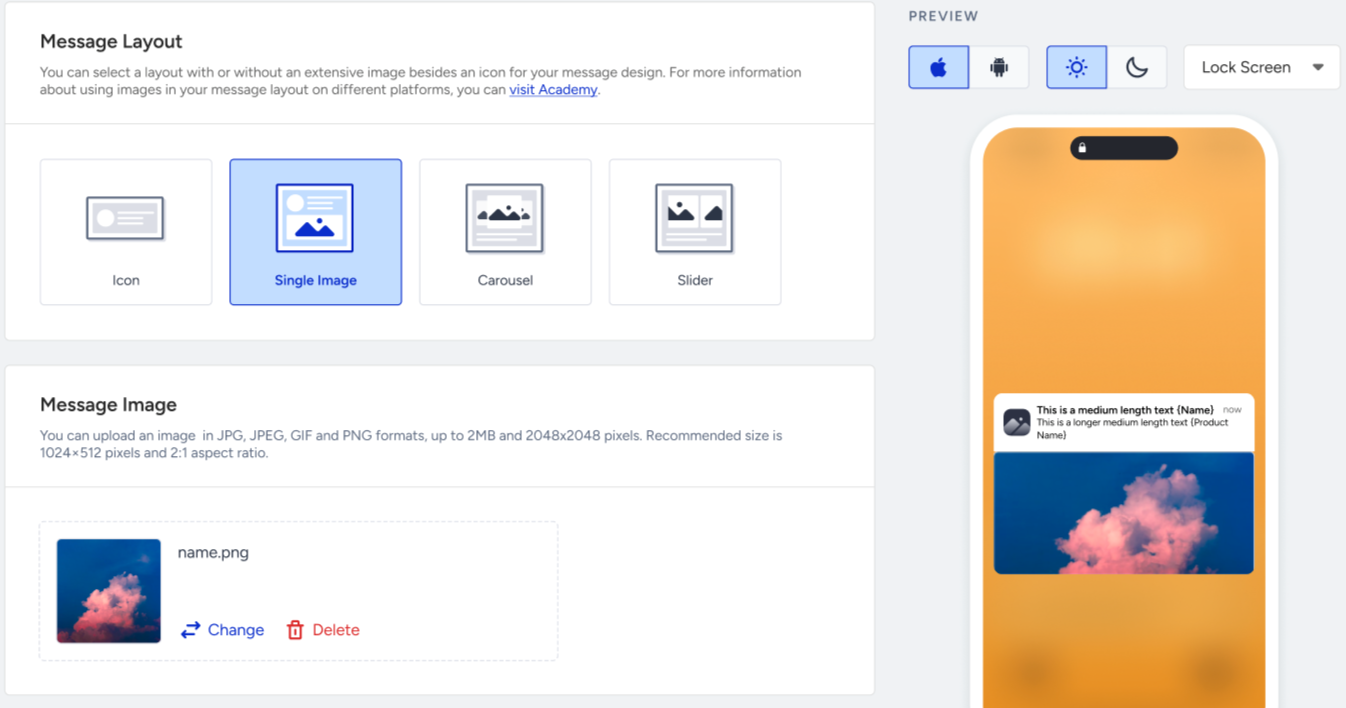
4.1. Select Icon or Single Image for your push notification. An icon push is a push with no uploaded image but the app icon while a single image push is a push with an image.
4.2. For the icon push, add your Message Title and Description.
4.3. For a single image, click the Upload Image button to add it. You can upload an image in JPG, JPEG, GIF, and PNG formats, up to 2MB and 2048x2048 pixels. The recommended size is 1024x512 pixels and a 2:1 aspect ratio.
Add dynamic content
4.4. With the Add Dynamic Content button right below the input areas, you can use the user attributes to personalize your message content for each user. You can insert the selected attribute where your typing cursor is.
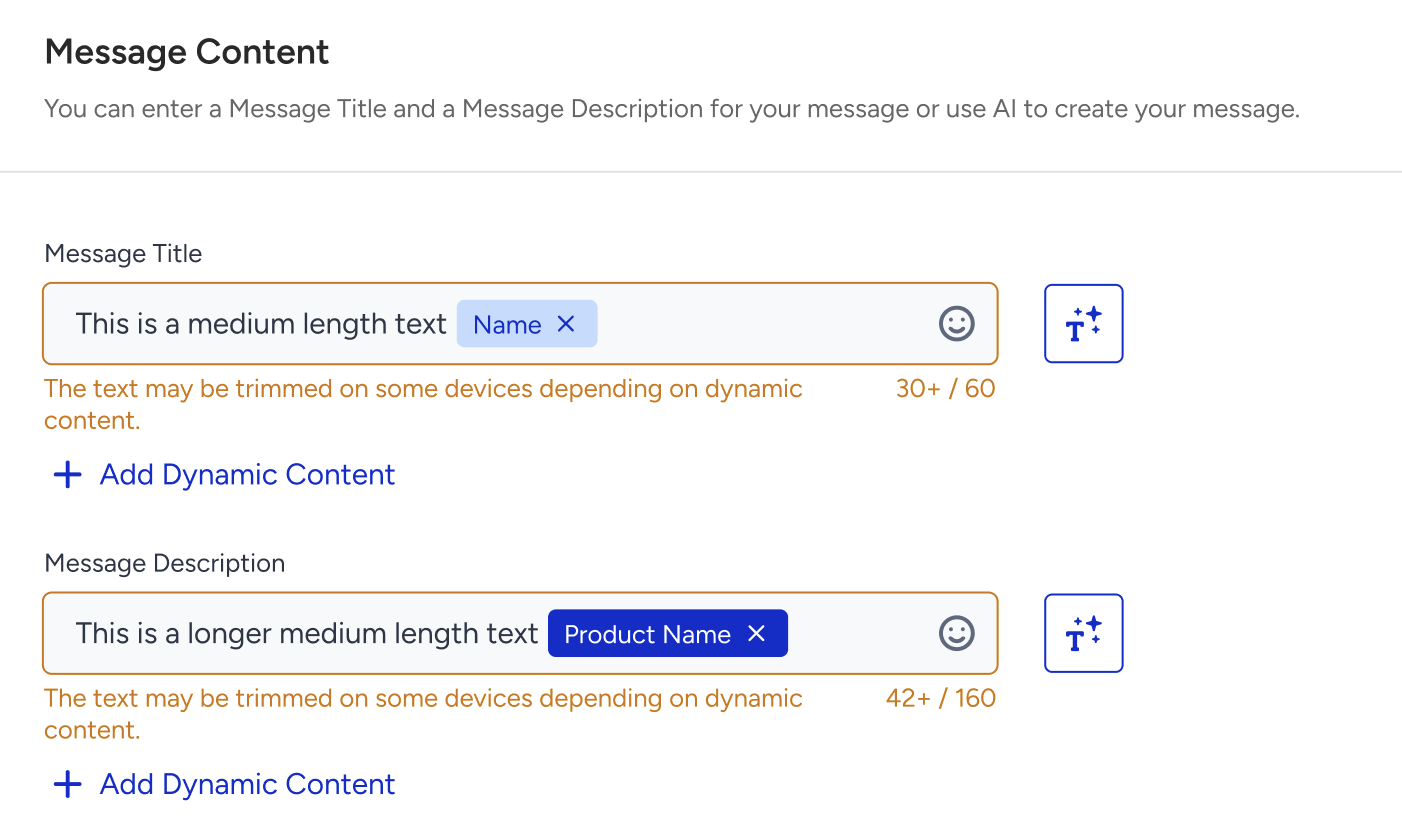
4.5. Click the emoji button against the Title and Message input areas to add emojis.
AI-generated text
4.6. To use an AI-generated text:
- Click the Generate Text button to see the side modal.
- Enter a prompt you want to generate the text about.
- The language option will be the default selected language of your panel.
- Select your industry and use case to define the context for the text to be generated.
- Click the Generate Copy button.
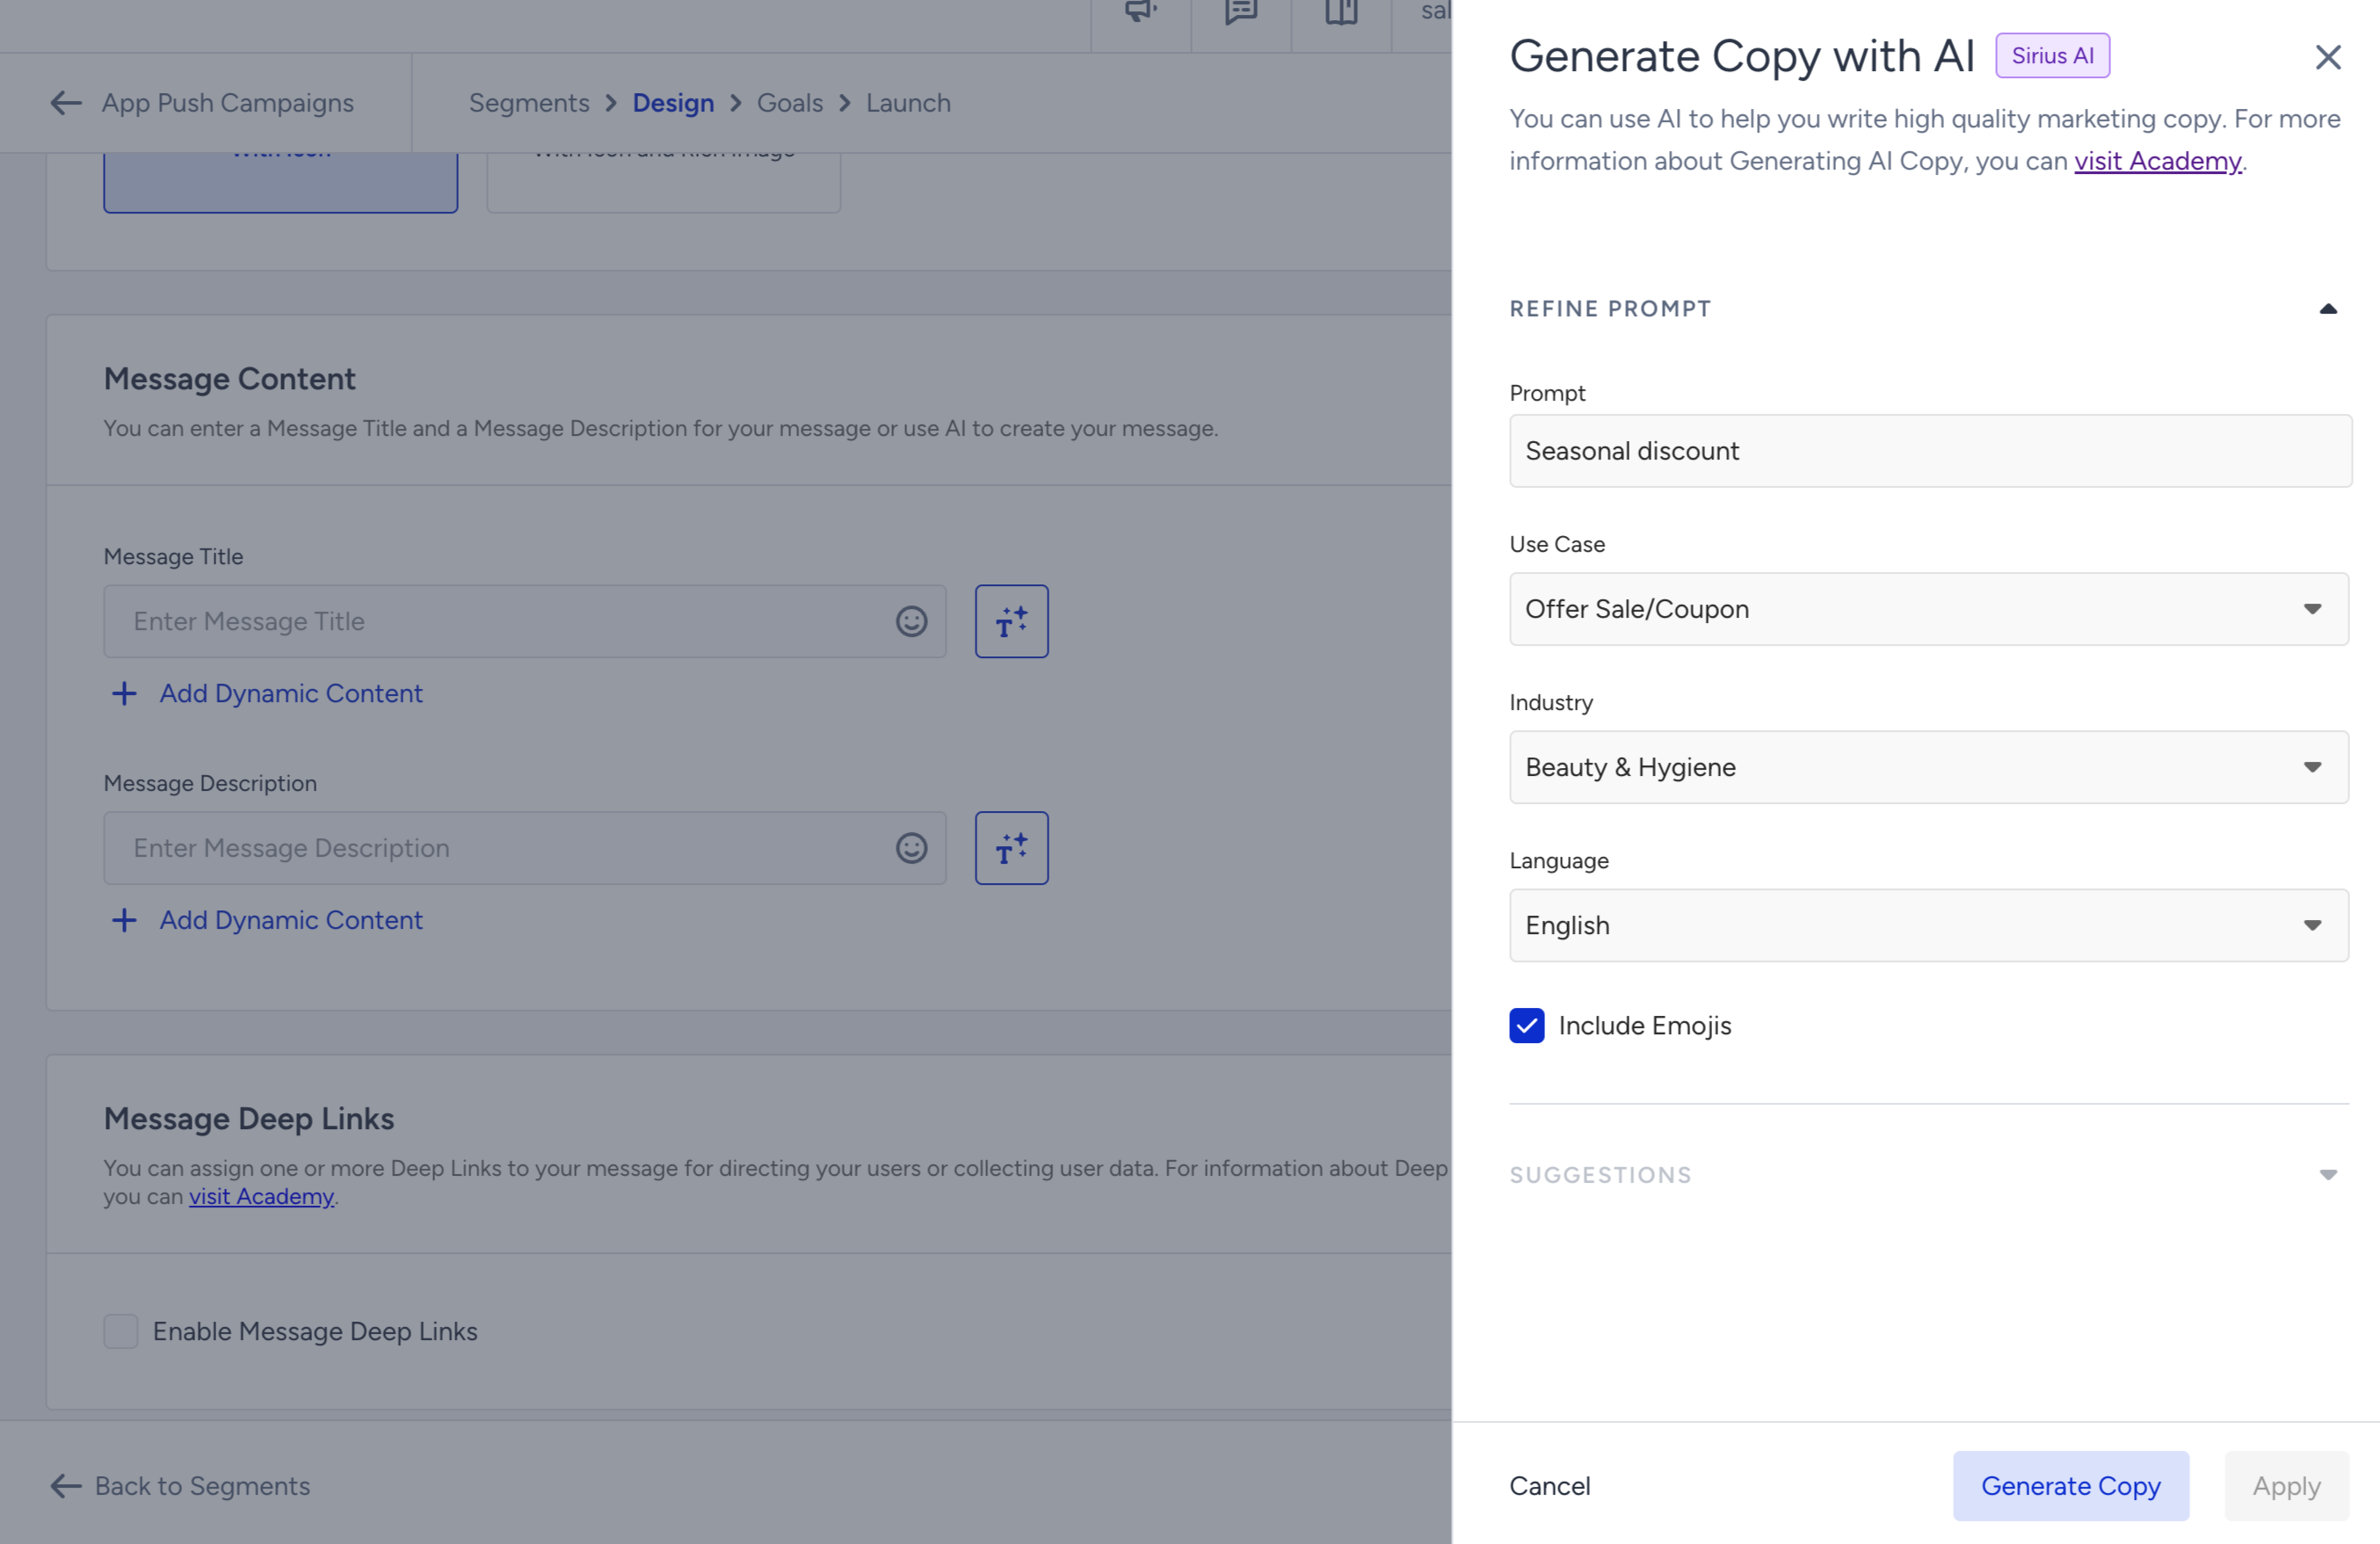
If you want to include emojis in your copy, you can check the "Include Emojis" box.
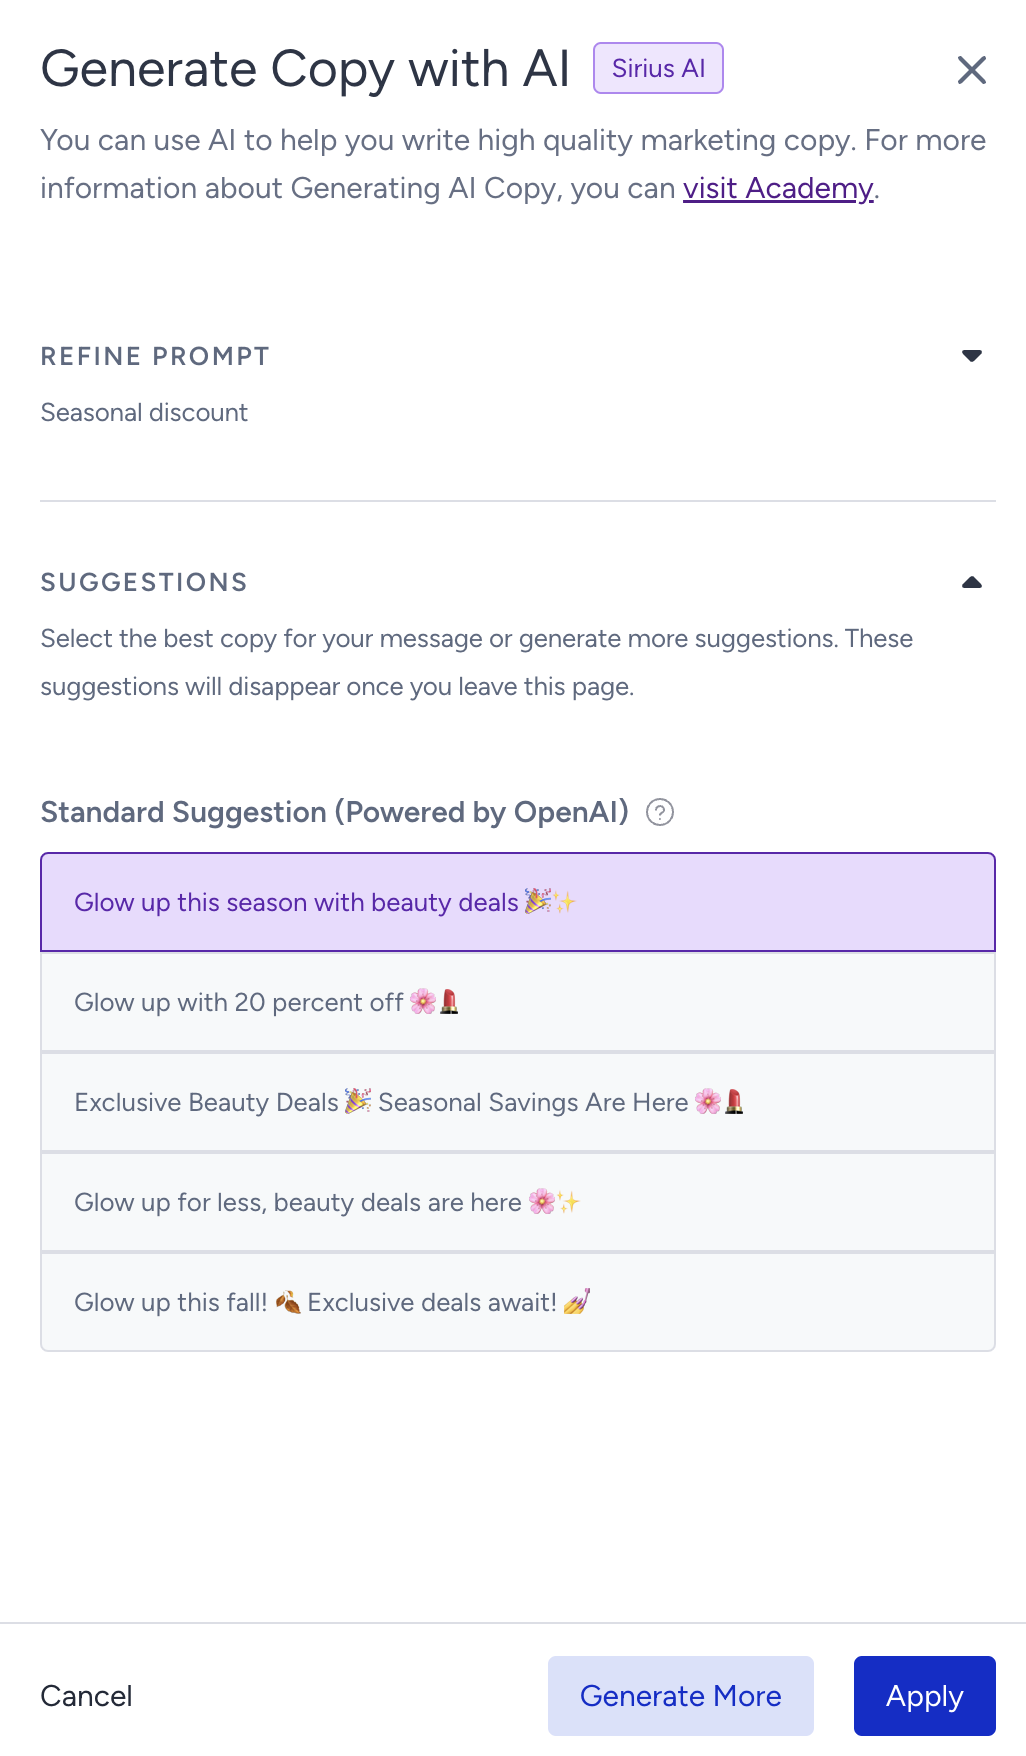
The modal displays 5 suggestions. To see more, you can click the Generate More button. To use any suggestion, you can select it and click the Apply button. Once you click the Apply button, the copy will be added to the respective field.
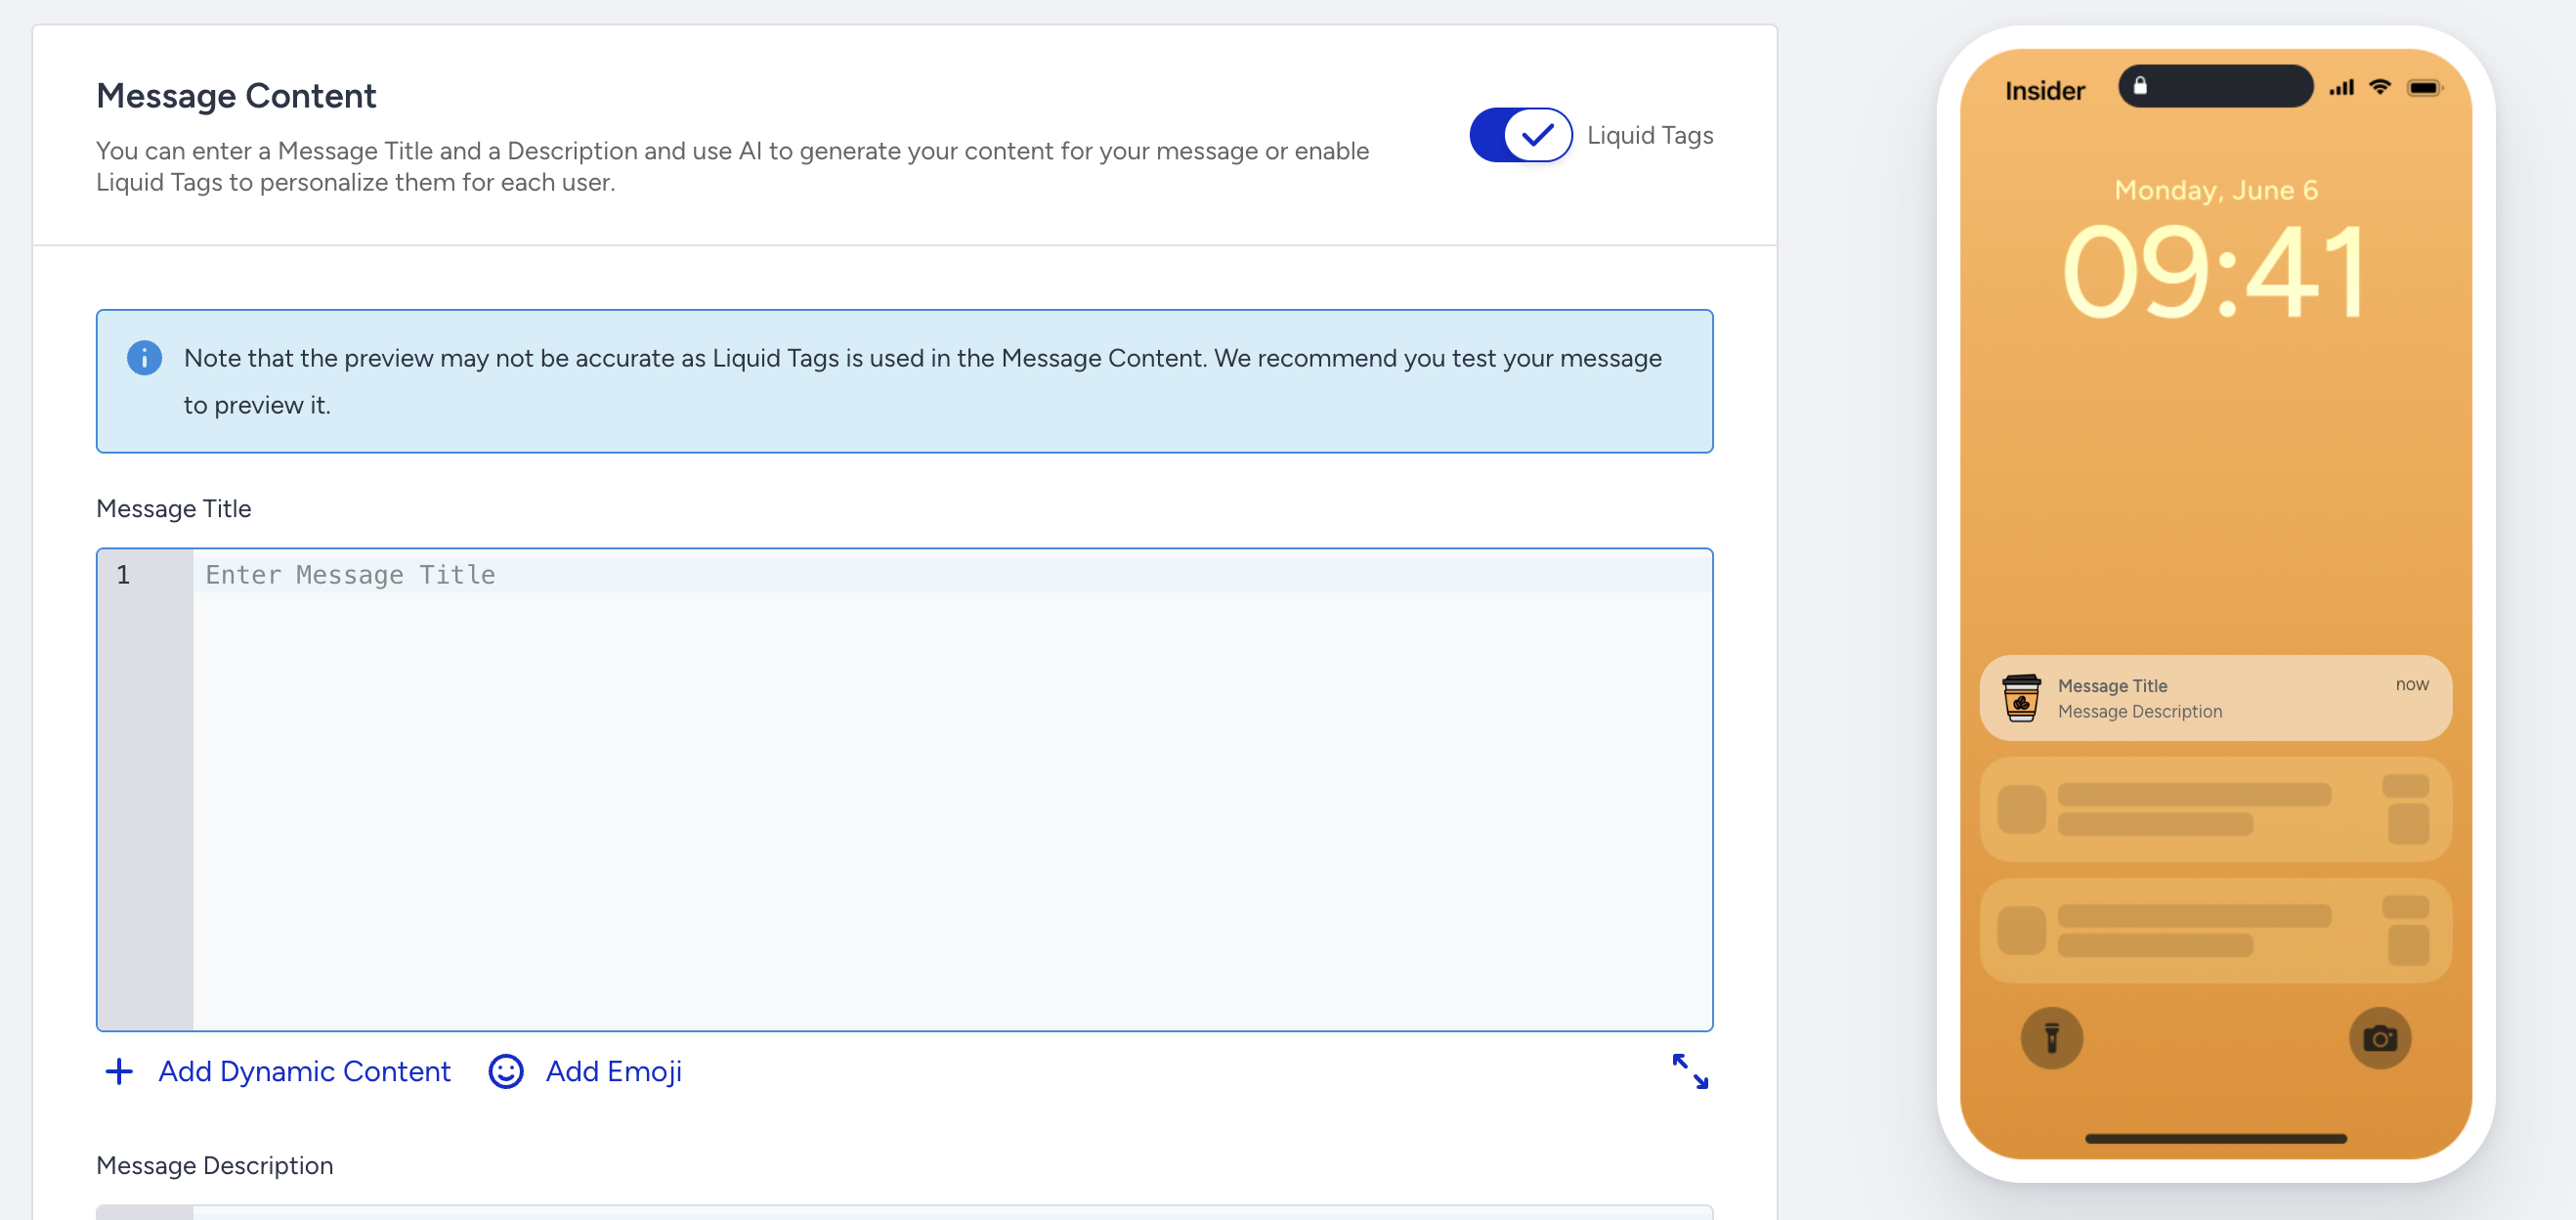
Liquid tags
4.7. To use Liquid Tags in your message title and description, toggle the Liquid Tags on.
Deep links
4.8. To add a deep link to the push message, check the Enable Message Deep Links box.
(1).png)
4.9. Select one of the deep link types to enter your key and value or add an existing deep link. Read more on deep links.
%20(1).png)
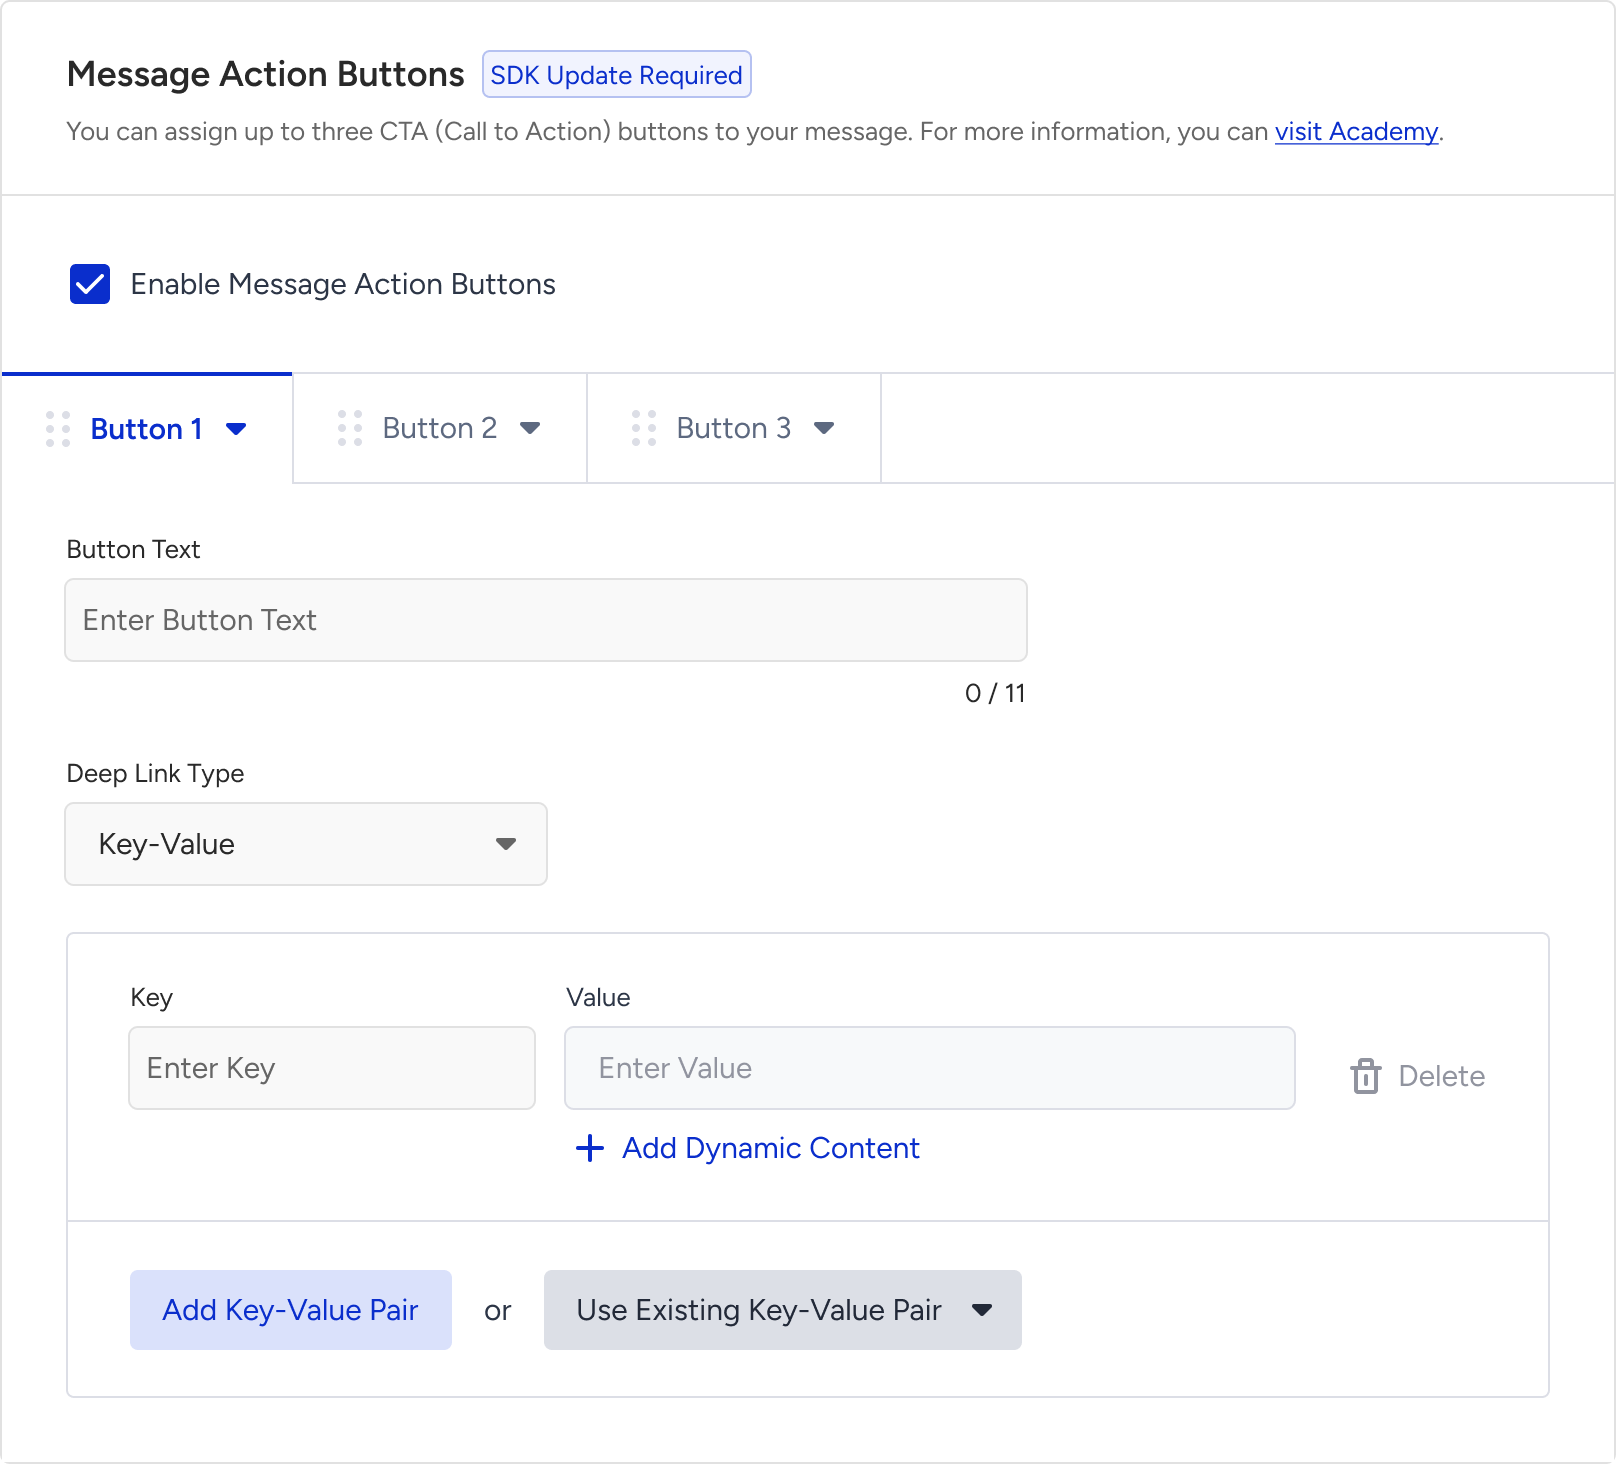
Add push CTA buttons
4.10. You can configure CTA buttons without requiring any development effort to:
- Seamlessly switch push notification types to include actionable buttons.
- Define multiple button actions in a single notification to expand redirection options.
- Customize button texts and deep links to align with your campaign goals.
- Manage all configurations directly within the panel, eliminating the need for developer involvement or app updates.
- Segment CTA buttons by user attributes, behaviors, or other targeting criteria to ensure more personalized and relevant interactions.
- Create richer, more interactive app push experiences that drive engagement and conversions.
You can add the Message Action Buttons to campaigns that use Icon and Single Image message layouts. By default, Message Action Buttons are disabled.
The action buttons will be visible depending on your SDK version. To ensure clarity, the minimum required SDK versions are:
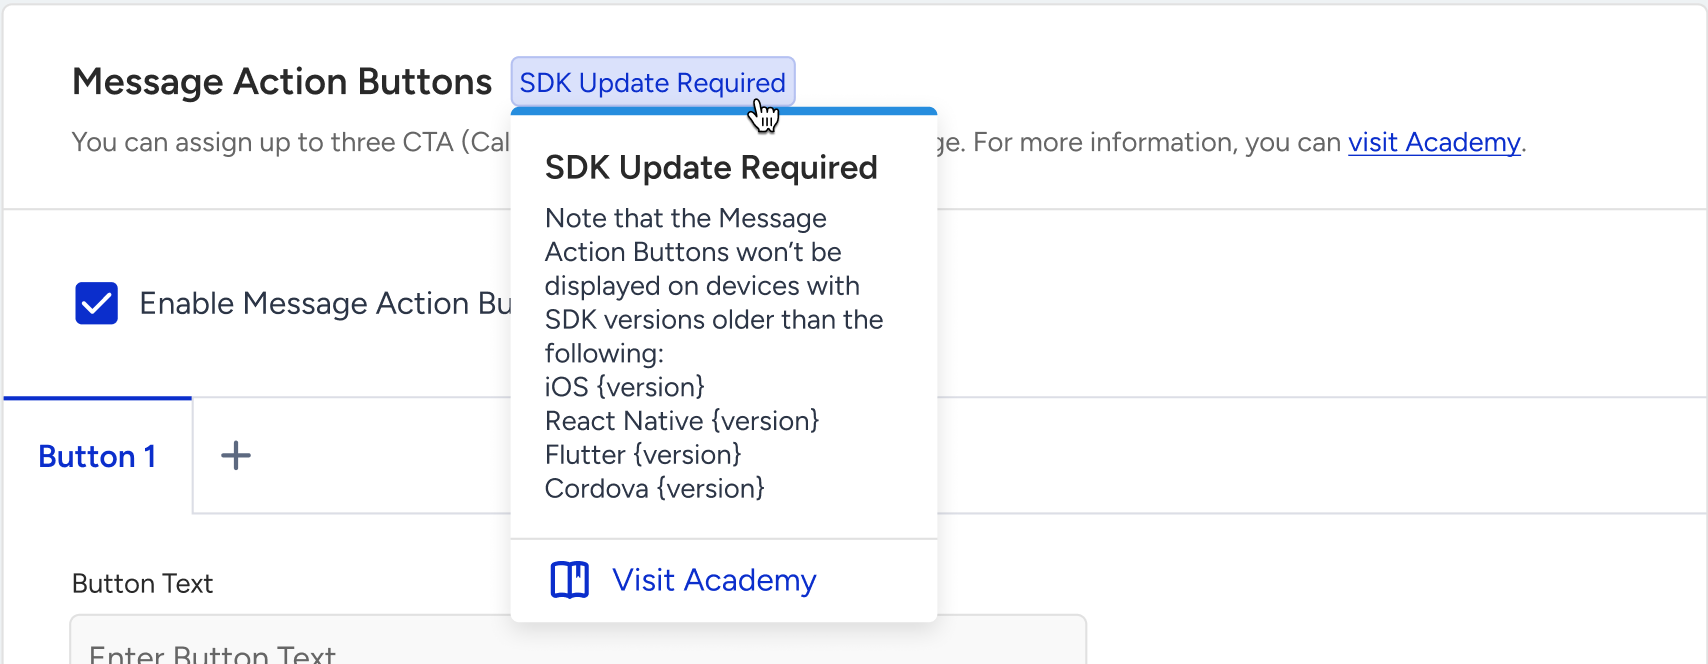
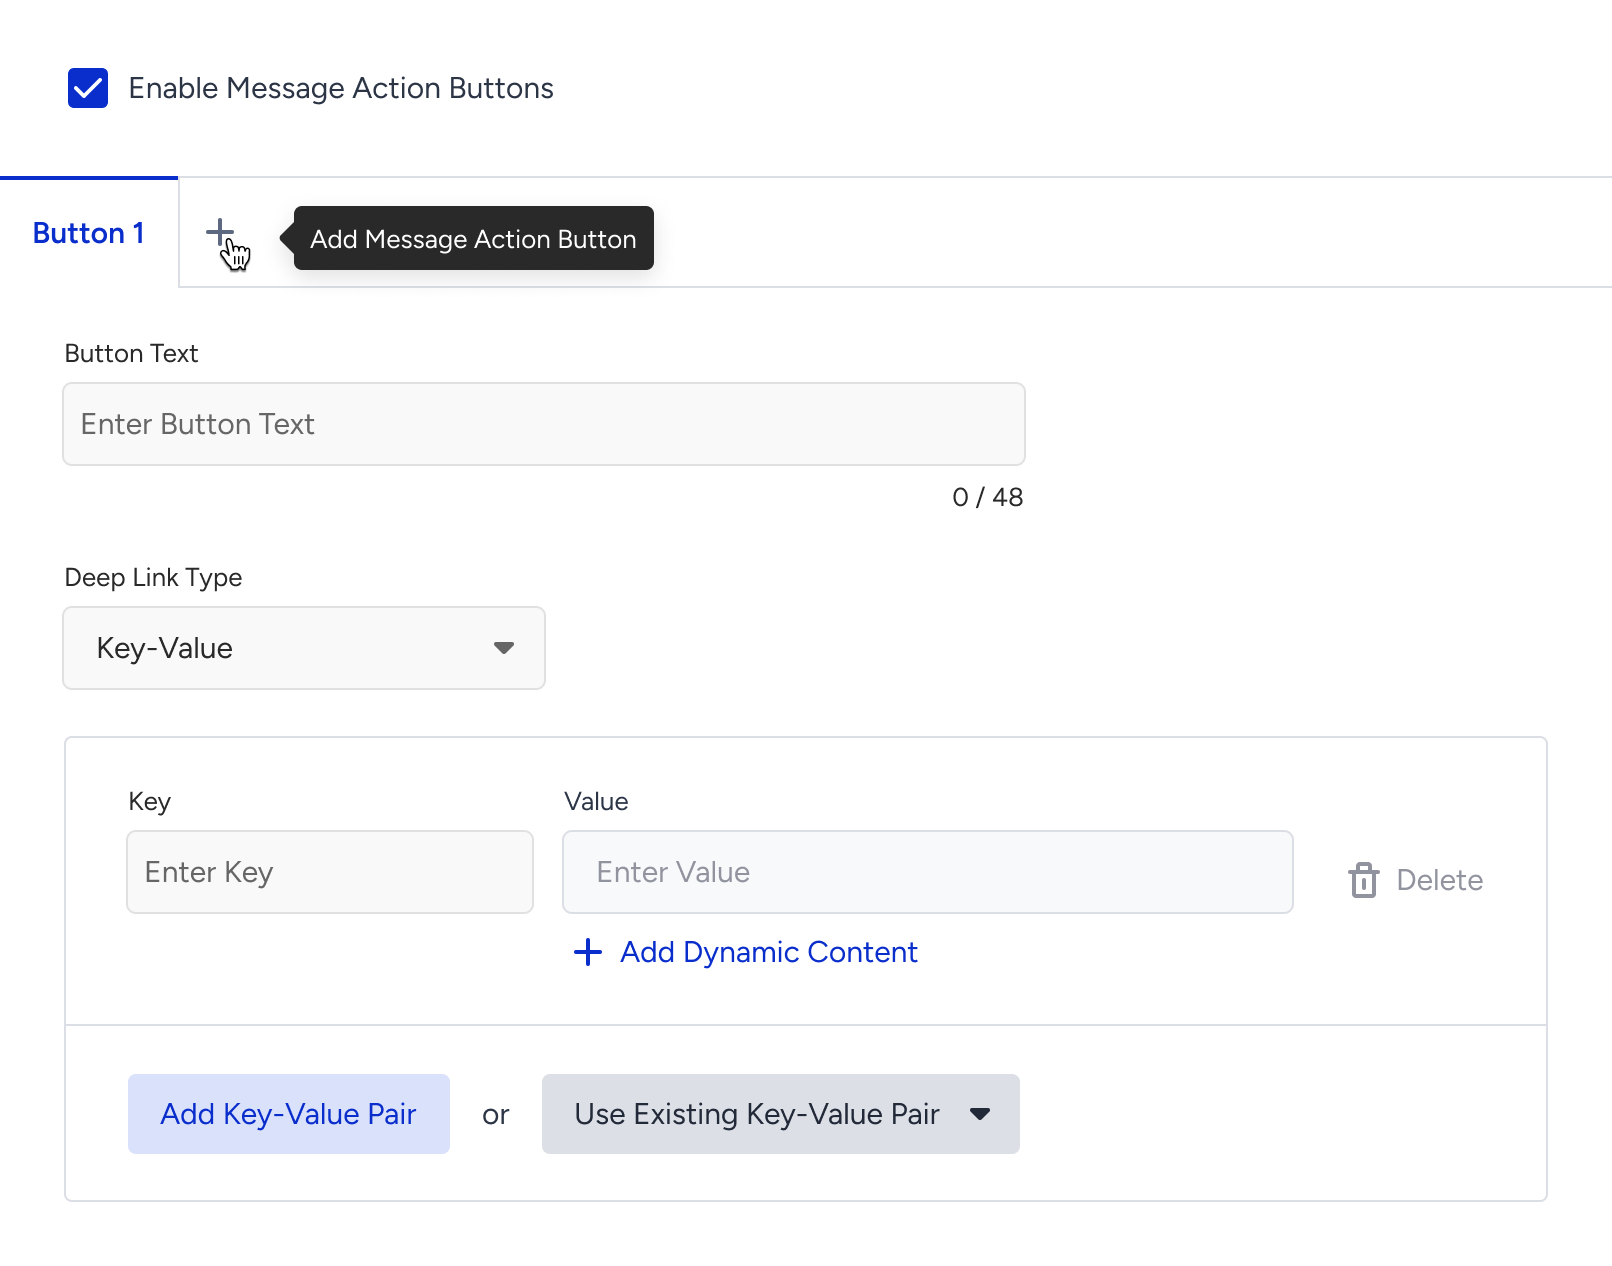
Once the action buttons are enabled, you can click the + (plus) sign to add up to three buttons. You can define a Button Text that determines how the button appears on end users' devices.
The maximum Button Text length varies depending on the number of buttons added:
- 1 button: Up to 48 characters
- 2 buttons: Up to 20 characters each
- 3 buttons: Up to 11 characters each
4.11. After adding the button text, you can assign a deep link to redirect those clicking the specific button. You can either add a new deep link of any type or select from the existing deep links you previously created.
Once you add the maximum number of buttons (three), the "+" icon will disappear. You can drag the buttons to rearrange them.
Additionally, previews will update dynamically based on the number of buttons and their content. This allows you to see a realistic preview of your campaign for both iOS and Android platforms.
Below you can see some example previews:
.png) |  |
Later, you can segment your users based on their clicks on the action buttons in the app push campaigns.
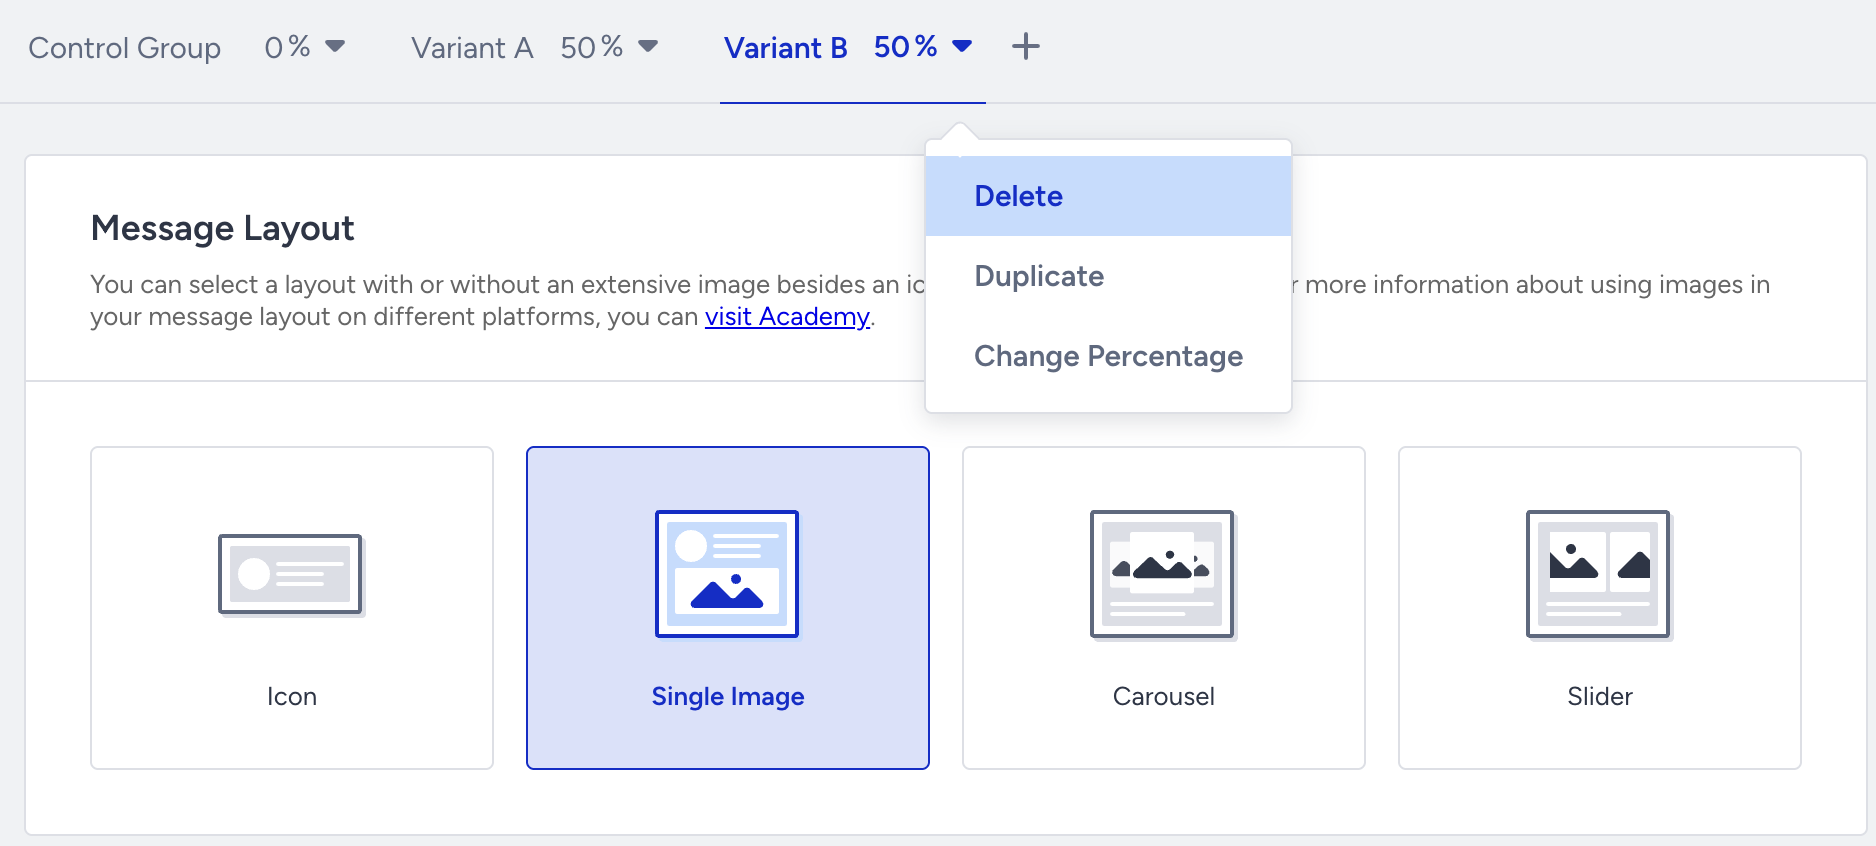
Add variants
4.12. To run A/B/C tests, click the + (plus) button next to your variant. Then click the variant to change its percentage, duplicate it, or delete it.
5. Test your campaign
You can preview your app pushes on the Create your message step while designing your message. Refer to Testing an app push to see how to test your campaign.
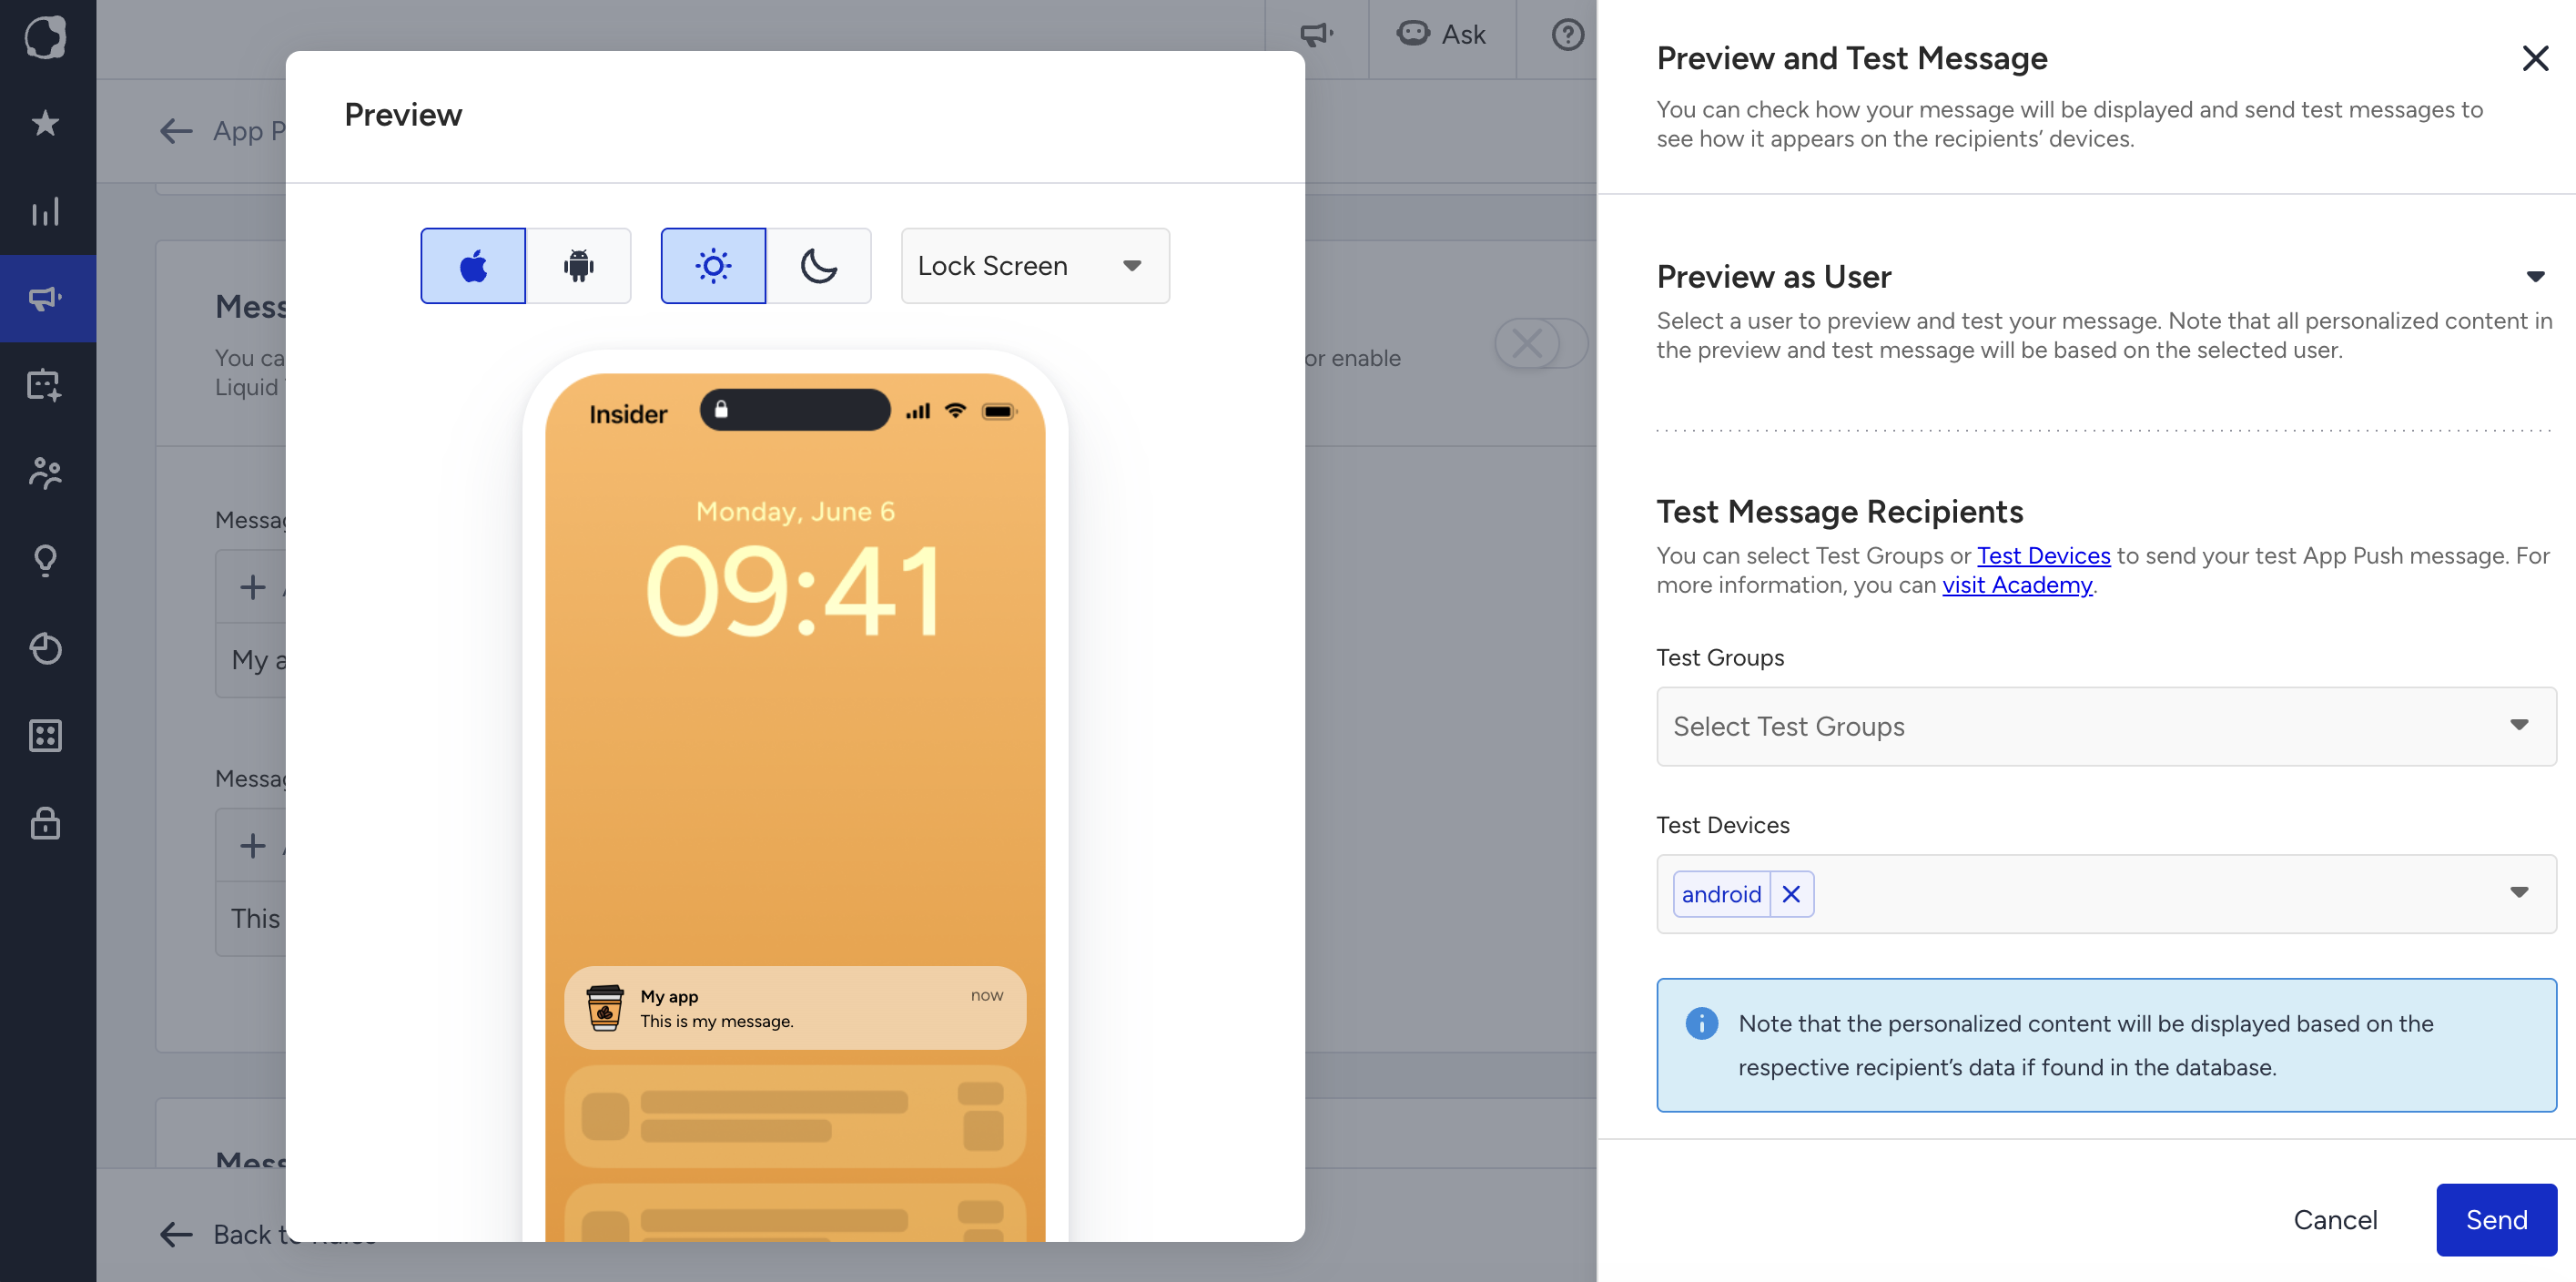
The Preview and Test Message button helps you see the campaign preview on your device.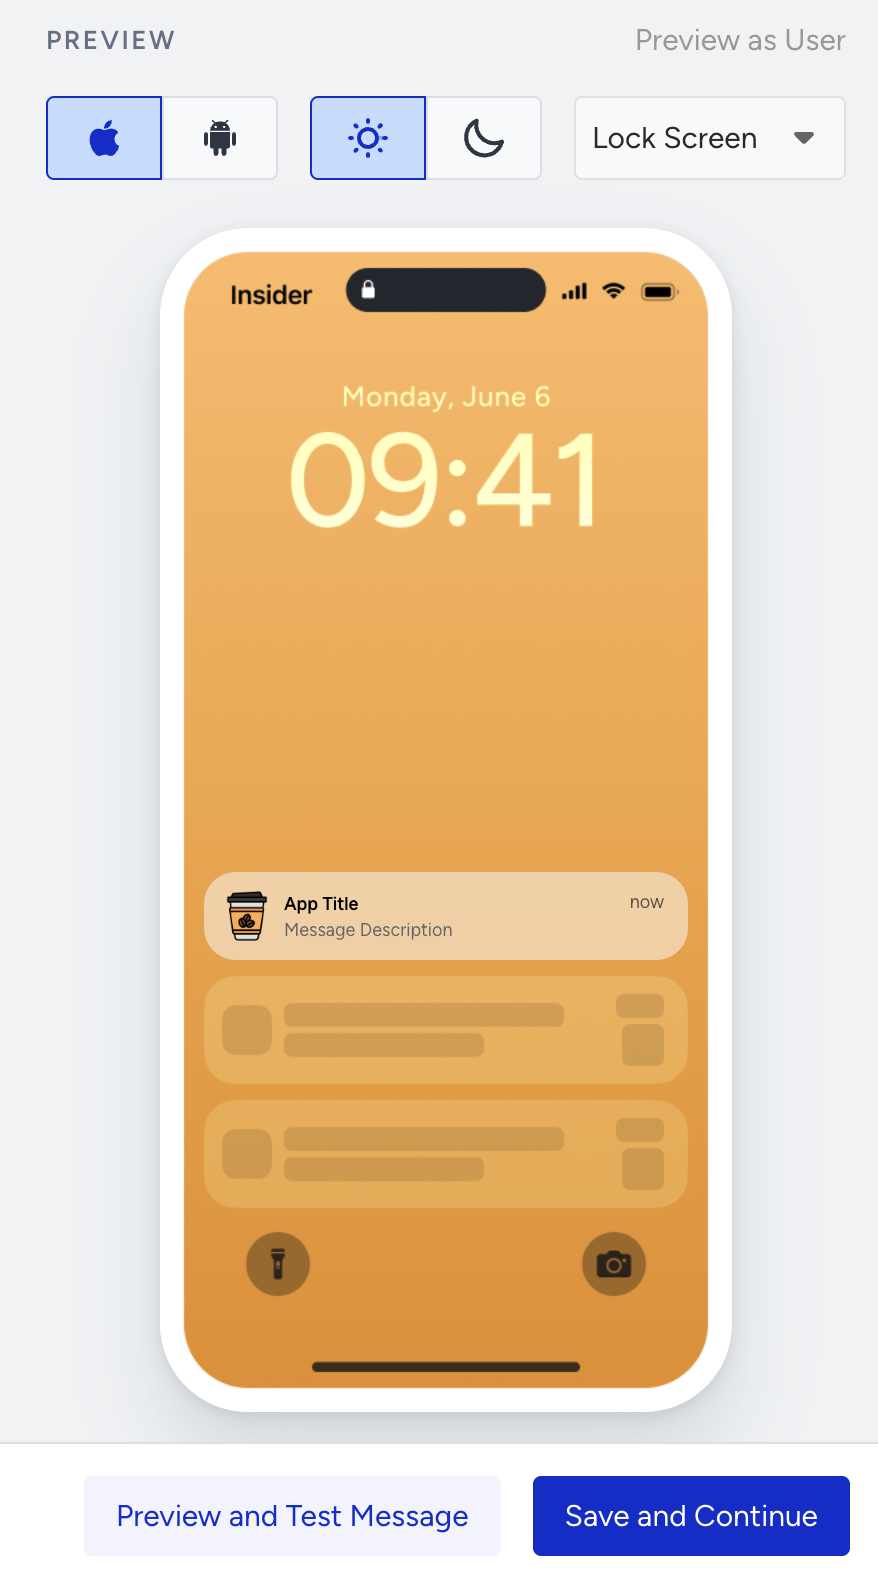
You can preview it as a user or select a test group and/or any individual user to test your message.
6. Select goals
The Goals step helps you create goals and configure conversion durations for your campaign.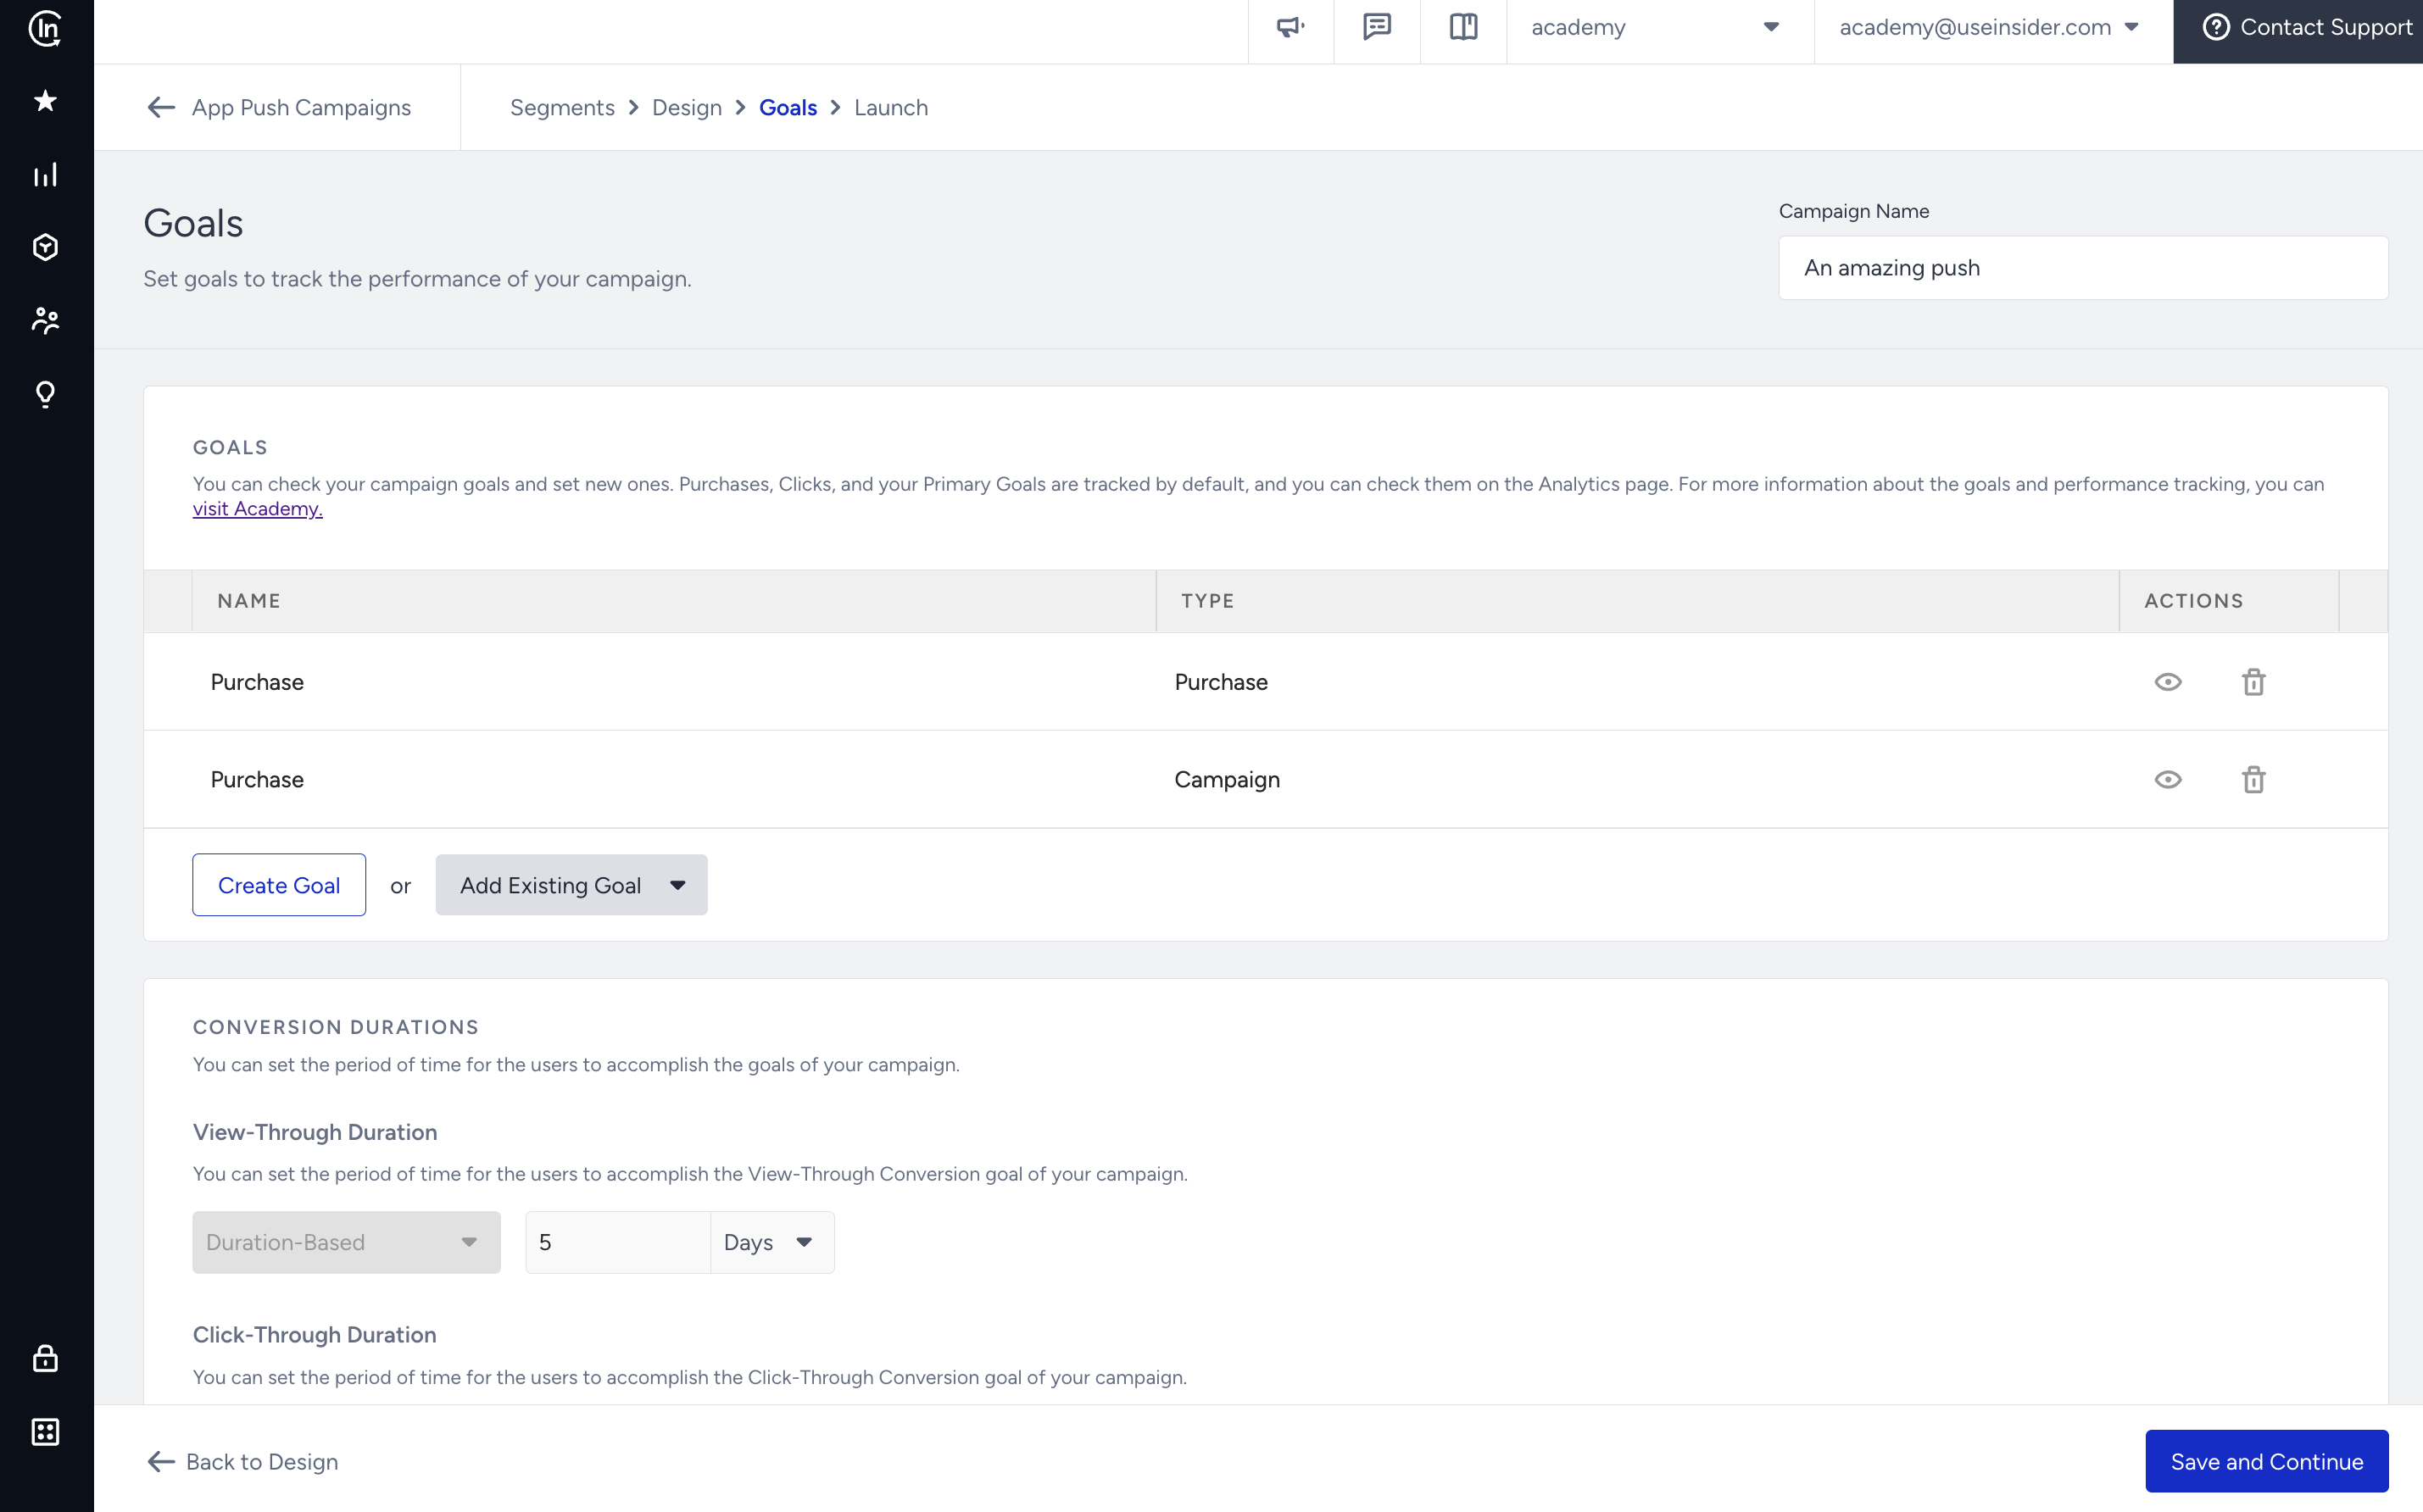
7. Configure the launch
Refer to the Launch page to configure Silent Hours, Time to Live, App Templates Campaign Linking, Frequency Capping, Message Throttling, Notification Preferences, and Campaign Tags.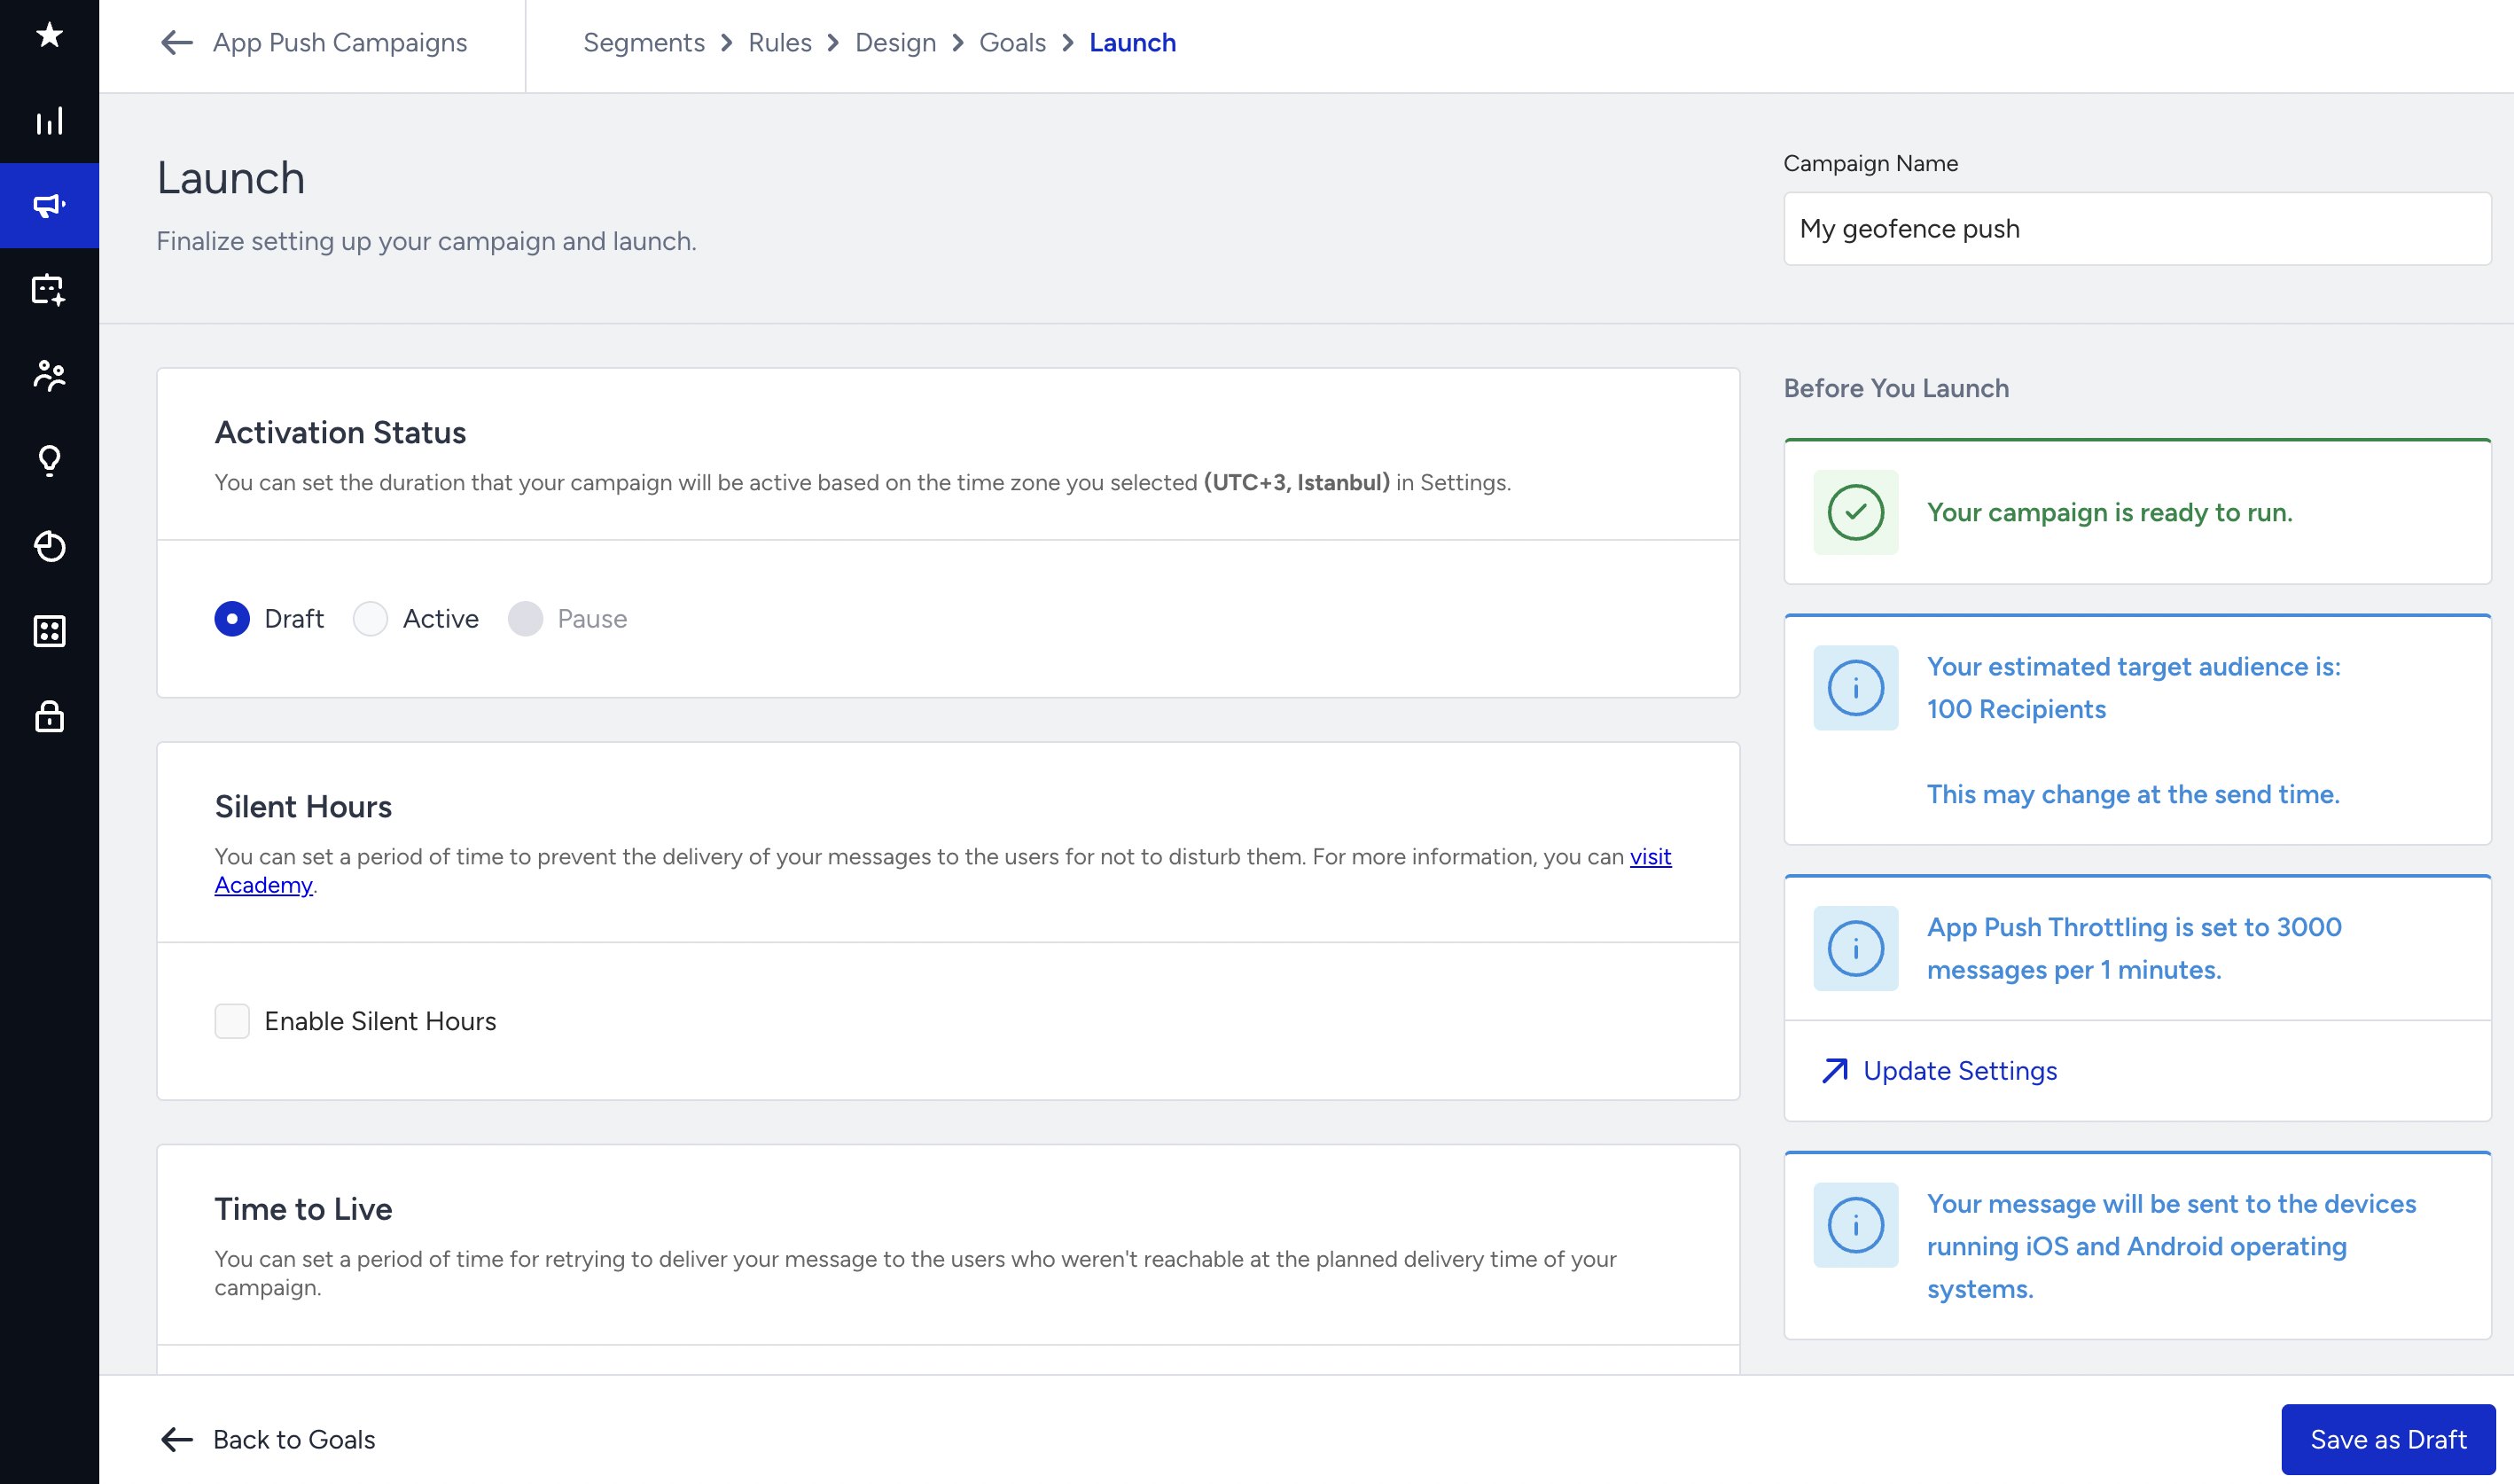
8. Check analytics
Go to the Analytics page to
- View the summary metrics
- Analyze the pie chart & graphs
- View the variant list
- Export your results
.png)