WhatsApp Flows let you create structured, interactive experiences that users can complete directly in a WhatsApp conversation. Instead of redirecting users to an external page or collecting information through multiple messages, you can provide a form-like experience through a call-to-action (CTA) button.
When a user taps the CTA button, the Flow opens in a full-screen view with one or more screens. These screens can include components such as text inputs, dropdowns, date and time pickers, radio buttons, checkboxes, and other interactive fields.
Users can complete tasks such as booking an appointment, signing up, submitting lead information, or answering a survey without leaving WhatsApp.
WhatsApp Flows are a feature of the WhatsApp Business Platform and are available through the Cloud API only.
How do WhatsApp Flows work?
A WhatsApp Flow consists of three main building blocks:
Screens: Each screen represents one step in the Flow. The first screen opens when the user taps the CTA button, and the user continues through the screens until the task is complete.
Layouts: Layouts define how components are arranged and displayed on a screen.
Components: Components are the interactive elements users engage with. These can include text, number, and email inputs; masked fields; dropdowns; radio buttons; checkboxes; calendar and date pickers; time selectors; media pickers for photos and documents; and Next and Back navigation buttons.
Each Flow is defined through Flow JSON, which specifies the Flow version, its screens, the components on each screen, and the routing between screens.
What can you use WhatsApp Flows for?
WhatsApp Flows are designed for structured, form-based tasks that would otherwise require a web form or multiple messages. Common use cases include:
Lead generation and sign-up: Collect information such as names, email addresses, preferences, and opt-in choices directly in WhatsApp.
Appointment booking: Let users select a service, choose a date and time, and confirm their booking.
Surveys and feedback: Collect CSAT, NPS, and post-purchase feedback without redirecting users to an external survey.
Sign-in and account management: Support authentication and profile update processes.
Quotes and renewals: Collect information for processes such as insurance quotes, subscription renewals, and loan pre-approval.
Support intake: Collect structured information such as an order number, issue category, severity, description, and media before continuing the support conversation.
Flows help you collect structured data and give users an end-to-end experience without requiring them to leave WhatsApp.
Where can you use WhatsApp Flows?
You launch a WhatsApp Flow from a CTA button in a WhatsApp message. You can use Flows in scenarios where you would otherwise send an external link or collect information through several messages.
Common scenarios include:
Proactive and outbound messages: Attach a Flow to a message template and send it as part of a campaign or broadcast.
Click-to-WhatsApp entry points: Open a Flow after a user starts a WhatsApp conversation through an advertisement, QR code, or link.
Chatbot and agent journeys: Trigger a Flow when structured input is required, then continue the conversation after the user completes it.
Flows are especially useful when you need to collect multiple structured fields in the same session, rather than asking for each piece of information separately or redirecting the user to an external form.
Create a WhatsApp Flow in WhatsApp Manager
You can create a Flow and attach it to a message template in WhatsApp Manager.
To create a message template, navigate to Message templates > Manage templates > Create template in WhatsApp Manager.
Select Marketing, Utility, or Authentication as the template category, and select Flows as the message type.
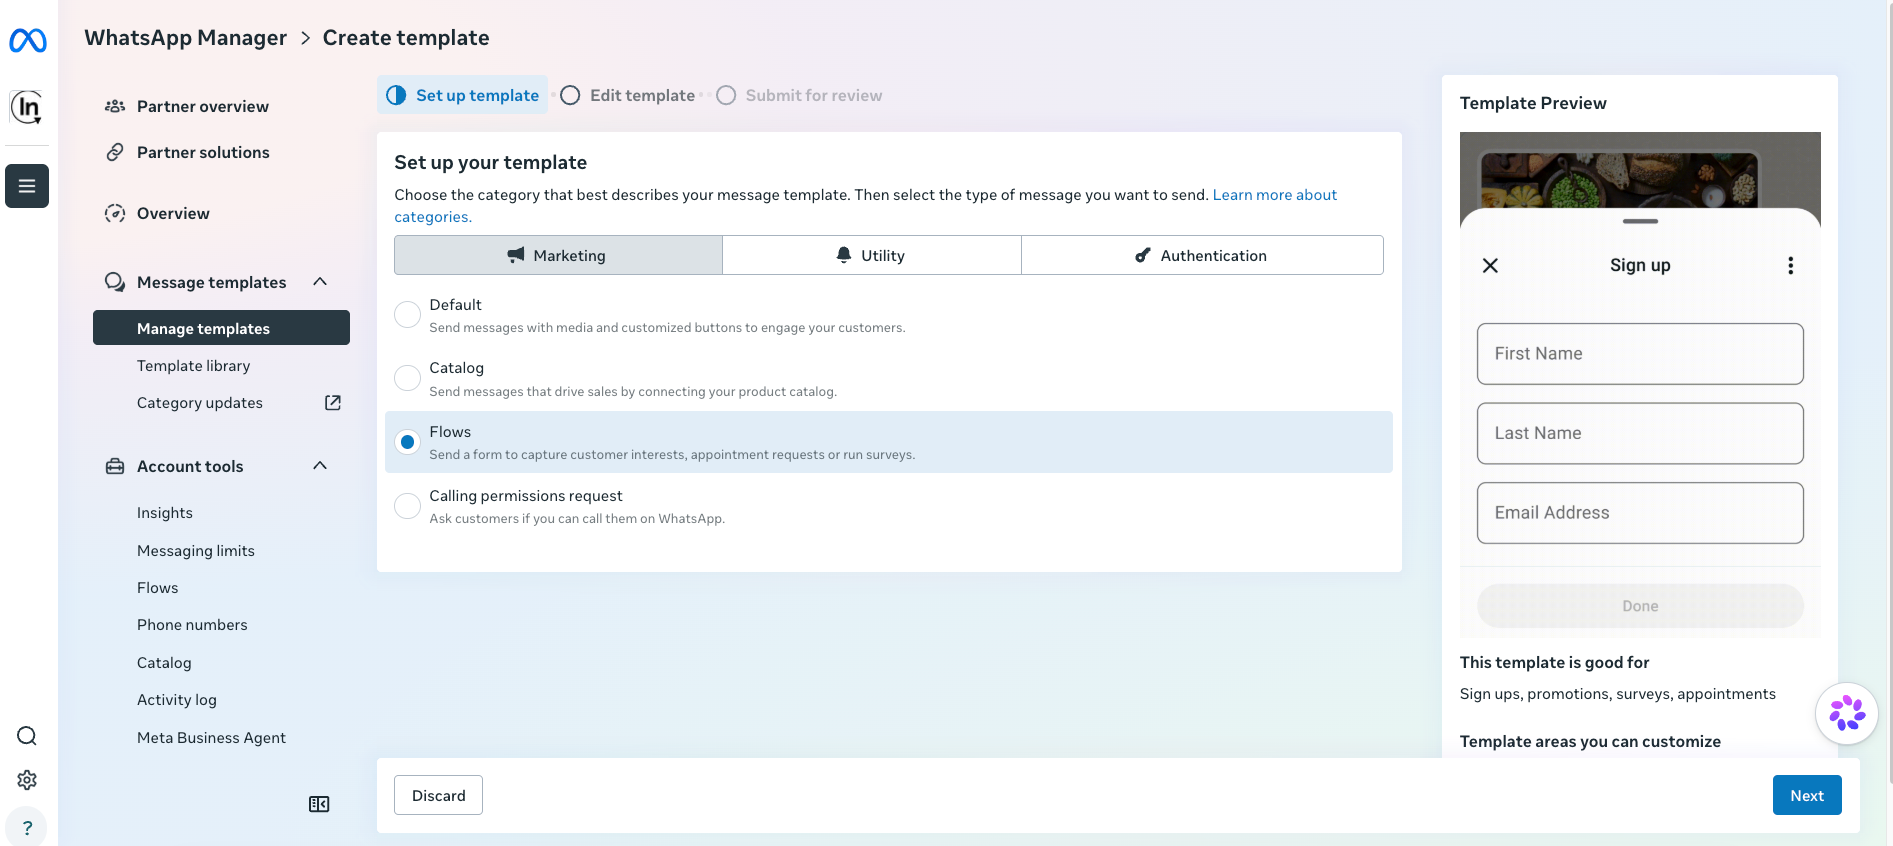
To configure the template details, enter a name and select the language on the Edit template step.
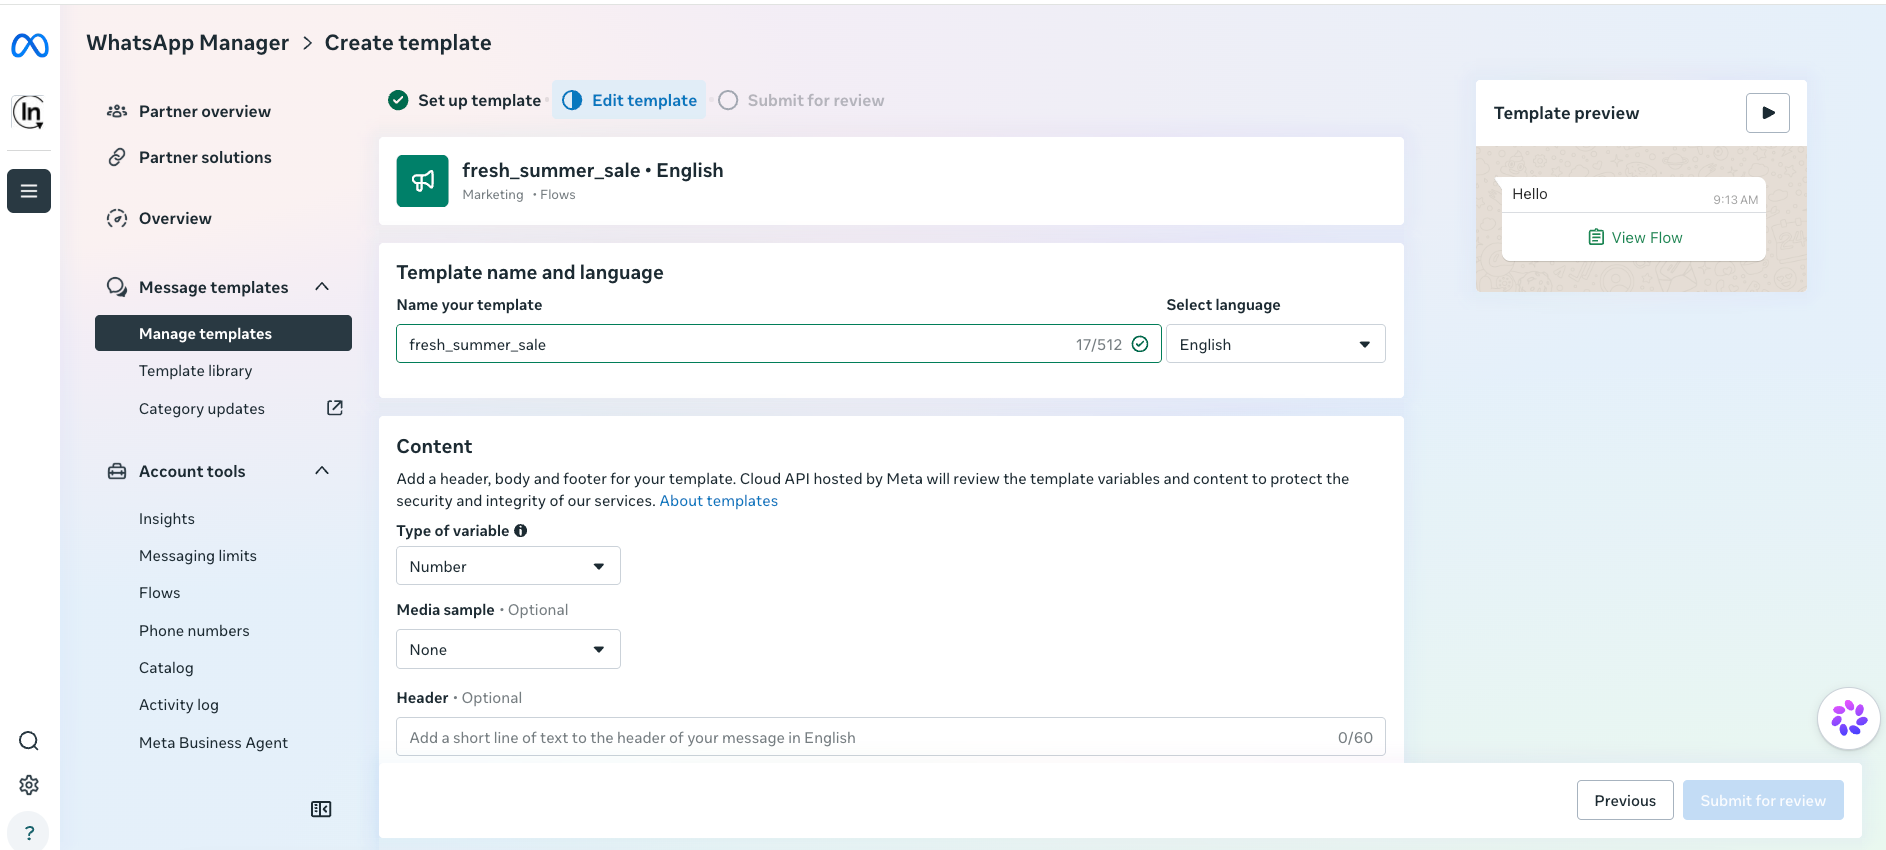
To add the message content and CTA, enter the message in the Body field and optionally add a footer.
Under Buttons > Call to Action, set Type of Action to Complete Flow. Then, configure the button icon and button text, such as “View Flow”.
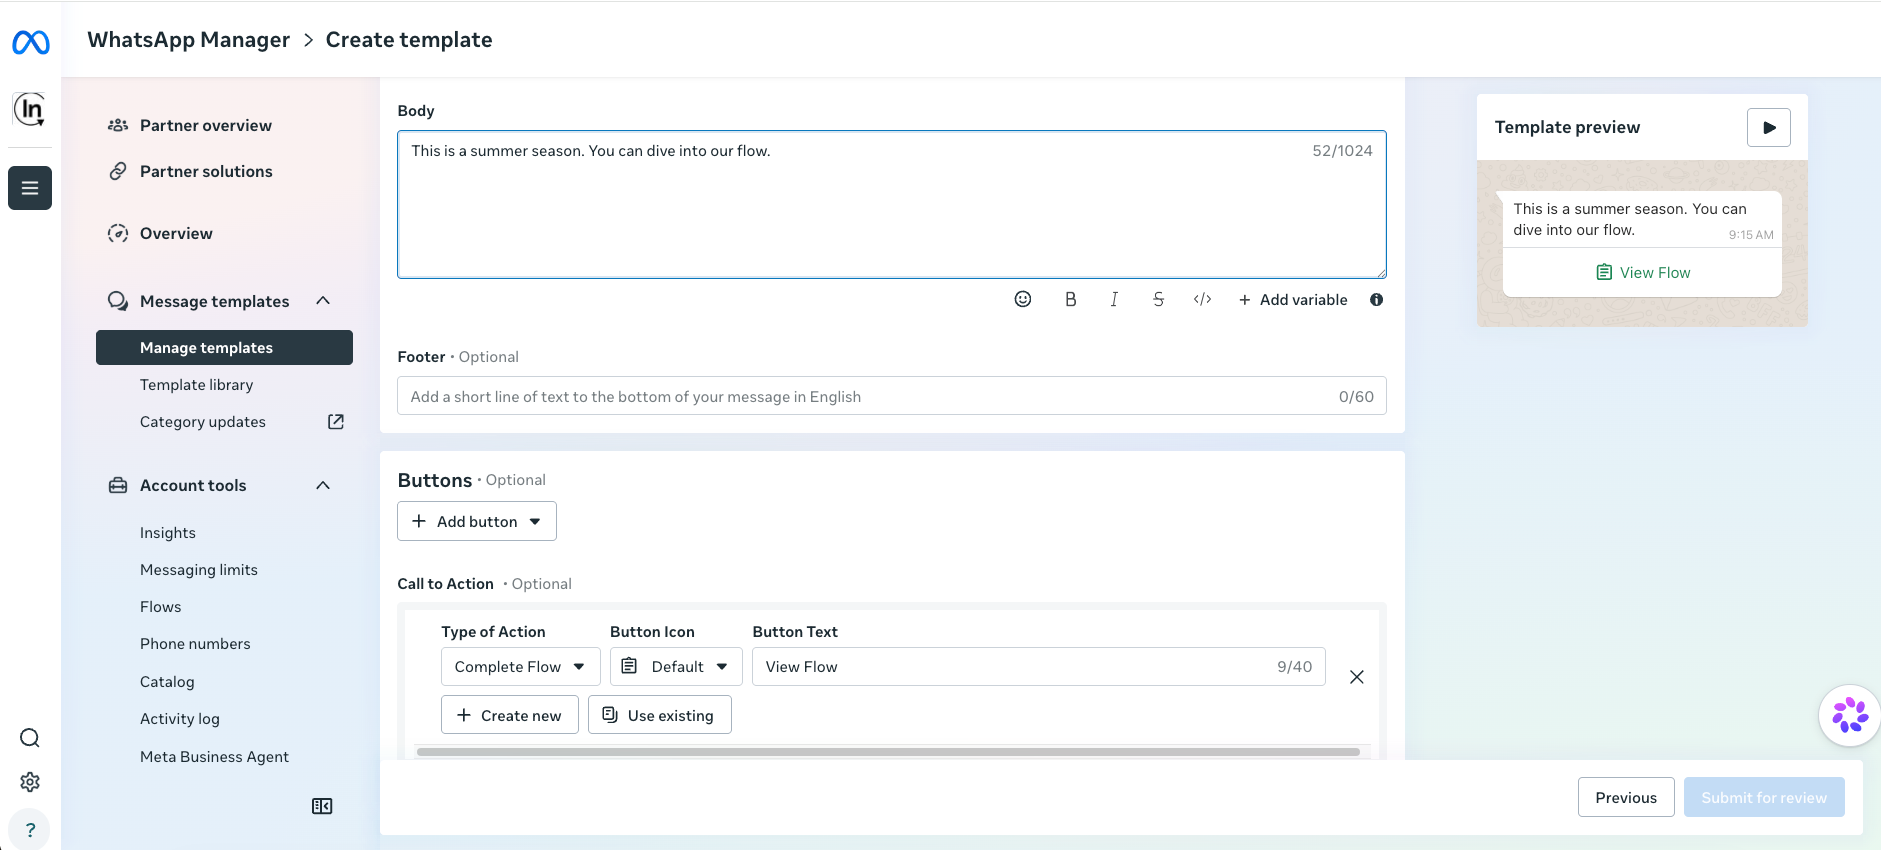
To attach a Flow, click Create new to create a new Flow or Use existing to attach an existing Flow.
To select a Flow type, choose one of the available starting points:
Send a survey
Register for an event
Complete sign up
Custom form
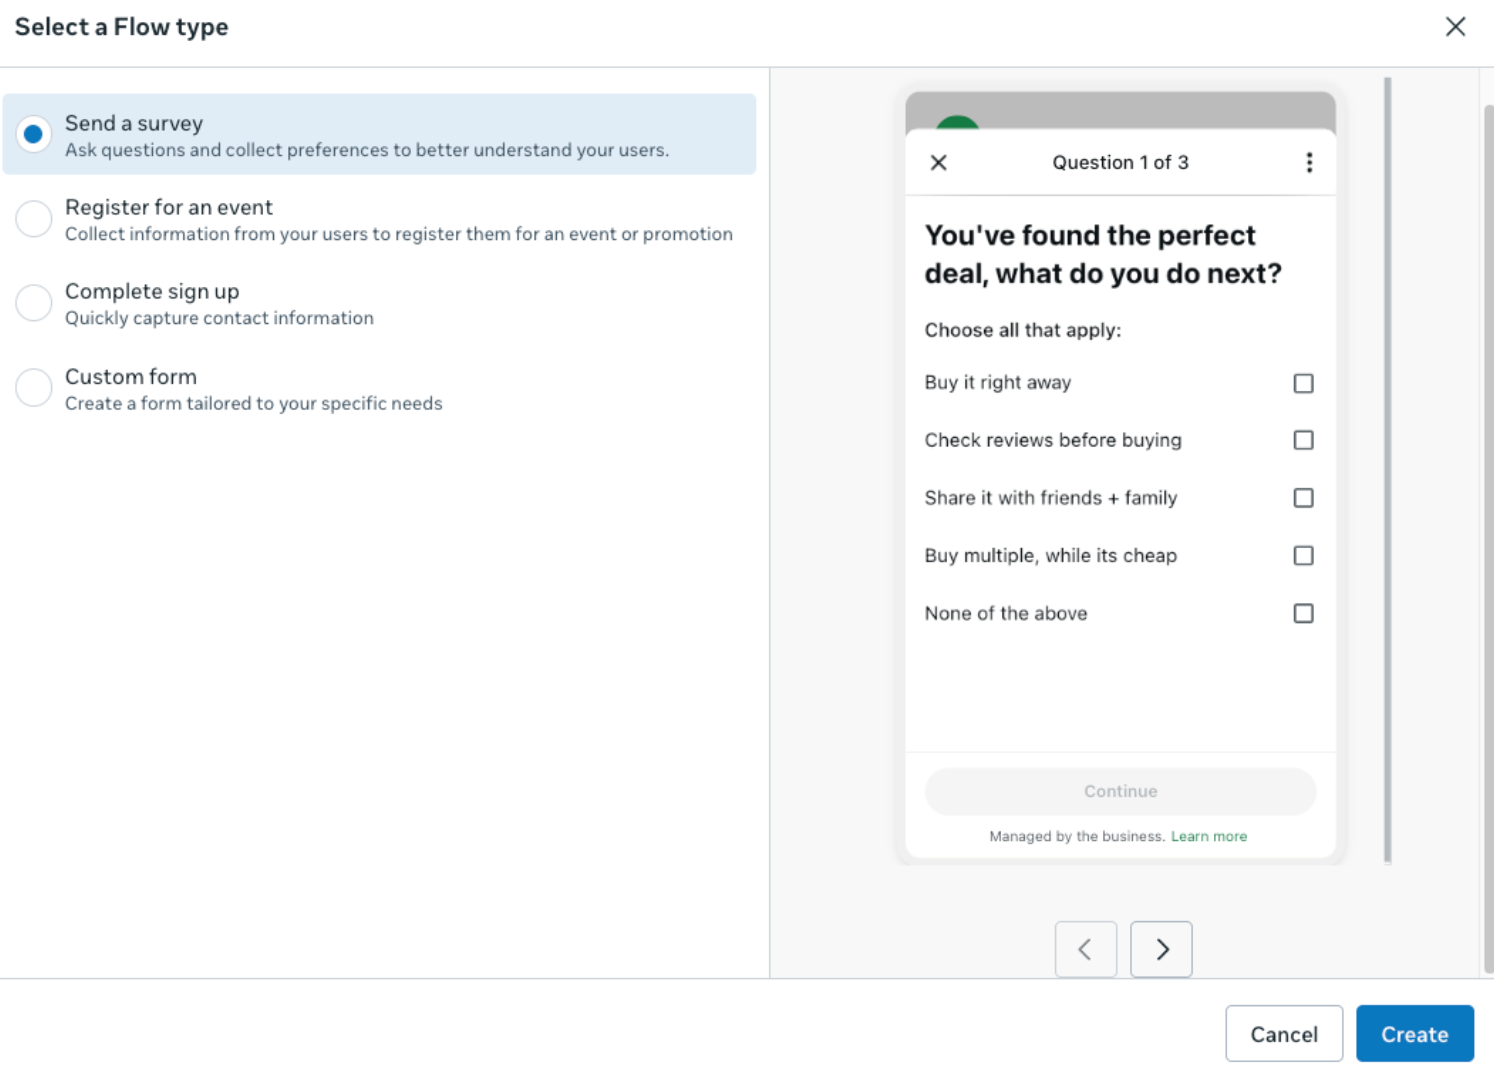
Click Create to continue.
To build the Flow screens, add one or more entries under Screens in the Flow builder. Configure each screen by adding its title, headings, and required components, such as multiple-choice options or text inputs. Use the Preview panel to review how the Flow appears to users.
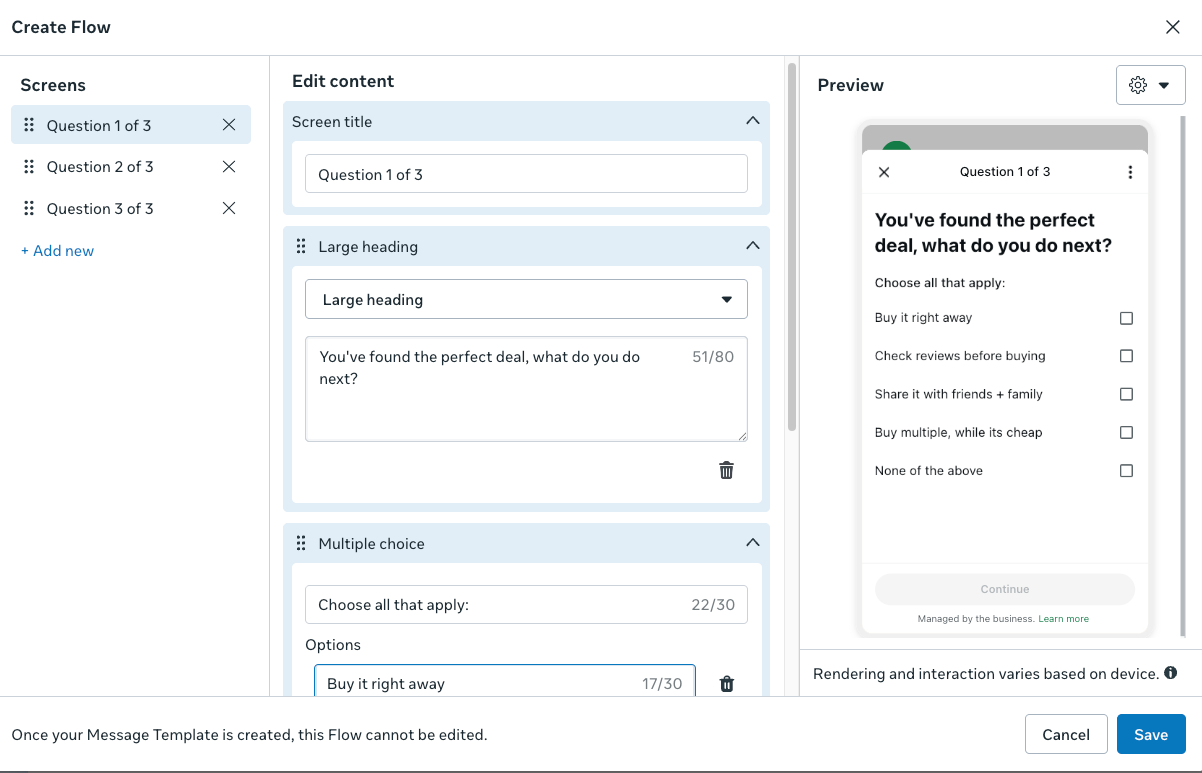
To attach the completed Flow to the message template, click Save.
To submit the template for review, return to the template editor. The attached Flow appears under Call to Action with the Edit and Delete actions. Complete the remaining template fields and click Submit.
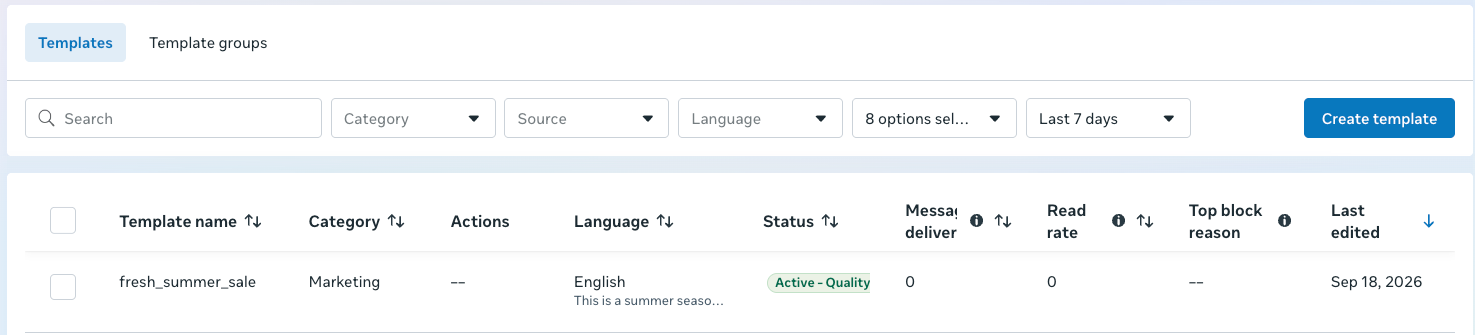
After approval, the template appears under Manage templates with its category and status.
After you create a message template with a Flow attached, you cannot edit the attached Flow. To make changes, delete the existing Flow from the template and replace it with a new one.