After generating your API Key, set your webhook URL in the account’s API settings to ensure successful message delivery and event tracking for WhatsApp.
Important notes:
Make sure to allow Insider One IP addresses on your server to receive webhook requests successfully.
Your system must respond with 200 OK to our request for the webhook to be saved and function correctly.
Test webhook URLs can be used temporarily to trigger test messages, but they may become outdated and cause errors. For reliable delivery, we recommend entering the actual webhook URL and sending a test message to yourself.
How to Configure Your Webhook URLs
Follow the steps below to configure your credentials for sending messages via Conversational and Transactional APIs:
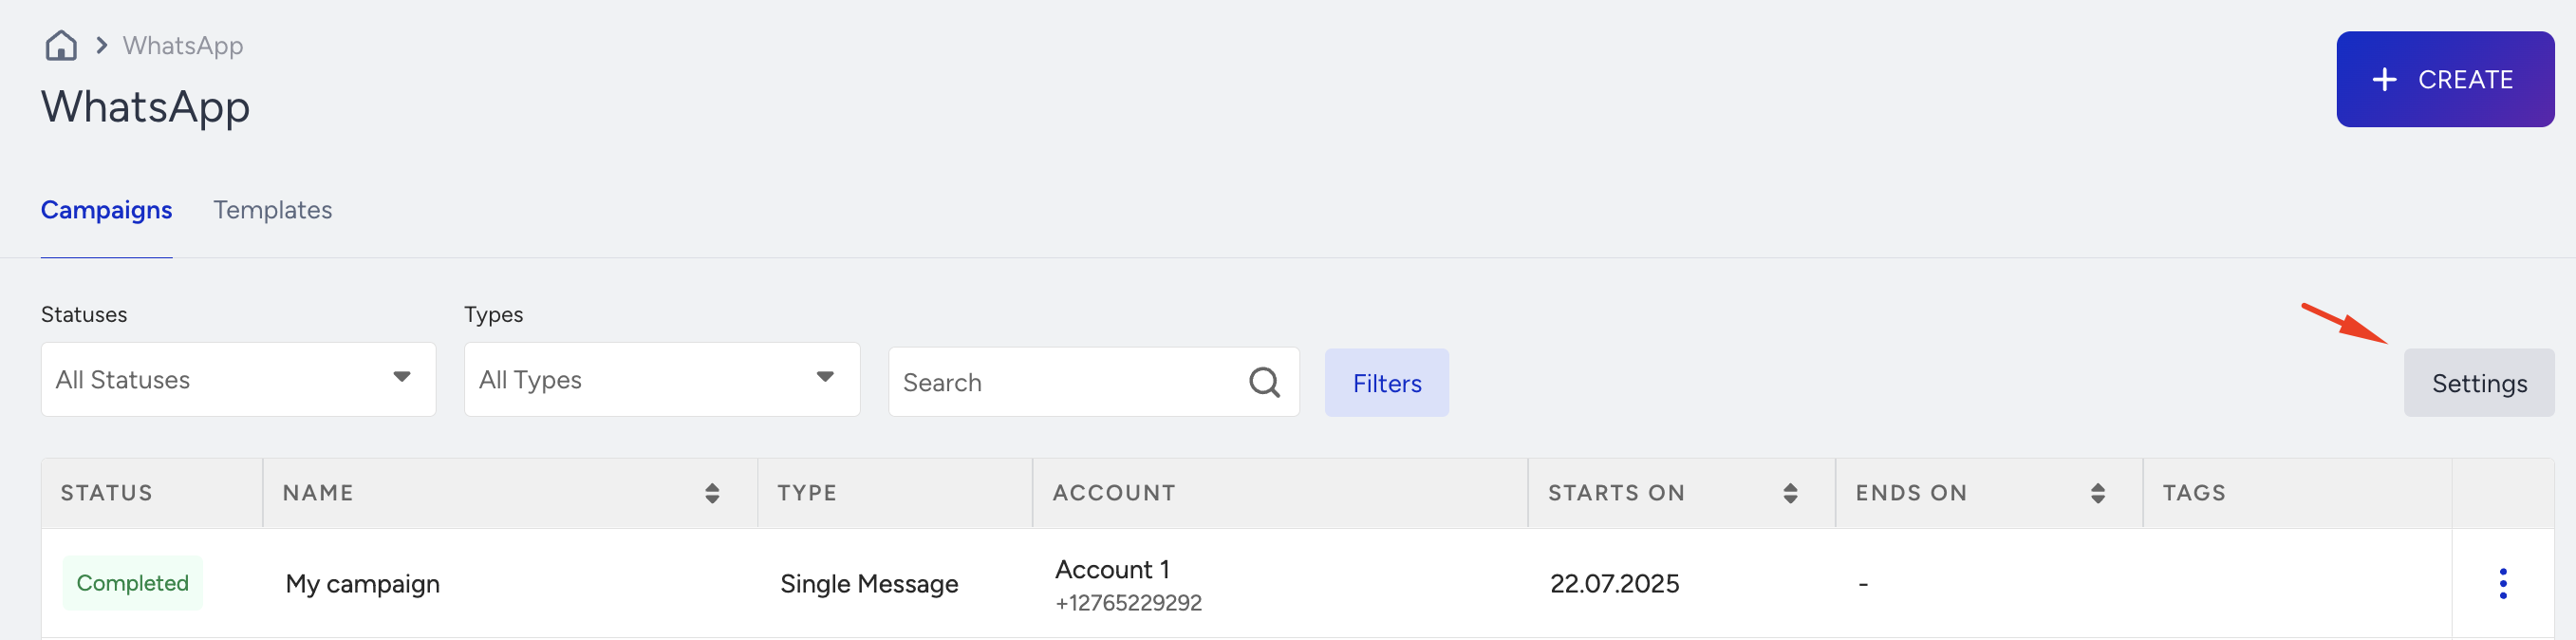
Navigate to WhatsApp > Settings.
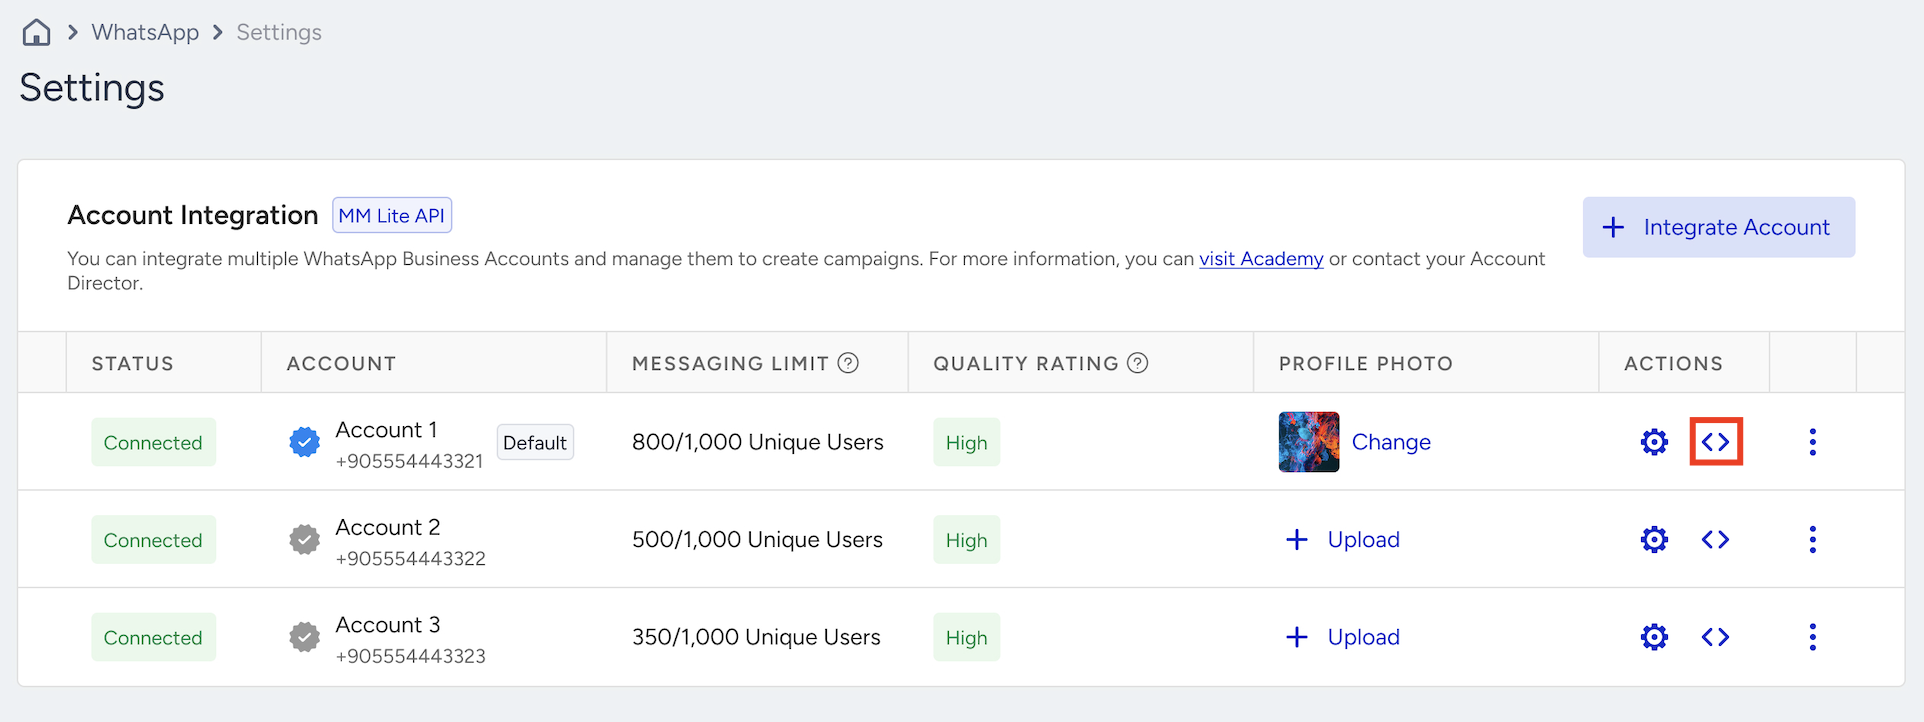
Click the Account APIs icon under the Actions column.
In the Account APIs panel, you can configure separate webhook URLs for:
Conversational API (for marketing and chatbot use cases)
Transactional API (for transactional messages)
Verify API (for OTP use cases)
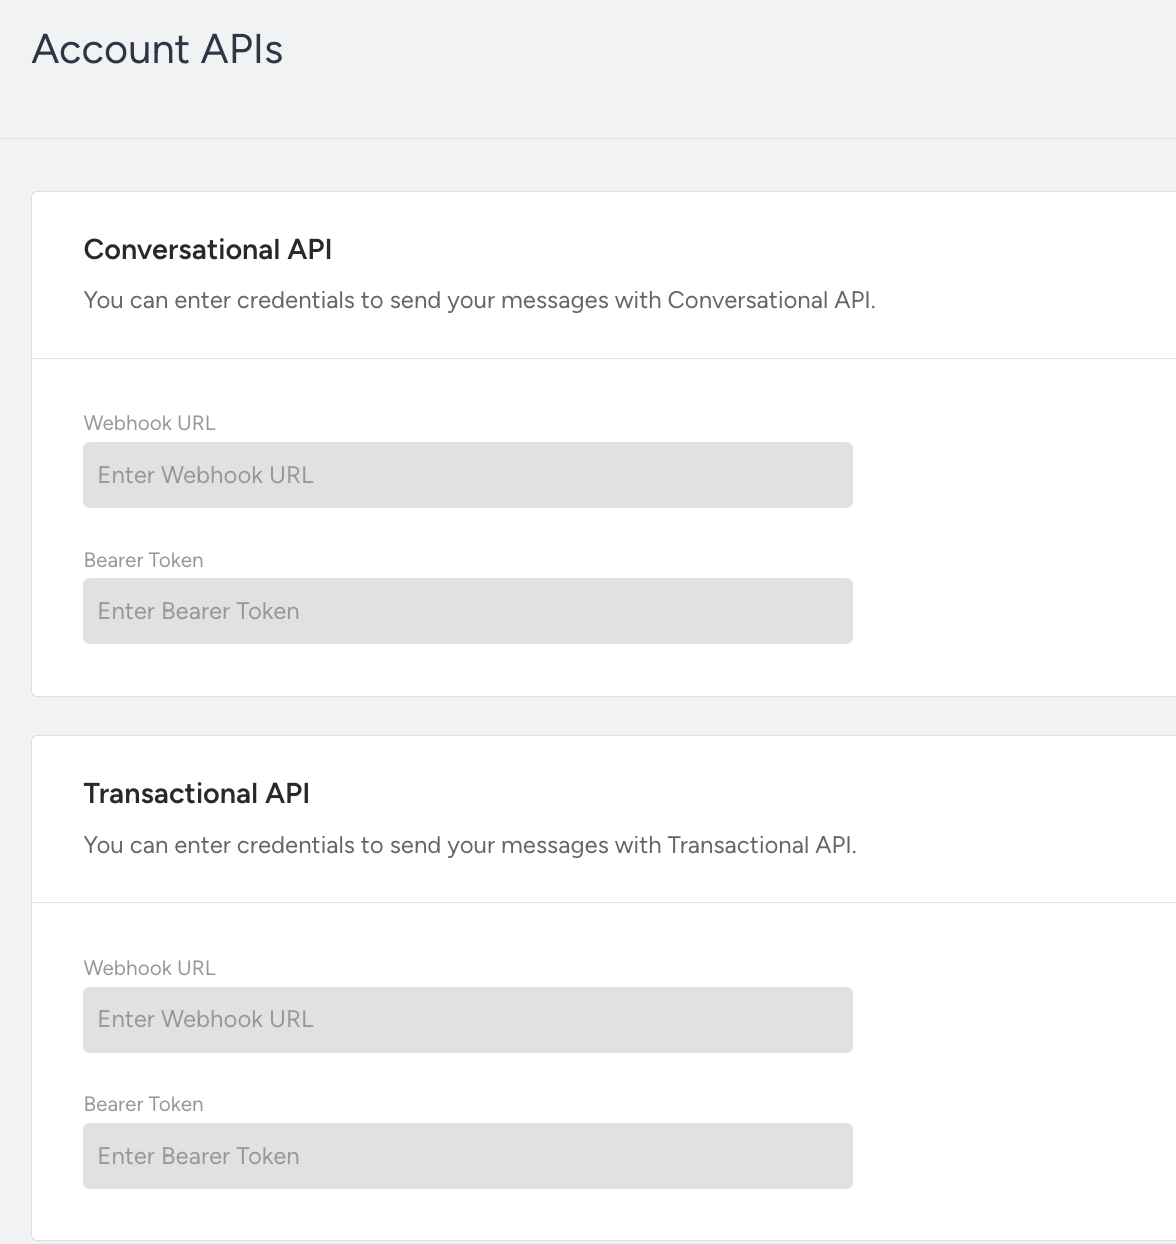
Ensure you enter the correct credentials and webhook URLs for each use case to start receiving event callbacks for the messages sent via API.
Sample Webhook Validation Request
Below is the sample validation request we send to your webhook endpoint. Your system must return 200 OK for the webhook to be saved:
curl --location '{{WEBHOOK_URL}}' \
--header 'Authorization: {{BEARER_TOKEN}}' \
--header 'Content-Type: application/json' \
--data '{
    "partner": "{{PARTNER_NAME}}",
    "object": "whatsapp_business_account",
    "entry": [
        {
            "id": 12345,
            "changes": [
                {
                    "field": "webhook_validation",
                    "value": {
                        "messaging_product": "whatsapp",
                        "metadata": {
                            "display_phone_number": "{{ACCOUNT_PHONE_NUMBER}}",
                            "phone_number_id": "{{ACCOUNT_PHONE_NUMBER_ID}}"
                        }
                    }
                }
            ]
        }
    ]
}'