After you complete the integration process, you can start creating app push notifications in your journeys by following the steps below:
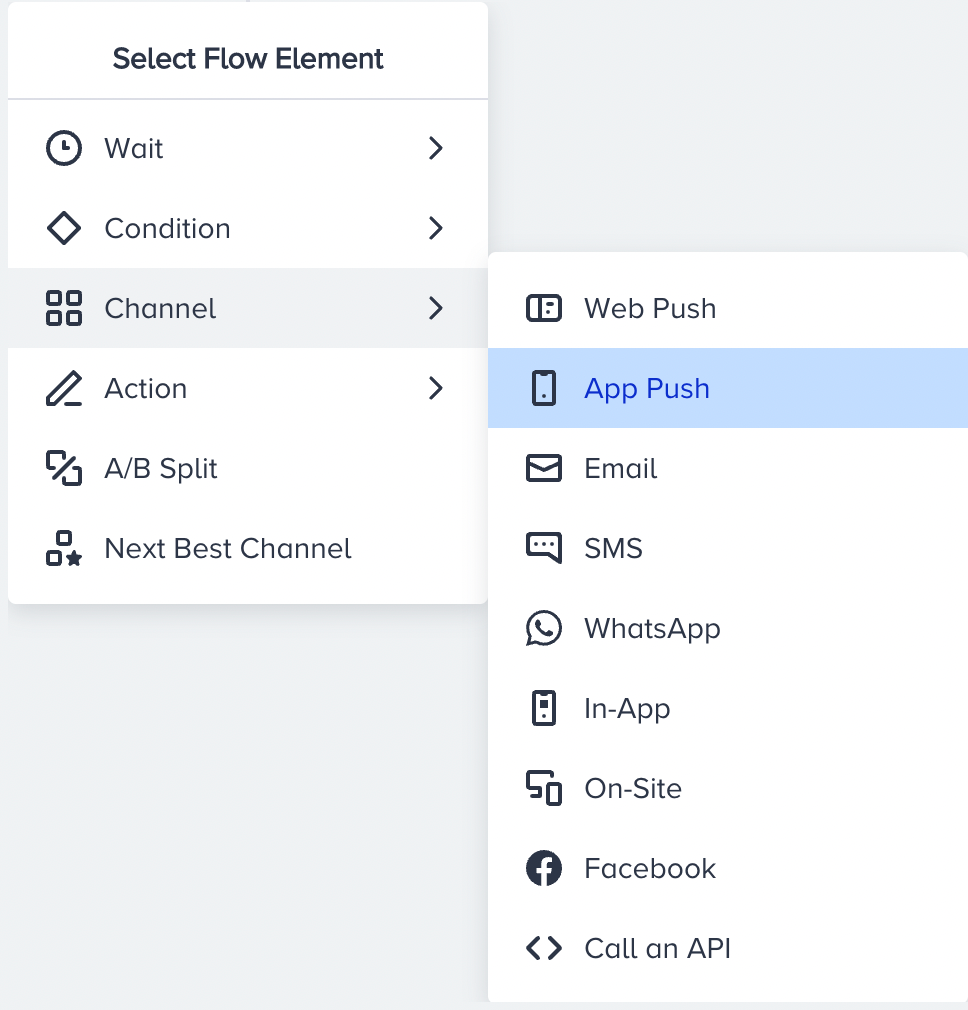
1. Add app push channel on canvas
- Click the + button on the path you want to add the web push channel on your journey.
- Click Channel > App Push.
2. Add Message Title and Description
Add the message title and description you want to send to your users.
If you want inspiration or need assistance when creating your message content, you can always use the Generate Text option.

To use an AI-generated text:
1. Click the Generate Text button to see the side modal.
2. Enter a prompt you want to generate the text about.
3. The language option will be the default selected language of your panel.
4. Select your industry and use case to define the context for generating the text.
5. Click the Generate Copy button.
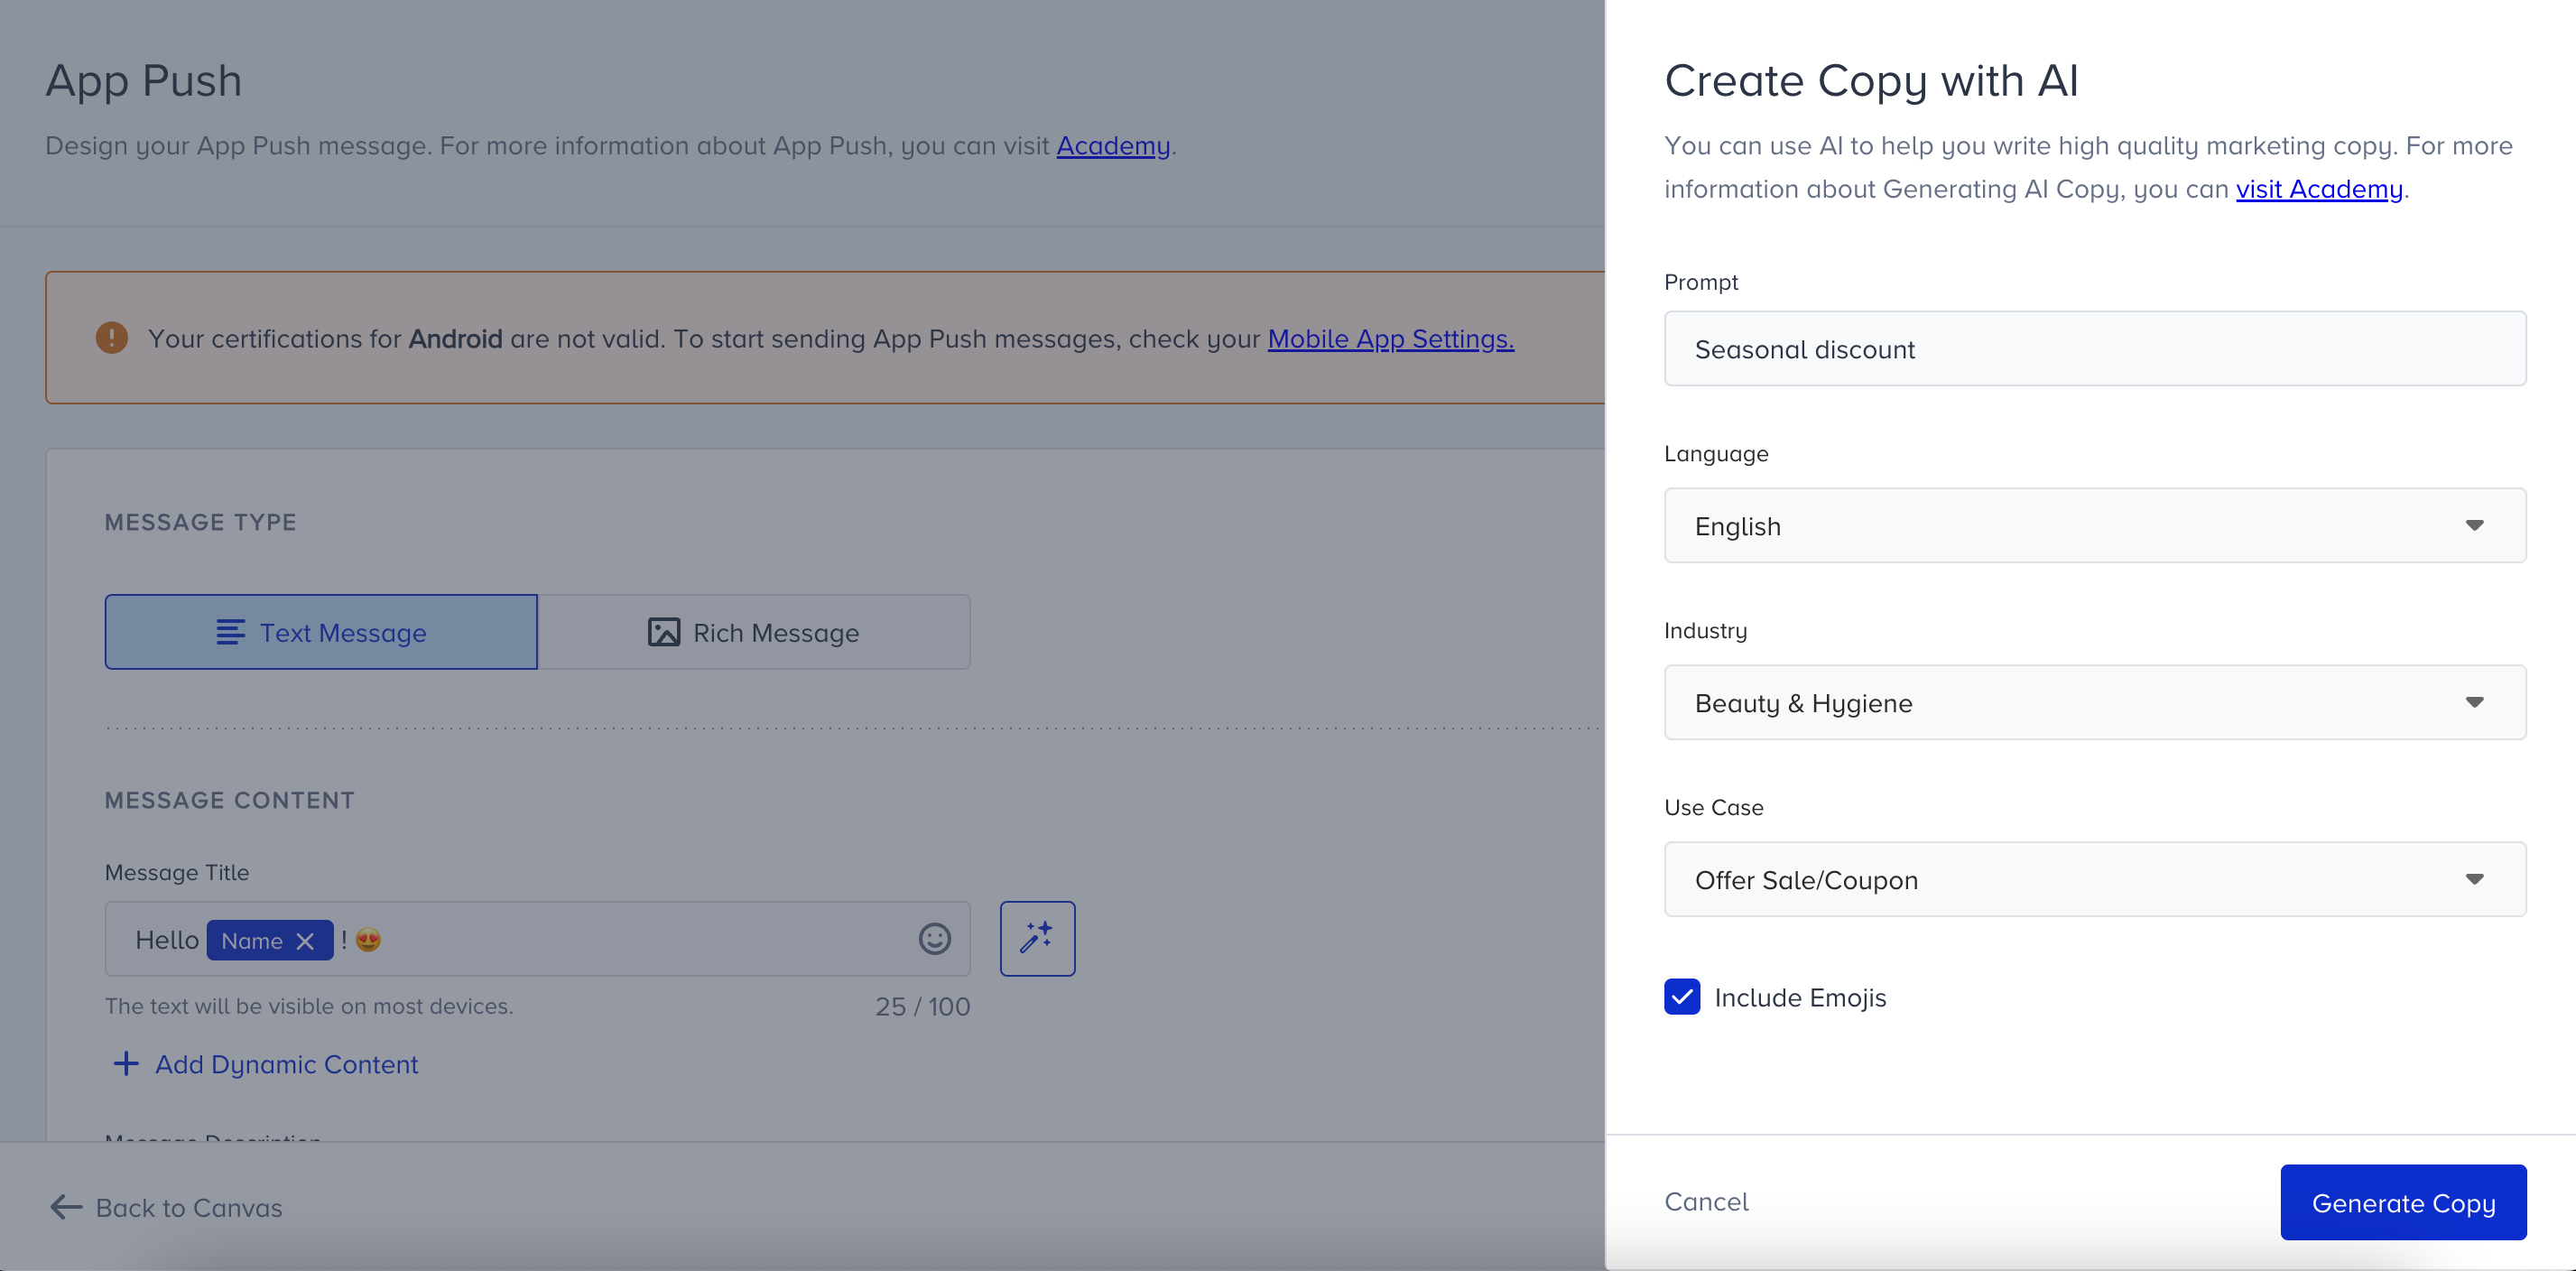
If you want to include emojis in your copy, you can check the "Include Emojis" box.
.png)
The modal displays five suggestions. To see more, you can click the Generate More Suggestions button.
To use any suggestion, you can select it and click the Apply button, or copy it via the Copy button against the suggestion you want to use.
Once you click the Apply button, the copy will be added to the respective field.
You can use default and custom user attributes, event parameters, and coupon codes in the content to personalize it for your users. You can send a new coupon or previously assigned one. Read more on dynamic content.

You can add fallback text for users who do not have a value for the attributes.
Architect excludes dynamic content from the character limit calculation. When you add any dynamic content, it does not have an impact on the character count. When you assign a fallback value to the dynamic content, it will be displayed to the user if the dynamic content's value is empty for that user. In this case, the character count includes the fallback value.
The plus sign in the character count indicates that dynamic content will receive a value upon message delivery to the end user.
Also, you can use emojis in your messages to increase the open rates.
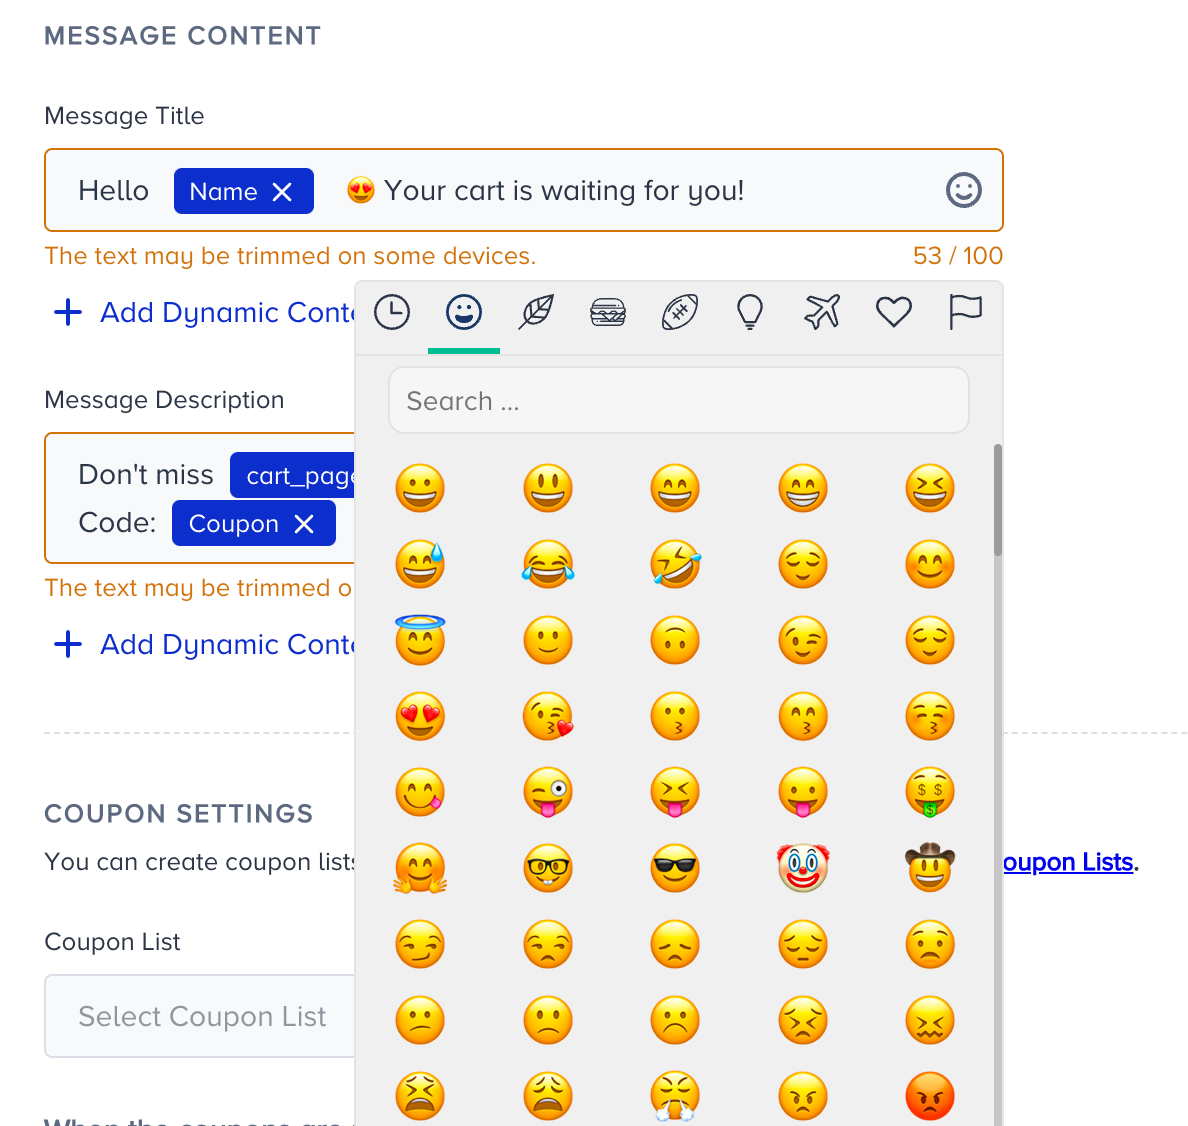
3. Configure coupon settings
You can add coupon codes to the content by uploading a coupon list beforehand.

You can also set coupon reminders for your coupon lists. Refer to Coupon Usage Reminder for further details.
.png)
4. Set Rich Message
You can upload a rich push image to your app push notification or use the dynamic image option if you want to offer more visual content. To use the rich push option, click on the Rich Message button. 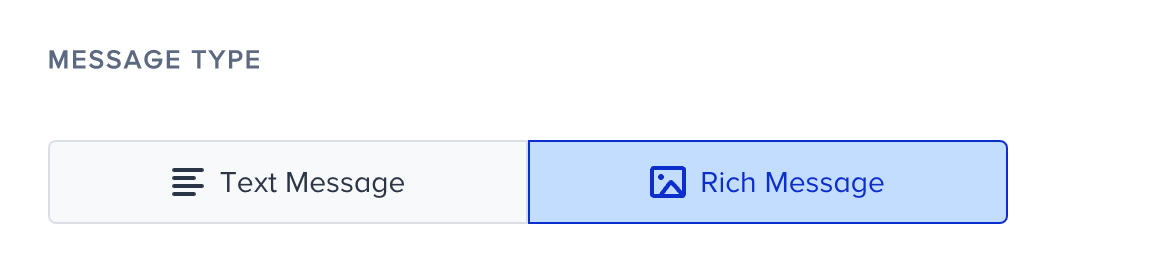
GIF Notifications are available for Insider SDK Version 6.1 and higher.
The recommended resolution for the GIF Notifications is 1280x720px.
The supported media types are .jpg, .jpeg, .png, and .gif.
The maximum file size can be 2 MB.
The maximum resolution can be width: 2048 and height: 1080.
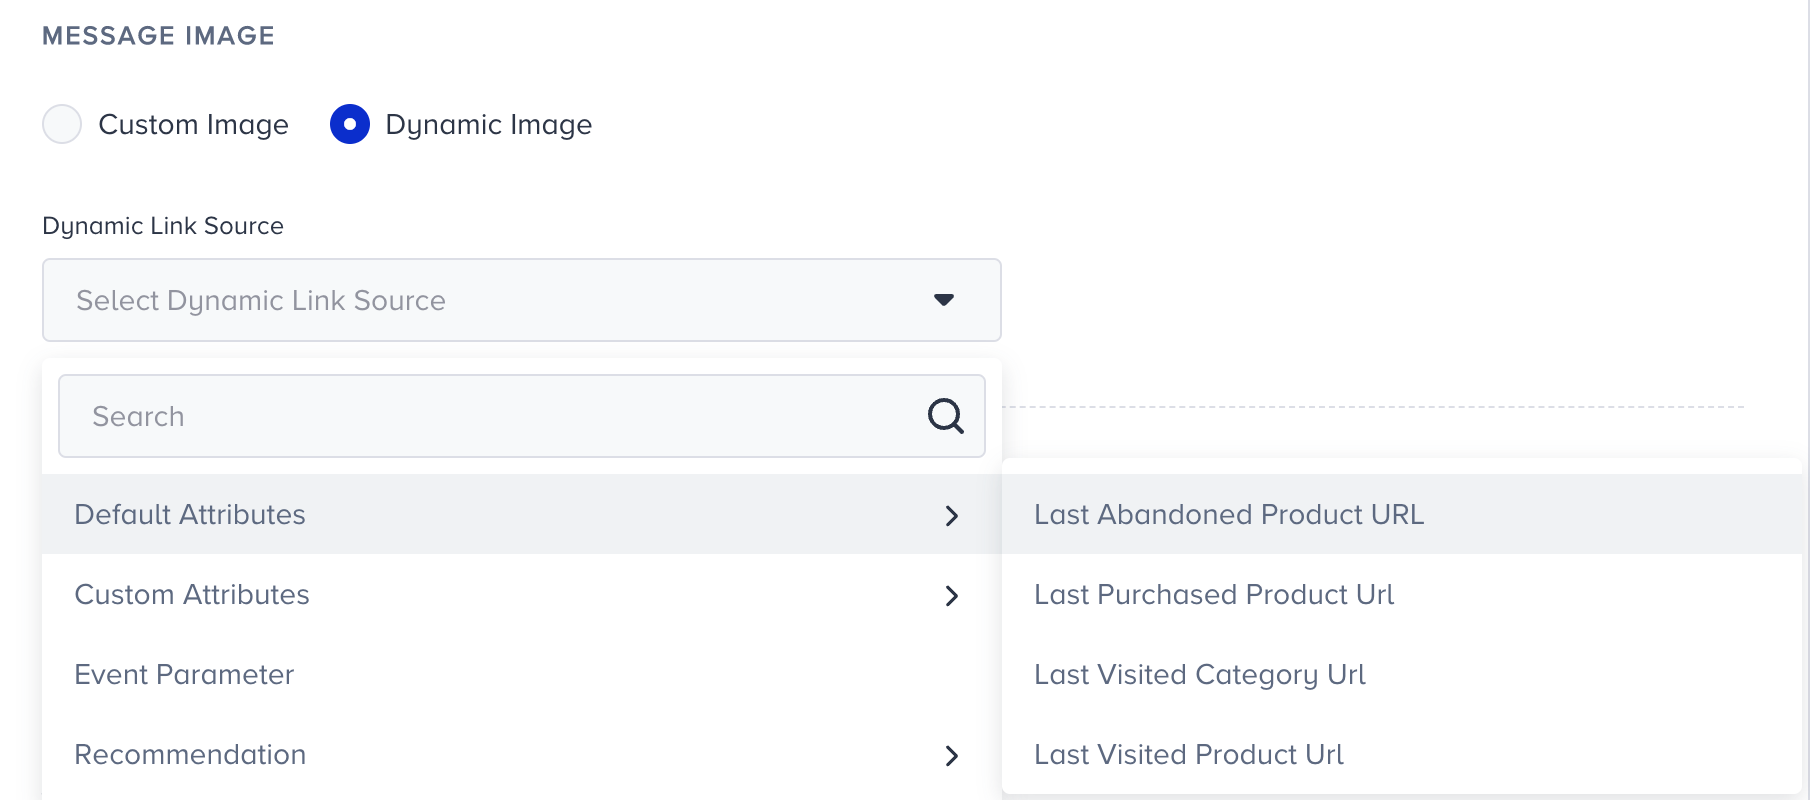 You can select URL type attributes or event parameters.
You can add the fallback URL for users who do not have a value for the dynamic URL.
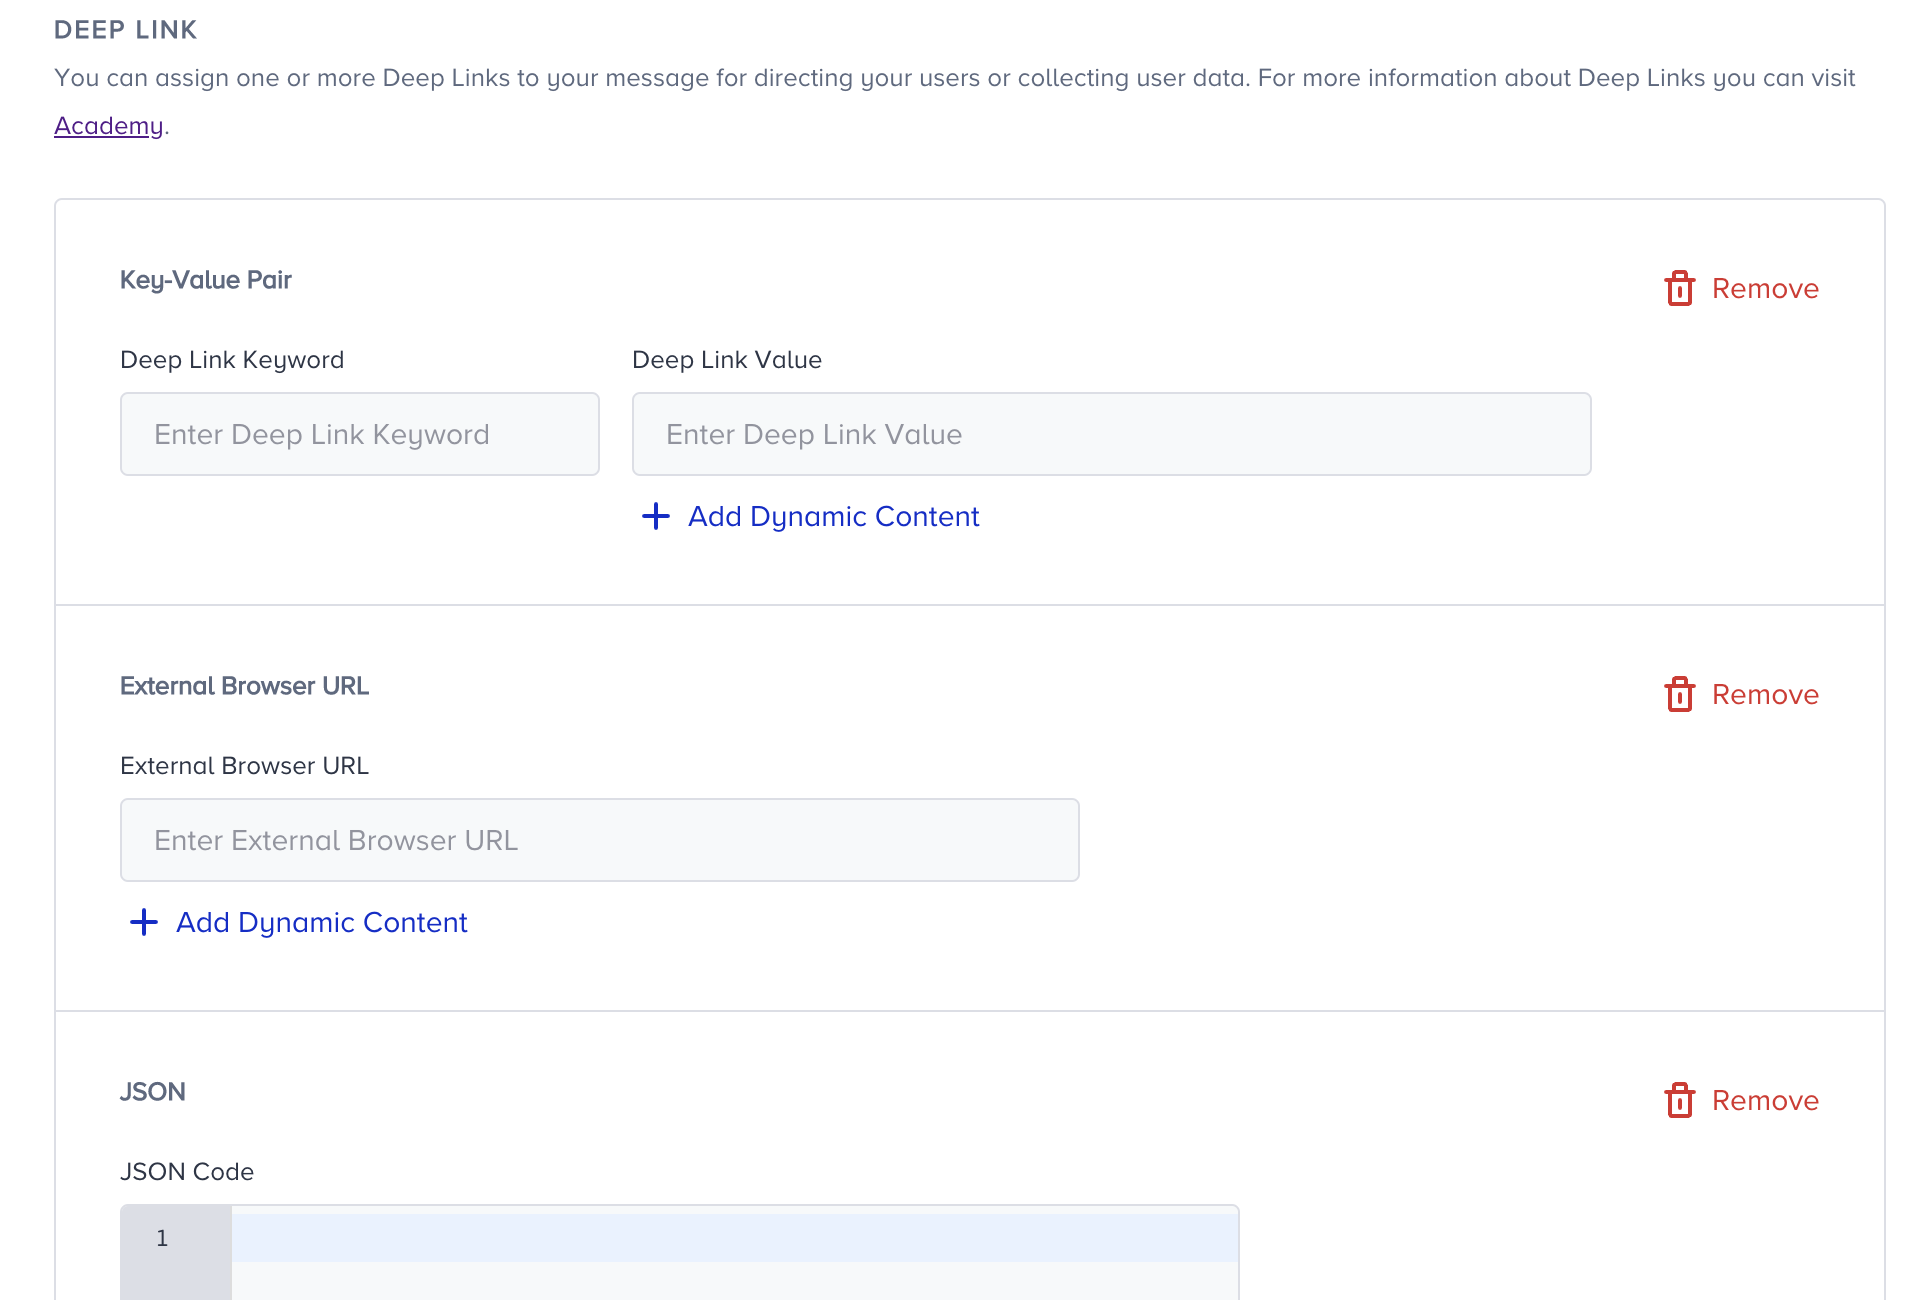
5. Add a deep link
You can add deep links to your app push notifications to redirect users to a specific page or use it for different instructions.
Deep Links are smart URLs that allow you to send existing and potential users to any location within your iOS or Android app. Users survive the app install process, so even new users see the content they're looking for when they open the app for the first time.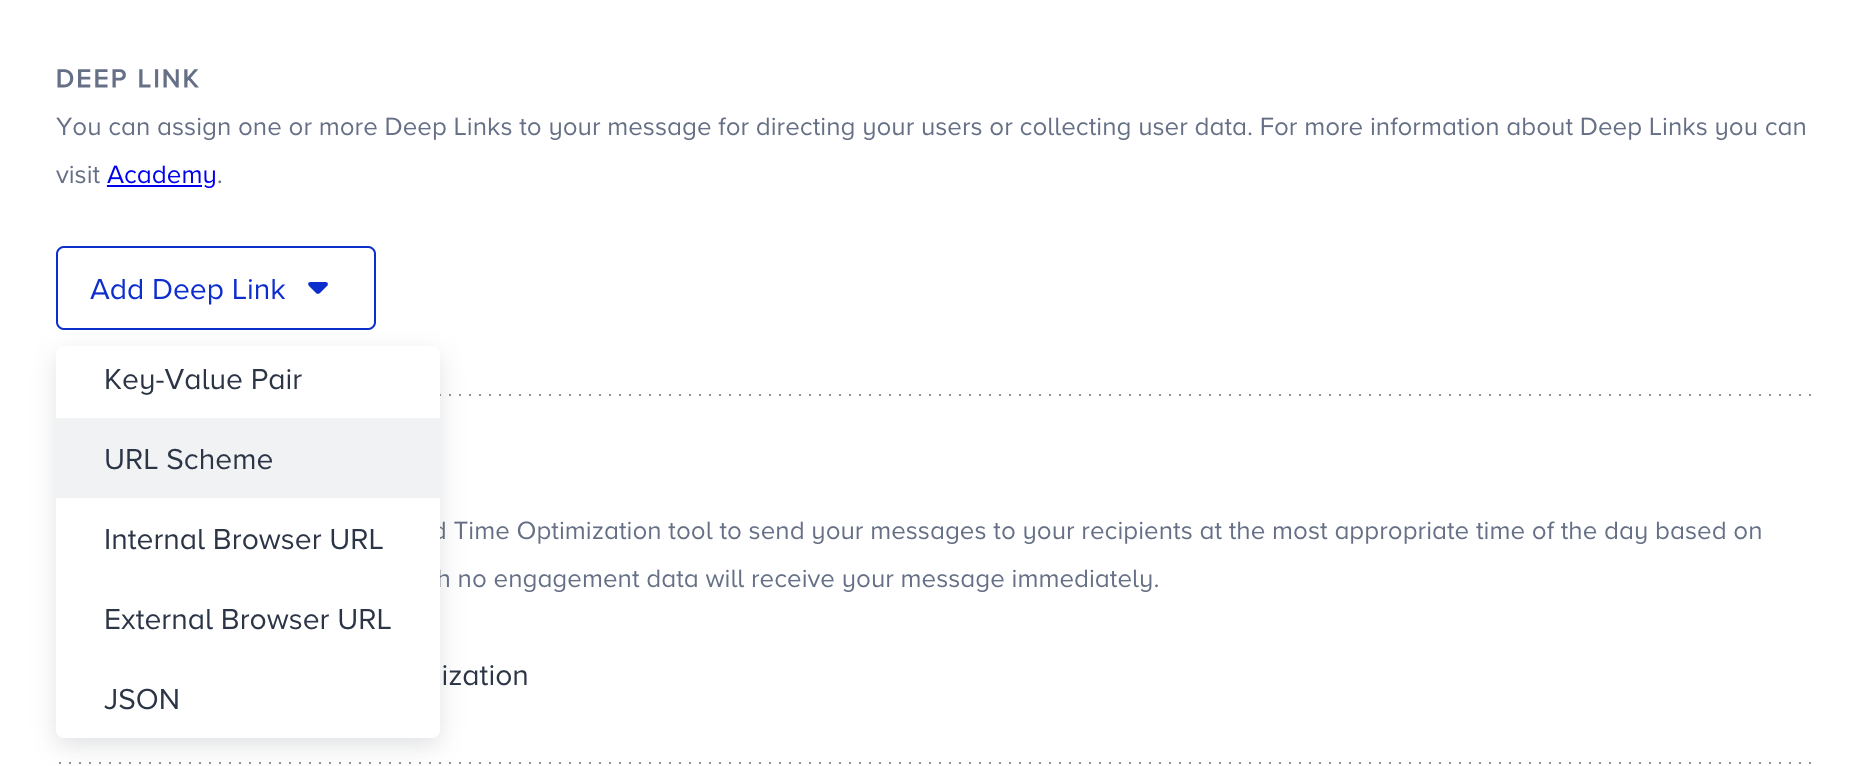
Each notification can have deep links to redirect the user to a specific page or use it for different instructions, such as sending open data to analytics tools. Deep Links work as Key&Value Pairs. It’s possible to use multiple pairs as desired.
In addition, dynamic content can be inserted into the Deep Link Value. This means that the Deep Link value will change for all users who have that value, and each user will be sent to, for example, their last visited product.
If a user does not have a value for the dynamic content you set, you can enter an alternative text (fallback) by clicking on the dynamic content tag.
You can use the deep link options below:
- Key-Value Pair
- URL Scheme
- JSON Code
- External Browser URL
- Internal Browser URL
6. Preview your content
You can preview how your app push looks before you send it out. The preview, placed on the right side of your screen, shows text and image elements.

You can also preview the dynamic content in your messages as a user. Click the Preview as User button to preview your message with real values of the dynamic content.
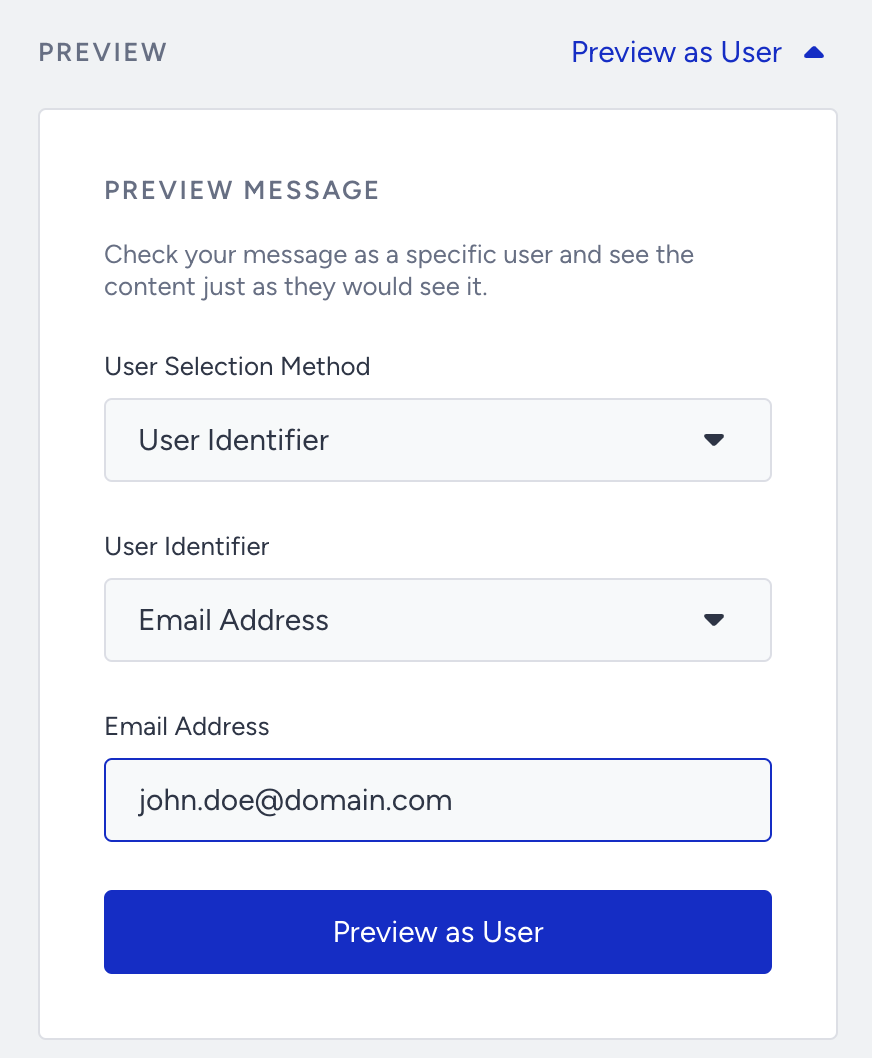
You can select one of the two User Selection Methods: User Identifier or Recent User. User Identifier will let you search for a user with Profile ID, Email Address, or Phone Number identifiers. Recent User will list the 10 recently searched users for you to choose from.
Once you select your user, click the Preview as User button to load the channel preview with real values of dynamic content for the user.

7. Enable send time optimization
You can optimize the time it takes to deliver your messages to the end-users. This helps you engage your users more effectively and draw their attention when they are most likely to interact with your messages.
 If you set Channel Frequency Capping before, when you enable Send Time Optimization, Bypass Channel Frequency Capping will be automatically enabled.
Read more on send time optimization.
8. Bypass Channel Frequency Capping
Insider provides app push notifications from the single app push campaigns and Architect. The risk of receiving too many push notifications is increasing, which may lead to unsubscription from your brand. With the App Push Frequency Capping, you can limit the number of app push notifications a user can receive in a specified period like sending a maximum of 5 app pushes to a user in one day.
Architect enables you to bypass the app push channel frequency capping if you have configured any.
Journeys are for real-time cases and they require users to receive notifications based on their actions. Therefore, you may want to override the channel frequency capping you set for your app push.

9. Test your app push notification
You can send a test app push notification to your device by clicking the Send button at the bottom right corner of the page.
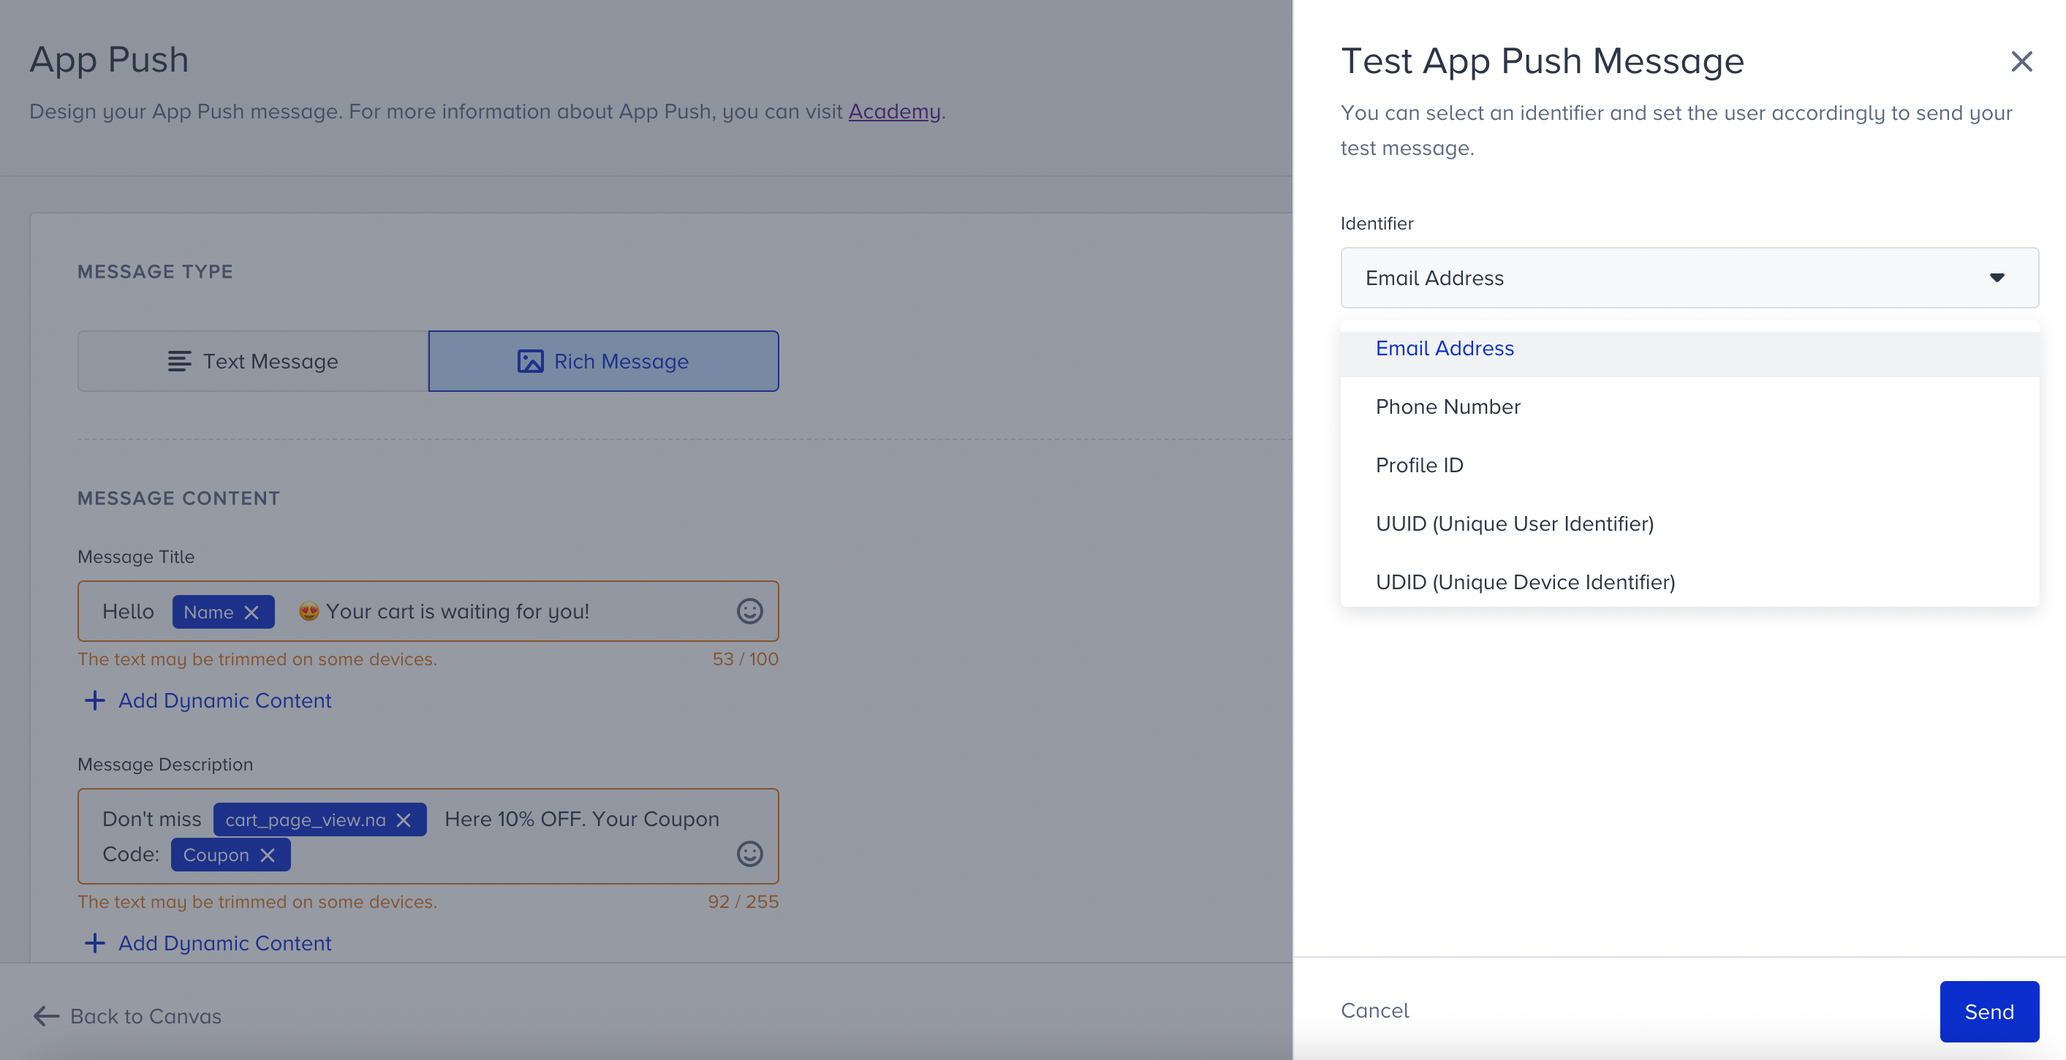
Several identifiers detect which user you are sending the test app push to.
- Phone number
- Profile ID
- Unique device identifier (UDID)
- Unique user identifier (UUID)
UUID is a distinctive attribute assigned to each particular user.
Based on the identifier, you must enter its value to ensure the system detects your user and device to send the app push notification.
10. Rename Channel Name
The Channel Name is generated by default based on the journey name and channel type. If you want to give it a different name, you can rename it at the top right corner..png)
11. Save app push element
After configuring app push settings, you can save the app push page.
Click the Save button, as this page does not have autosaving—autosaving functions only on the canvas page.
Check User Interactions
After the app push element, you can take another action by branching your flow according to user interactions (e.g., viewing app push or opening app push) on the app push notification after a while.

Read Check Interaction for further details.