Suggested reading: Single Sign-On
This guide lists the actions you need to complete to configure SSO (Single Sign-On) for Onelogin. On this page, you will learn about:
Set up SSO
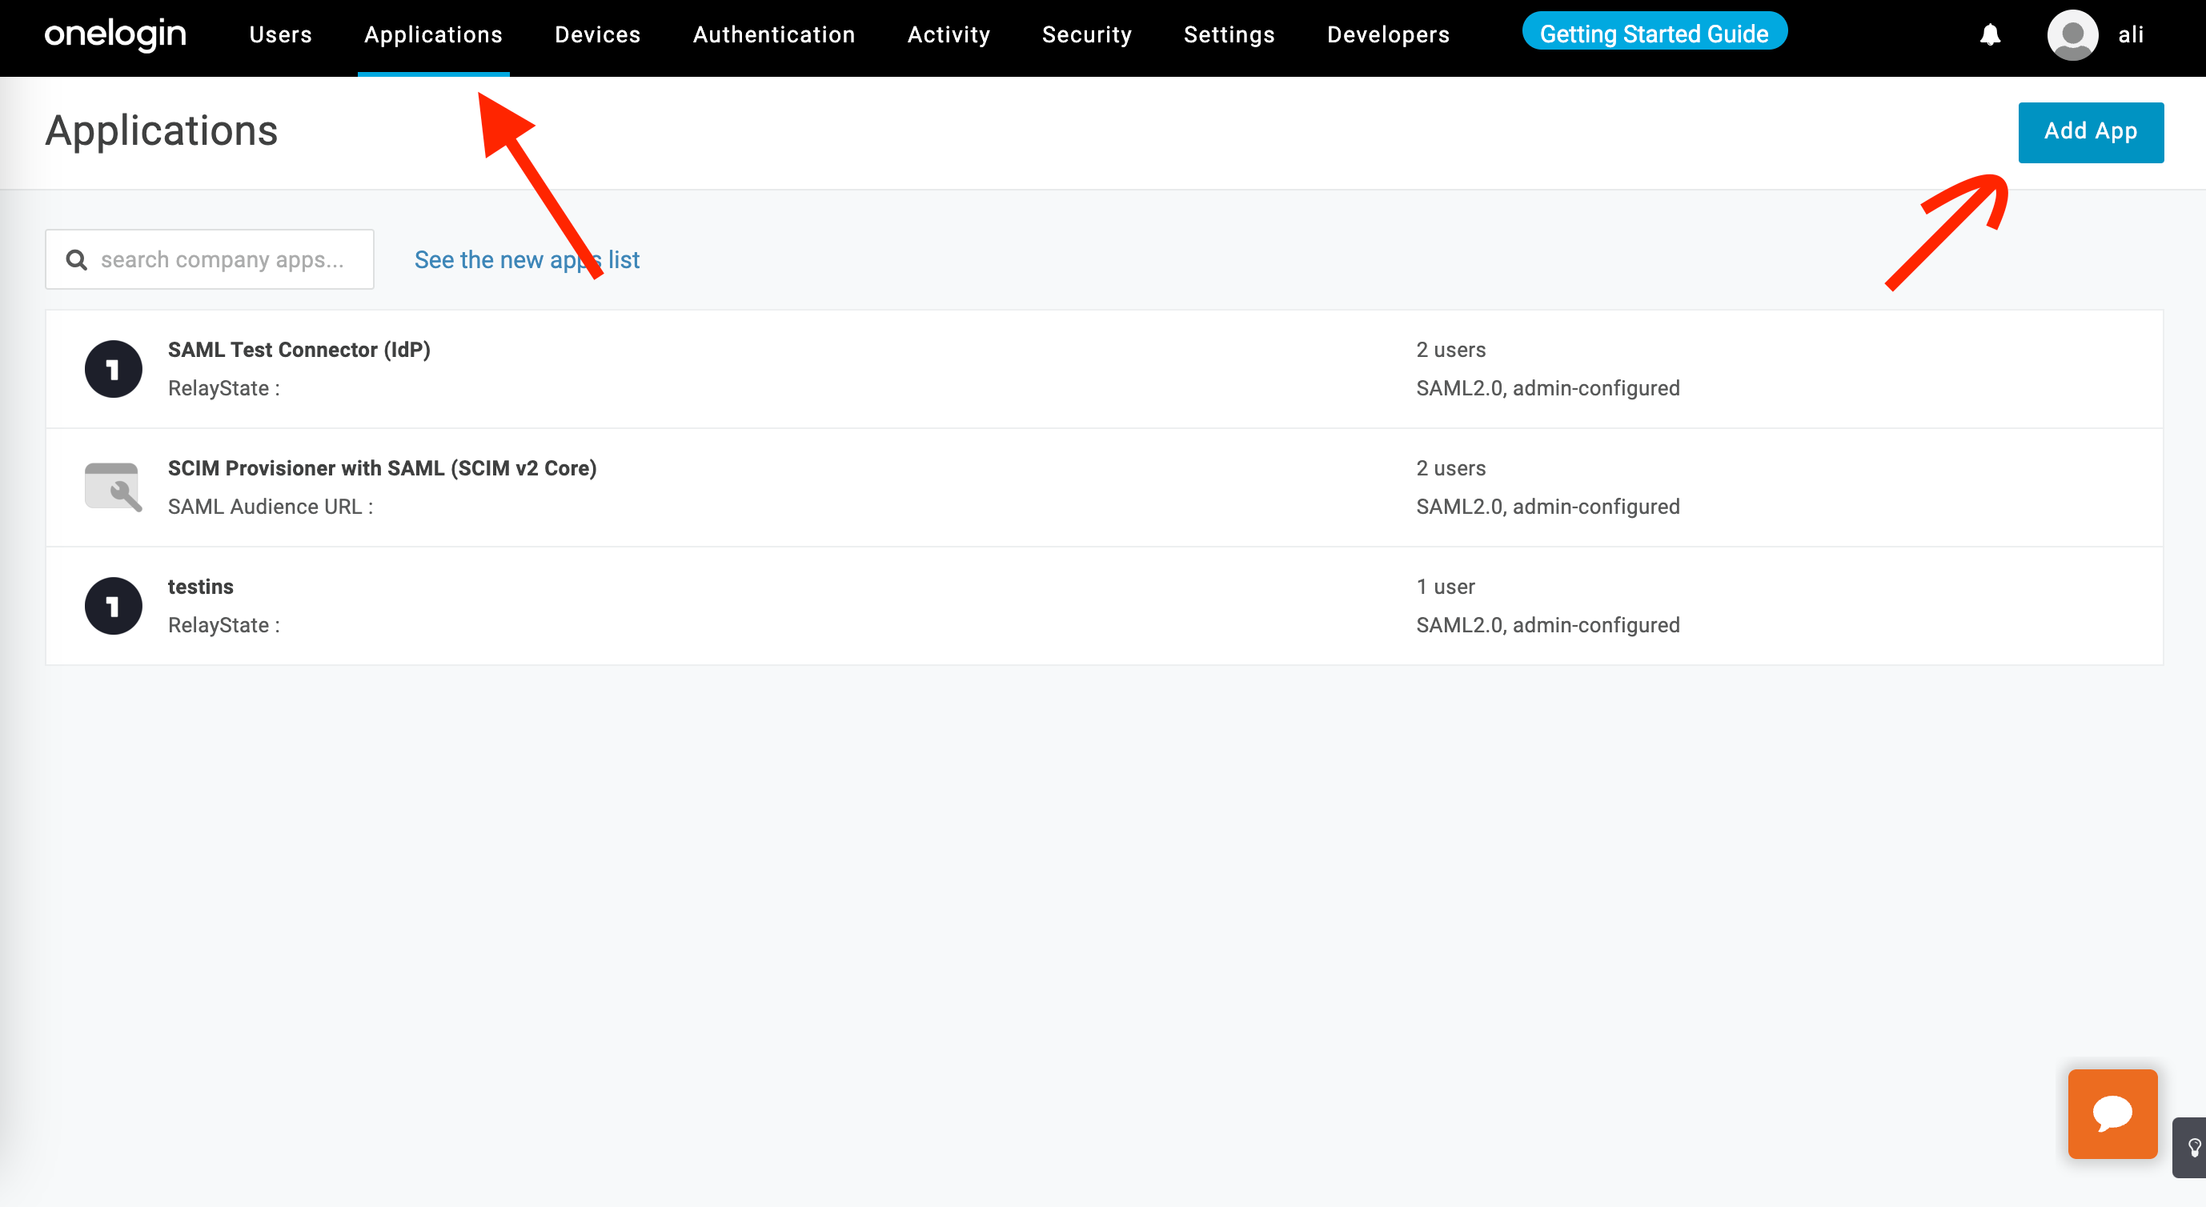
- Go to your Onelogin panel to go to the Applications tab and click the Add App button.
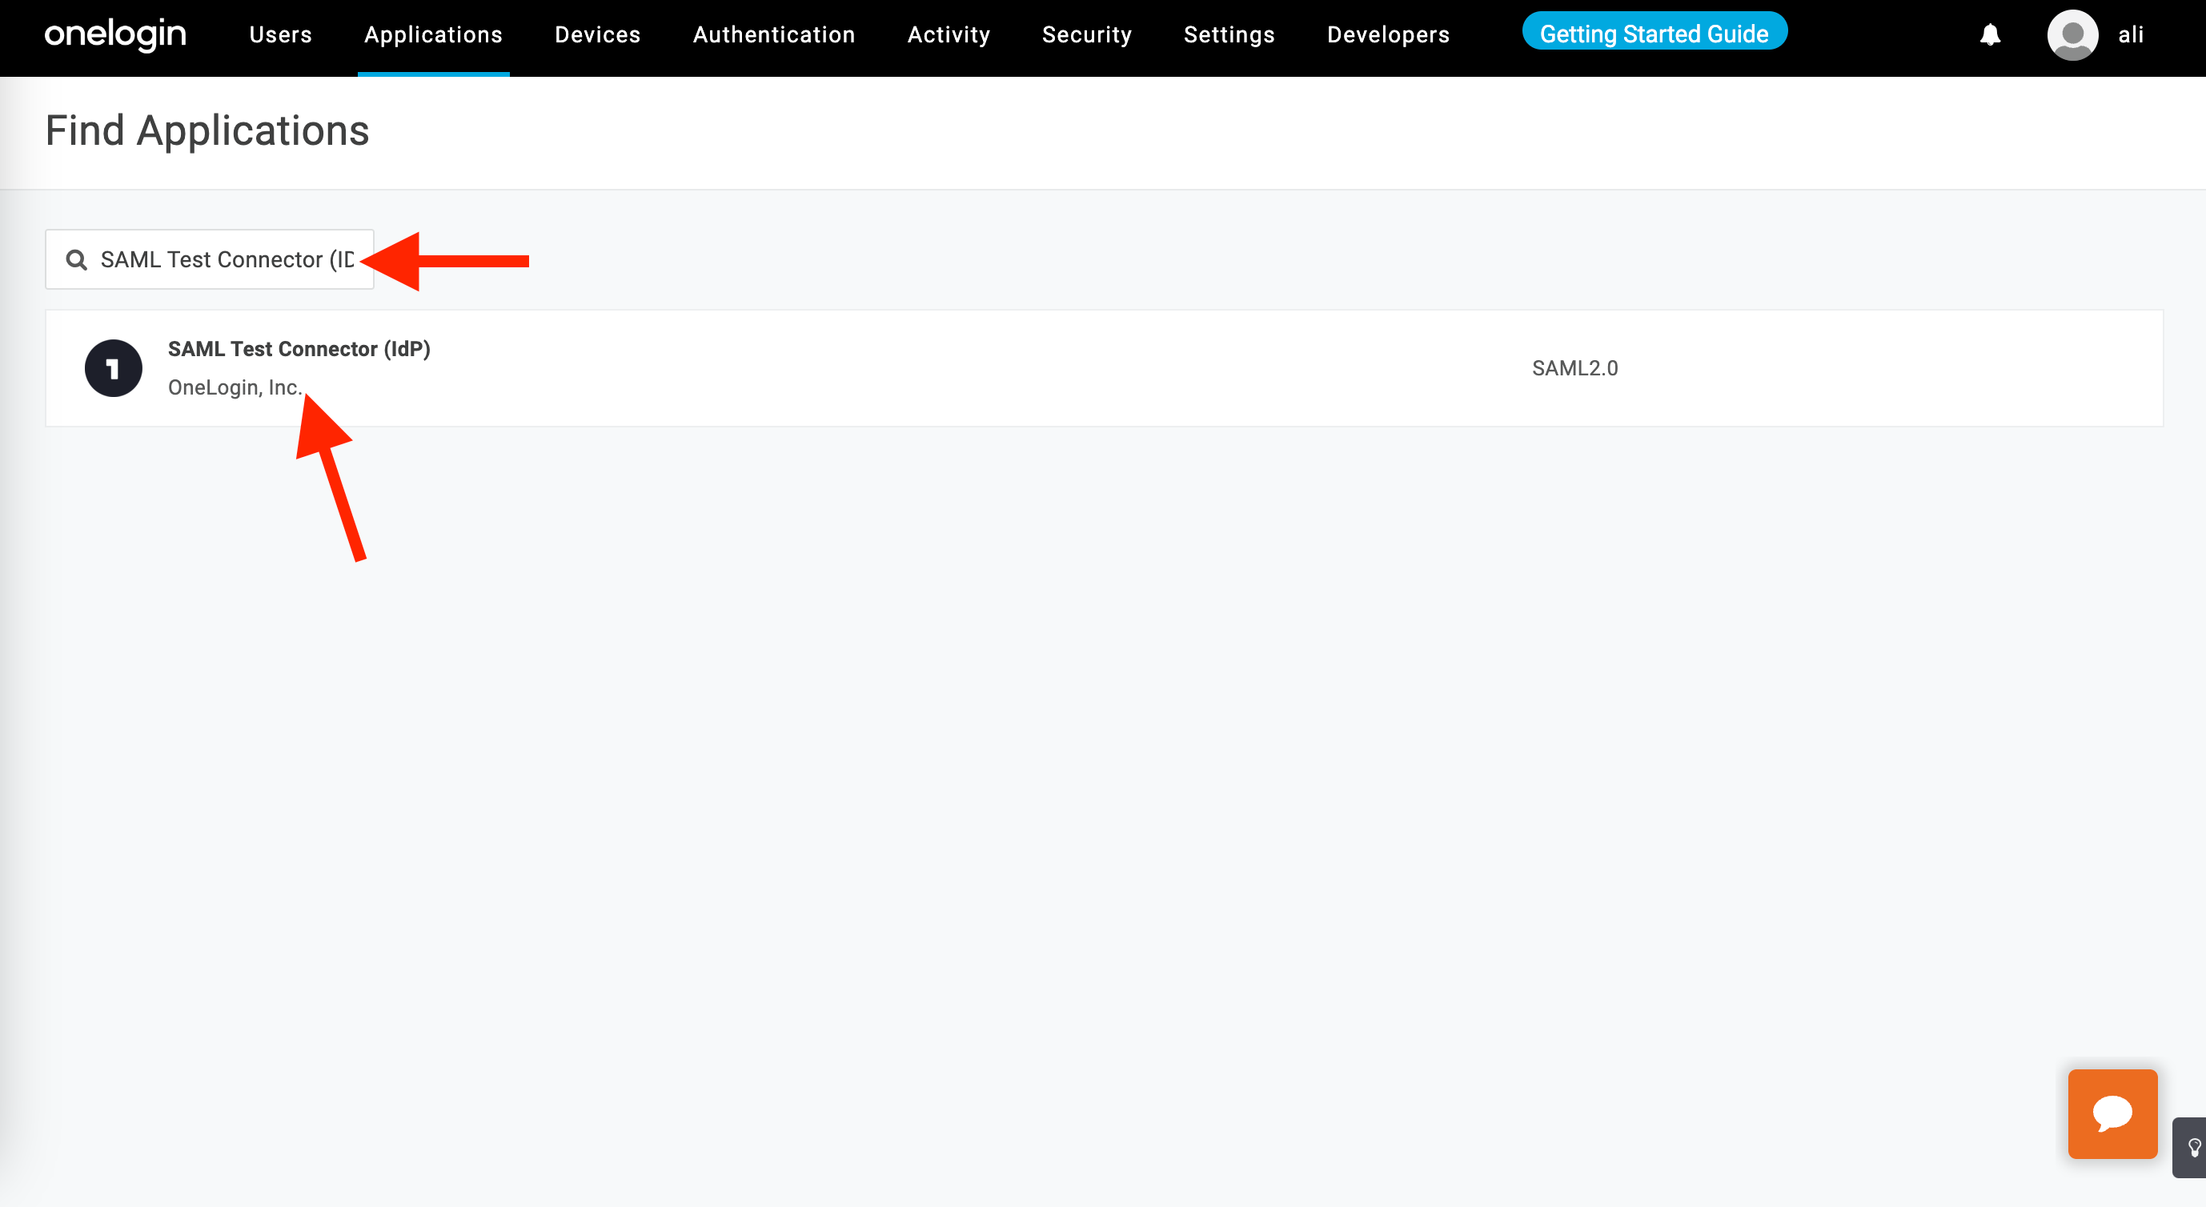
- Search for SAML Test Connector (IdP).
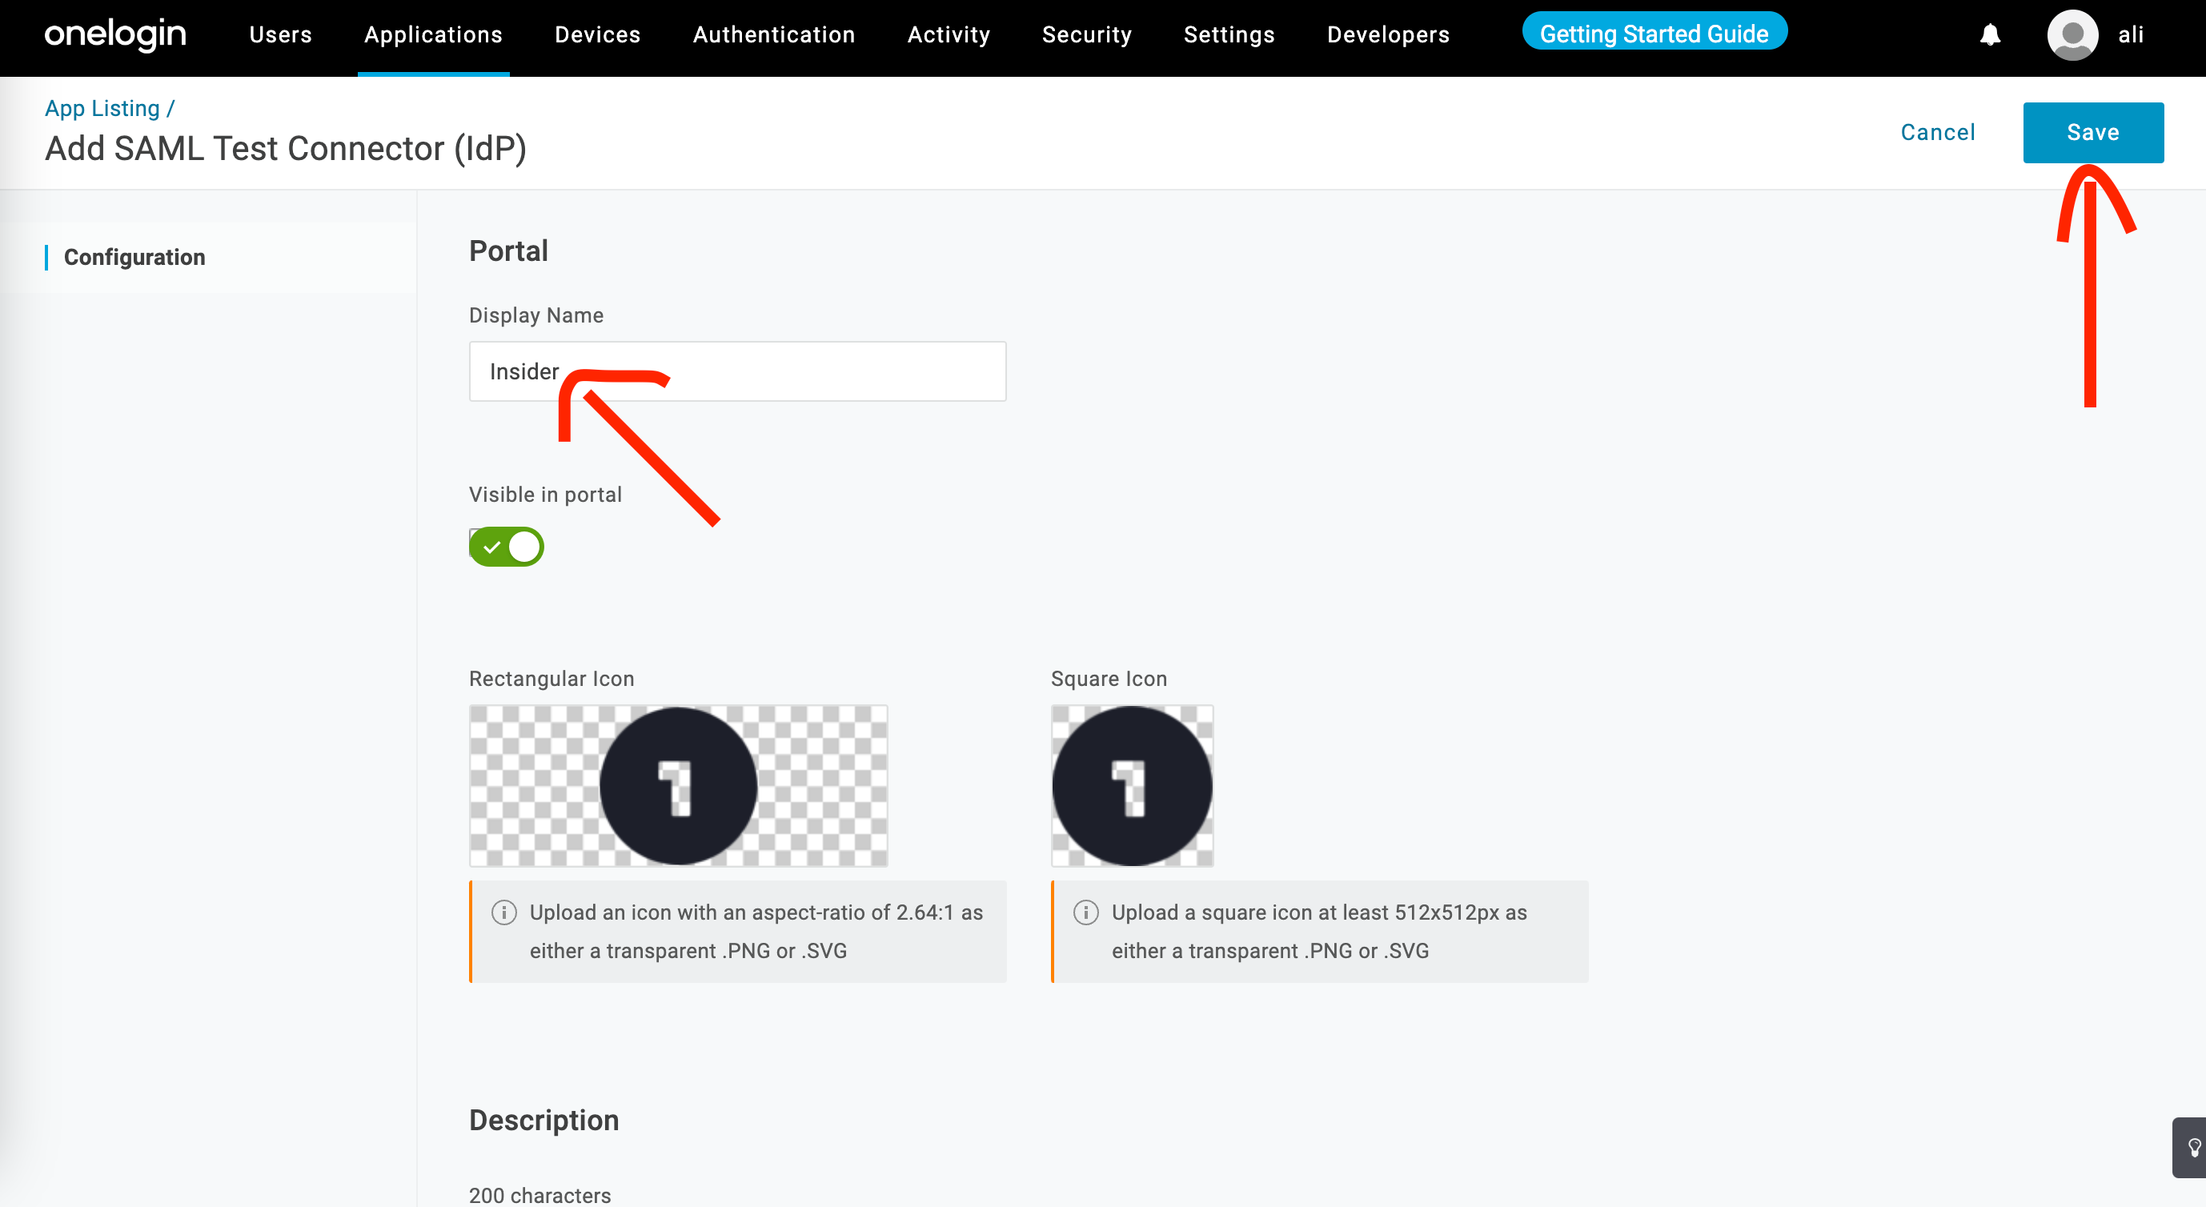
- Enter Insider as a display name and click the Save button.
- Go to the Configuration tab. Copy the necessary URL addresses and save them for later use. Fill out all the fields and click the Save button.

| Field | Value |
|---|---|
| Audience | Service Provider Entity ID |
| ACS (Consumer) URL | Insider SSO URL |
| ACS (Consumer) URL Validator | .* |
| Single Logout URL | Insider Logout URL |
| RelayState and Recipient | empty |
5. Go to the Users page. 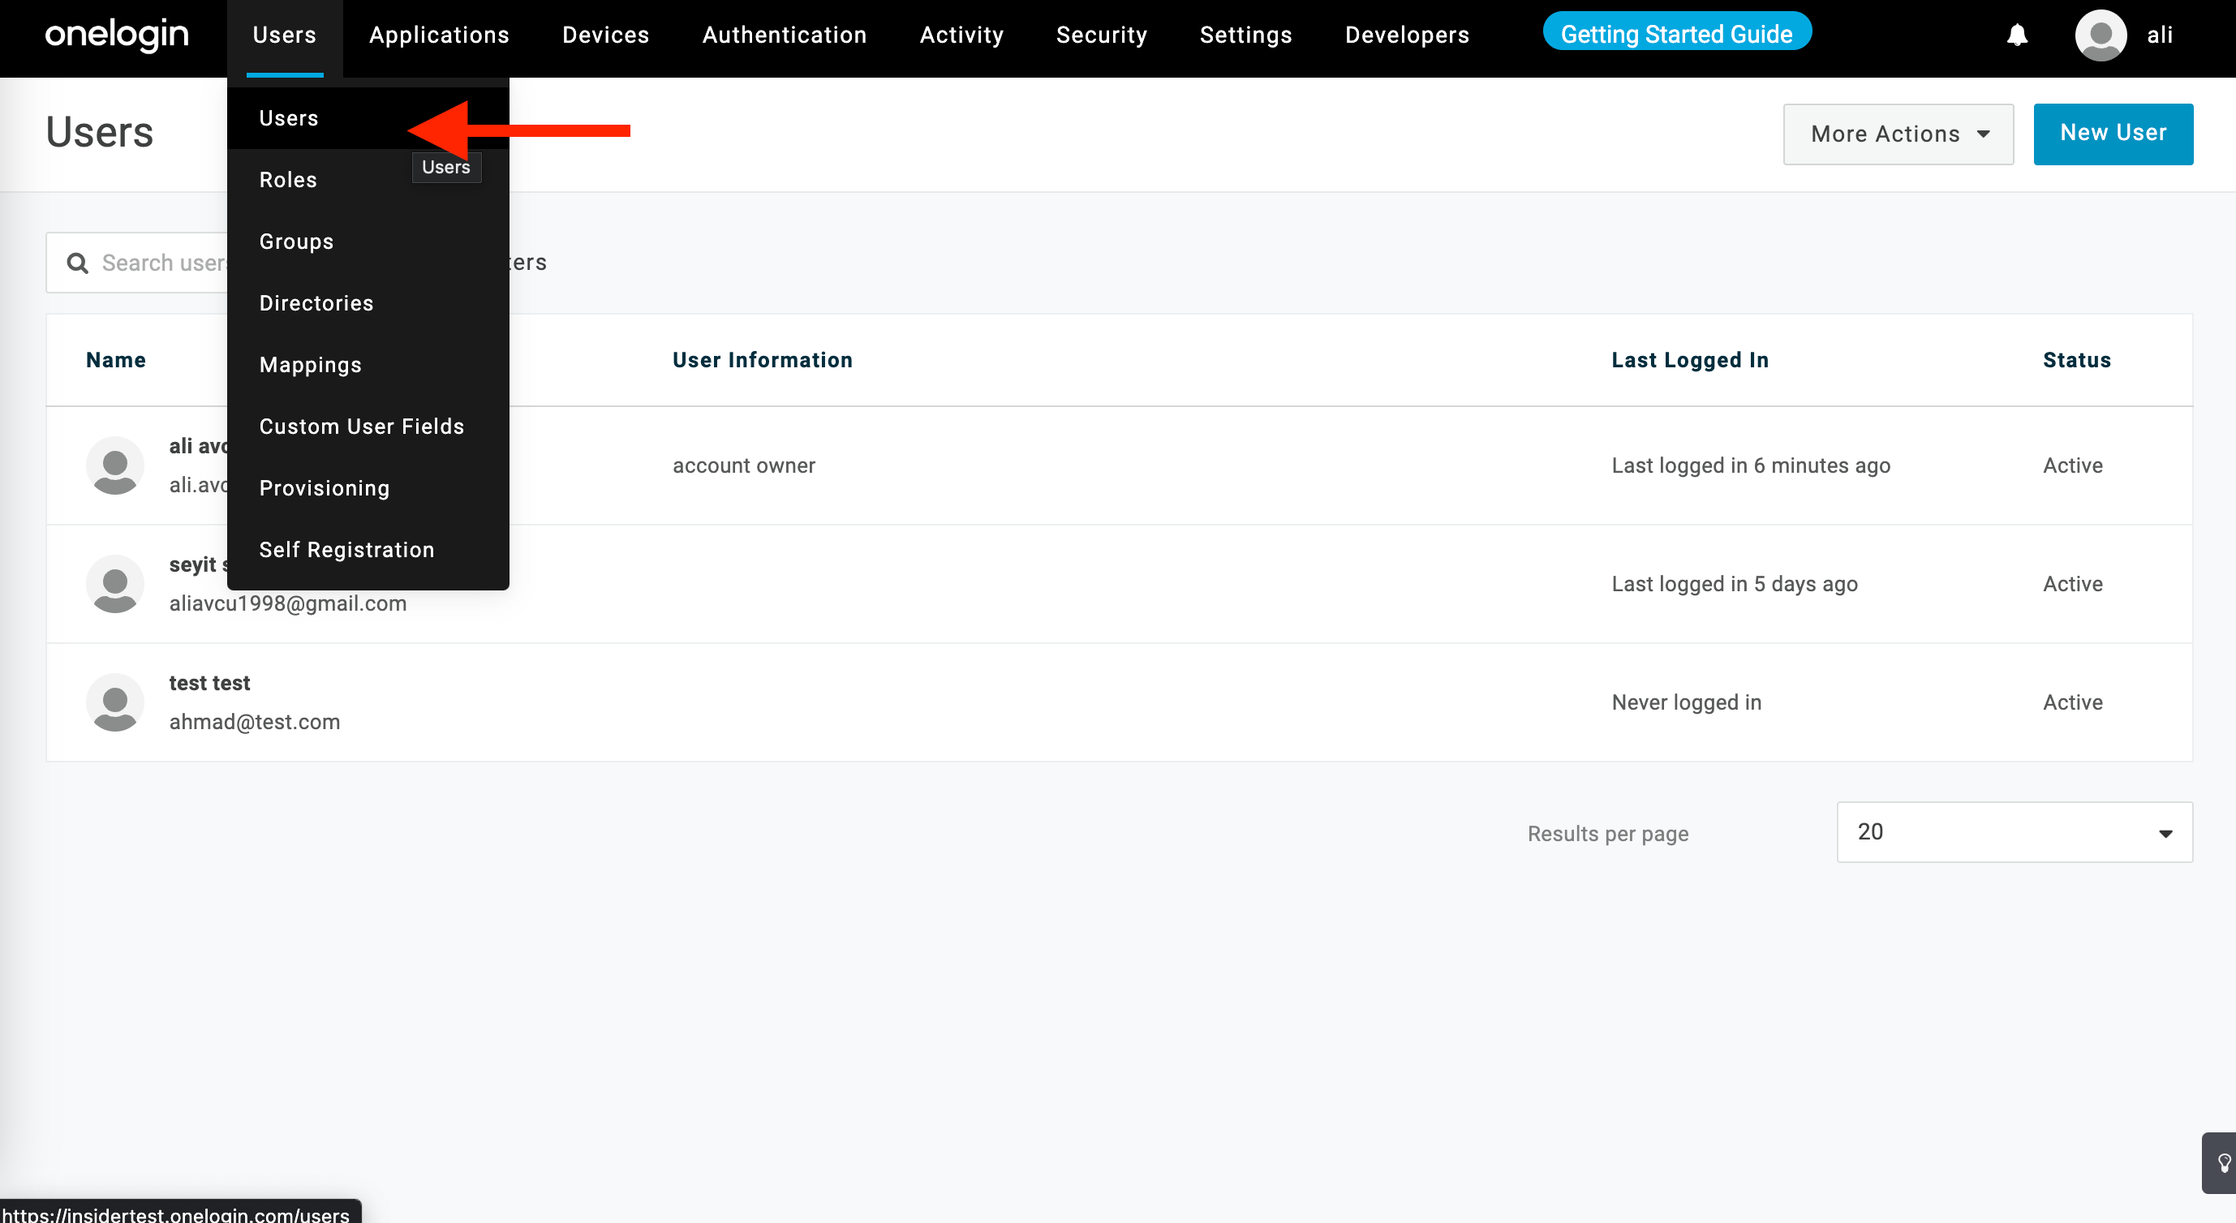
6. To test the connection, assign your user to your newly created app. Click on your profile in the list. 
7. Click on the Applications tab on the left menu. Click the +(plus) button in the top right corner. Select Insider, and click the Continue button in the pop-up.
8.Check the "Allow the user to sign in" box. Click the Save button. 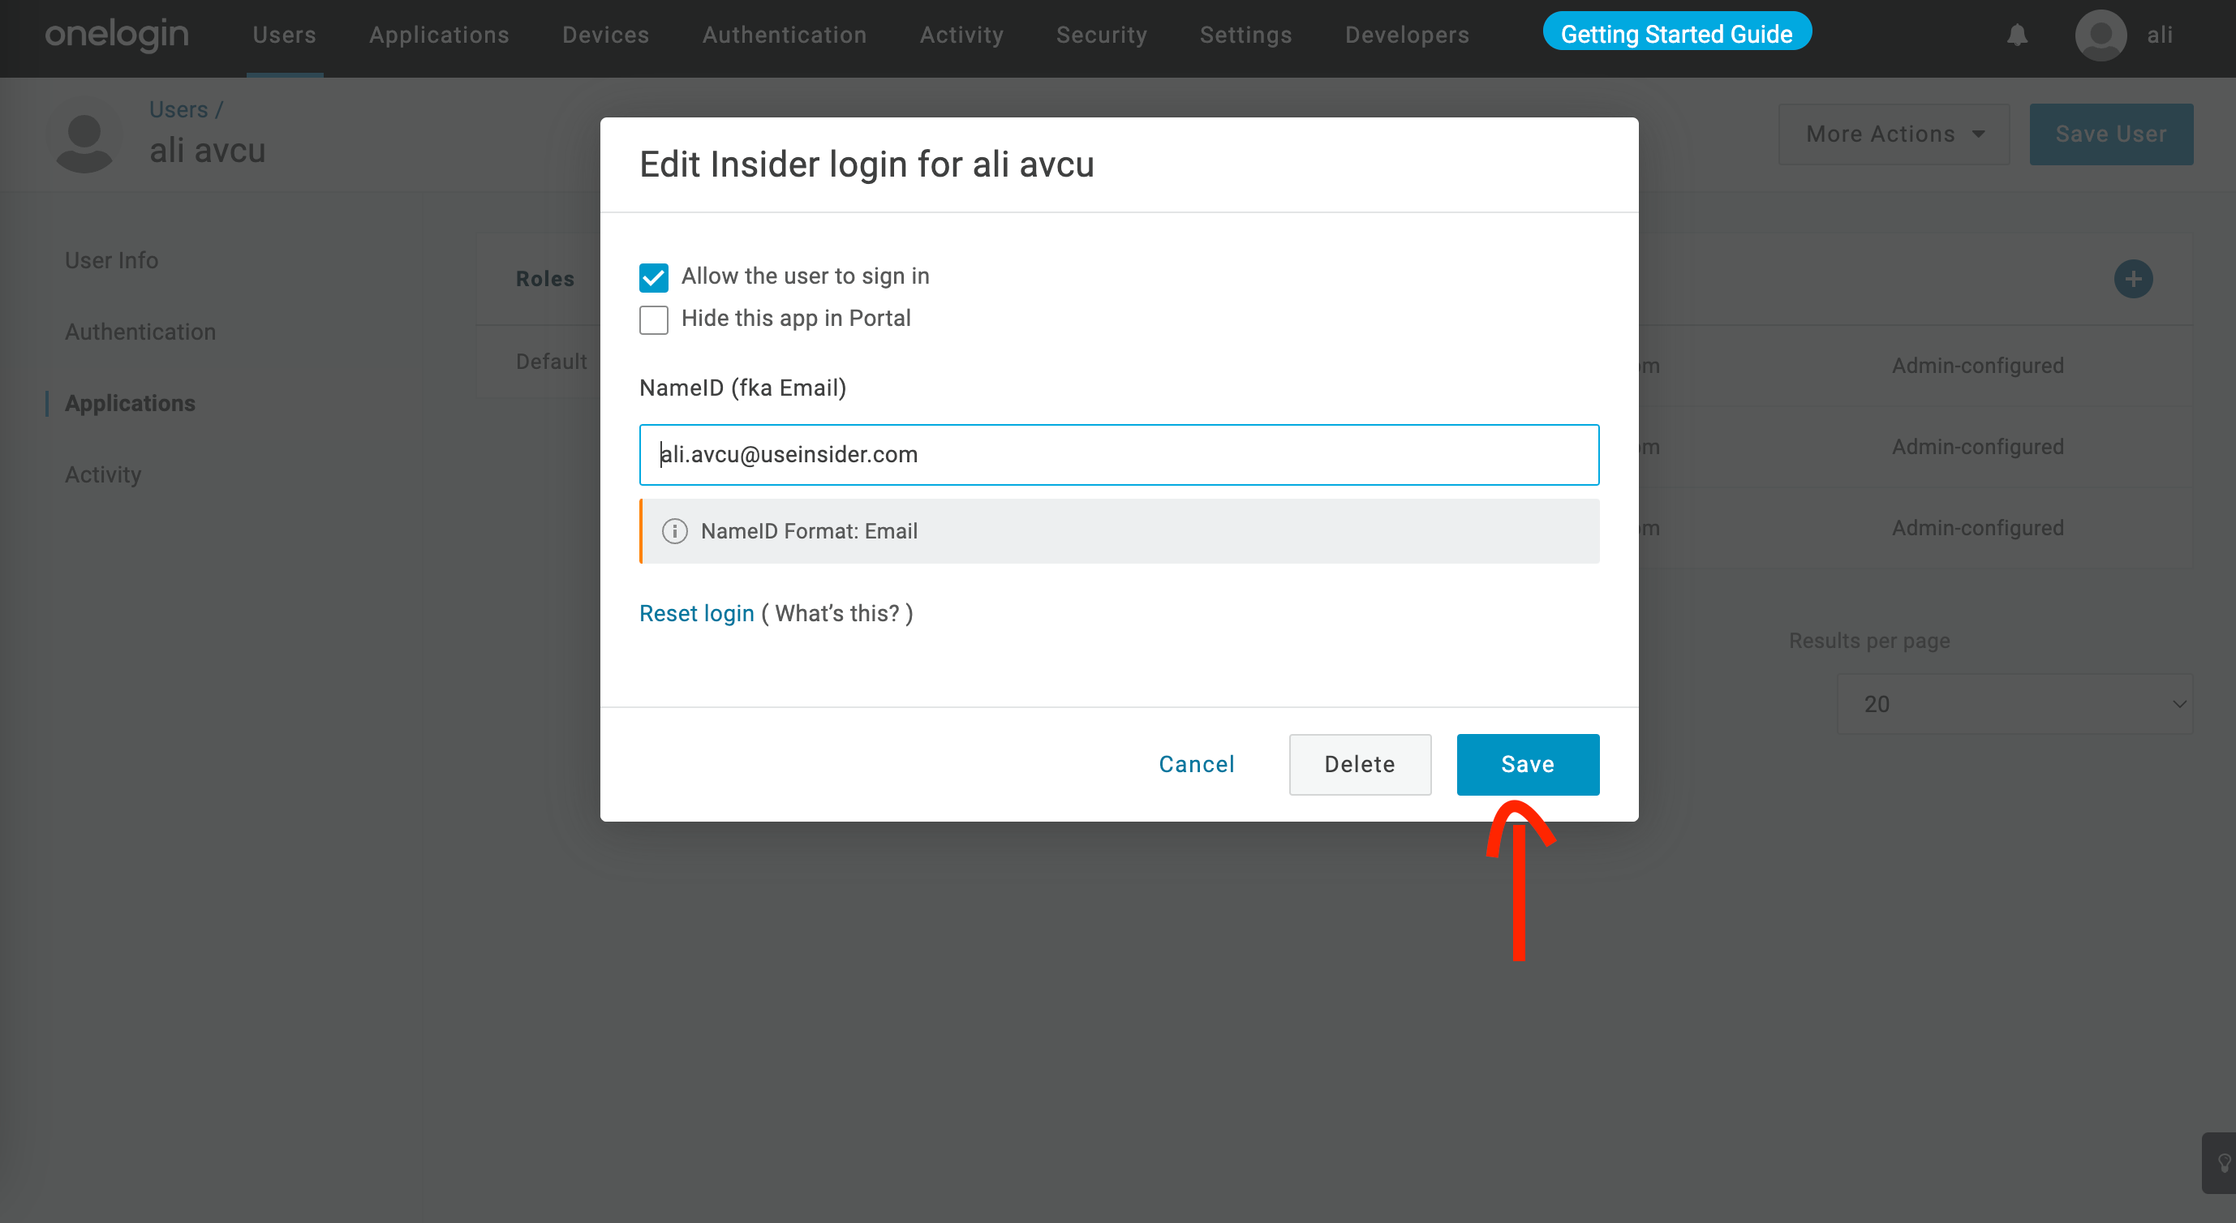
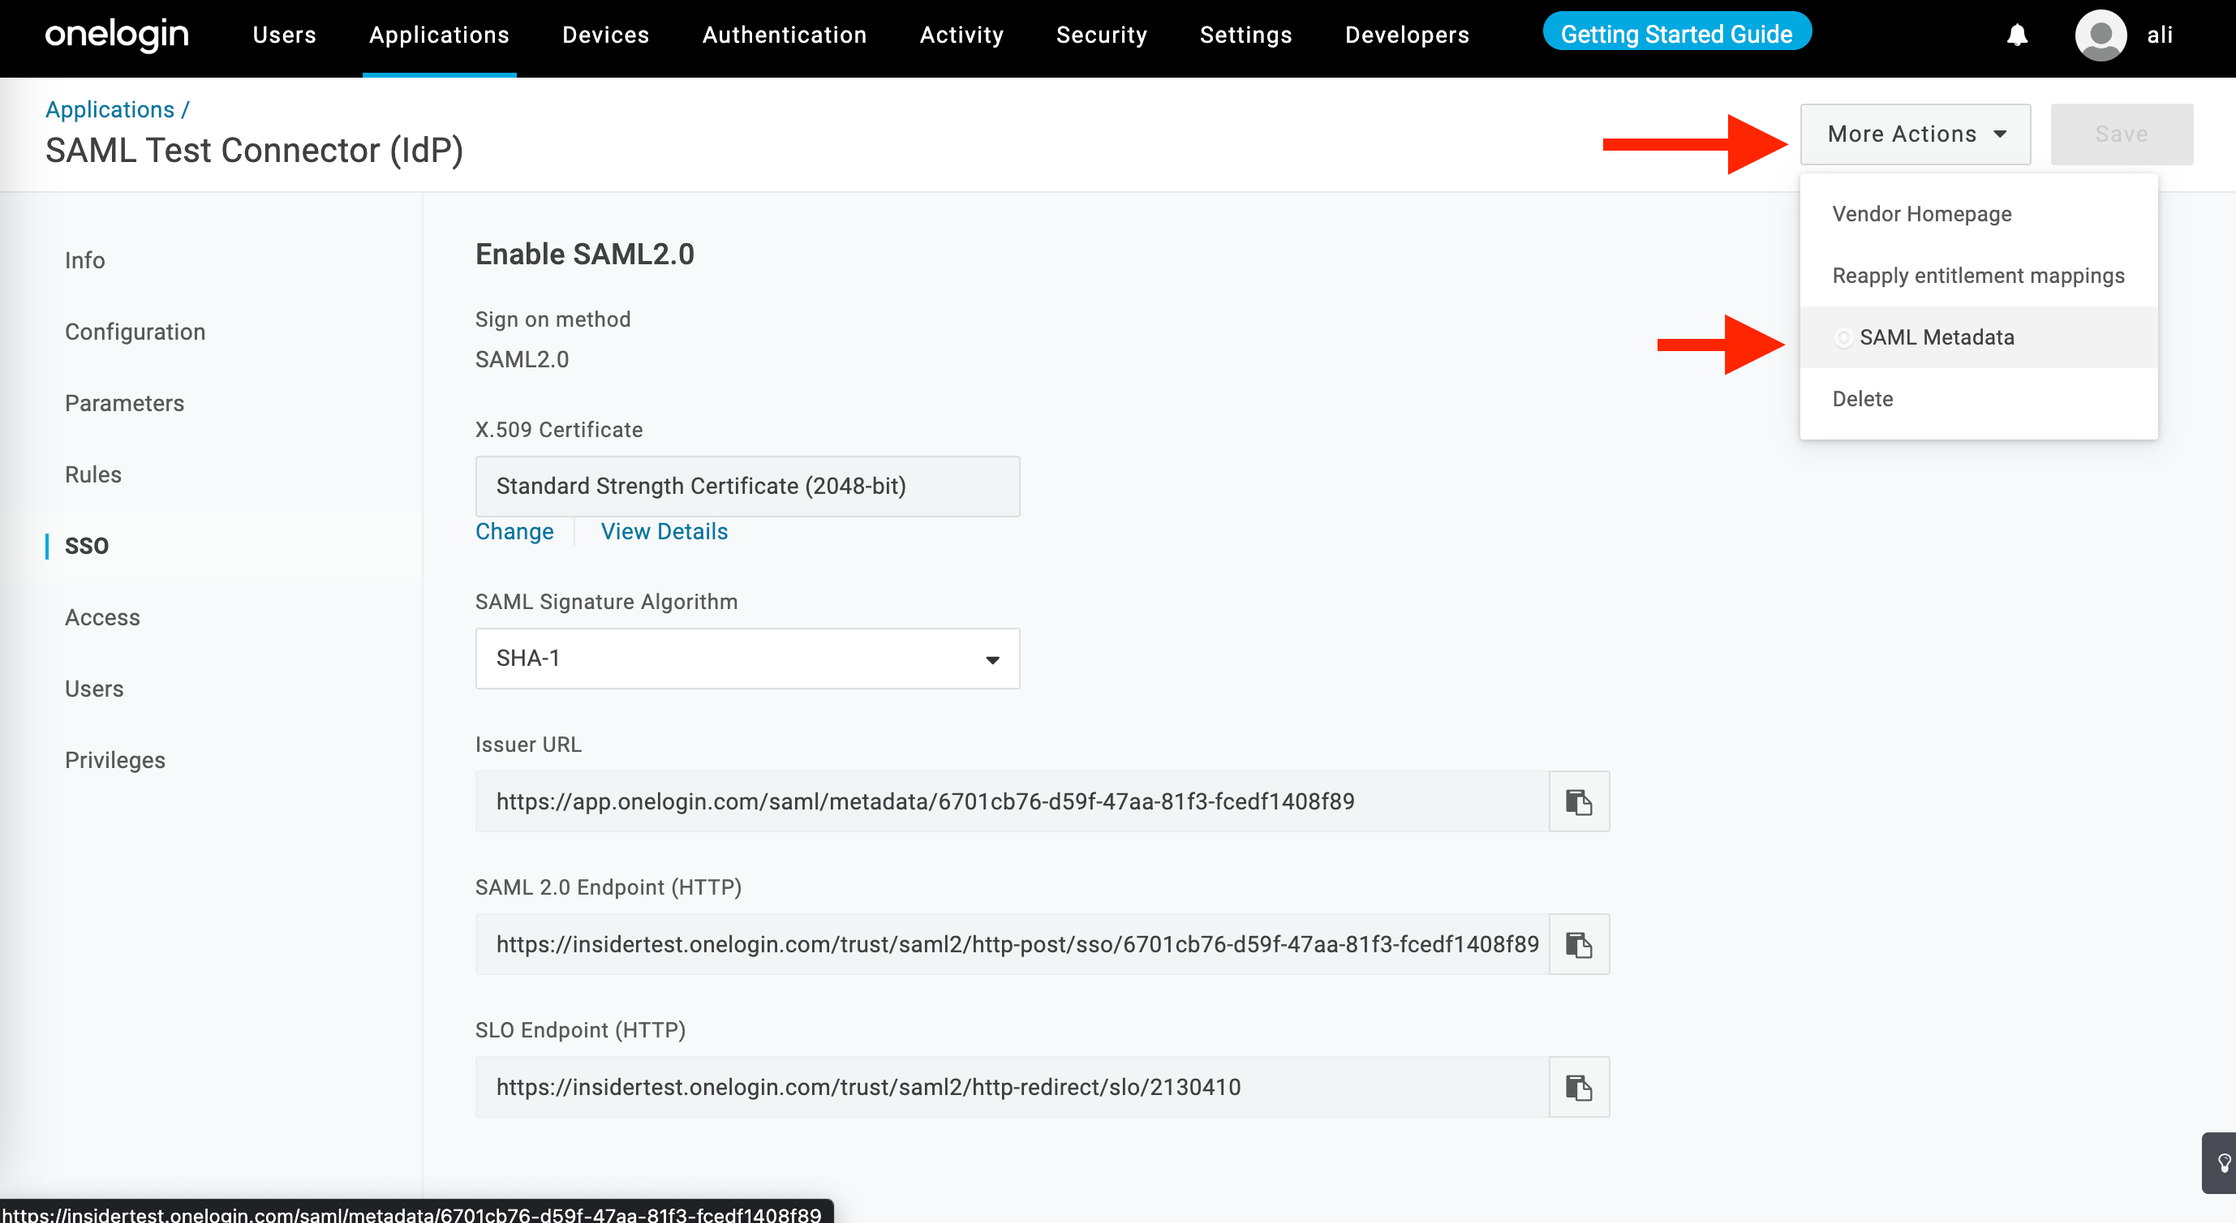
9. Go back to the Applications page and select Insider application. Click the More Actions > SAML Metadata button. You’ll see an XML file downloaded on your computer. Go to the Insider Security Settings page and upload the XML file you’ve downloaded for the IdP Settings.
10. Click the Test Connection button to test the connection and save the settings. You are now ready to use the Single Sign-On feature.
Add more users to the application
Typically, you can log in via email and password registered on Onelogin’s dashboard while testing the Single Sign-On connection. However, to test additional SSO features, you must add another user to the IdP. Here you can find how to add more users to the application.
1. Go to the Users page. Click on the New User button. 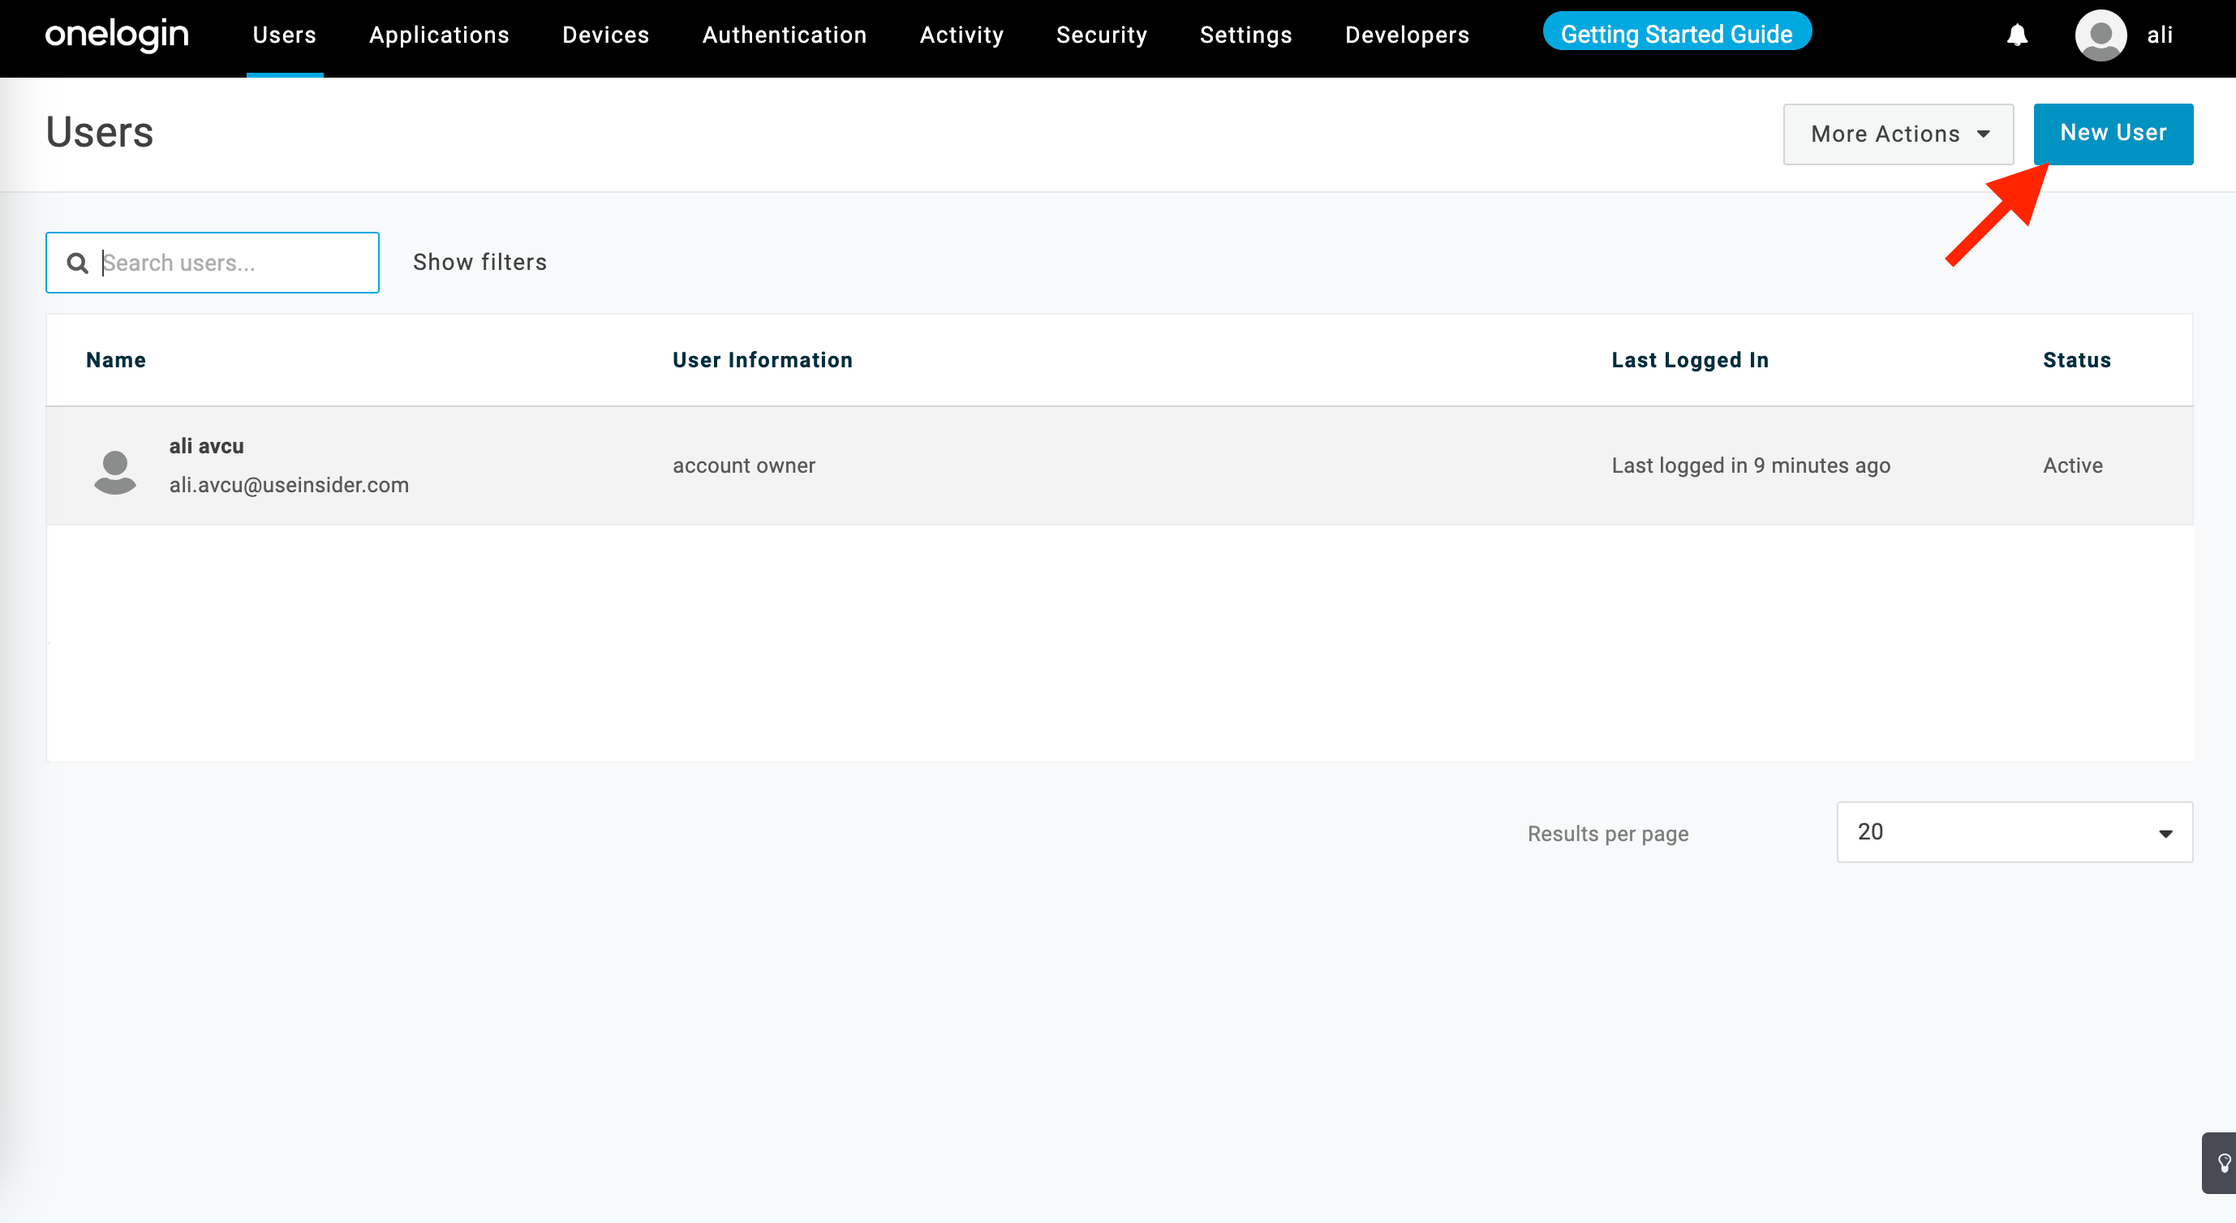
2. Fill in the name, surname, and email fields on the following page and click the Save User button. 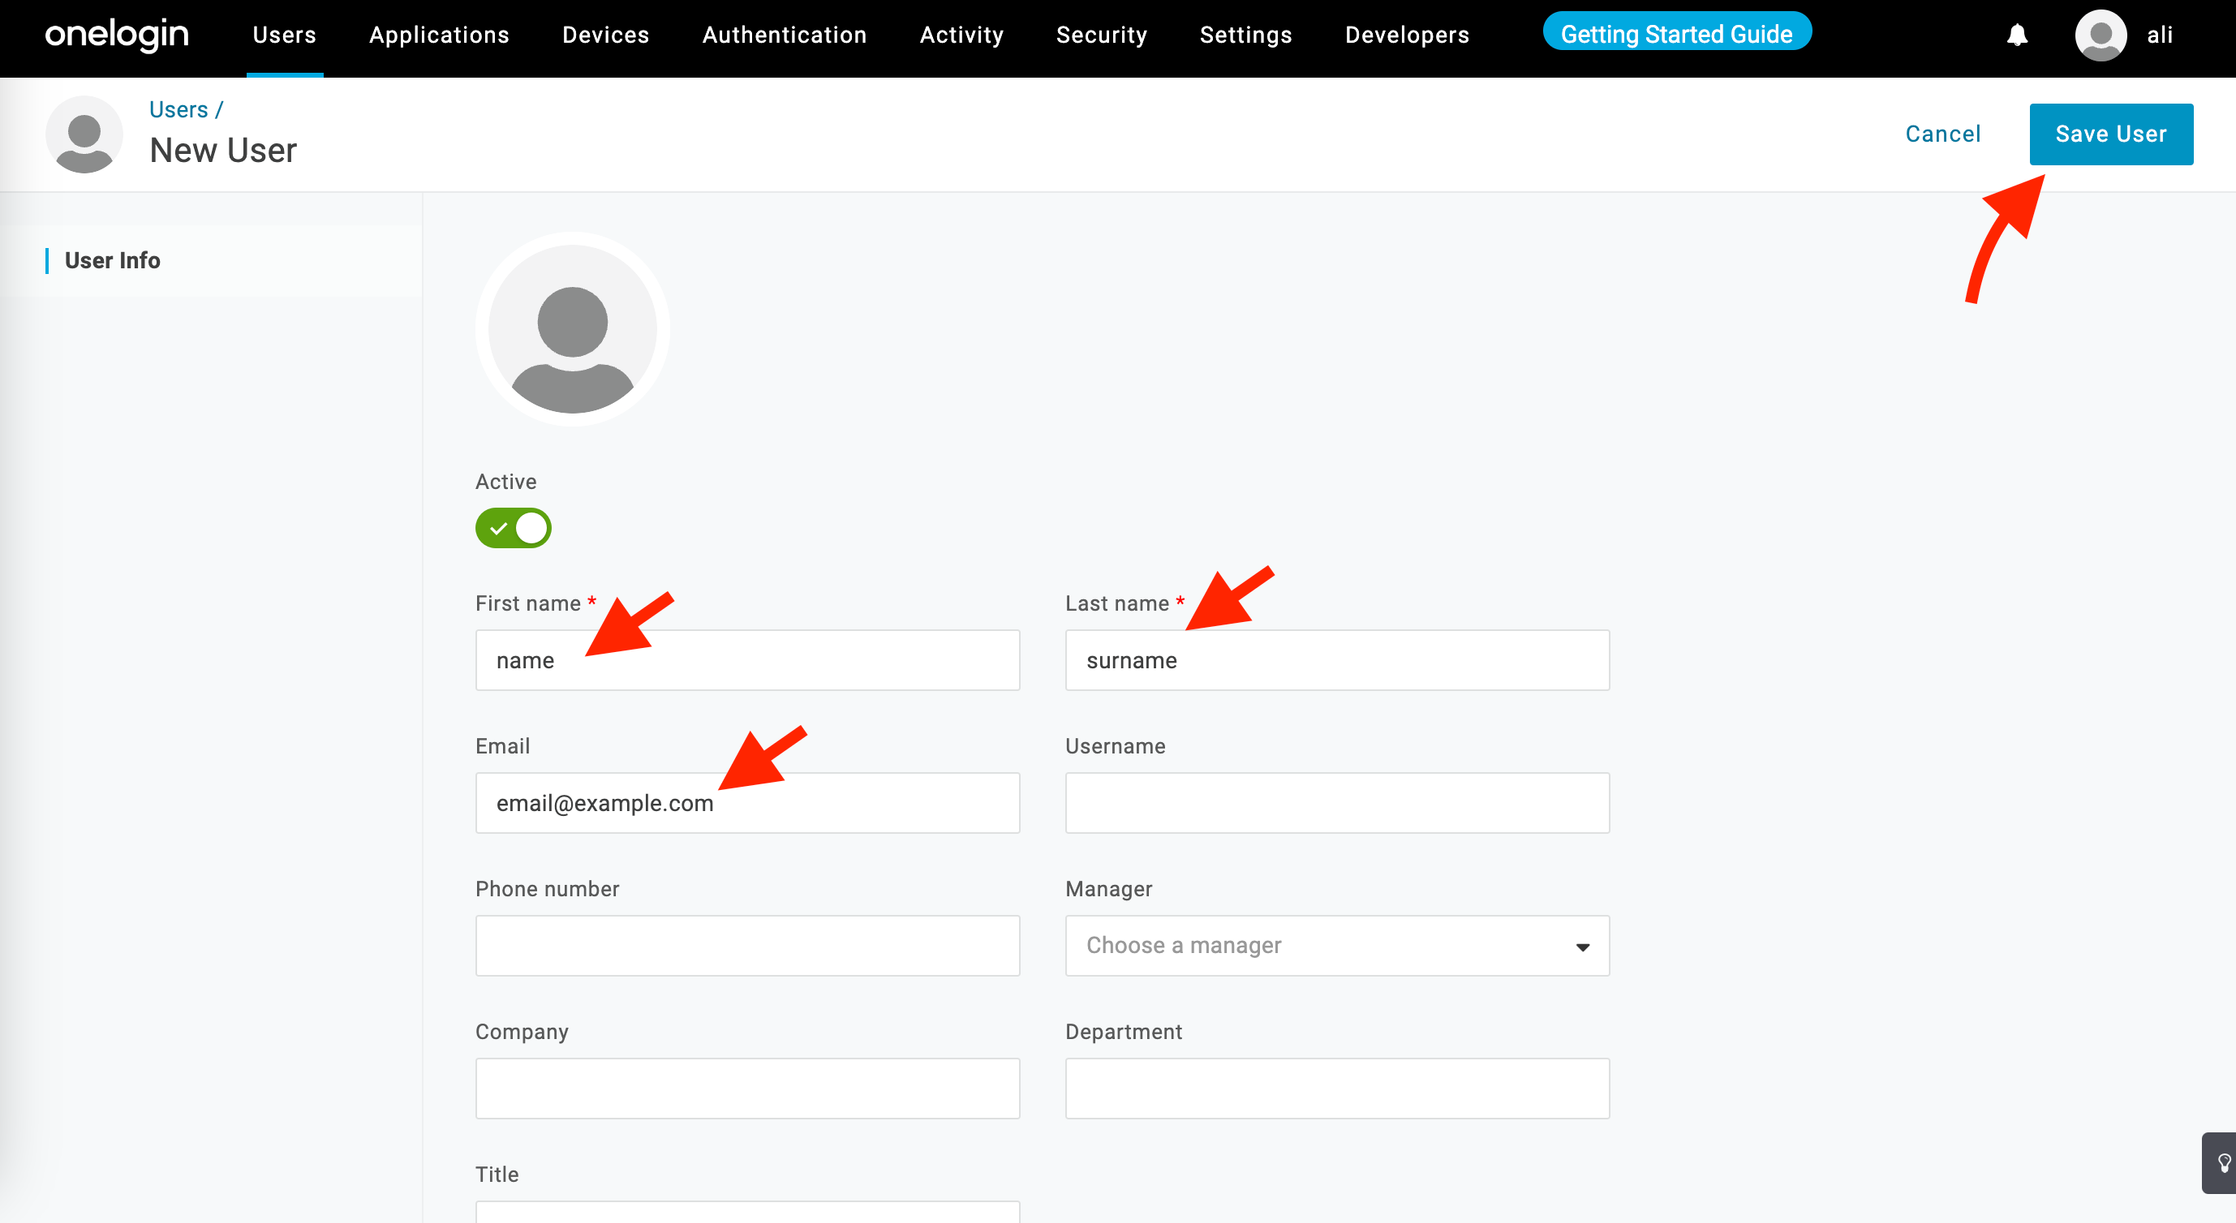
3. Click the More Actions > Change Password button. Create a password for the new user in the pop-up and click the Update button. 

4. Click the Applications tab on the left menu. Click on the +(plus) button in the top right corner. Select the Insider application and click the Continue button. 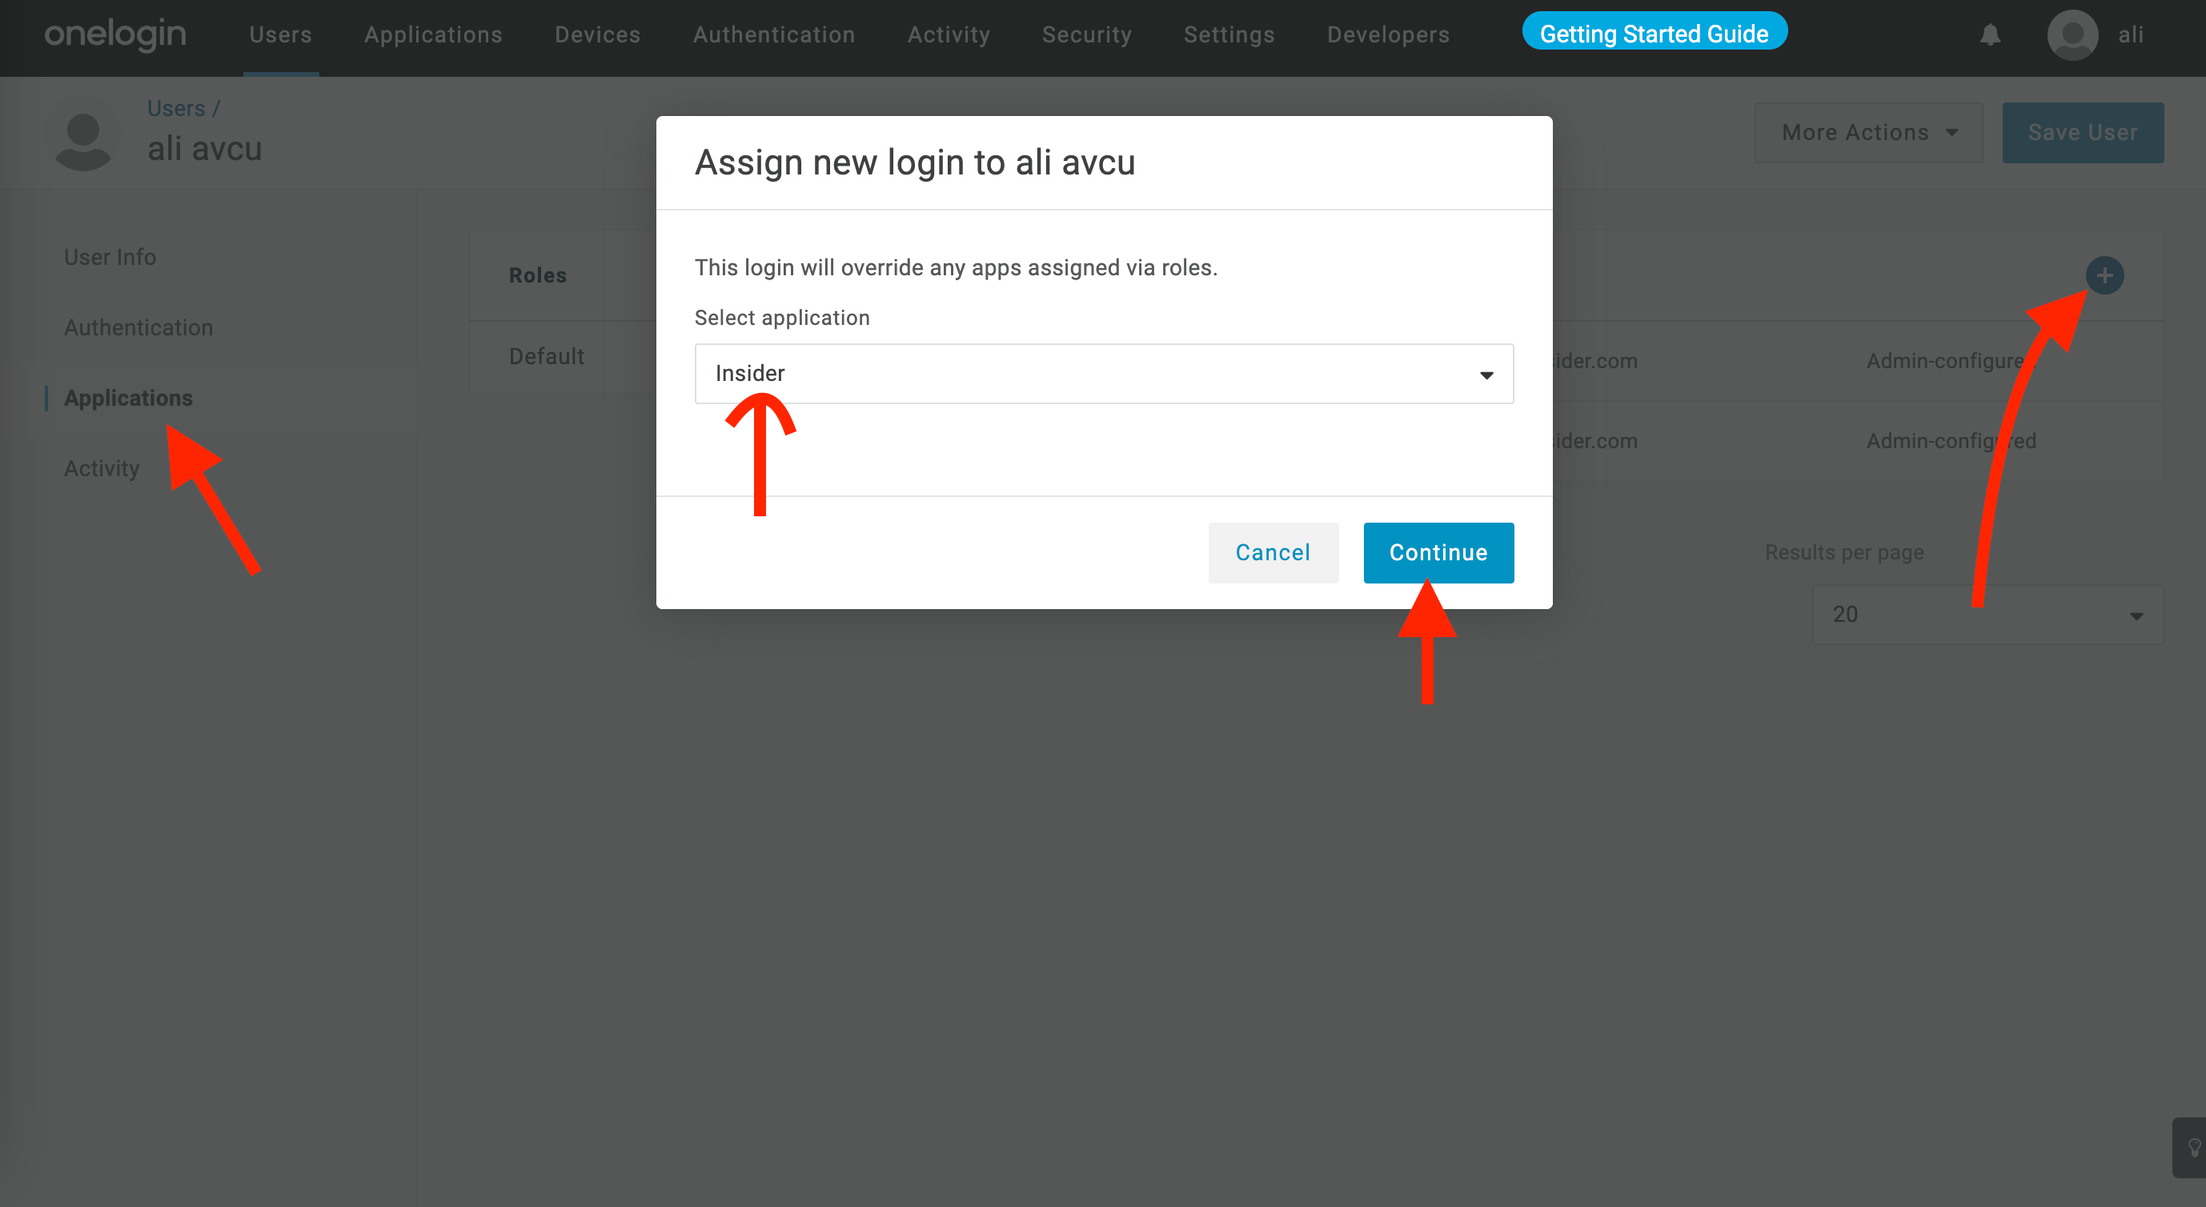
5. Make sure to check the “Allow the user to sign in” box. Click the Save button. 
Now that you have added a new user, you can start using it to test your Single Sign-On connections.