Suggested reading: Single Sign-On
This guide lists the actions you need to complete to configure SSO (Single Sign-On) and SCIM (System for Cross-Domain Identity Management) for Okta.
You can complete this configuration in the following steps:
Set up SSO
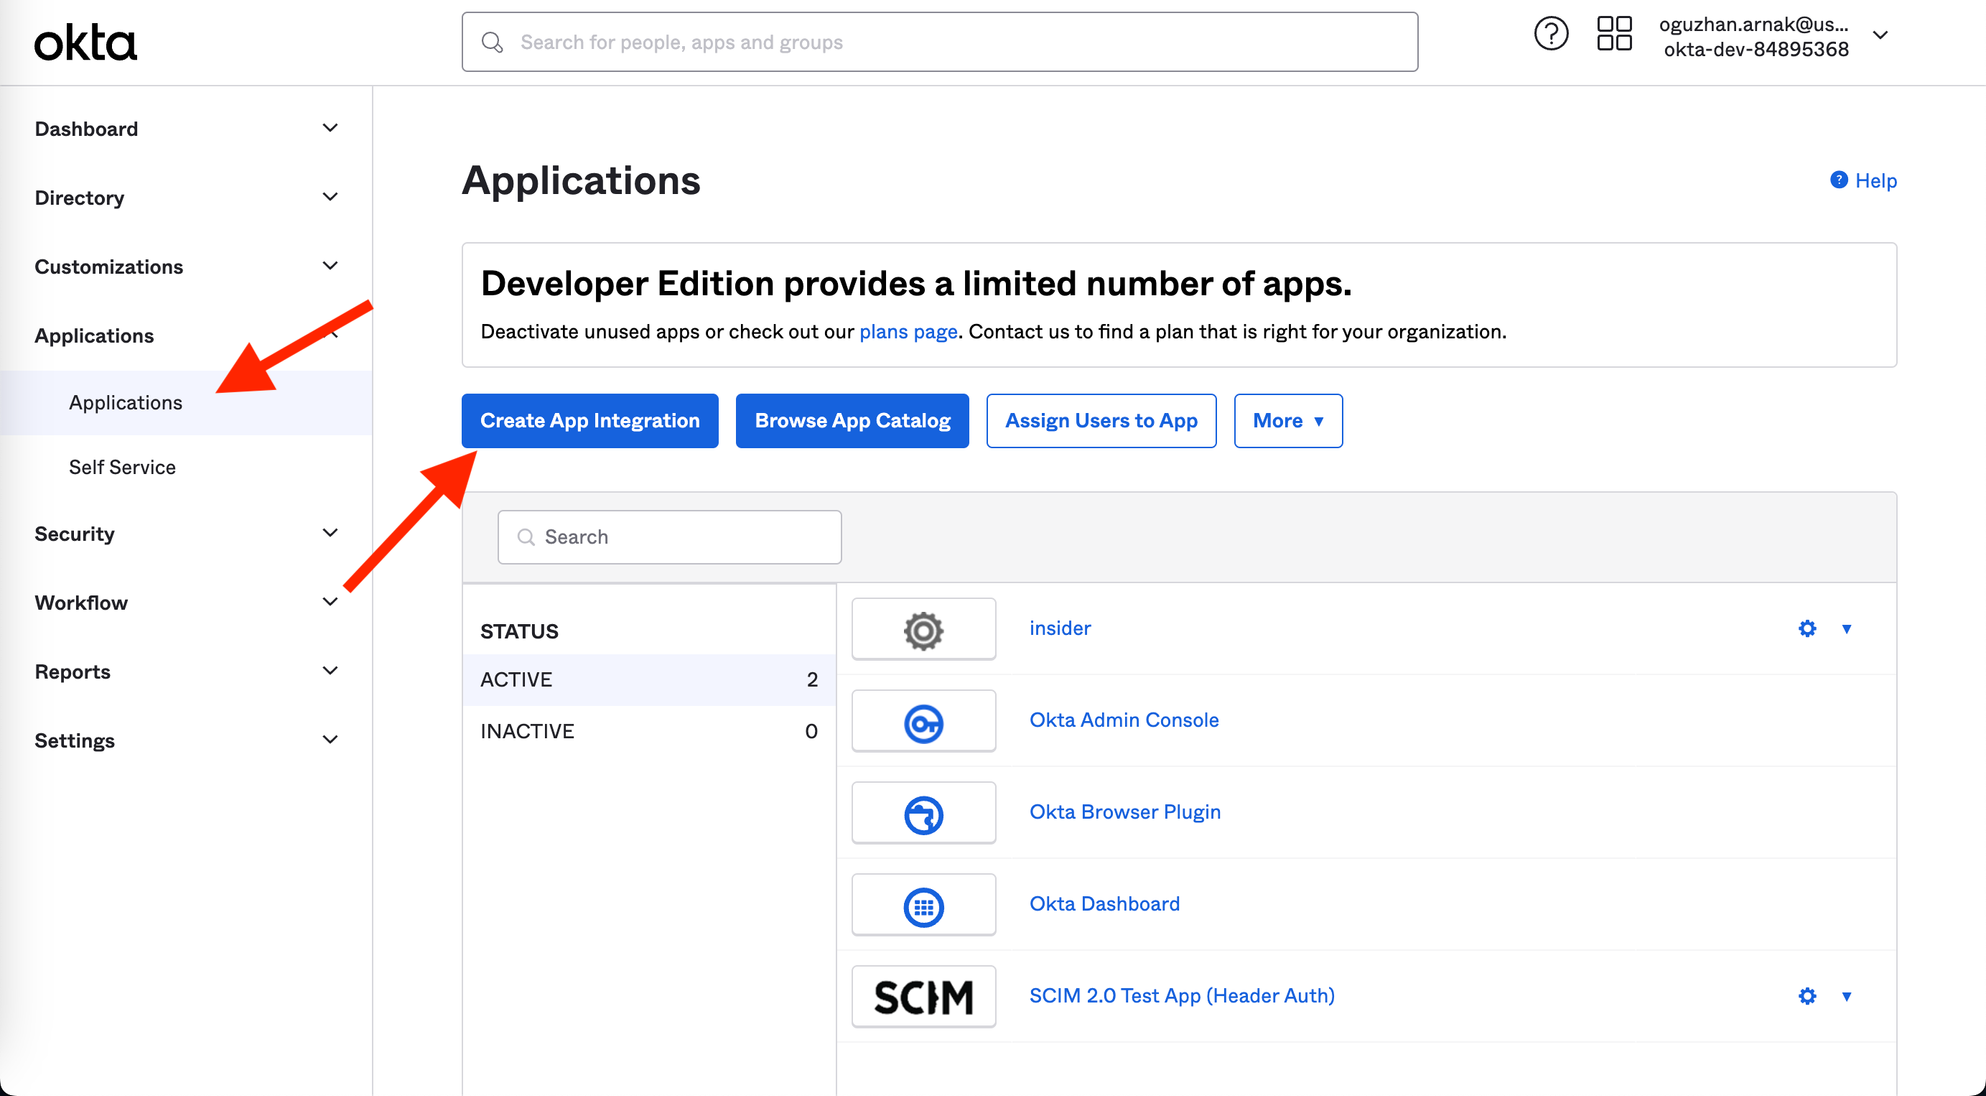
1. Log in to your Okta account, and go to Applications to click the Create App Integration button.
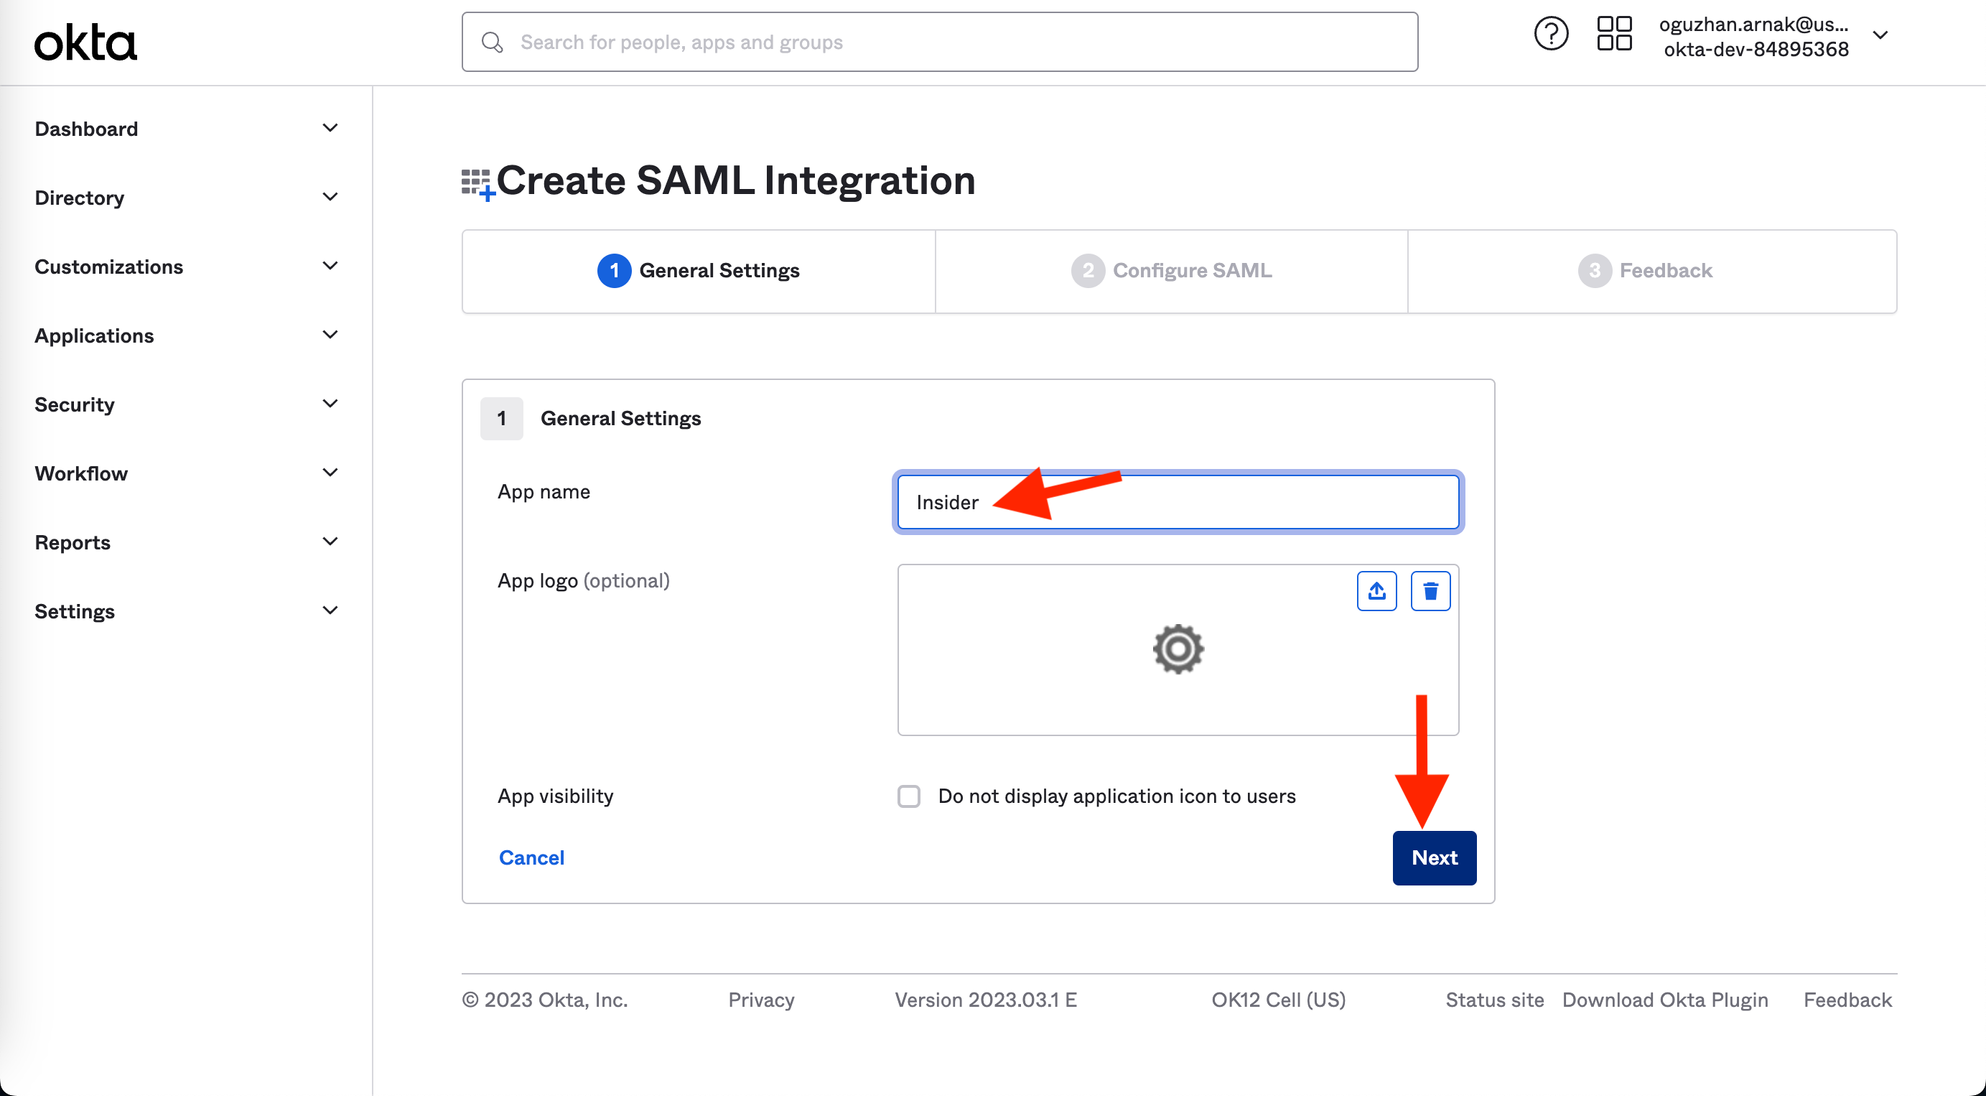
2. Fill in the App name input as displayed, and click the Next button.
3. Choose SAML 2.0 and click the Next button.
(1).webp)
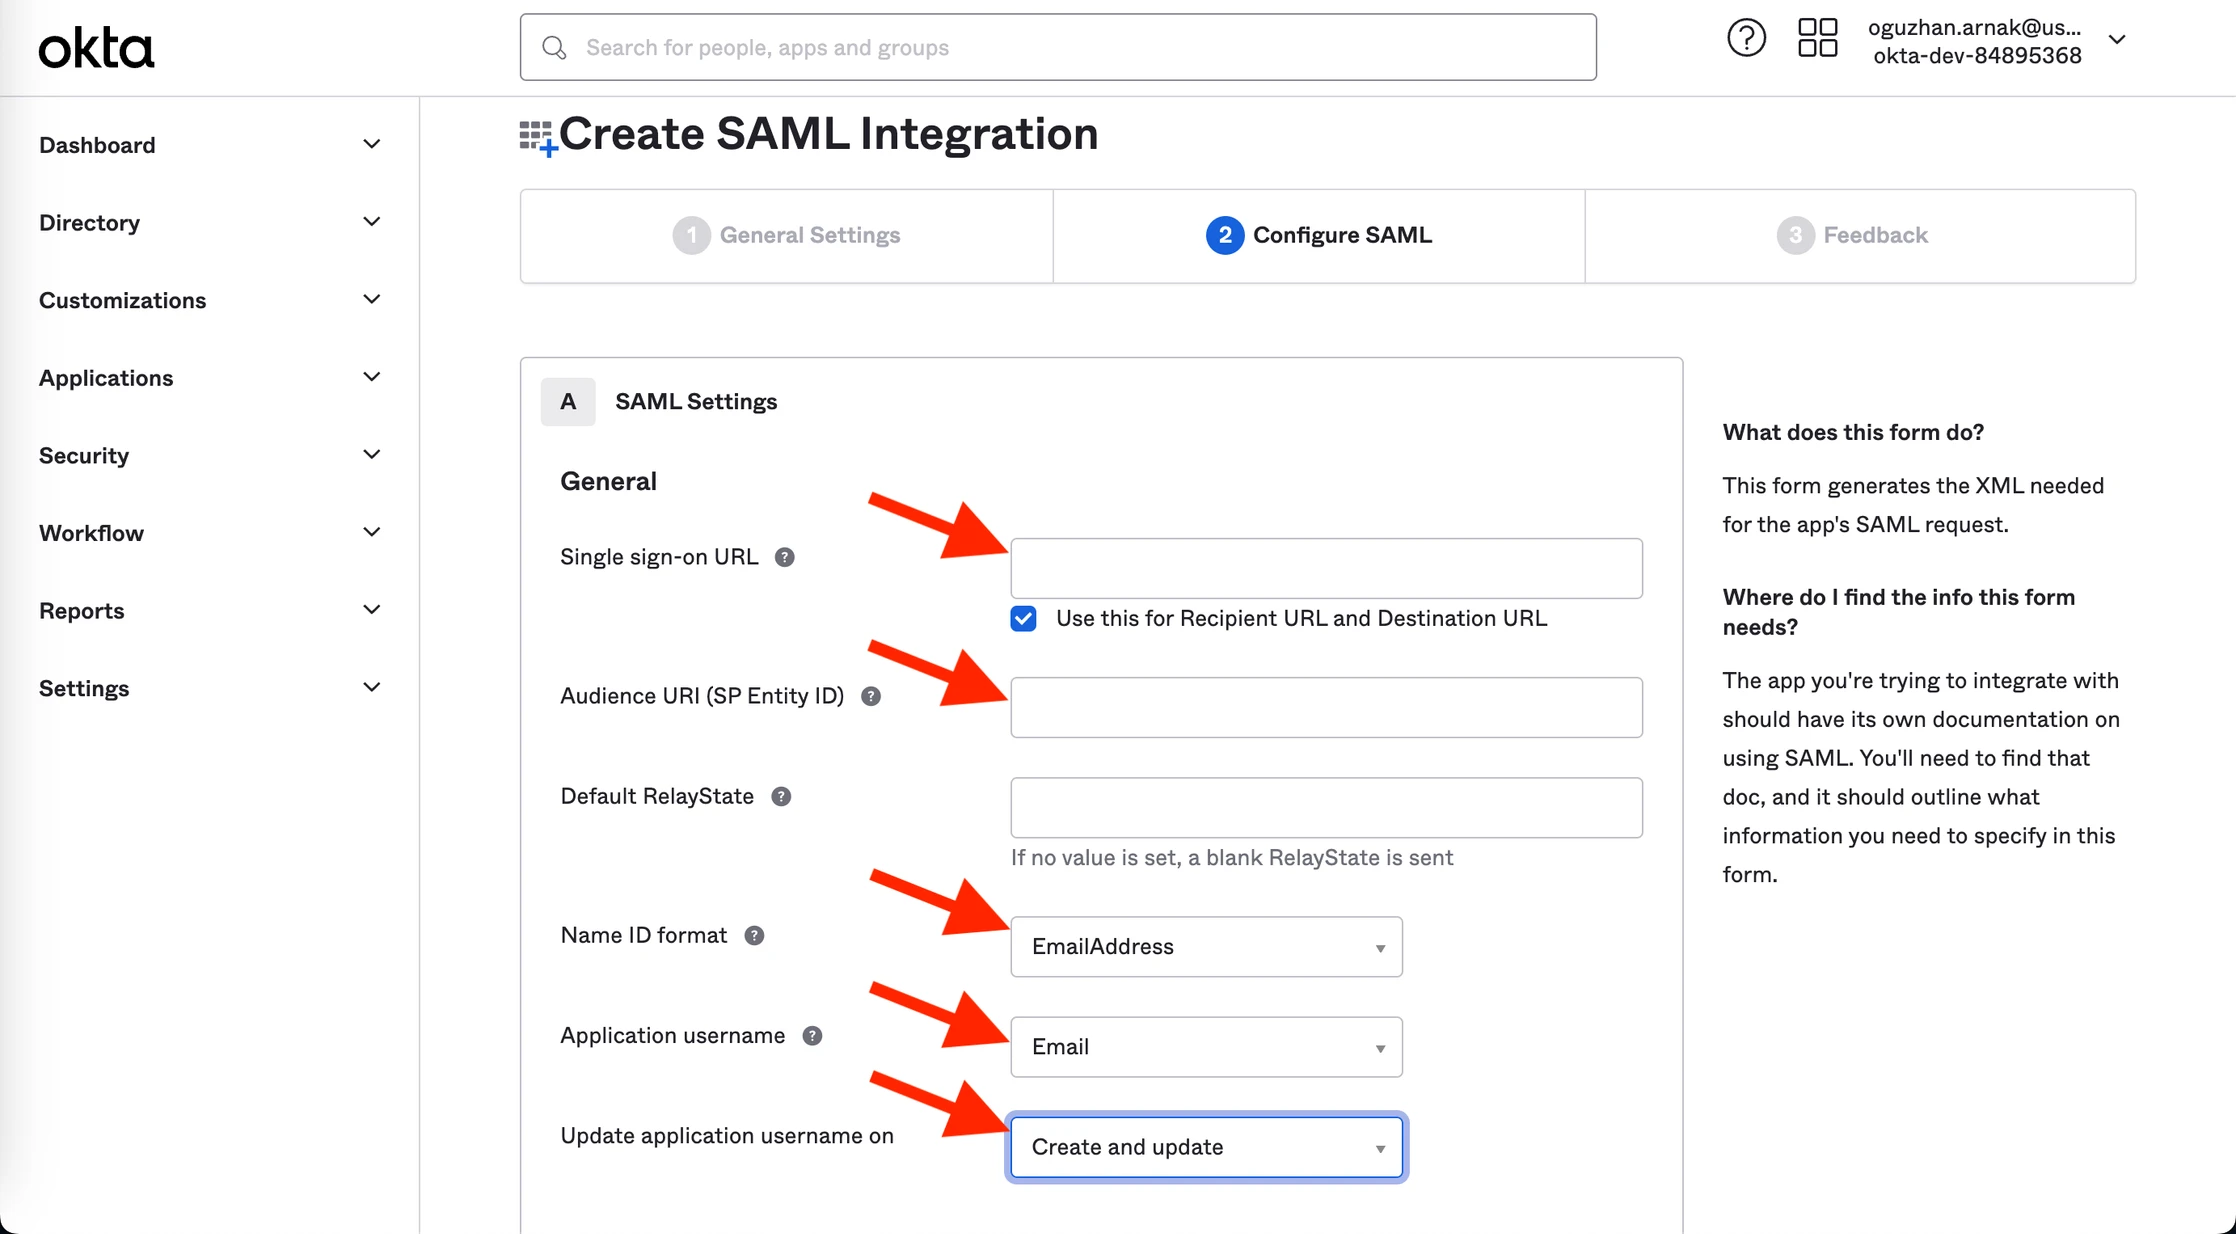
4. Fill the SAML Settings fields with the following information.
| Field | Information |
|---|---|
| Single sign-on URL | Insider SSO URL on Inone Settings > Security |
| Use this for Recipient URL and Destination URL | - |
| Audience URI (SP Entity Id) | Service Provider Entity ID on Inone Settings > Security |
| Default Relay State | empty |
| Name ID Format | EmailAddress |
| Application username | |
| Update application username on | Create and update |
5. After filling the fields, click the Next button at the bottom of the page to save your changes.
6. Select the I’m an Okta customer adding an internal app option.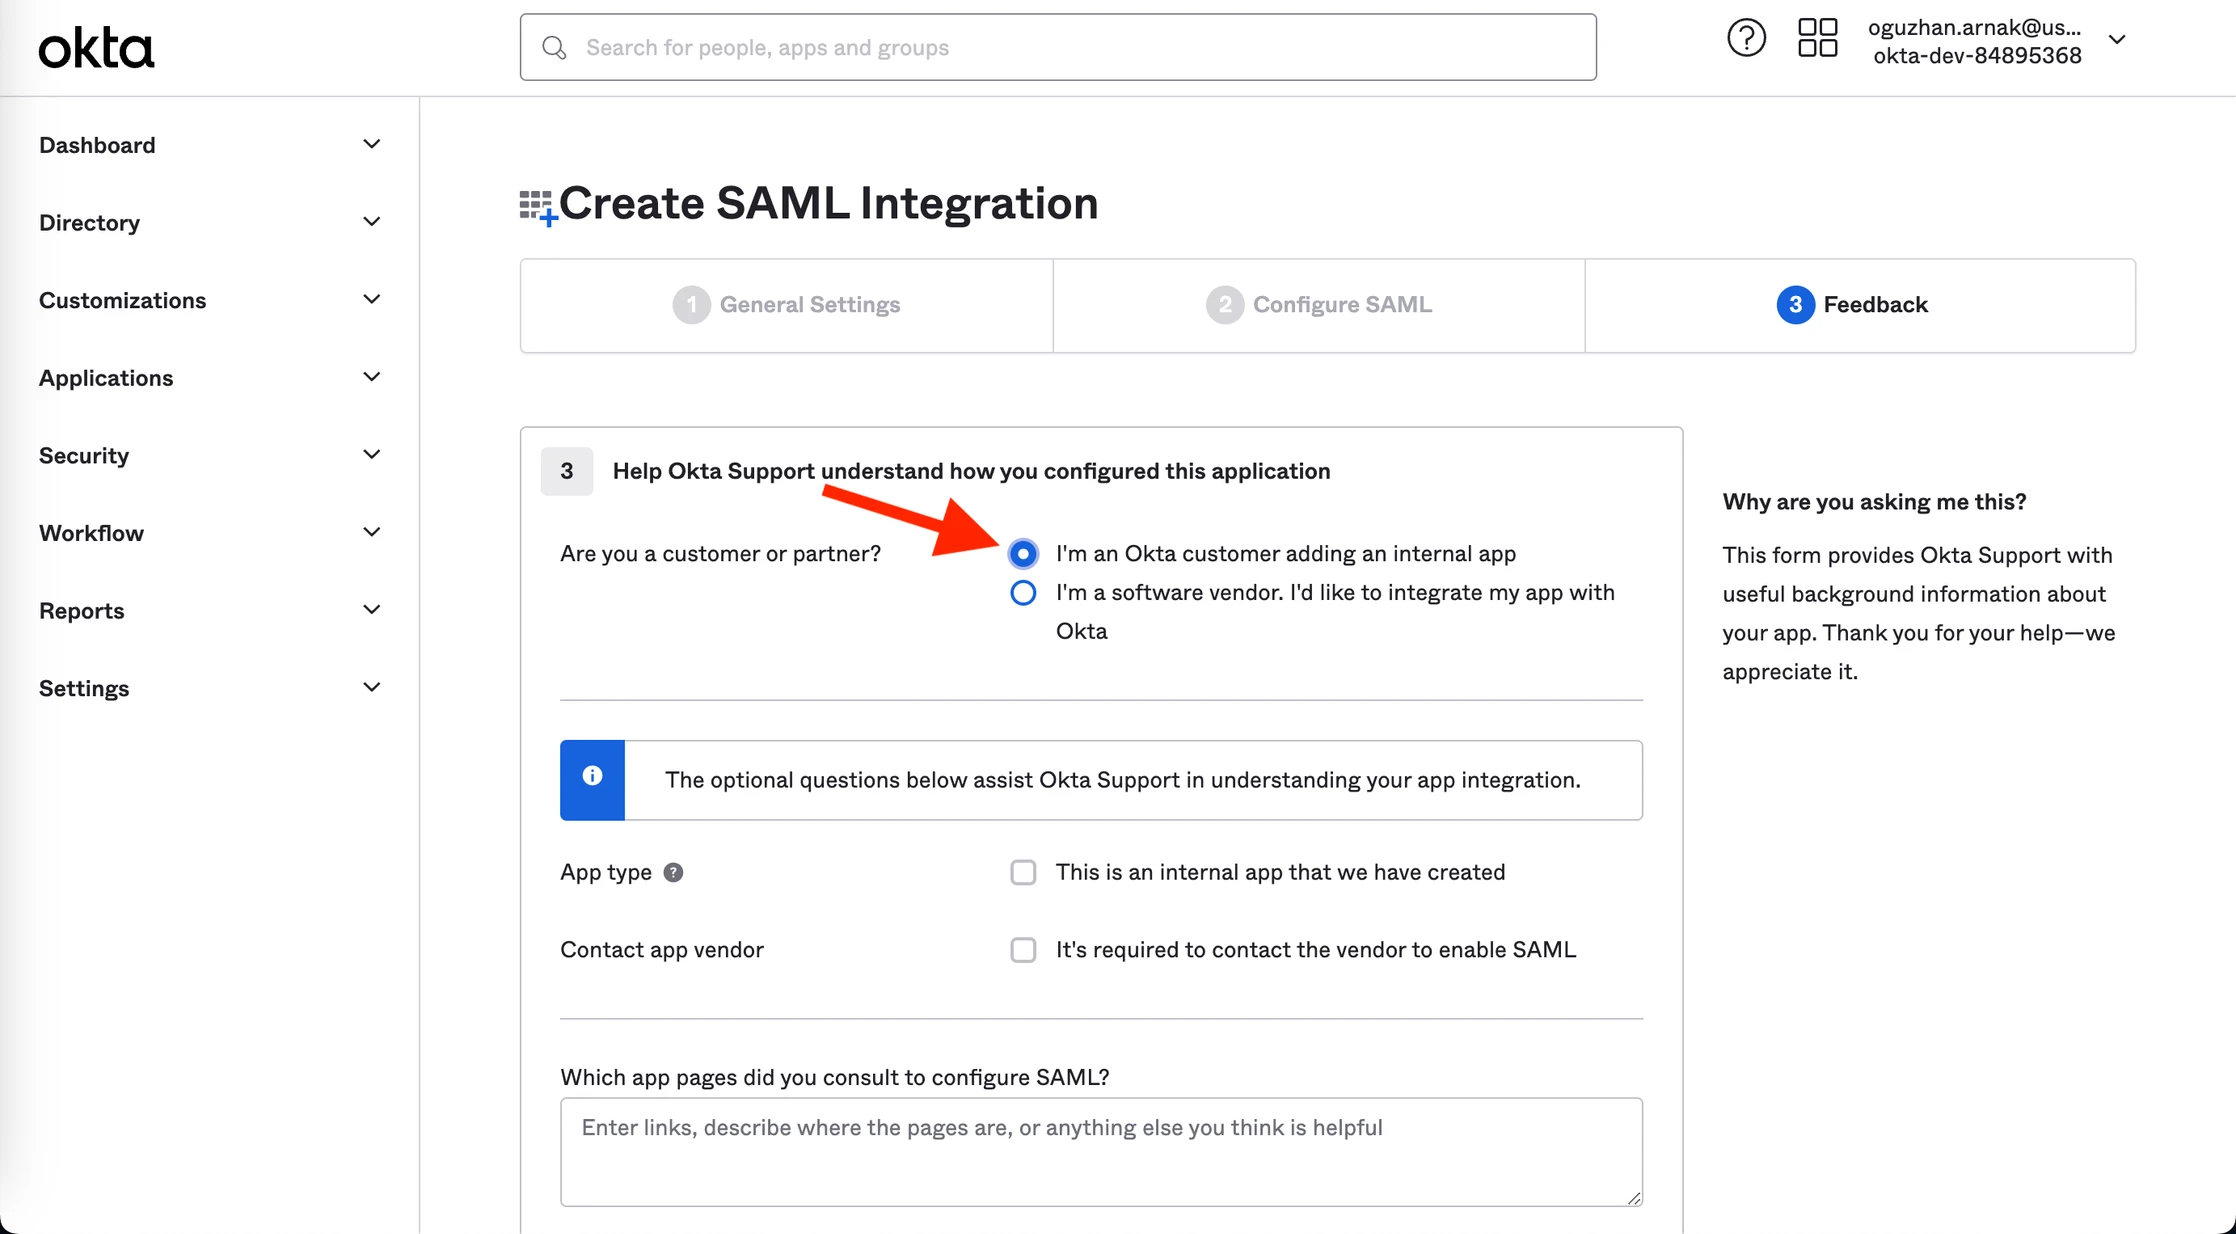
7. Other fields in this section are optional. You can skip them and click the Next button at the bottom of the page to finalize your setup.
8. Go to Applications > Assignments to click the Assign button. Select the People Filter. 
9. You’ll see your account name and email. Click the Assign button to add this user to the application you created so they can log in.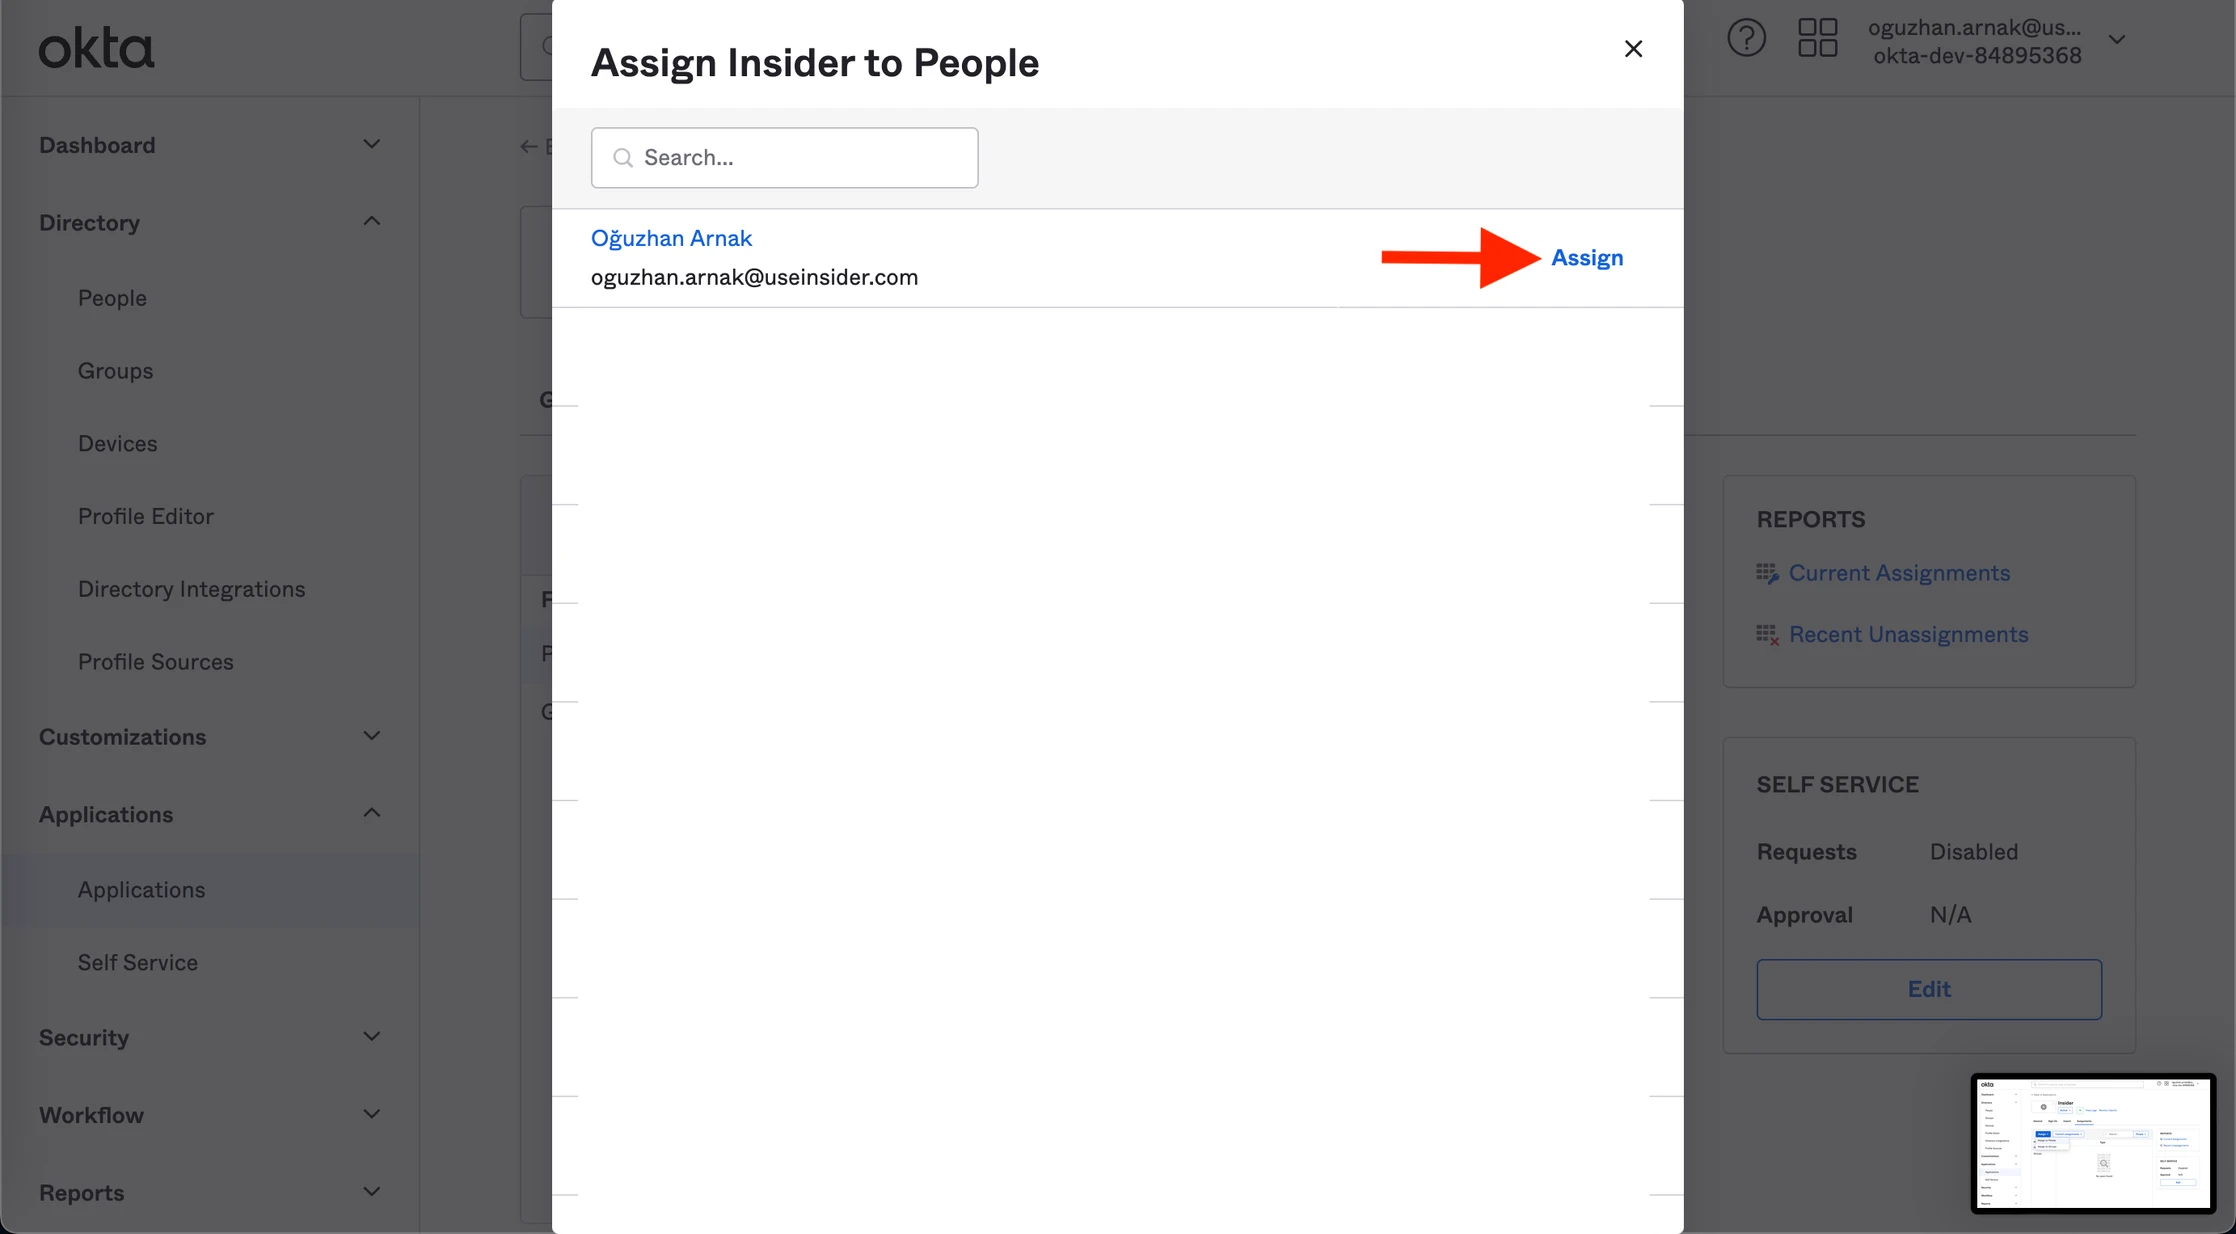
10. Go to the Sign On tab to copy the Metadata URL, and paste it in a new tab in your browser.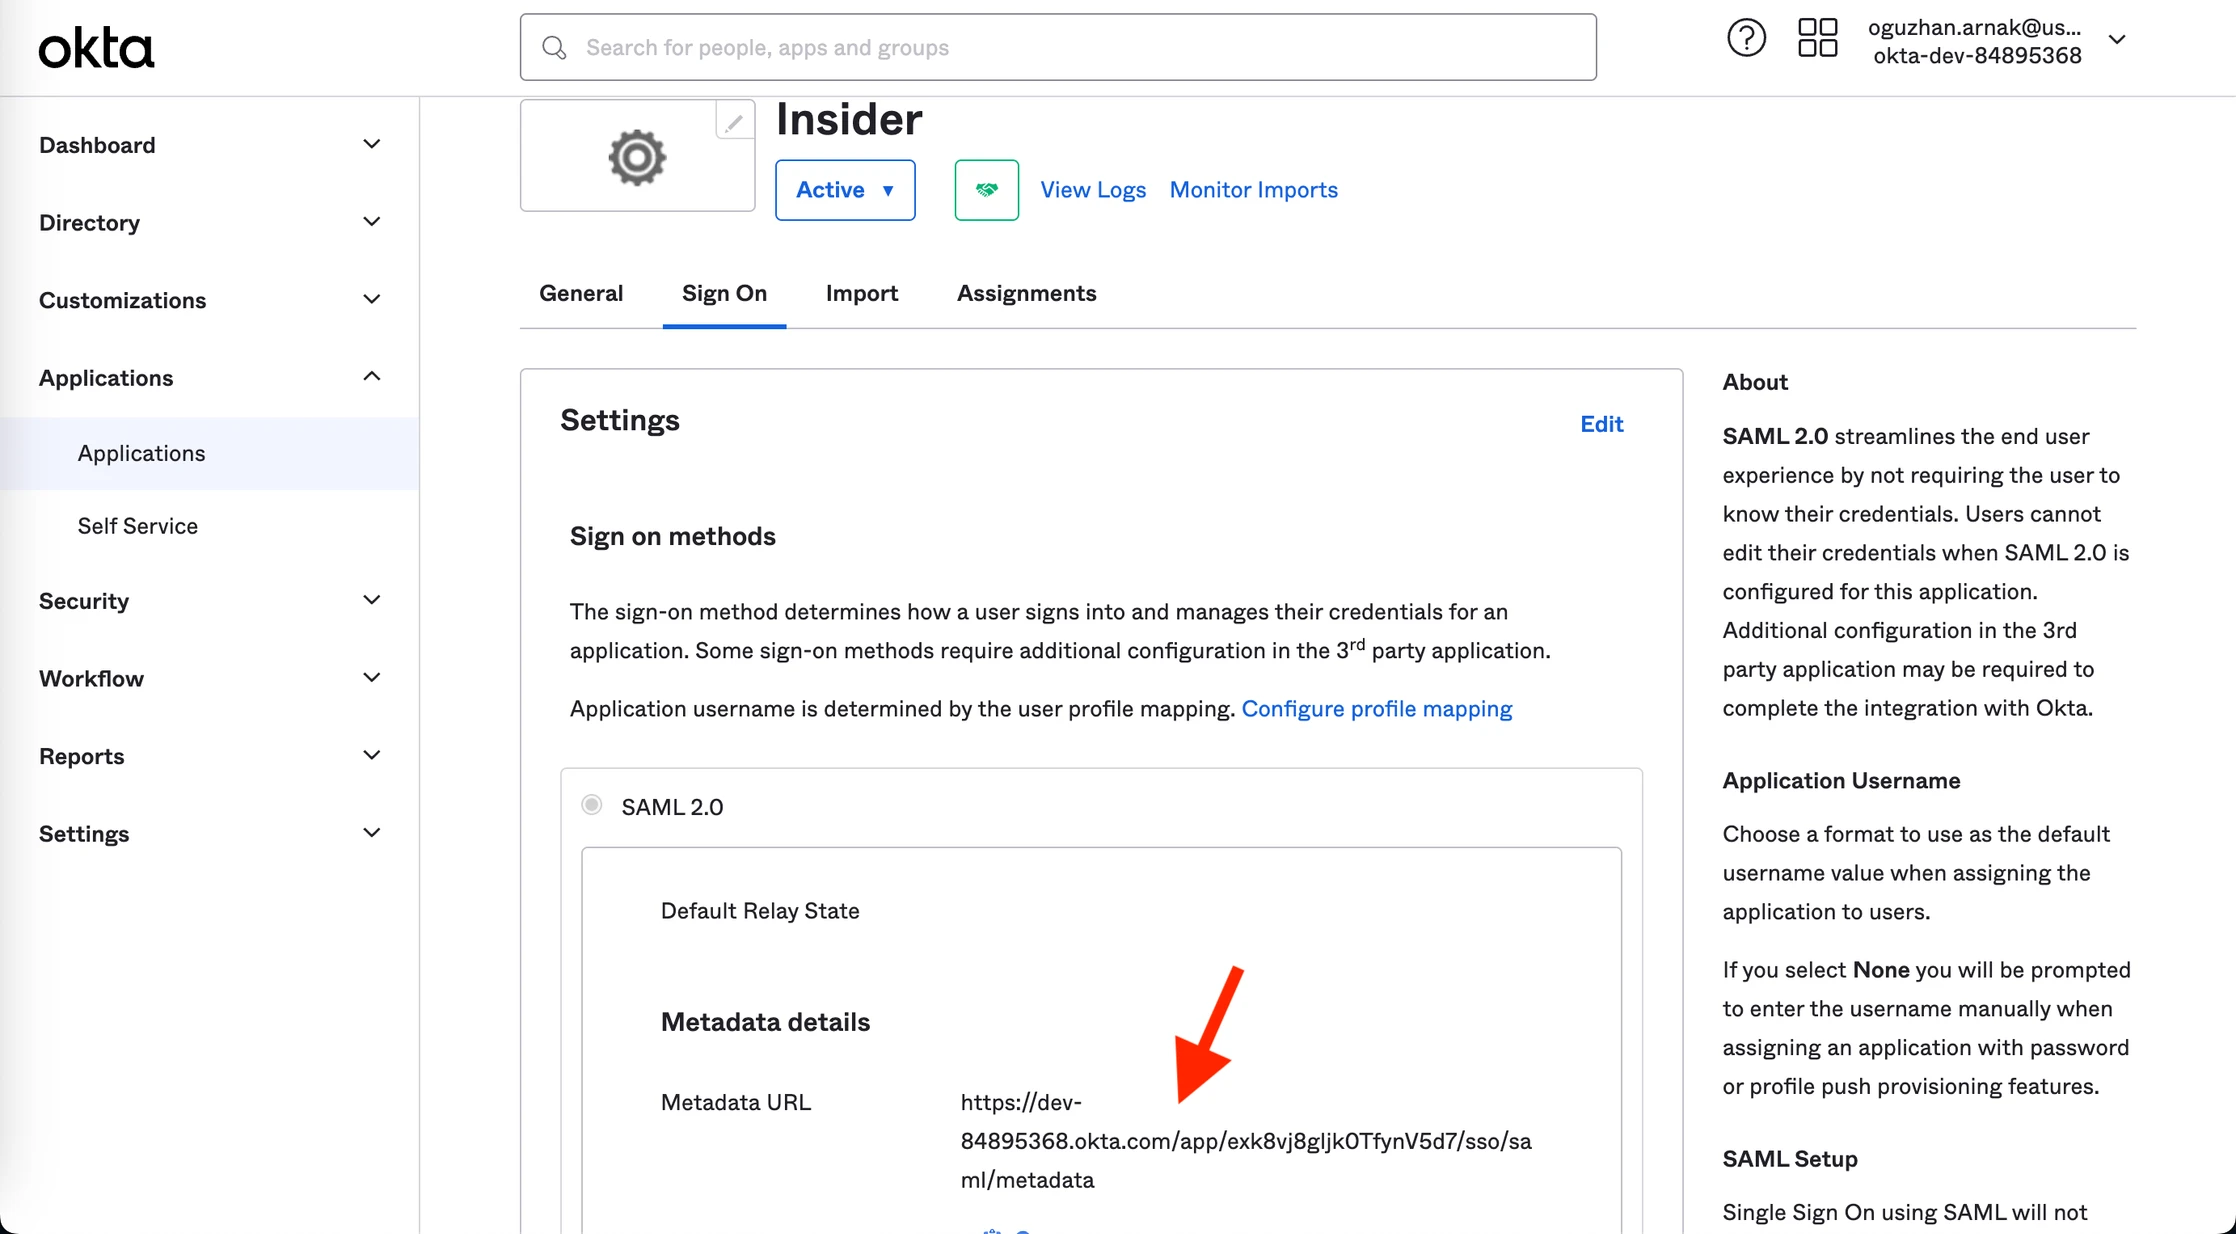
11. You’ll see an XML file/code. If the XML file does not download manually, click CTRL+S (CMD+S) and save the file as a metada.xml file.
12. Go back to Inone panel > Settings > Inone Settings > Security to upload the XML file you’ve downloaded, and click the Test Connection button. 
13. You should see a green text that indicates the test connection is successful. Save the settings, and your SSO setup is ready.
Add more users to the IdP (Identity Provider)
You can log in via the email address and password you use to log in to Okta’s dashboard. To test other functionalities, you might need to add another user to the IdP. Follow these steps to add your users.
1. Go to Directory > People and click the Add Person button.

2. Fill out all the fields and click the Save button. 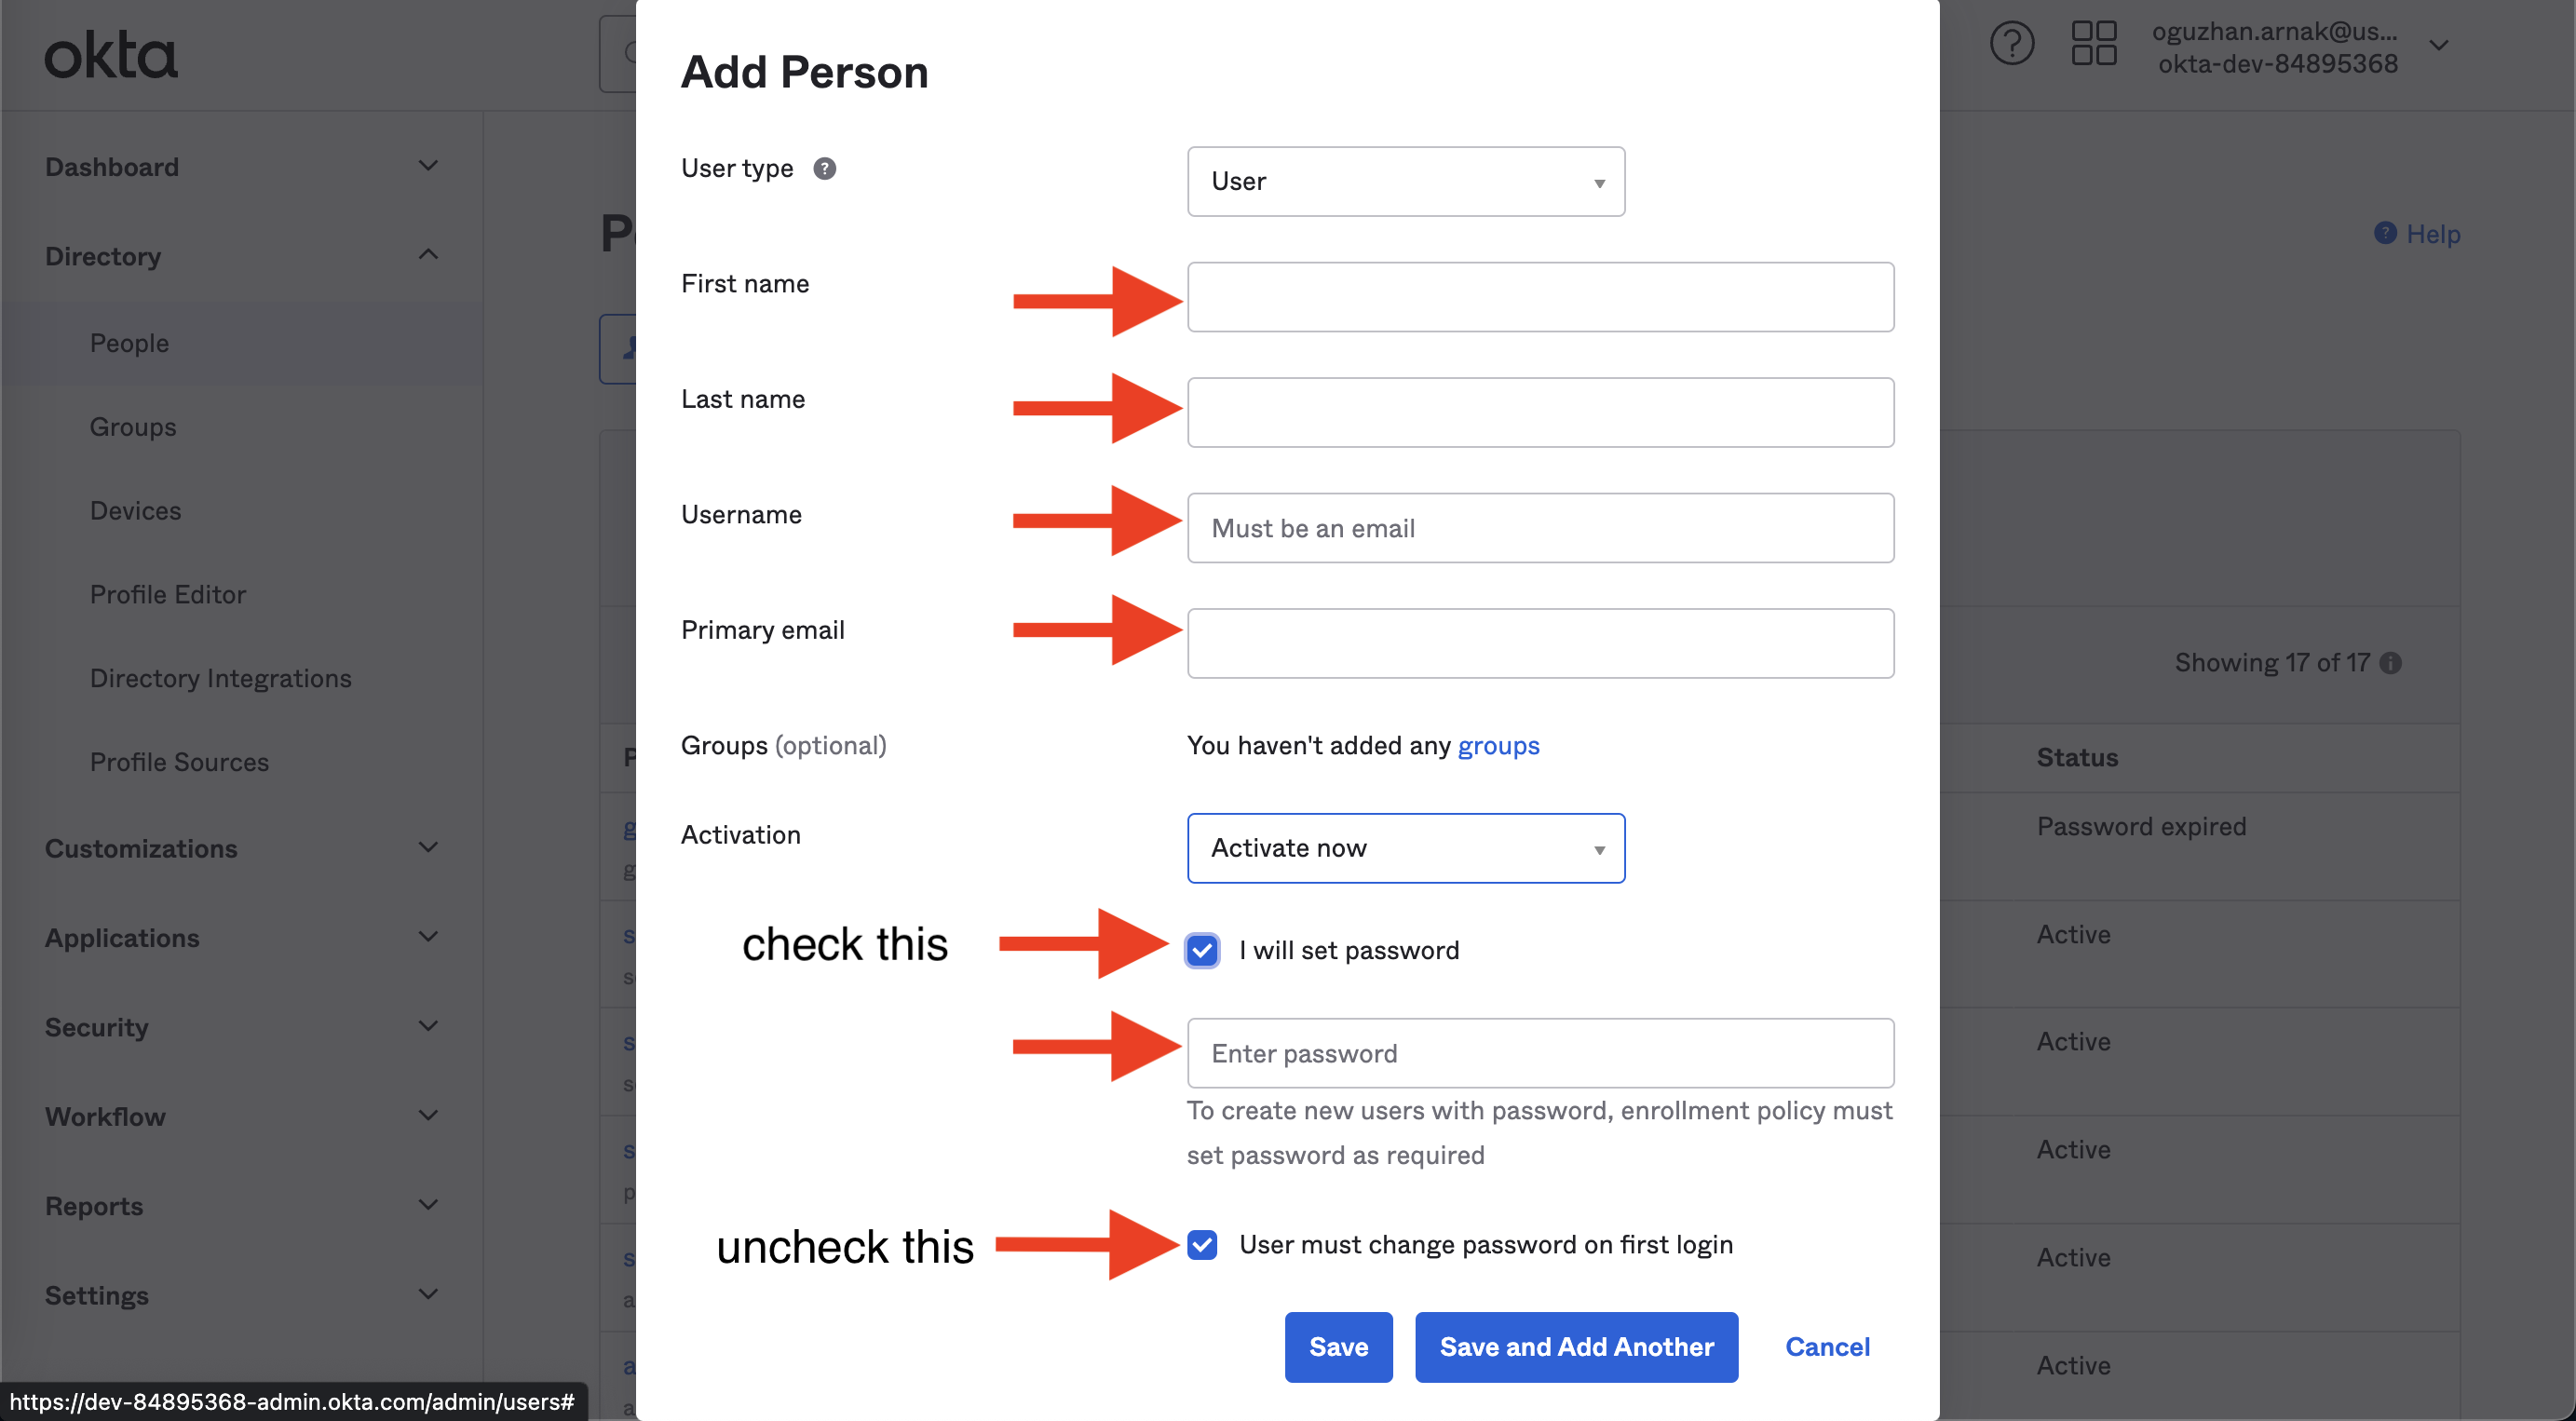
3. Go back to Applications, choose the application you created, and navigate to the Assignments tab.
4. Click the Assign and the Assign to People button.
5. Choose the person you just created and click the Assign button.
Finally, you can log in with the user you created. To test it, you can open a new incognito tab on your browser and go to Insider's Log In with SSO. Type in your Workplace ID, and click the Login button. You will be redirected to Okta’s login page. Enter your new user credentials to log in via that user.
Set up SCIM
Refer to Single Sign-On for further information on System for Cross domain Identity Management (SCIM).
1. Go to Applications > Insider > General, click the Edit button, and check the Enable SCIM Provisioning box.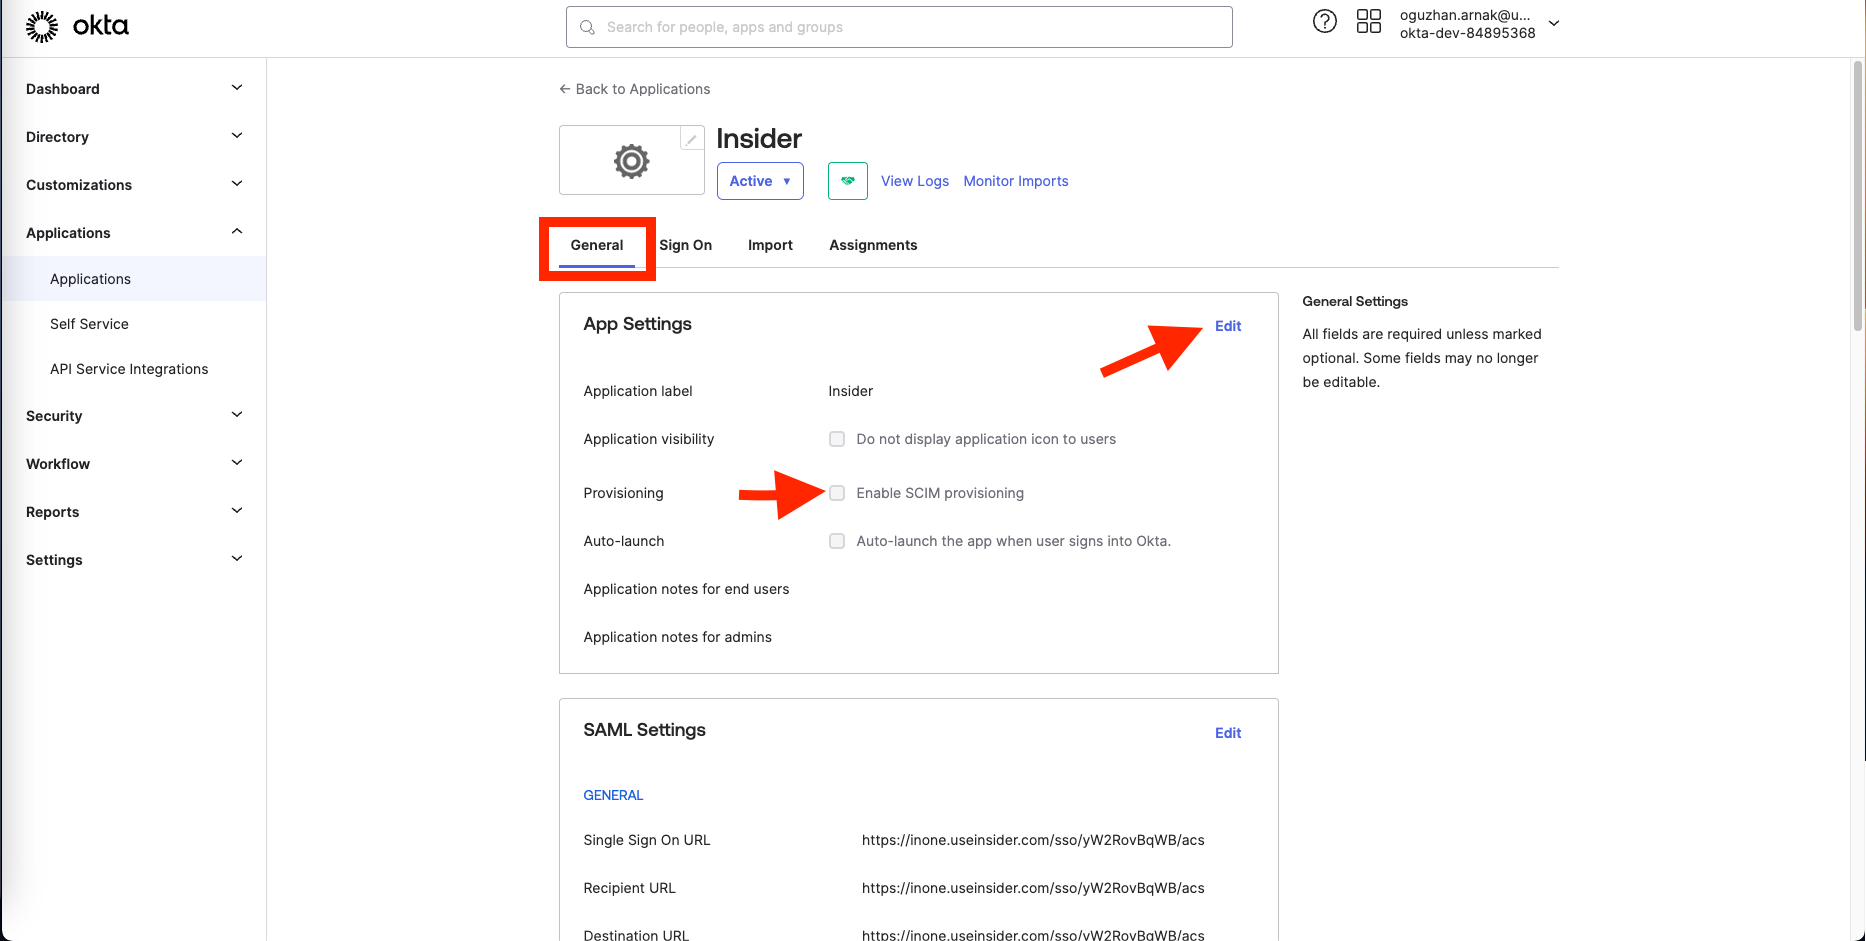
2. Once you enable it, you’ll see a new tab called Provisioning. Click the Edit button on the Provisioning tab.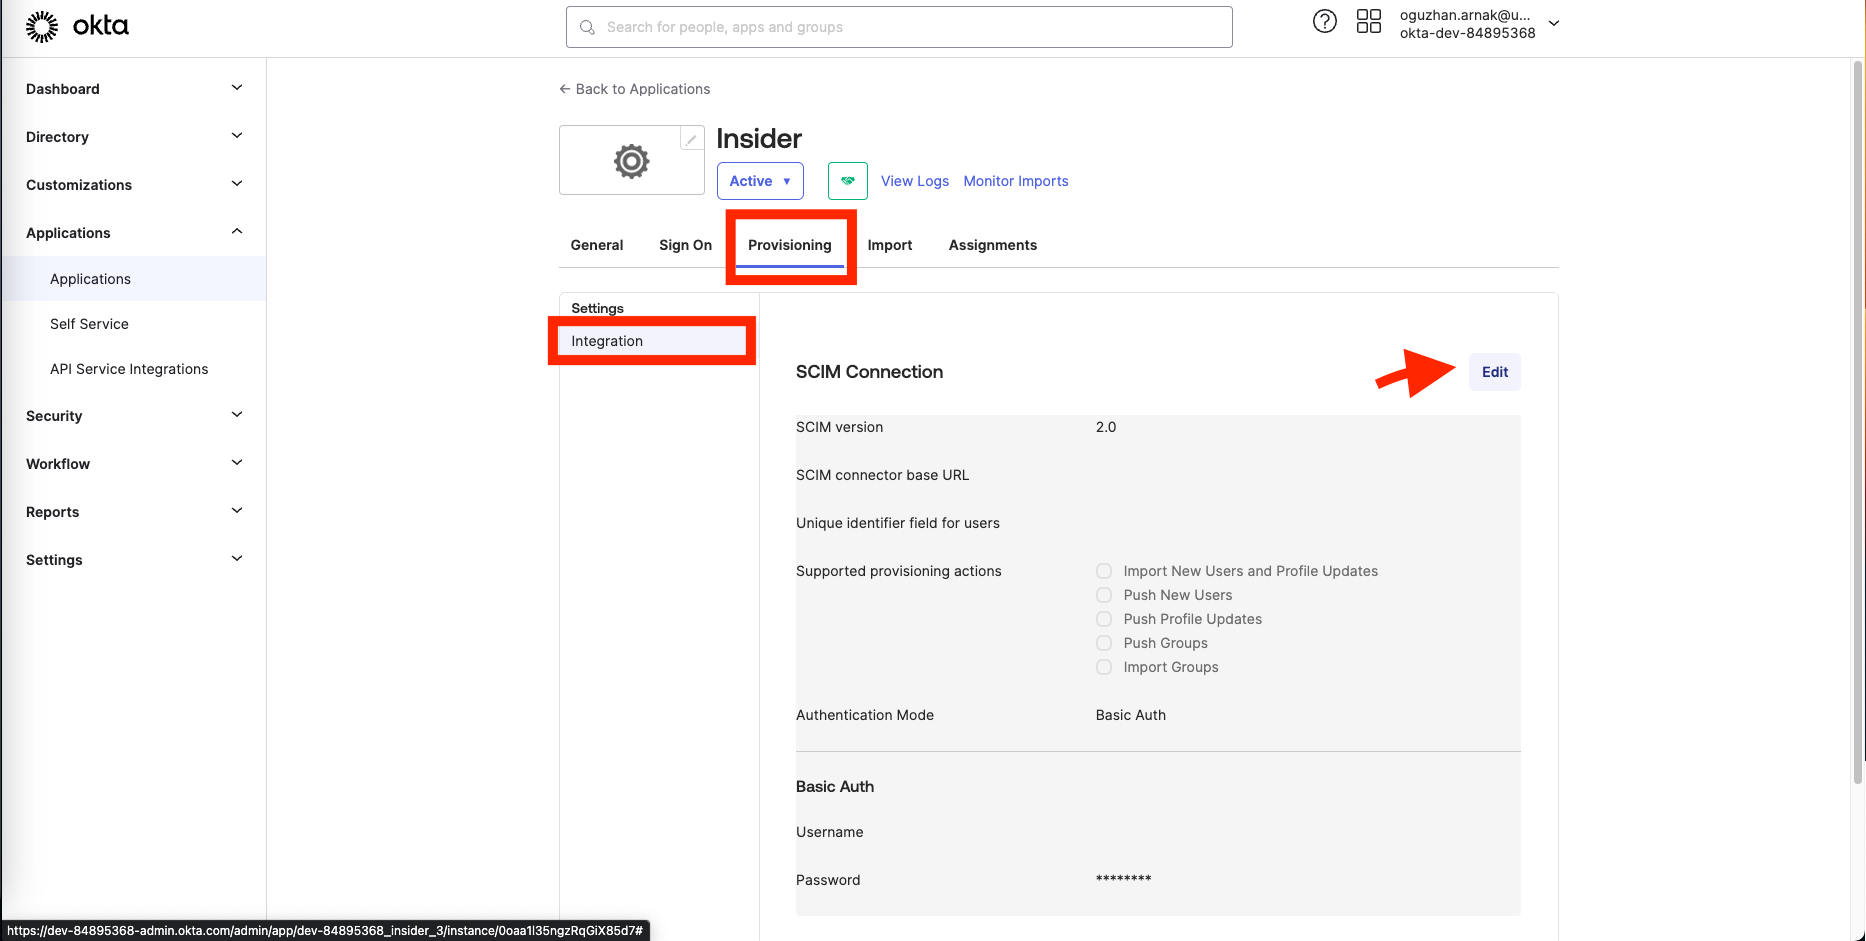
3. Fill out the form with the following information, and click the Save button to save the settings.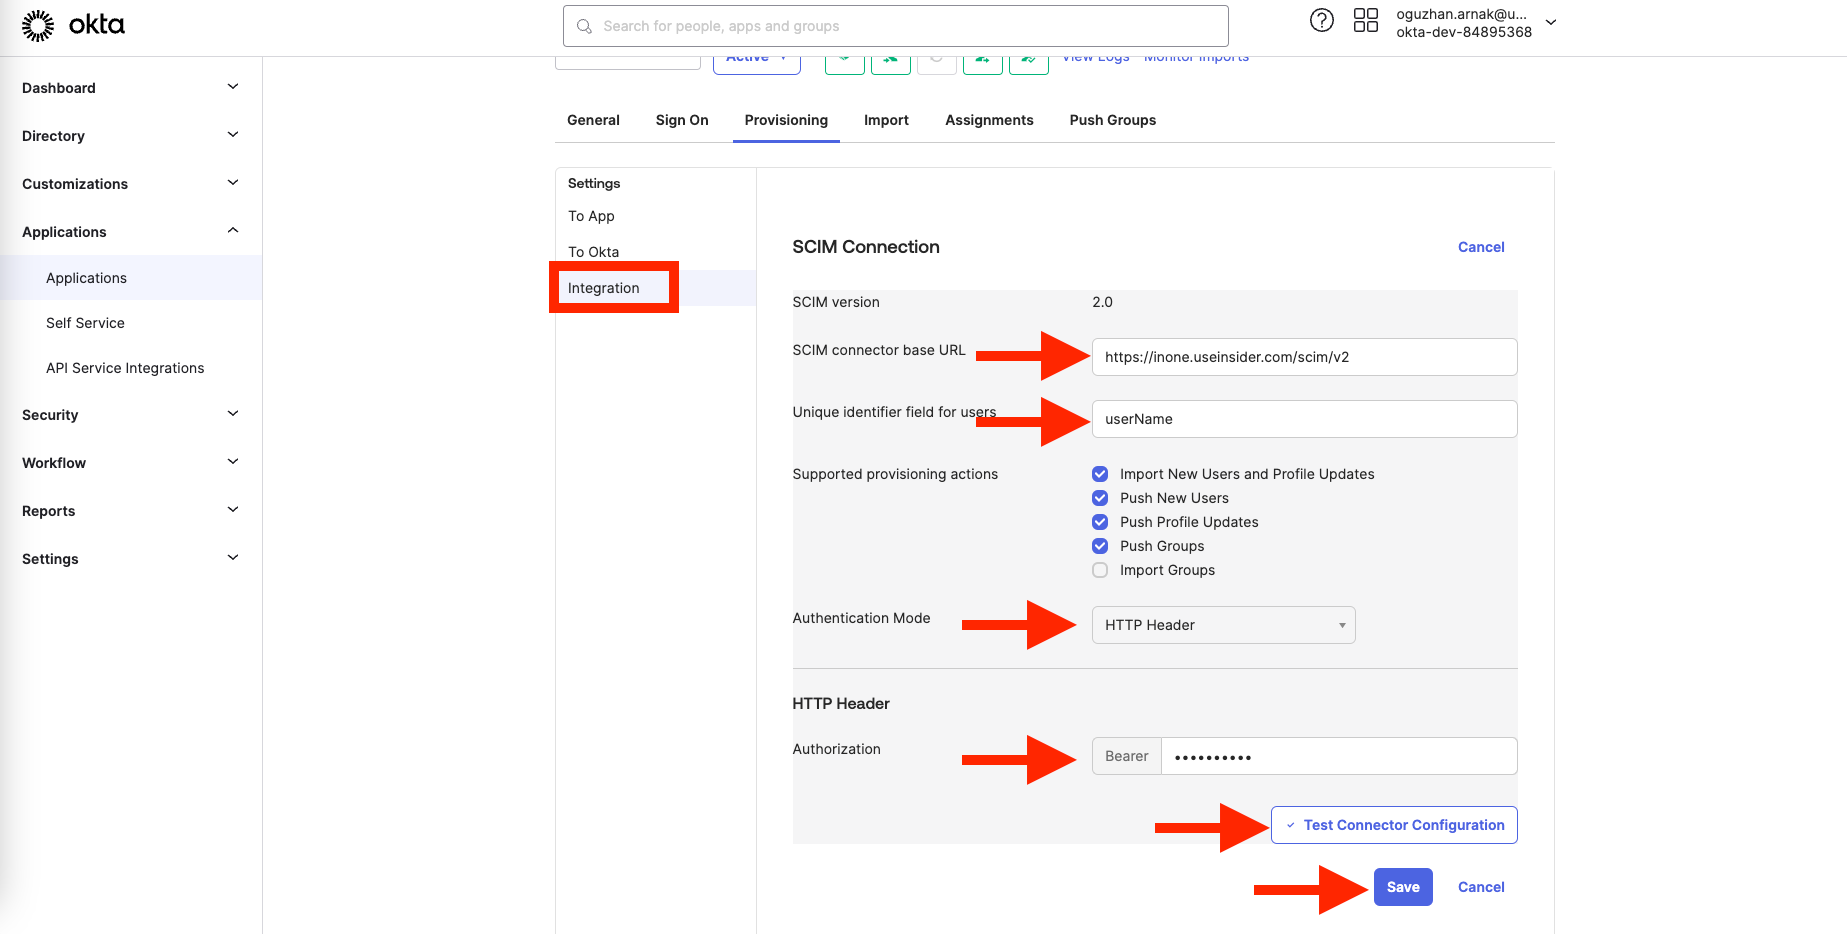
| Field | Information |
|---|---|
| SCIM connector base URL | Copy and paste the base URL on Inone Settings > Security |
| Unique identifier field for users | userName |
| Supported provisioning actions | Select all except the Import Groups option |
| Authentication Mode | HTTP Header |
| Authorization | Copy and paste your SCIM API Token generated from the Inone Settings page. |
4. Once you fill out the form, click the Test Connector Configuration button to make sure everything is fine, and click the Save button to save the settings.
5. After you save the settings, under the same Provisioning tab, click the To App button on the left menu and enable the following settings:
Create Users, Update User Attributes, and Deactivate Users, and save the settings.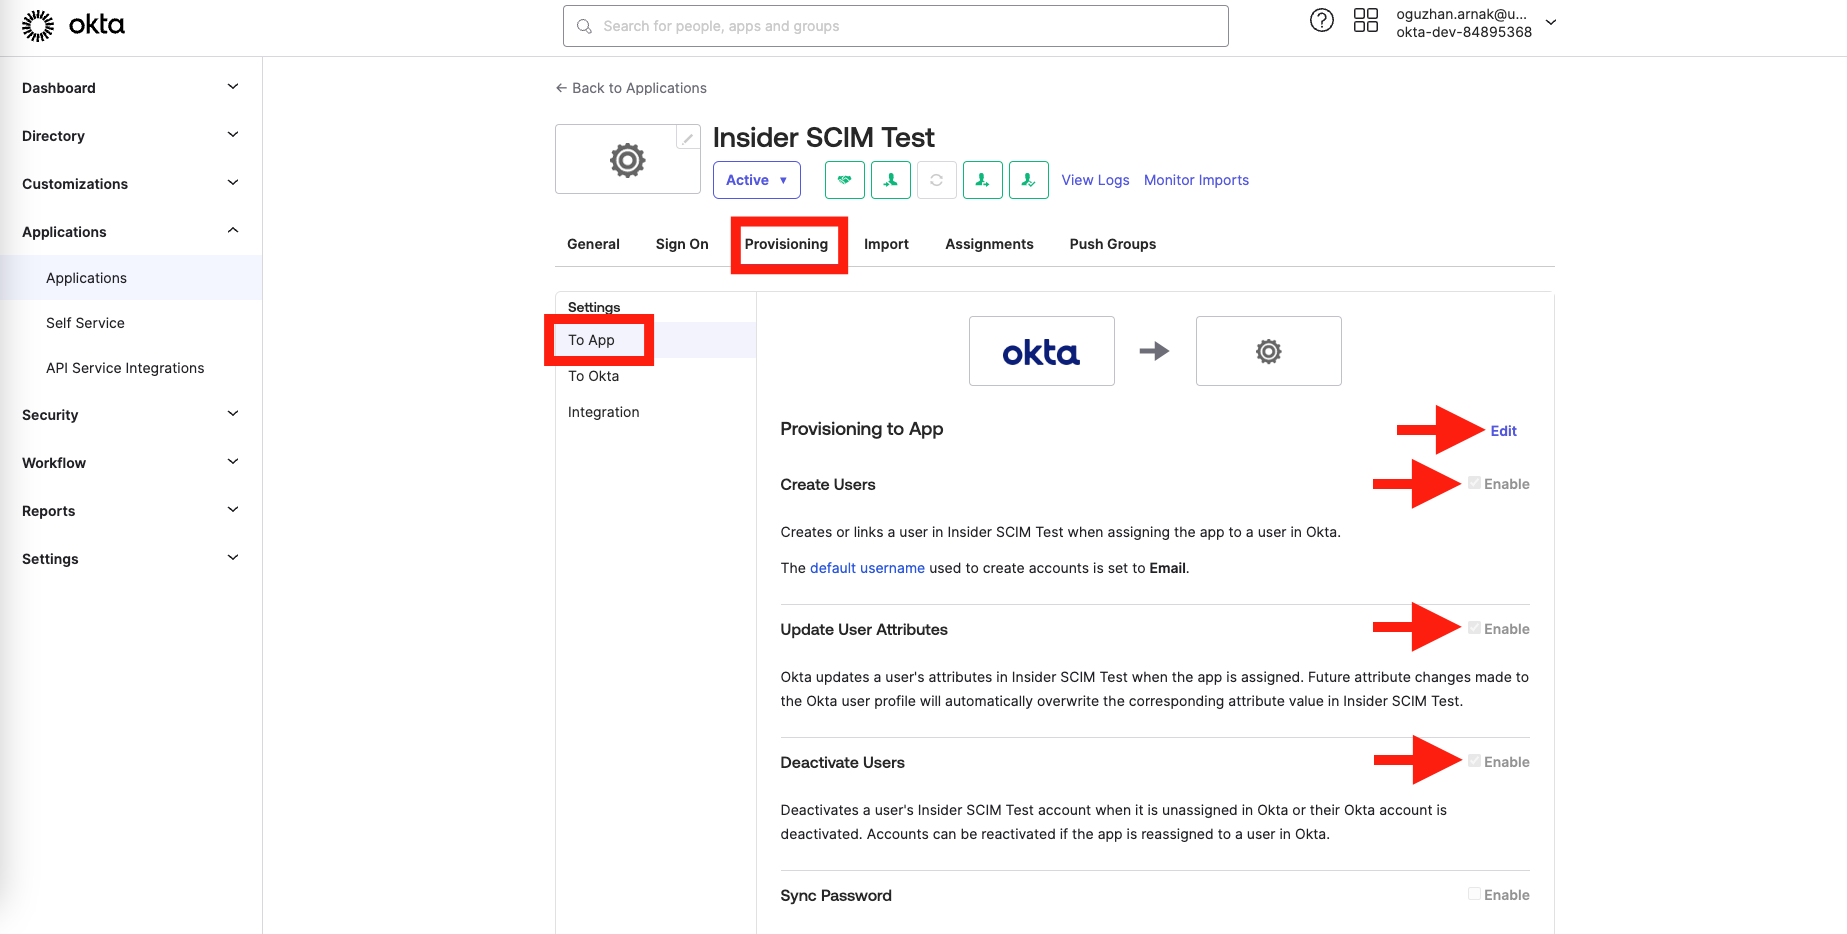
6. You should create User groups to map roles between Okta and Inone Panel. 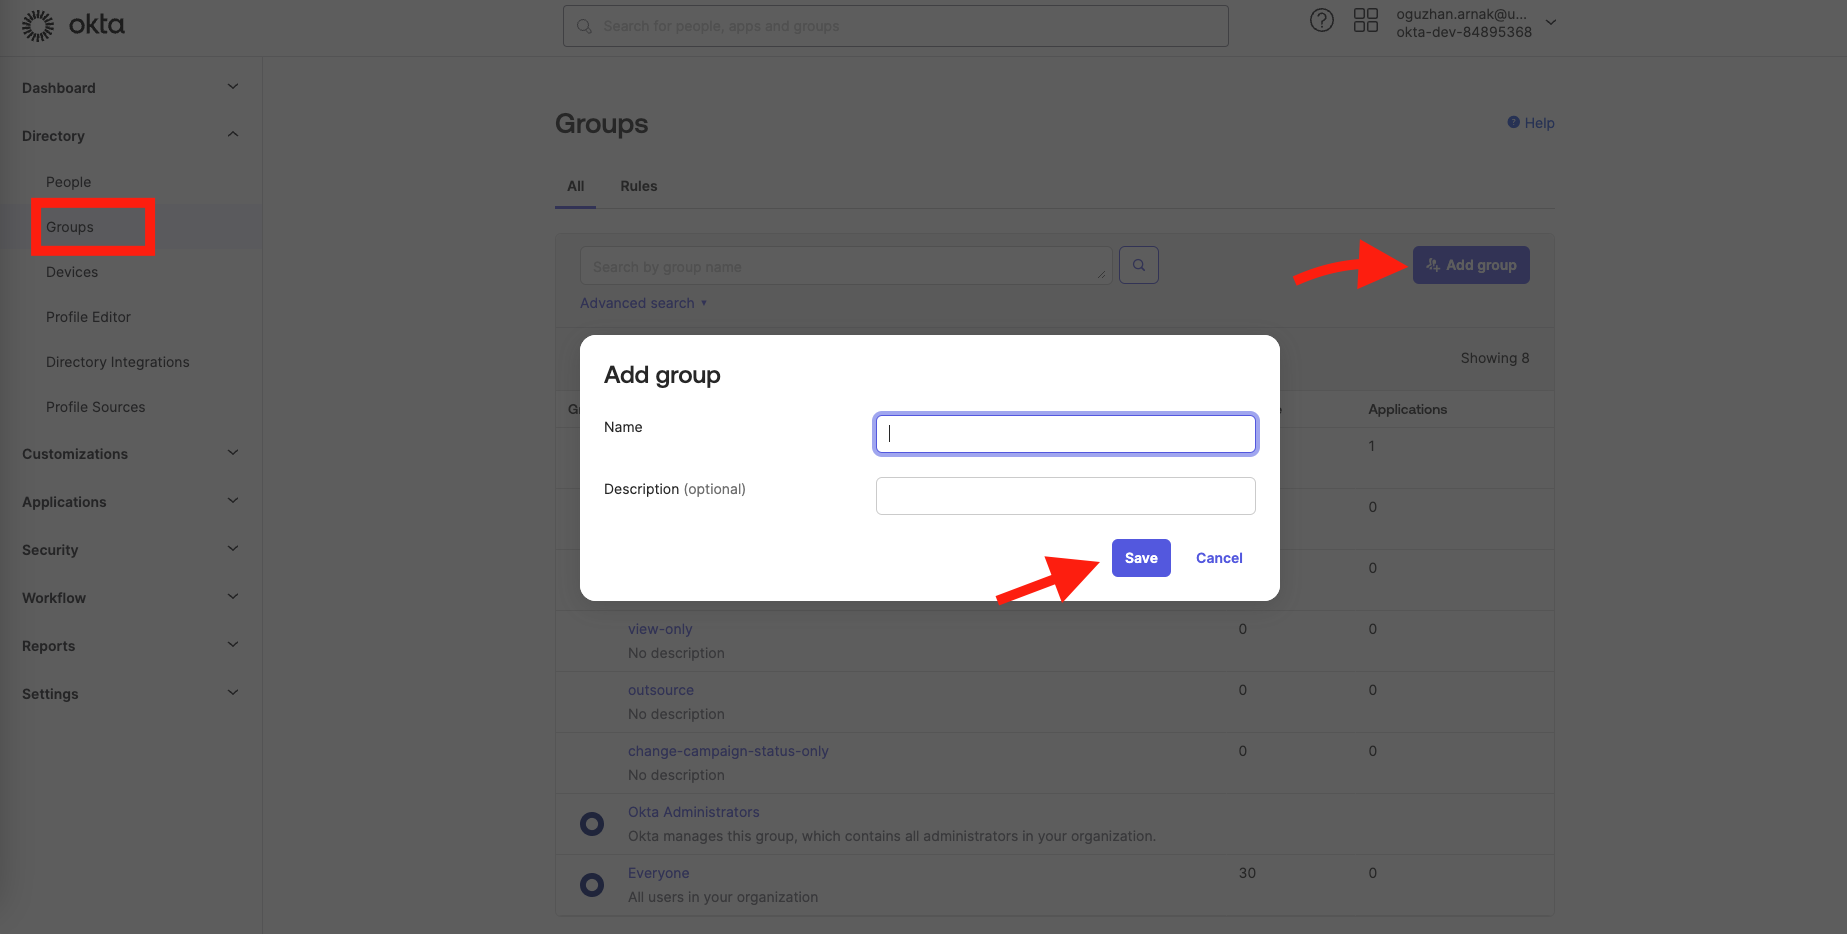
Please create groups as described below.
| Name | Description |
|---|---|
| Insider Manage Users | Administrator role for Insider One |
| Insider Edit And Publish | Editor role for Insider One |
| Insider Collaborate | Collaborator role for Insider One |
| Insider View Only | Viewer role for Insider One |
| Insider Change Campaign Status Only | Campaign Status Updater role for Insider One |
| Insider Outsource | Outsourcer role for Insider One |
You can put users in these groups to sync roles between Okta and Inone.
7. Finally, add these groups to the Insider application and start syncing. To assign the new groups to our Application, open the Assignments tab in the application page, click the Assign and the Assign to Groups button, and select all groups created before.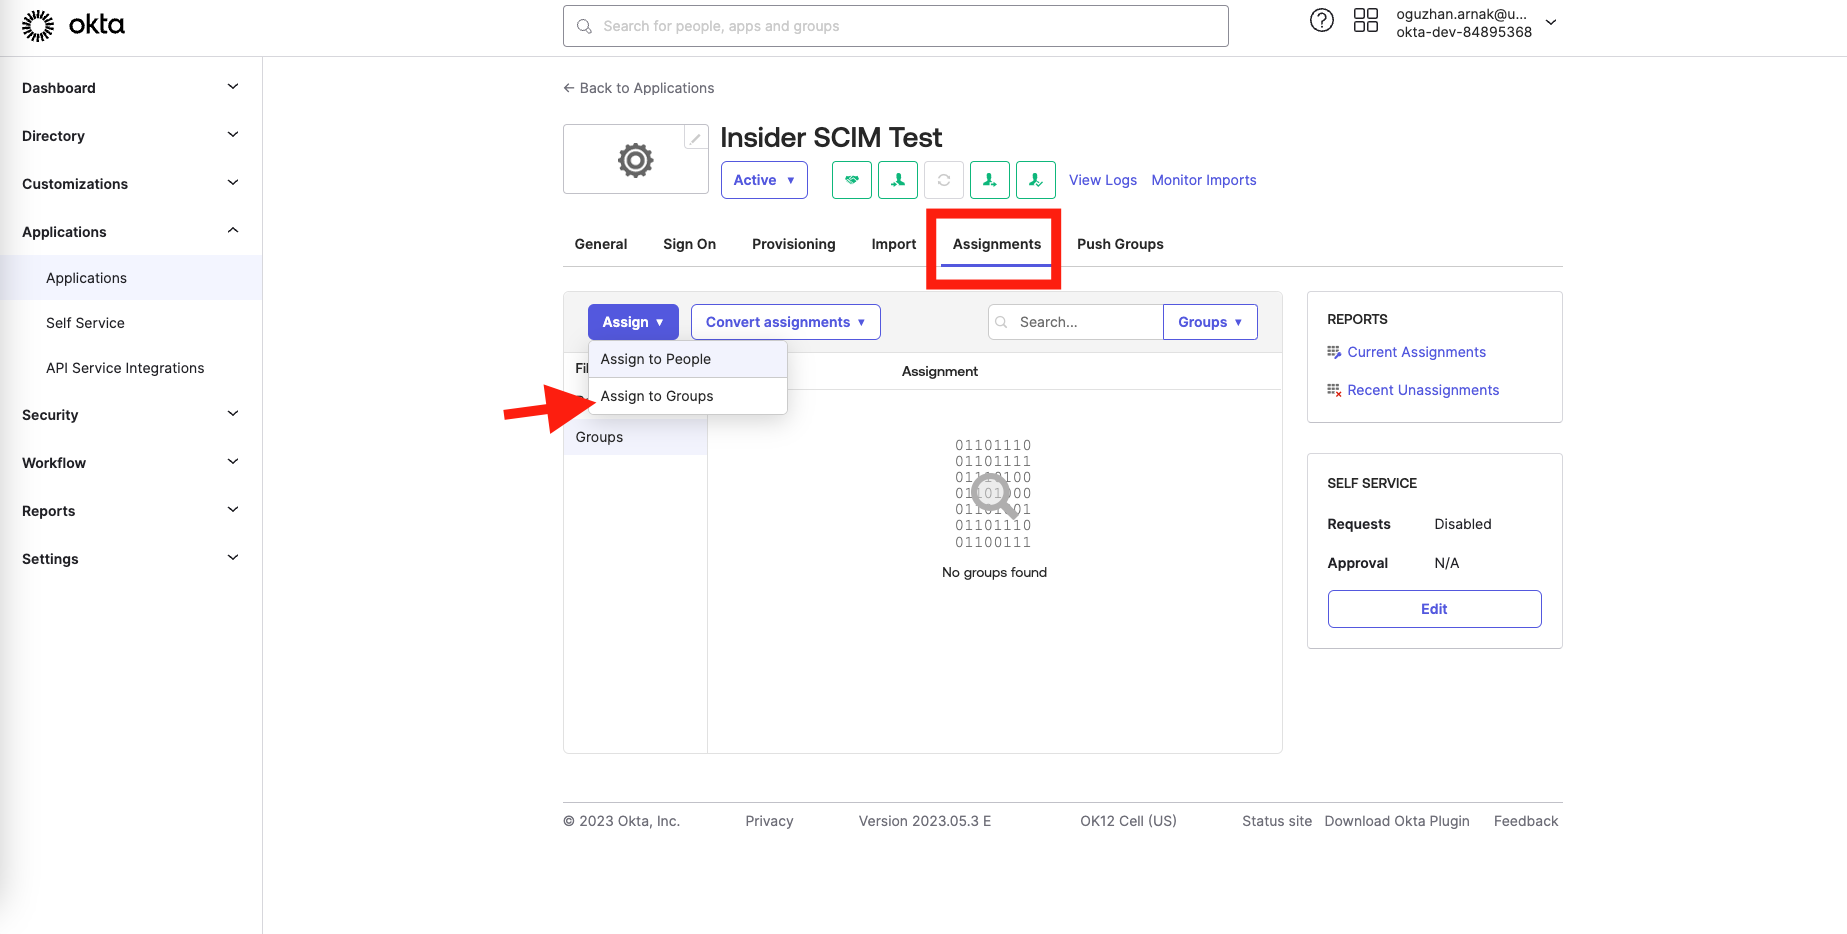
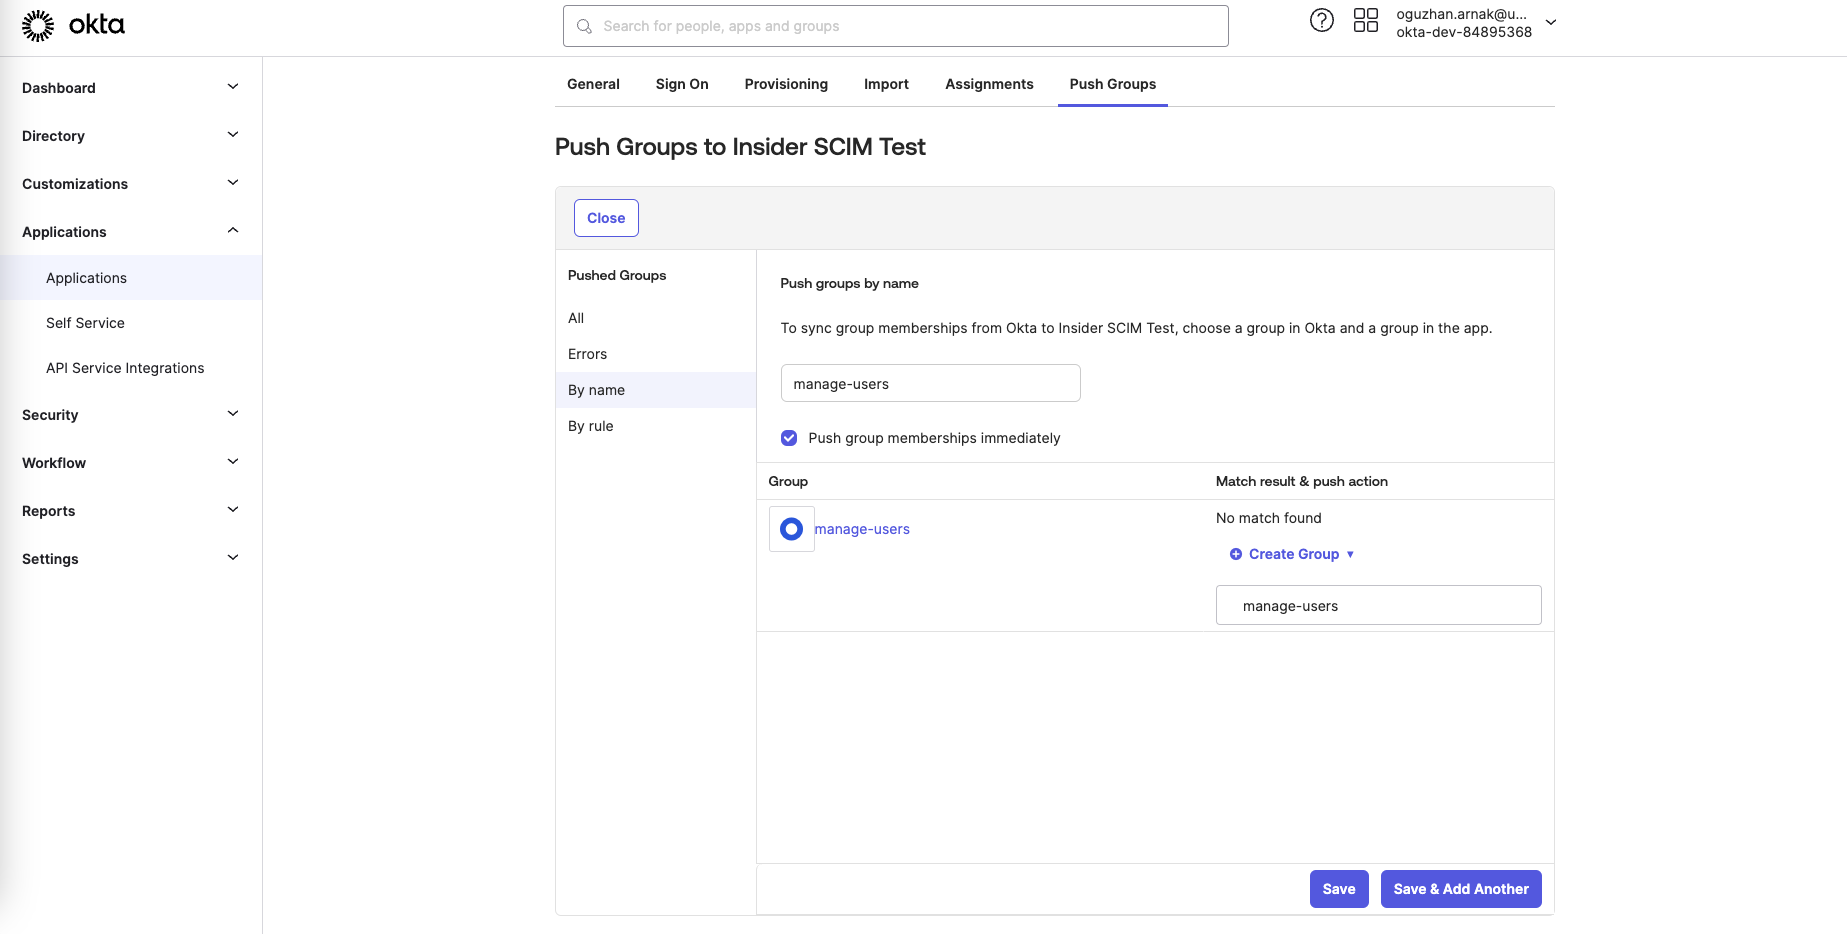
8. Under the Push Groups tab, click the Push Groups > Find groups by name.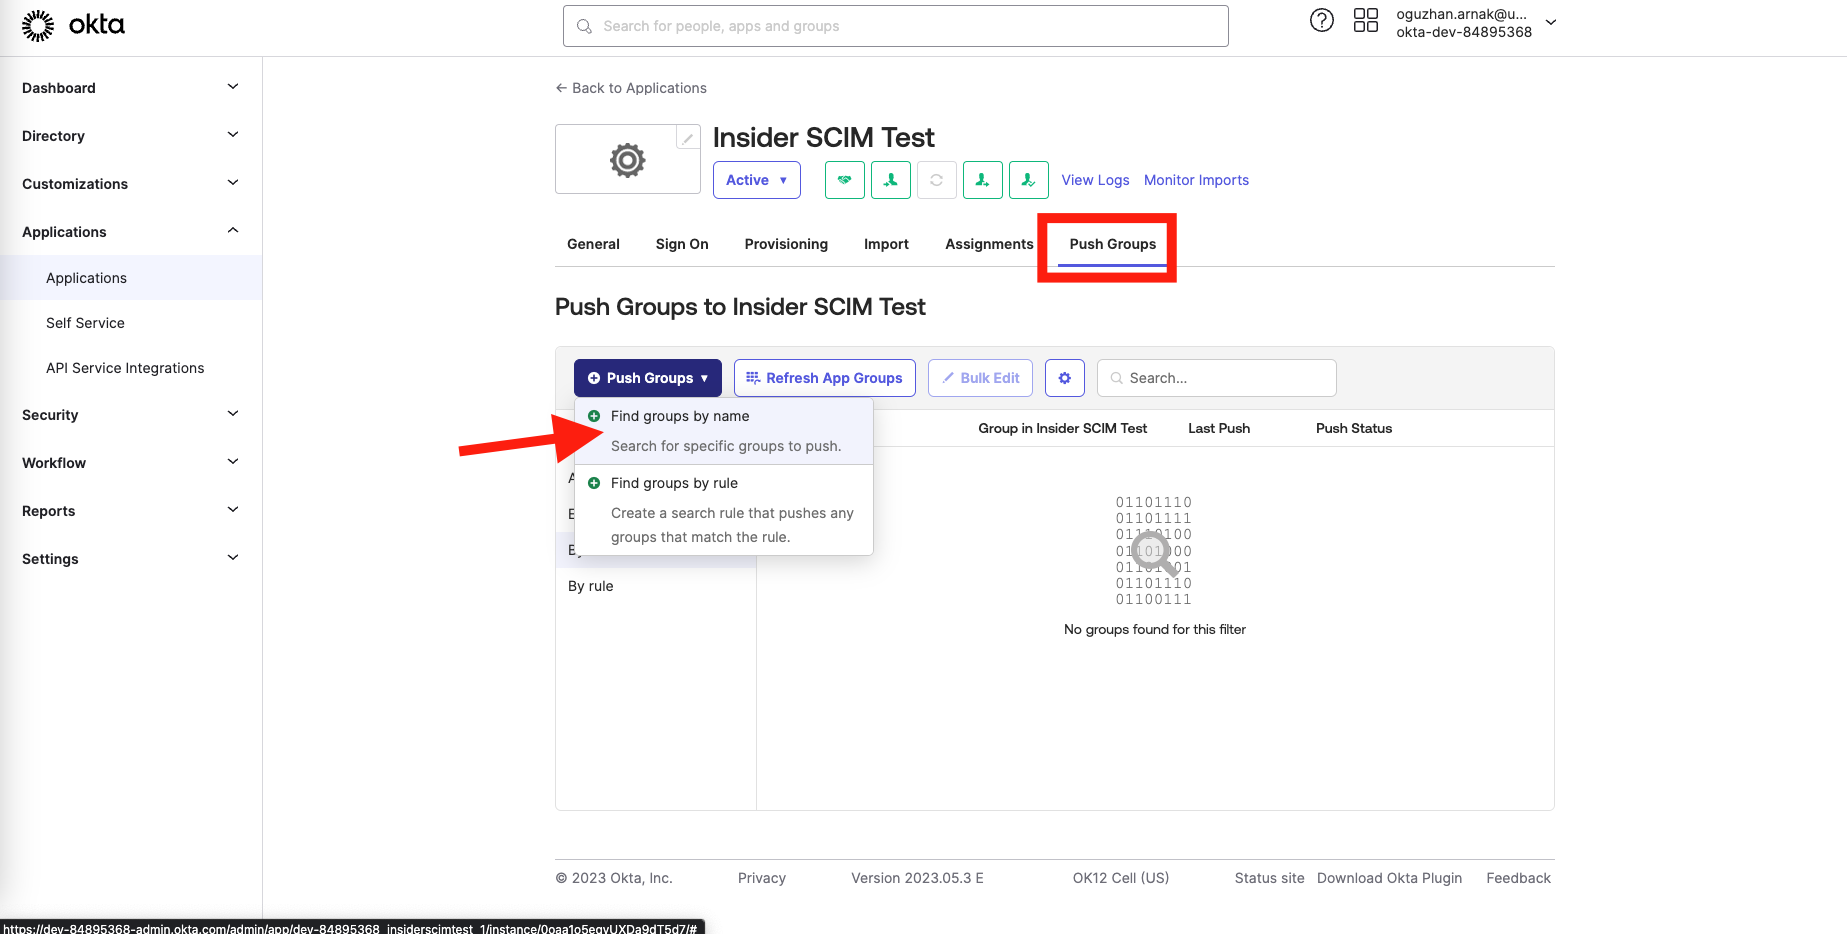
9. On the following page, search for the group name that you recently created and check the Push group membership immediately box. Once you select the group in the first input, write the exact name for the second input as well. Finally, click the Save & Add Another button, then repeat the same steps for each group you created.