Suggested reading: Single Sign-On
This guide lists the actions you need to complete to configure SSO (Single Sign-On) for CyberArk. On this page, you will learn about:
Set up SSO
1. Go to your CyberArk account to start creating the Insider Application. Go to Apps & Widgets > Web Apps and click the Add Web Apps button.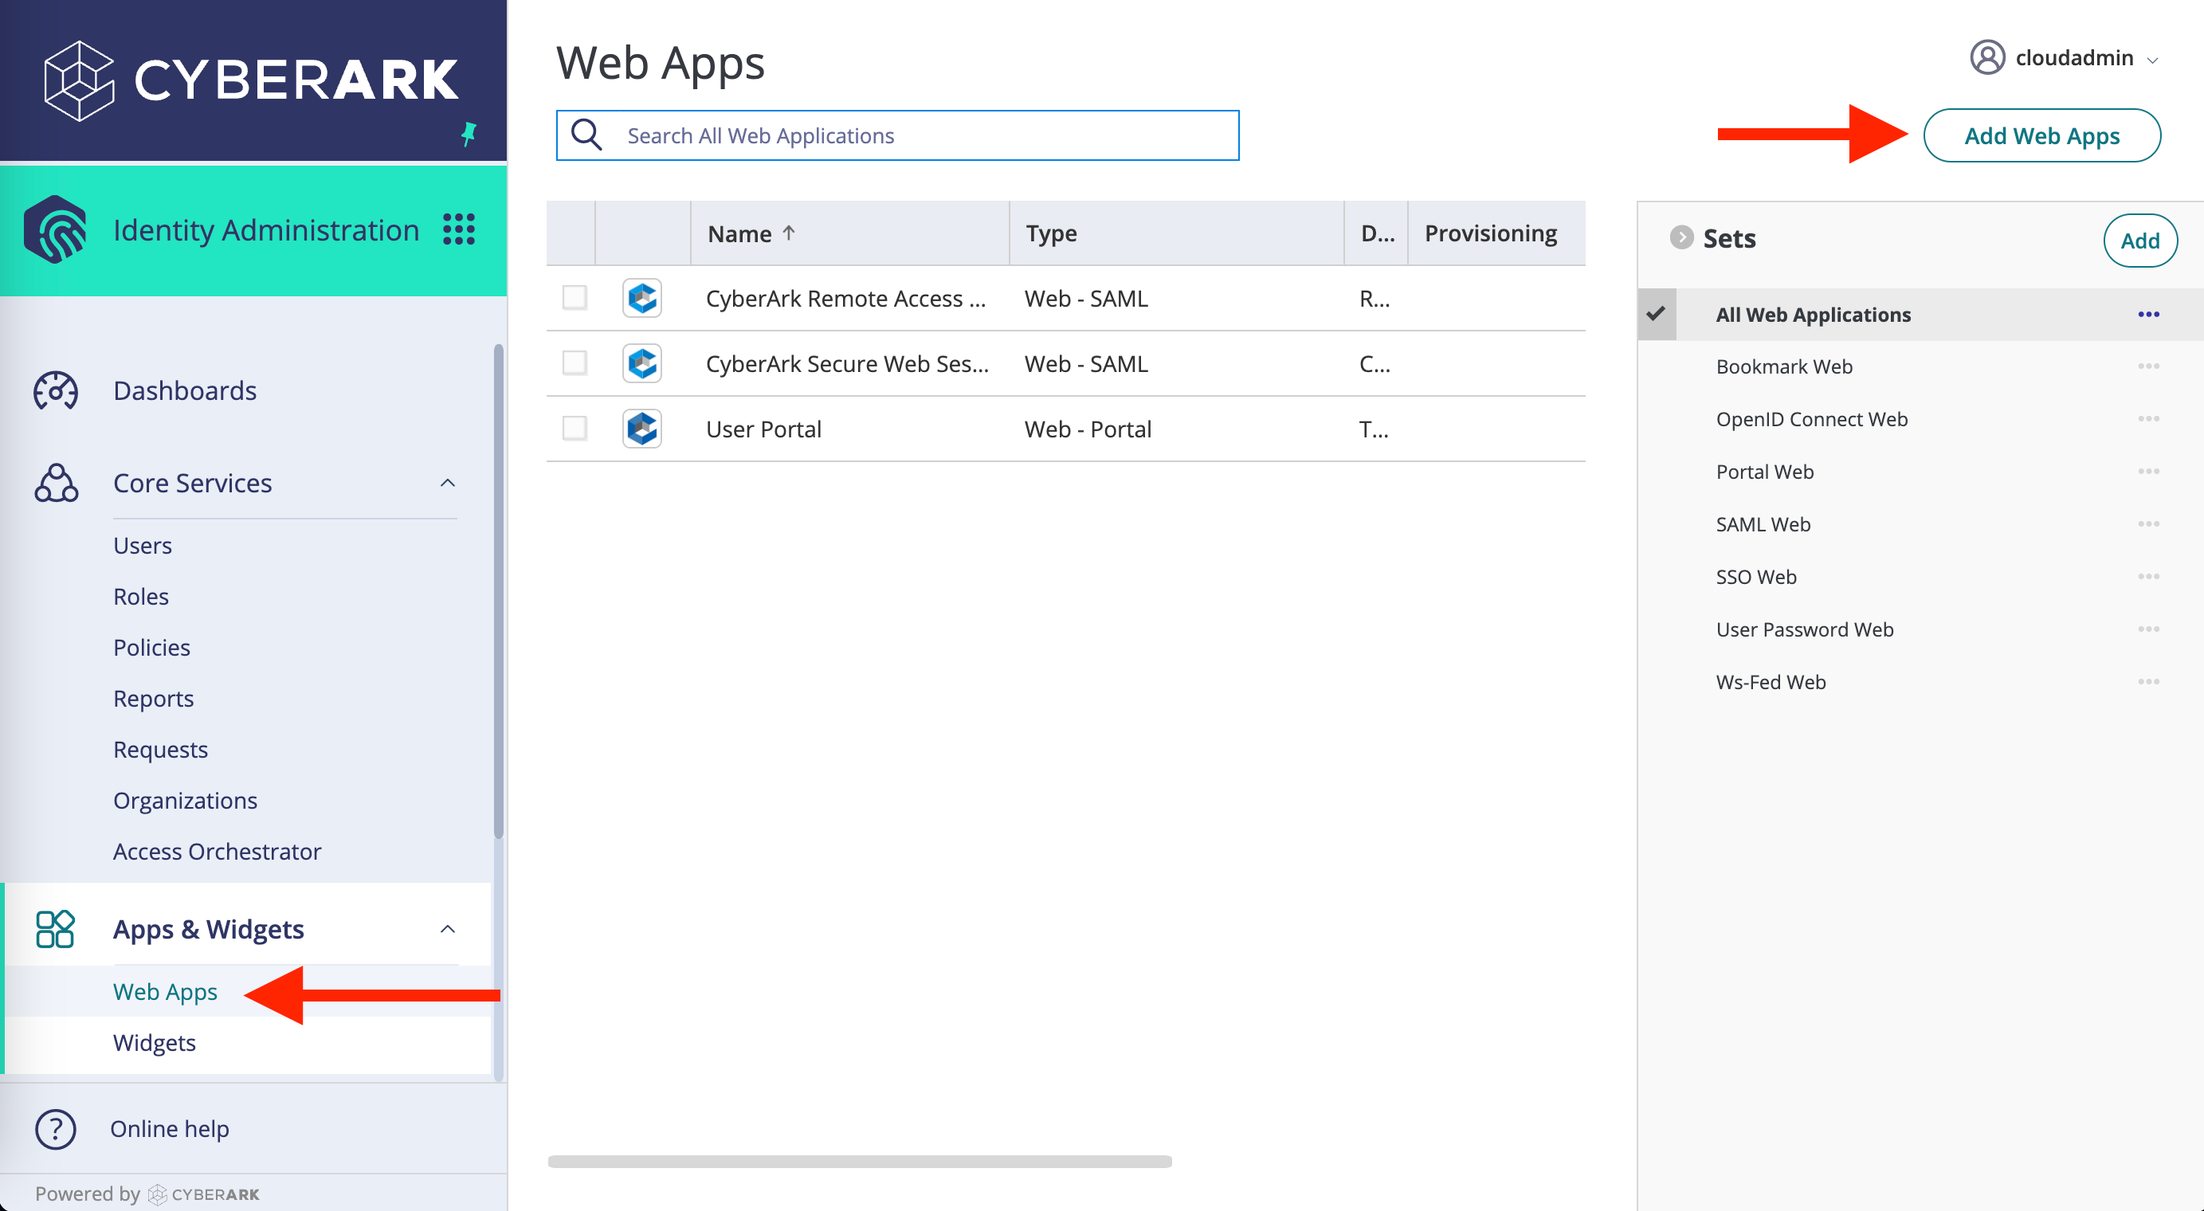
2. Click the Custom tab and click the Add button for SAML. 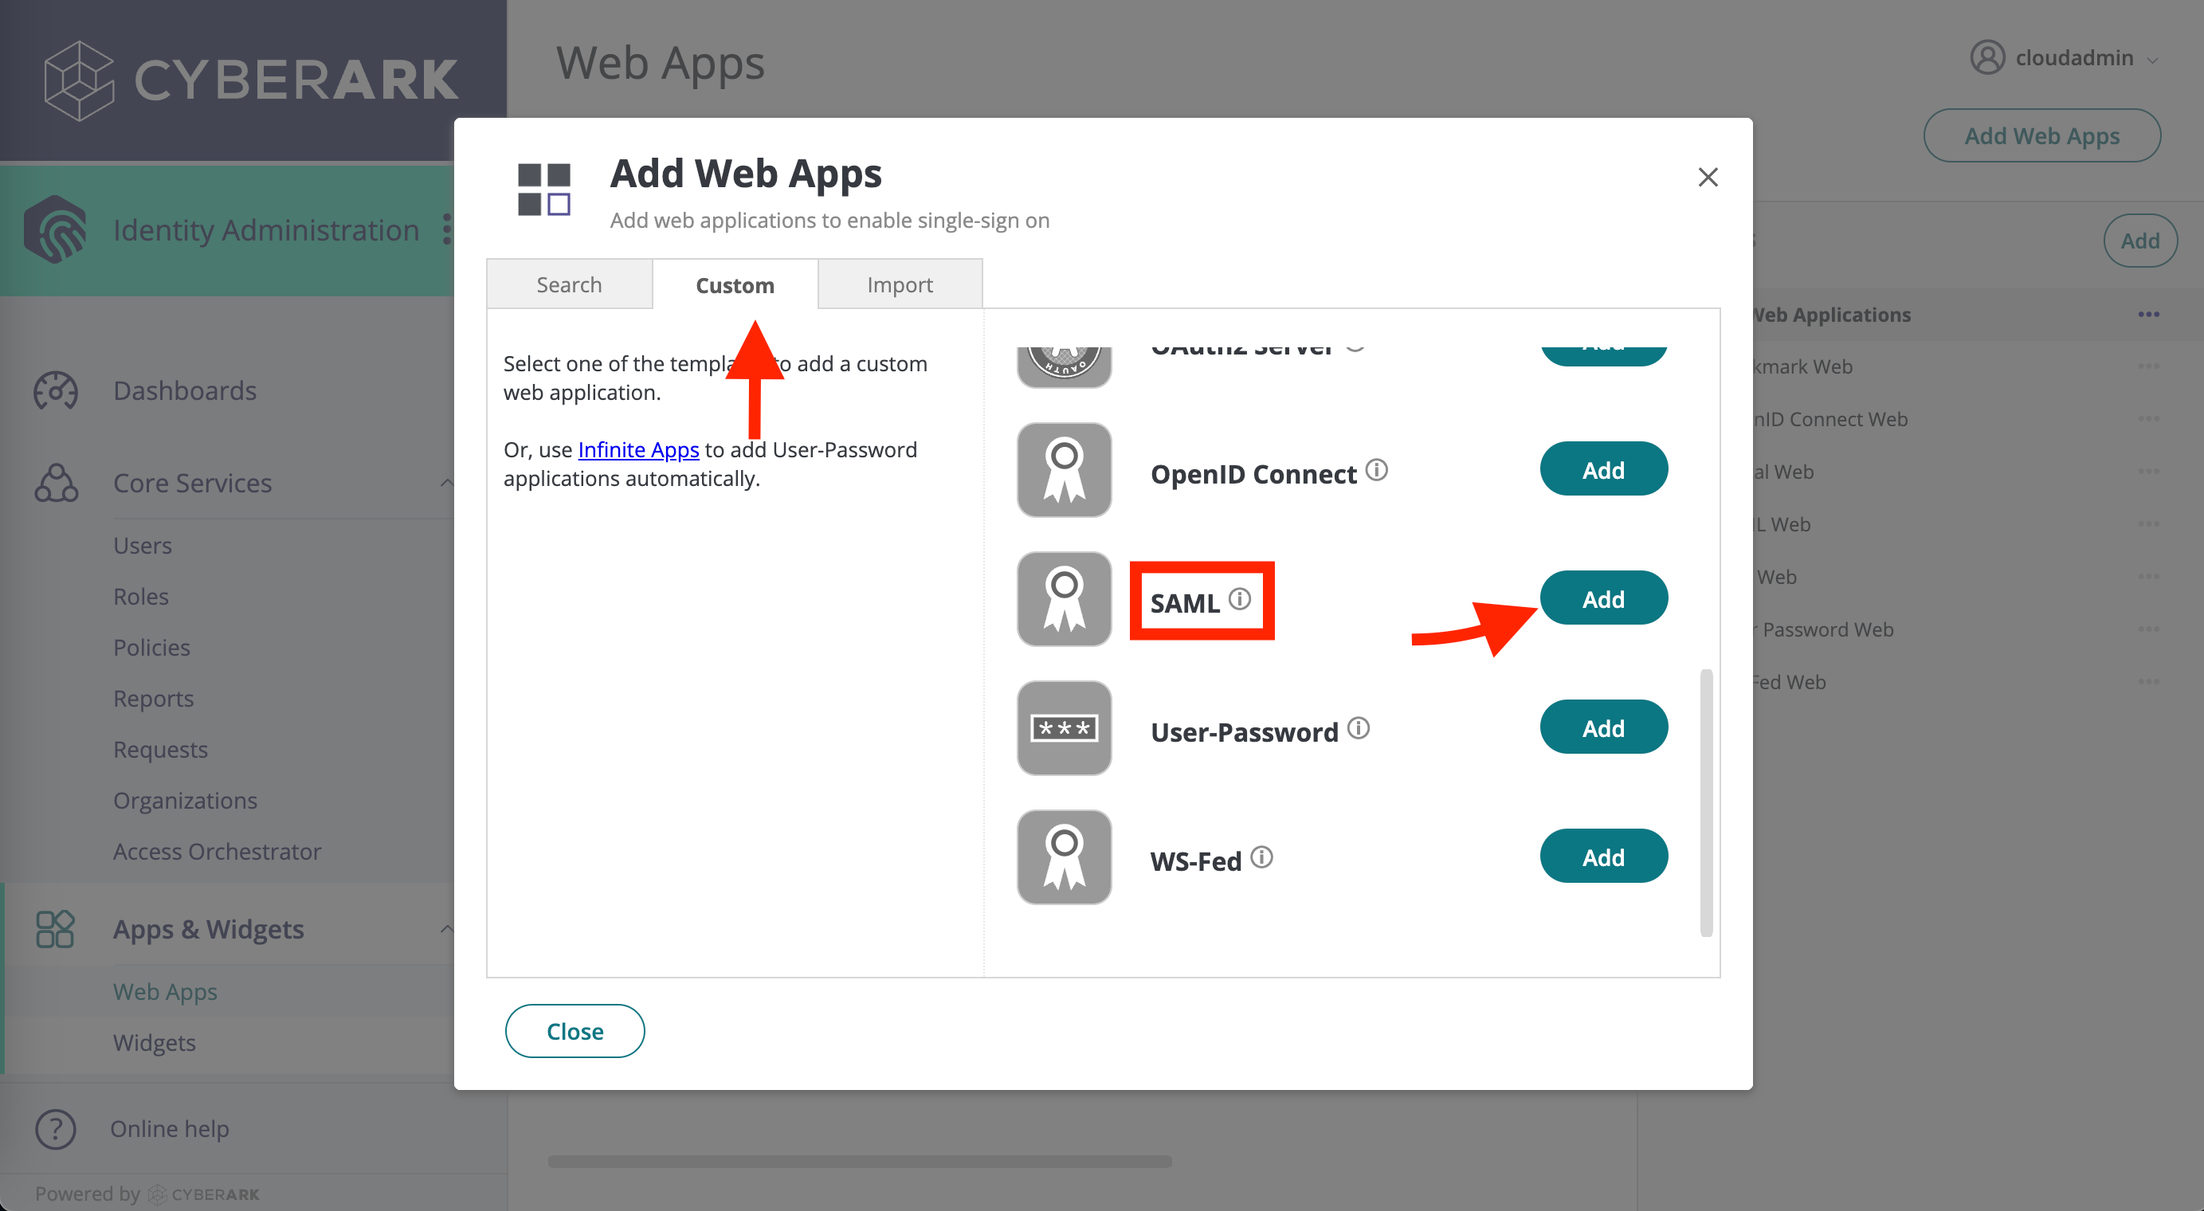
3. Fill in the inputs shown below. Click the Save button. .png)
| Field | Value |
|---|---|
| Manual Configuration | - |
| SP Entity ID / Issuer / Audience | Service Provider Entity ID |
| Assertion Consumer Service (ACS) URL | Insider SSO URL |
| Recipient | Same as ACS URL |
| Sign Response or Assertion | Response |
| NameID Format | emailAddress |
| Single Logout URL | Insider Logout URL |
4. To test the connection, you should assign your user to your newly created app. Go to the Permissions tab, and click the Add button. Select your profile and add the profile to the Insider One’s application to successfully test the integration with your login credentials. If your user is already assigned to the application, you can skip this step. 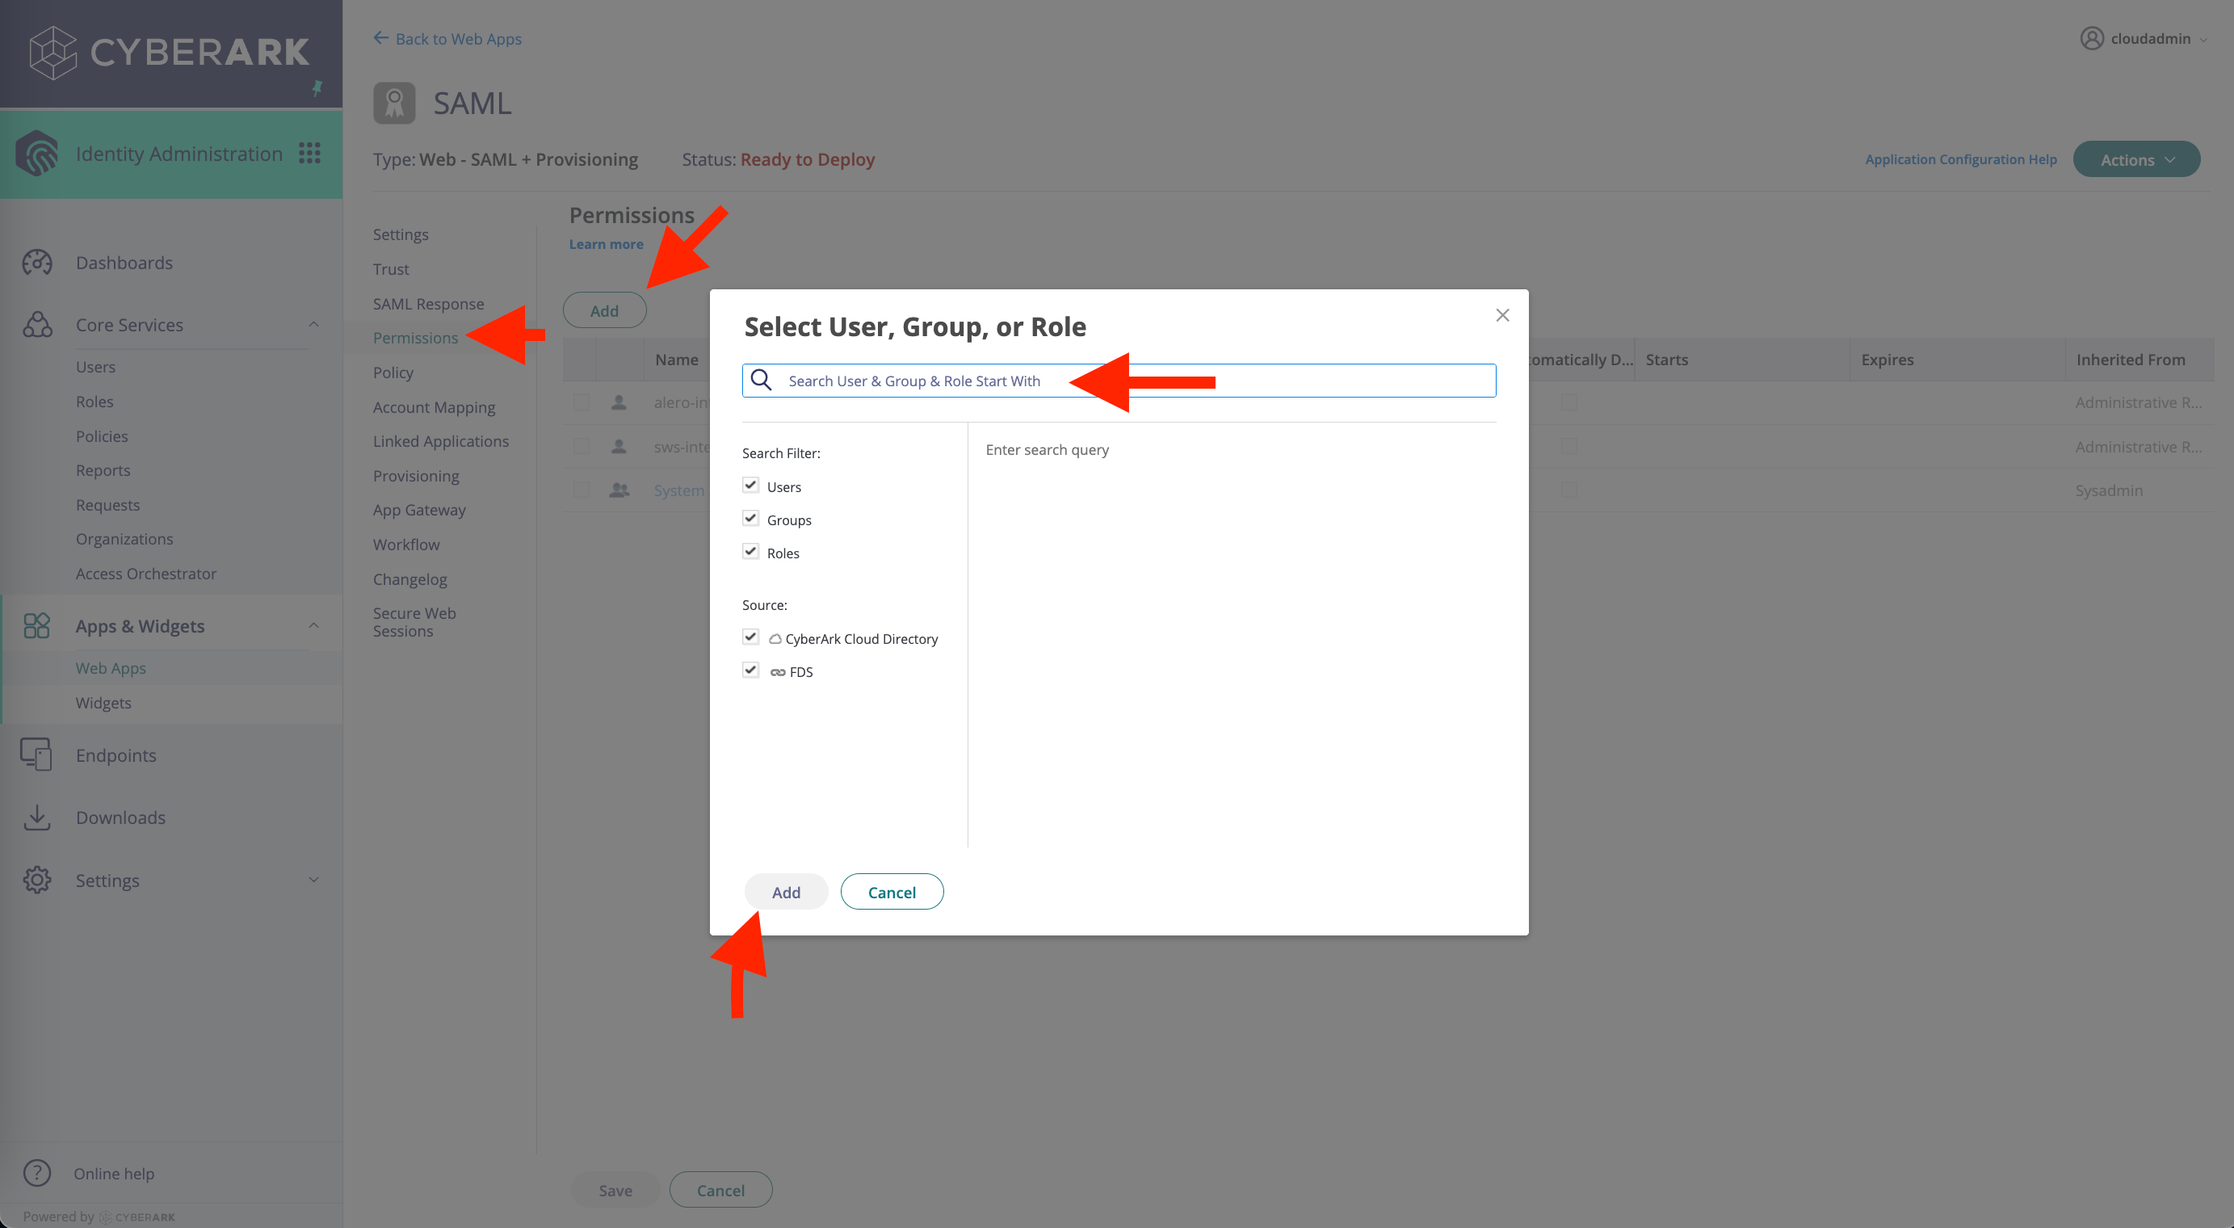
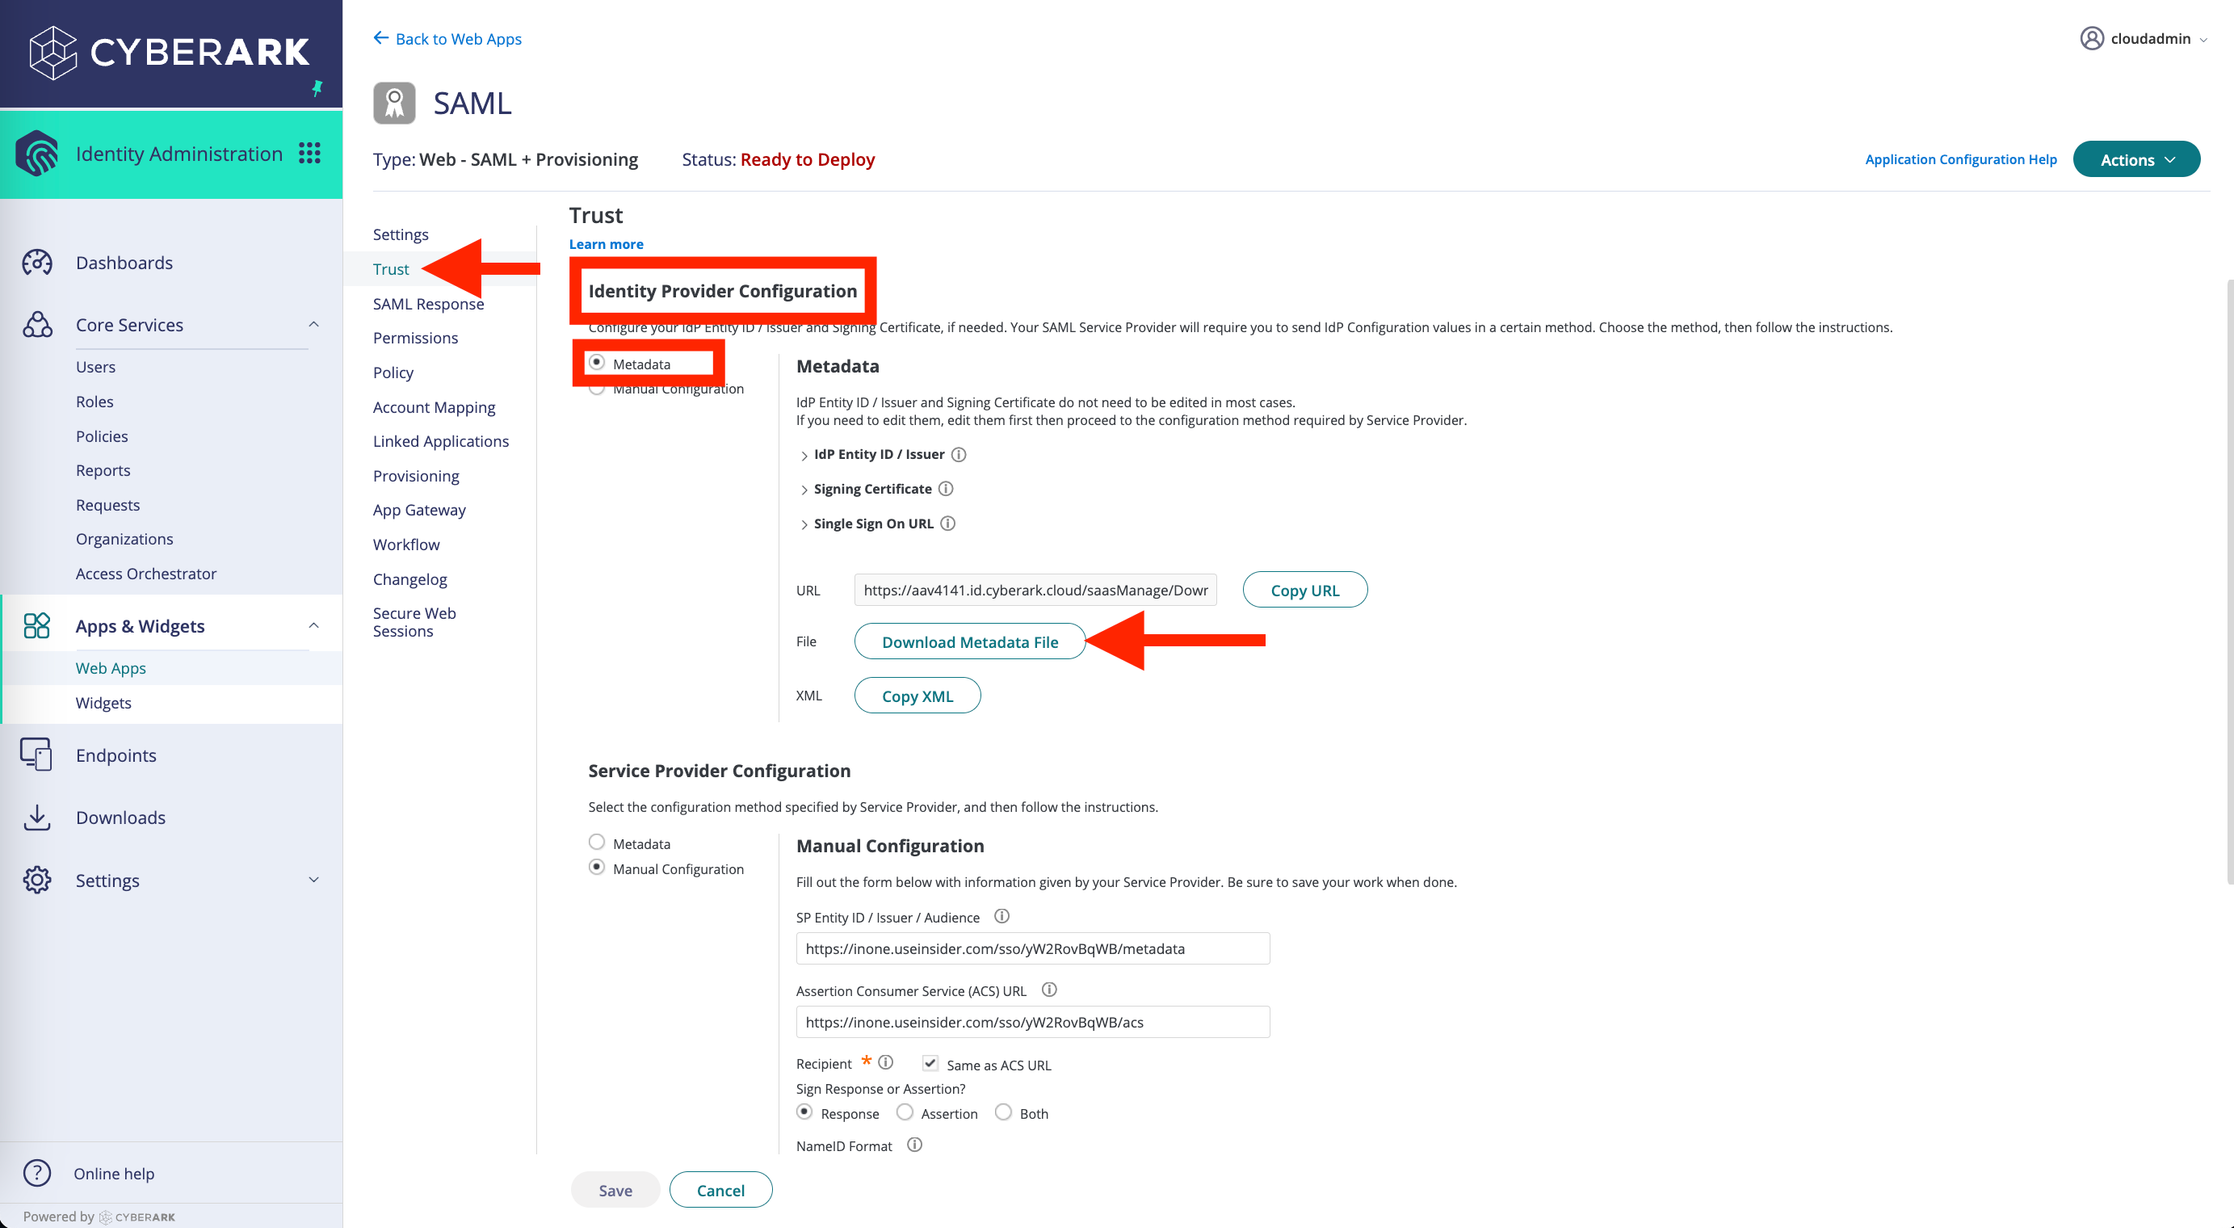
5. Click the Trust tab on the left menu. Download the Metadata File. You’ll see an XML file downloaded on your computer. Go to the Insider Security Settings page and upload the XML file you’ve downloaded for the IdP Settings.
6. Click the Test Connection button to test the connection and save the settings. You are now ready to use the Single Sign-On feature.
Add more users to the Application
Typically, you can log in via email and password registered on Onelogin’s dashboard while testing the Single Sign-On connection. However, to test additional SSO features, you must add another user to the IdP. Here you can find how to add more users to the application.
1. Go to the Core Services > Users page. Click on the Add User button. You may be asked to enter the Login Suffix. If it is the case, you can put insiderone.com as a suffix or your email domain itself. (ex. sample@insiderone.com > put insiderone.com as suffix)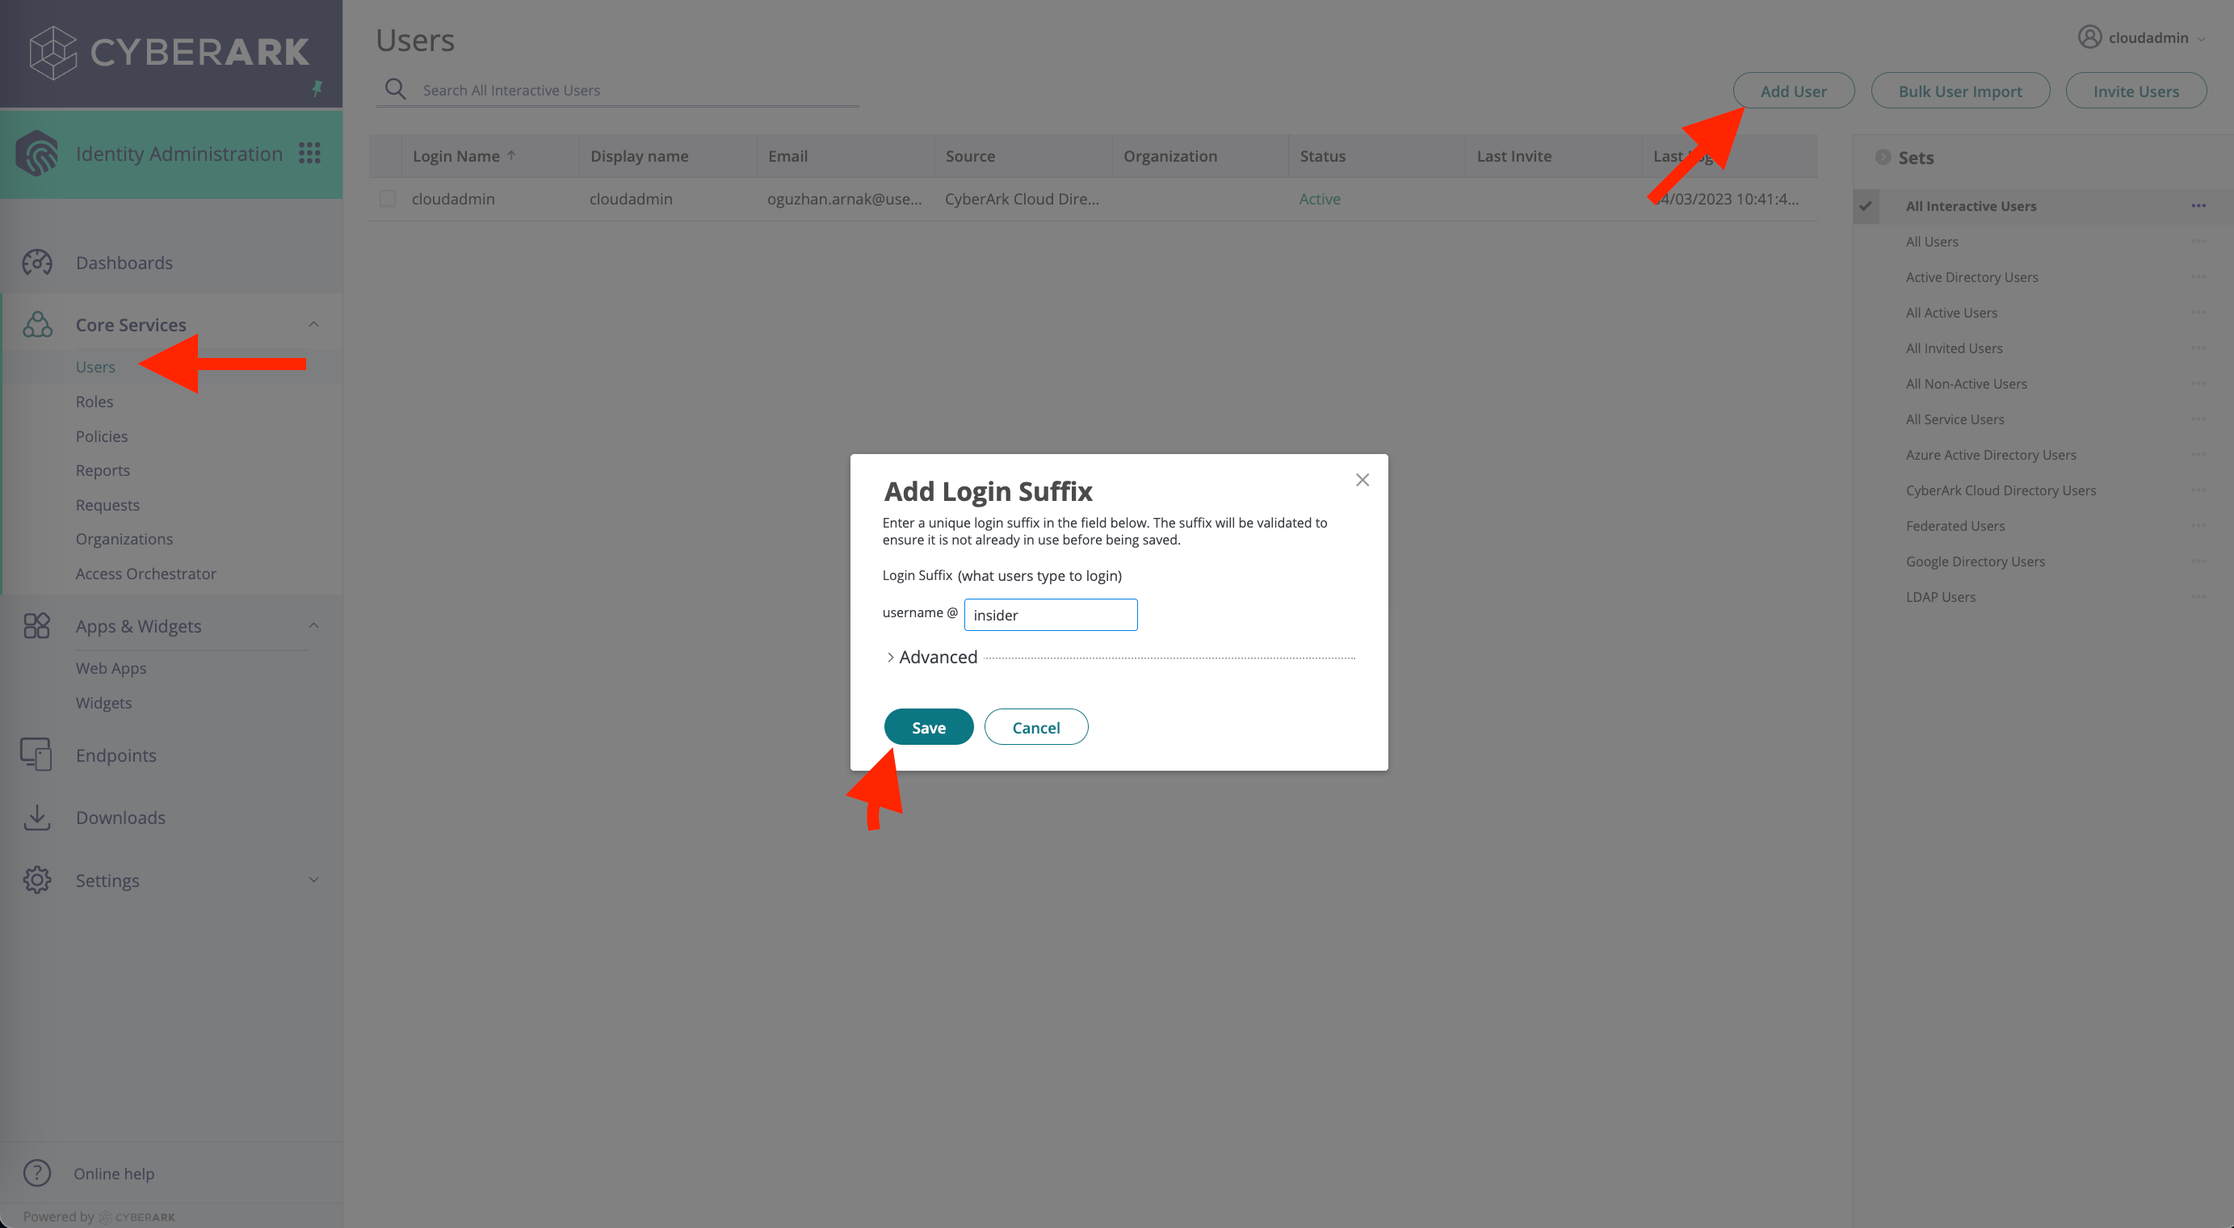
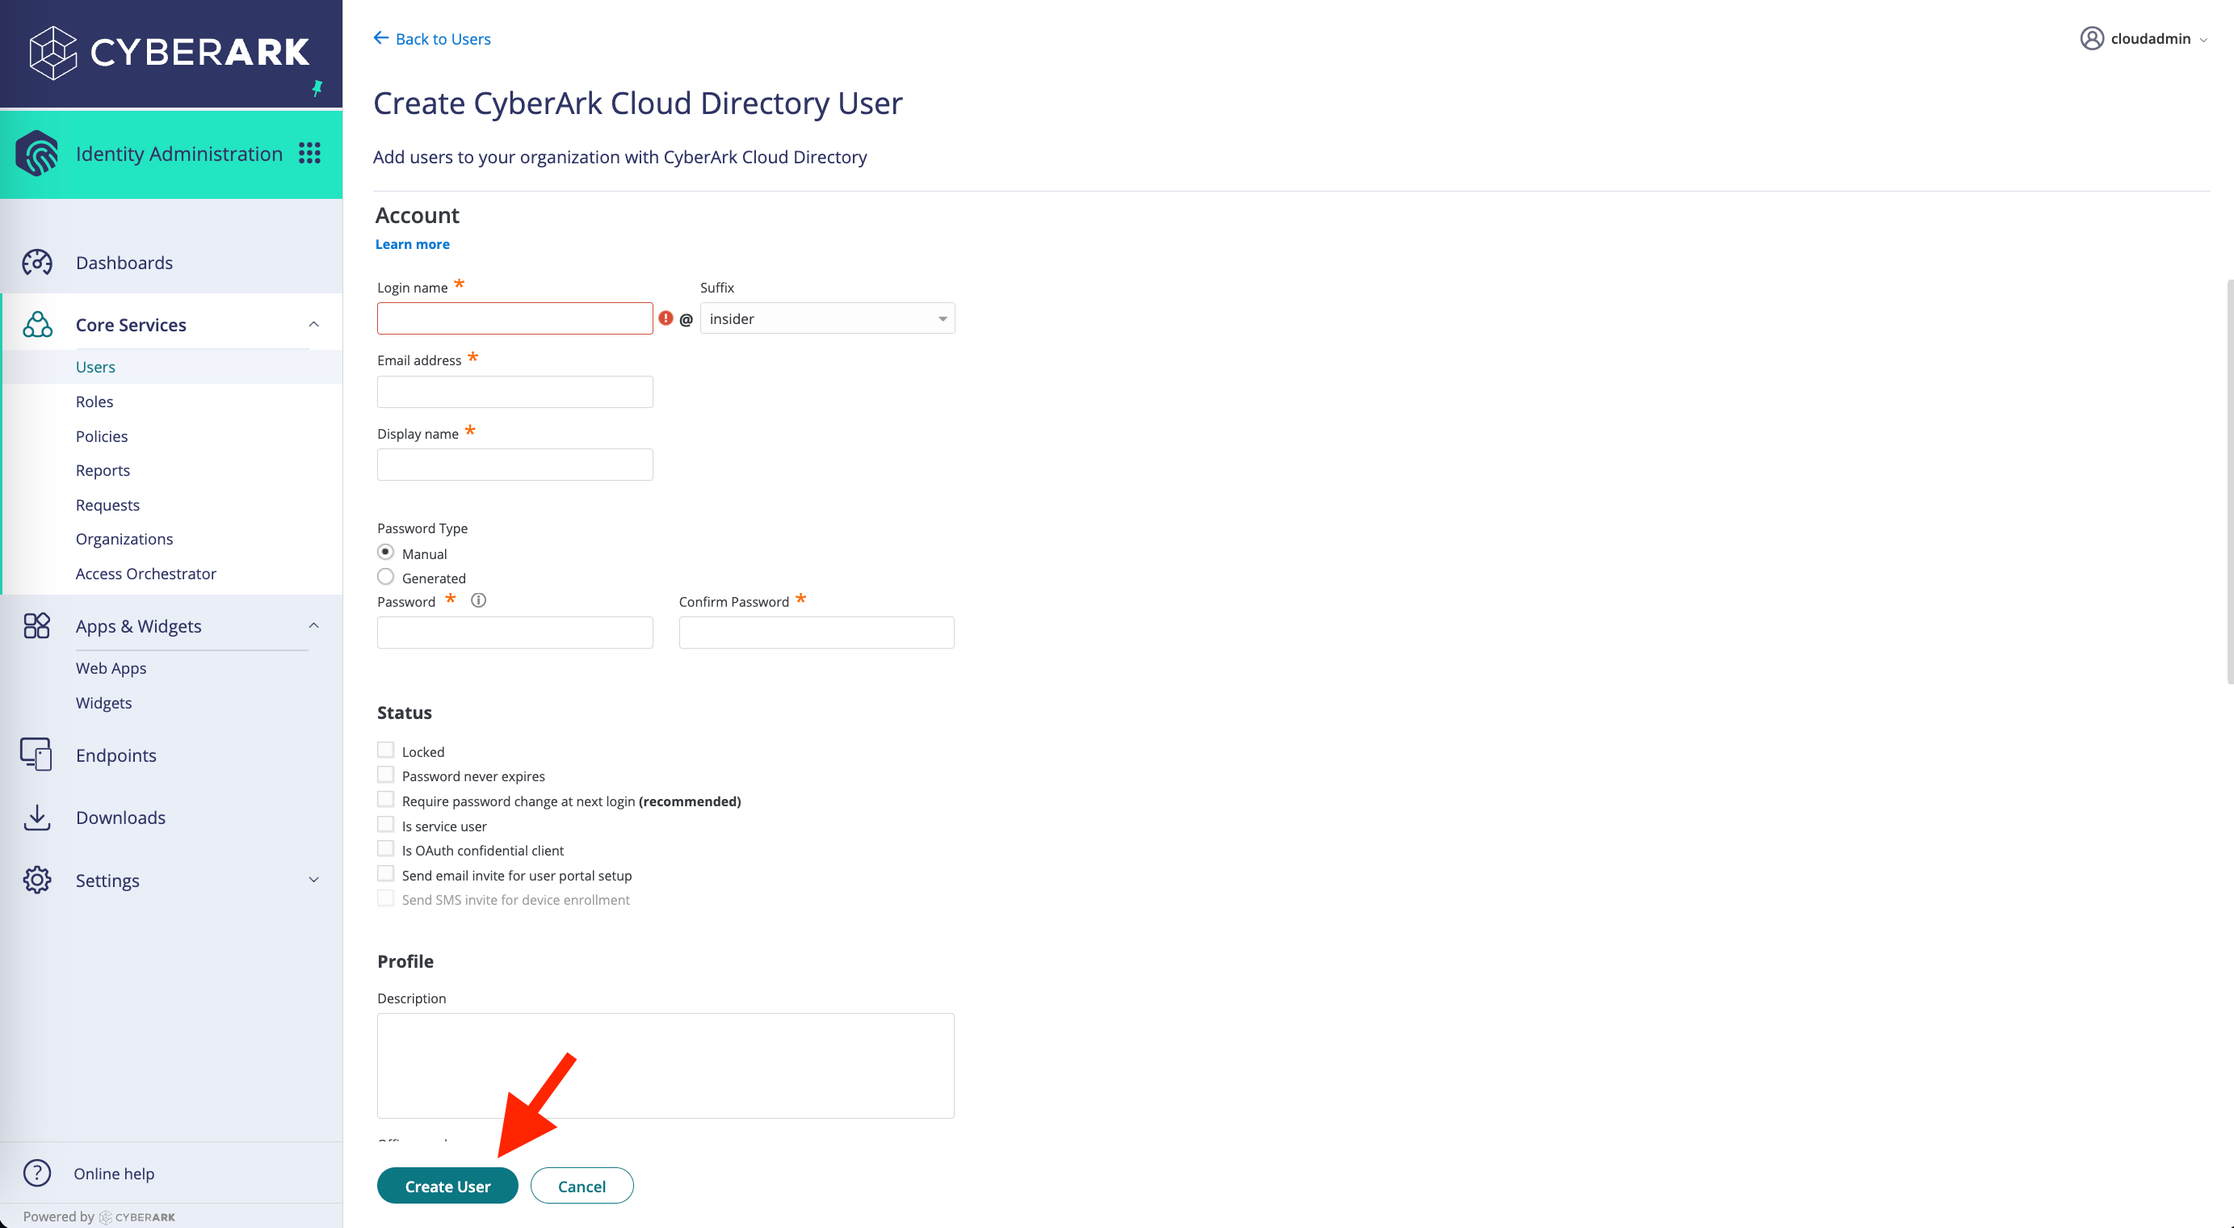
2. Fill in all the necessary inputs and then click the Create User button. Login name and Suffix must be your email. For instance, if you have sample@insiderone.com as an email, you should put sample in the login name and select the suffix as insiderone.com.
3. Go back to the Insider One’s Application settings. Click the Permissions tab in the left menu, and click the Add button and search for your user that you have created and then add it to the Insider application.
Now that you have added a new user, you can start using it to test your Single Sign-On connections.