Suggested reading: Single Sign-On
This guide lists the actions you need to complete to configure SSO (Single Sign-On) and SCIM (System for Cross-Domain Identity Management) for Jumpcloud:
Create the application and enable SSO
1. Sign up or log in to the admin dashboard on your Jumpcloud account.
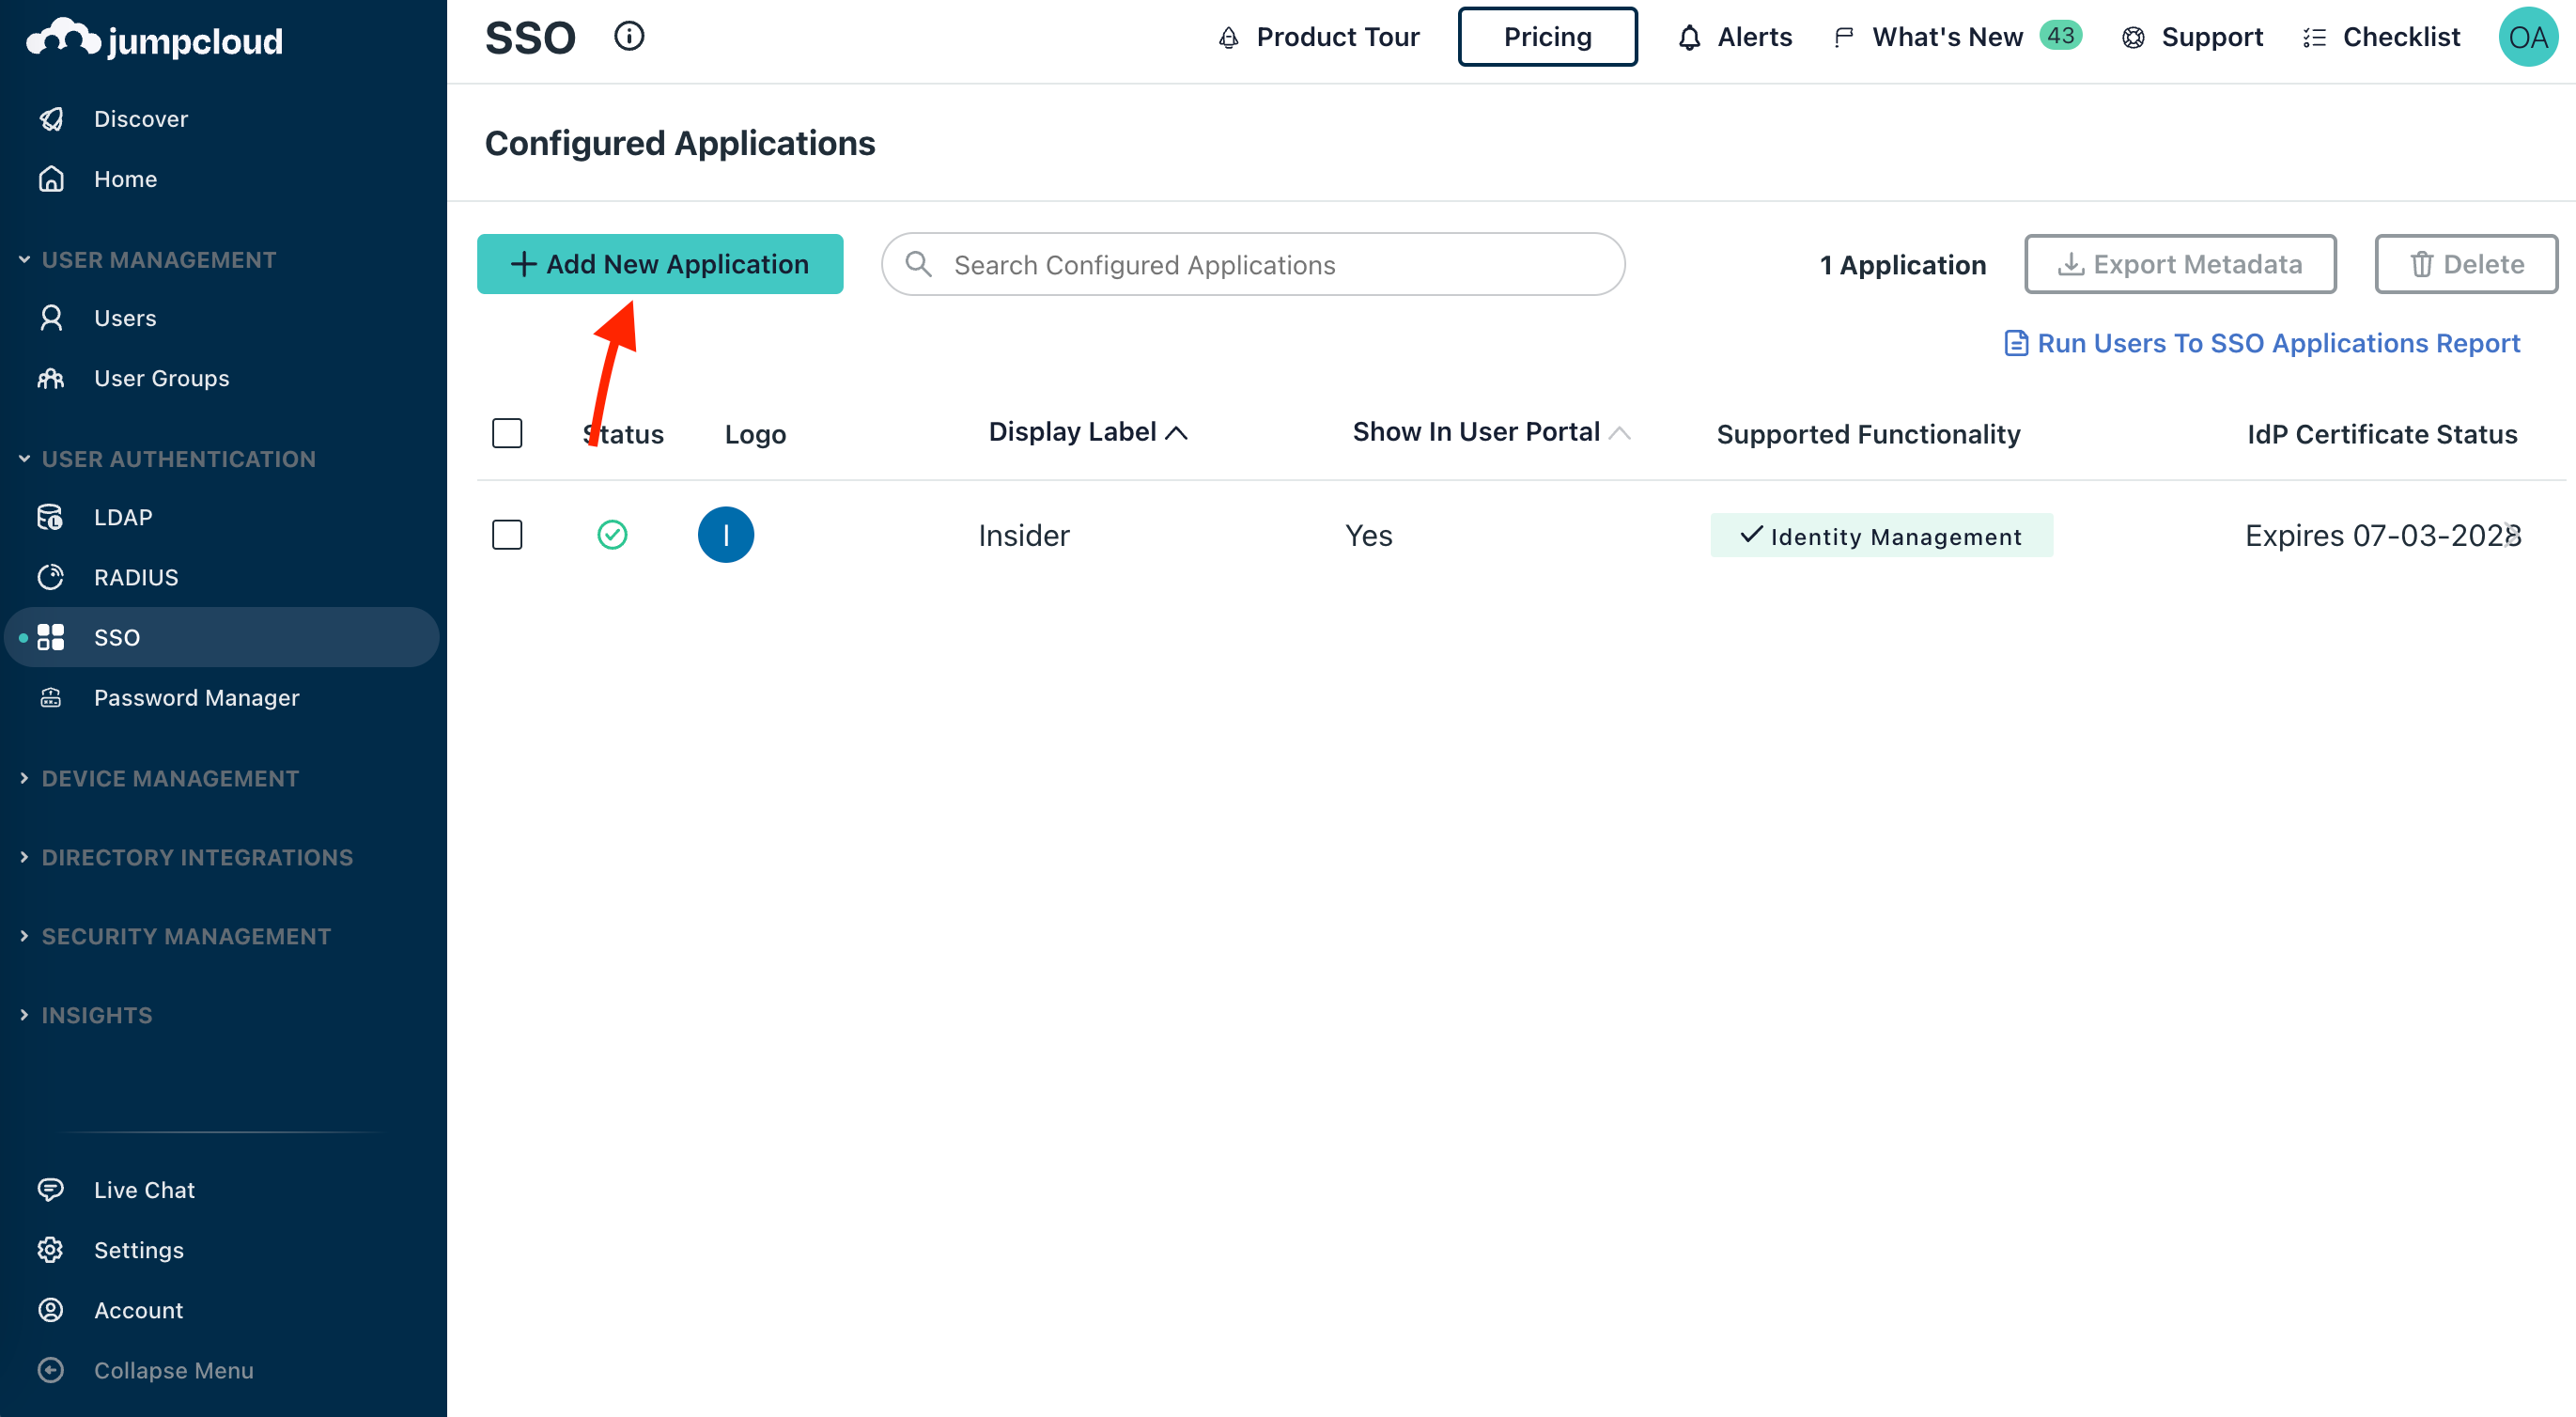
2. Go to the SSO tab on the left menu to click the Get Started button.
 If you already have an application created, click the Add New Application button above the previously created application(s).
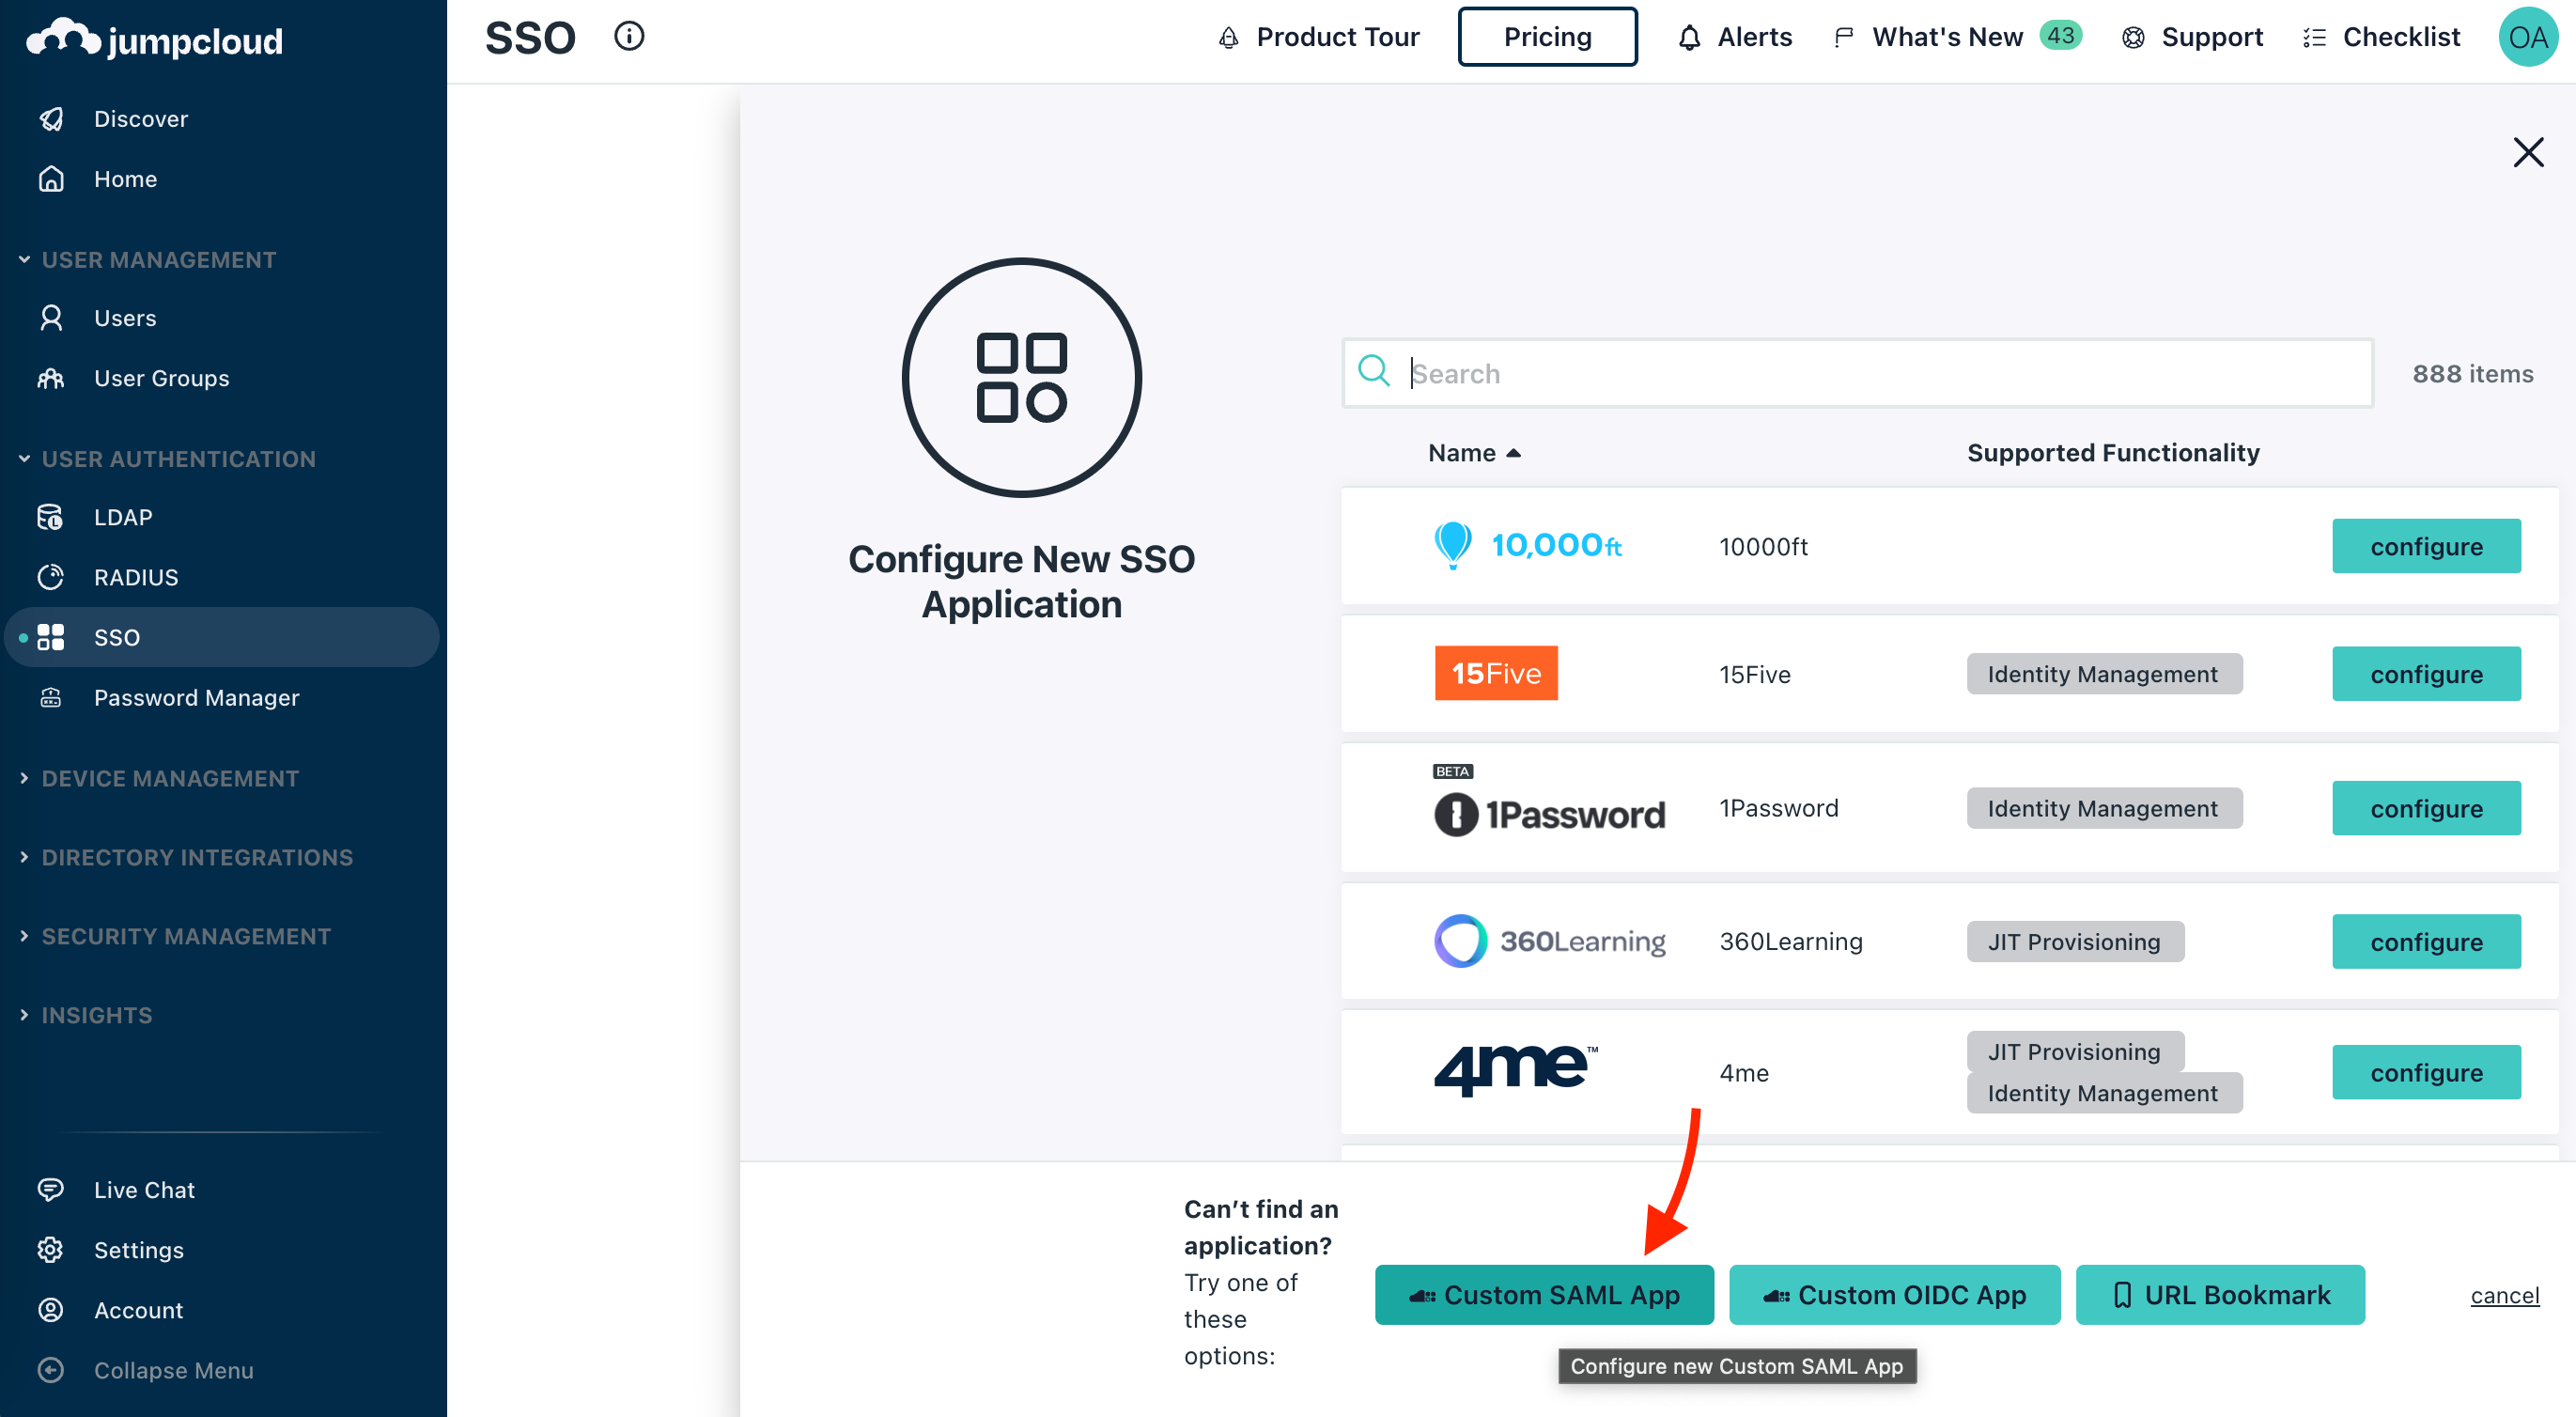
2. Click the Custom SAML App button at the bottom of the opened tab to create a custom application.
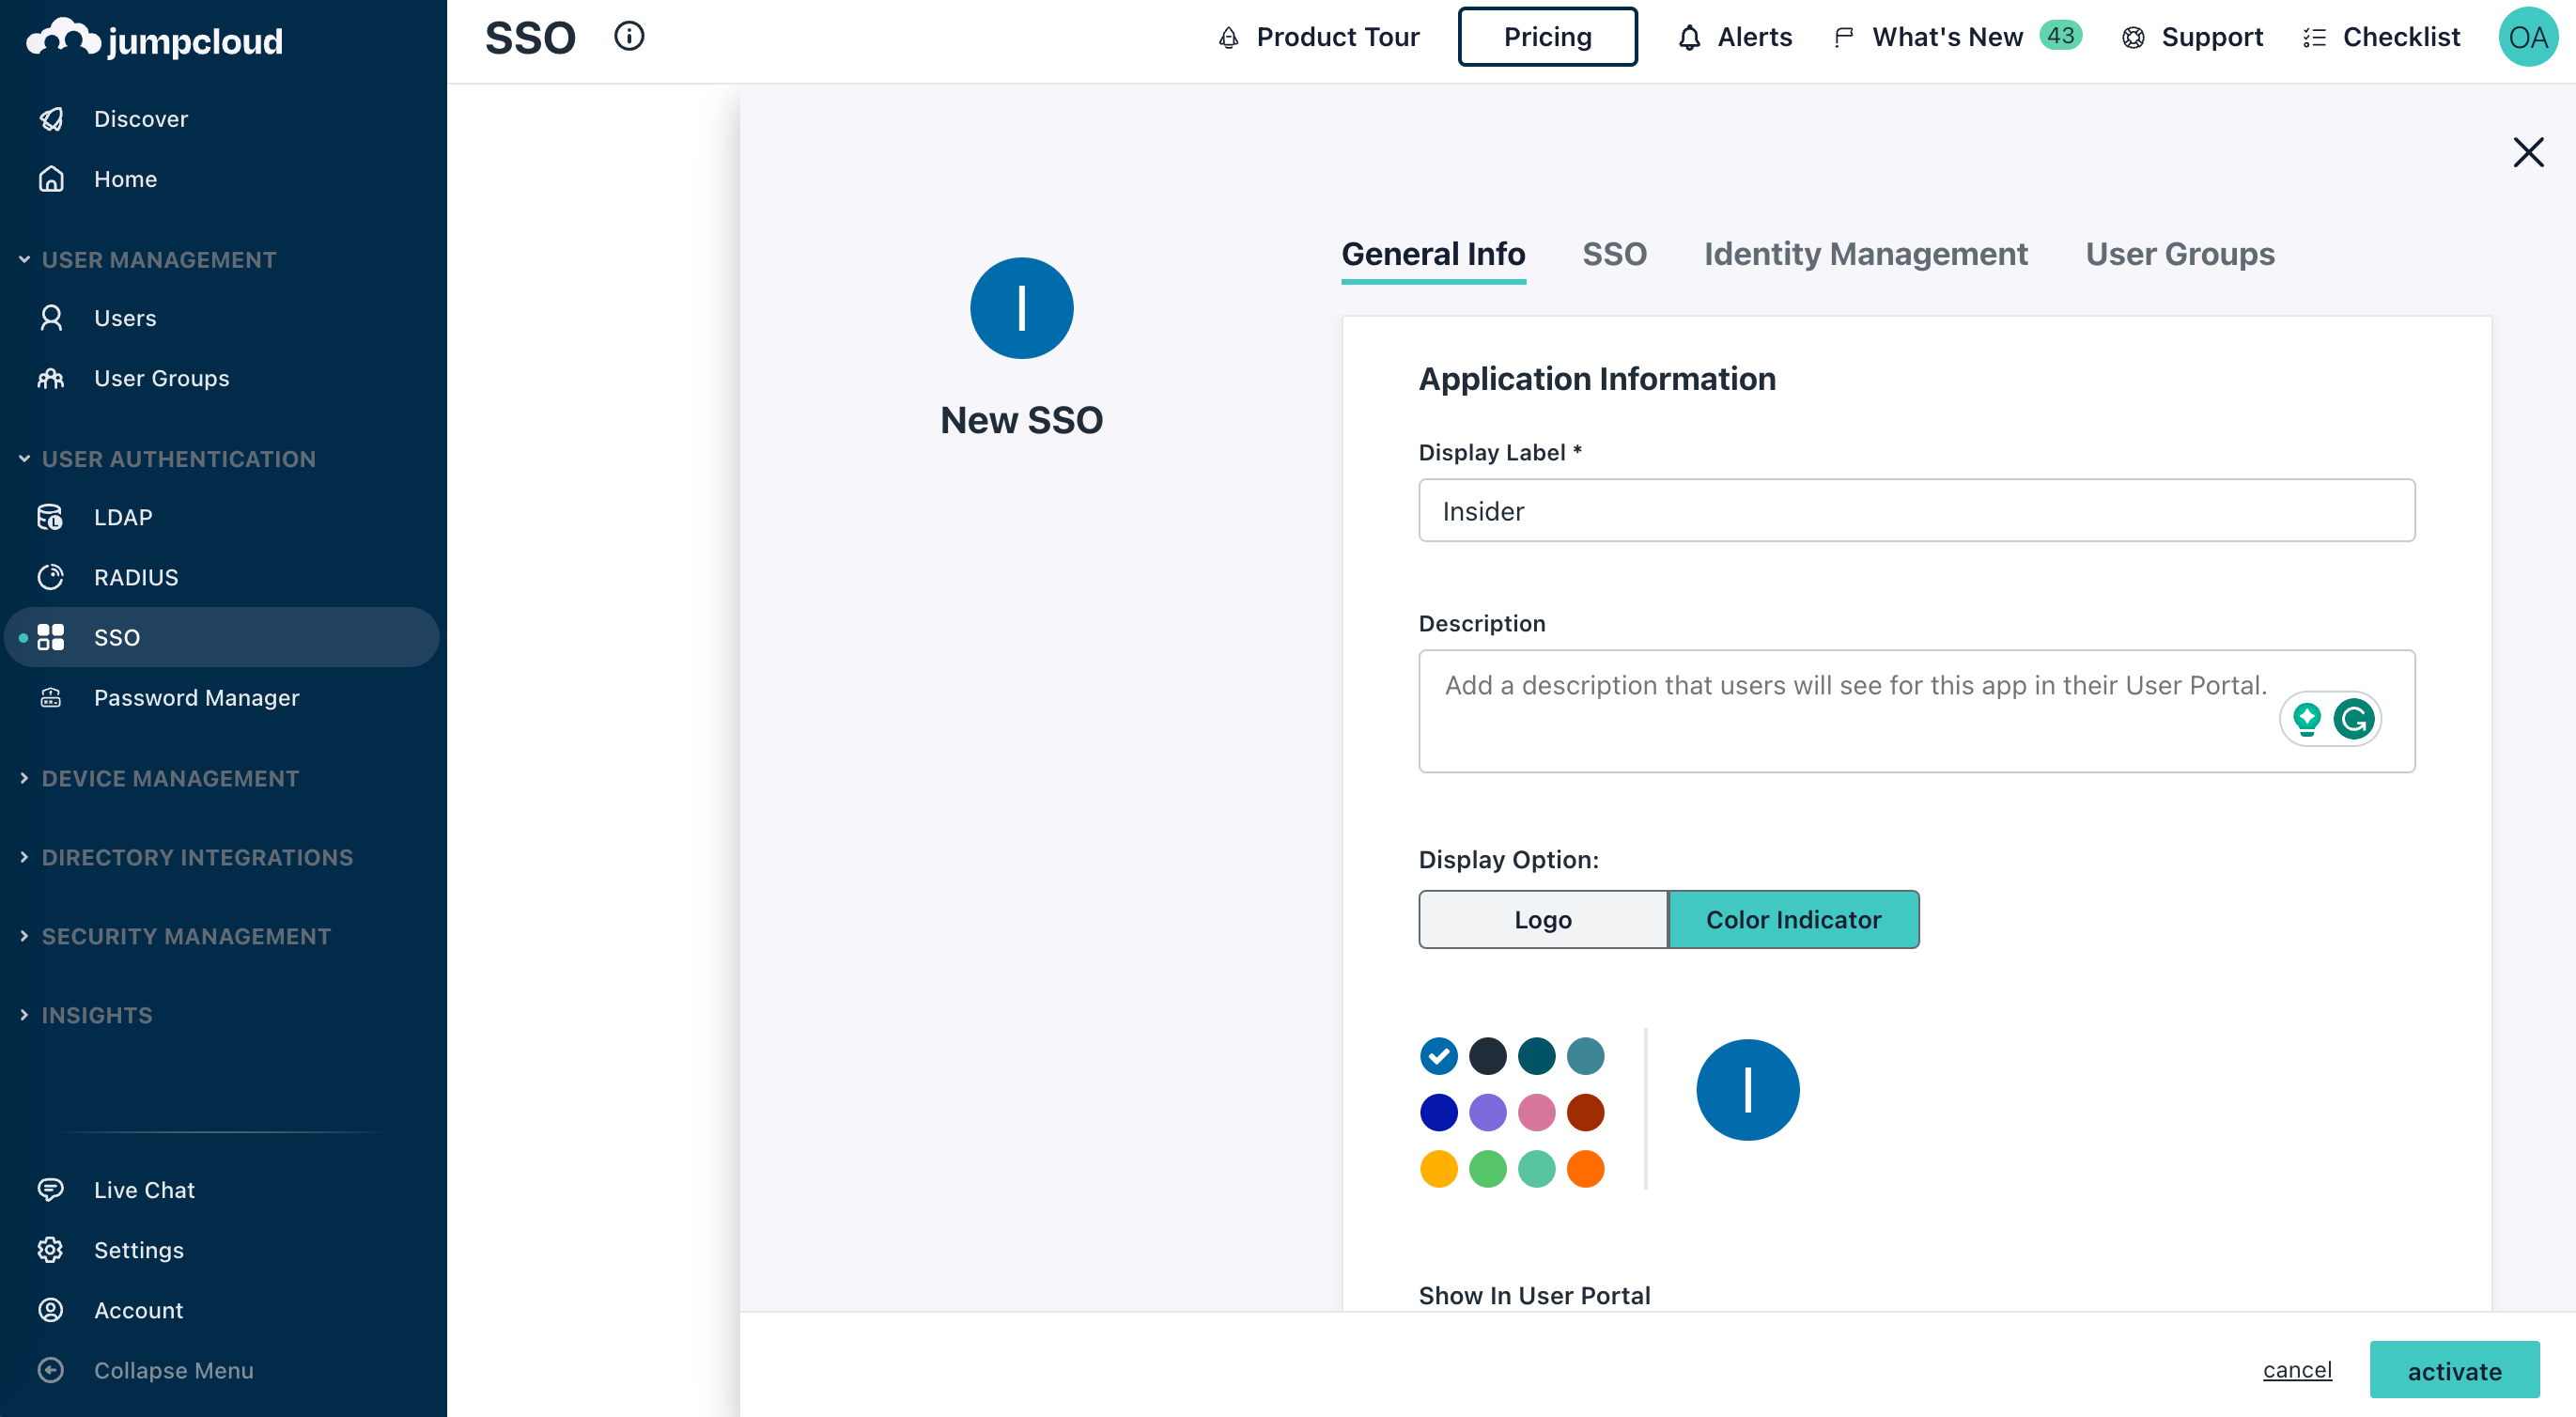
3. Fill out the Display Name and Description on the General Info tab.
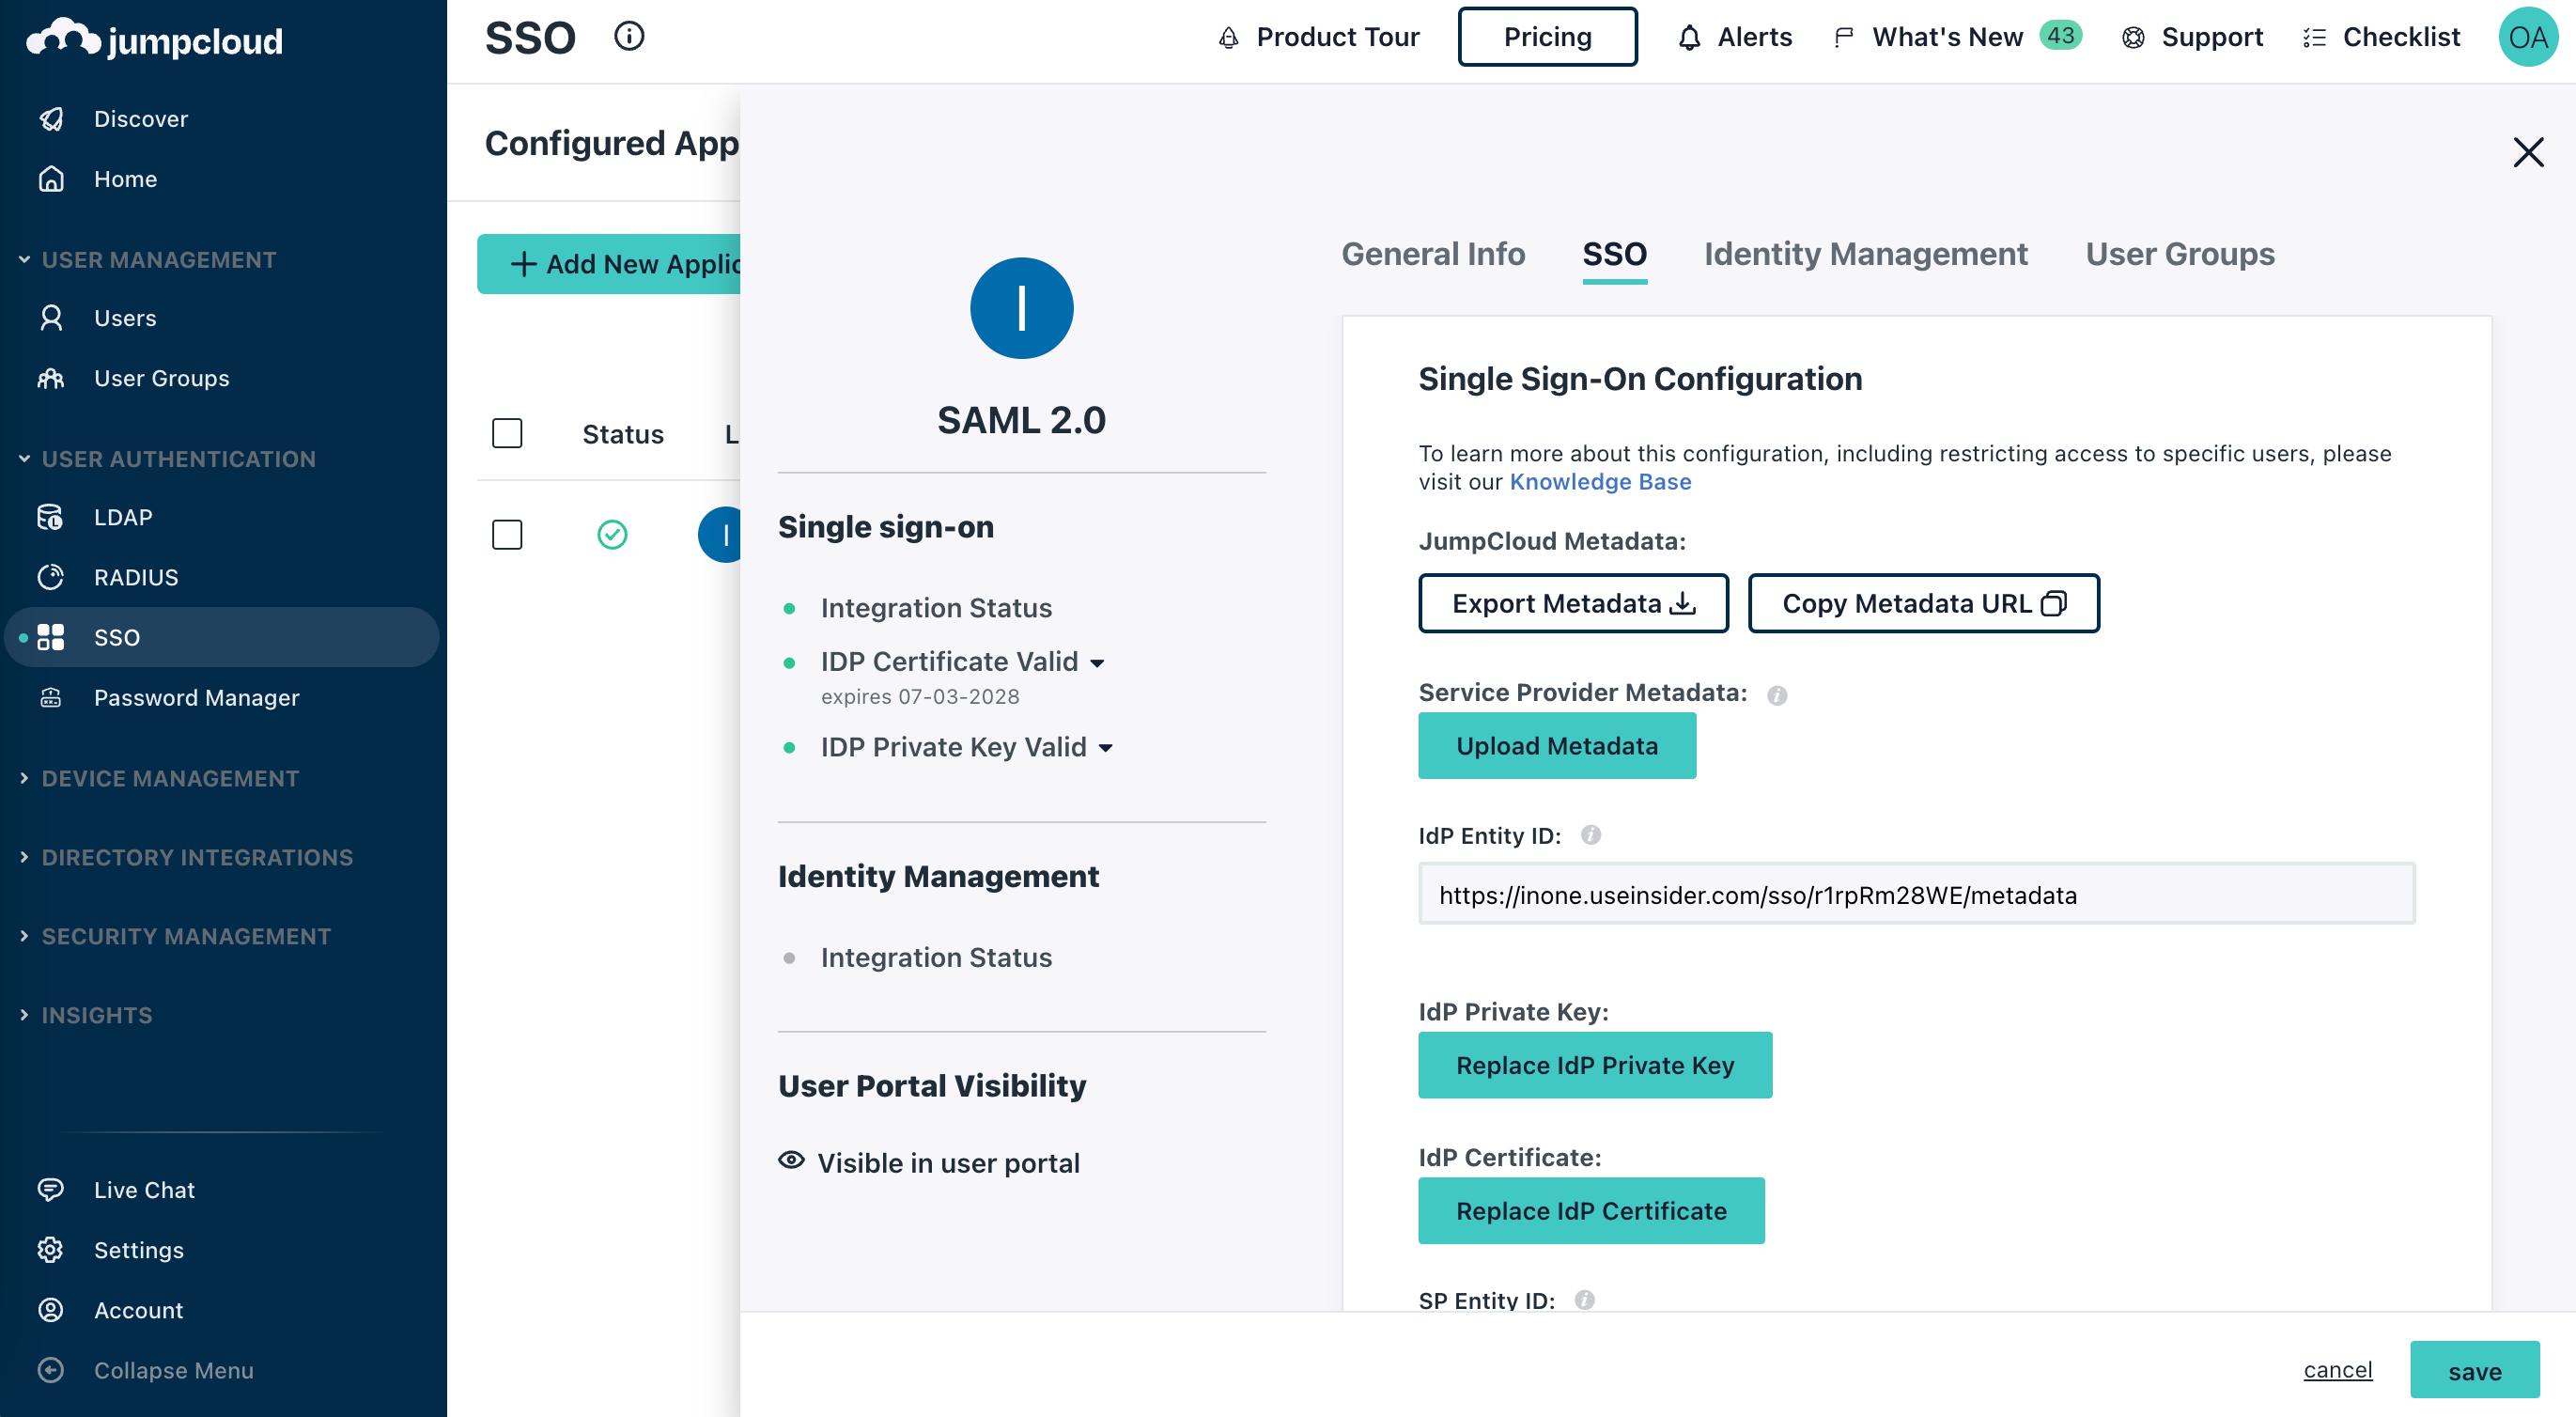
4. Go to the SSO tab from the top menu and fill out the information as displayed below.
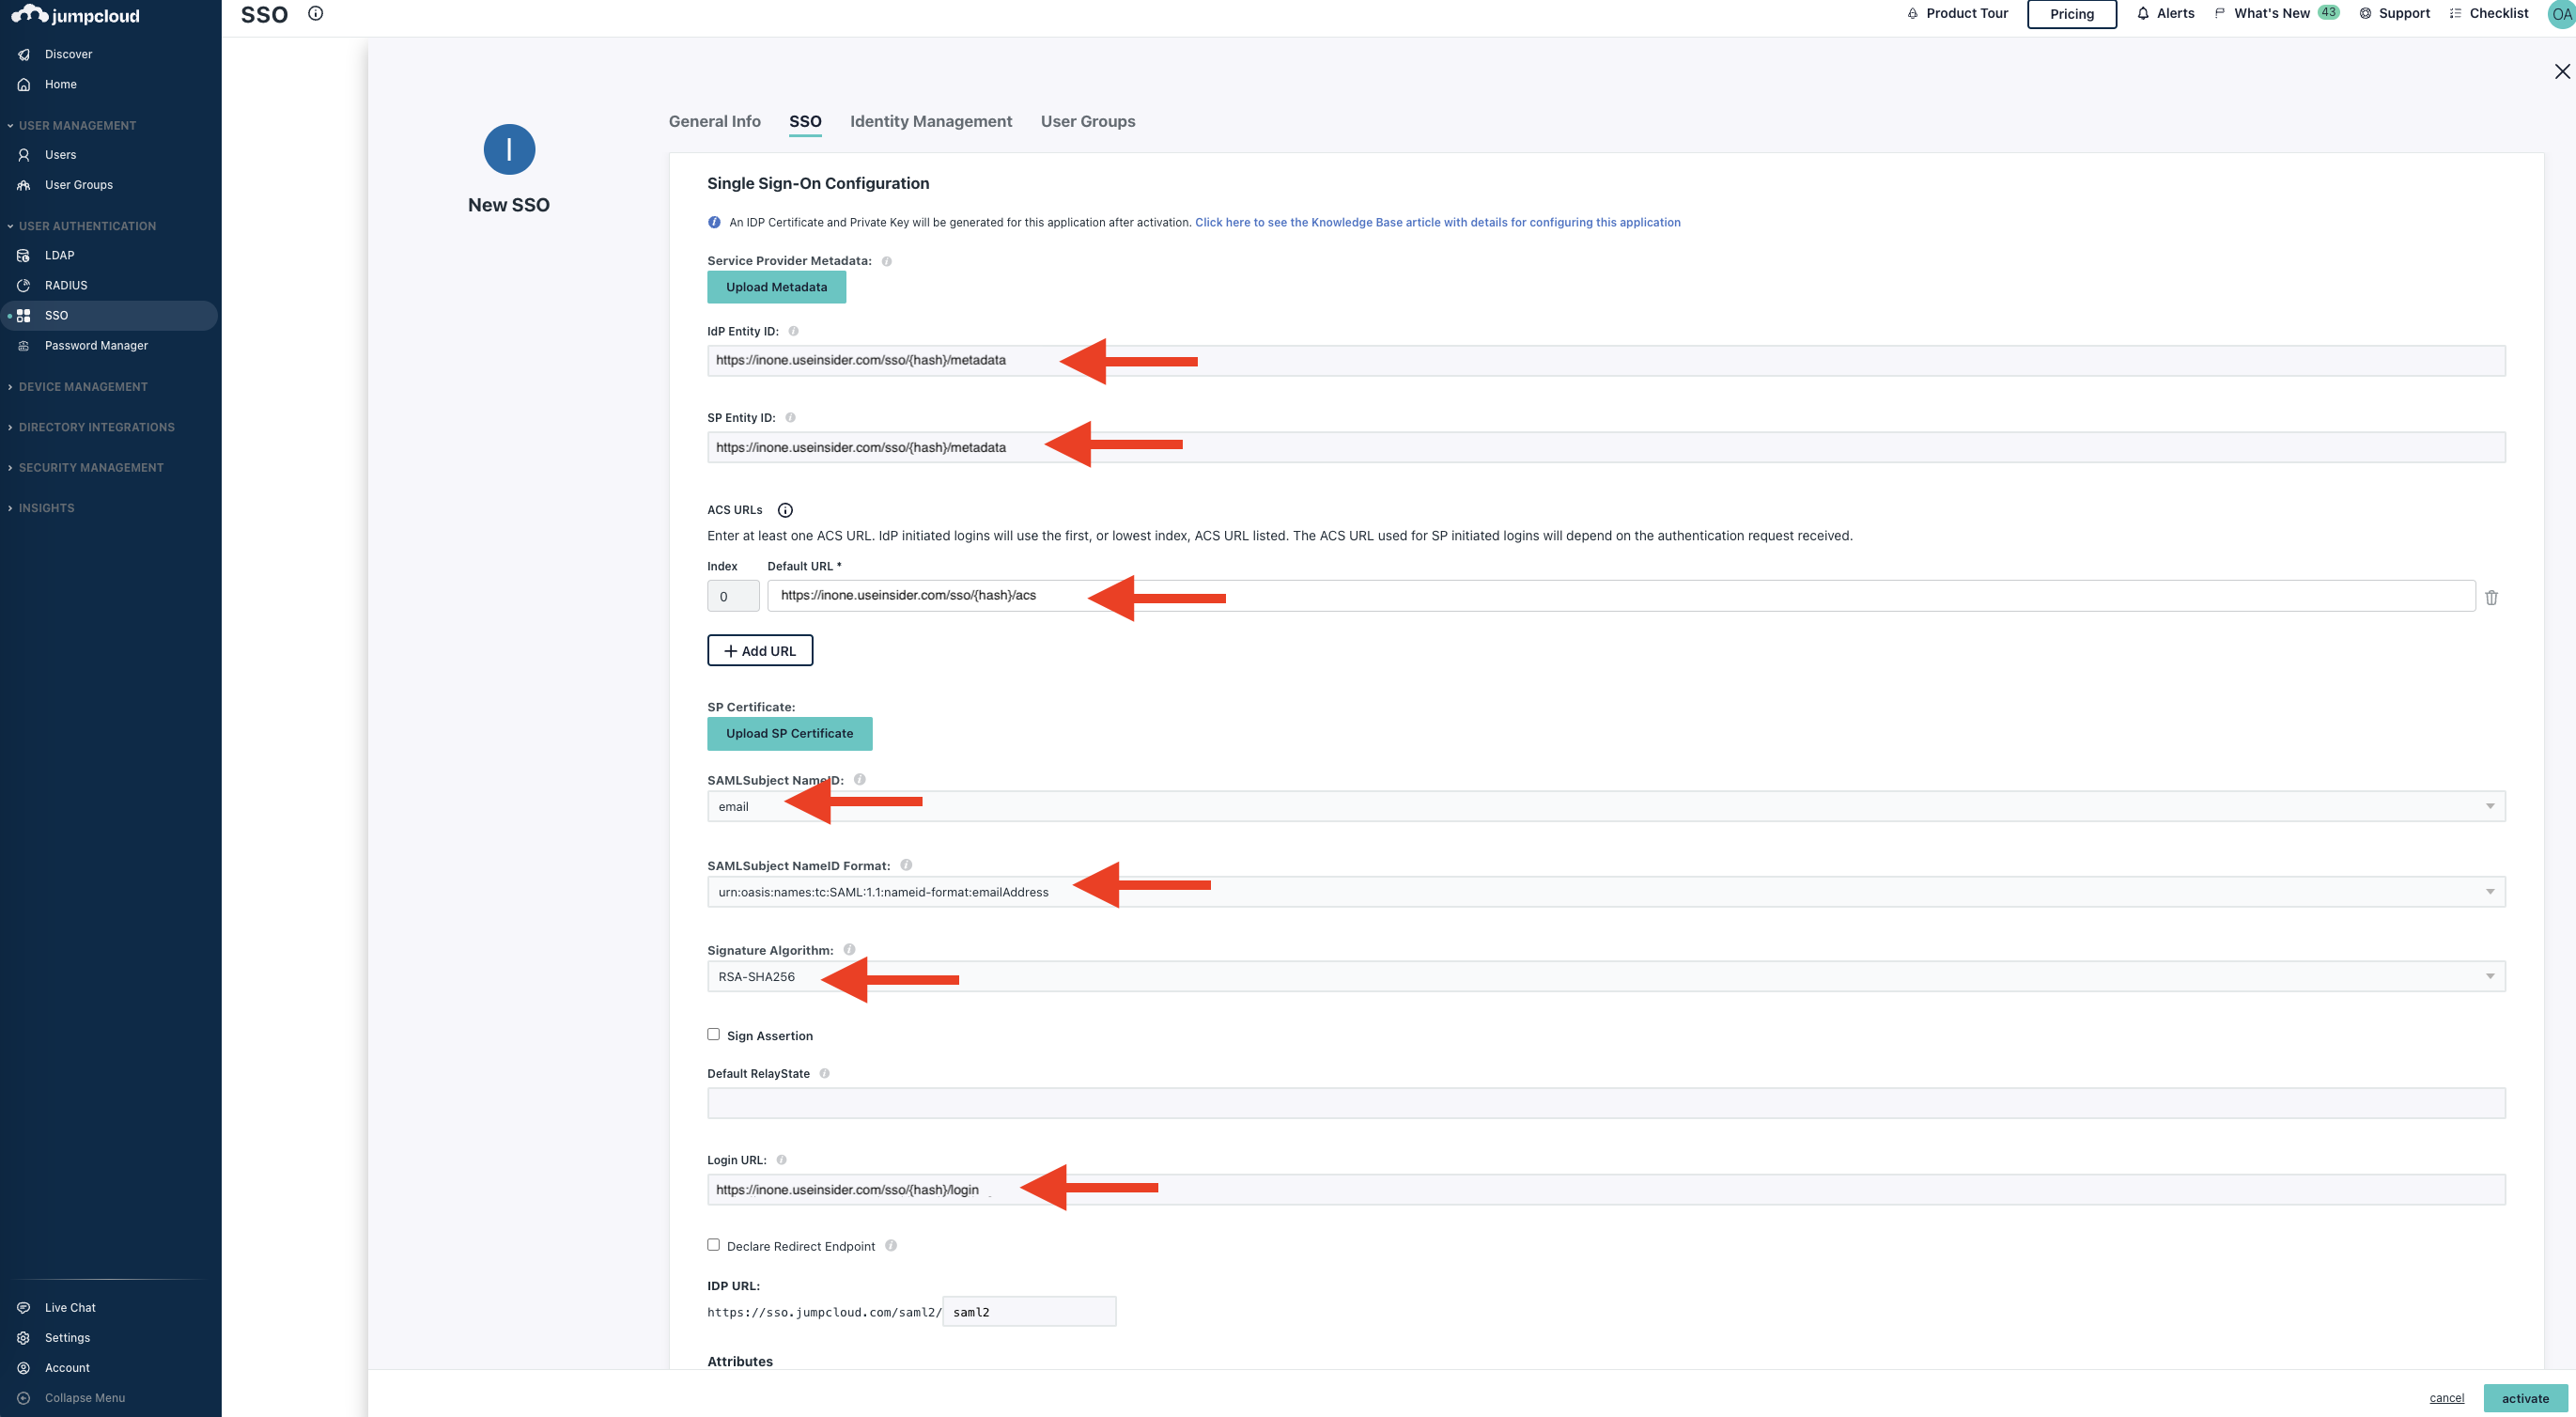
The values for the required fields are as follows:
| Field | Value |
|---|---|
| IdP Entity ID | https://inone.useinsider.com/sso/{hash}/metadata |
| SP Entity ID | https://inone.useinsider.com/sso/{hash}/metadata |
| ACS URLs/Default URL | https://inone.useinsider.com/sso/{hash}/acs |
| SAMLSubject NameID | |
| SAMLSubject NameID Format | urn:oasis:names:tc:SAML:1.1:nameid-format:emailAddress |
| Signature Algorithm | RSA-SHA256 |
| Login URL | https://inone.useinsider.com/sso/{hash}/login |
5. Once you complete all the information, click the Activate button at the bottom of the page to activate Single Sign On integration.
6. Once you activate the integration, click the Export Metadata button on the same SSO tab.
7. Go to Inone panel > Settings > Inone Settings > Security to upload the downloaded XML file.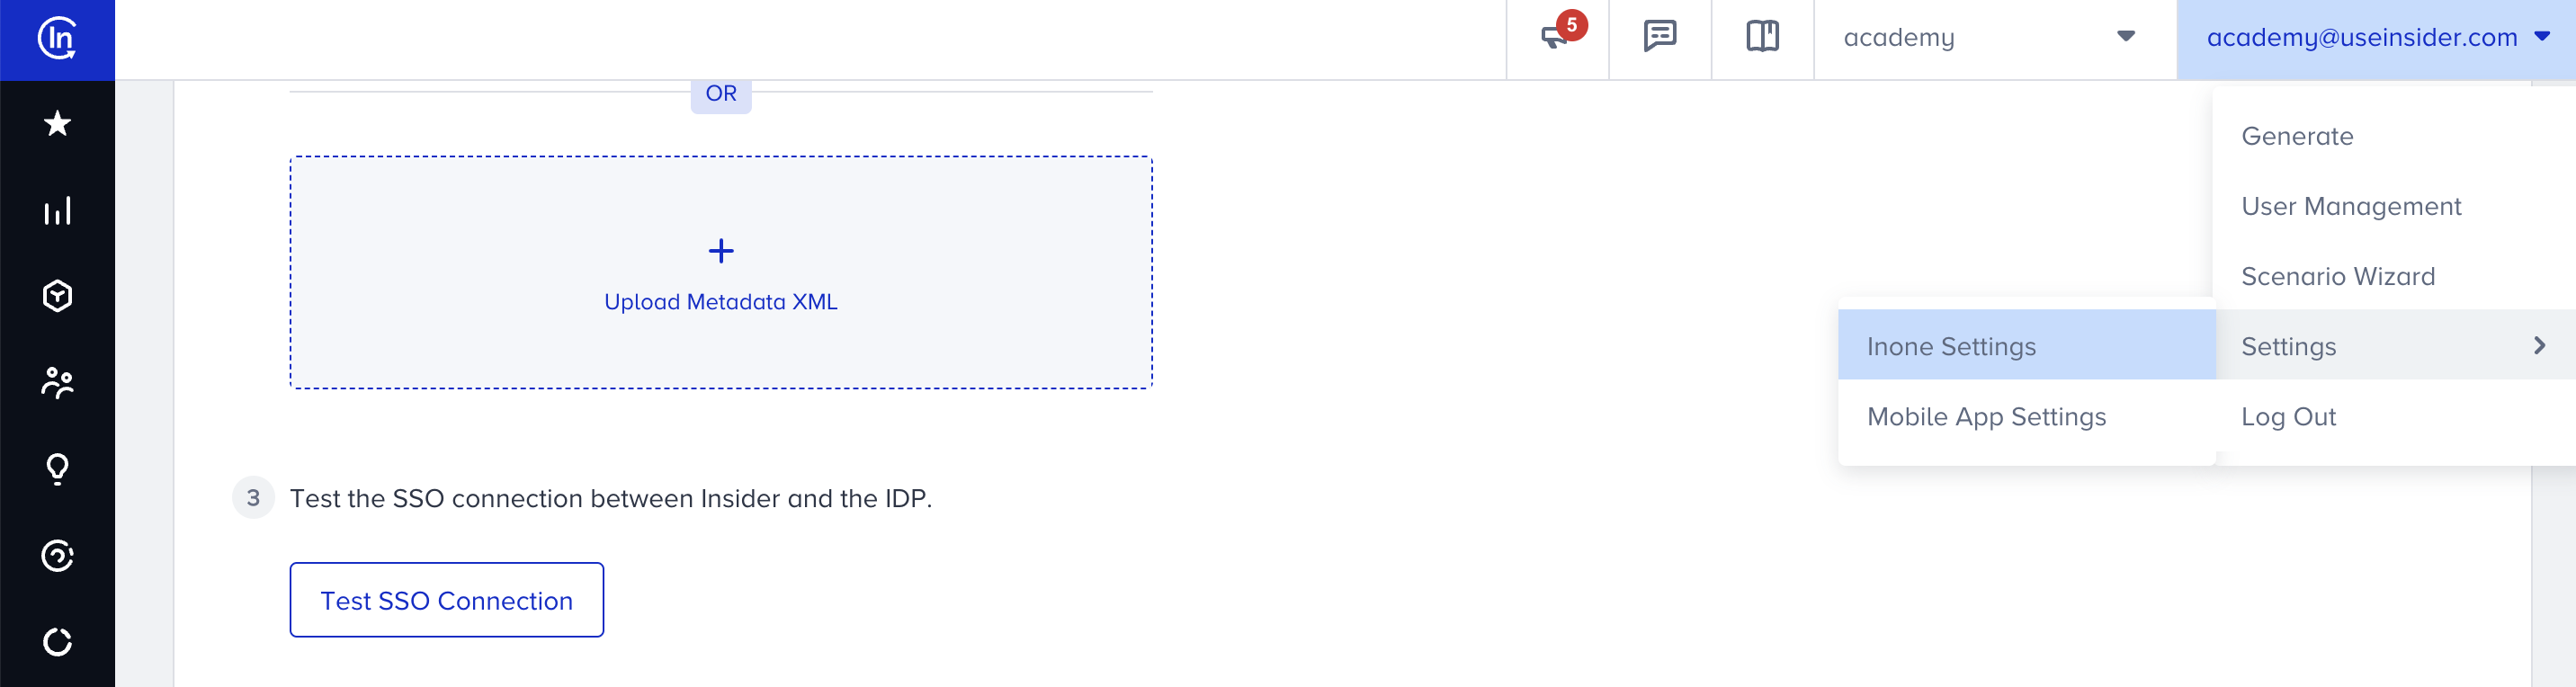
Before testing the SSO connection on Inone, you need to assign your Jumpcloud user to log in to the Insider application you created. To achieve this, you can create user groups or add yourself to an existing one.
Create user groups
This step is required to complete provisioning for SCIM integration.
1. Go to the User Groups on the left menu to click the + (plus) button to create new groups.
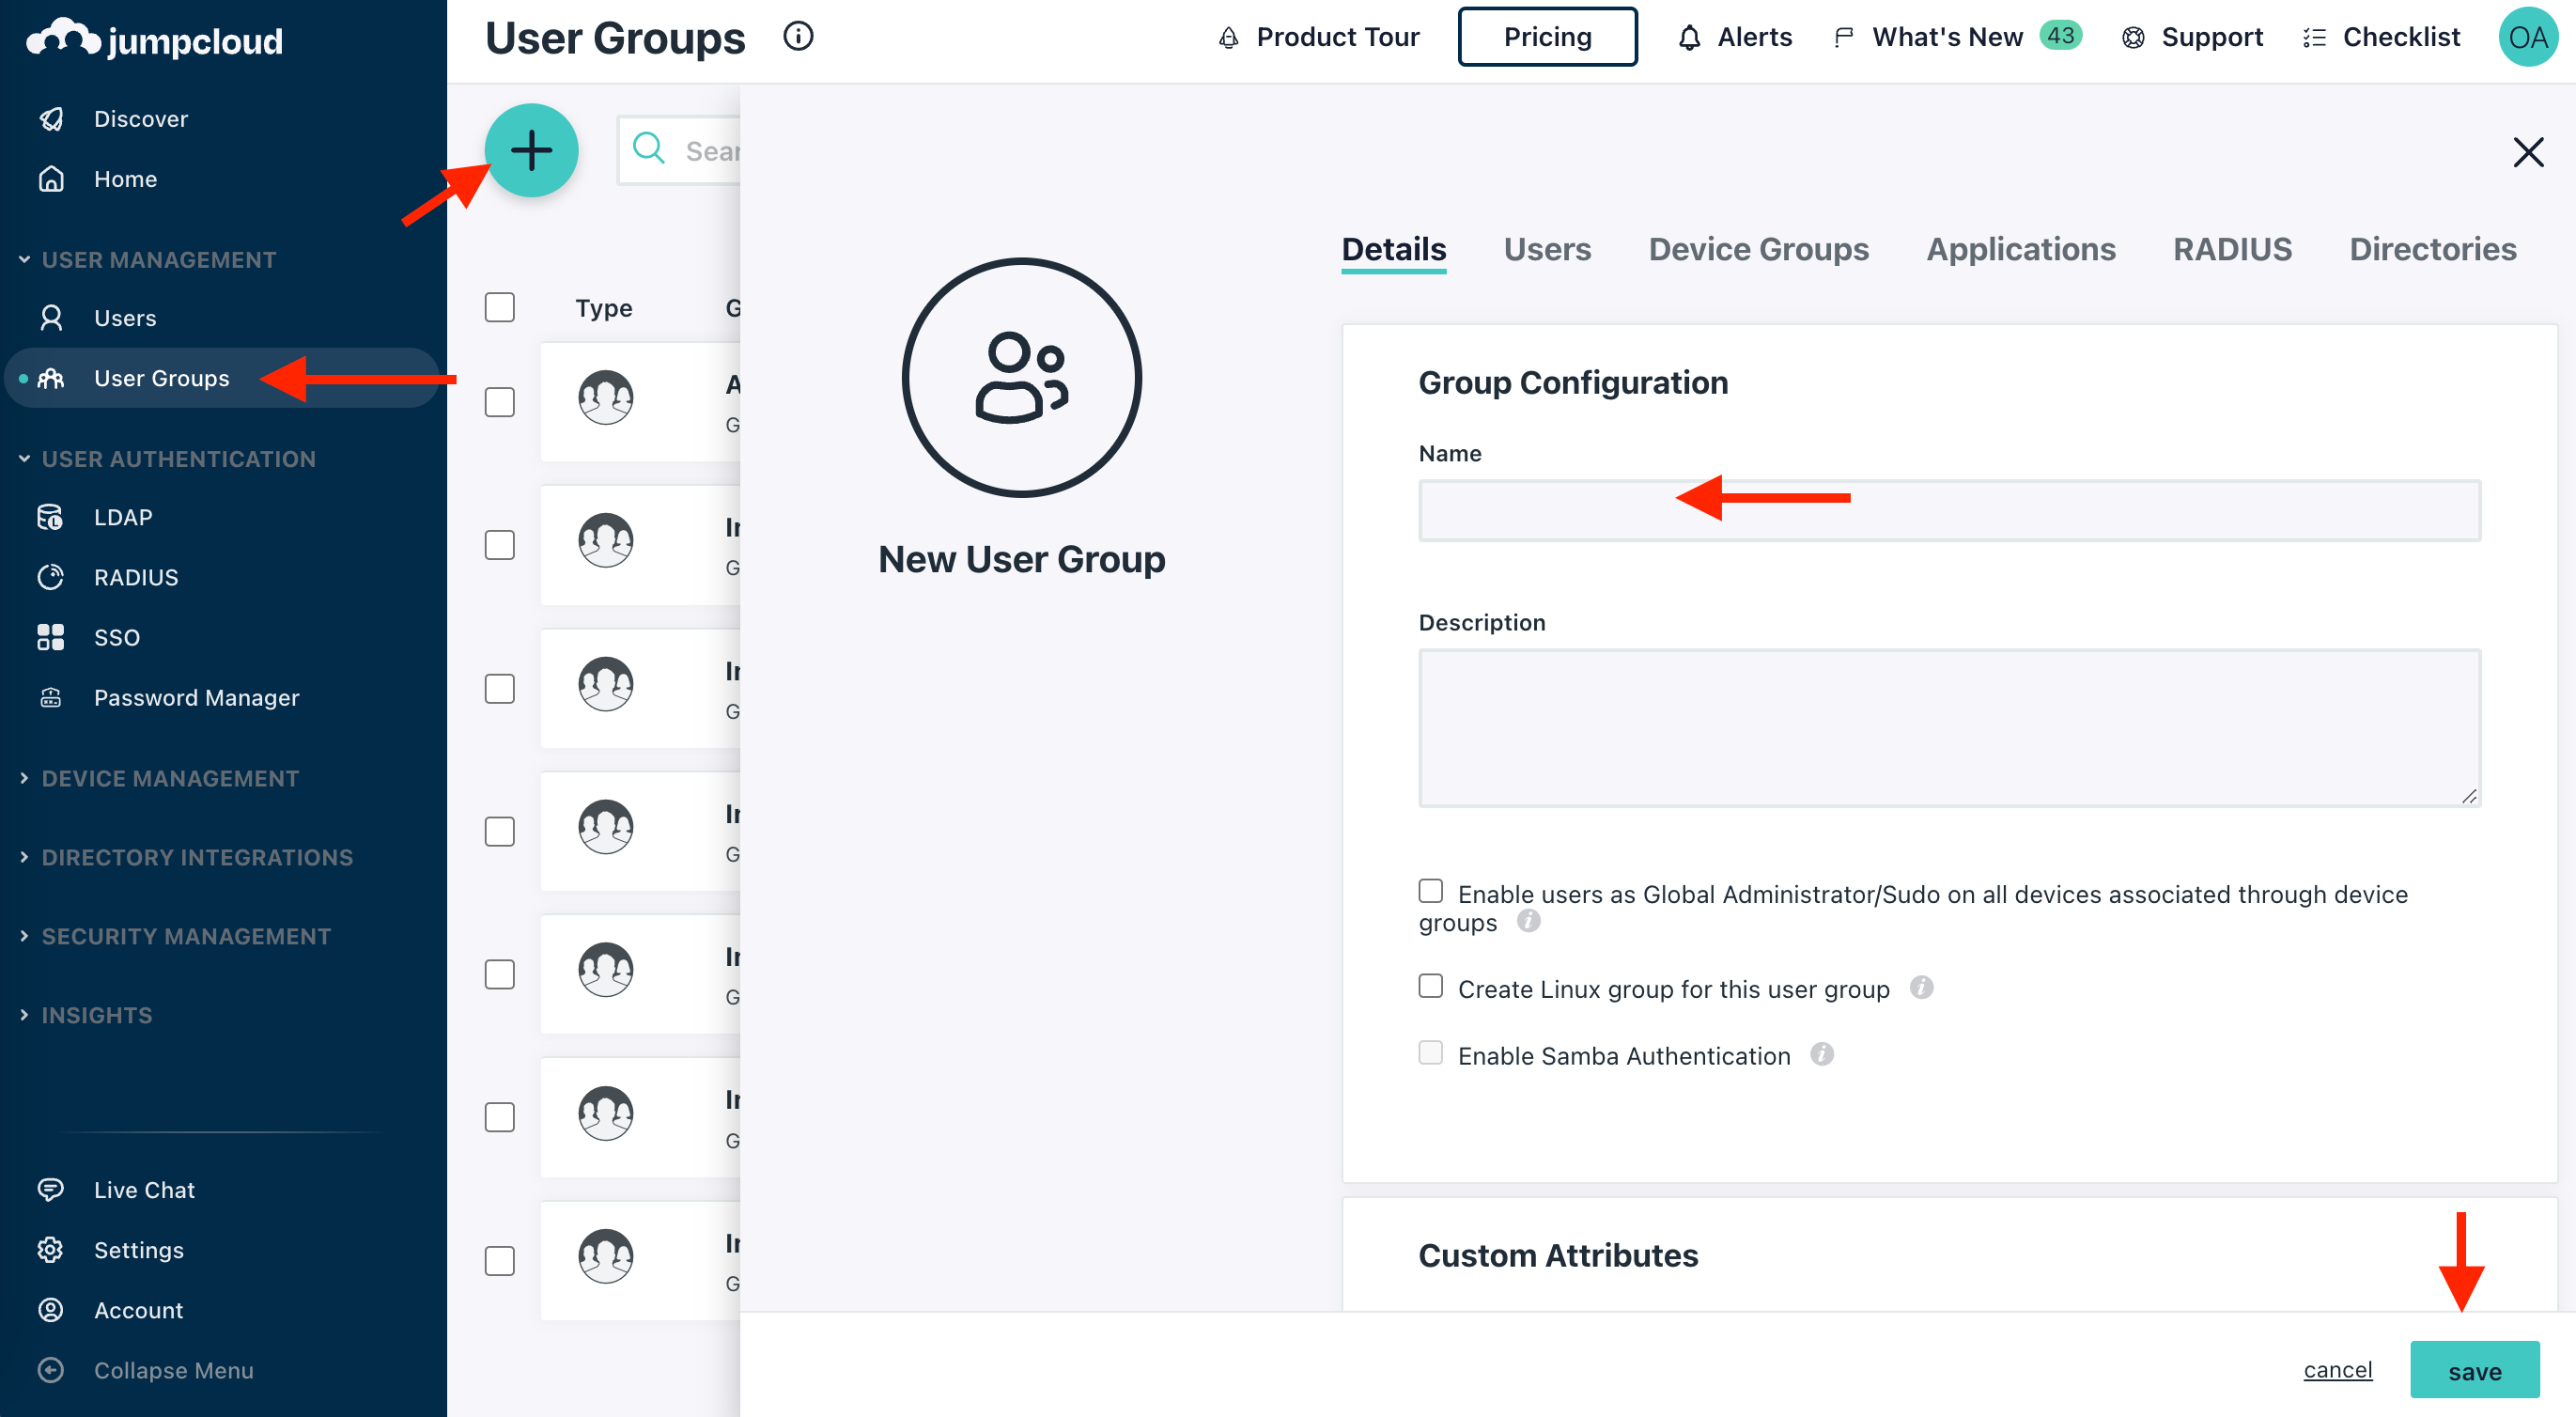
2. Create all the groups below for each respective role for the Inone panel.
| Role | Description |
|---|---|
| Insider Manage Users | Manage Users role for Insider One |
| Insider Edit and Publish | Edit and Publish role for Insider One |
| Insider Collaborate | Collaborate role for Insider One |
| Insider View Only | View Only role for Insider One |
| Insider Change Campaign Status Only | Change Campaign Status Only role for Insider One |
| Insider Outsource | Outsource role for Insider One |
Enable SCIM and user provisioning
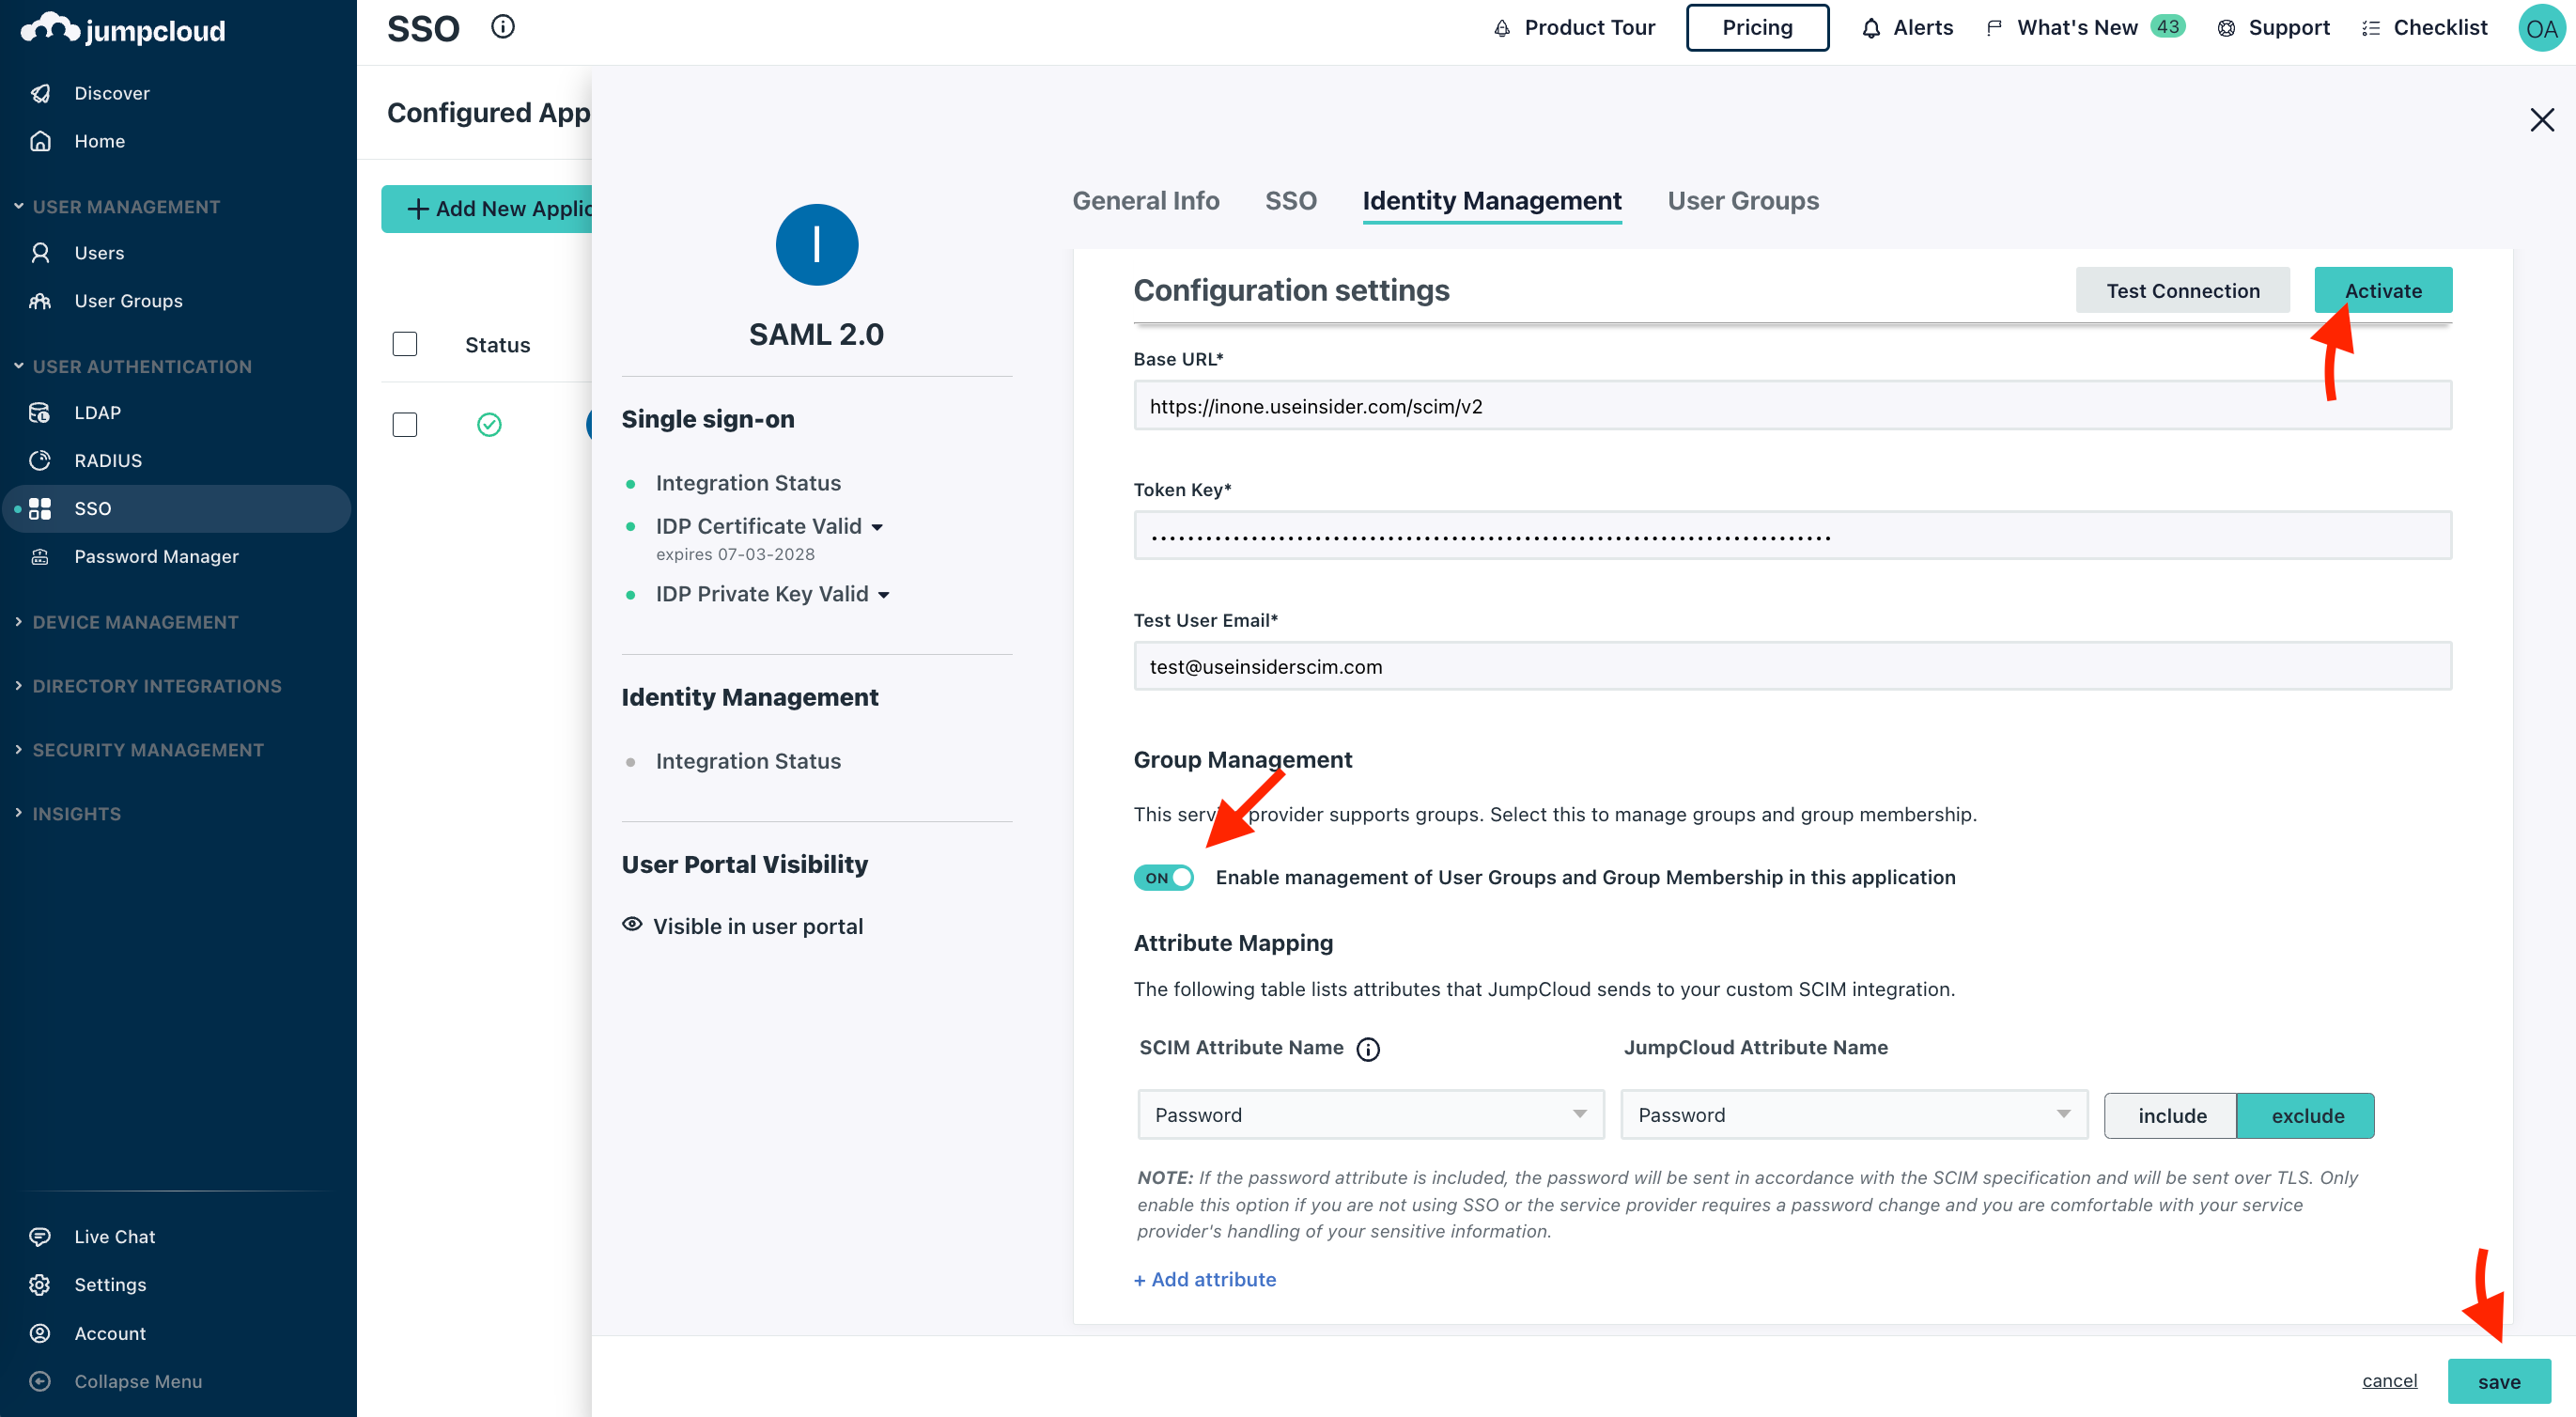
1. Click the Identity Management tab under the application detail page. Fill out the information as listed below:
| Field | Value |
|---|---|
| SCIM Version | SCIM 2.0 |
| Base URL | https://inone.useinsider.com/scim/v2 |
| Token Key | The key you will get from Inone Settings > Security |
| Test User Email | test@useinsiderscim.com (Make sure to provide the same email for testing) |
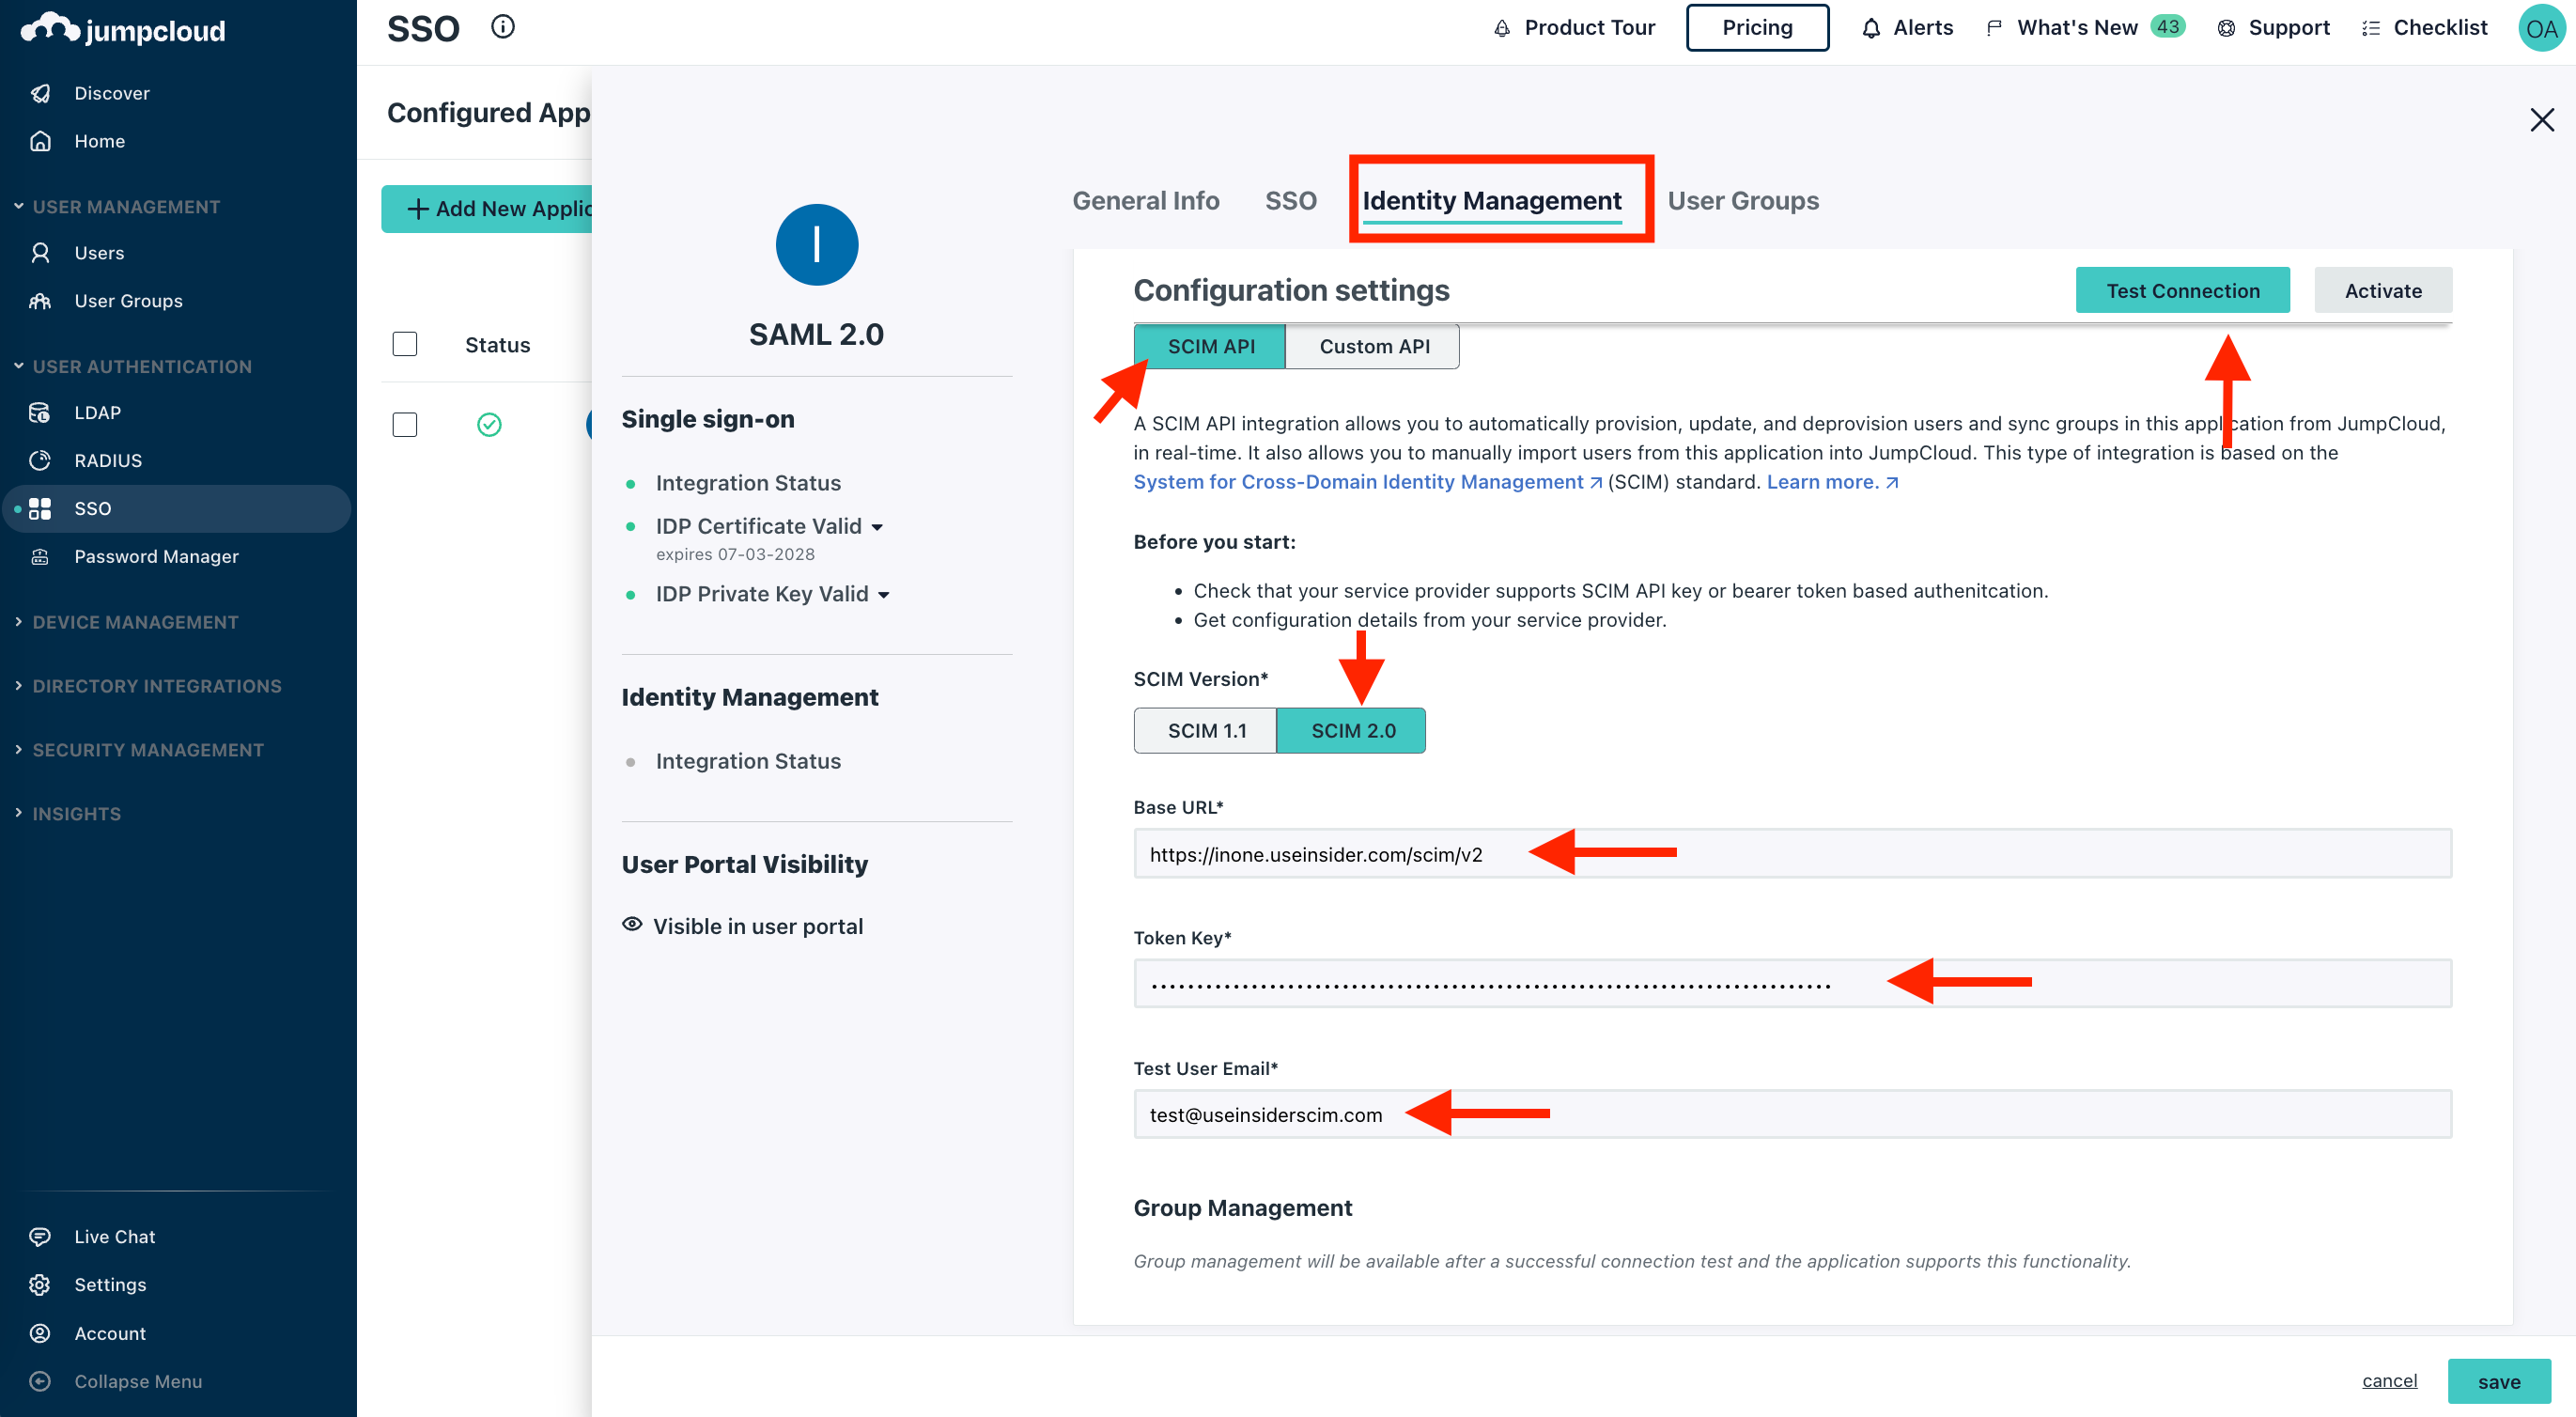
2. Click the Test Connection button on top of the prompt. Once you successfully test the connection, Group management features will be enabled.
3. Make sure to check the “Enable management of User Groups and Group Membership in this application” box and click the Activate button. Then click the Save button to save your changes.
4. Go to the User Groups tab to select all Insider-related groups. Click the Save button to save your selection.
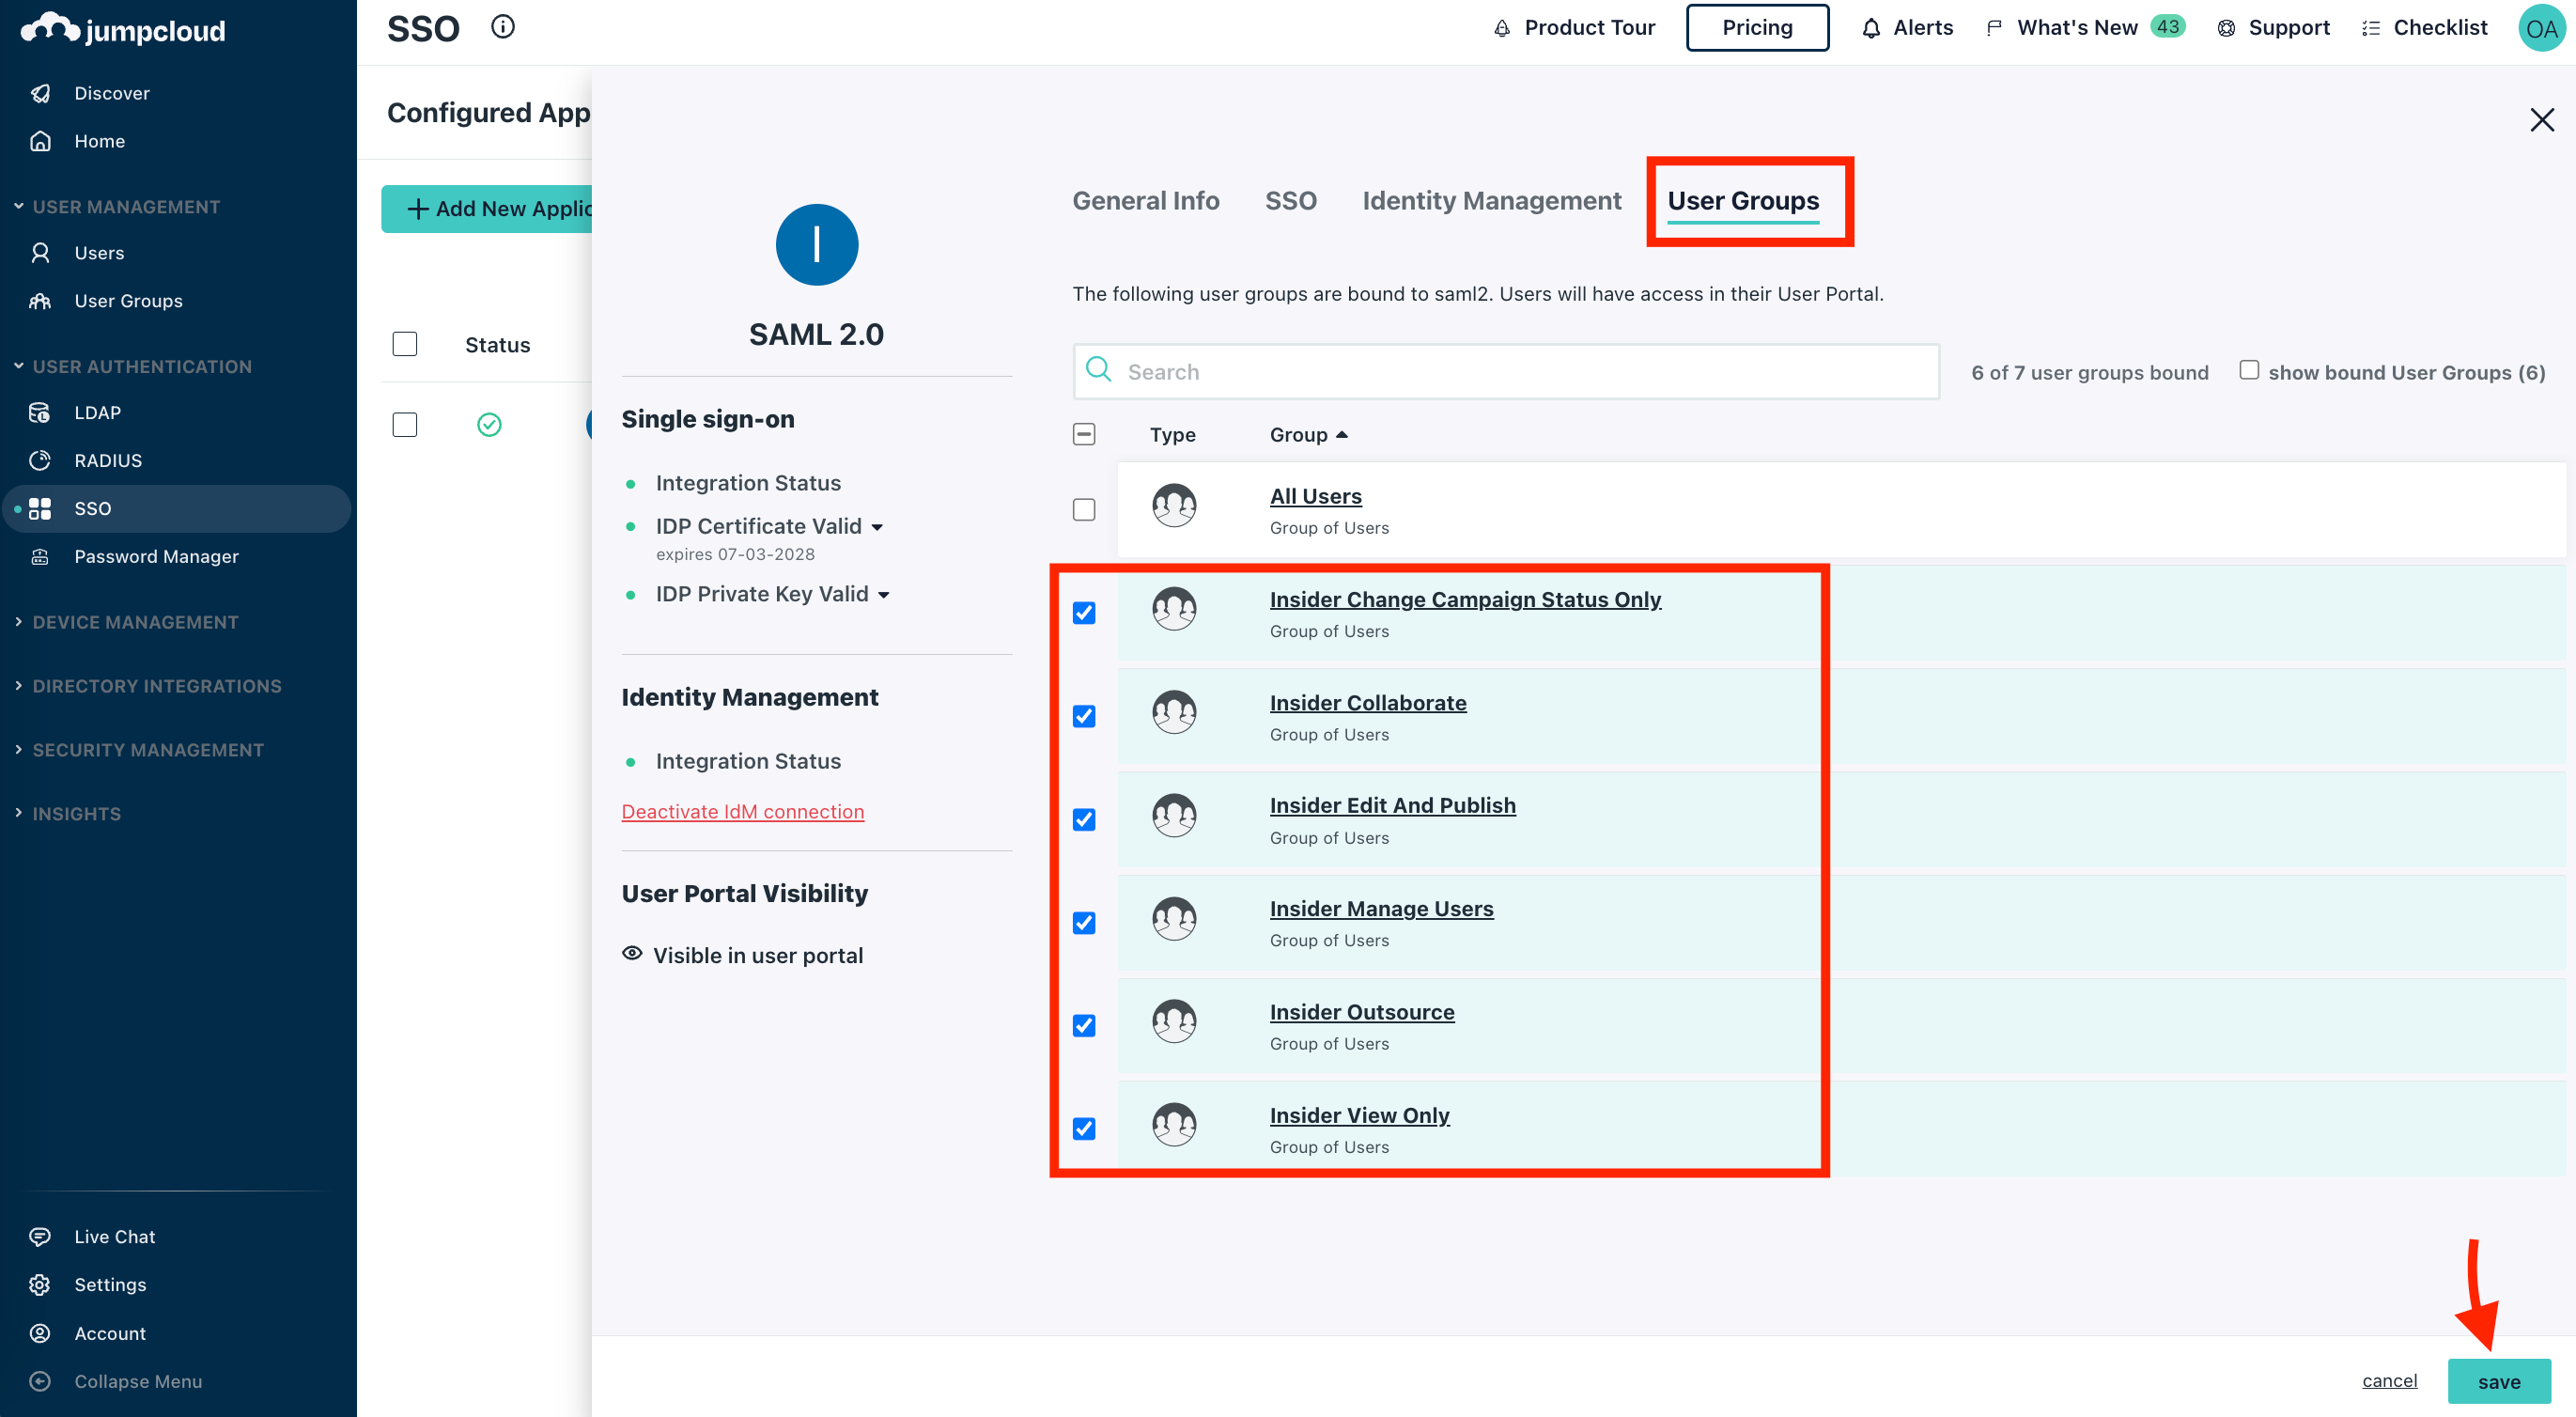
Once you save the selected groups, the provisioning will start, and each user in the selected groups will be created or updated on the Inone panel.