You can create Eureka campaigns for target platforms, such as desktop or mobile web. In line with your target platform selection, the campaign design of templates changes.
Requirements
Complete the Eureka Channel Setup before starting to use Insider One's Eureka product.
To create an Eureka campaign with ease,
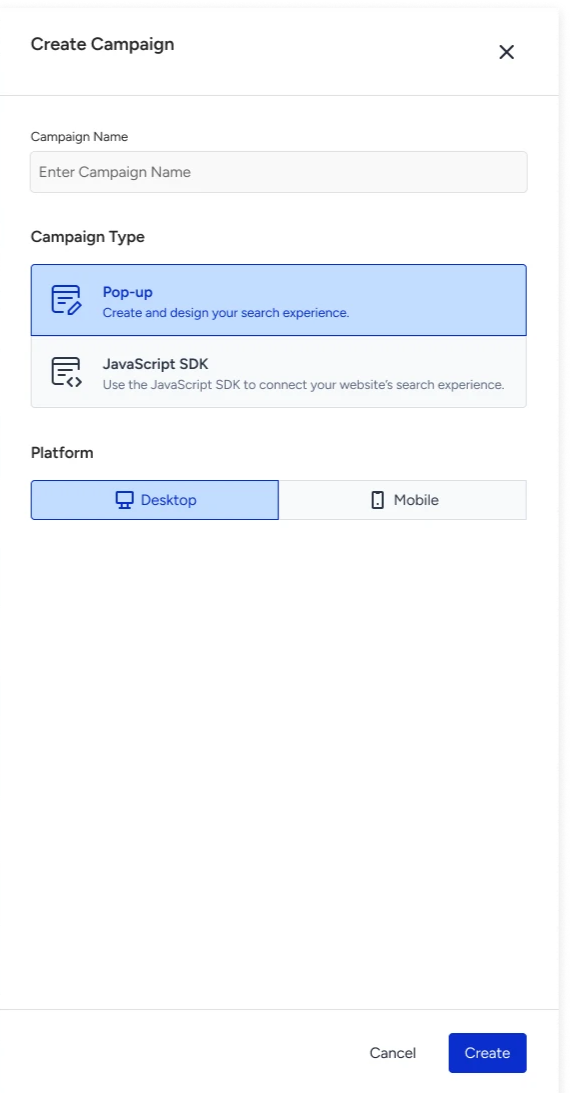
Navigate to Campaigns > Search and Merchandising > Eureka.
Click on the Create button on the listing page. Name your campaign, select your campaign type and target platform, and click on the Create button to proceed.
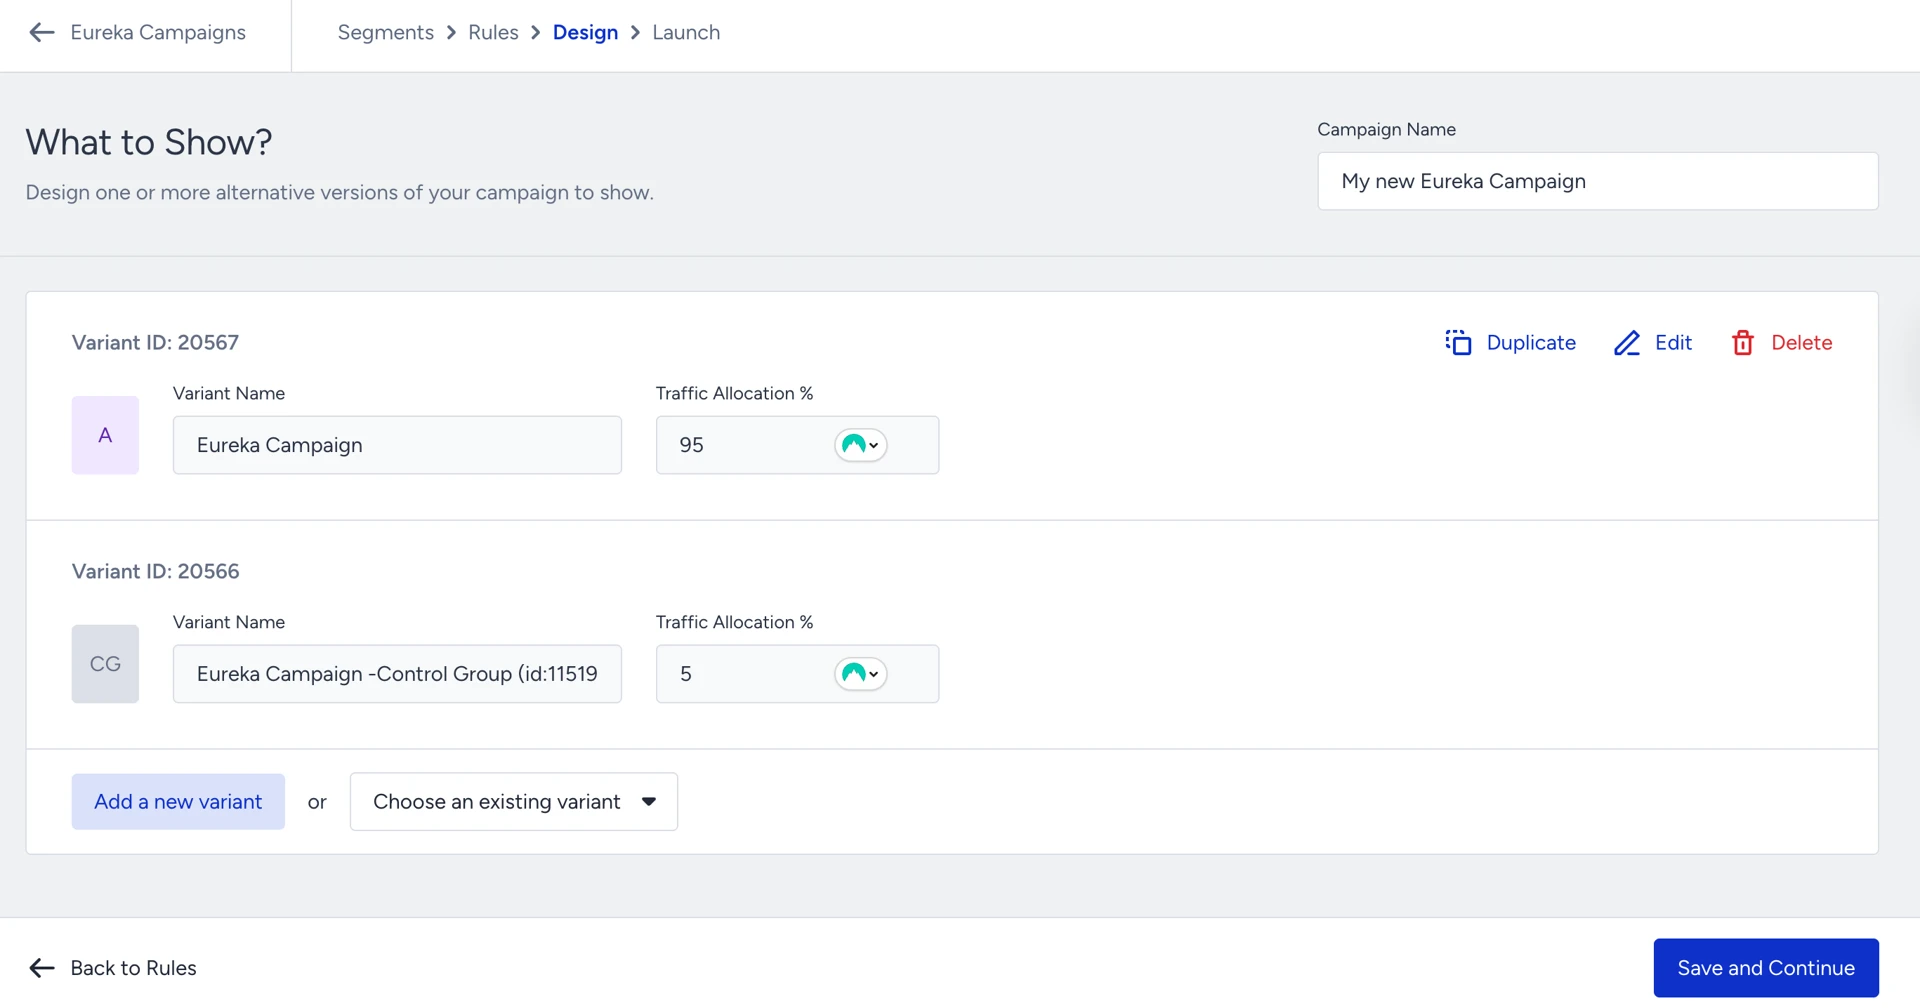
On the Design step of your campaign, you can create and configure A/B test variations for your campaign. Click on the Add a new variant button to start your new experience design, or Choose an existing variant to use your existing experience designs. You can refer to Customize a Eureka Campaign Template for designing your template.
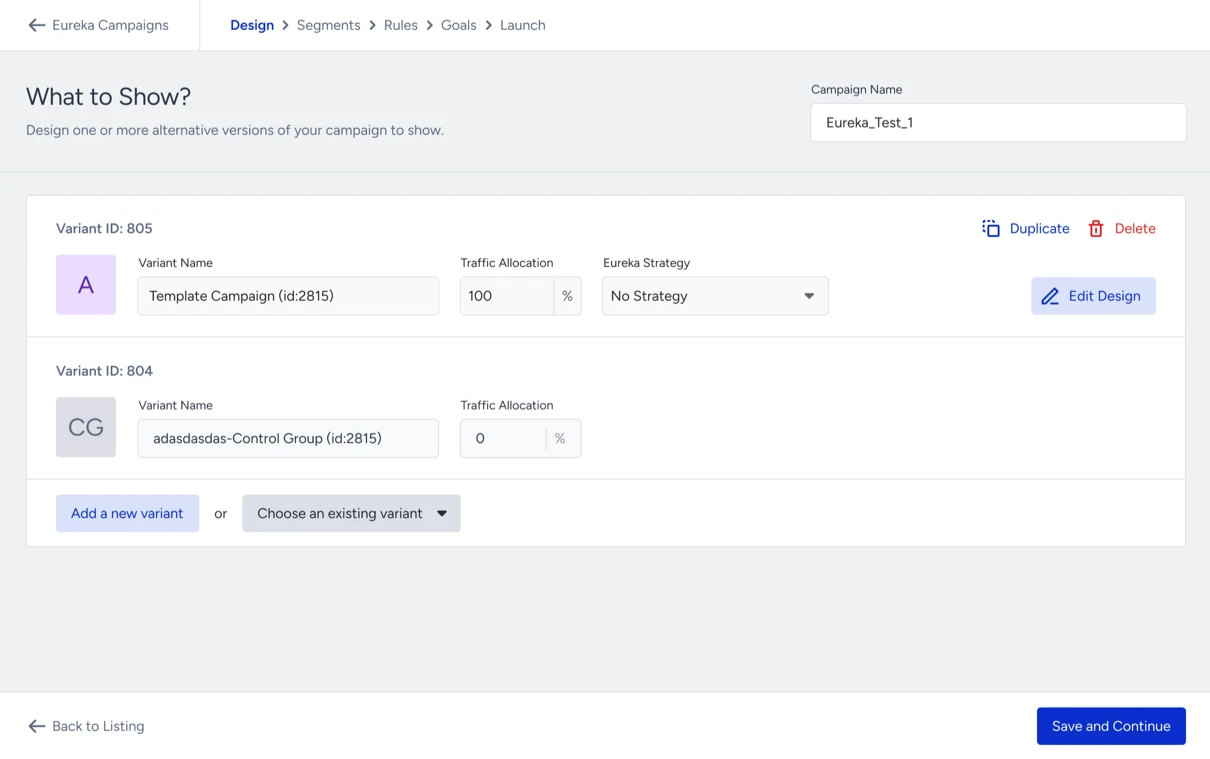
Traffic allocation input boxes allow you to adjust the ratios of your variants.
If Eureka Strategies are enabled for your account, you can assign a Eureka Strategy to a variant. If Eureka Strategies aren’t enabled, you can’t assign a strategy to a variant.
After finalizing the Design step of your campaign, click Save and Continue to proceed.
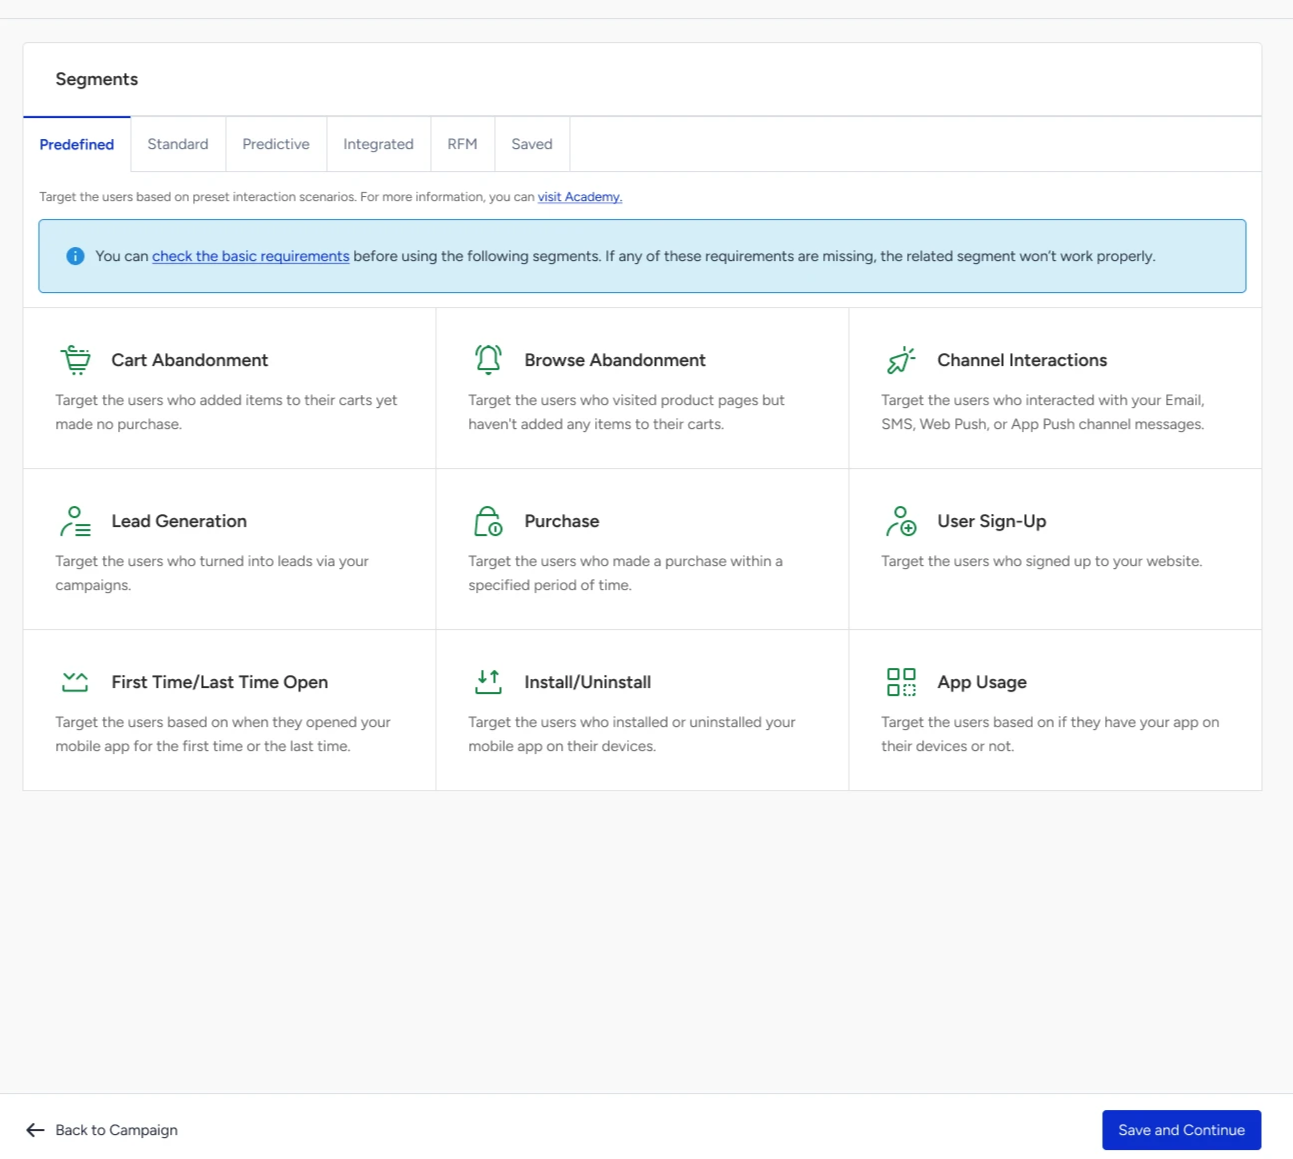
Adjust your target audience using standard or predictive audiences in the Segments step. Segmentation options include Predefined, Standard, Predictive, Integrated, RFM, and Saved segments. Select a segmentation option to target a relevant audience for your campaign, then click Save and Continue to proceed.
Set rules to start showing your campaign on the Rules step.

You can also use Insider One's advanced rule logic builder to combine your rules to tailor experiences. You can enable/disable your campaigns to be triggered from other campaigns. In addition, you can also specify the Display Time of your campaign. Click Save and Continue to proceed.

In the Launch step of your campaign, configure your language selection, activation time, display settings, and advanced settings as applicable.
You need to select the correct language to display your campaign on your website. The language should be the one defined in the system rules.

When you launch a JavaScript SDK Campaign, you should add the JavaScript SDK snippets to connect your website’s search or category pages after launching your campaign for it to run properly. Refer to the Eureka JavaScript SDK Campaign Implementation Guide to add JavaScript SDK snippets to connect your website’s search or category pages.

When you finalize your launch settings, click the Launch button to run your campaign. We highly recommend testing your campaign before going live.
Don’t forget to generate the InOne panel to apply changes to your website.
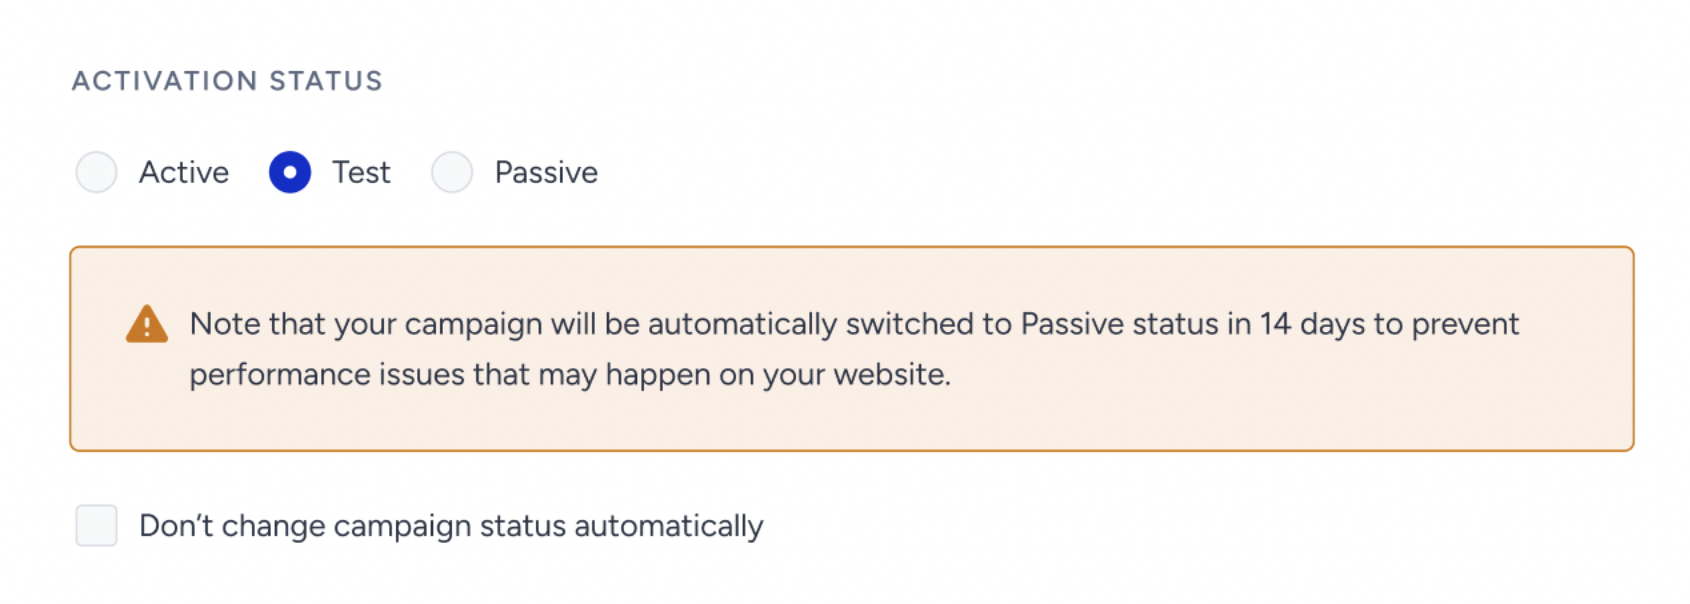
As of February 19th, 2025, Test campaigns will be automatically deactivated after 14 days if their status is not updated. To prevent this, you can select the appropriate option in the Launch step.
This change applies only to newly created campaigns. Existing campaigns will not be affected.
When selecting the Test status in the Launch step, a warning message will indicate that the campaign will be deactivated in 14 days.
To disable automatic deactivation, simply check the box below the warning.
For campaigns that remain in Test status beyond 14 days, an informational message will appear in the Details Modal on the listing page.