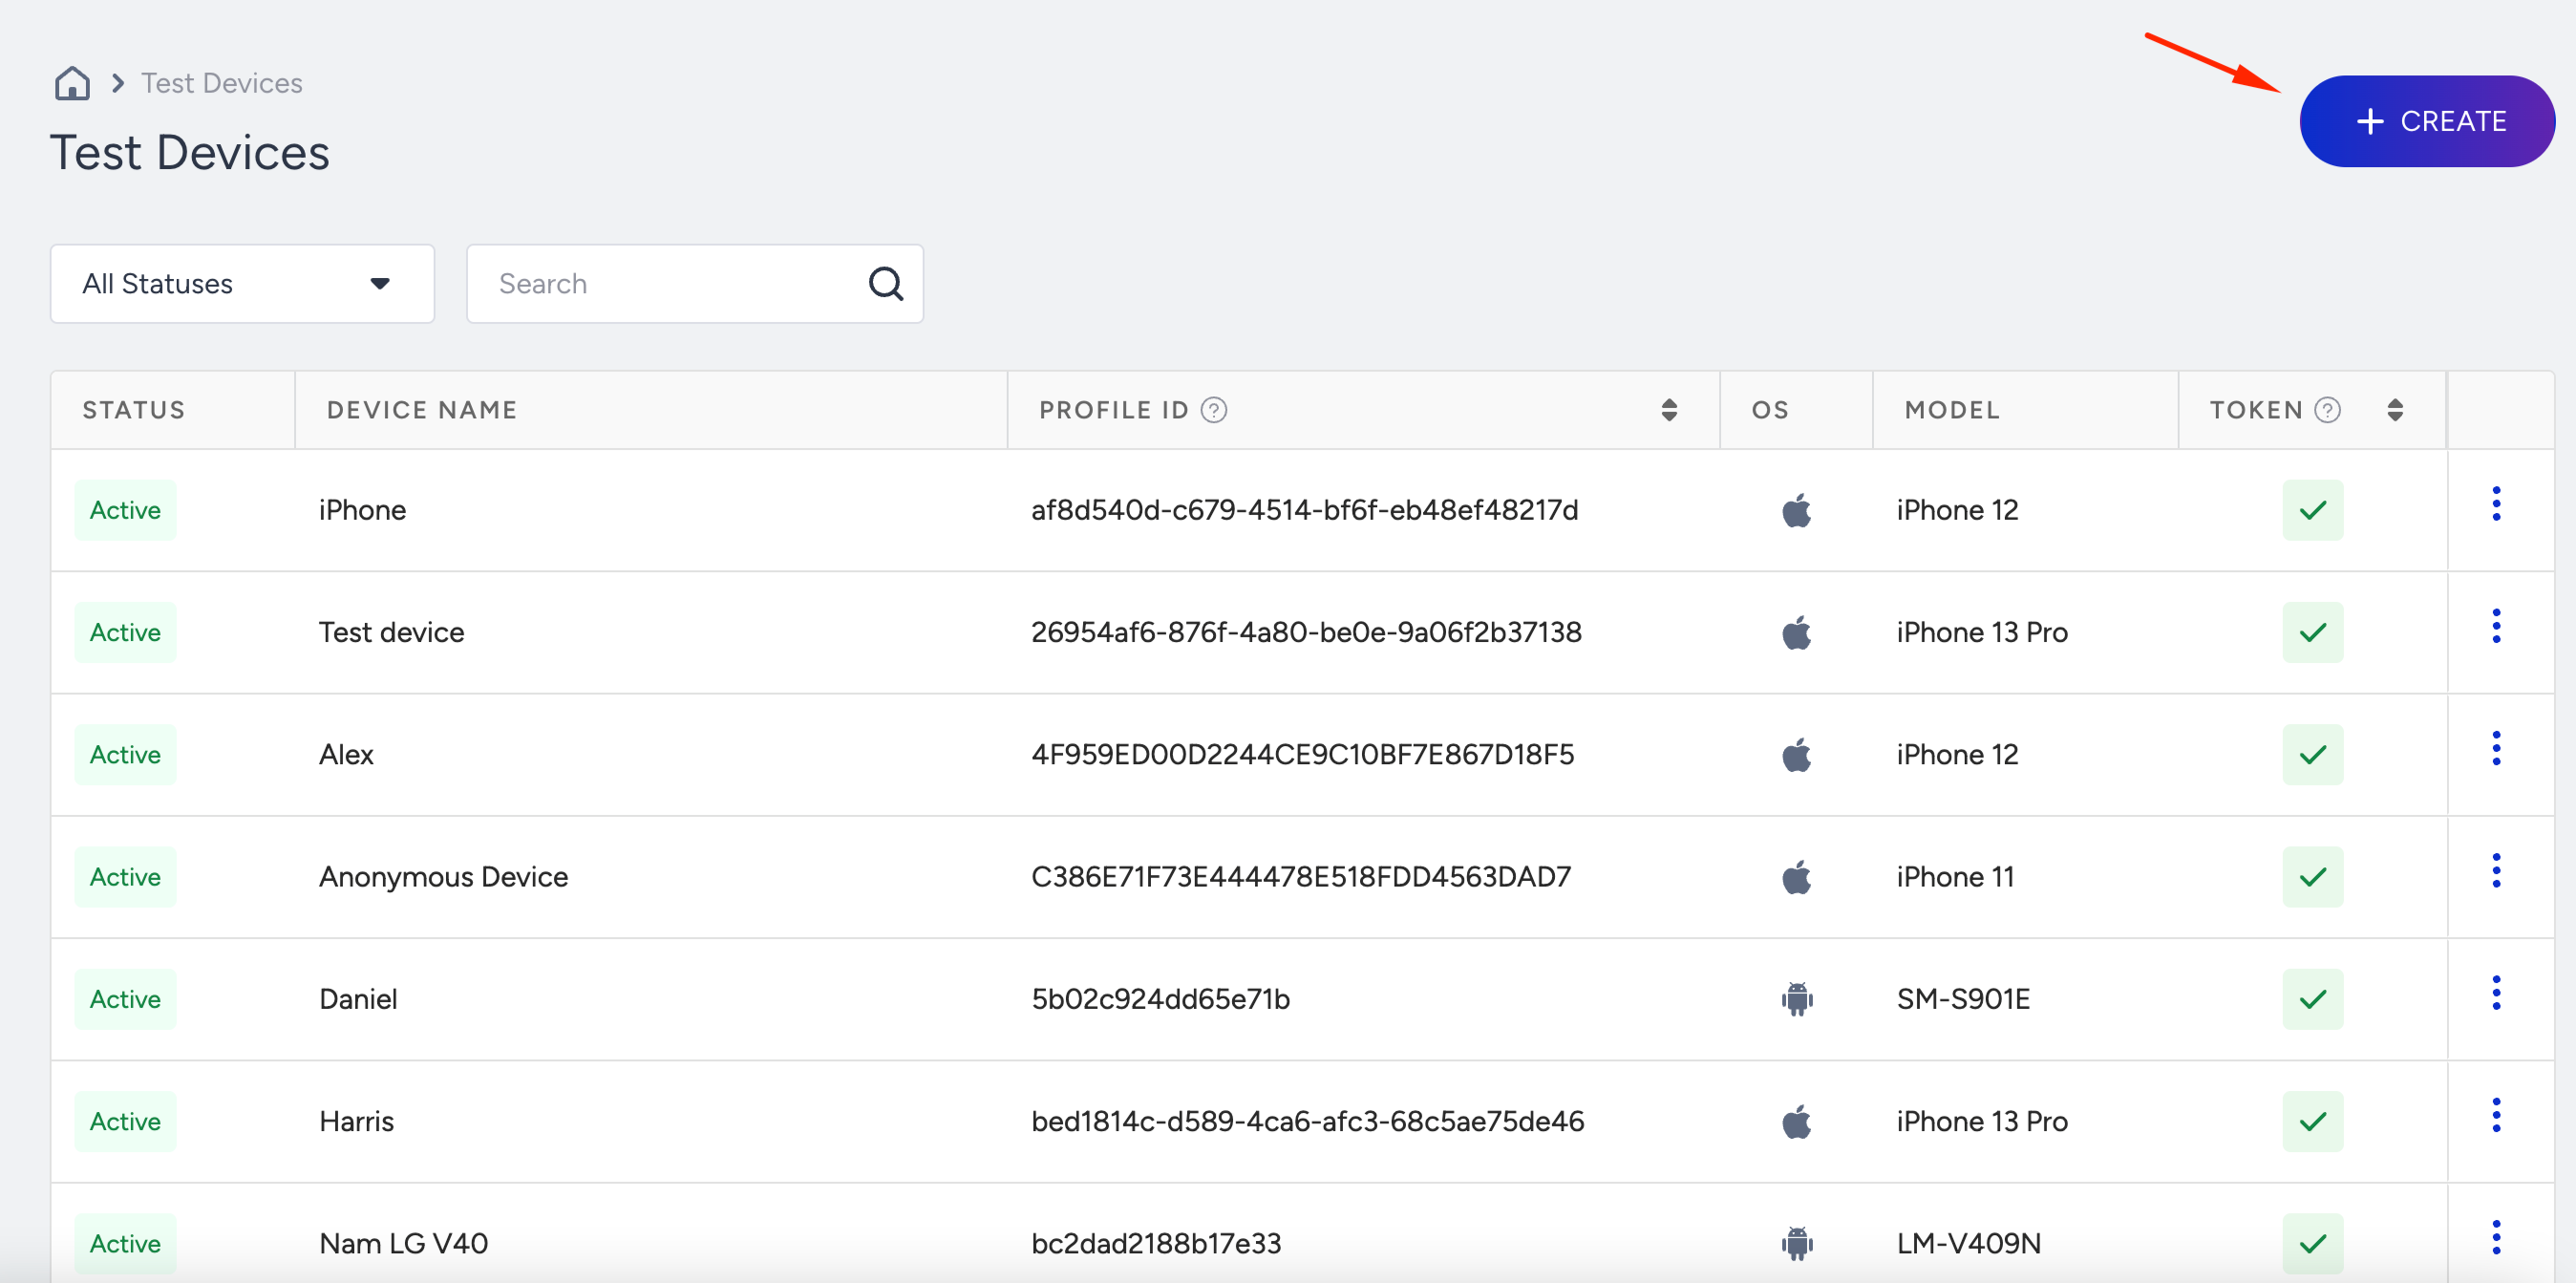
You can see all active and inactive devices added as test devices to your application under Components > Integrations > App Integrations > Test Devices.
When you send a test push or a test InApp, all active devices in this list will receive your message. If you do not want to send a test message to a certain device, you can deactivate it and reactivate it later.
This guide explains the following concepts:
You can add a test device following these steps:
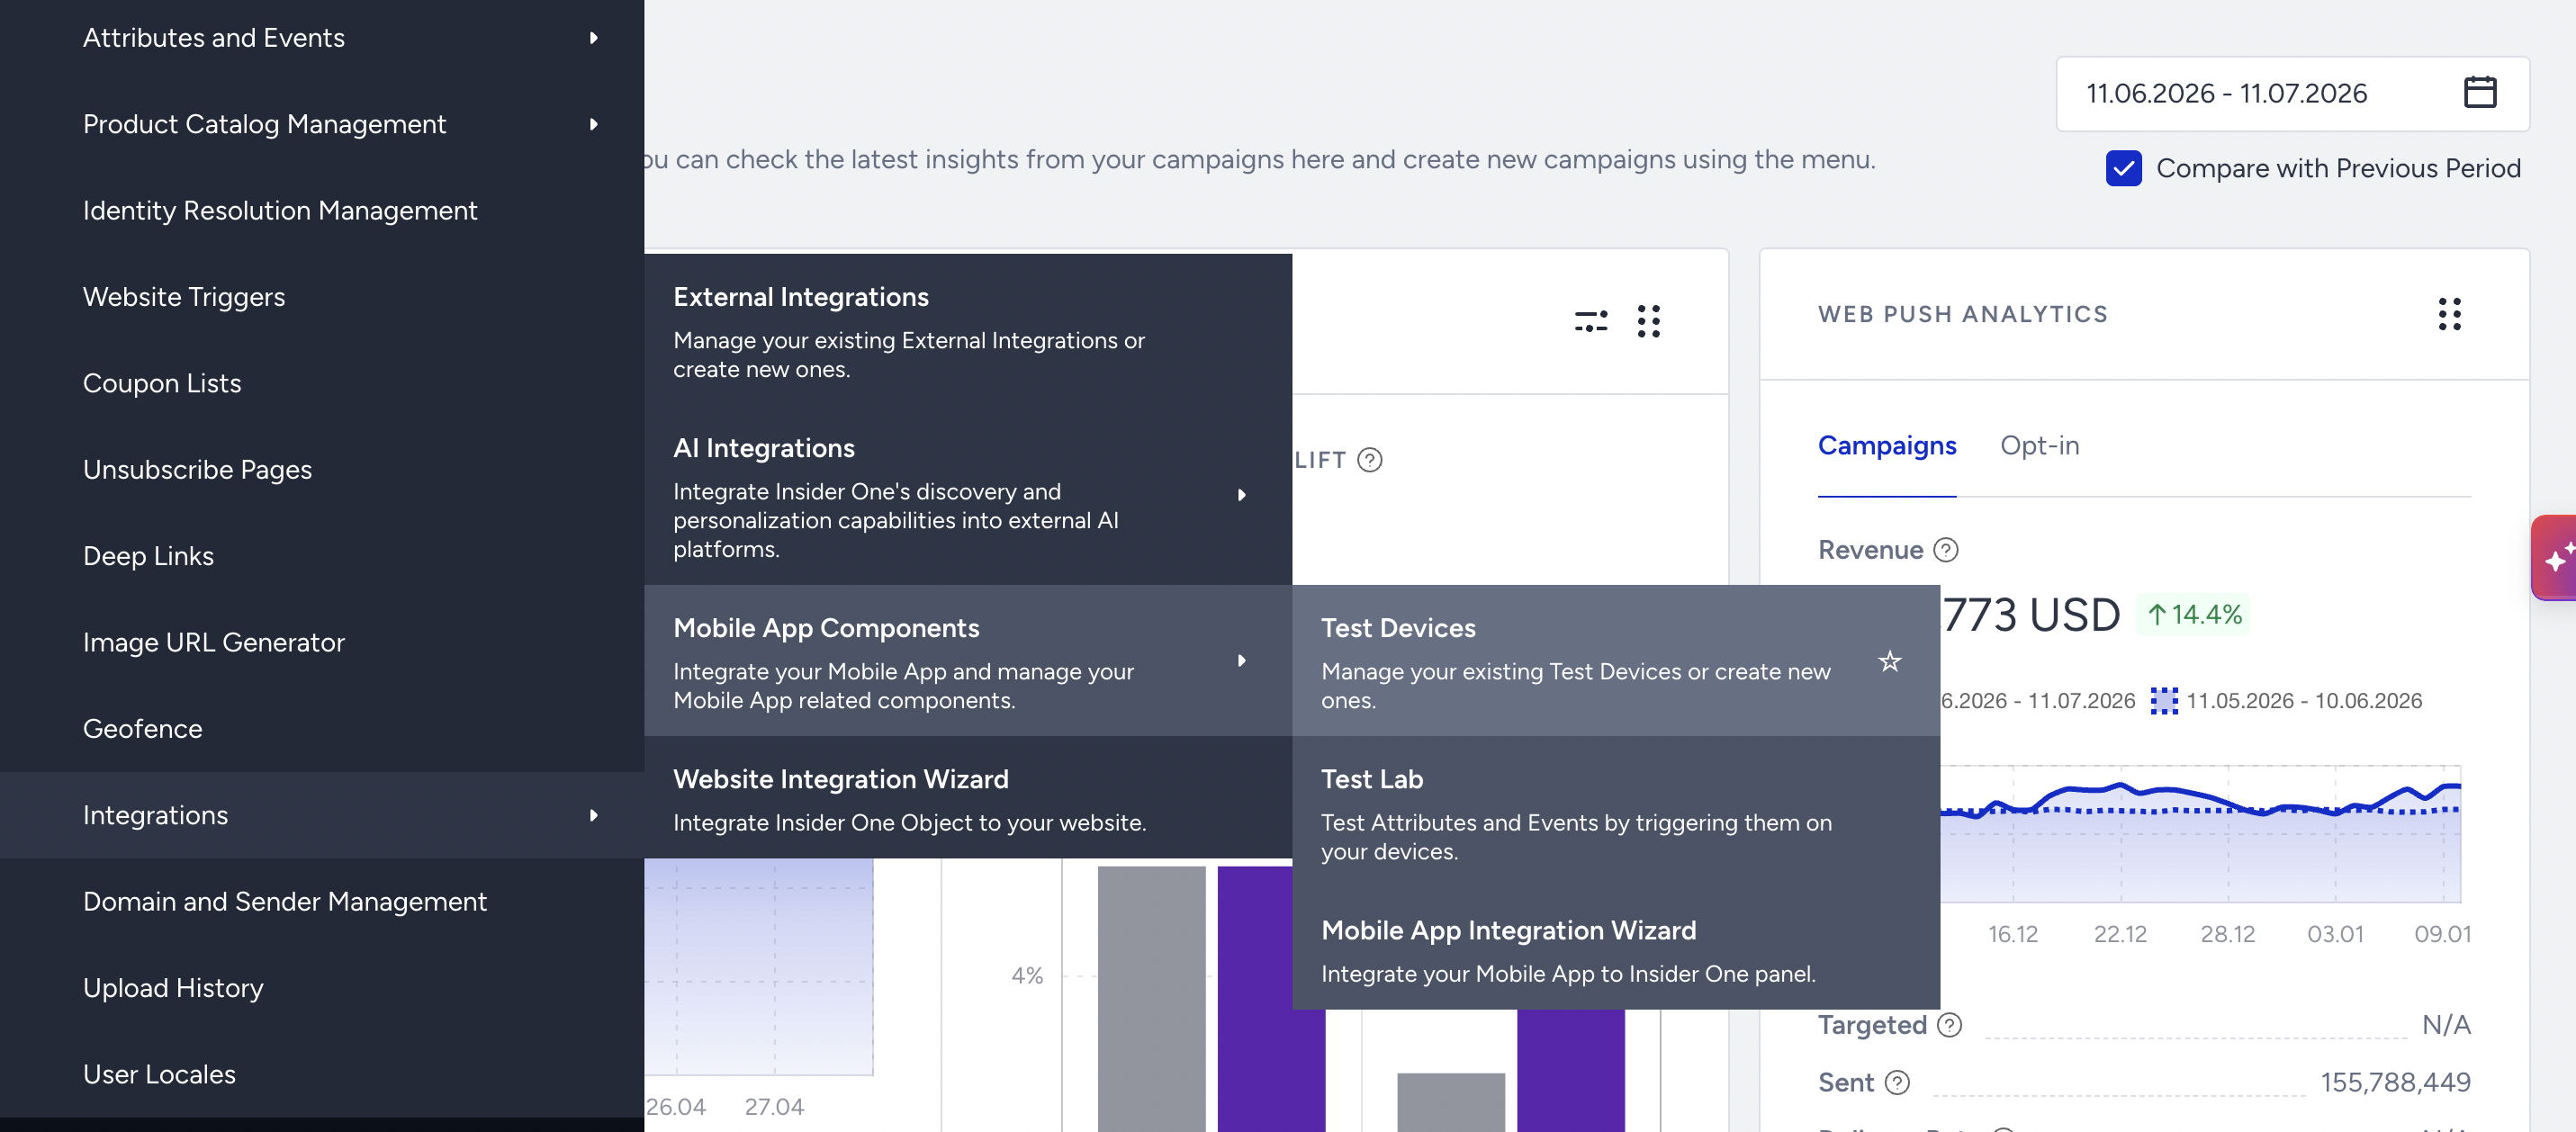
1. Go to Components > Integrations > Mobile App Components > Test Devices.
2. Click the Create button to add a test device.
3. You can add your device using a User Identifier, Dynamic Link, or QR Code.
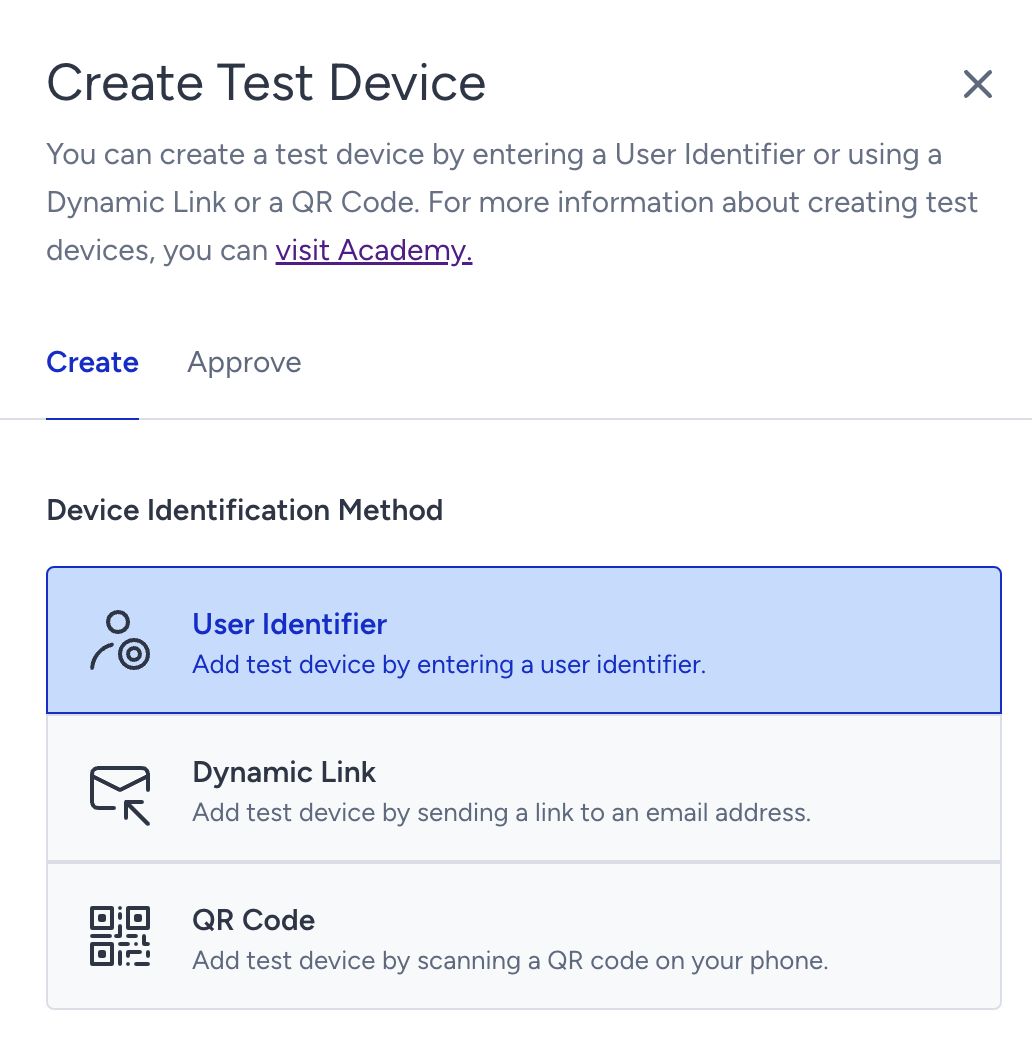
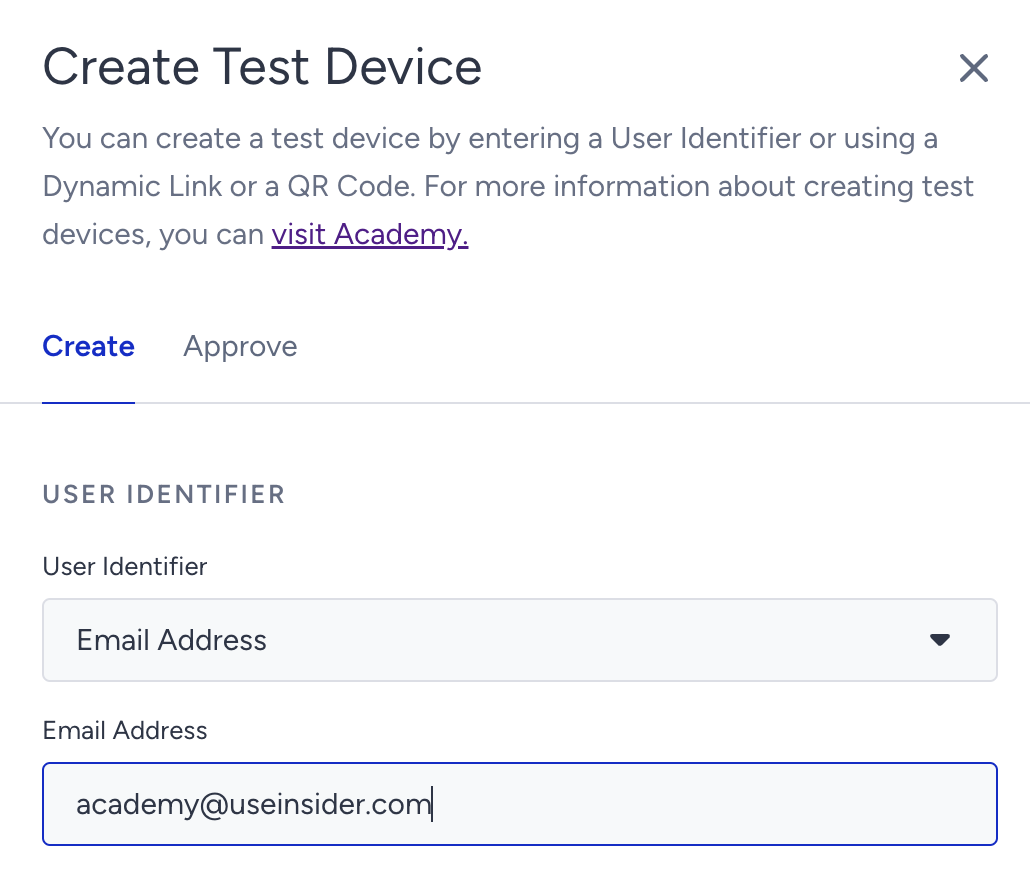
User Identifier
User identifier is an attribute assigned as the primary key to a unique device ID (UDID), used to identify the user behind that device. You can use UUID (unique user ID), phone number, or email address as your identifiers.
1. Select a user identifier for your test device.
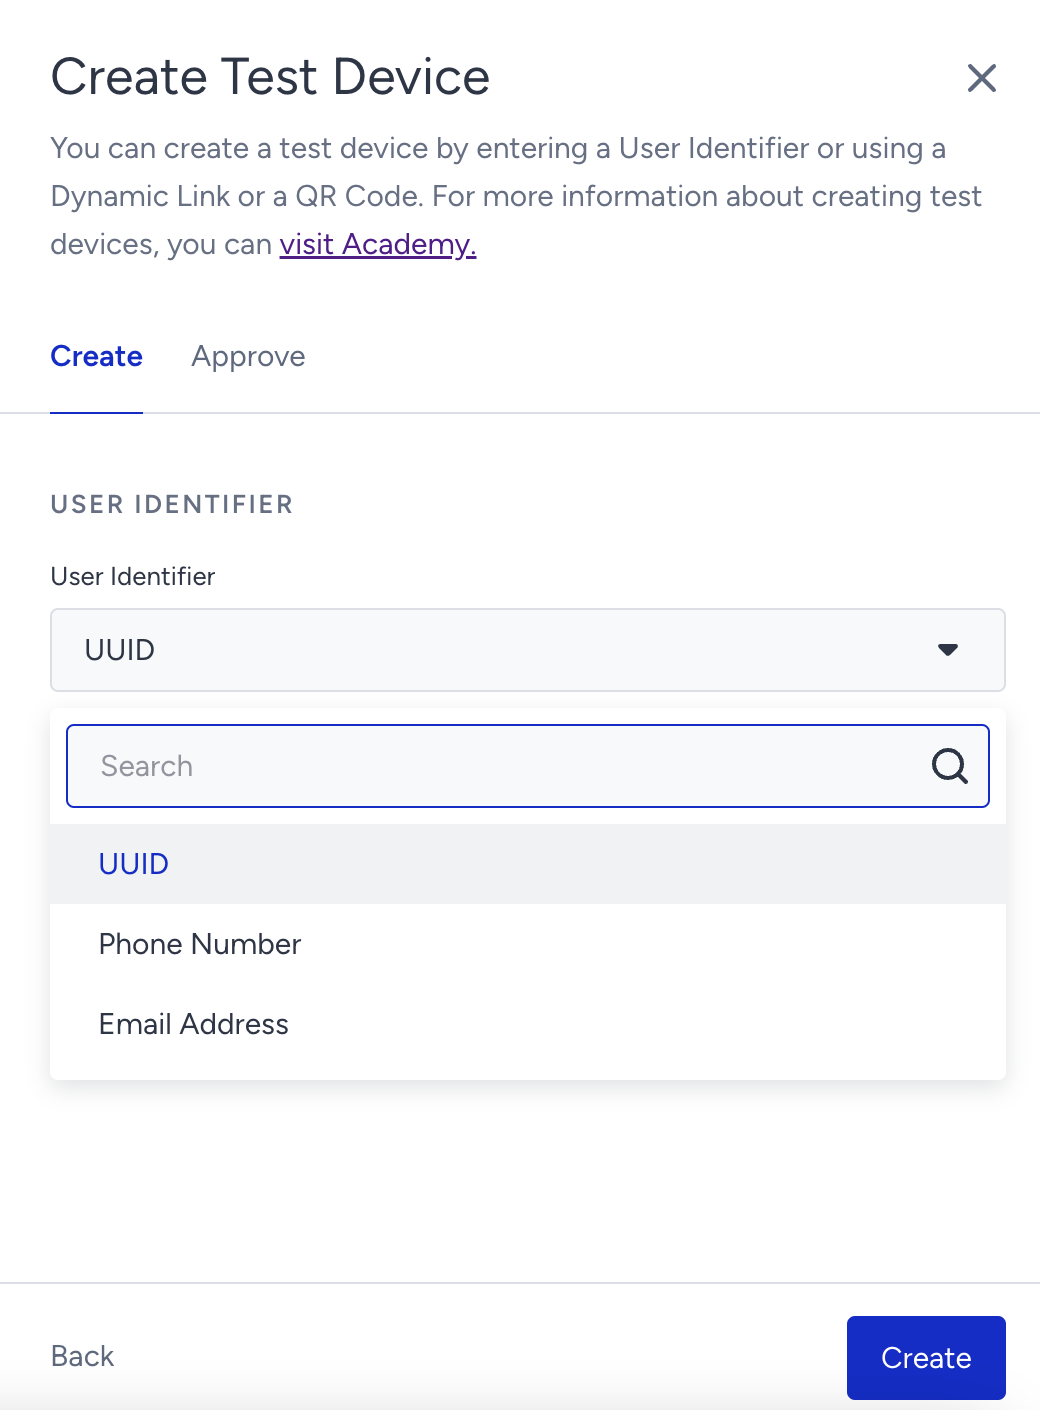
2. Add the value for your identifier, and click the Create button.
3. Go to Approve tab, enter a name for your test device, and click the Approve button.
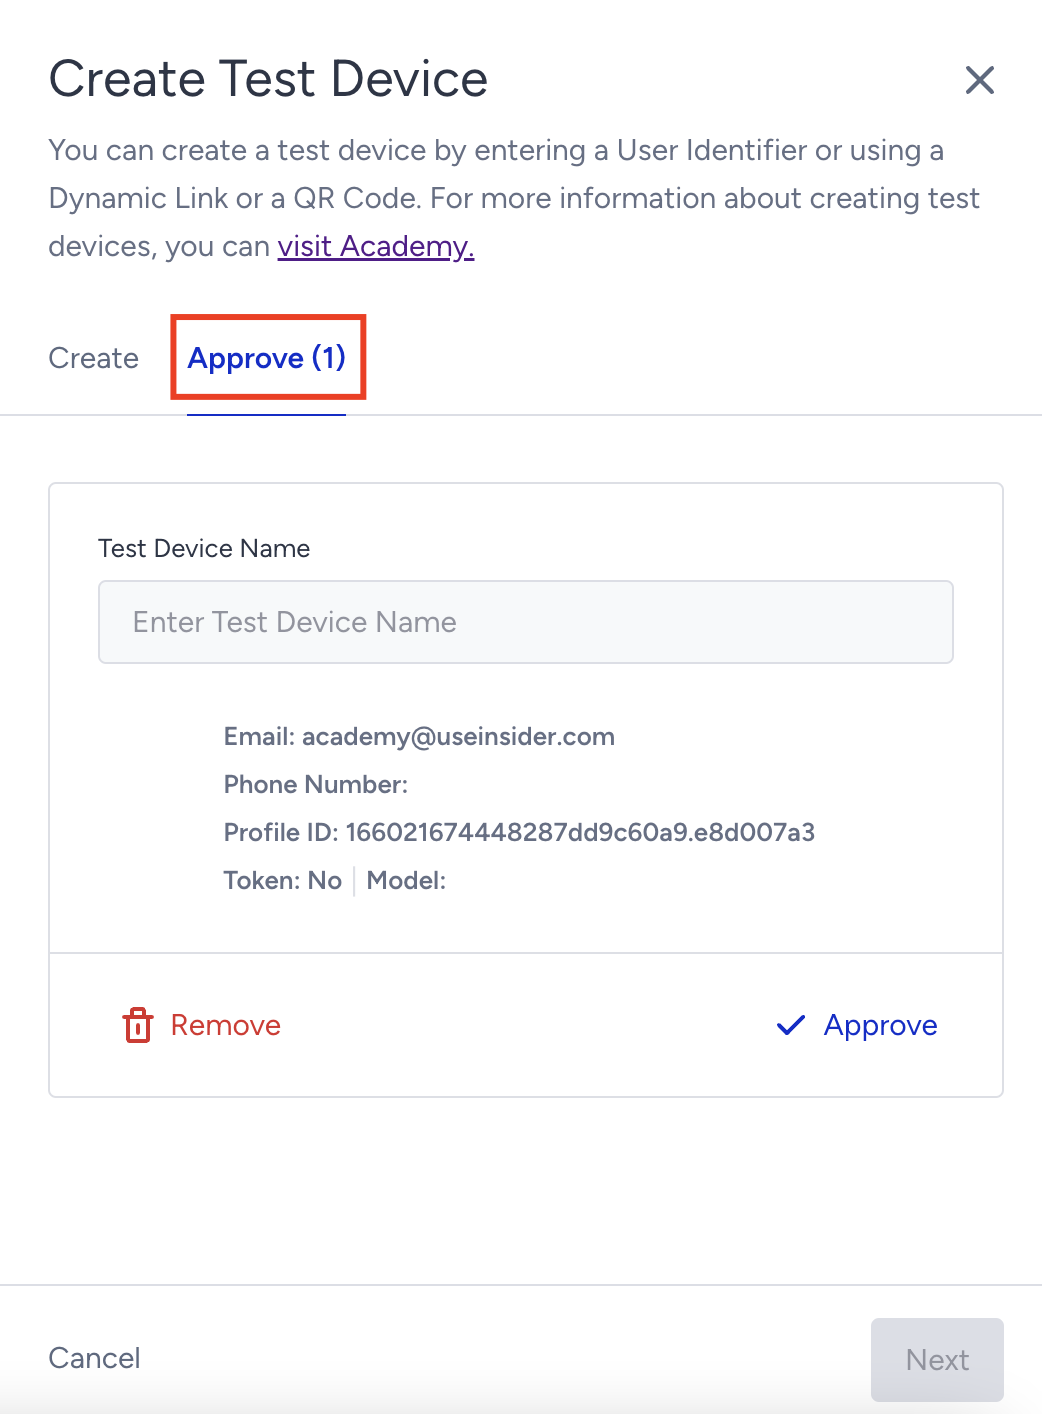
Once approved, your test device will be listed on the Test Devices list.
Dynamic Link
You can send a dynamic link to your email to add your device as a test device.
1. Add the email address to which you want to send the dynamic link.
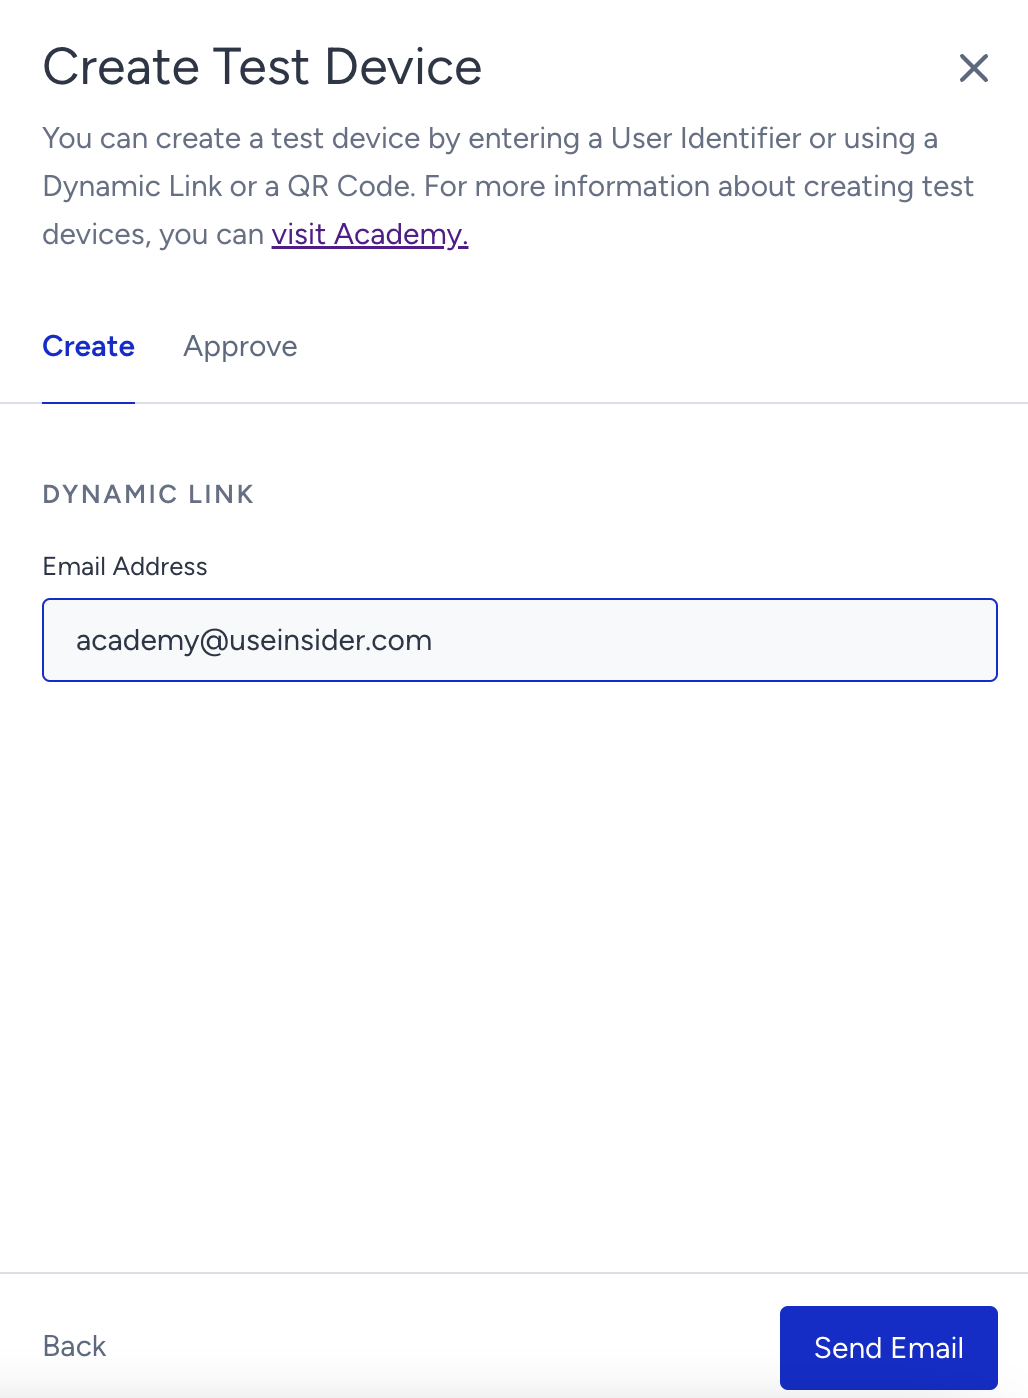
2. Click the Send Email button to send the link to the email address.
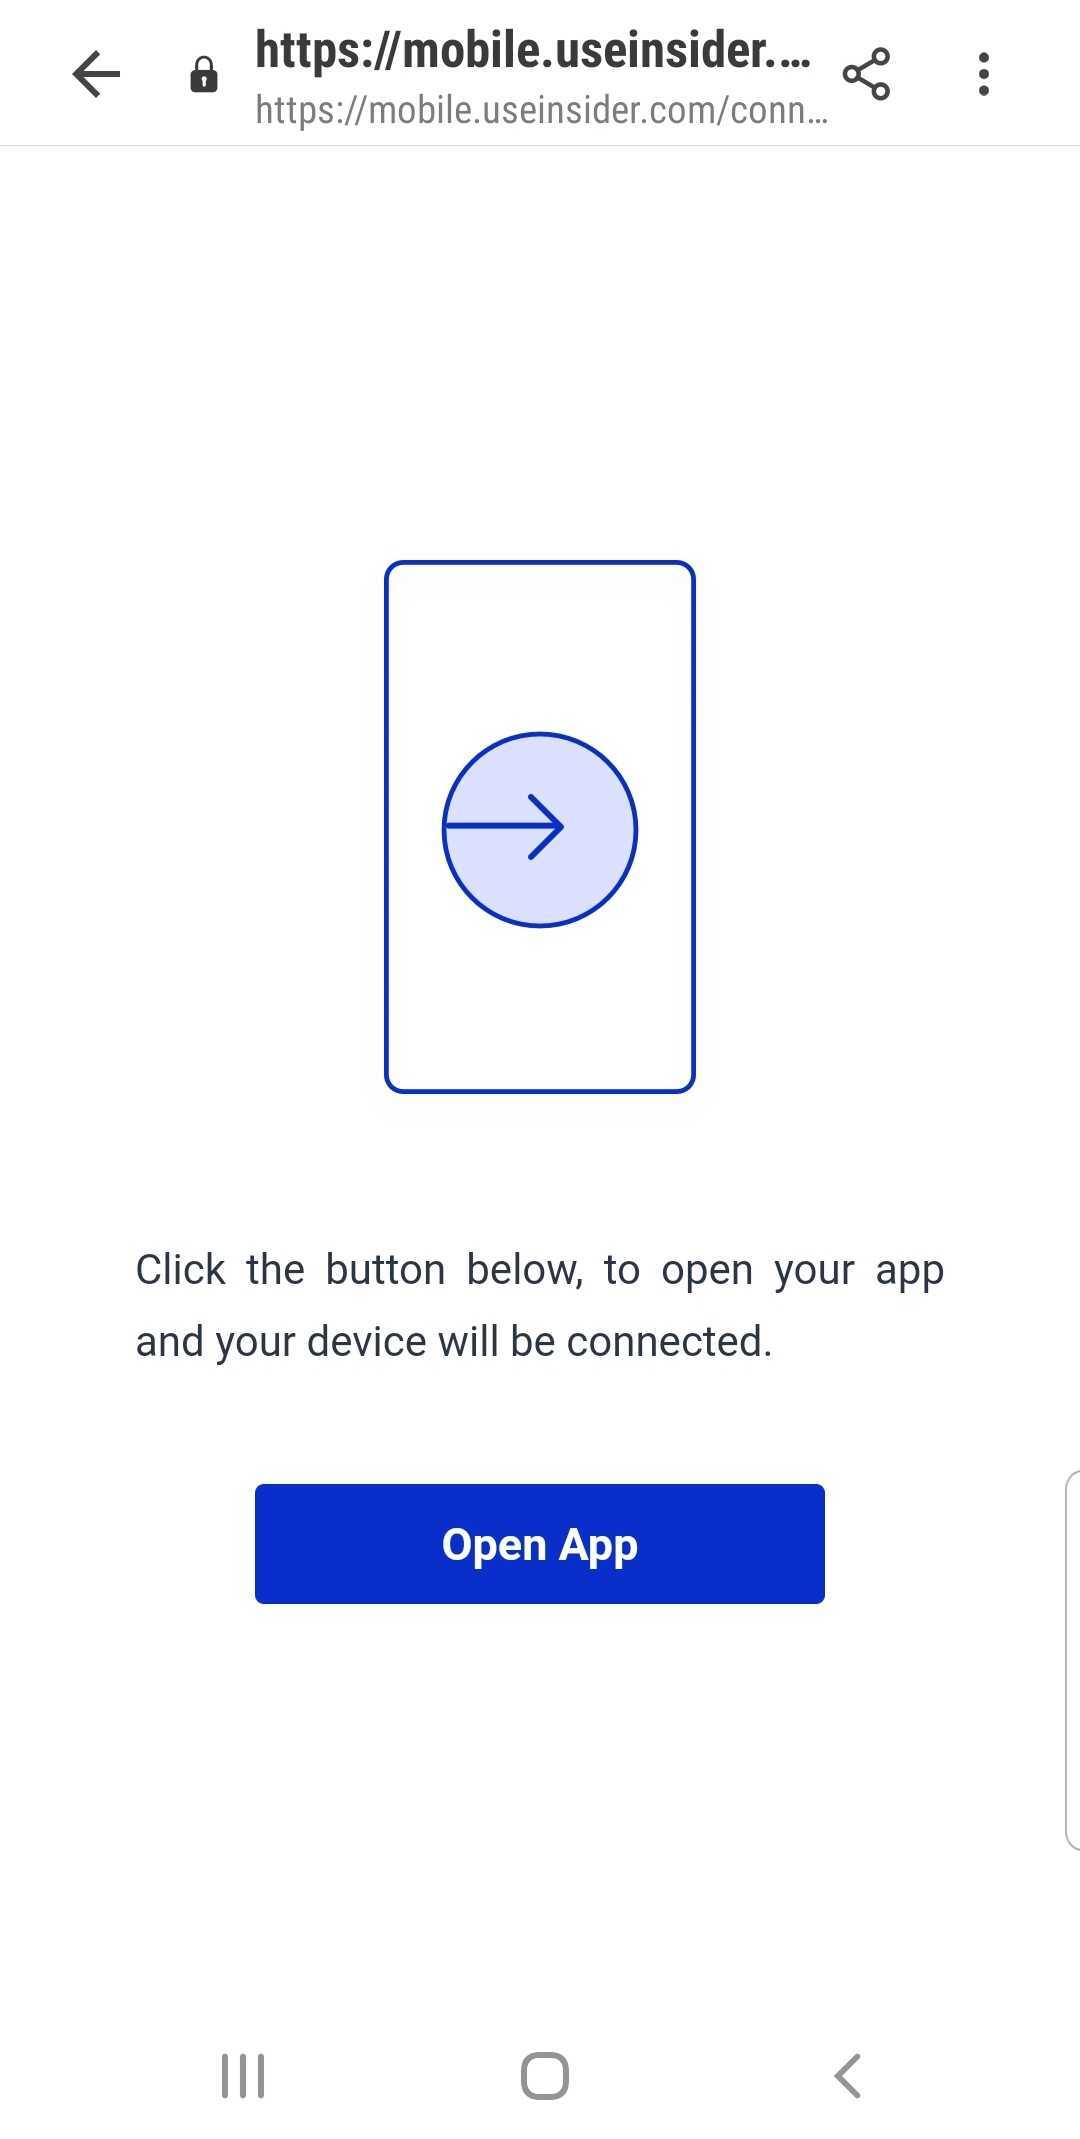
3. Open the email in the device that you are adding as a test device.
4. Click Connect This Device to add your device as a test device.
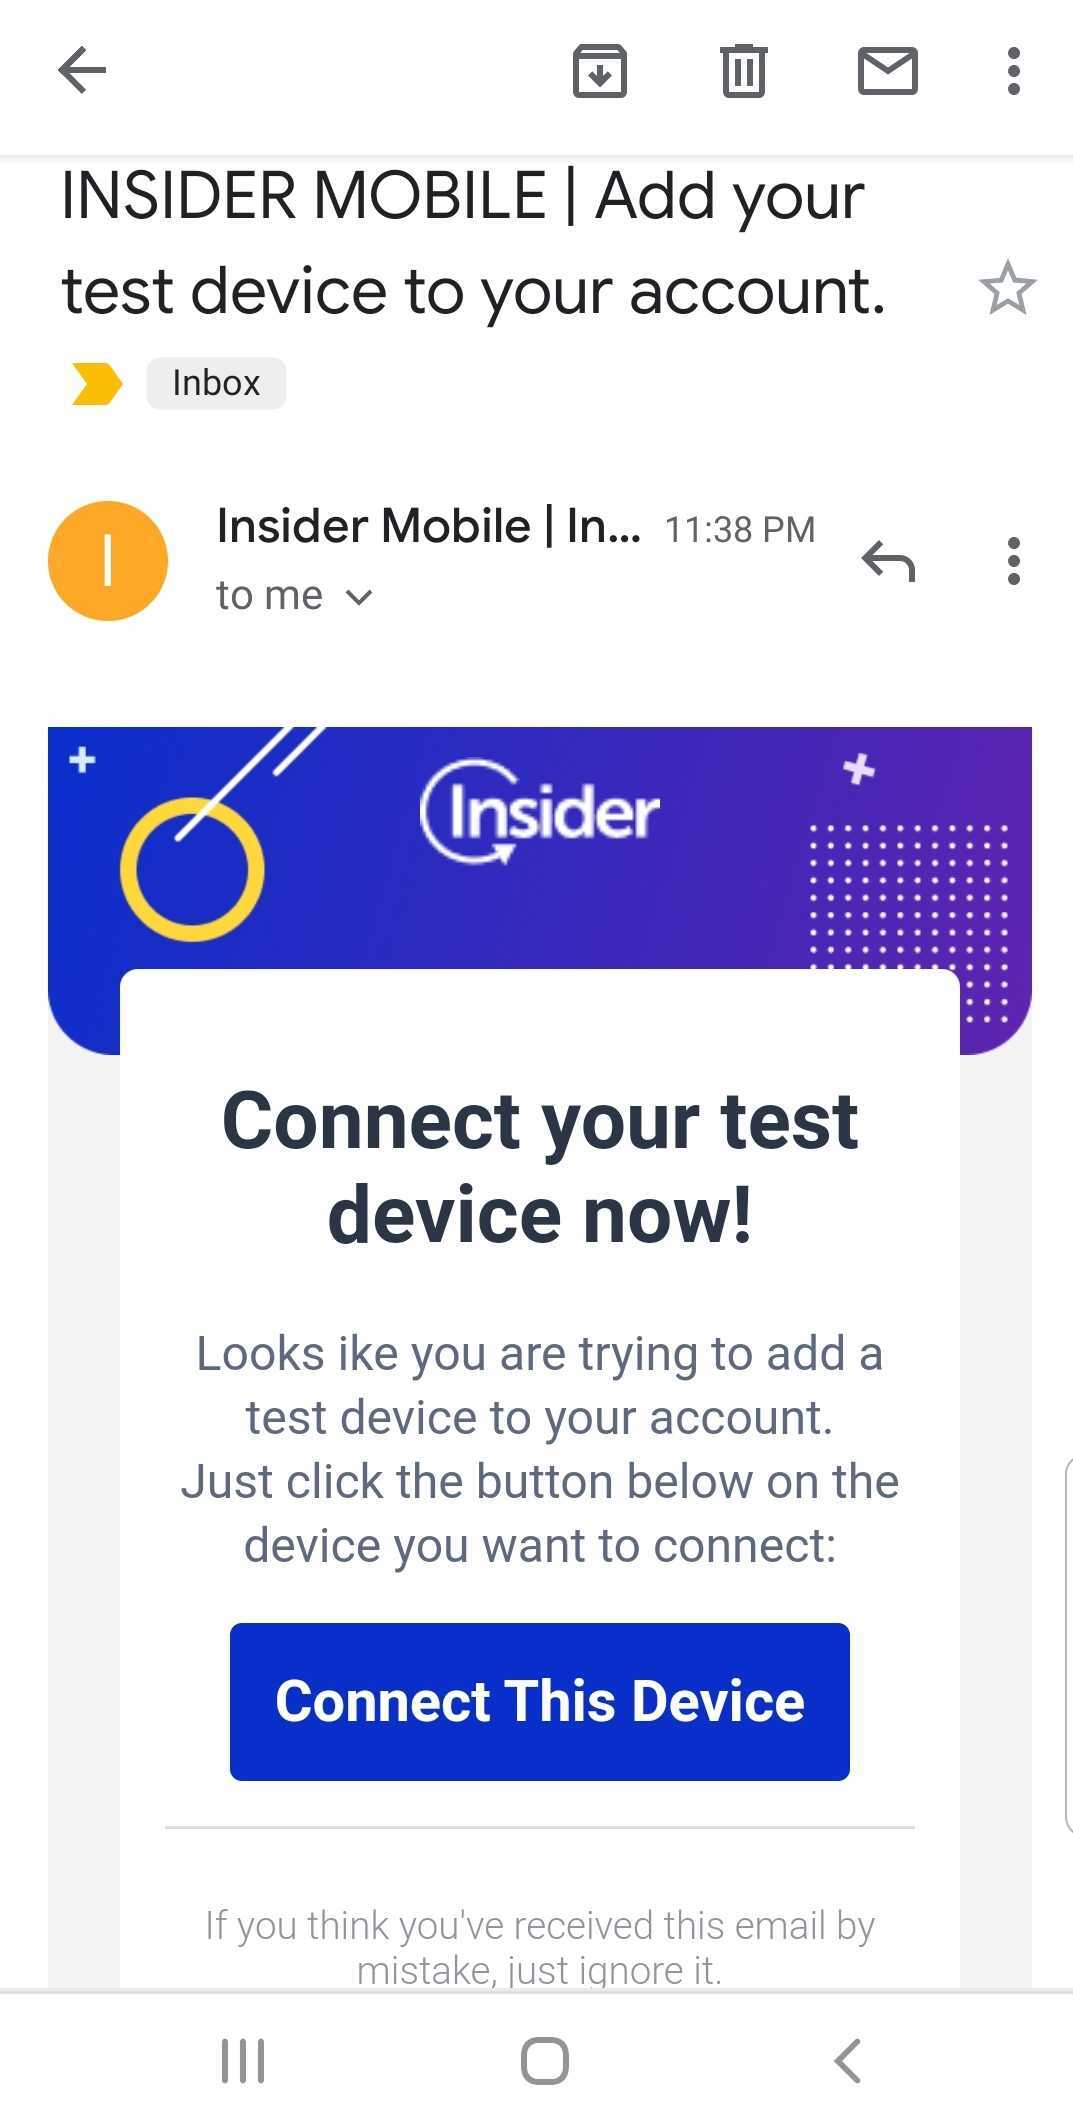
5. Click Open App in the page you are redirected to.
QR Code
1. Scan the QR code on the panel with the device you are adding as a test device.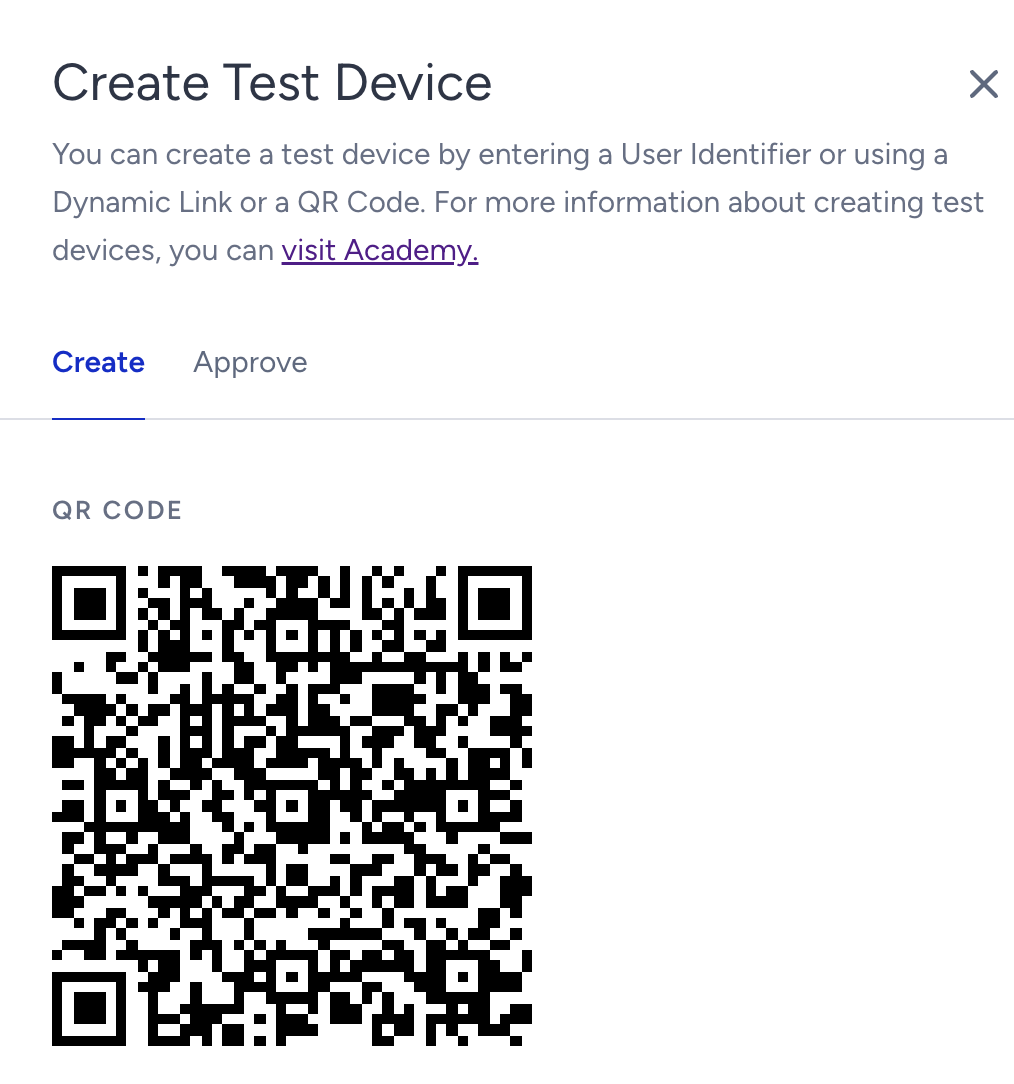
2. Click the link to add your device as a test device.
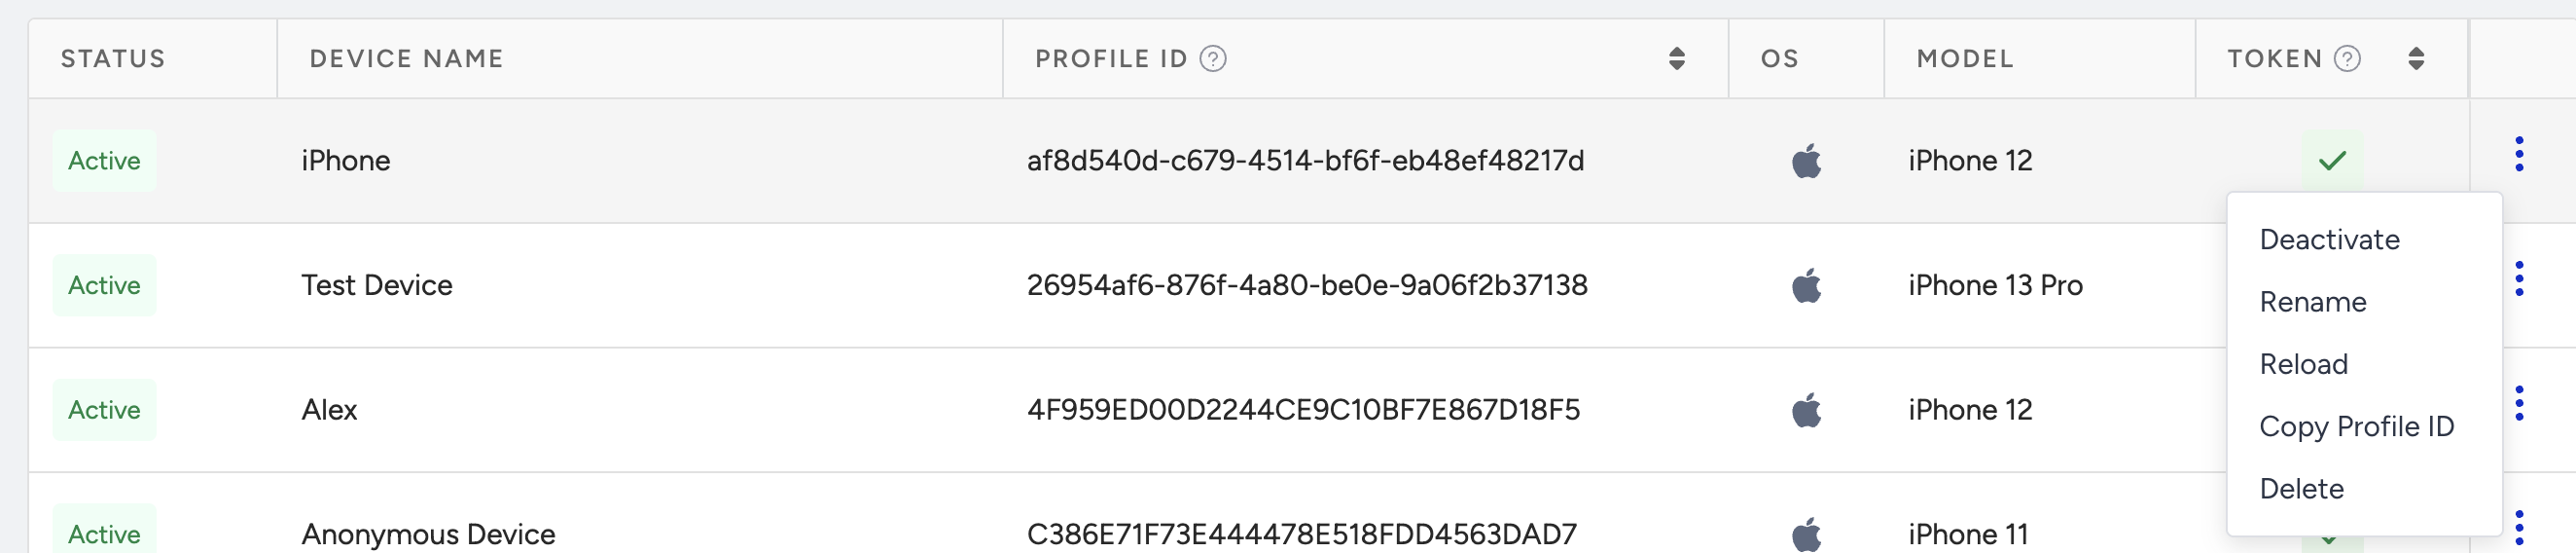
Once you add your test device, you will see it listed on the Test Devices with the following information:
- Status: Indicates if the test device is Active, Passive, or Merged.
- Active: This is an active user device. This device will be eligible to reach whenever you send a test push or test link via an inapp.
- Passive: This is a passive user device disabled by a panel user and cannot be reached by testing tools on app push and template store.
- Merged: These are the devices that are merged with another user. You can see which user gets this device under the profile ID. This means it is not reachable anymore via this entity and is merged with another entity on the test devices. It can only be deleted and cannot be activated or deactivated.
- Device Name: Displays the name you enter for your test device.
- Profile ID: Displays the profile ID of the device.
- OS (Operating System): Indicates if the test device runs on iOS or Android.
- Model: Model of the device. Android devices sometimes get special codes that are hard to recognize. If you can't find your model number, you can search the model name using your preferred search engine.
- Token: A unique key for the app-device combination issued by the Apple or Google push notification gateways.
If the test device is not listed after scanning the QR code, the respective device might have been already added as a test device. To understand if this device is previously added as a test device, wait for at least 30 seconds after scanning the QR code and reload the page. If the device is still not visible on the list, go to Components > Integrations > App Integrations > Test Devices to remove the test devices of the same device model and try again.
Remove/Deactivate test devices
After adding your device as a test device, you can deactivate/activate, rename, or delete them through the menu against the respective test device.
Create test groups
You can create test groups to send your test app push notifications to a specific group of users or even individual users instead of all test users.
To create or edit your test groups, follow these steps:
1. Click the three-dot menu against the test device you want to add to your test group and click the Edit Test Groups button.
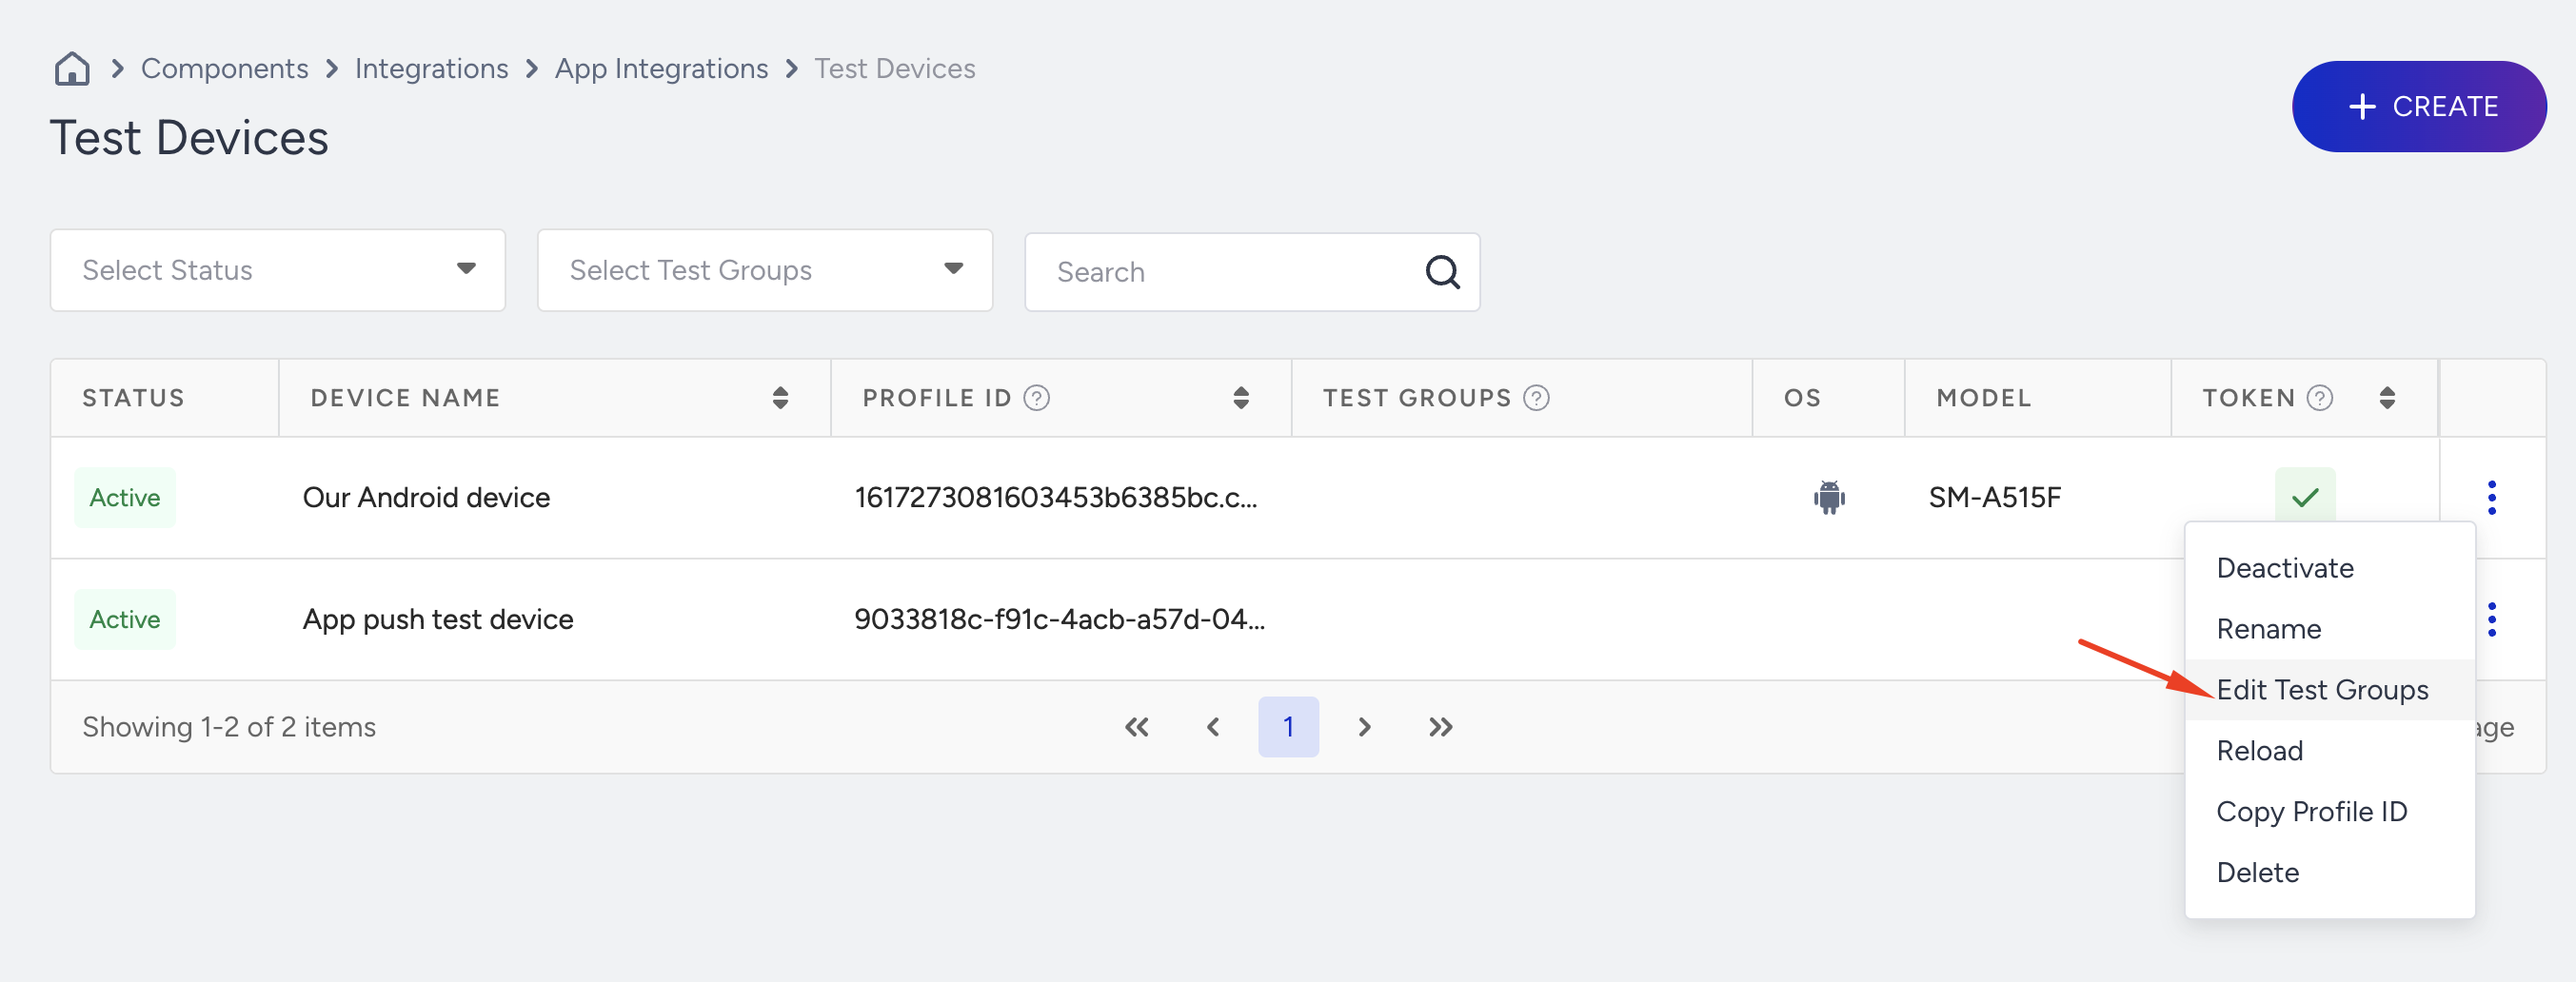
2. Choose one of the previously created test groups or click the Create Test Group button to create a new one.
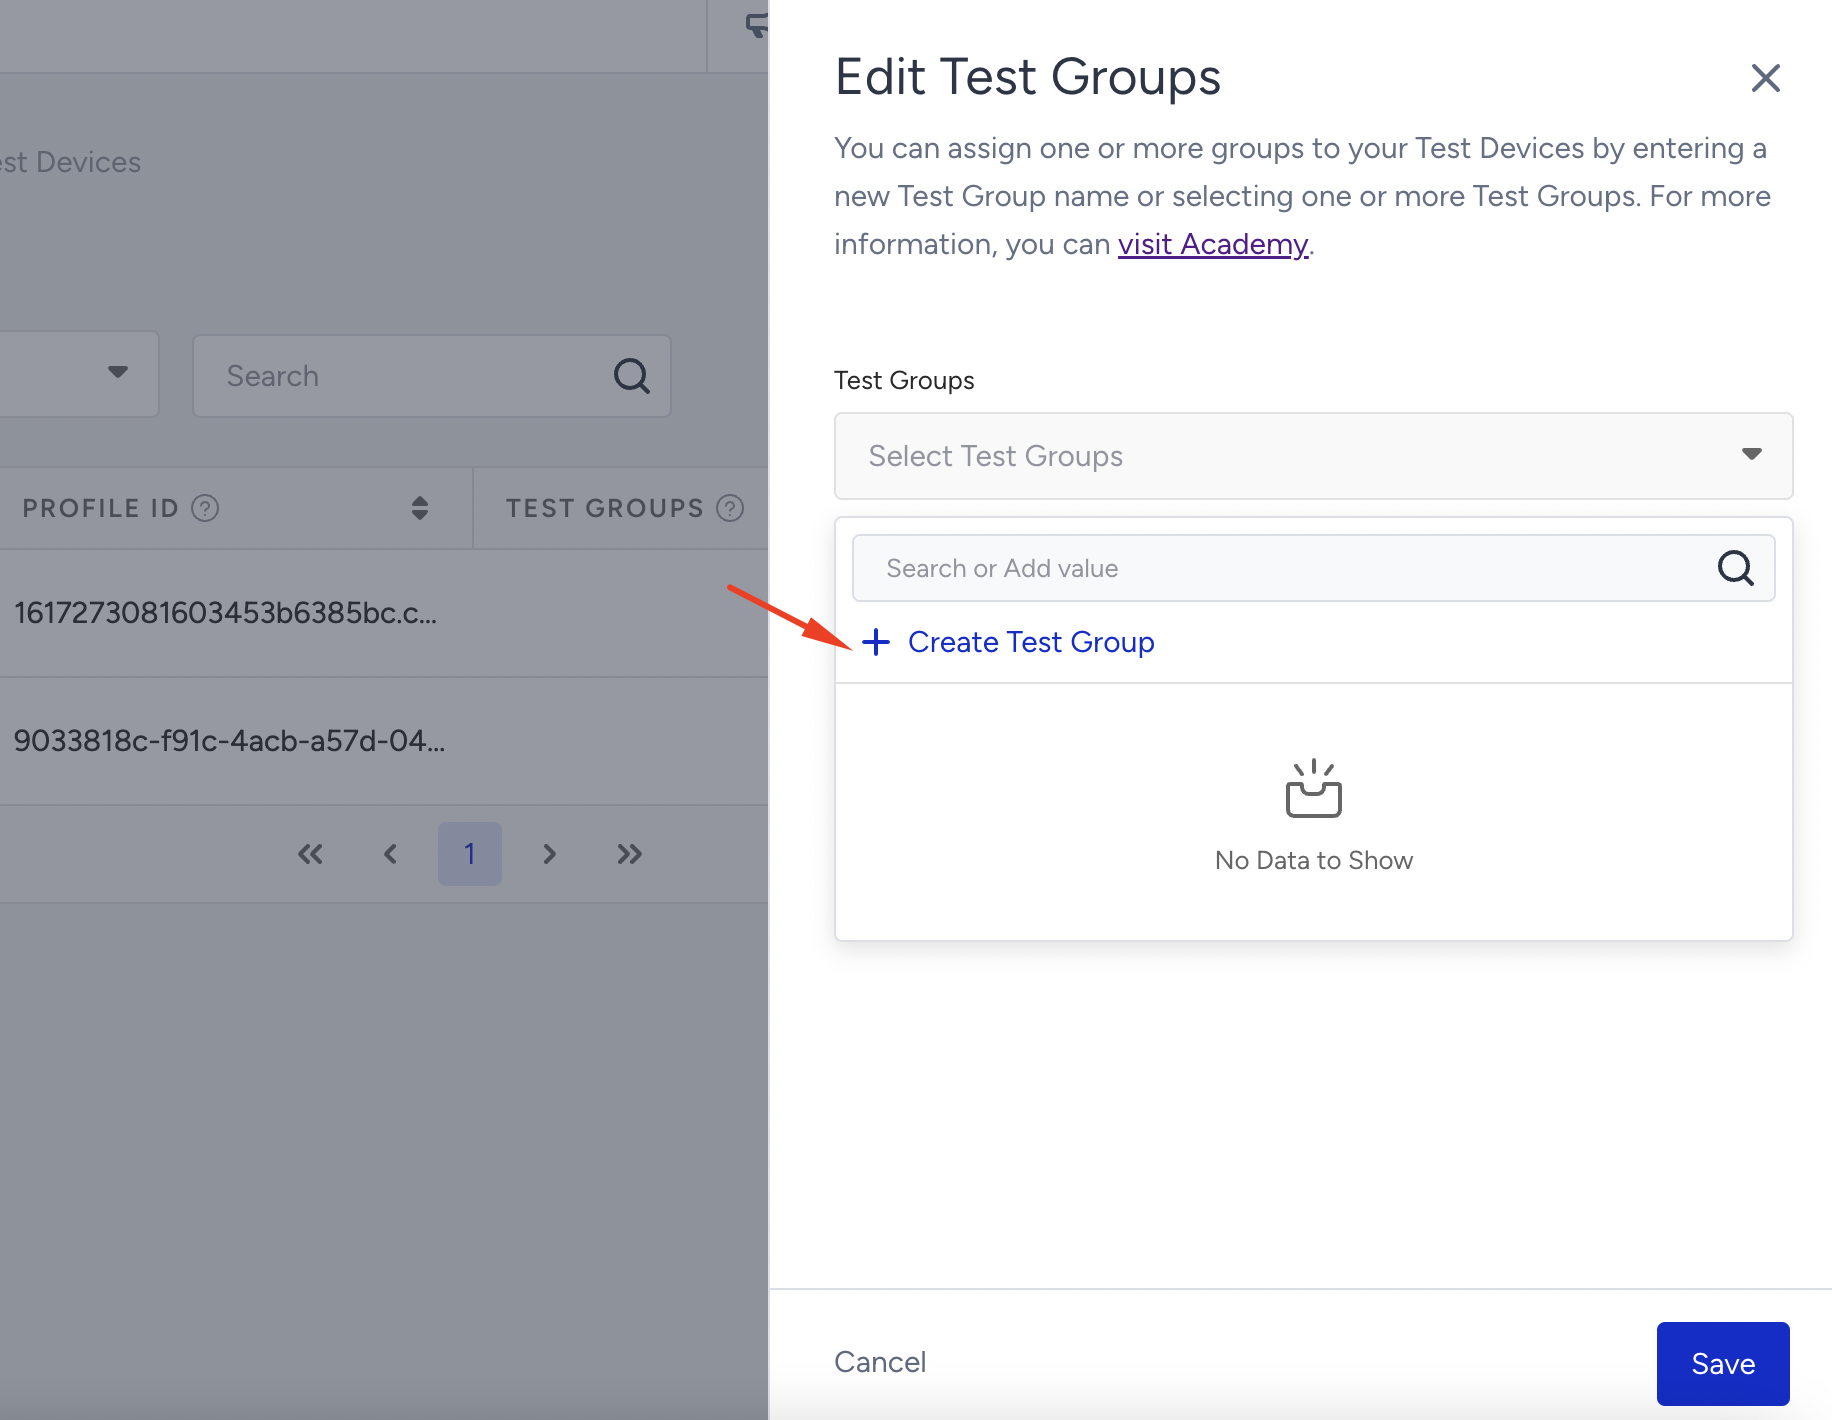
Once selected or created, the test group will be listed along with the device name.

To send a test message to one of the test groups, click the Test Message button on the design step. and select the test group and test devices.
