This guide explains how to invite users to MindBehind Live, assign their roles, manage department and conversation access, configure conversation limits, manage agent statuses, and remove users.
You can manage these settings from a single page. Log in to your MindBehind Live account and navigate to Company Management > User and Agent Management.
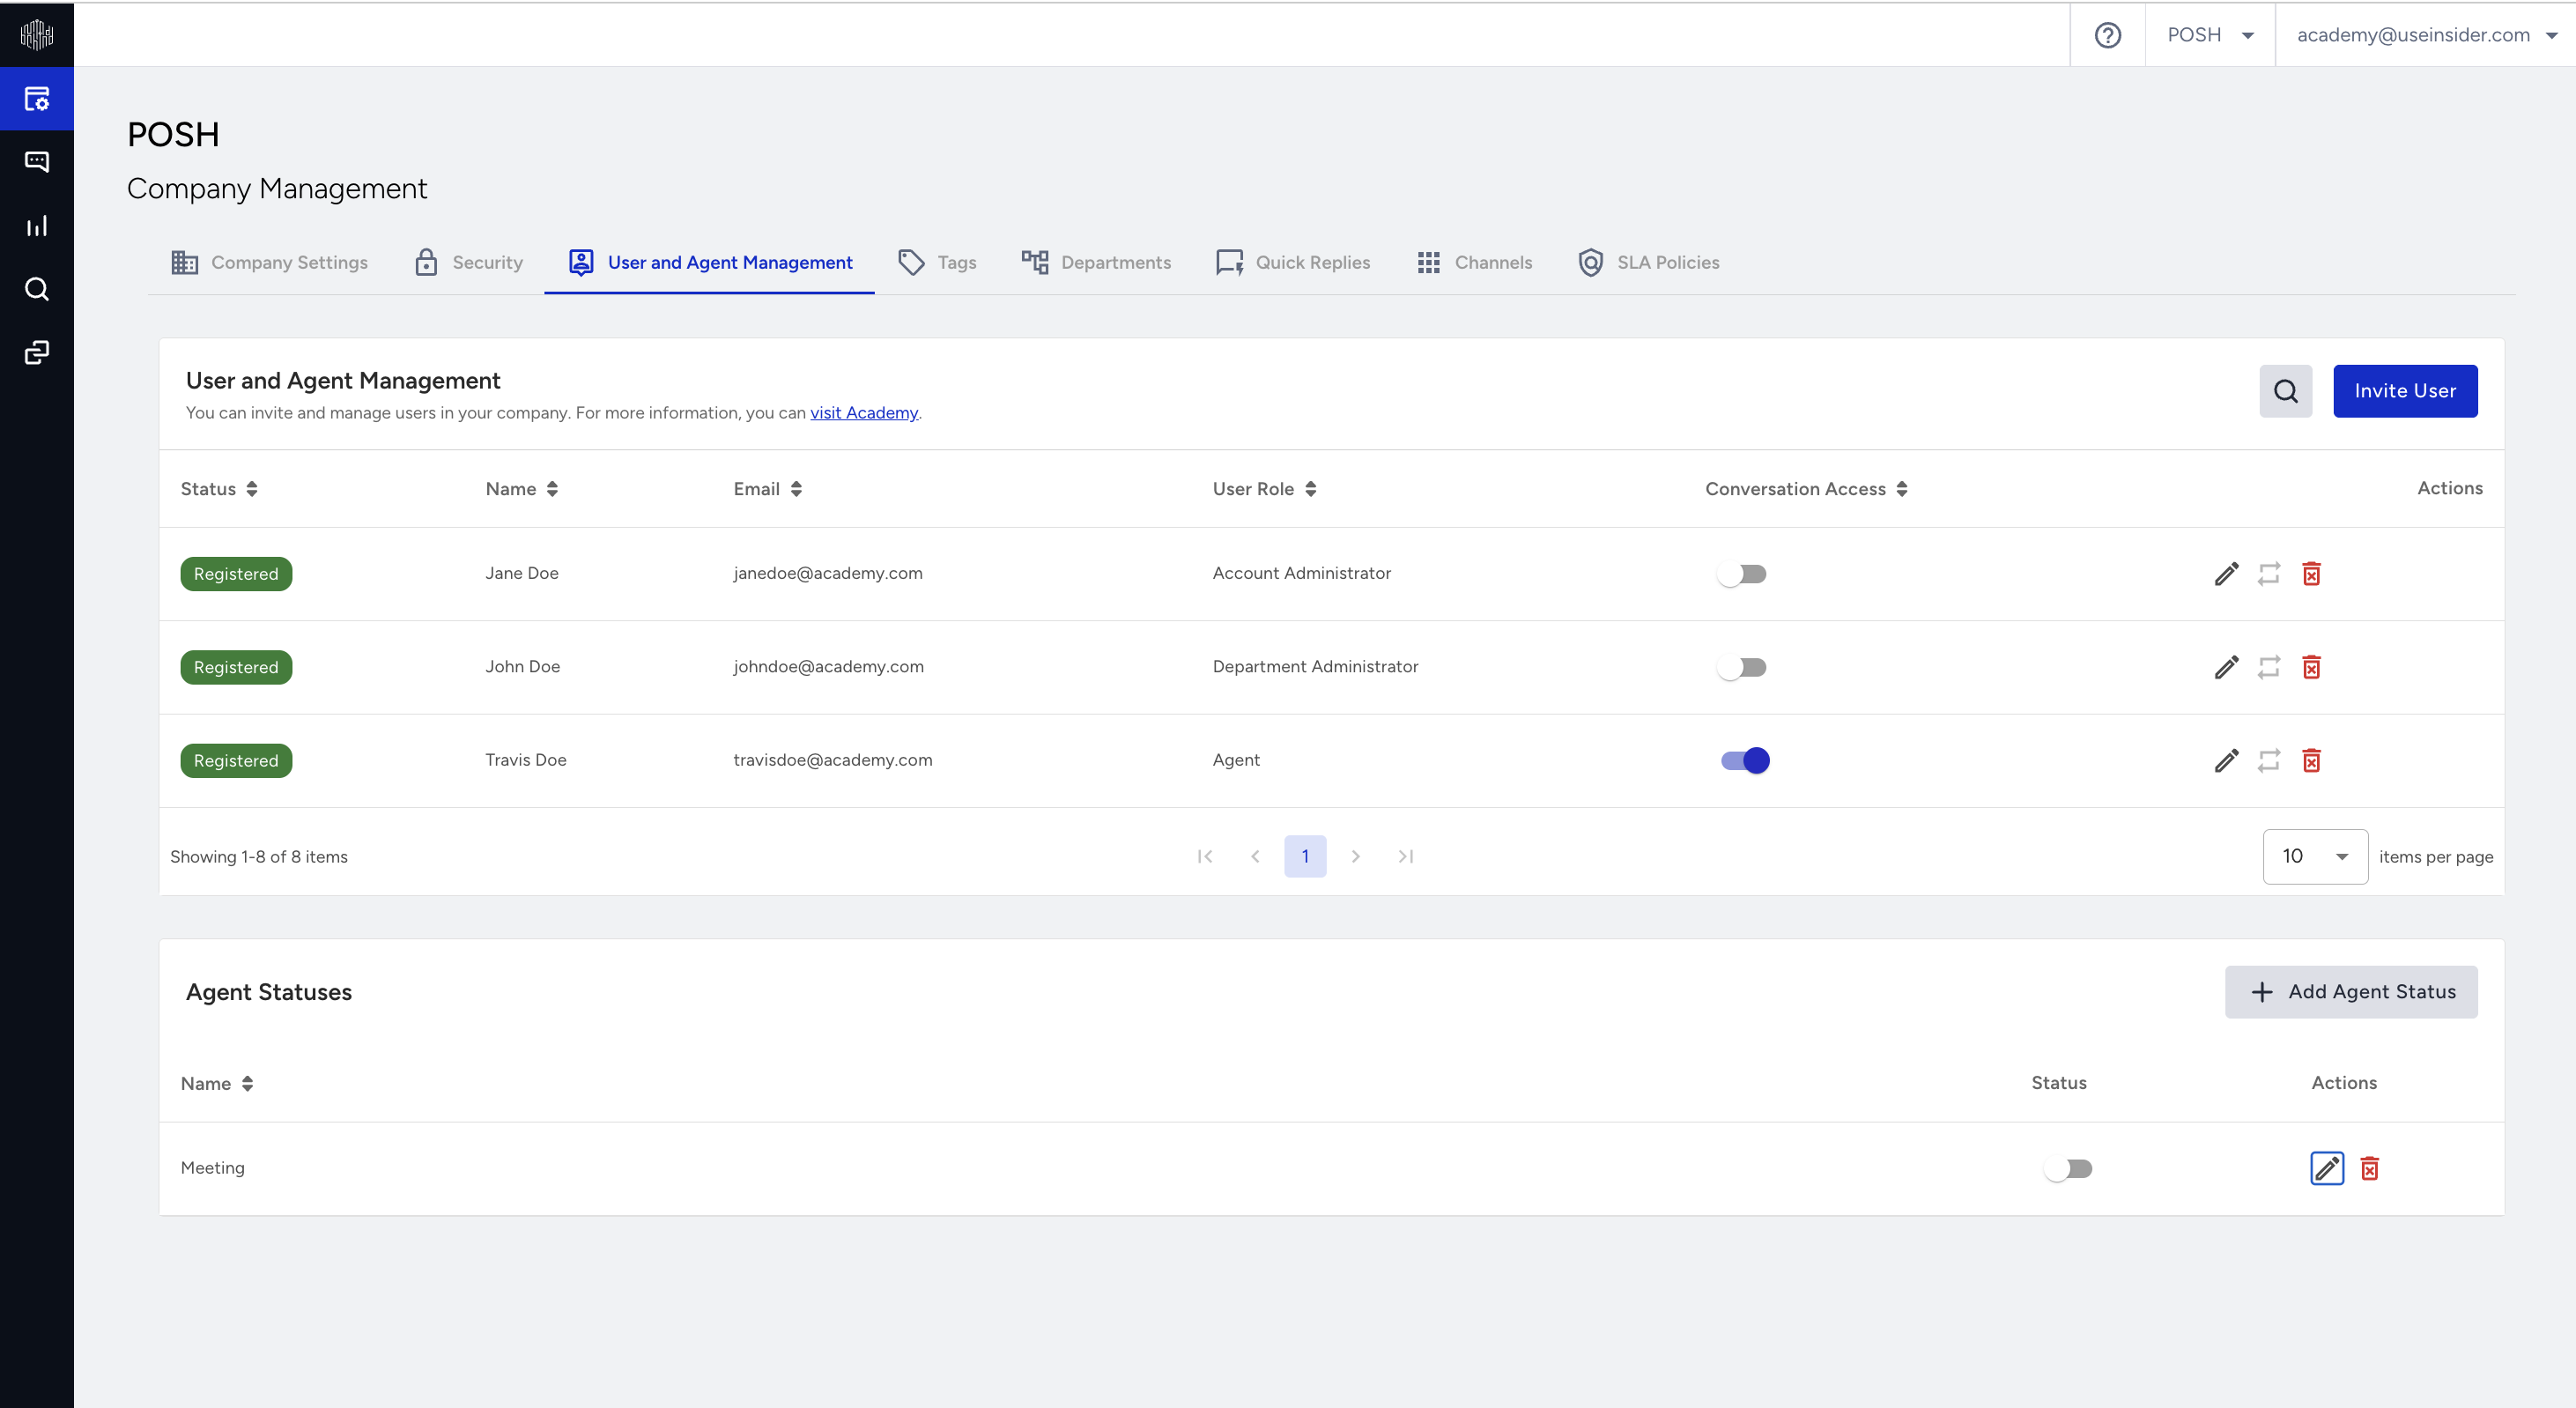
In this article, you can find answers to these questions:
User roles
MindBehind Live supports three user roles: Account Administrator, Department Administrator, and Agent.
Account Administrator: Has access to all application features, settings, and departments. Account Administrators do not require department-specific configuration because they have access across all departments.
Department Administrator: Does not have access to the company page. On the Agent page, Department Administrators can view all assigned and queued conversations in their assigned departments. They can also access reports, view customer representatives, and monitor conversations within those departments.
Agent: Has limited access to the Agent page and conversation search. Agents can view only their assigned conversations and access performance metrics and conversation details for their department.
All user roles in the company can access chatbot conversations through the search and reports features.
Only Account Administrators can invite users, change their roles, or remove them from the company. When you change a user's role, their active sessions end. The user needs to sign in again for the new permissions to take effect.
Invite a user
To invite a user:
Log in to your MindBehind Live account and navigate to Company Management > User and Agent Management.
Click Invite User in the top-right corner.
Enter the user's email address and select the User Role you want to assign.
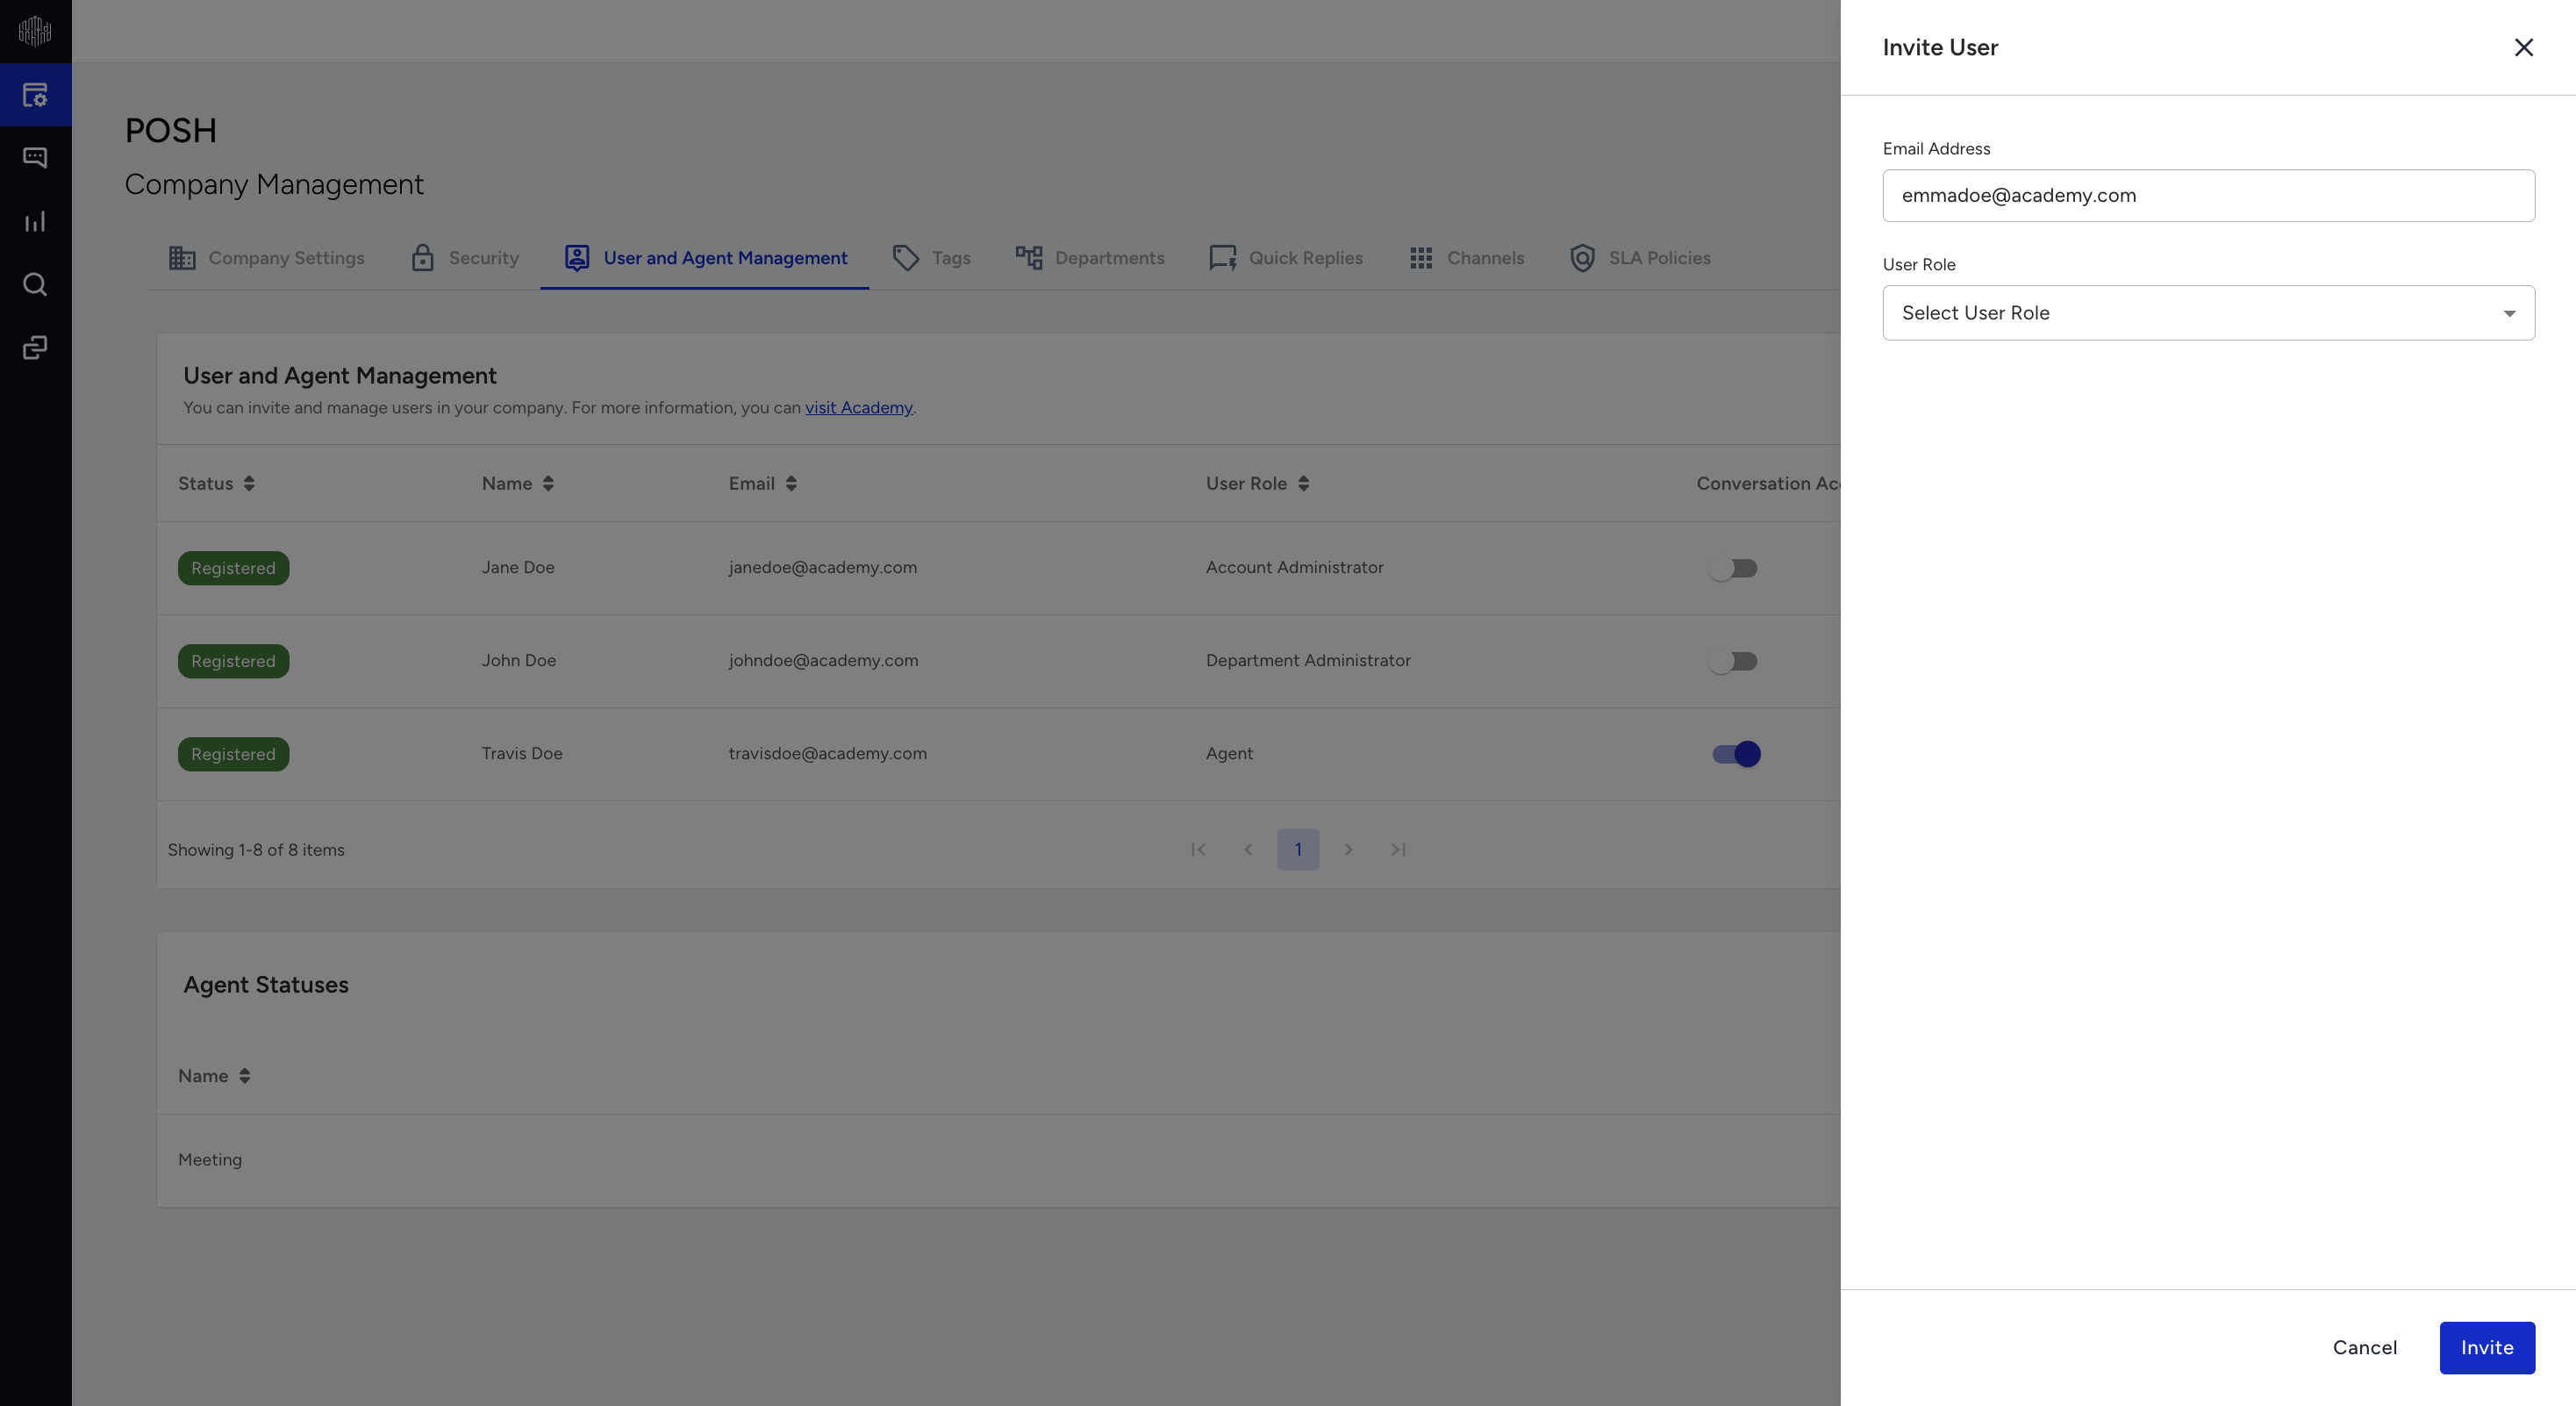
Select the departments from which the user can be assigned conversations and set their conversation limit.
Save the invitation to send it.
The user receives an invitation email and appears in the user list with the Unregistered status until they complete their registration.
Every invited user is also set up as an agent at the same time, so you can configure their conversation access without an additional setup process.
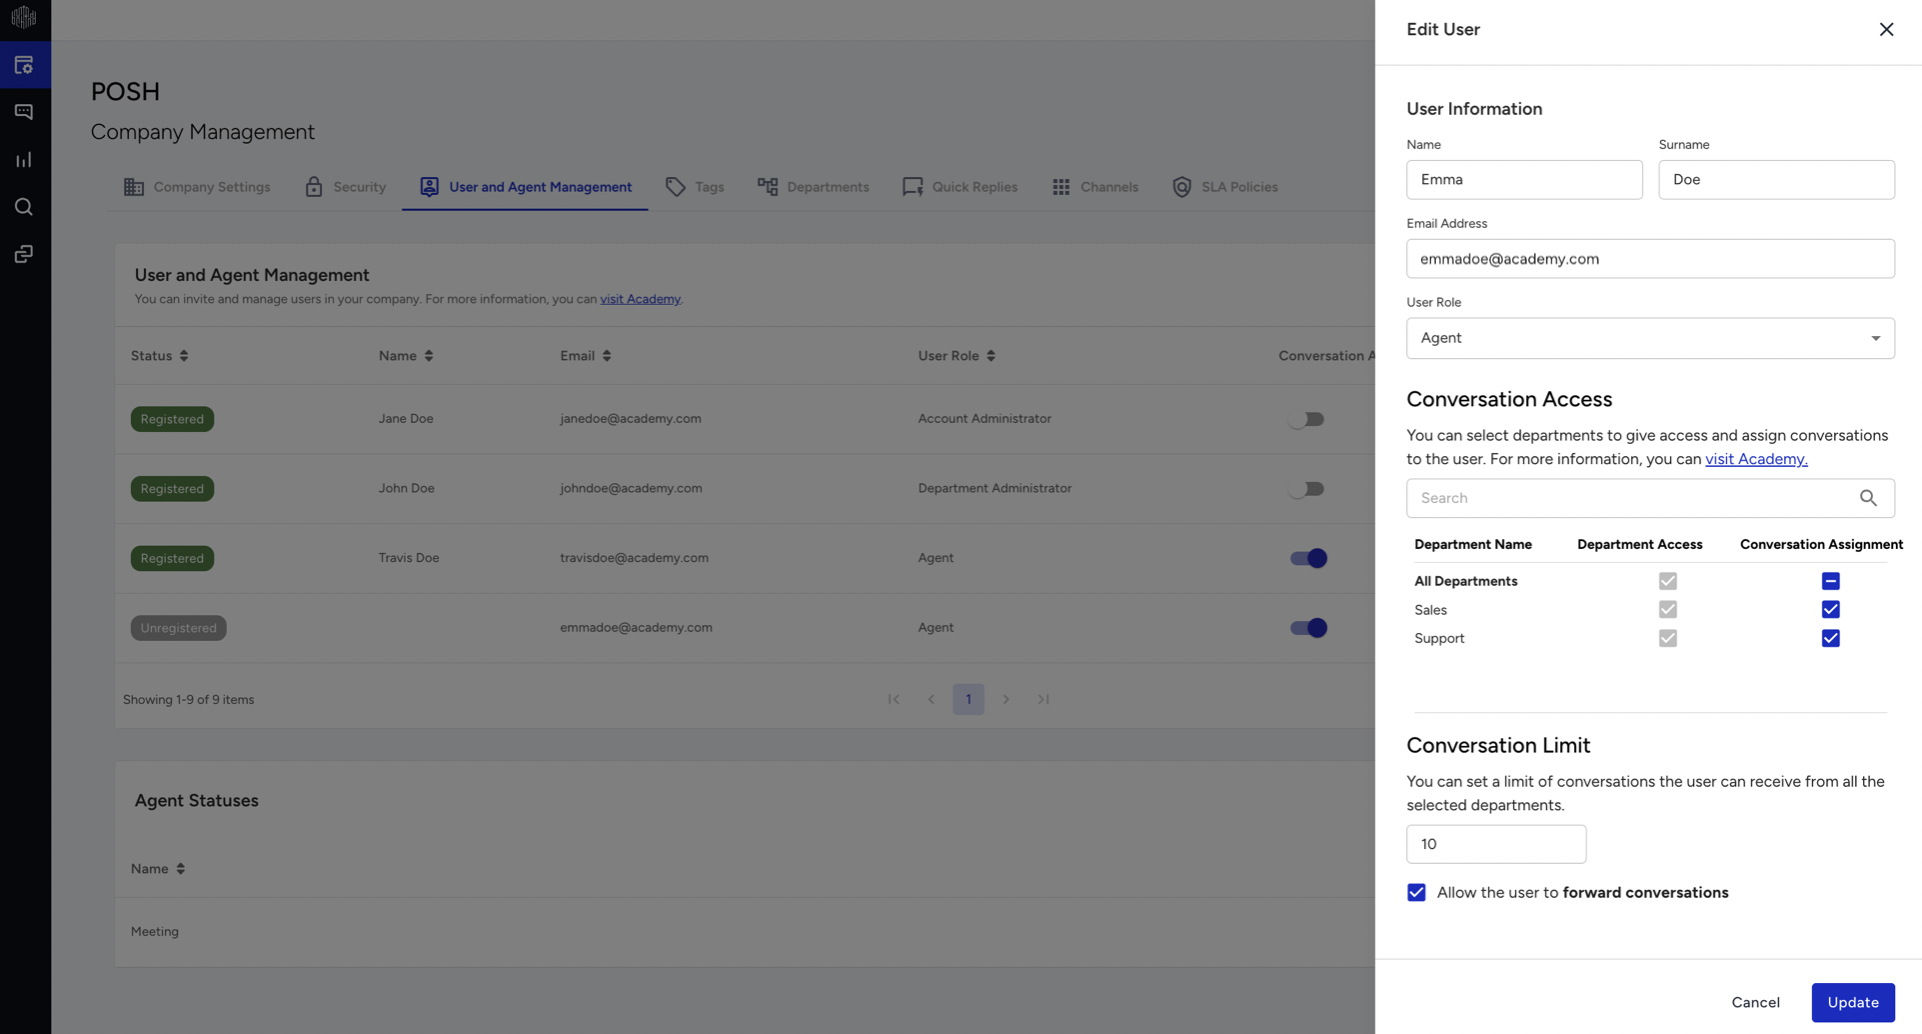
If the user already uses MindBehind Live in another company, they join your company directly and do not receive another registration email. They can continue using their existing sign-in details.
User statuses
You can view each user's status in the Status column on the User and Agent Management page.
Registered: The user has completed registration and can sign in.
Unregistered: The user has received the invitation email but has not completed registration.
Expired: The user's invitation link has passed its validity period and can no longer be used. You can resend the invitation to provide a new link.
Resend an invitation
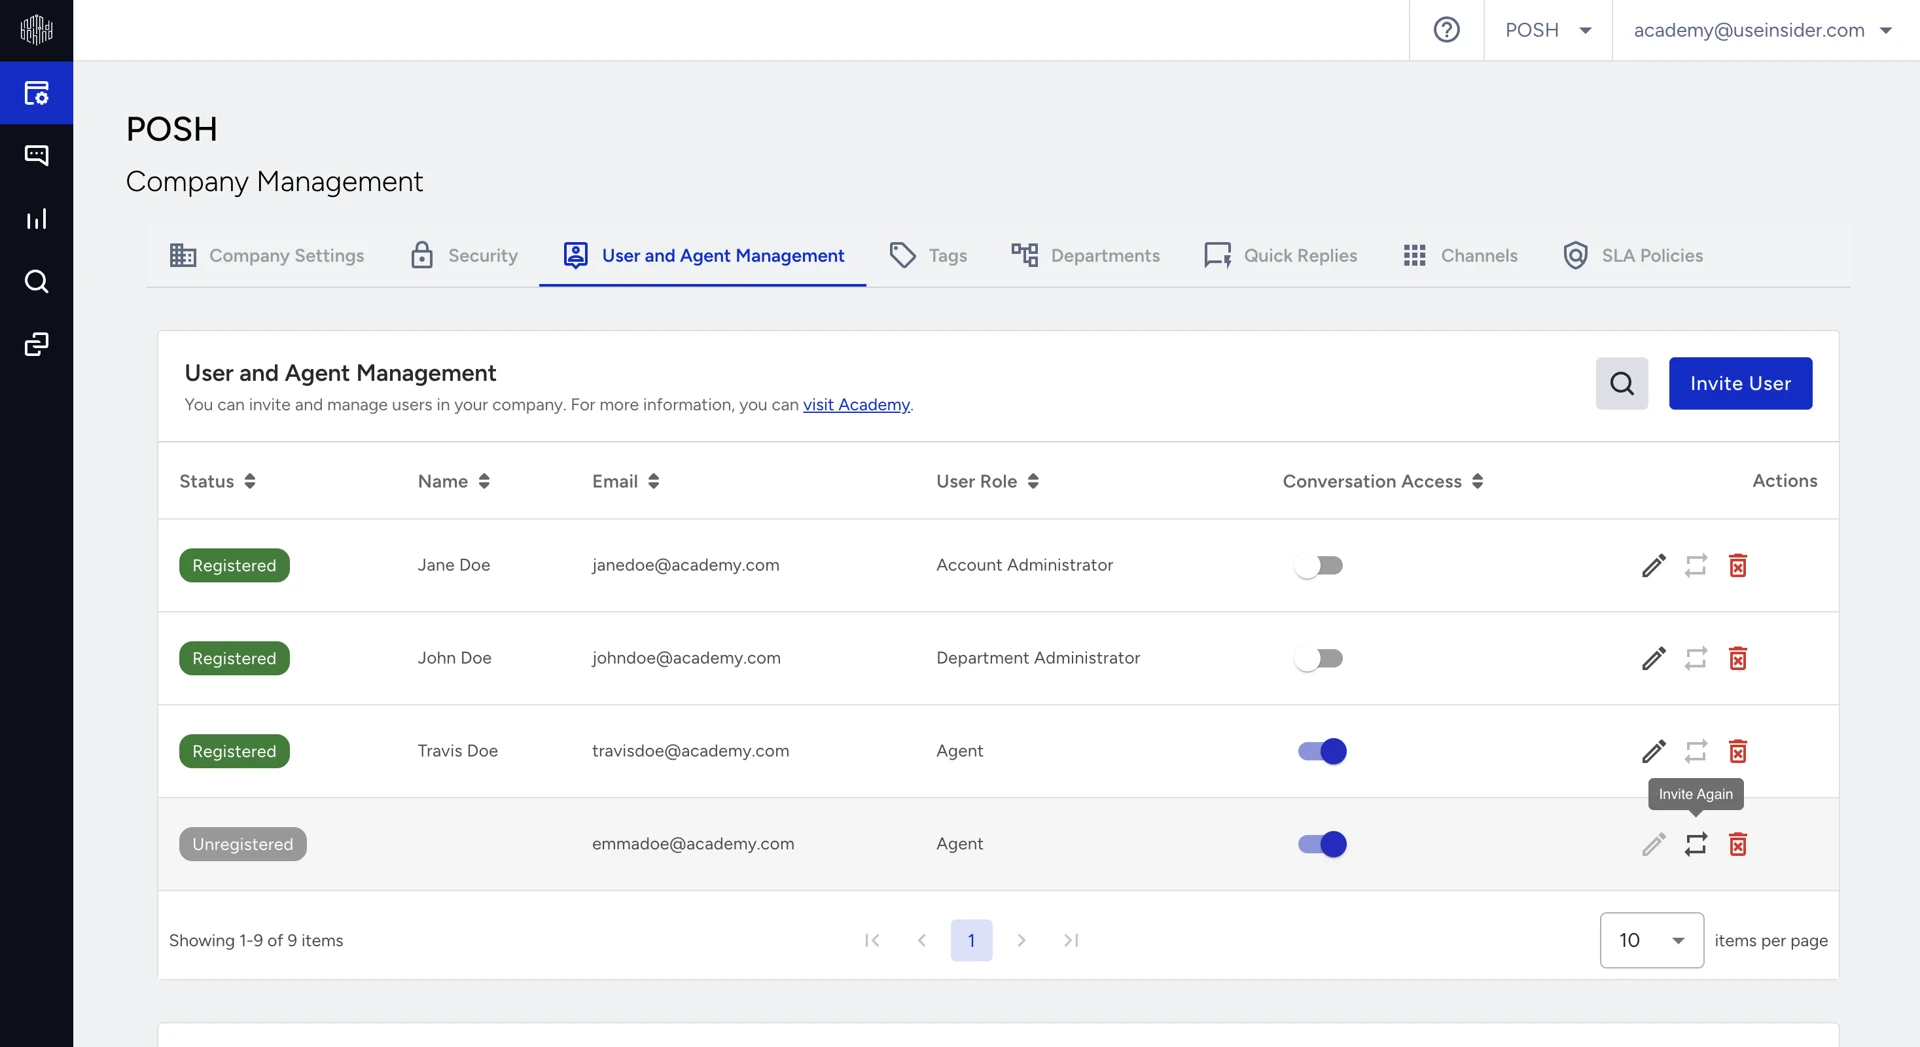
If a user has not completed registration or their invitation has expired, you can resend the invitation without removing them and inviting them again.
To resend an invitation:
Log in to your MindBehind Live account and navigate to Company Management > User and Agent Management.
Find the user with the Unregistered or Expired status.
Click the Resend icon in the Actions column.
The user receives a new invitation link, and their status remains Unregistered until they complete registration.
The resend action does not apply to users with the Registered status because they already have access.
Manage conversation access
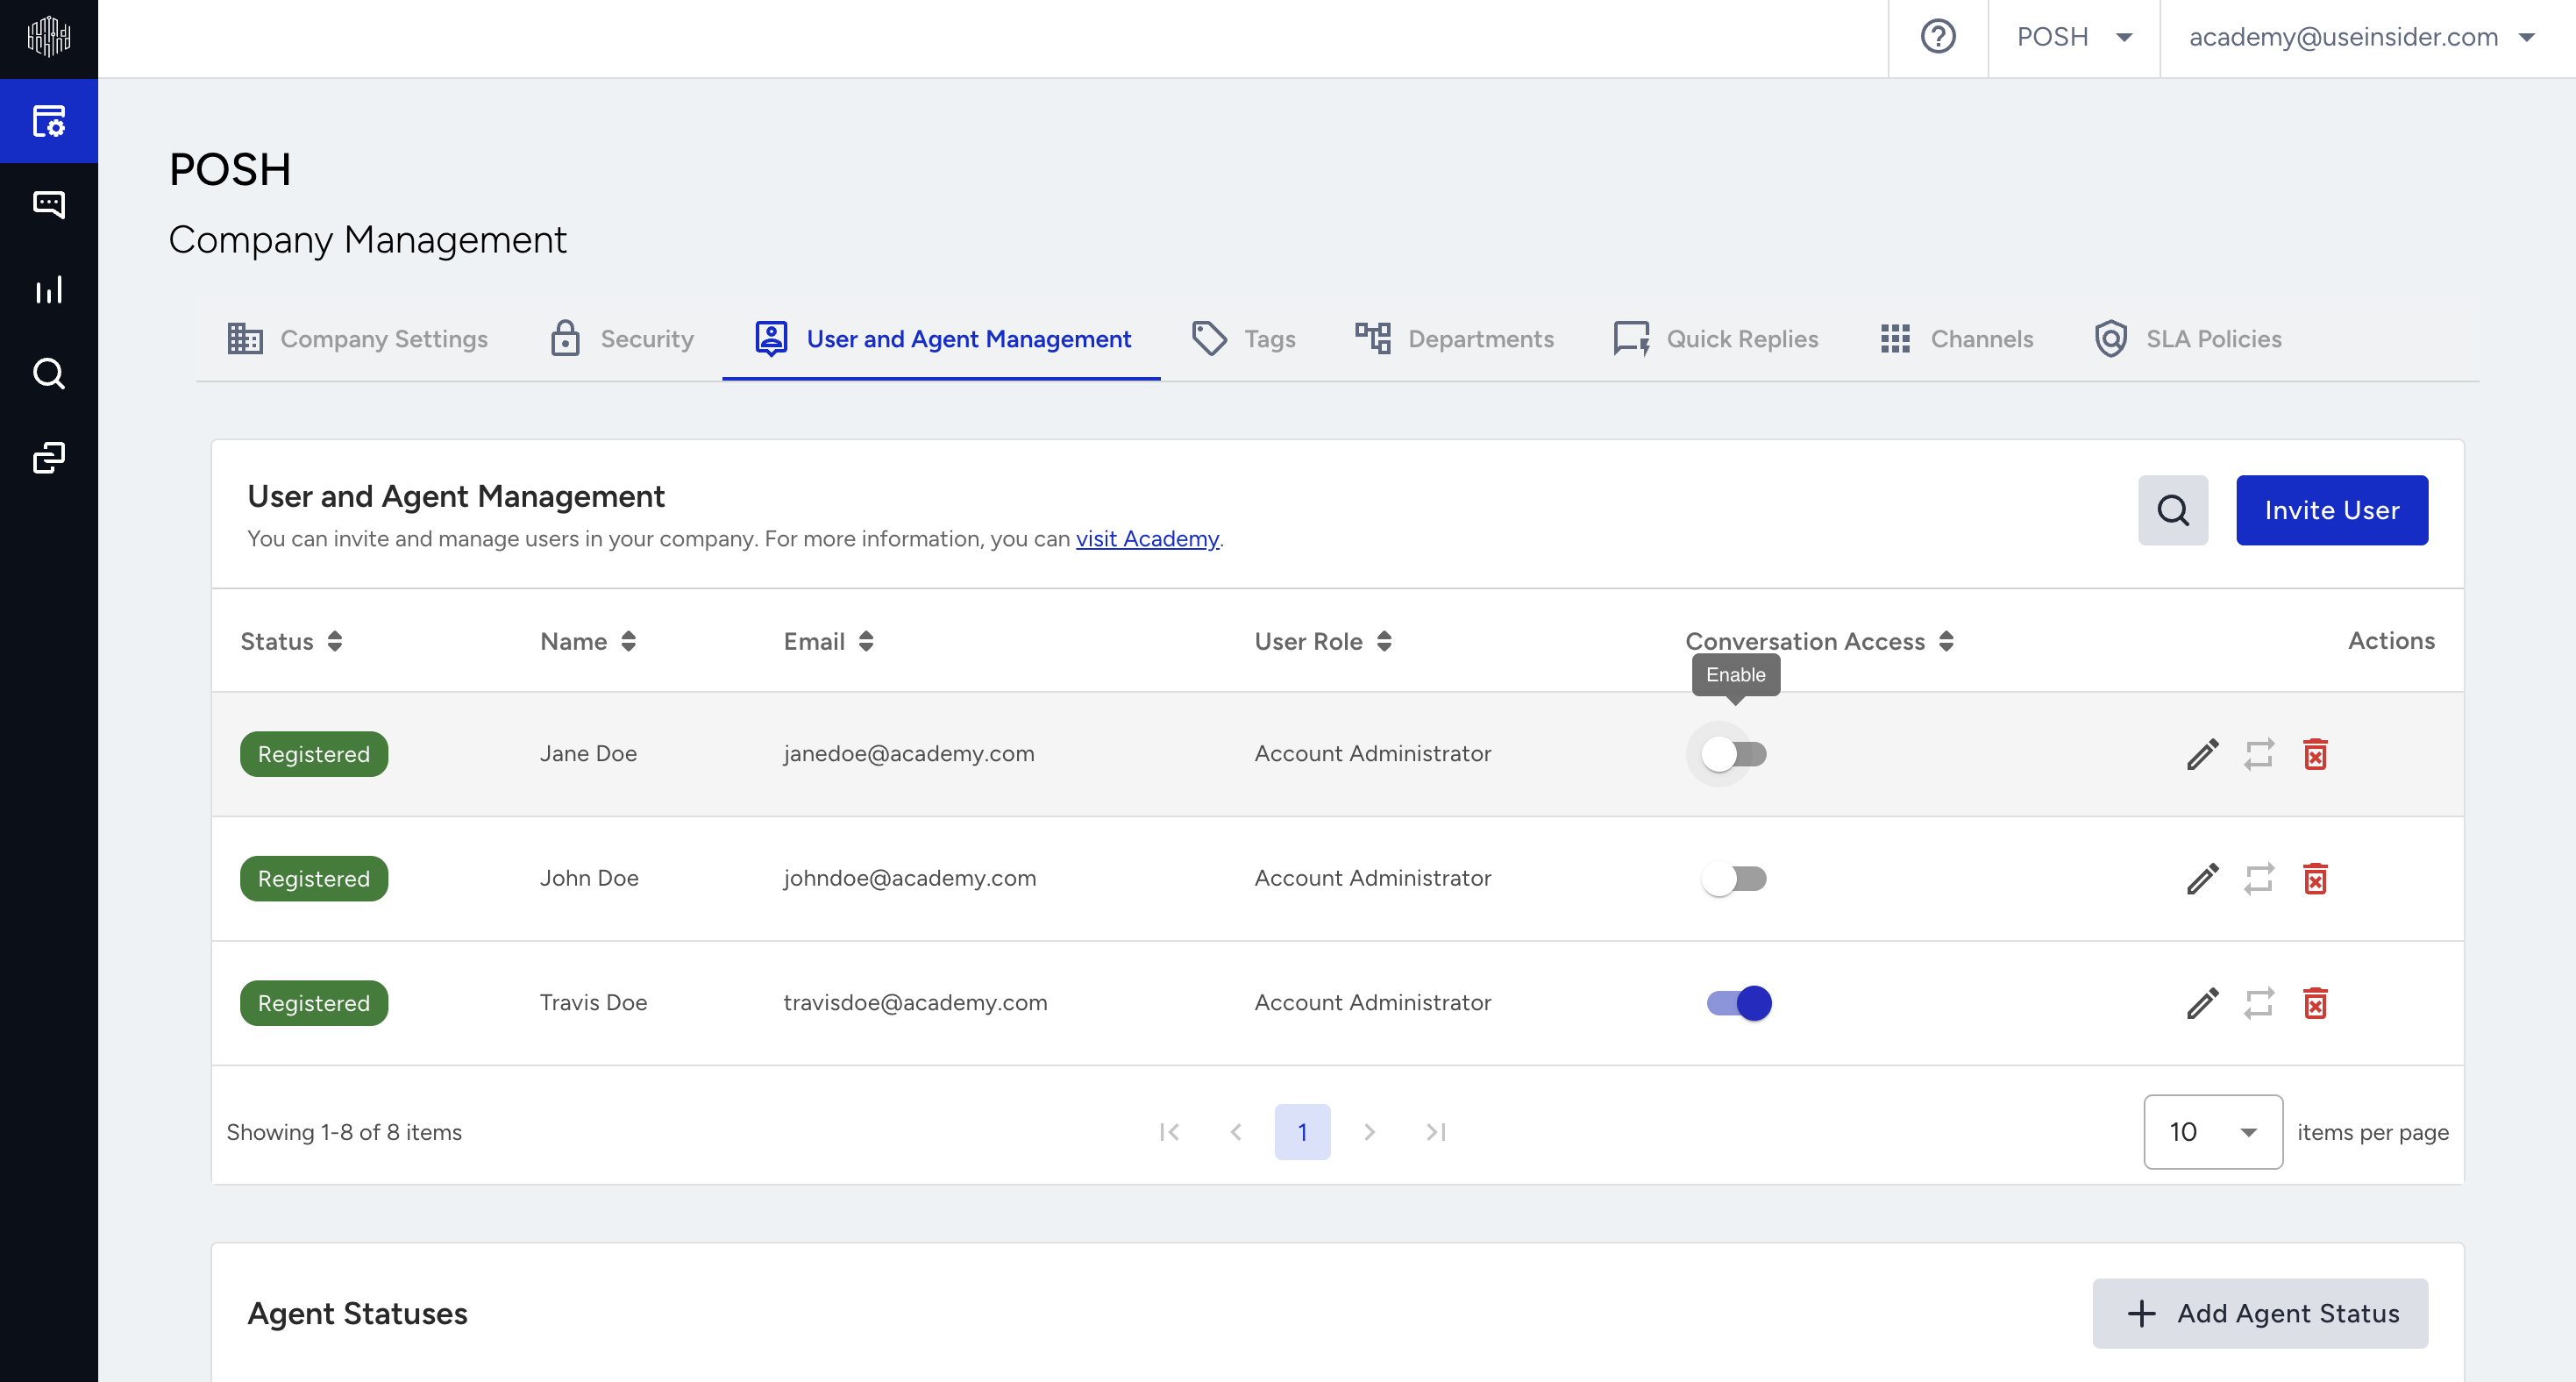
The Conversation Access toggle determines whether a user can be assigned conversations as an agent.
Turn Conversation Access on to allow the user to receive conversations from the departments configured for them.
Turn Conversation Access off to stop assigning new conversations to the user.
The toggle remains unavailable until the user completes registration and has at least one department configured with a conversation limit.
Configure the user's department access and conversation limit first. The toggle becomes available after these requirements are met.
For more information, refer to the Configure conversation assignment and limits section.
Manage department access
Department Administrators and Agents can view data only for the departments they are authorized to access.
To configure department access:
Log in to your MindBehind Live account and navigate to Company Management > User and Agent Management. Click the Manage User icon for the relevant user.
In the window that opens, select the departments the user can access in the Department Access section.
Click Update to save your changes.
Configure department access for every Agent and Department Administrator. Account Administrators do not require this configuration.
For example, an Account Administrator can view data for both Department 1 and Department 2, while a Department Administrator assigned only to Department 1 can view data only for that department.
Configure conversation assignment and limits
You can select the departments from which Agents can be assigned conversations and configure their conversation limits on the User and Agent Management page.
To configure conversation assignment and limits:
Log in to your MindBehind Live account and navigate to Company Management > User and Agent Management.
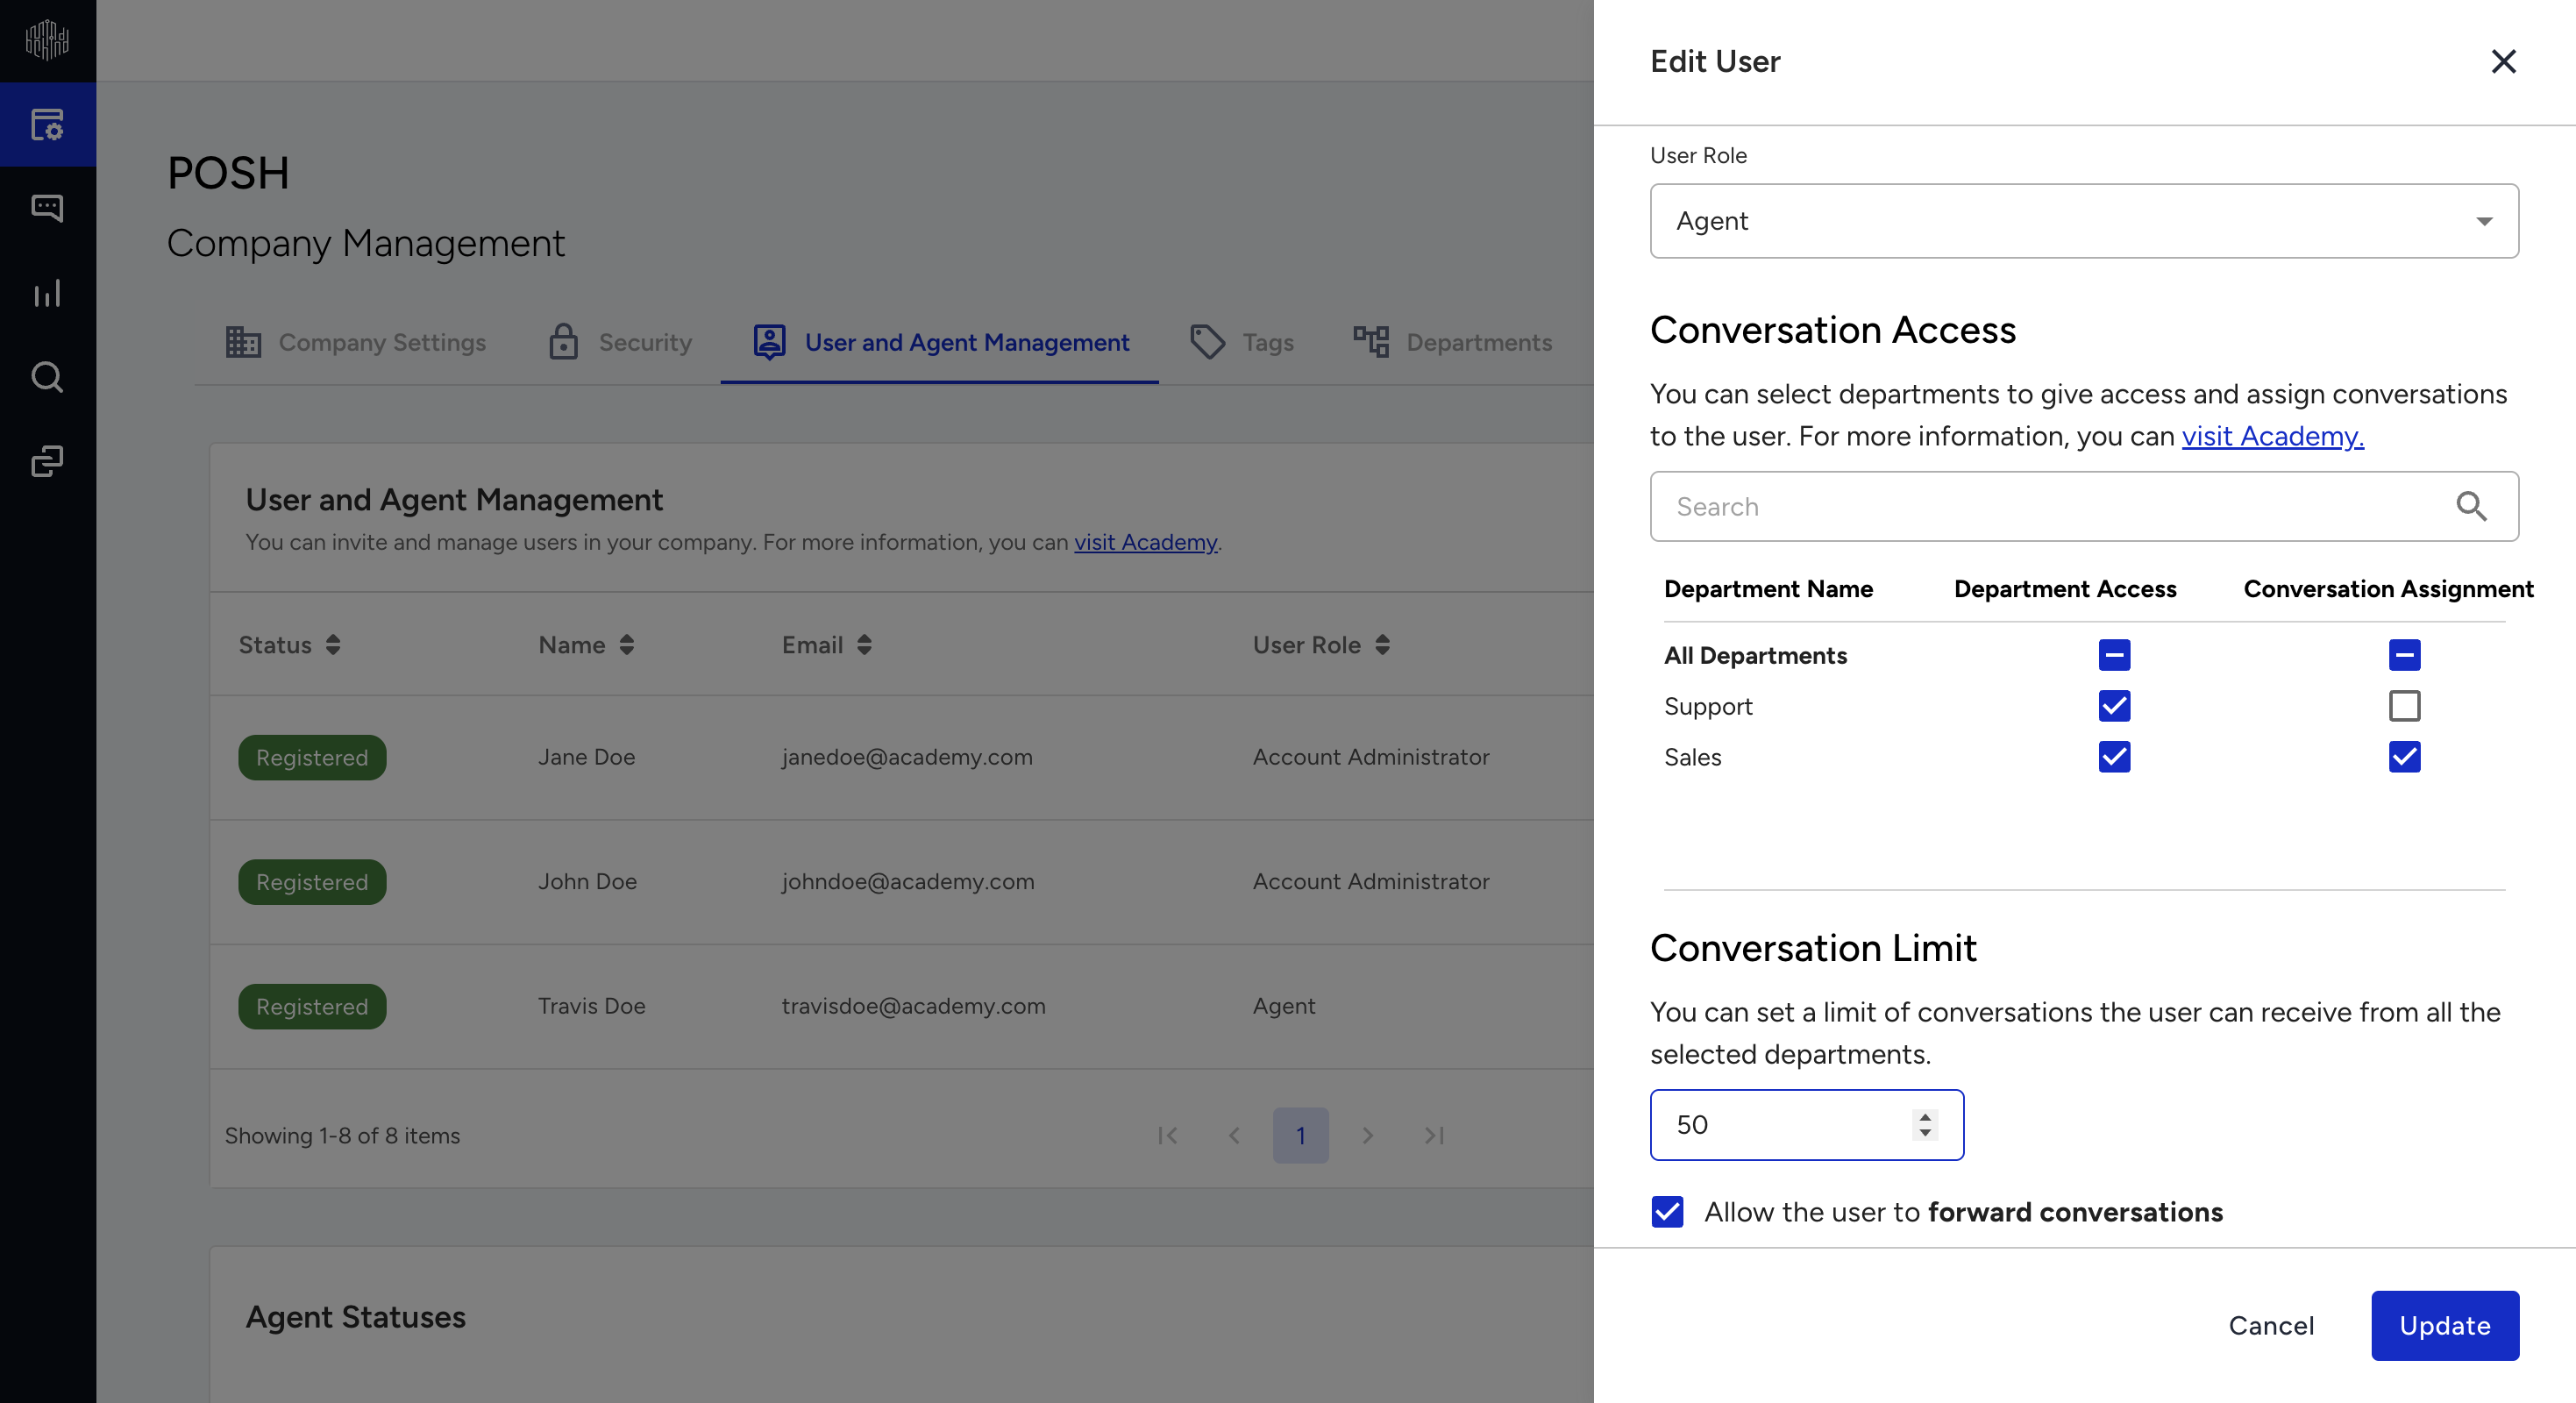
In the user management window, select the departments from which the Agent can be assigned conversations.
In the Conversation Limit section, set the maximum number of conversations the Agent can receive across all selected departments.
Click Update to save your changes.
You can set the conversation limit for each Agent between 1 and 50. Configure this limit for every user who will be assigned conversations.
Department access and conversation assignment are configured separately. A user can have permission to view conversations and reports for a department without being assigned conversations from that department.
For example, a user named John Doe can be assigned conversations only from the Support department while having permission to view conversations and reports for both My Department 1 and Support. The user does not have access to or receive conversations from the Live Chat and Sales departments.
Manage agent statuses
Agent statuses are availability states that agents can select from the Agent panel alongside the standard Online, Busy, and Offline options.
You can manage agent statuses on the User and Agent Management page below the user list.
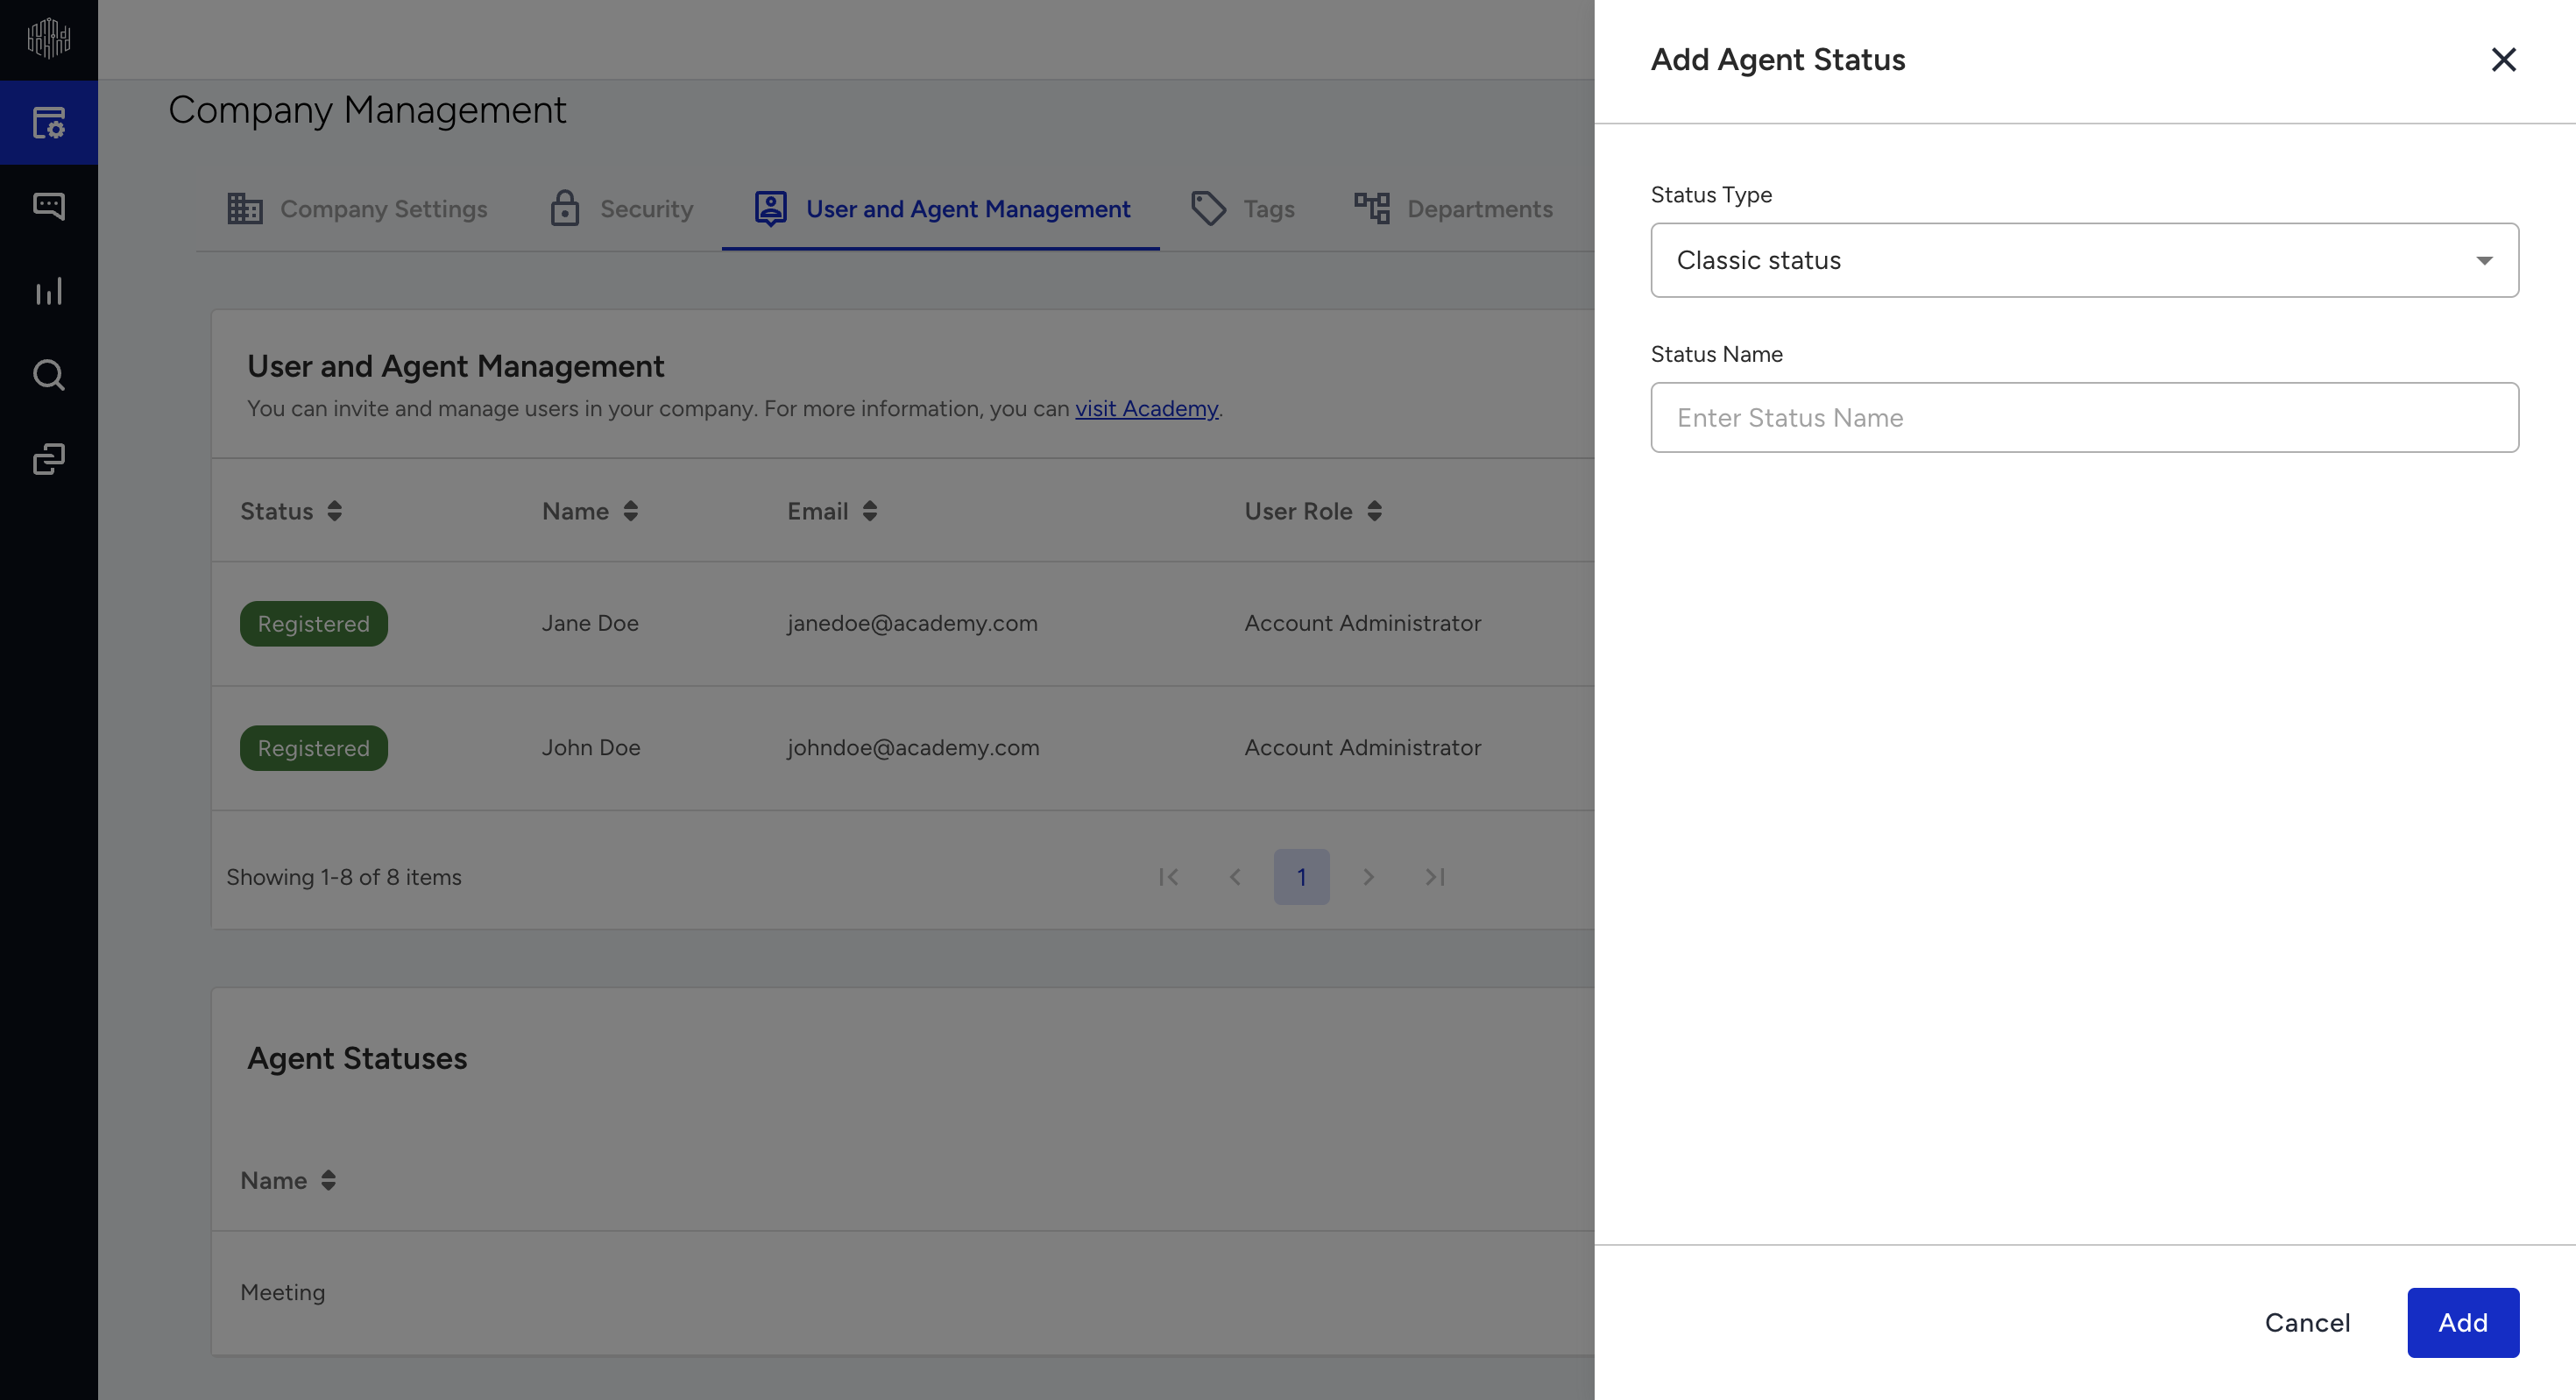
To add an agent status, click Add Agent Status and complete the fields in the drawer that opens. You can create up to three agent statuses.
To edit an agent status, click the Edit icon in its row.
To delete an agent status, first set it to Passive, and then click the Delete icon. While the status is Active, the delete control remains unavailable and displays the following tooltip: This Agent Status can't be deleted as it's Active.
Remove a user
To remove a user from your company:
Log in to your MindBehind Live account and navigate to Company Management > User and Agent Management.
Find the user and click the Delete icon in the Actions column.
Confirm the removal.
If the user belongs to other companies, they keep their access to those companies and lose access only to yours. If your company is their only company, remove their account entirely.