This guide explains how to set up the MindBehind Live Single Sign-On feature with Microsoft Azure Active Directory (AD).
If you are using Azure AD as your identity provider, you can follow these steps:
1. Go to the MindBehind Live panel and navigate to Company Management > Security tab on your Live panel. 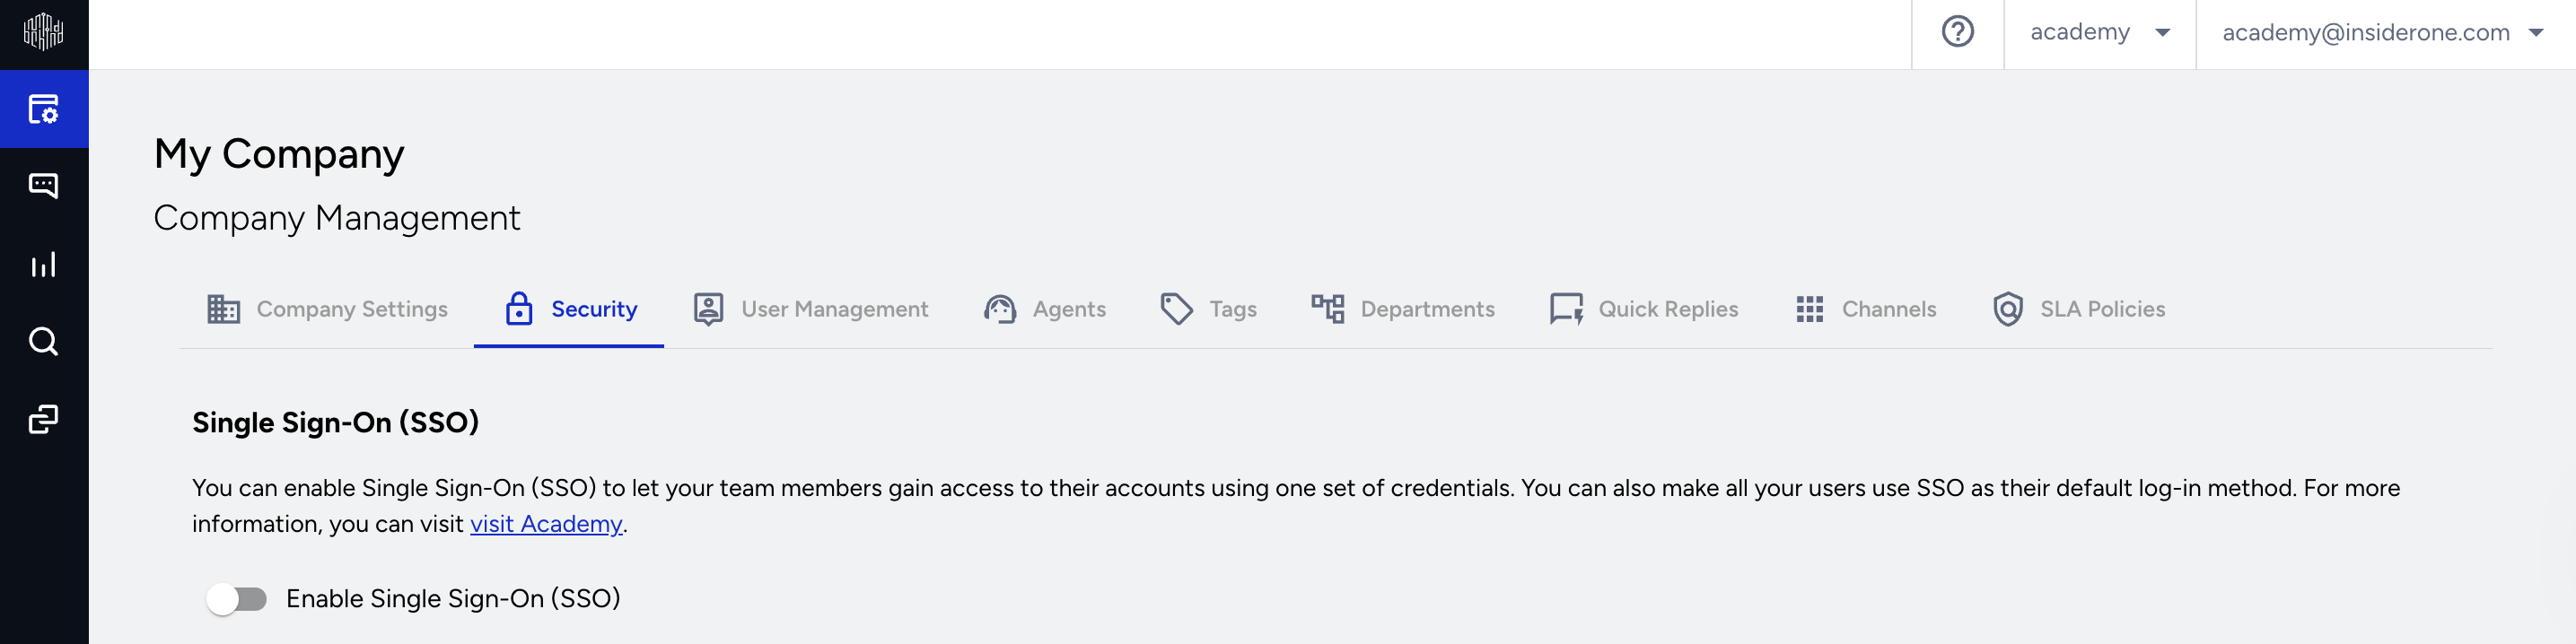
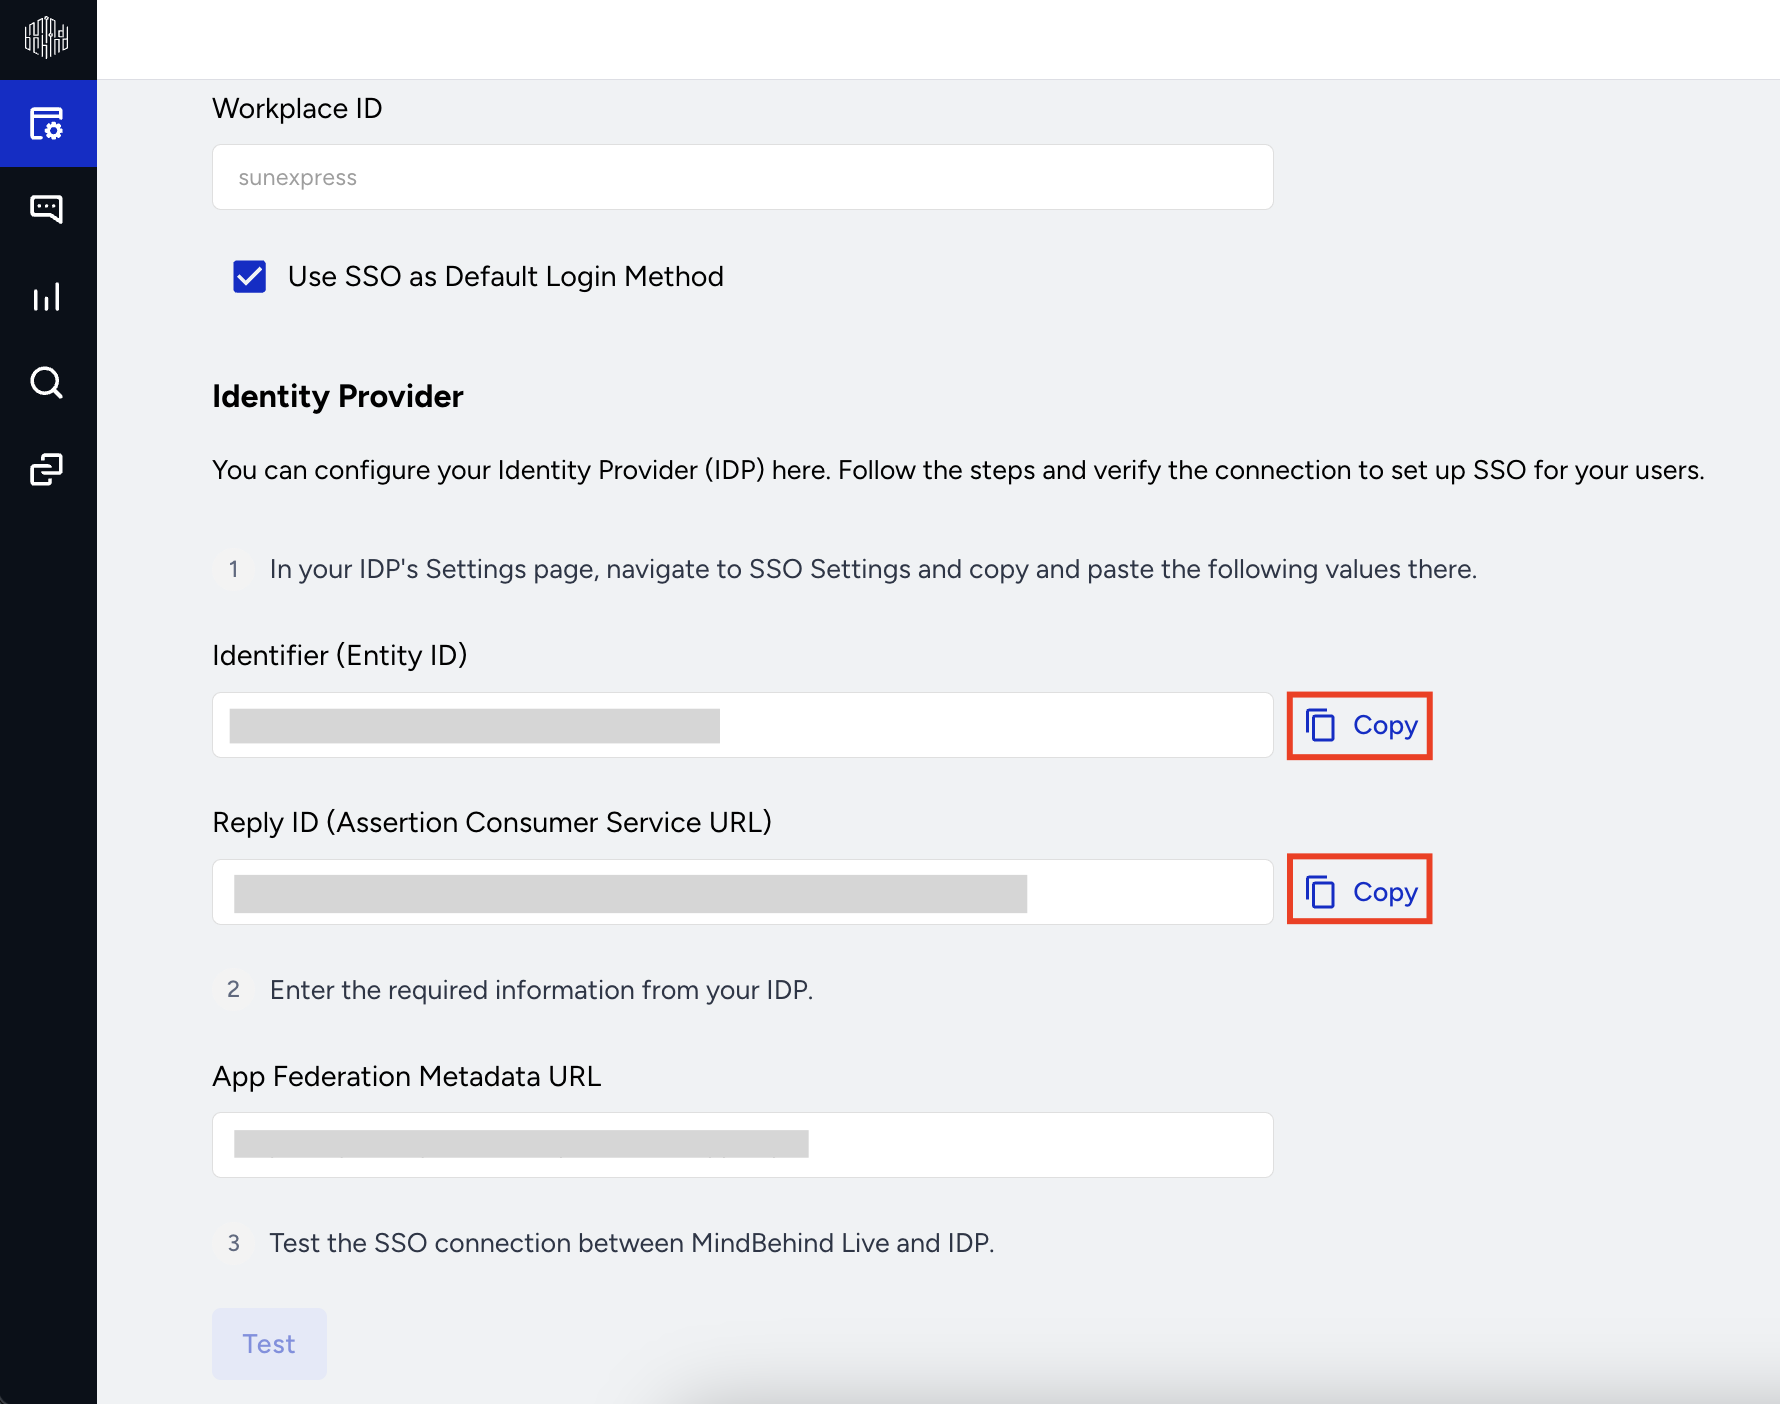
2. Enable the Single Sign-On (SSO) toggle and define your Workplace ID. You can't edit the Workplace ID later.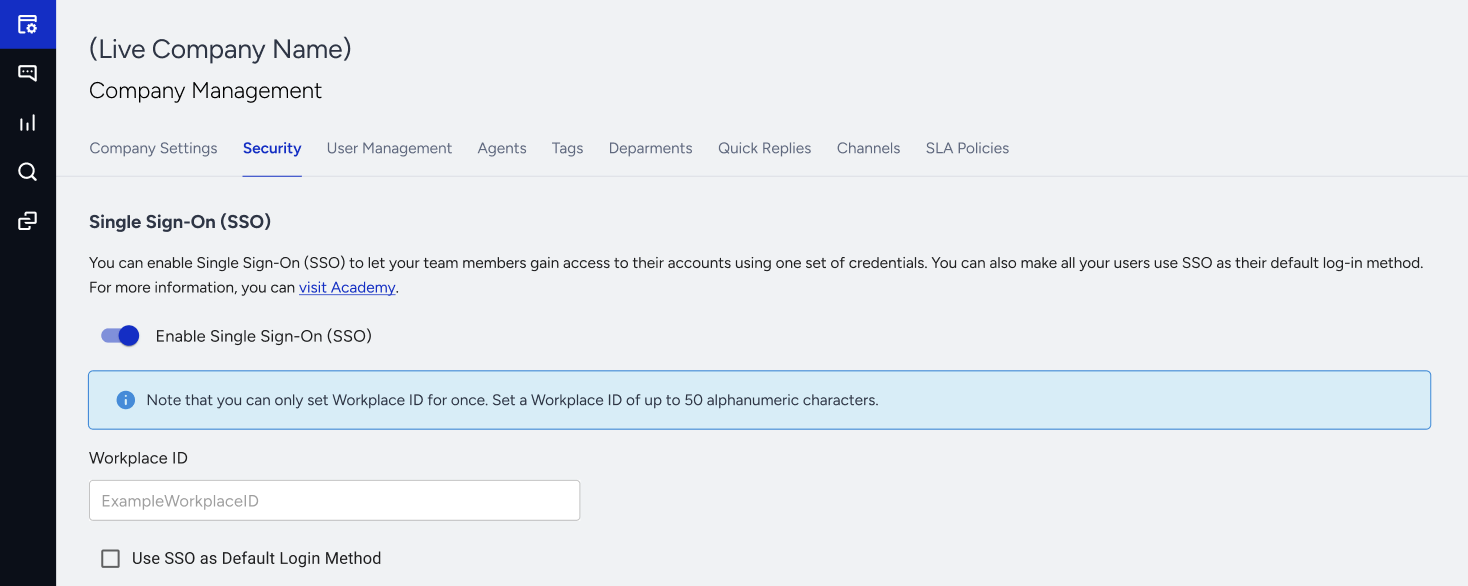
To require all users to access the panel via SSO, enable the Use SSO as default login method option. Once enabled, users can no longer log in using their MindBehind-specific email addresses and passwords. 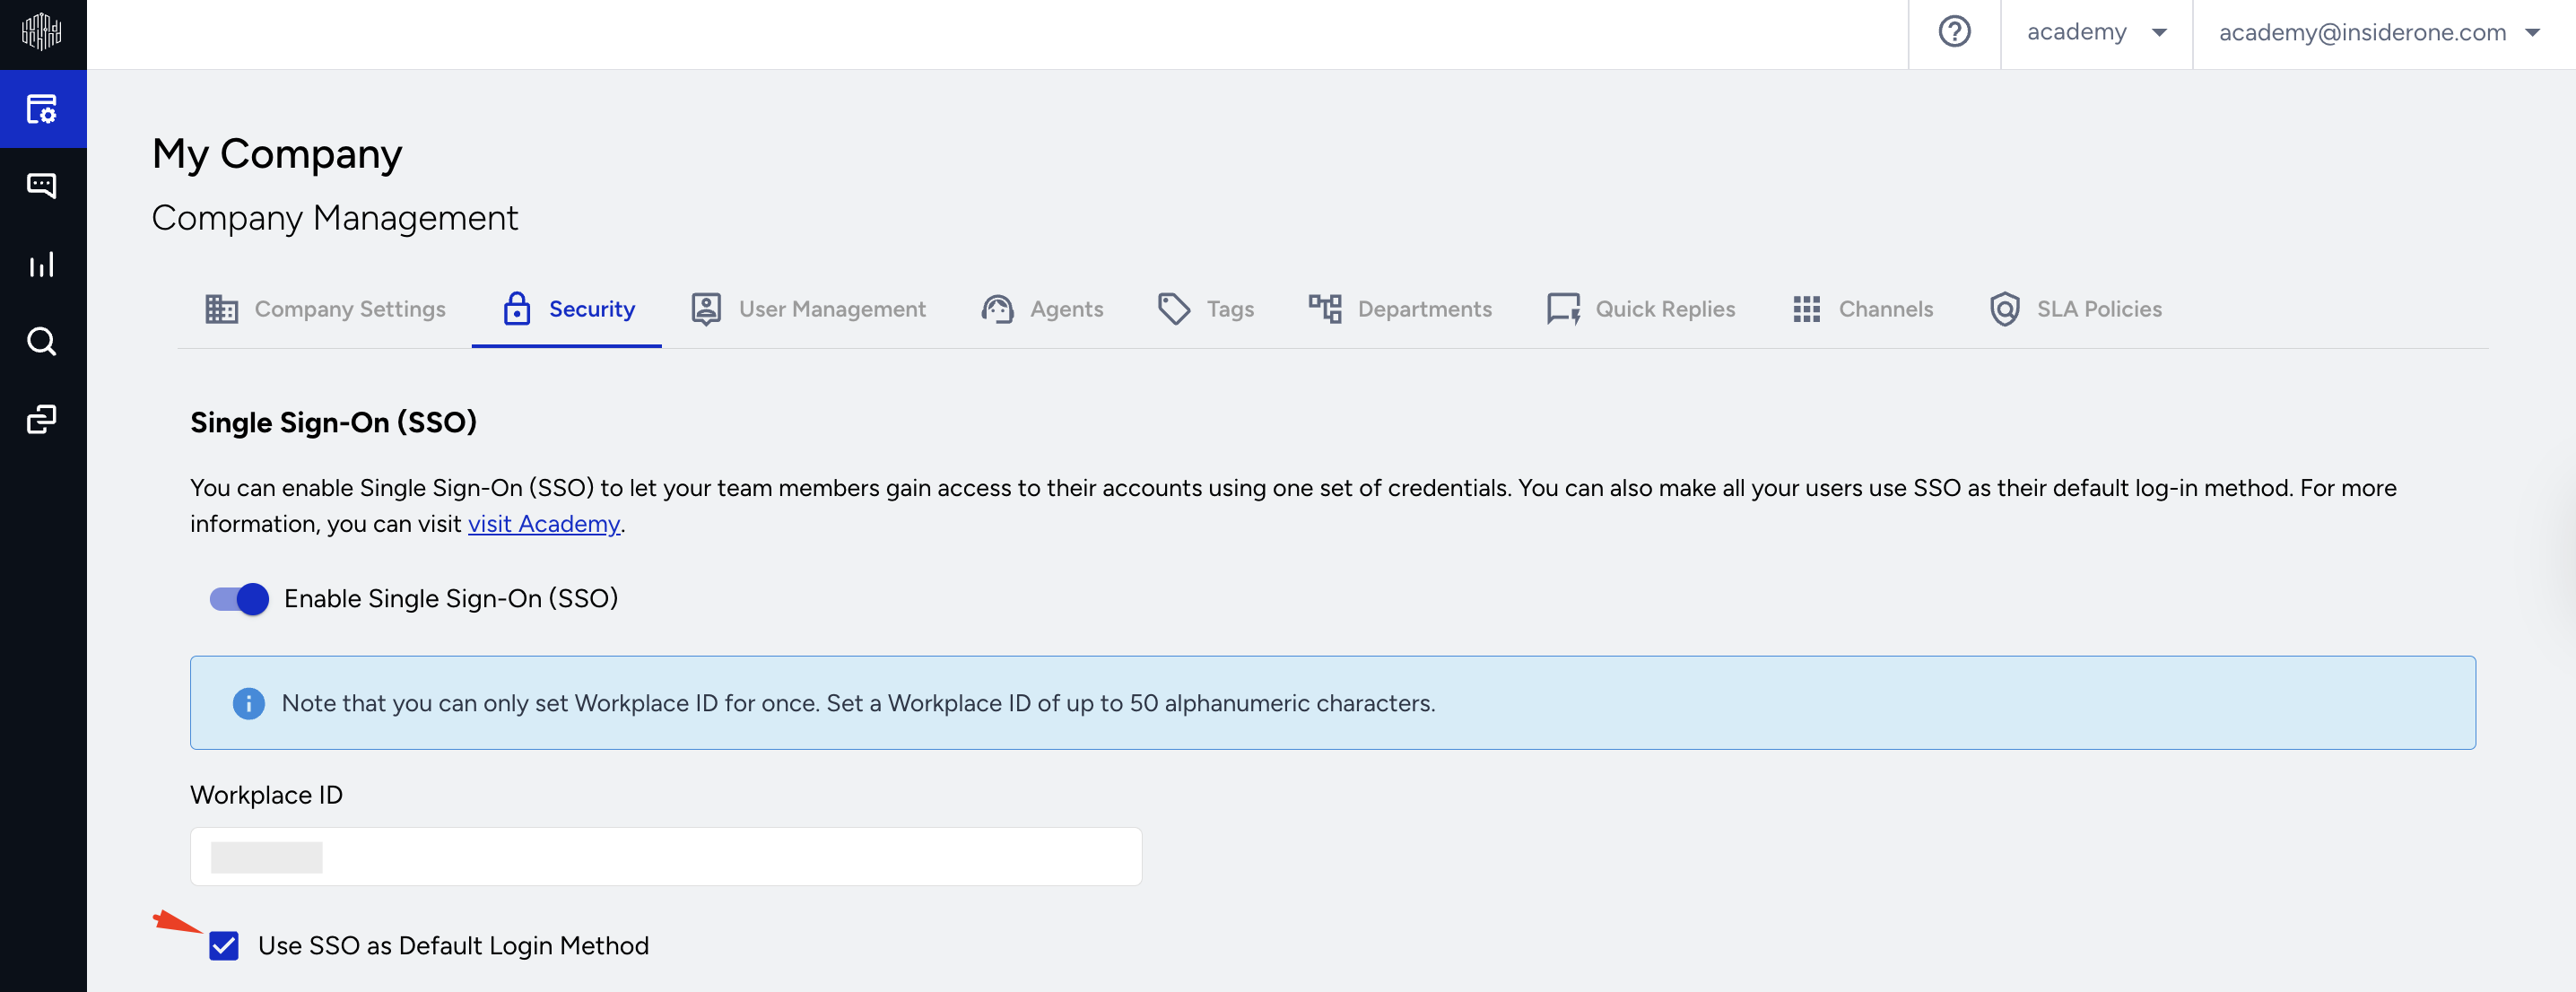
4. Log in to your Azure AD app and go to Applications > Enterprise Applications to click the + New application button.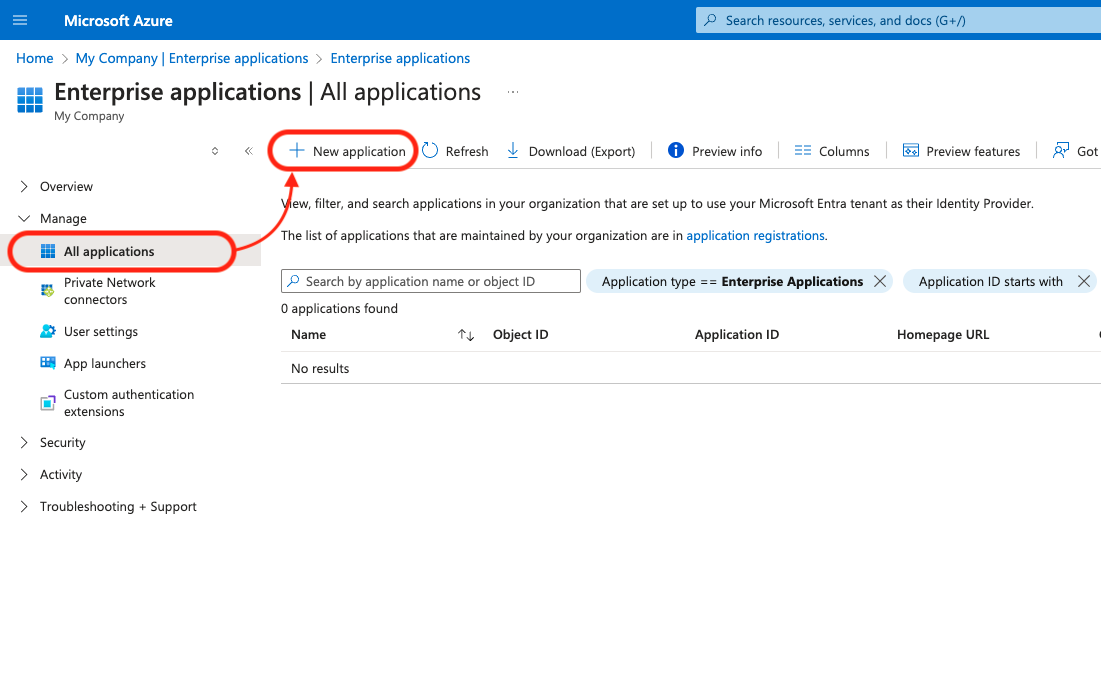
5. Click the + Create your own application button. 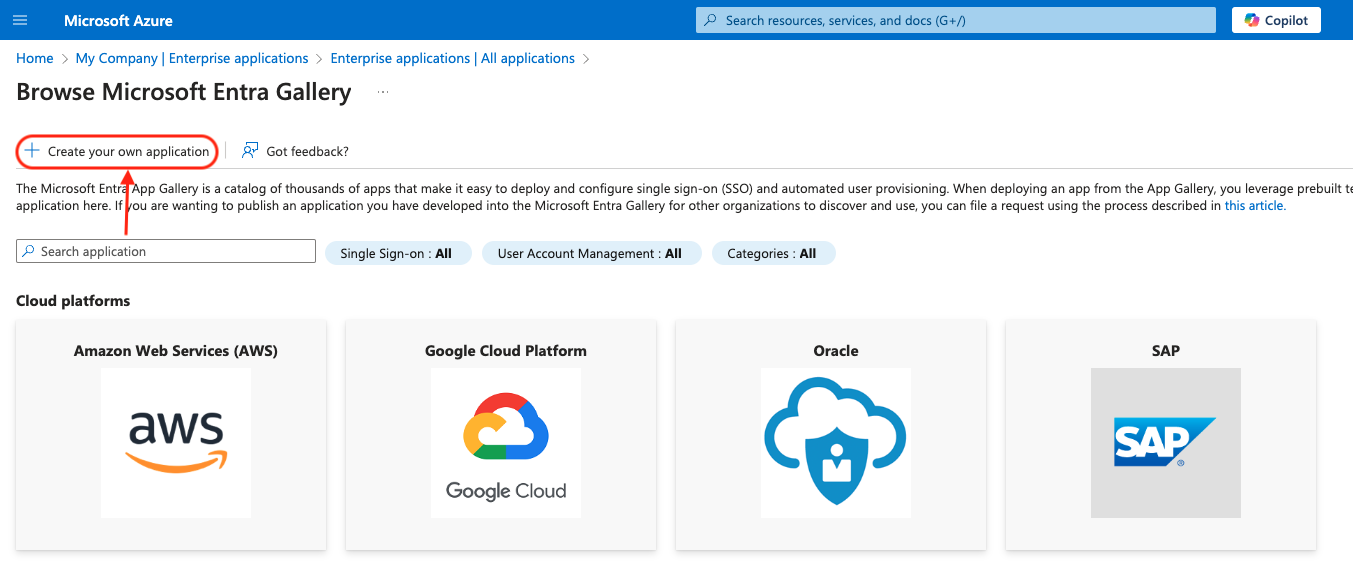
6. Name your app, and choose the option below on the pop-up. 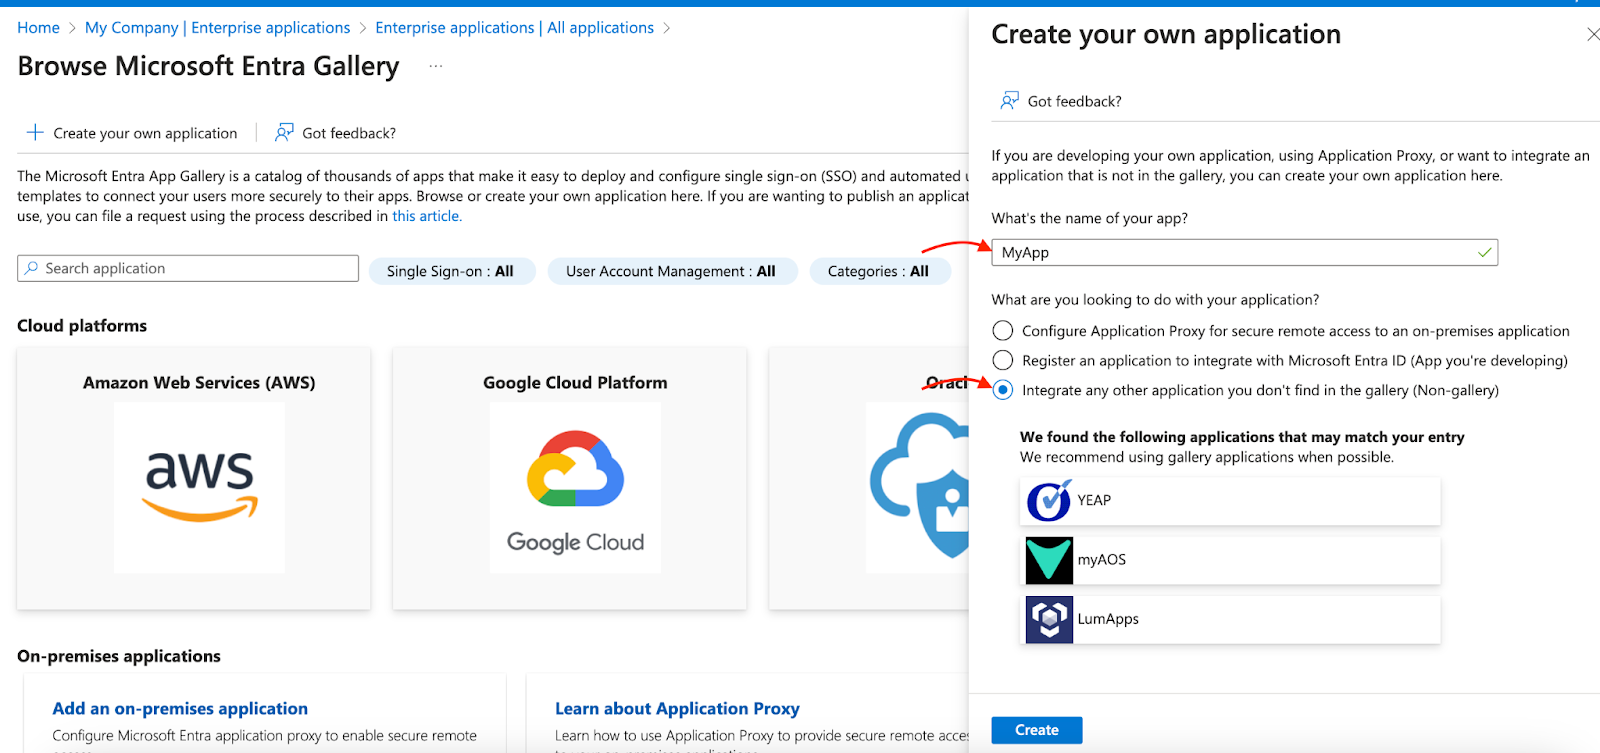
7. Go to the 2. Set up the single sign-on option.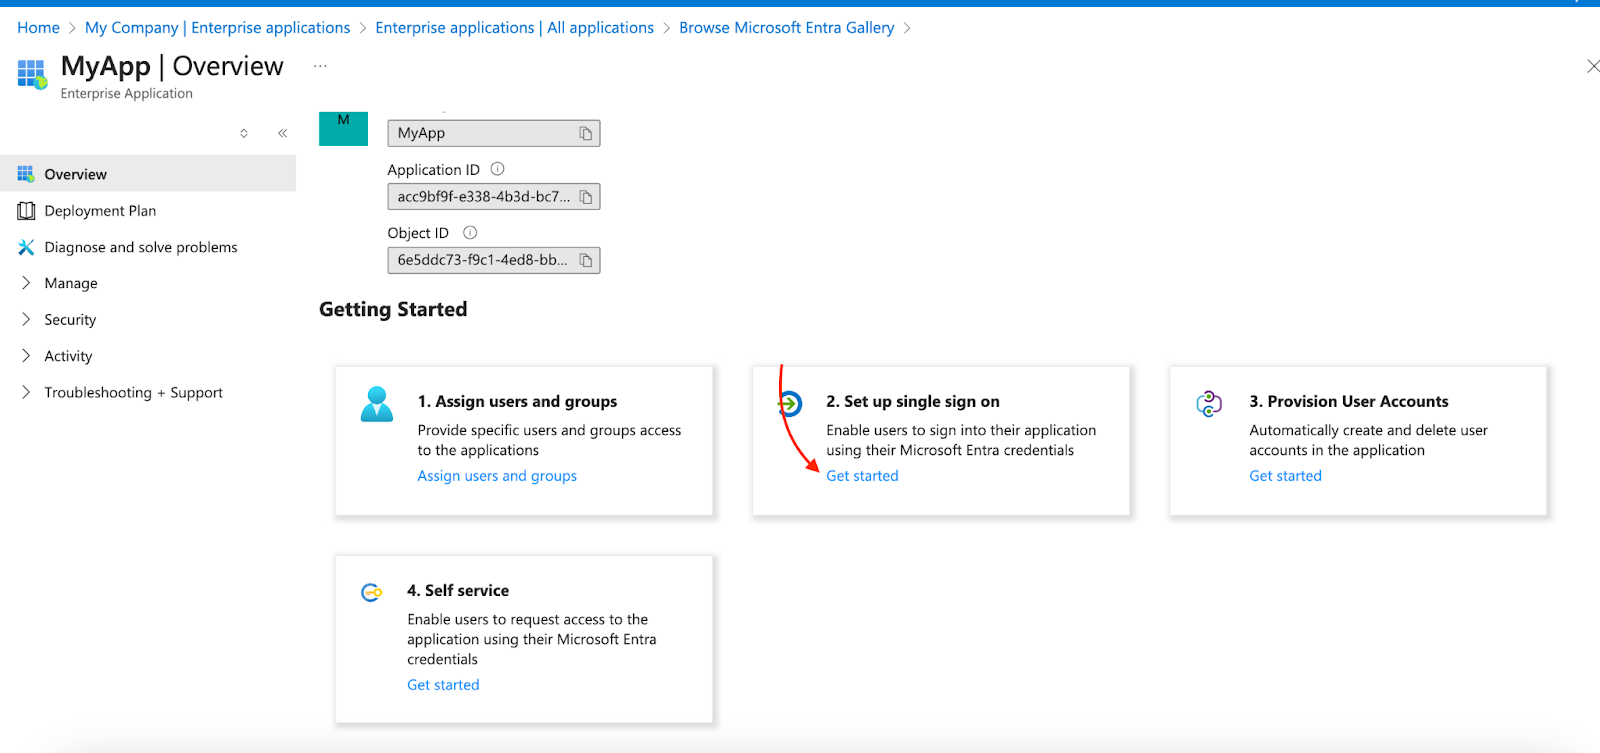
8. Select SAML as your single sign-on method.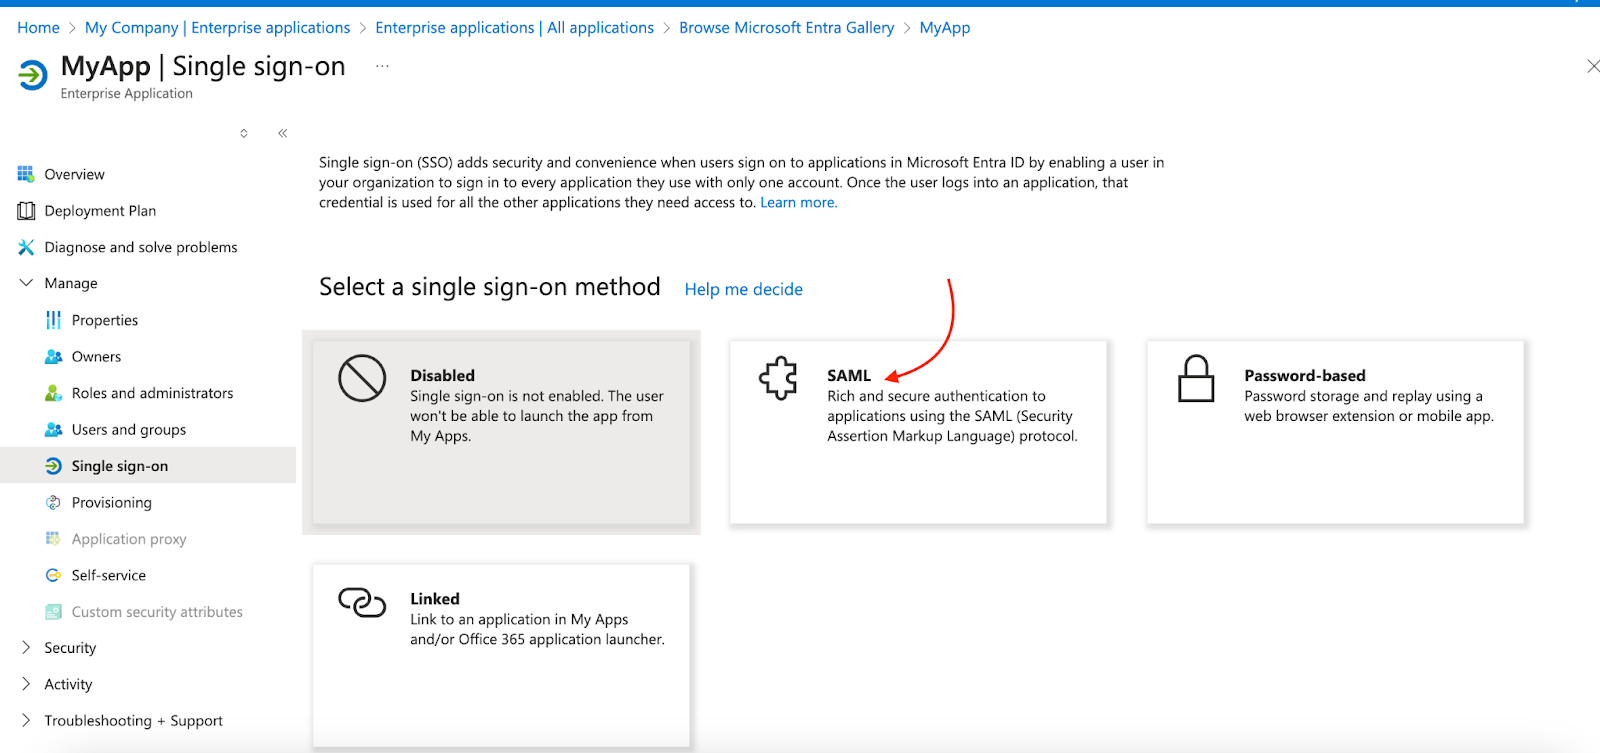
9. Click the Edit button next to the Basic SAML Configuration on the following page.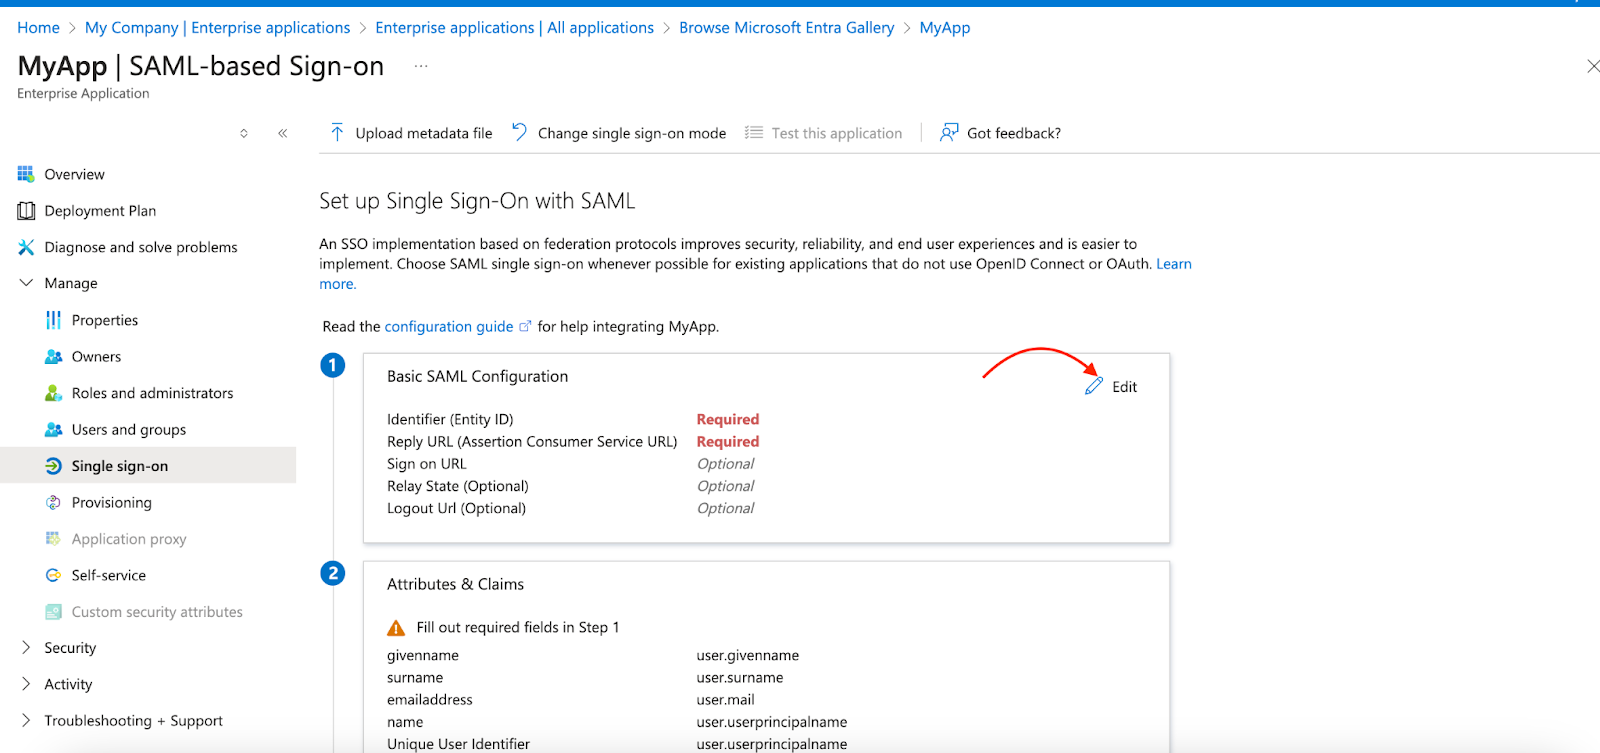
10. Copy the Identifier (Entity ID) from the MindBehind Live panel and paste it into the Identifier (Entity ID) field on Azure.
Copy the Reply ID (Assertion Consumer Service URL) from the MindBehind Live panel and paste it into the Reply URL (Assertion Consumer Service URL) field on Azure.
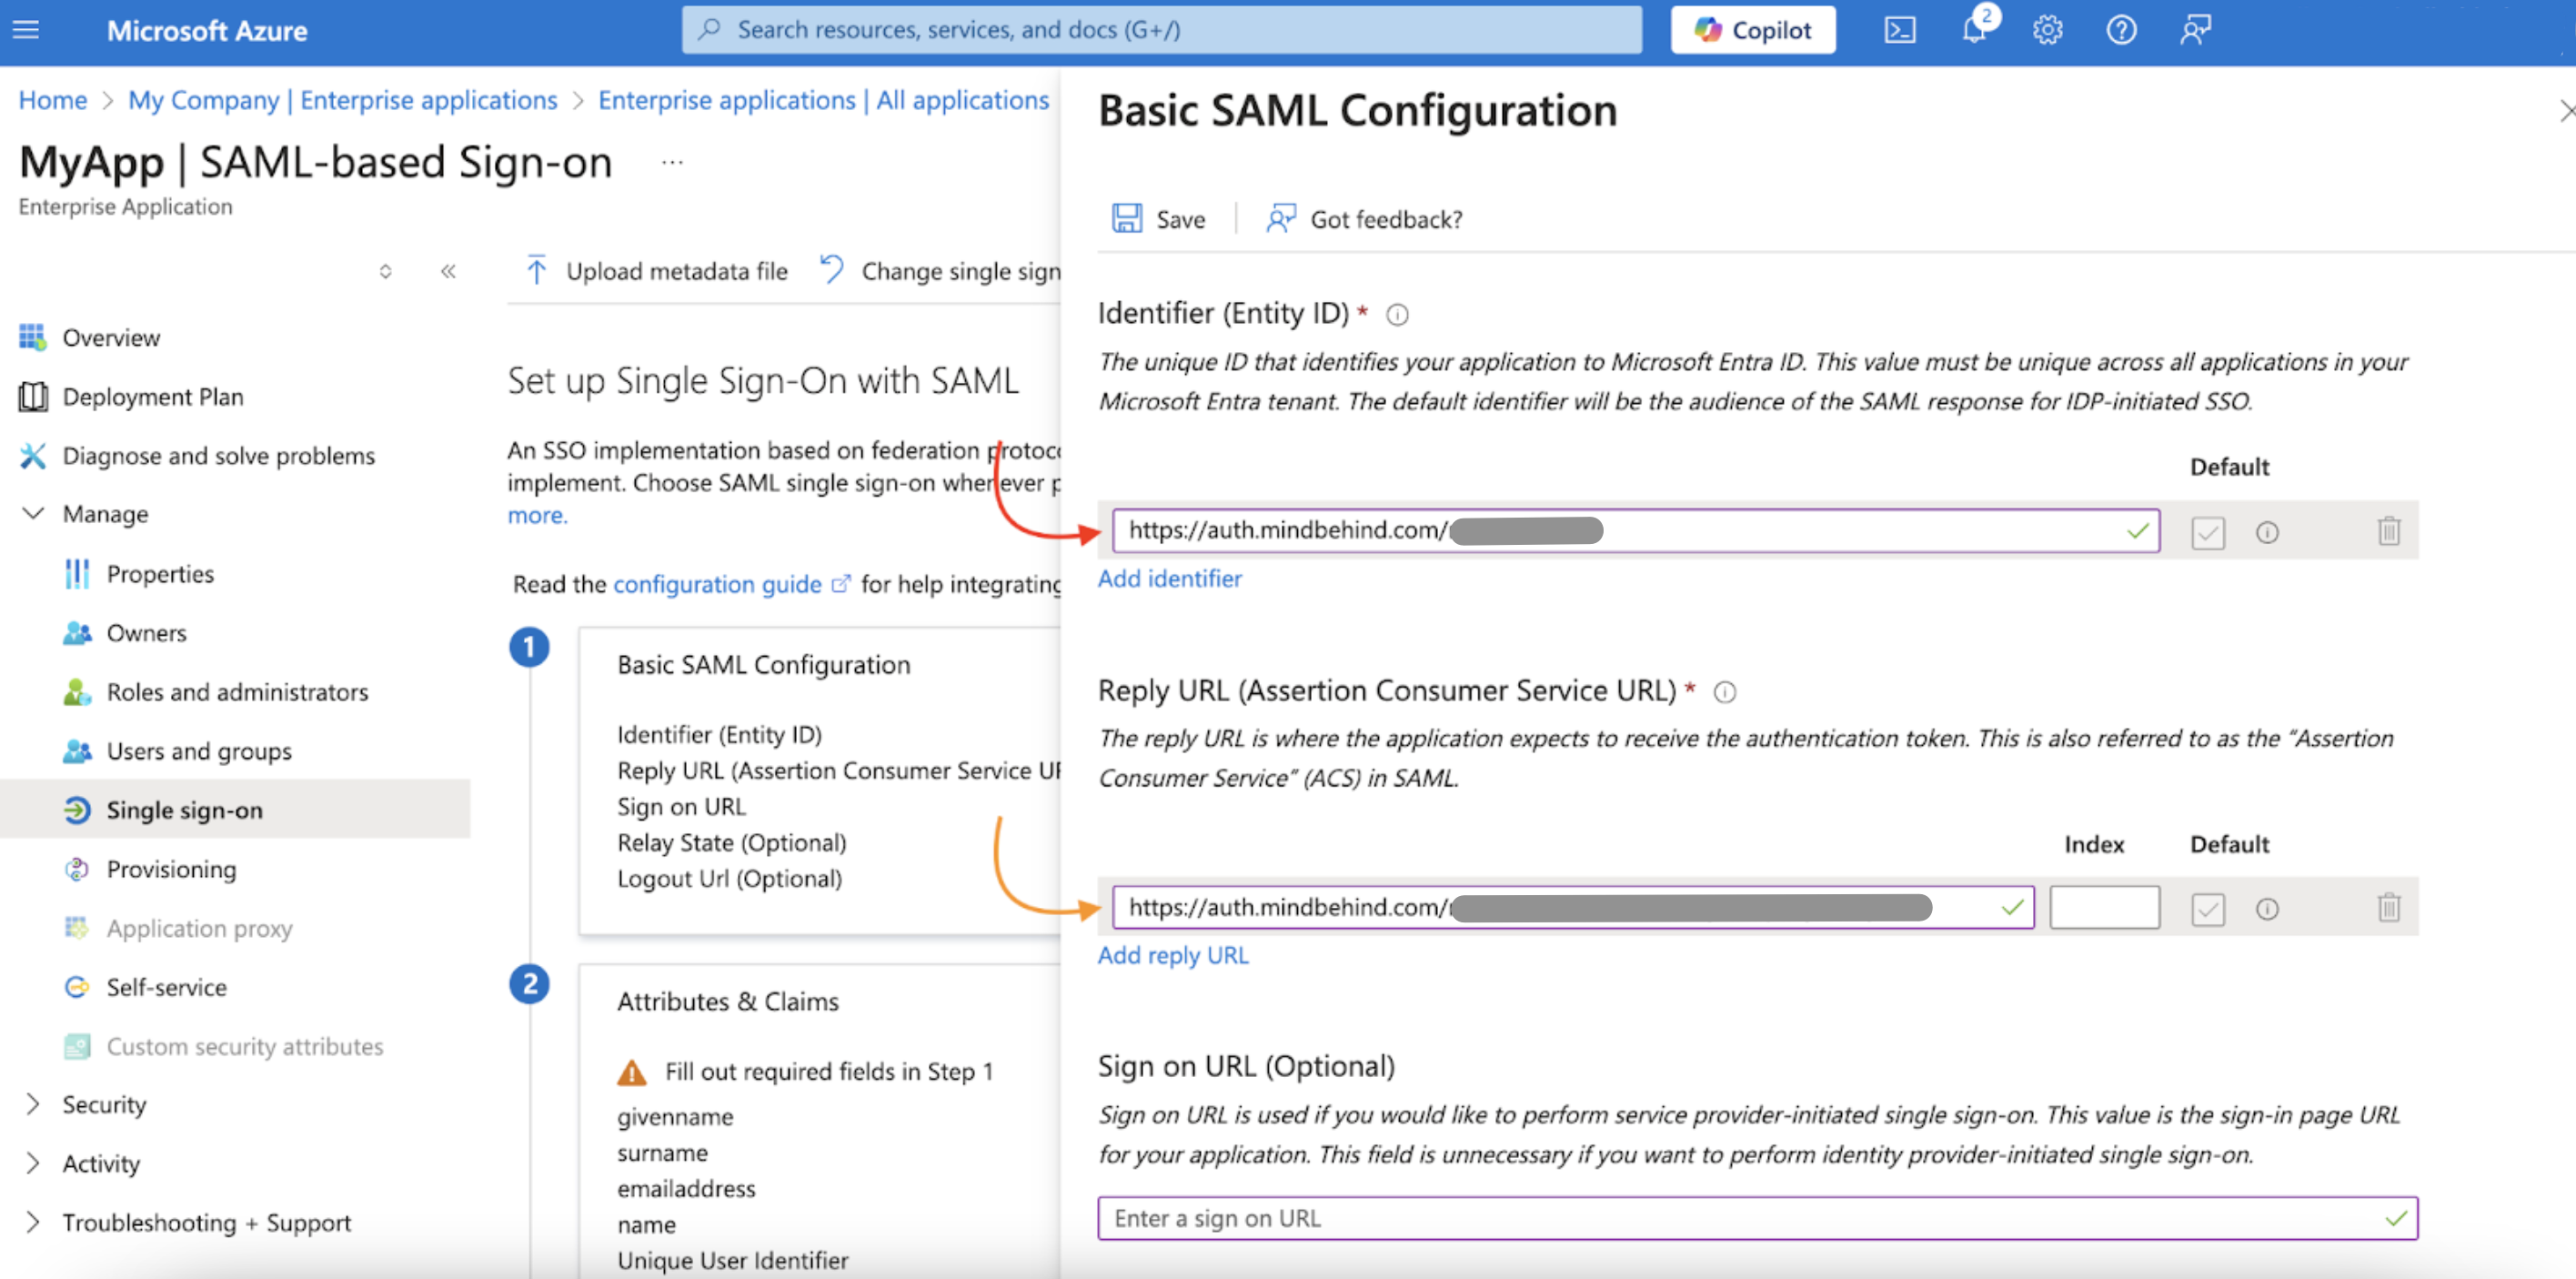
12. You should leave the Sign on URL (Optional) and Relay State (Optional) fields empty.
13. Click the Save button on Azure to complete this step.
14. Click the Edit button next to Attributes & Claims on the following page. 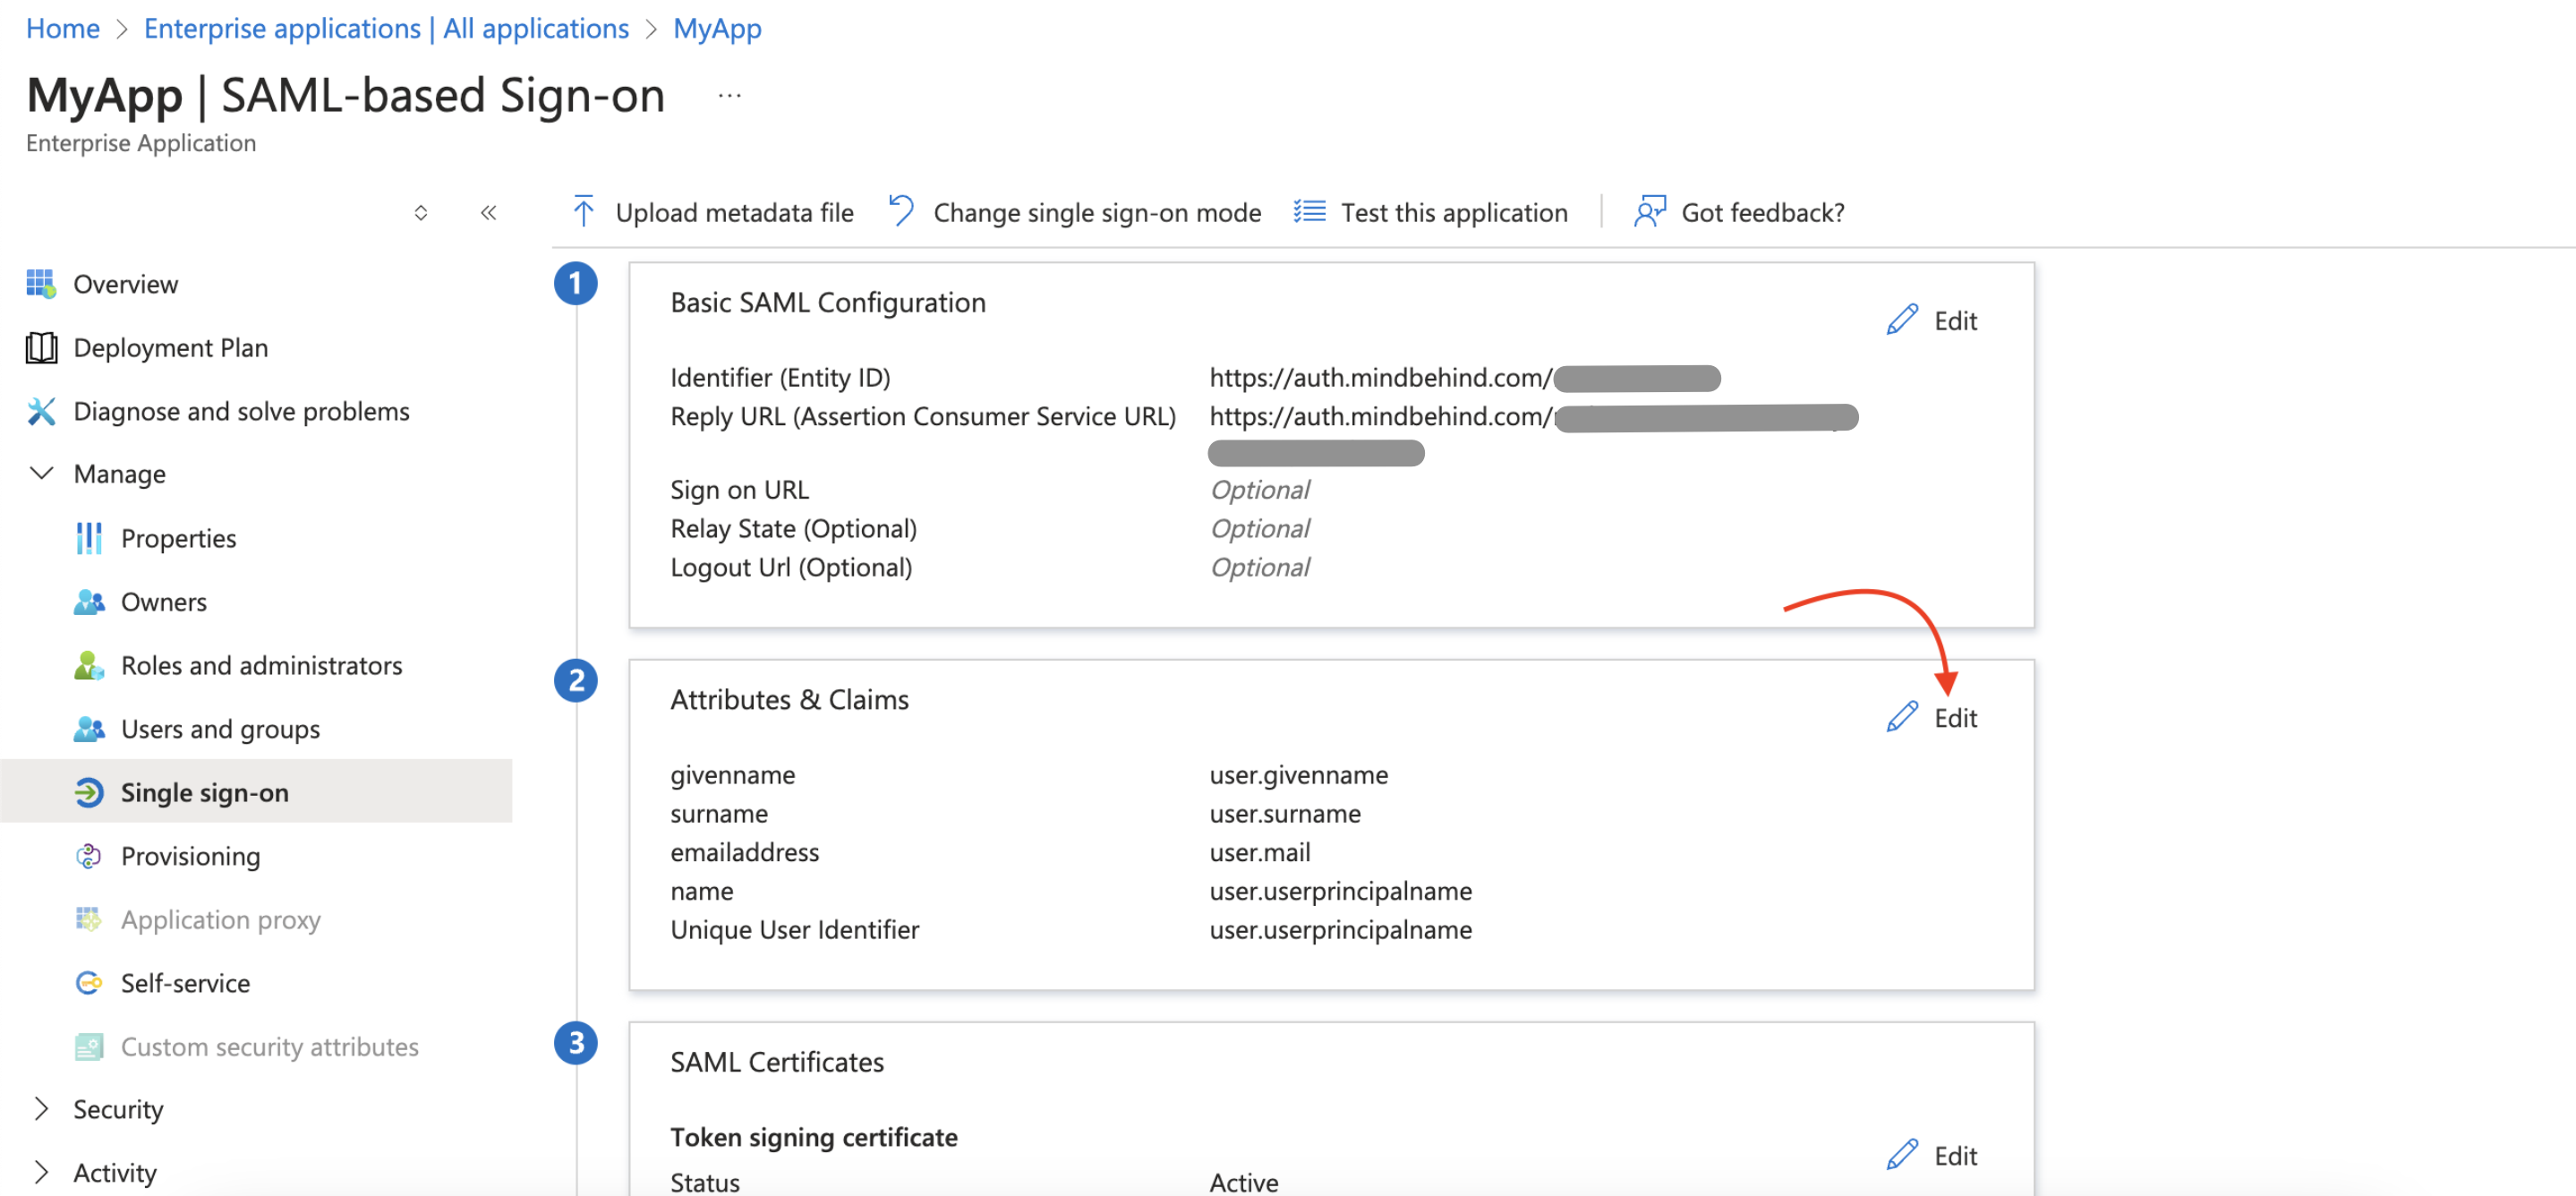
15. Go to Unique User Identifier (Name ID).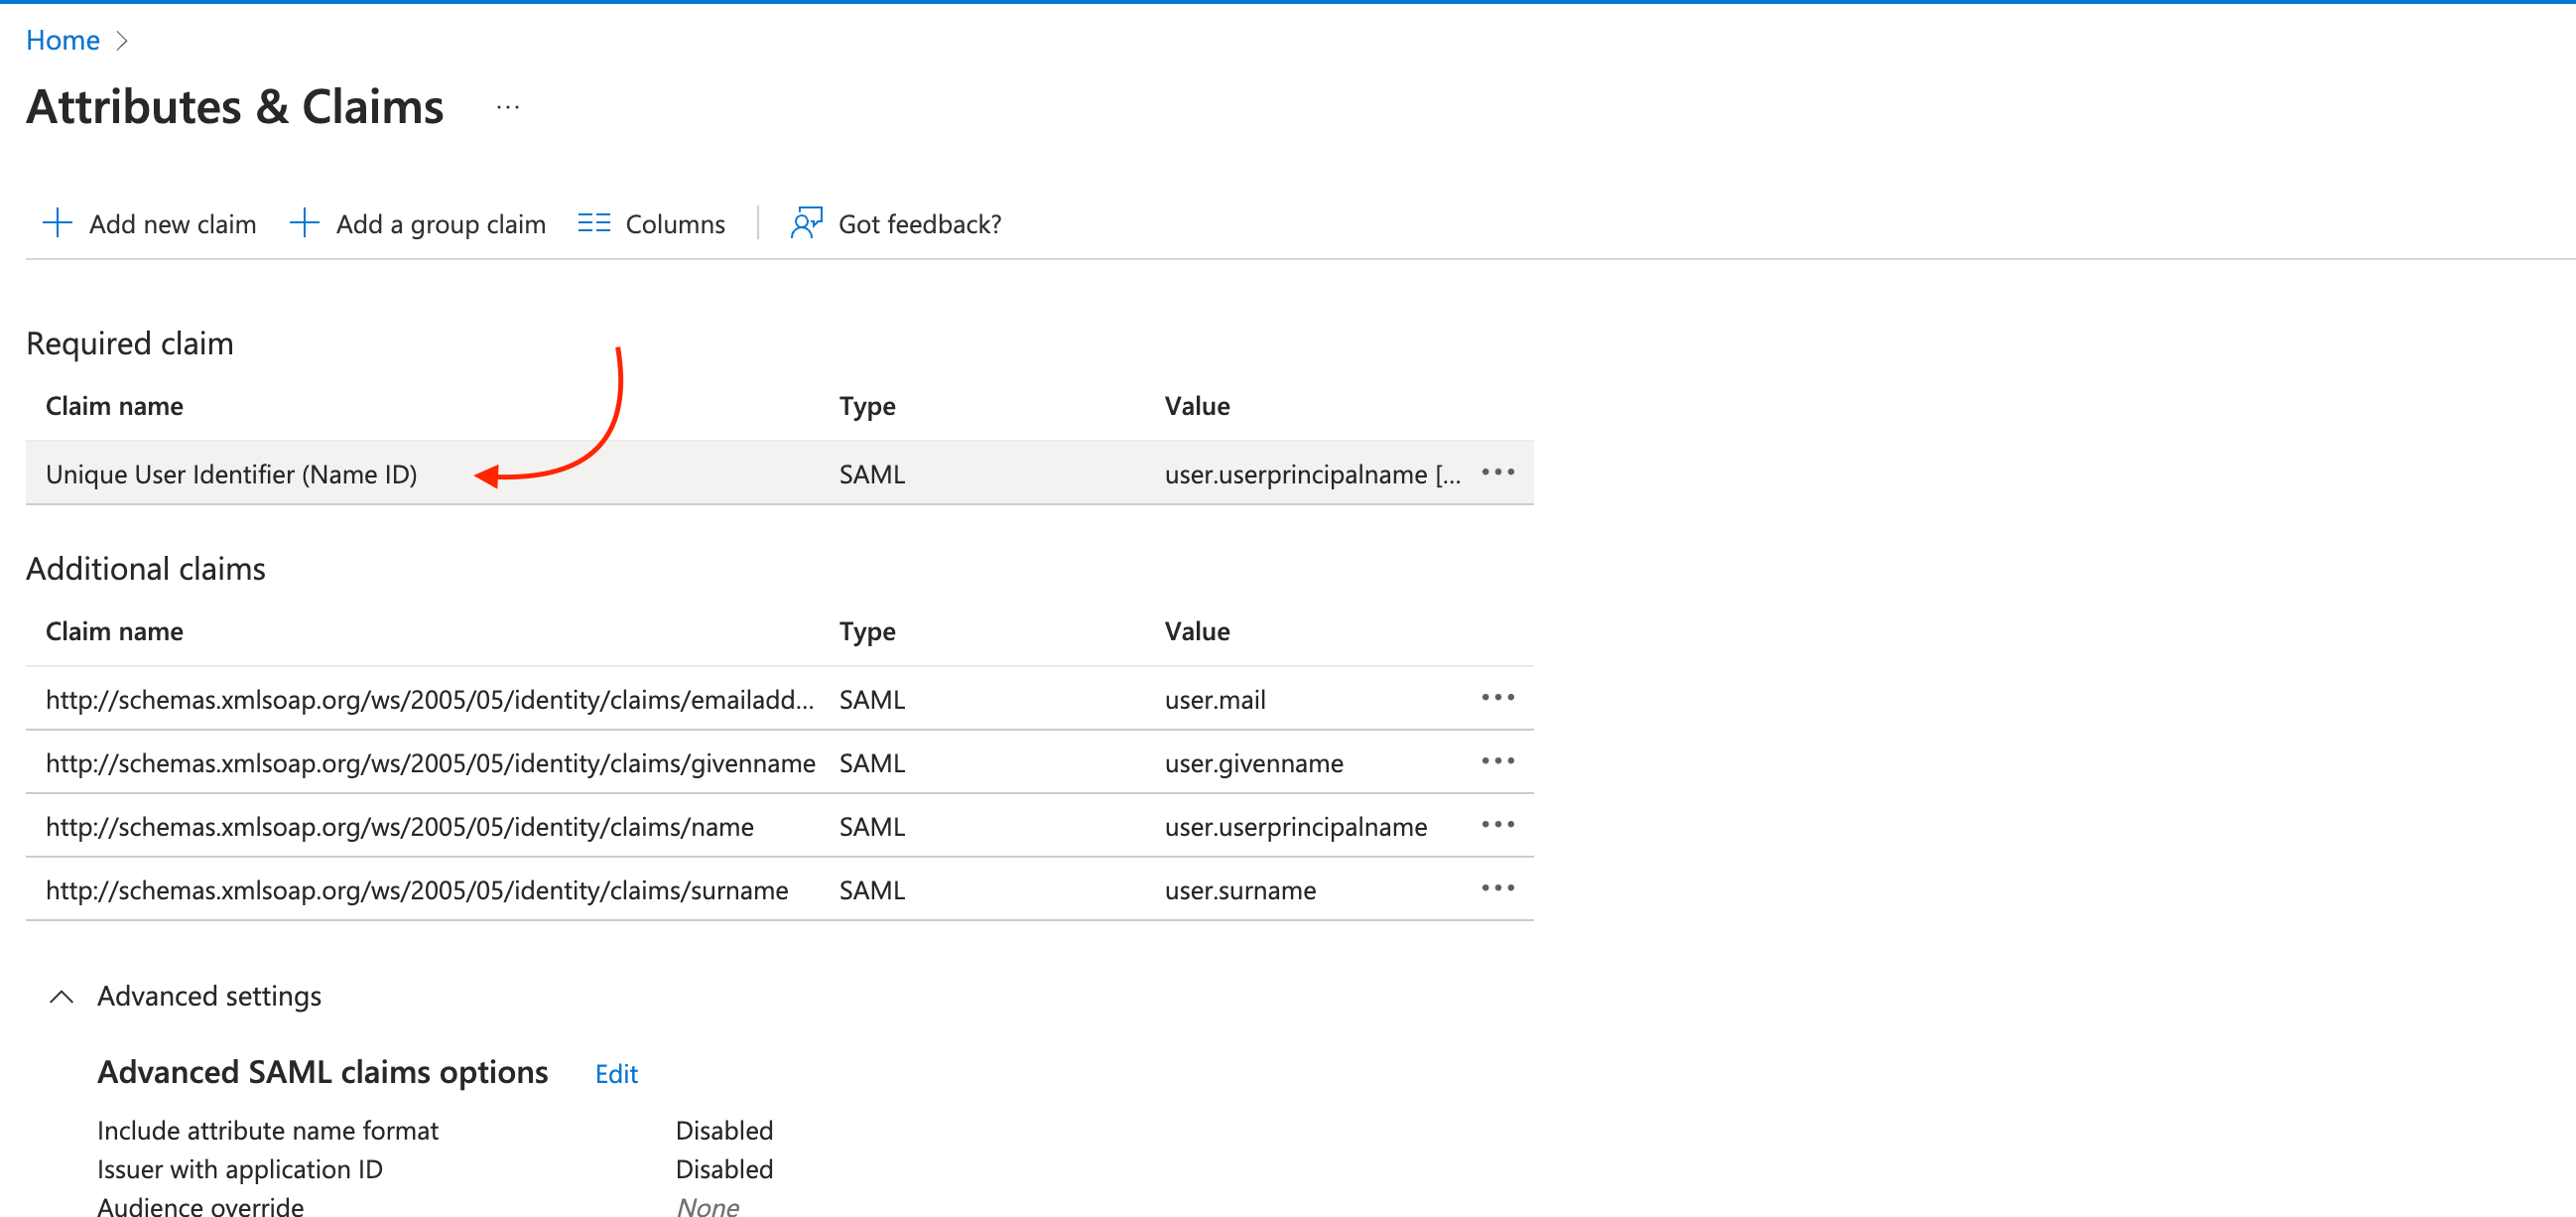
16. Choose "Email address" for the Name identifier format and "user.mail" for the Source attribute. 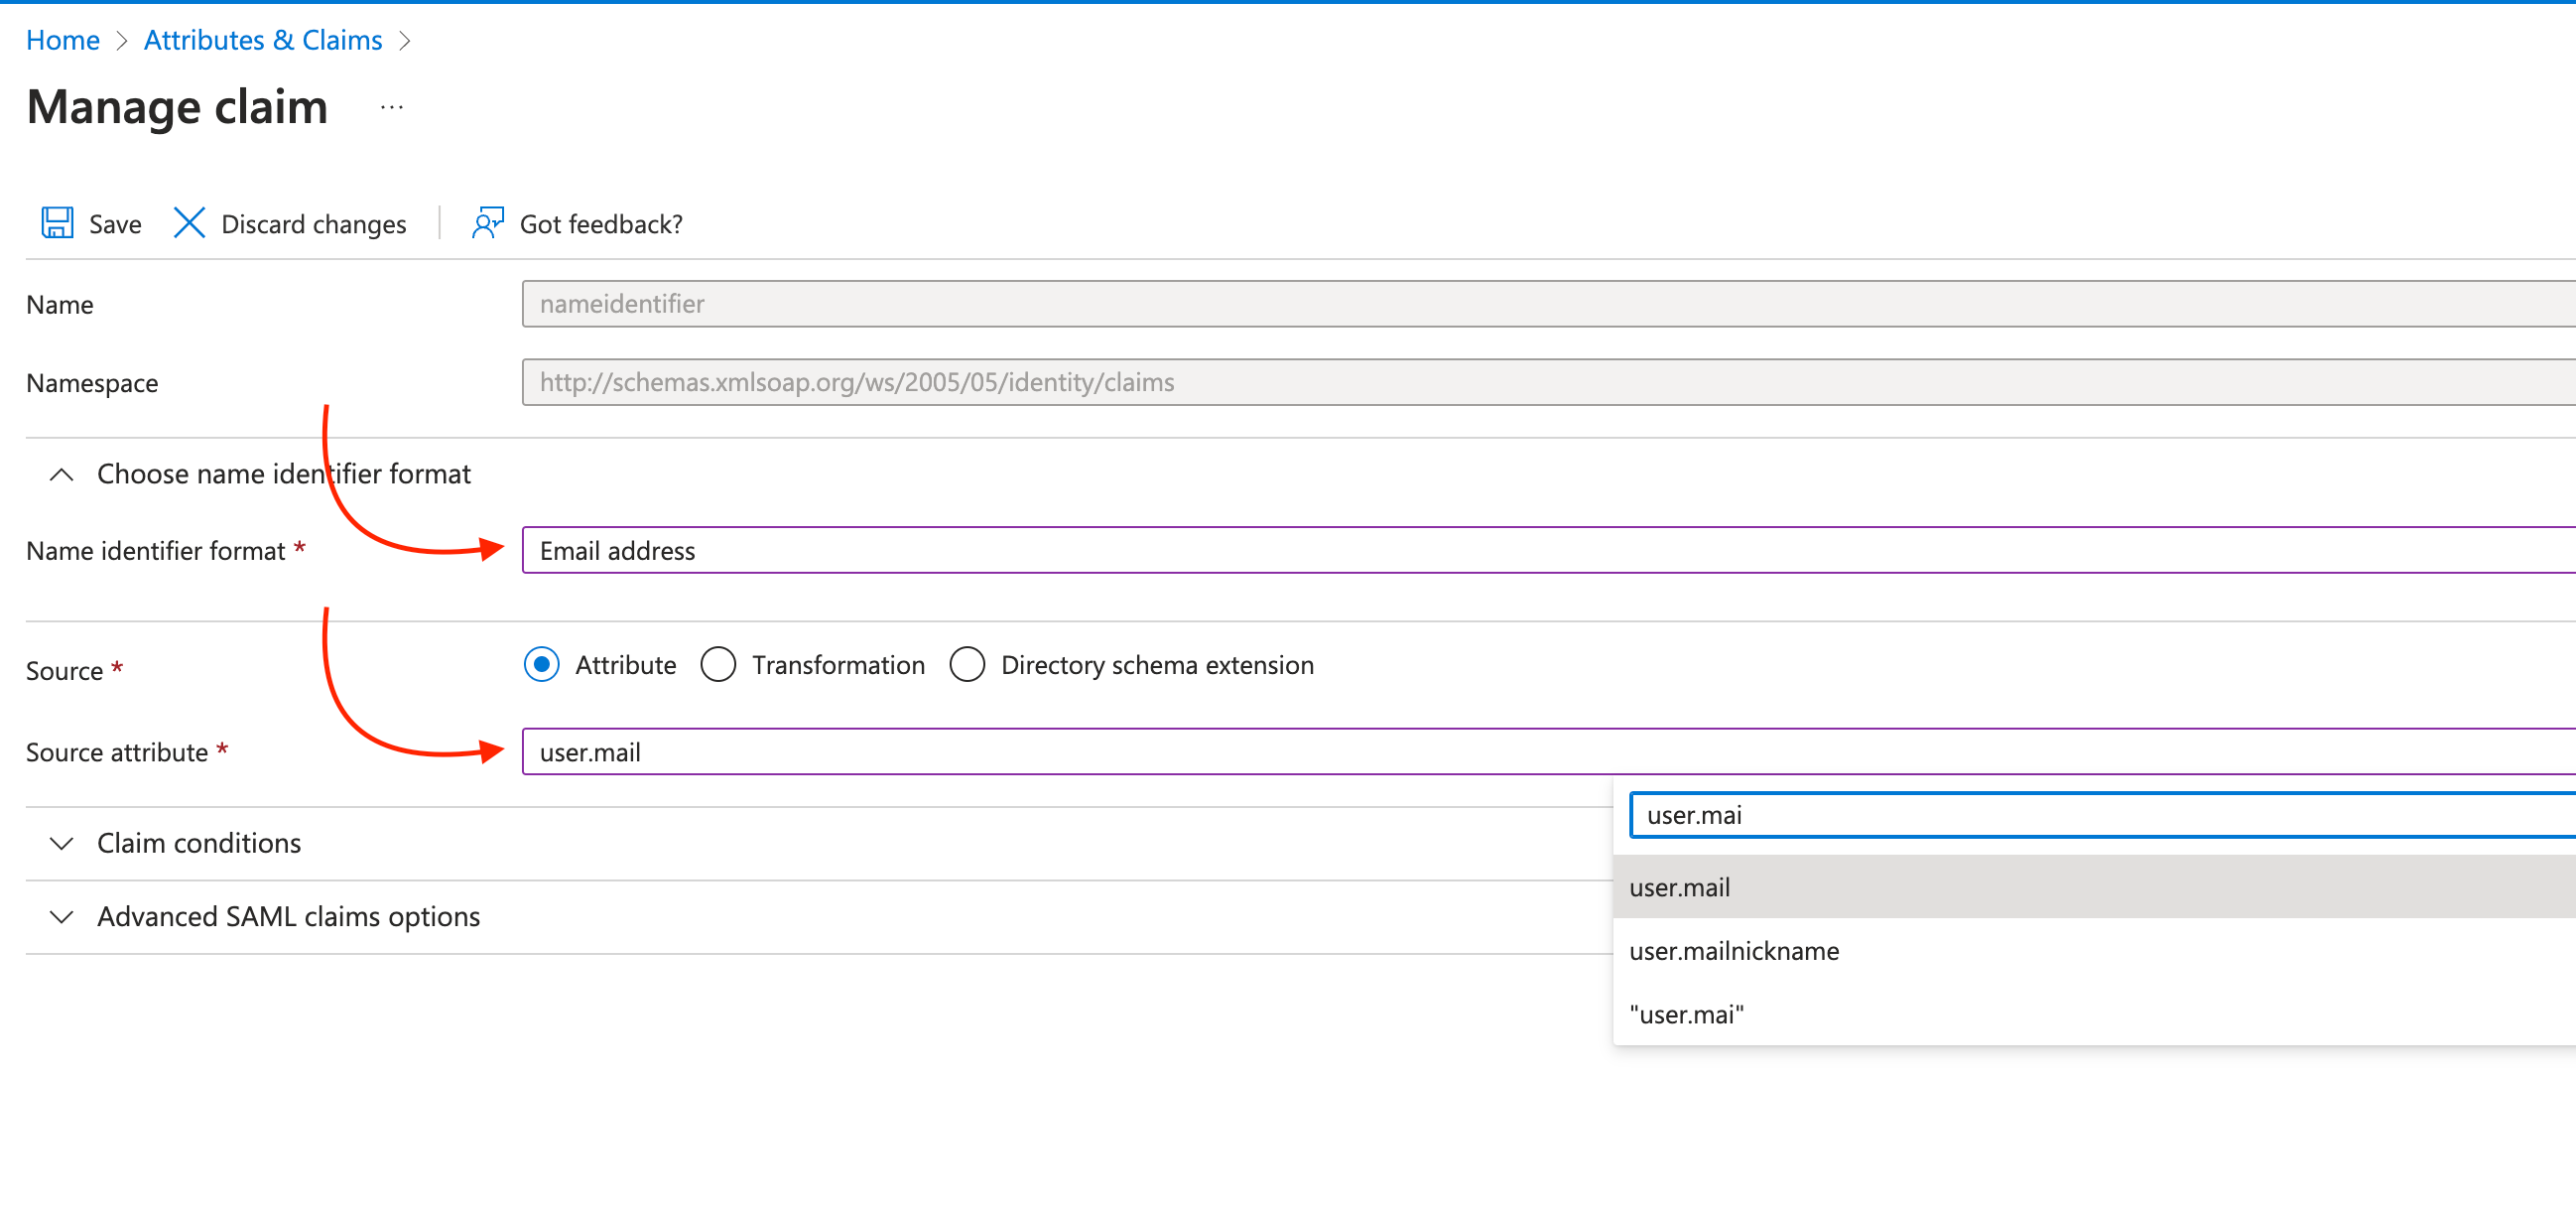
17. Go to Manage > Single sign-on on the left menu to copy the App Federation Metadata URL. 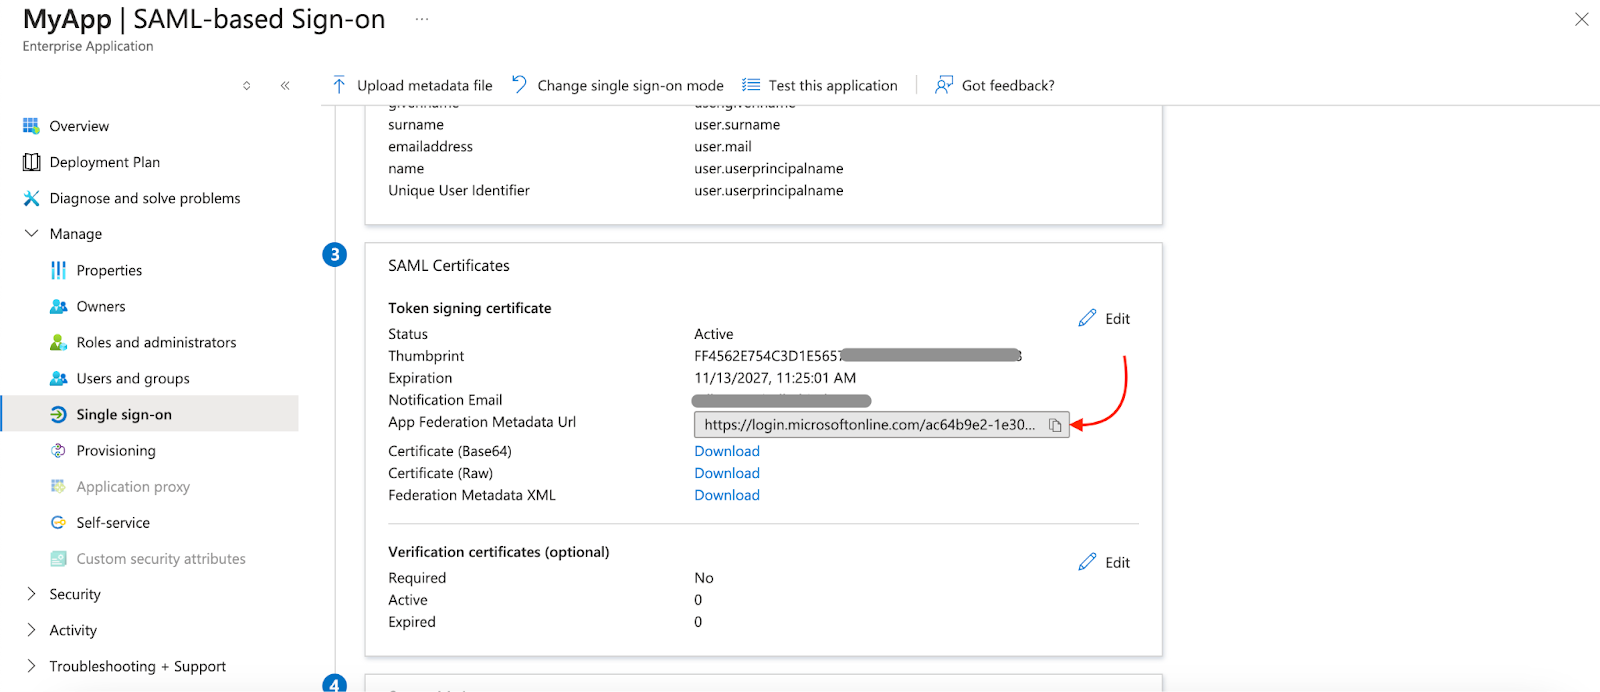
18. Go to Company Management > Security tab on the MindBehind Live panel, and paste the copied URL into the App Federation Metadata URL field.
You can also enter the URL manually if you prefer to do so.
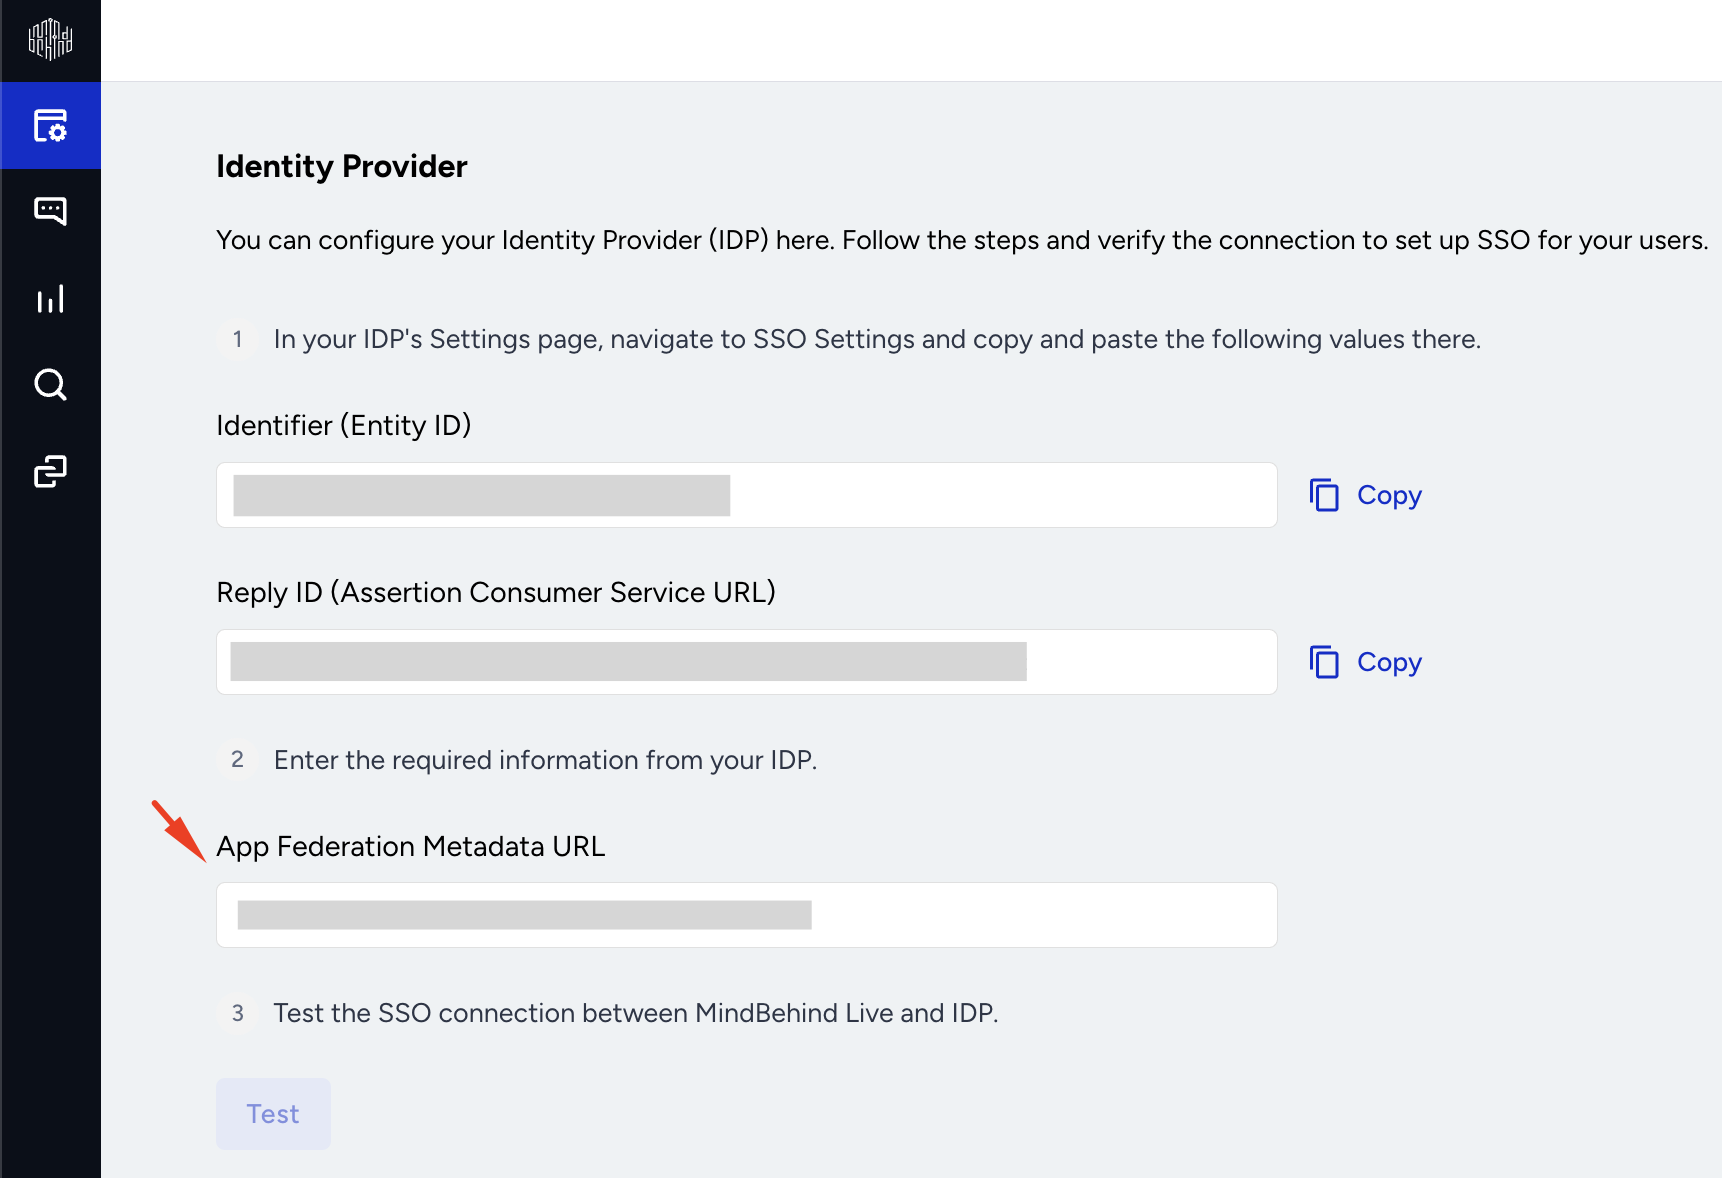
19. Now, you can test the SSO connection on MindBehind Live. Once you click the Test button, the connection will be tested. 
20. After you see the "SSO connection was successful" information, click the Save button.
21. To complete the connection on Azure, you need to assign your user to the newly created app. Click the Users and Groups tab on the left menu. Click the + Add user/group button.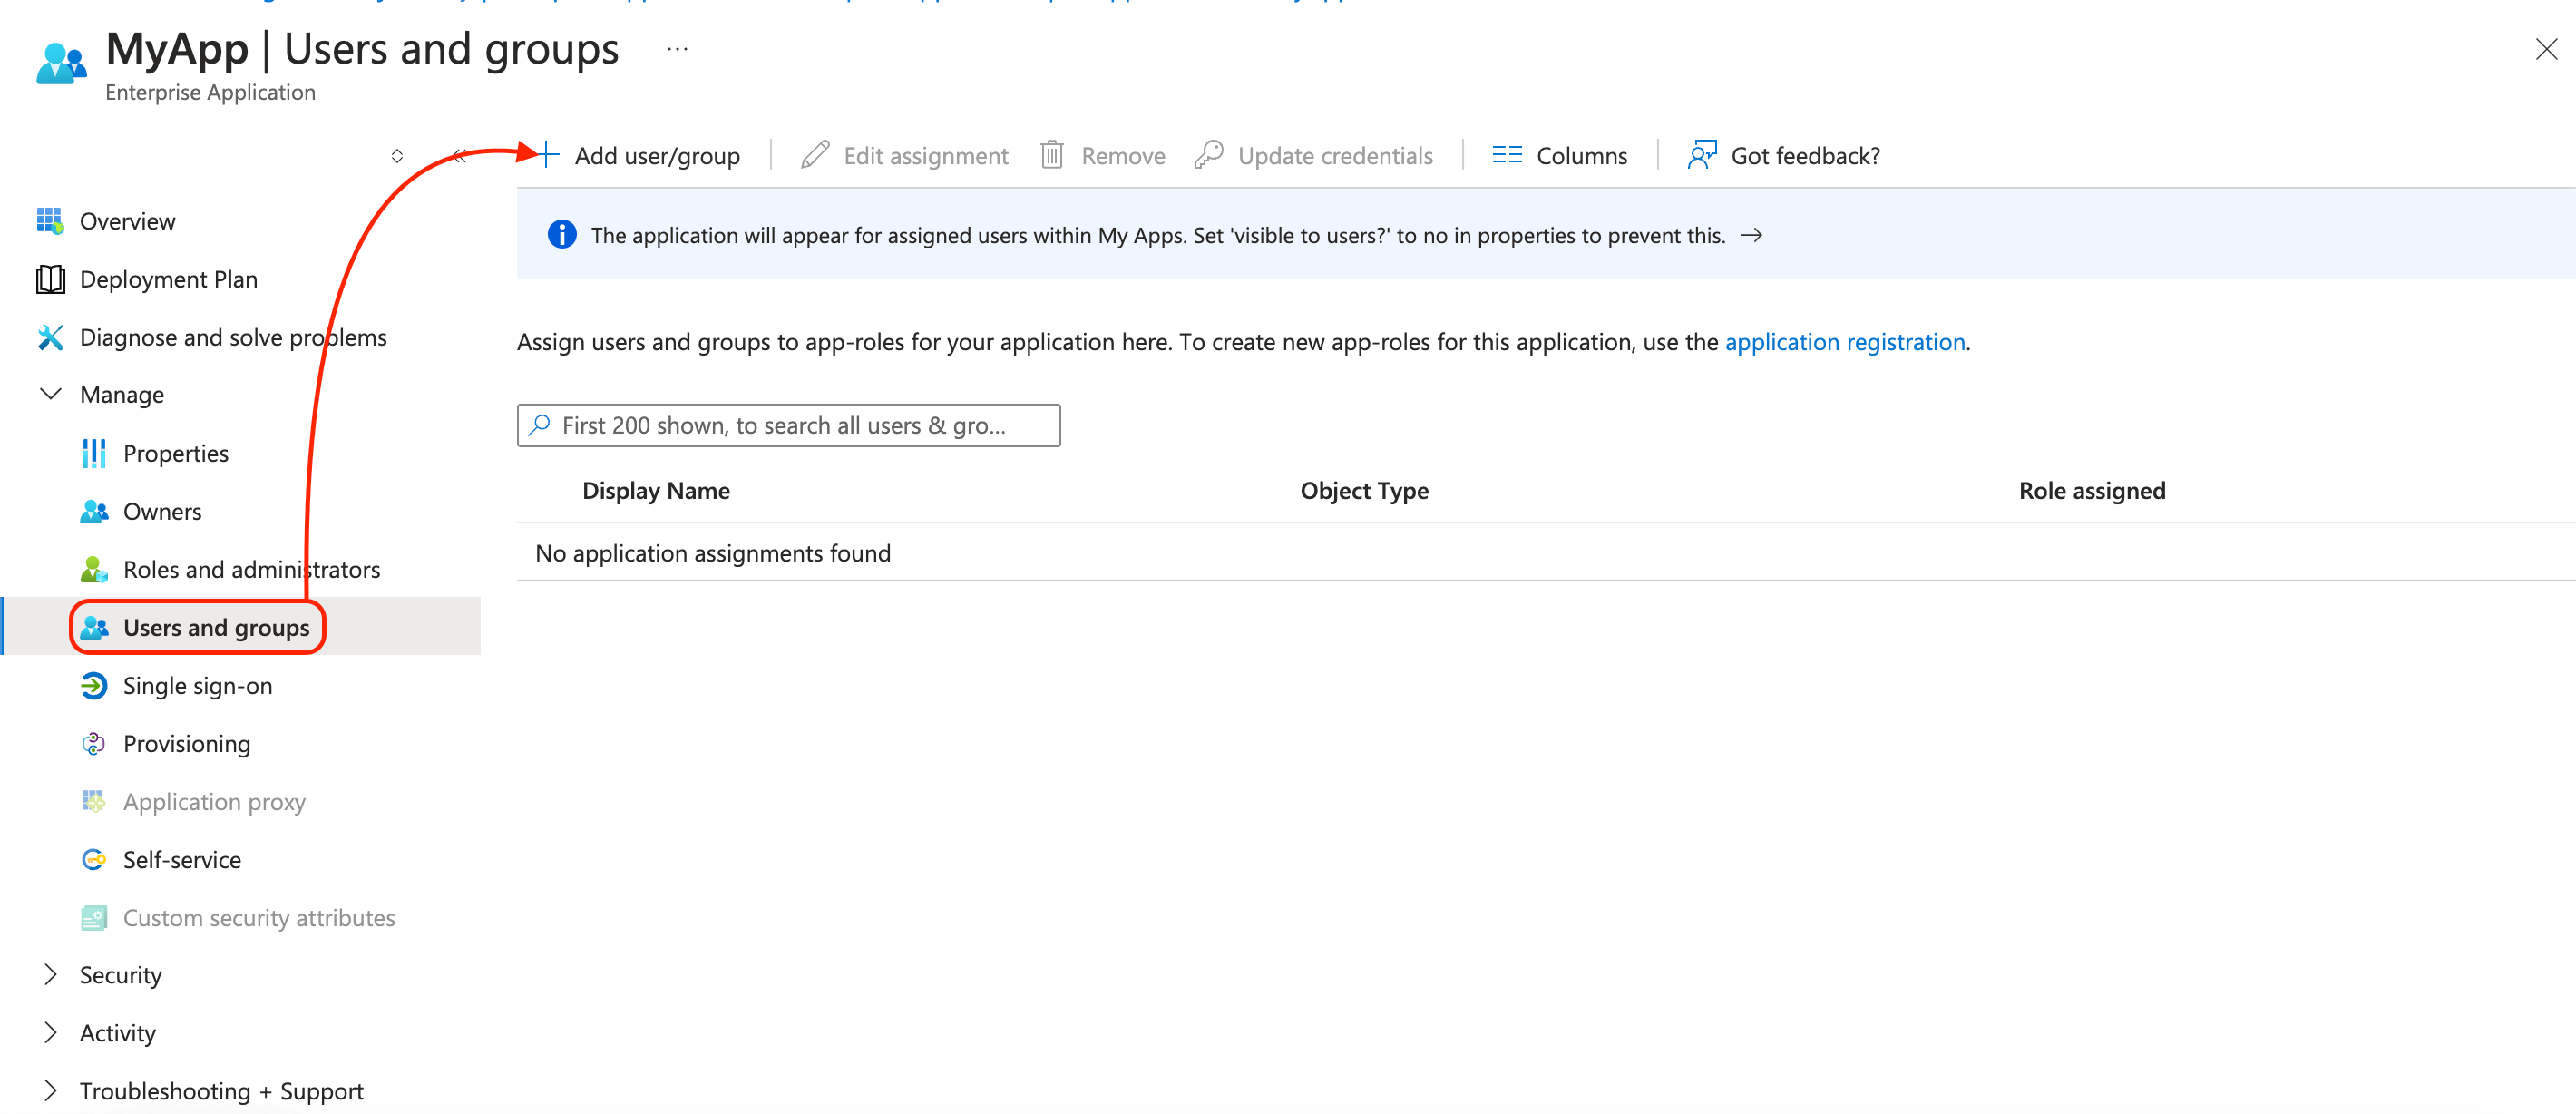
22. On the following pop-up, select your user and click the Assign button. 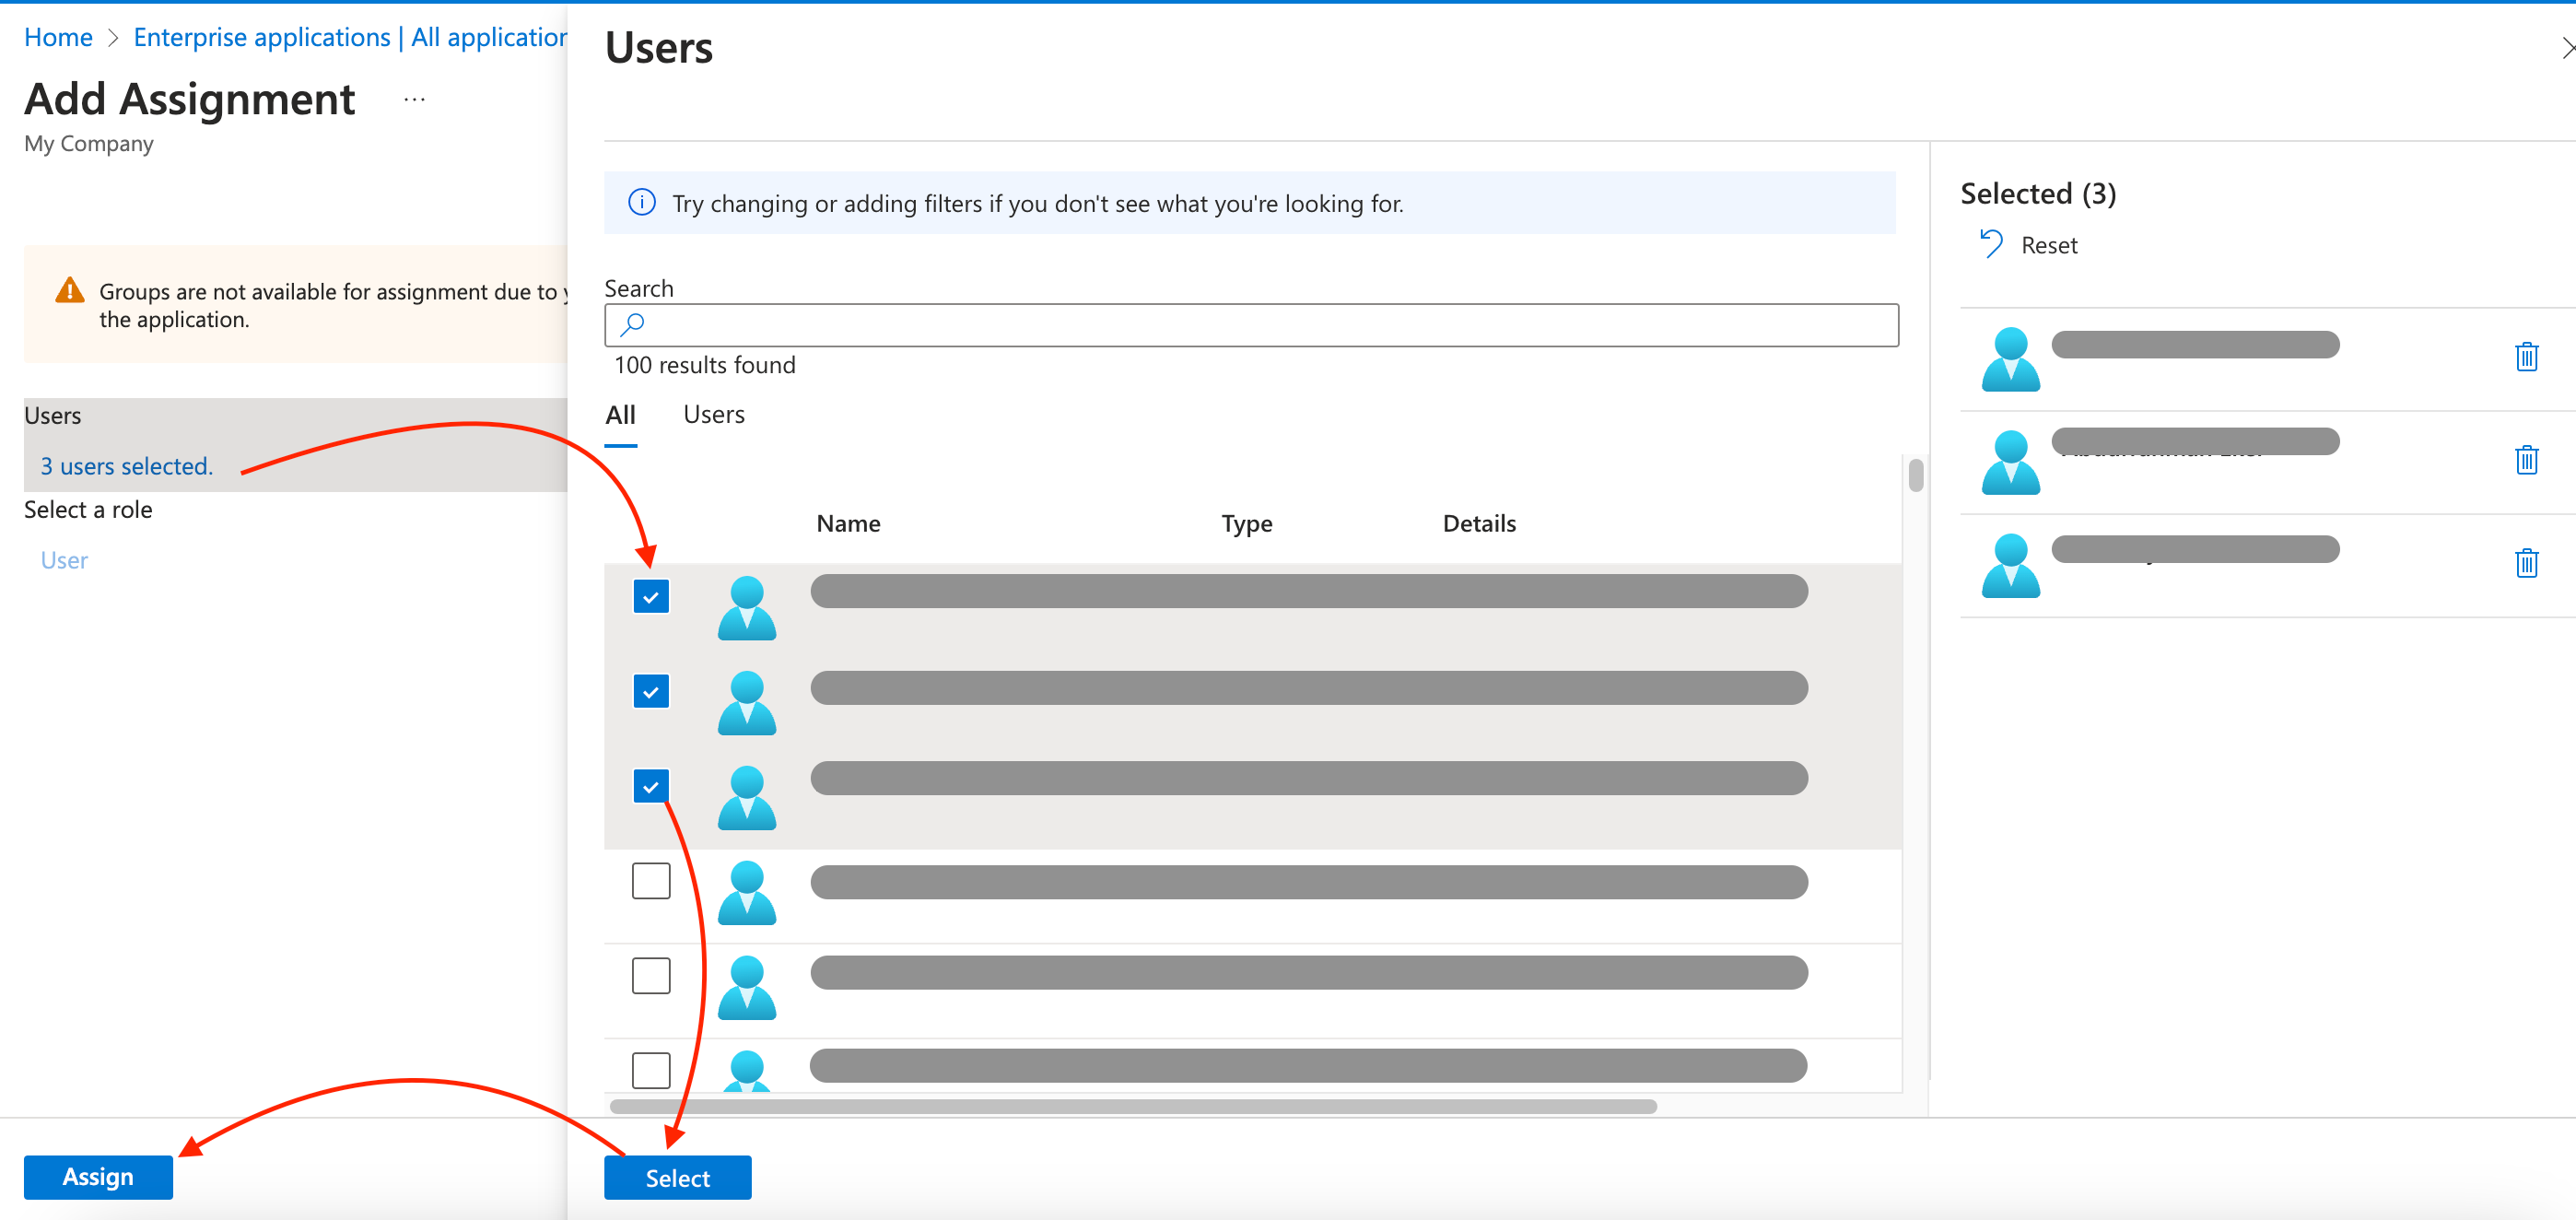
Congratulations! You have successfully set up SSO for your panel users with Azure AD.