Once you add your sender domain, the next step is to configure DNS records through your domain provider. These records allow Insider One to verify domain ownership and authorize email sending on your behalf. They also enable key authentication mechanisms that mailbox providers use to verify that your emails are legitimate, which helps prevent spoofing, improve deliverability, and protect your sender reputation.
During the IP Address Assignment step, if you proceed with dedicated IPs, you will be required to configure reverse DNS (rDNS) for those IPs. This step is essential for email authentication and deliverability when sending from a dedicated IP.
Configure sender DNS records
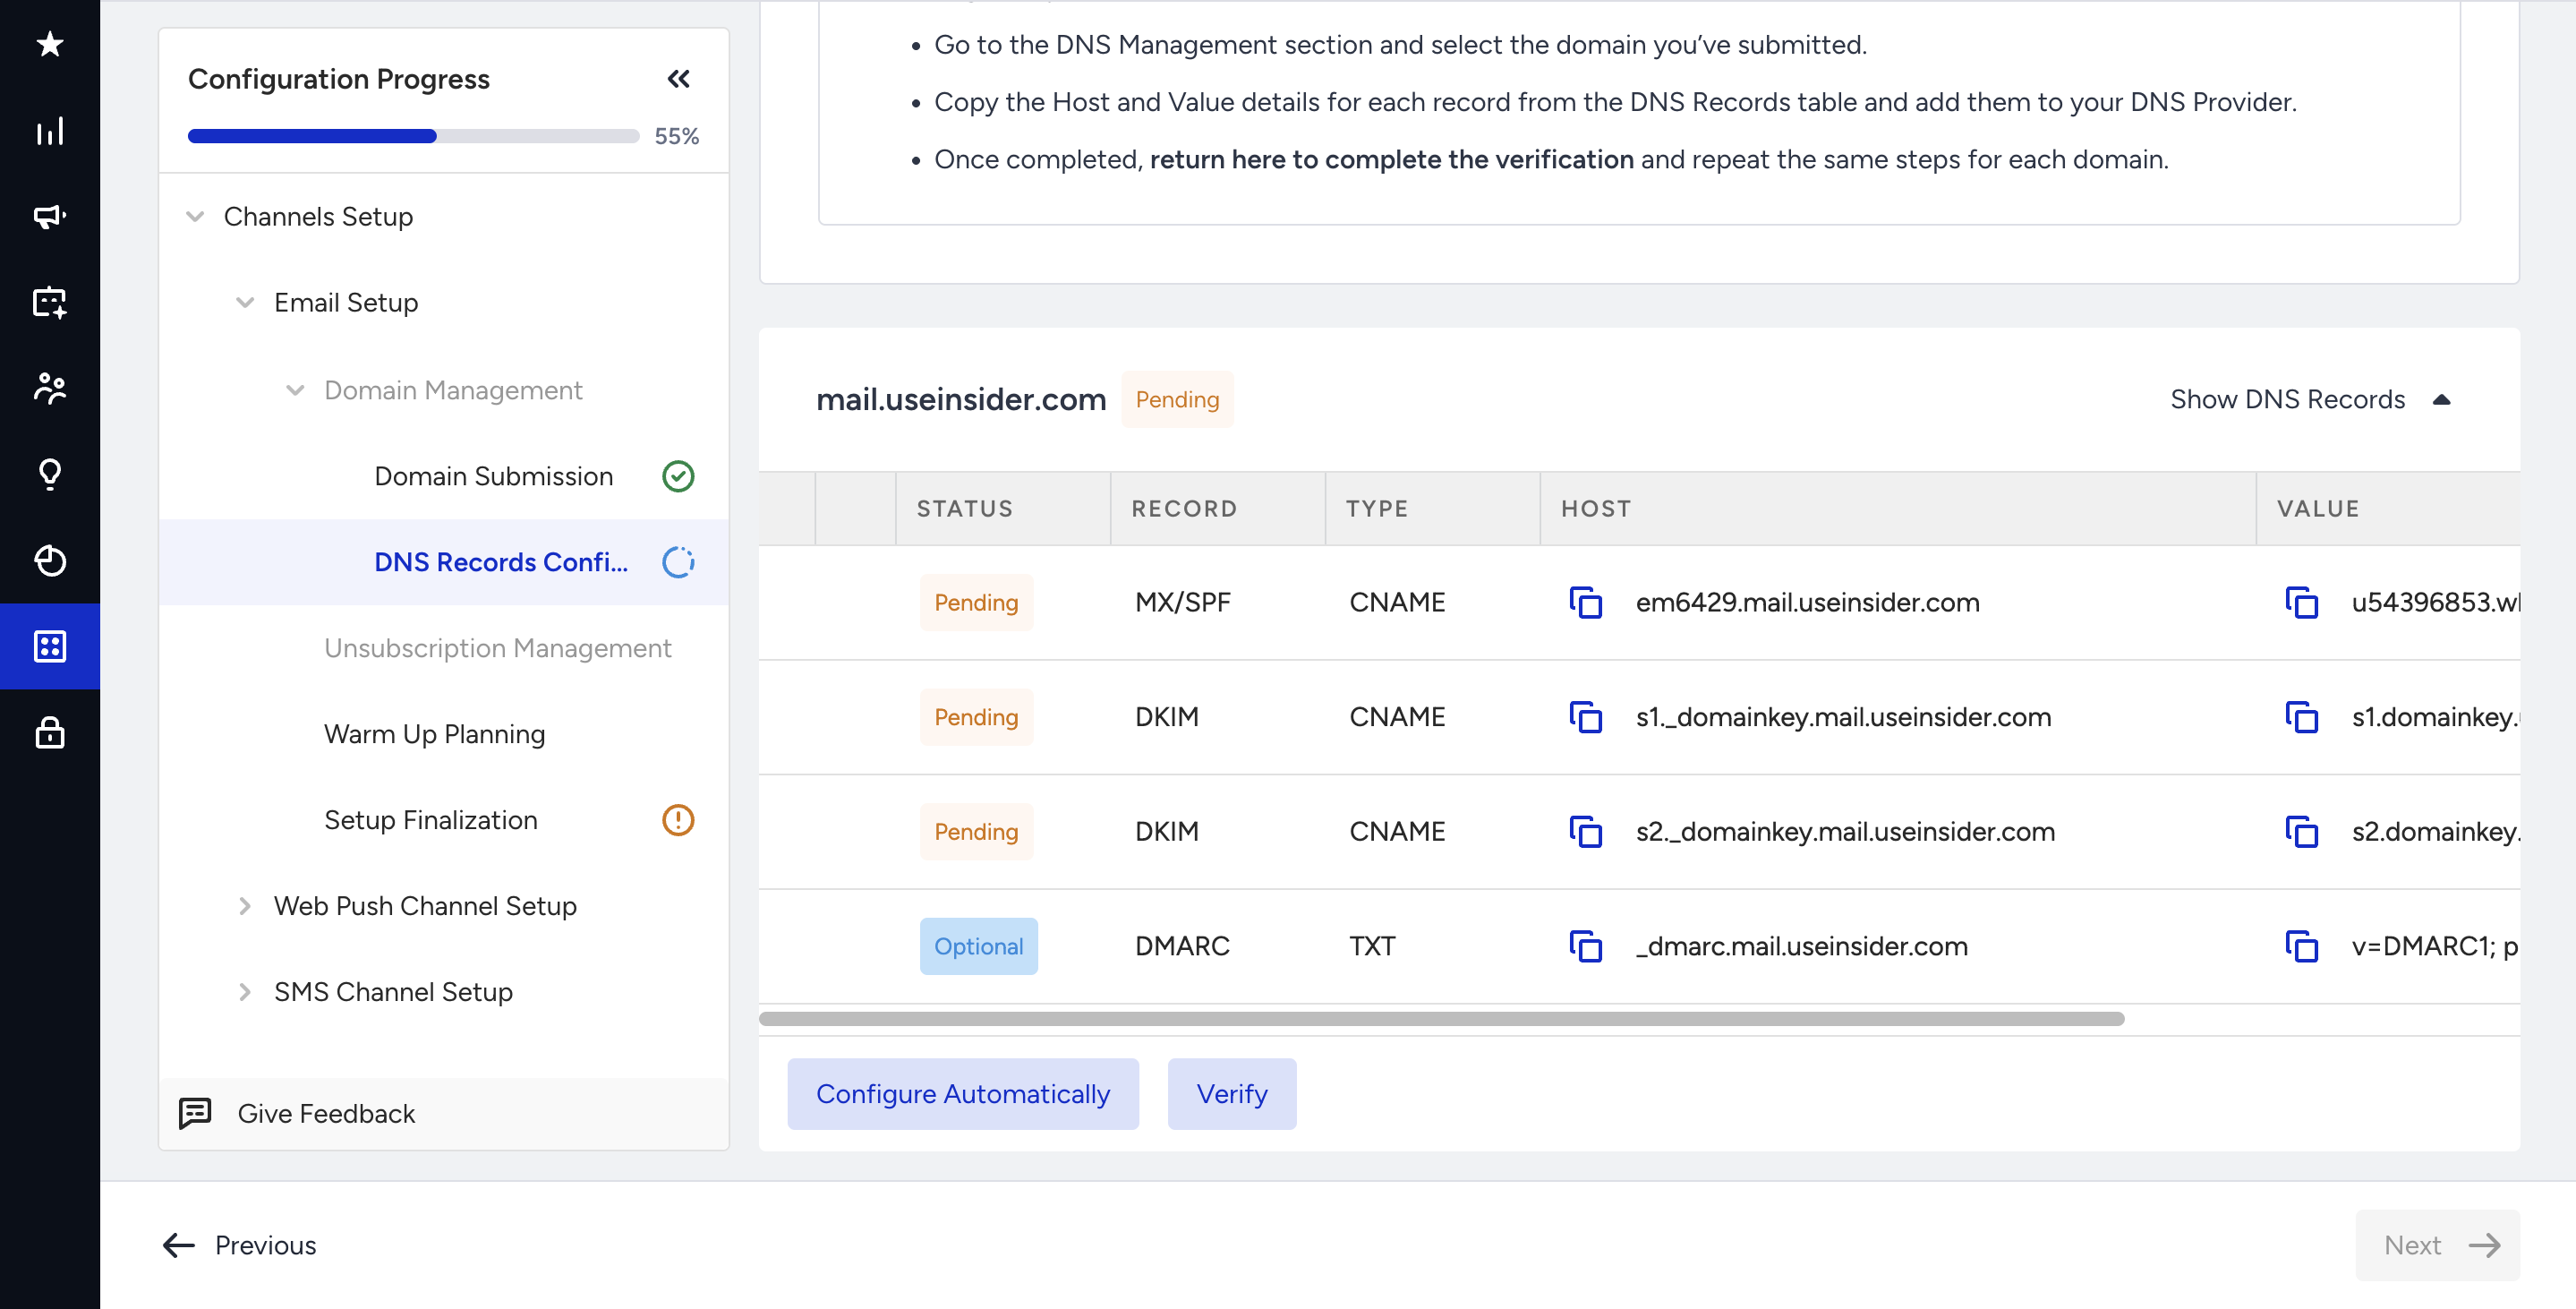
Adding a CNAME (Canonical Name) record to your DNS configuration redirects traffic from one domain or subdomain to another. These records help establish your ownership of the sender domain and enhance email deliverability.
Suggested reading: Configure DNS Settings for Email
You can configure your DNS Records in two ways:
Manual configuration: Manually enter the DNS records for your domain provider.
Automatic configuration: Click the Configure Automatically button, then follow the instructions in the pop-up modal. An automatic approach is recommended as it will help you configure the DNS records in minutes.
After the DNS records have propagated, you can verify their existence using the Verify button on the InOne Domain Management page. This confirms whether your CNAME record has been added correctly.
Until the DNS records are configured, their status will appear as pending. After the records are added, it may take up to 48 hours for the changes to propagate and for the records to be fully verified.
If you are unsure about how to add DNS records, you can consult with your IT or DNS administrator for guidance.
If you receive a Failed status while verifying your domain, it means your DNS records:
Have not been added,
Have been added incorrectly,
Or are still not propagated.
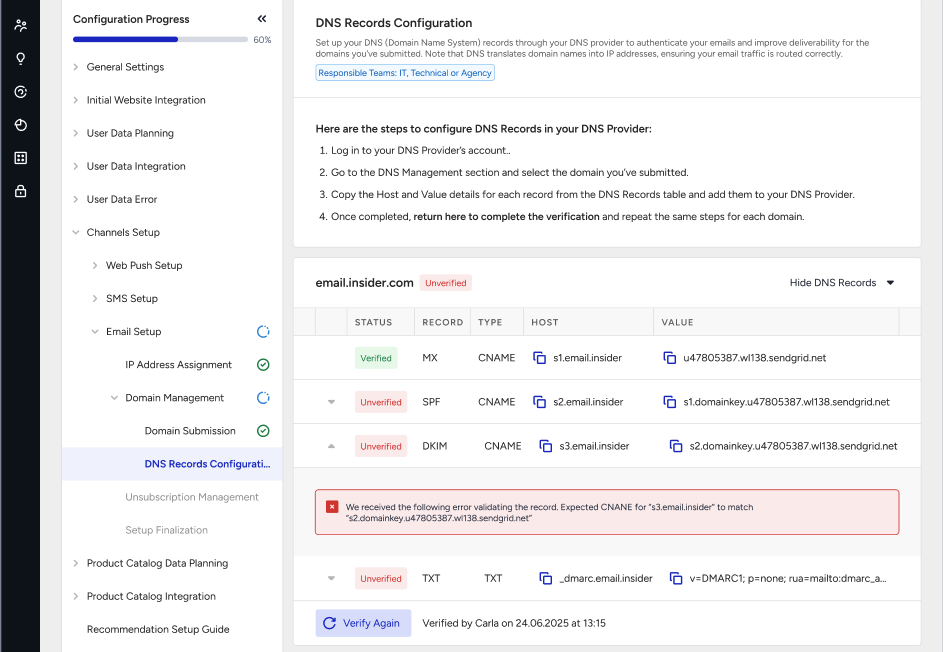
Once at least one of your sender domains' DNS records is verified, you will see the Skip button enabled and you can continue with the Email Setup Wizard. However, keep in mind that you cannot send email from your unverified sender domains. If all of your sender domains have been successfully verified, you will see the Next button enabled, and you can continue.
Reverse DNS (rDNS) setup for dedicated IPs
If dedicated IPs are assigned to your account, the first step is to select a sender domain to associate with your reverse DNS (rDNS) records.
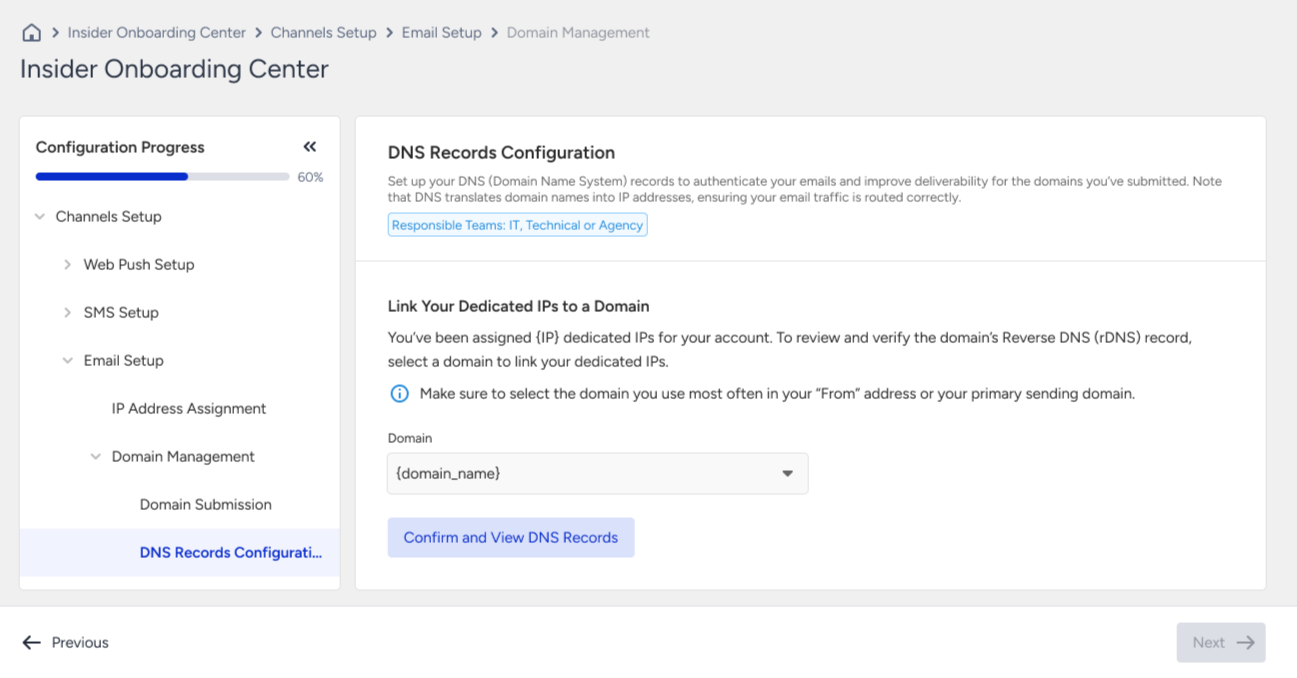
By selecting a sender domain, you specify which domain your dedicated IP will resolve to during a reverse lookup by mailbox providers. This effectively links your sending IP to a recognizable and authorized domain.
An rDNS record maps an IP address back to a domain name. Mailbox providers use this check to verify that the IP sending an email is legitimately associated with the domain it claims to send from. Properly configured rDNS helps establish trust, reduces the likelihood of emails being flagged as suspicious, and supports consistent inbox placement.
Once the sender domain is selected and confirmed, you will see the DNS records table displaying both sender domain records and the associated rDNS records. The sender domain linked to rDNS will be marked with the Dedicated IP Linked tag, and its rDNS records will appear alongside the other DNS records.
