If Eureka Strategies are enabled for your account, refer to Edit Merchandising Rule Activation Time to schedule merchandising rules within a strategy.
Merchandising rules cannot be scheduled from the Merchandising section. Instead, scheduling must be configured from the Eureka Strategies page, as a single merchandising rule can have different schedules across multiple strategies.
If Eureka Strategies aren’t enabled for your account, proceed with the steps below.
Time-based Merchandising enables you to dynamically adjust product displays, banners, and promotions for specific time periods, such as seasons, holidays, special days, or peak shopping hours. You can create rules in advance to automatically activate and deactivate campaigns, ensuring timely, relevant content delivery to maximize engagement and sales.
Use Cases
Using the Time-based Merchandising feature, you can
Boost Christmas-themed jumpers and display a holiday discount banner when users search for "jumpers" from December 1st to December 25th, focusing on festive products and promotions.
Highlight new spring jackets and bury winter products when users search for "jackets." The rule will have a specified start time but no end time, allowing the merchandiser to deactivate it manually at any time.
Run an exclusive "Back-to-School" campaign showcasing backpacks and sneakers when users search for "school essentials" from August 1st to August 31st. They would like to define the campaign in early July to ensure everything is in place before it begins.
Time-based merchandising rules can be applied to both conditional and global rules.
Create a Time-based Merchandising Rule
To create a Time-based Merchandising rule,
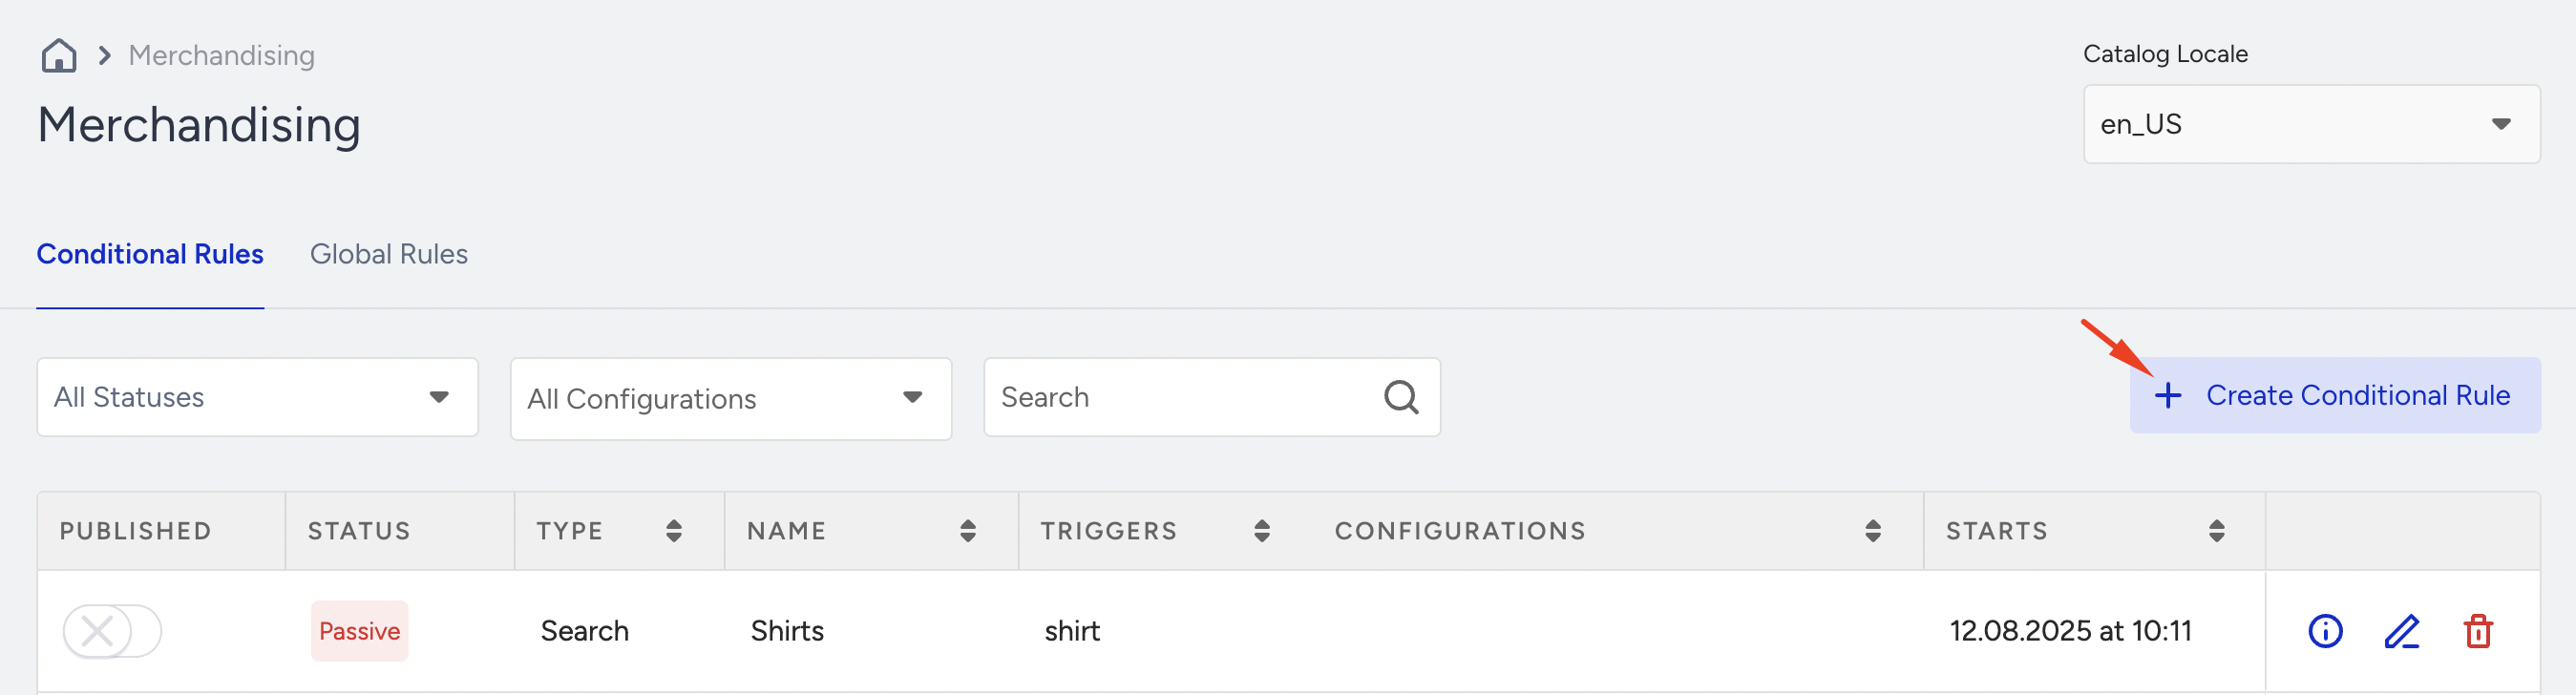
Navigate to Search and Merchandising > Merchandising Rules. You can add the rule as Conditional Rules or Global Rules.
After selecting the rule type, click the Create Rule button to open the rule creation modal and select either a Search Rule or a Category Rule.
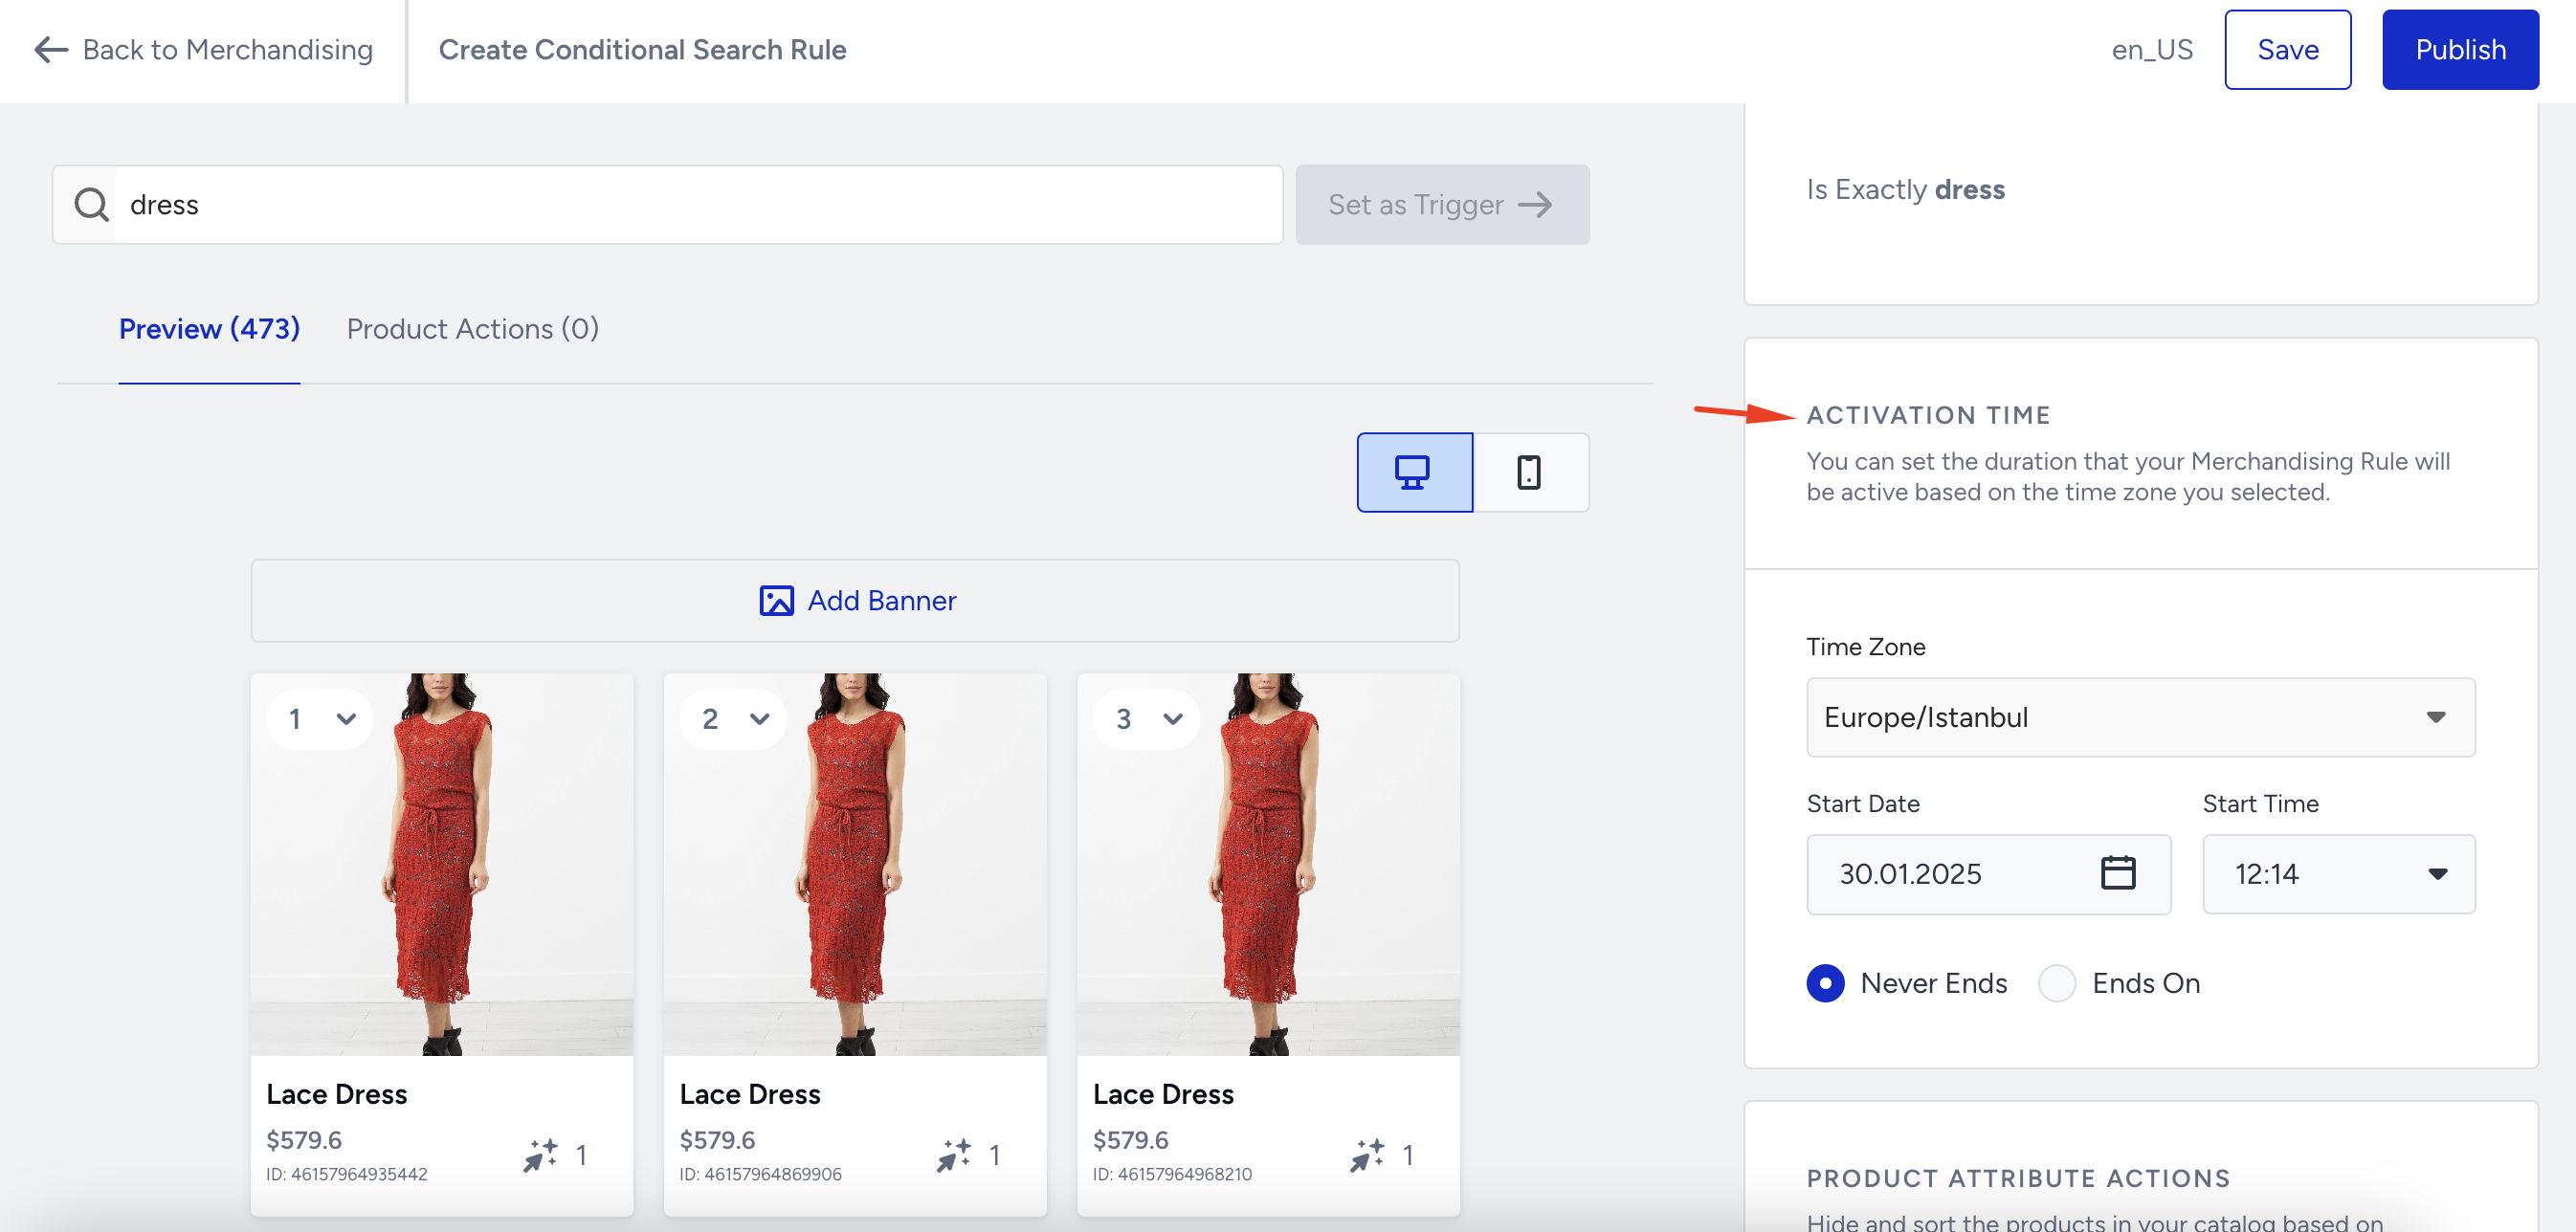
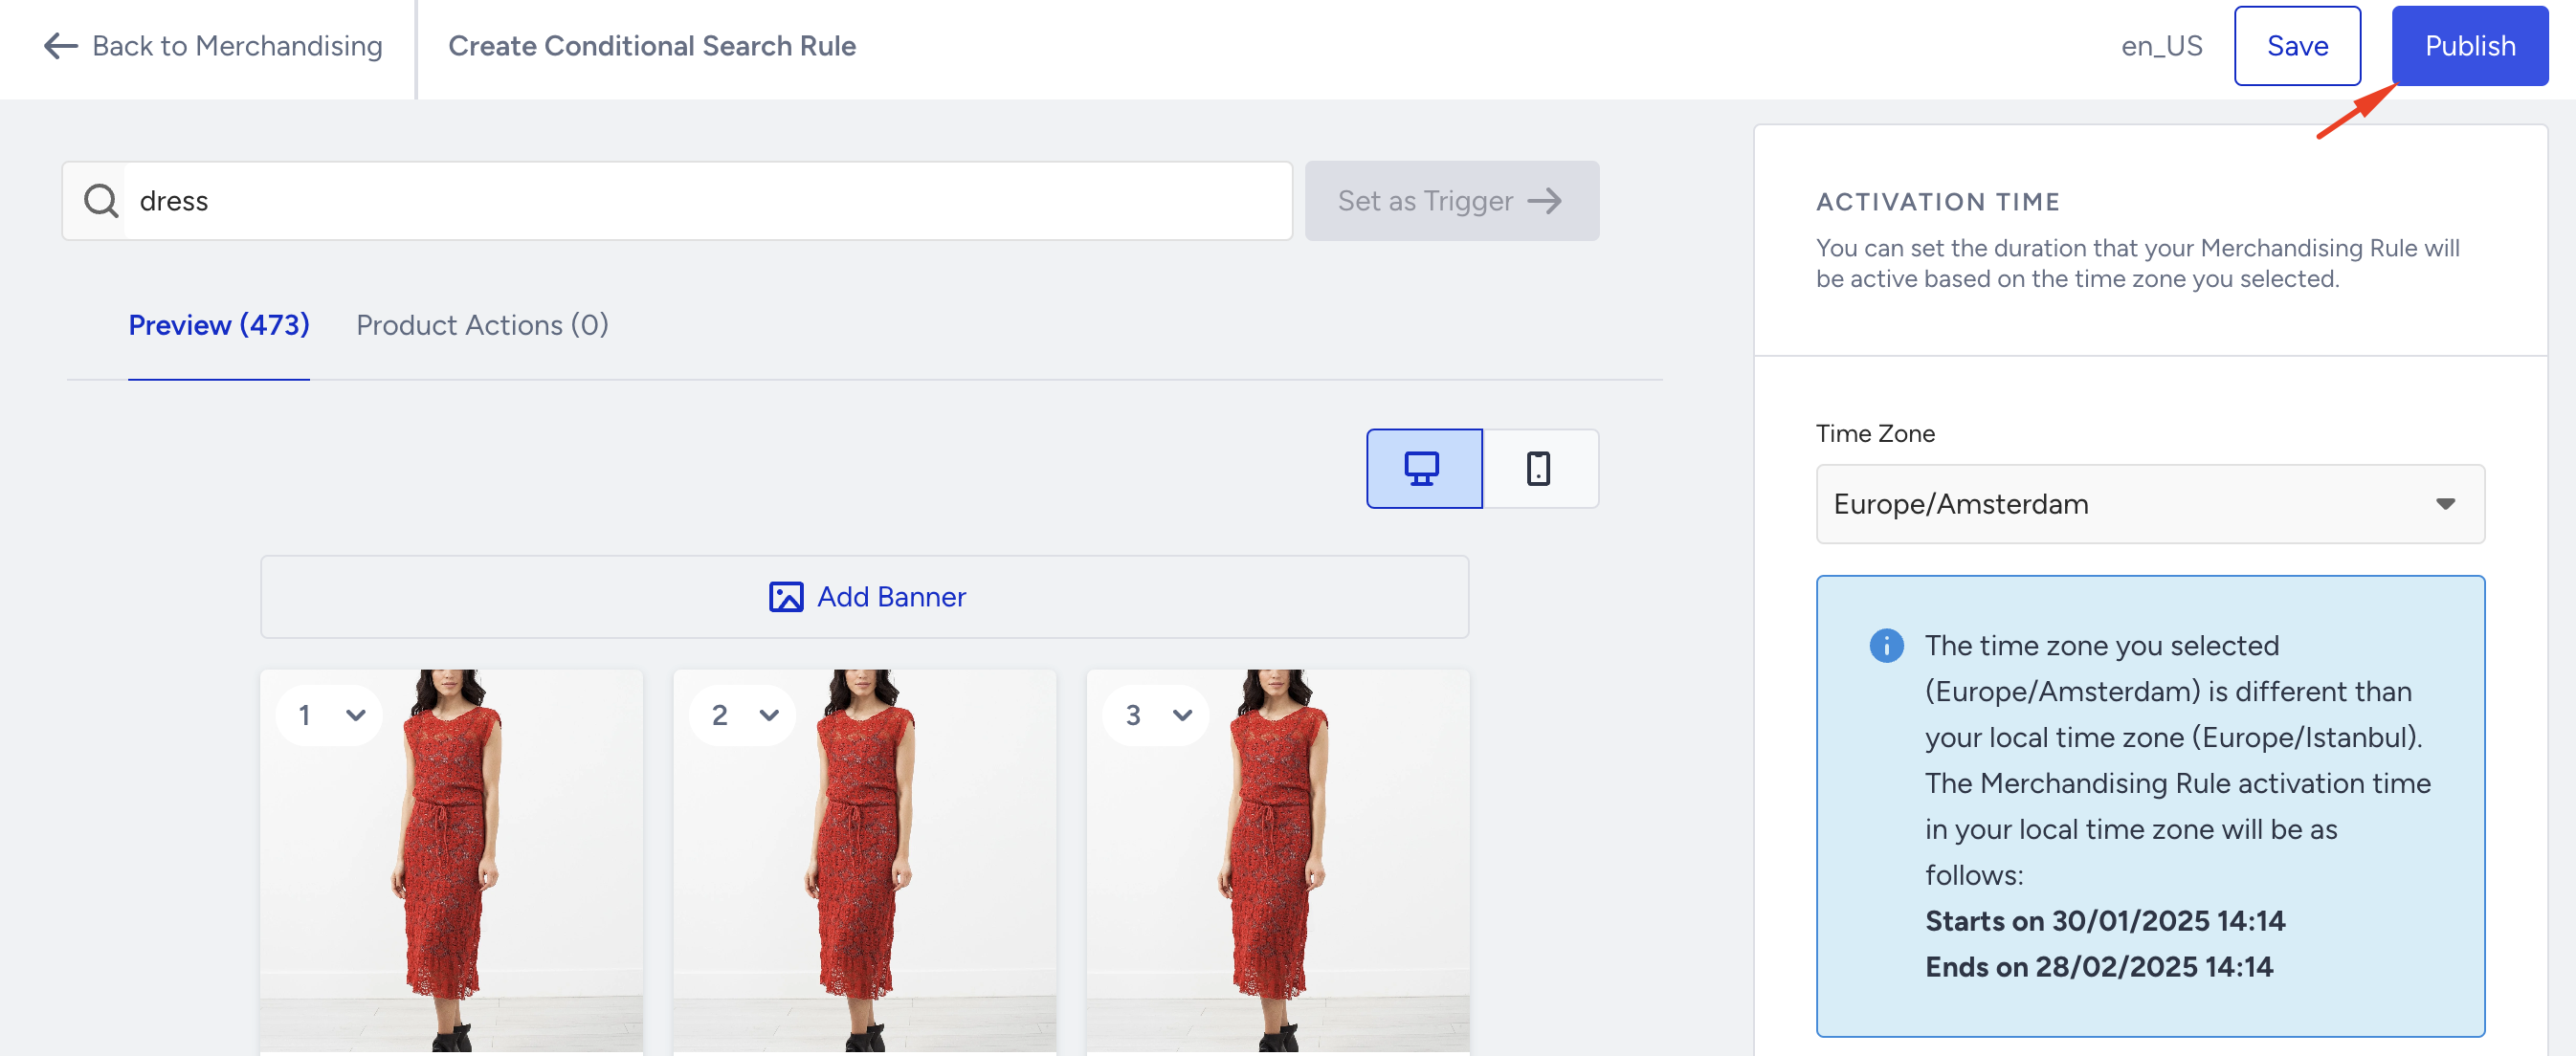
Select the Conditional Search Rule option and navigate to the rule creation/preview page to create a search-term-based rule. Type the related trigger keyword on the preview page, click the Set as Trigger button, and make the necessary settings. Then, navigate to the Activation Time section to select the rule's Timezone, Start Time, and End Time.
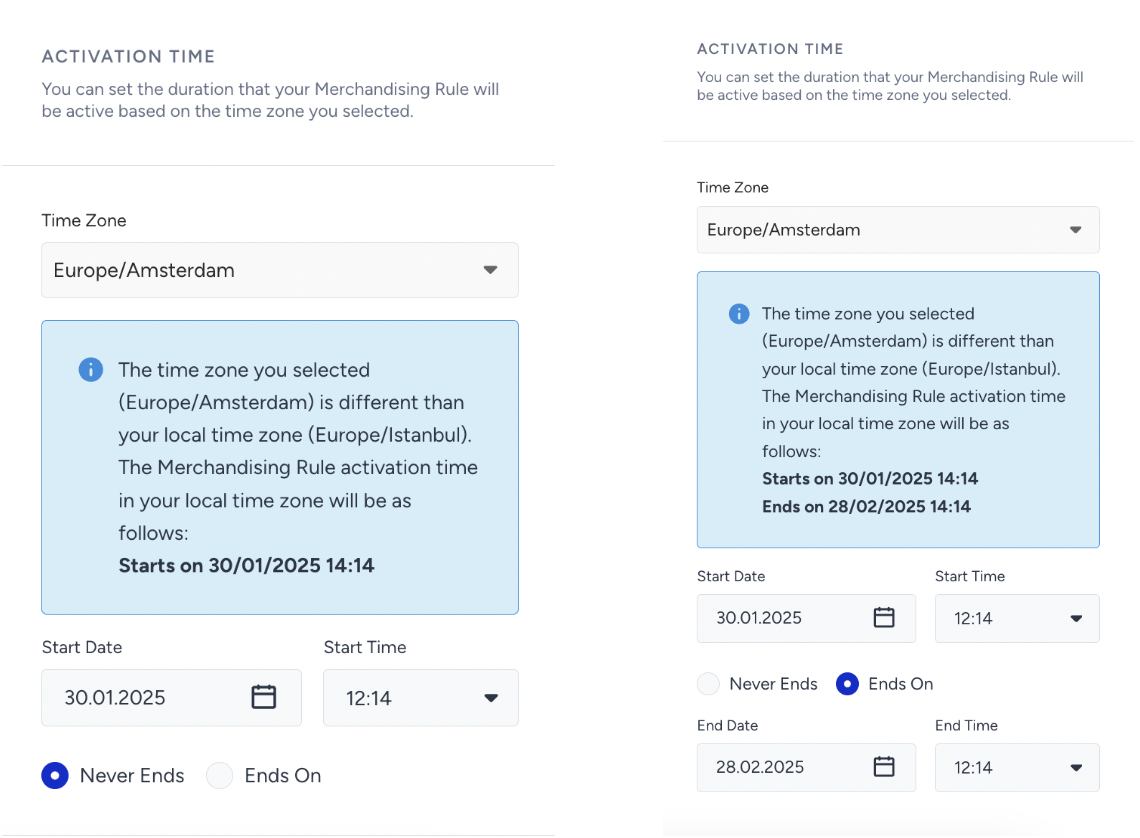
Select the time zone for rule creation. If you select a time zone other than your local time zone, an informational message indicates when the rule will begin in your local time zone.
After selecting the time zone, you need to specify whether the rule should “Never End” or “End On” a specific date.
If you select Never Ends, only the Start Date and Start Time fields will be available. The rule will remain active indefinitely until you manually deactivate it.
If you select Ends On, the Start Date and Start Time fields, along with the End Date and End Time fields, will be available. This configuration ensures the rule is automatically deactivated when the specified end date and time are reached.
After you configure the rule, click the Publish button.
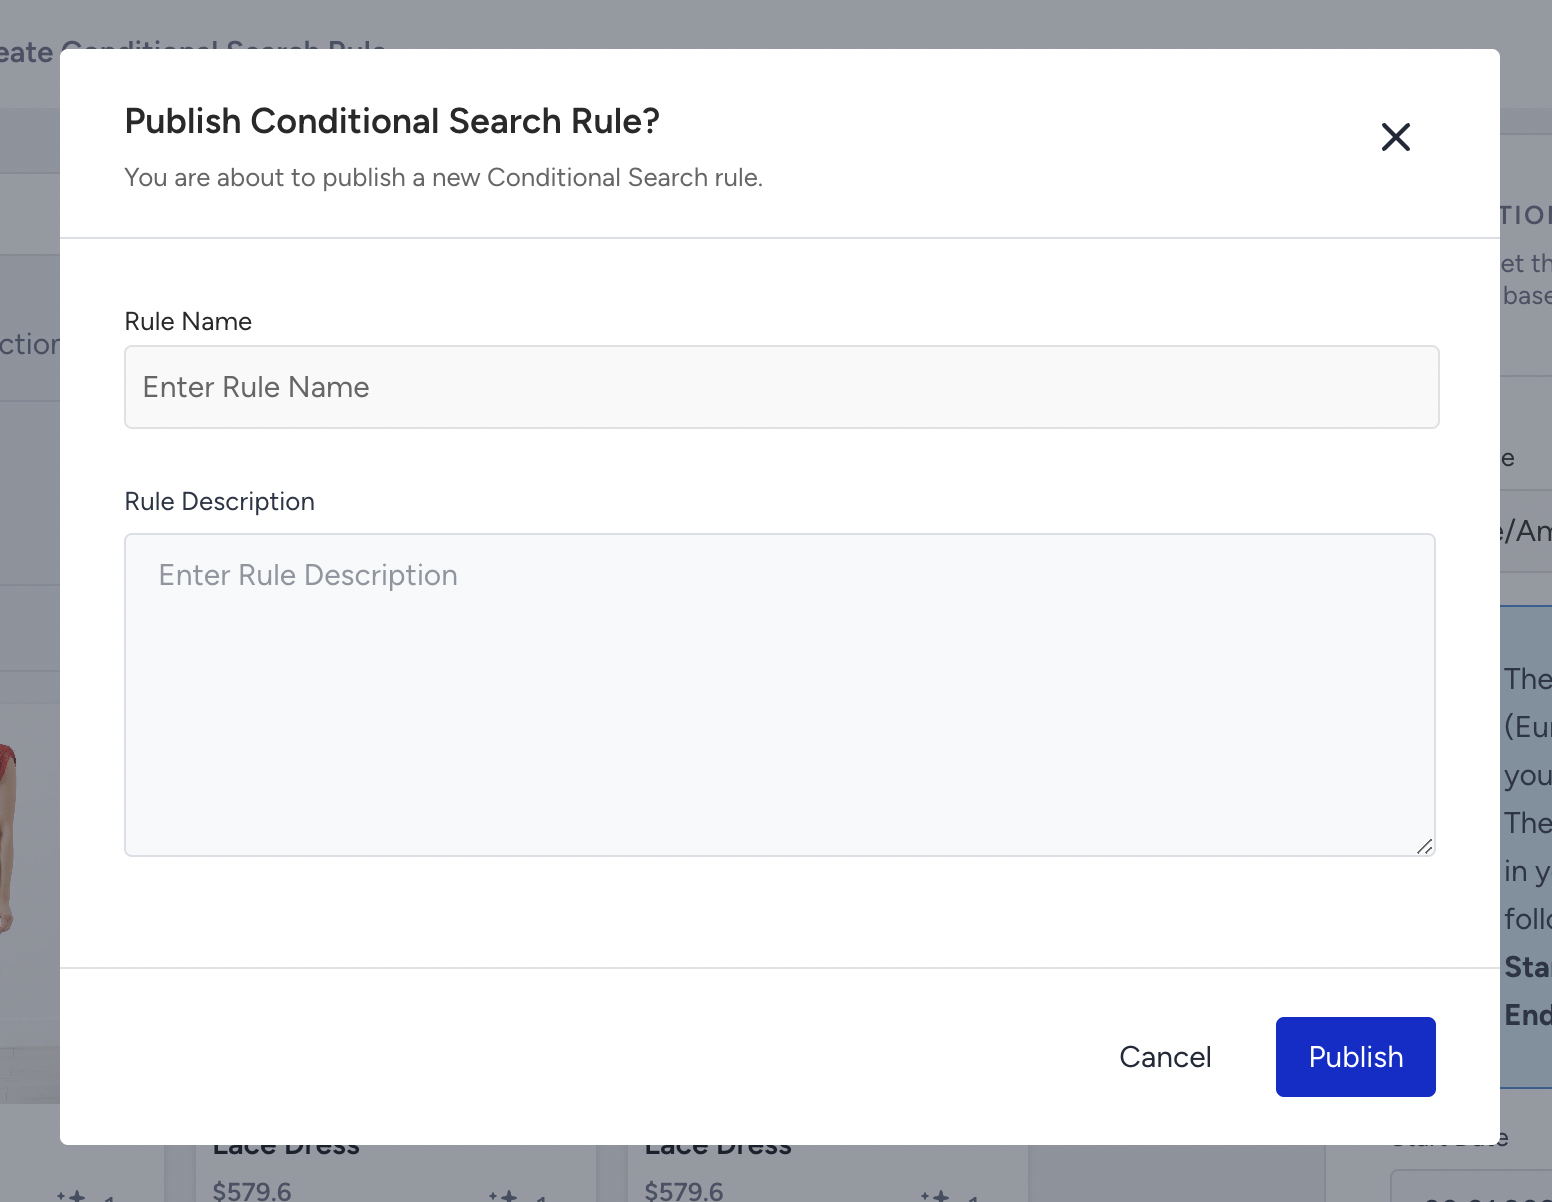
Then, enter the rule name and description and click the Publish button in the pop-up to create the rule.
The Time-based Merchandising rule interval can not be less than 30 minutes
There cannot be two different active rules simultaneously with the same trigger.
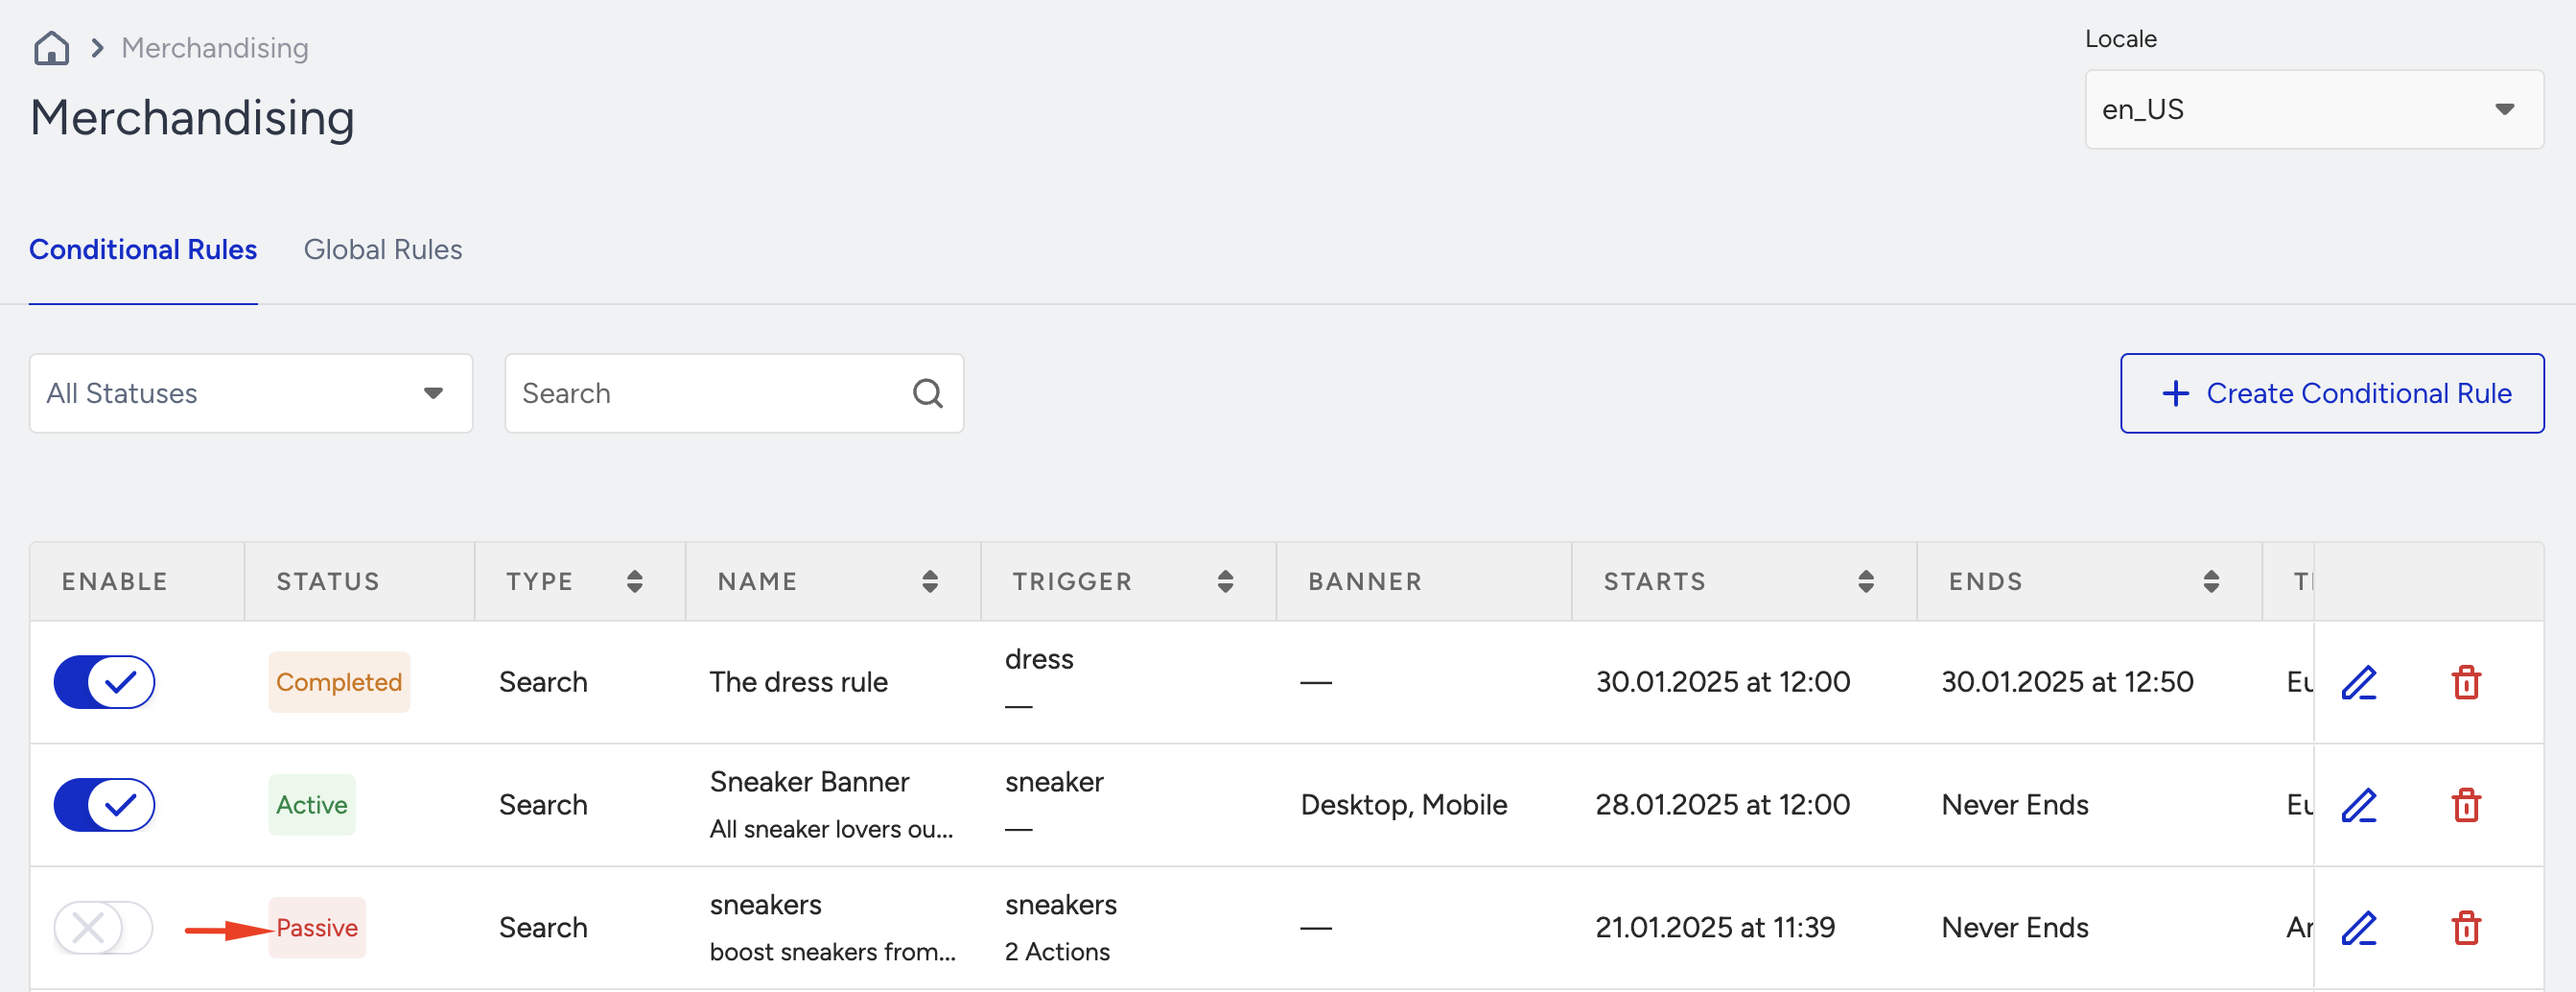
Rule Statuses
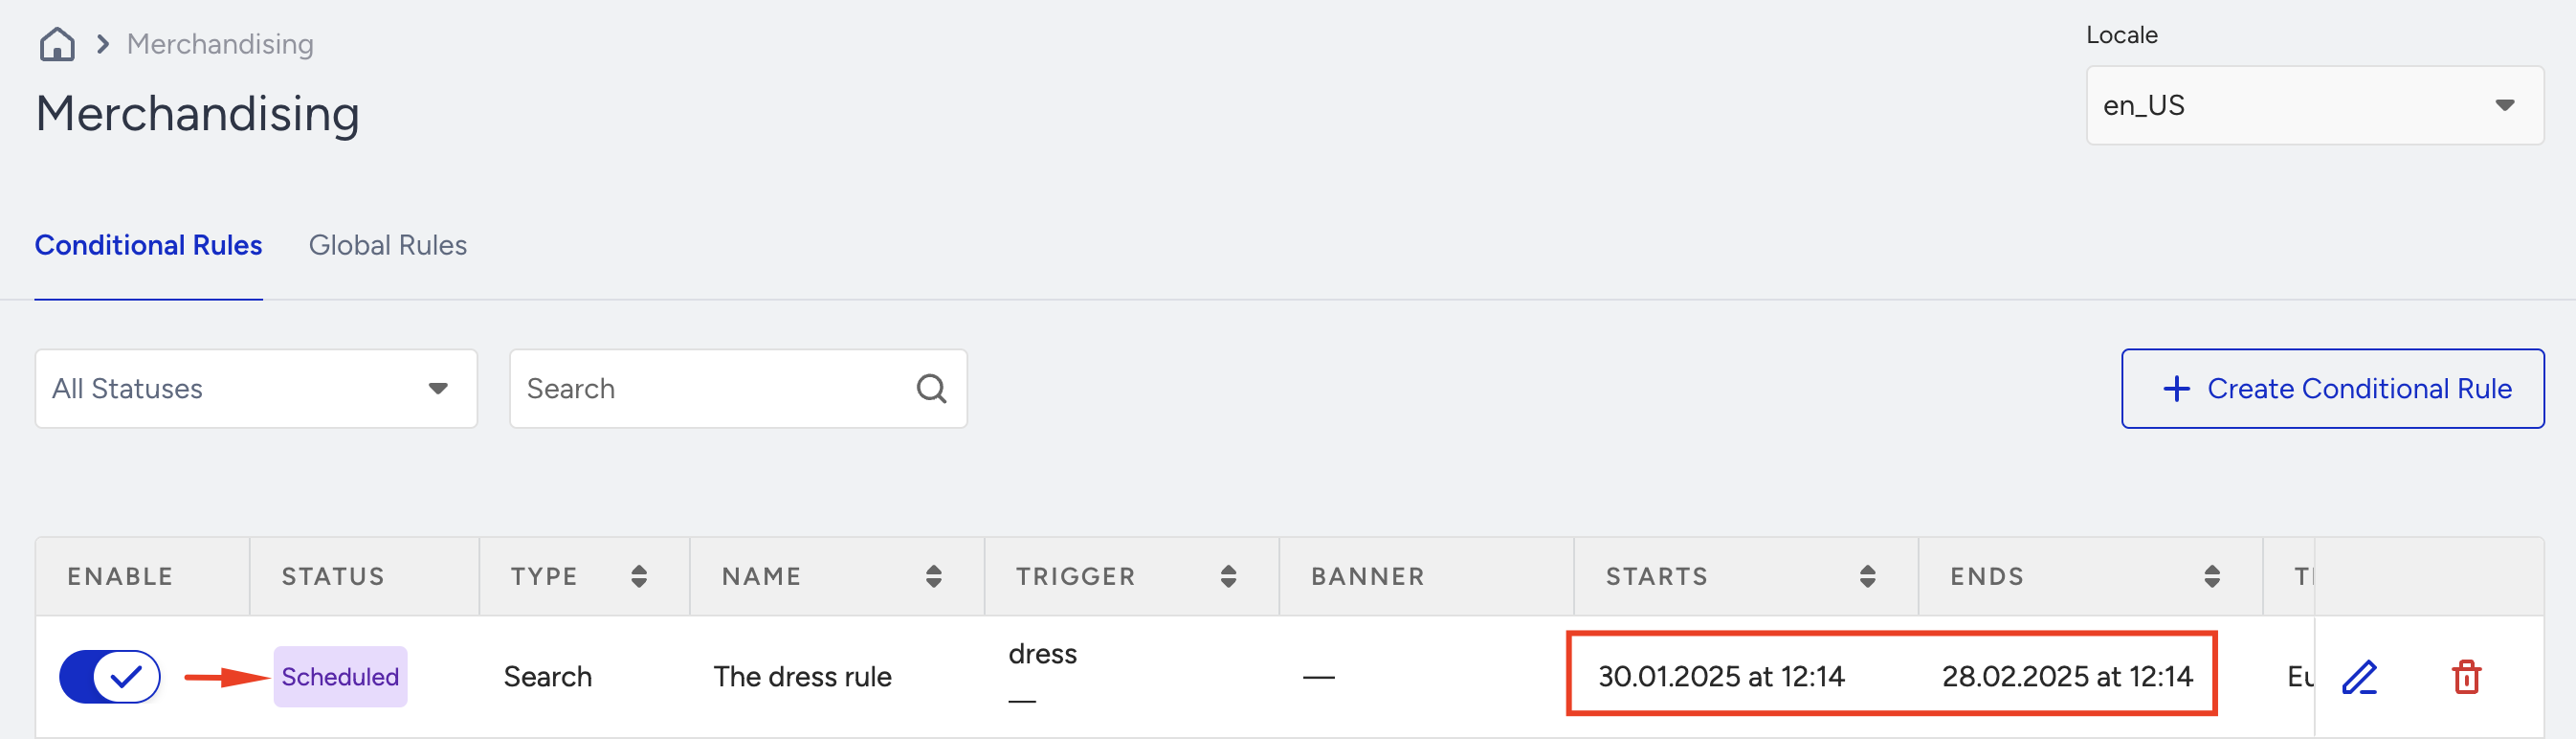
You are redirected to the Merchandising screen when the rule is created successfully. The rule status is displayed as Scheduled since it is set to begin on a future date. You can view all relevant information, including the rule's current status, scheduled start and end times, and the selected time zone.
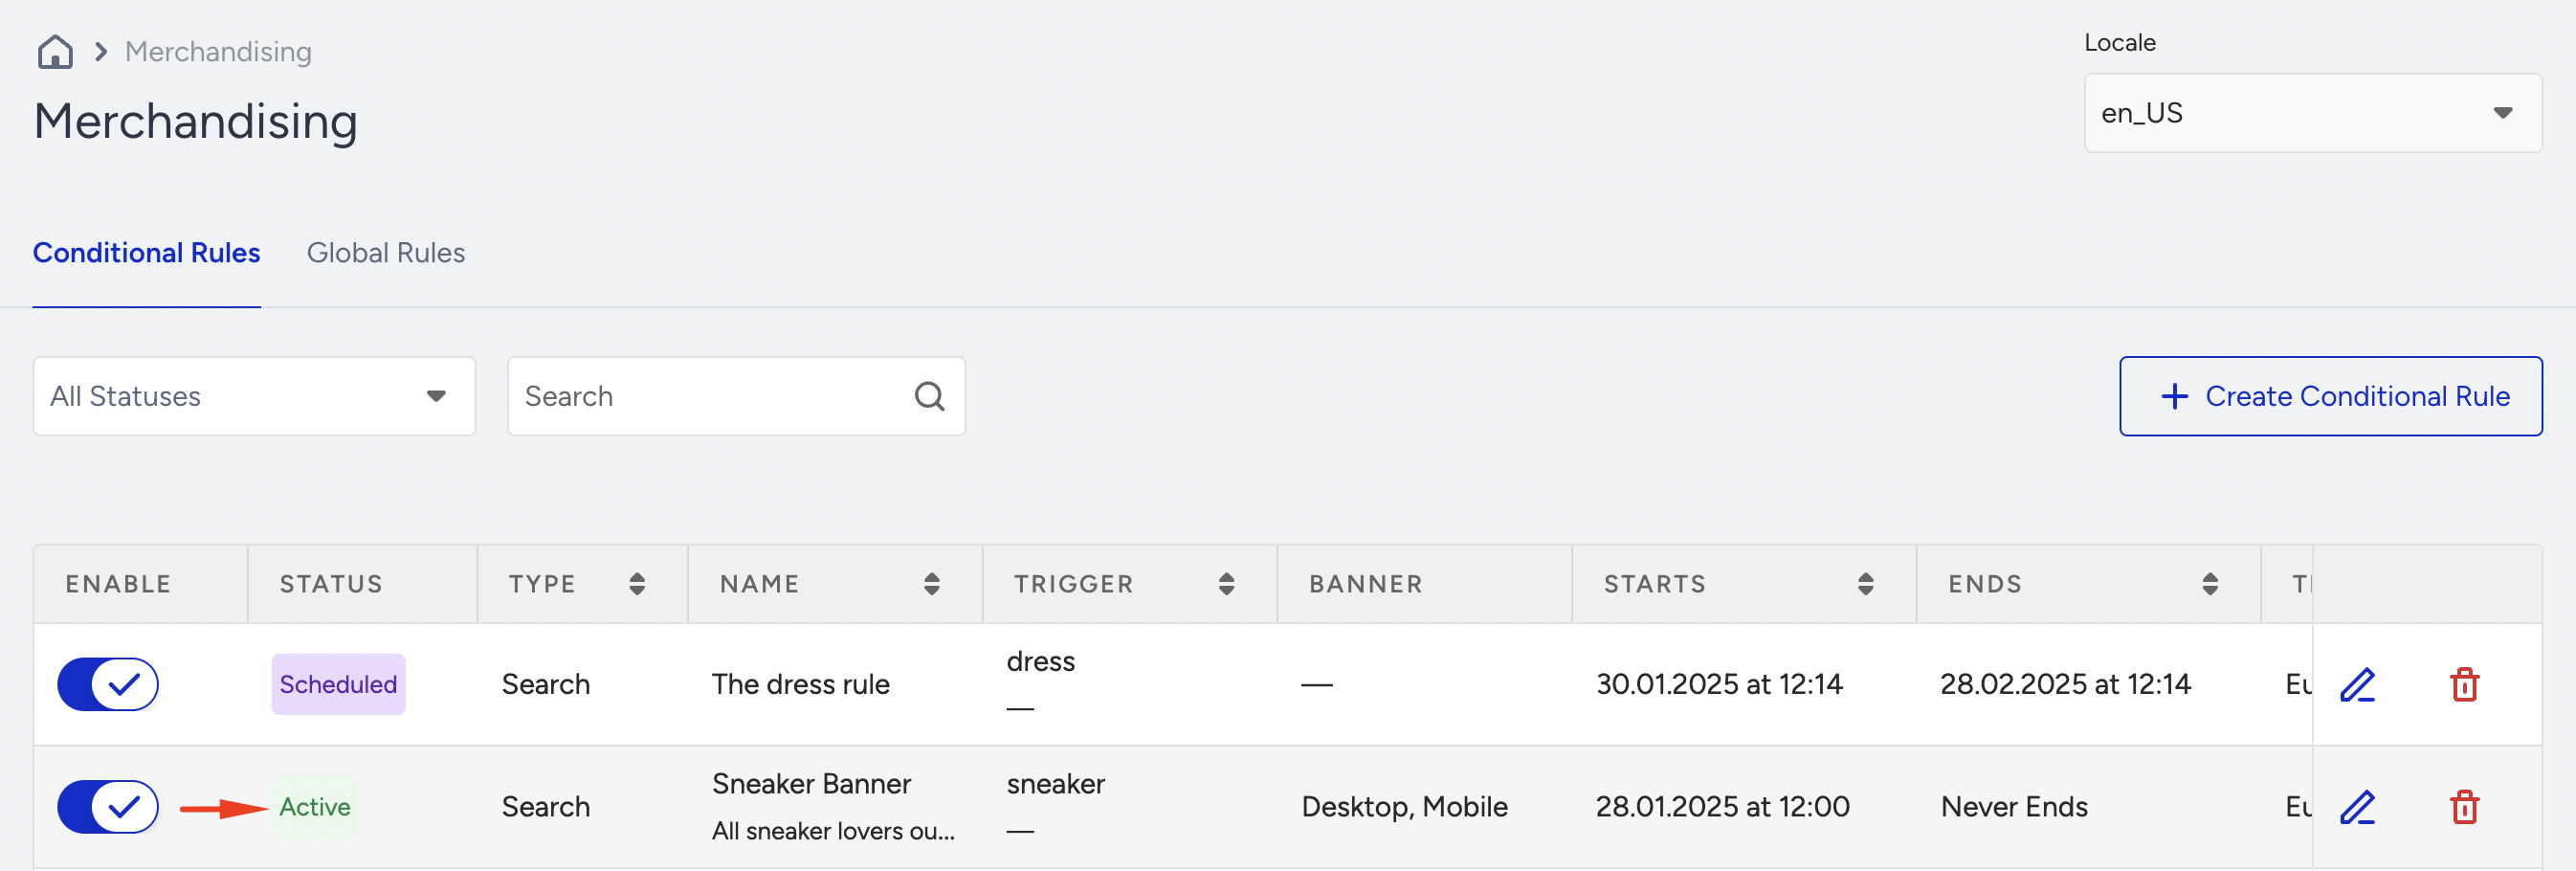
When the specified start date and time arrive, the rule status will be changed to Active, and the merchandising rules will start automatically. The rules will be applied without additional configurations.
The rule will remain active until the specified end date arrives. When the end date arrives, the rule status will automatically update to Completed. The applied merchandising rules will be inactive.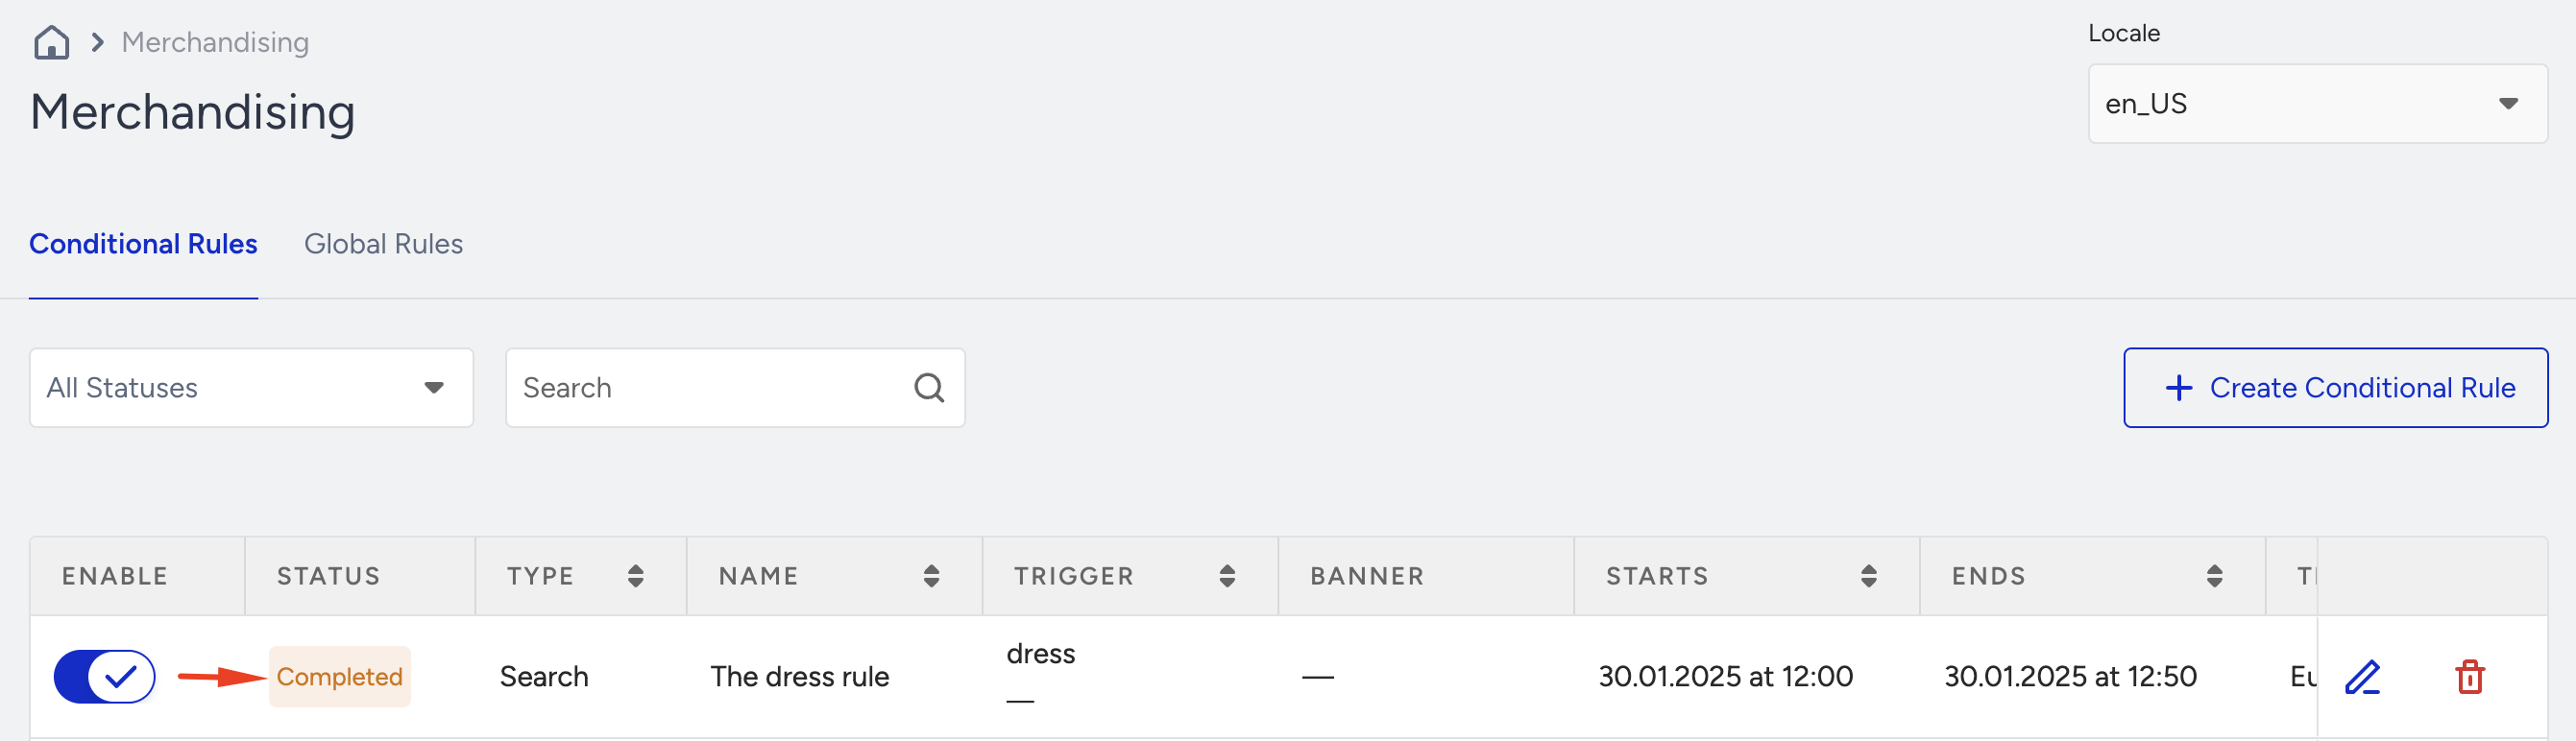
If you want to disable the rule before the specified end date, switch off the toggle. This applies to both scheduled and active rules. Once you switch the toggle off, the status will change to Passive, indicating that the rule is no longer active and will not be applied.