Category Merchandising helps you optimize the browsing experience for your customers, influence their purchasing decisions, and maximize your sales opportunities. Using merchandising in an ecommerce platform has benefits such as:
Enhanced user experience: Well-organized category pages streamline browsing, enabling users to effortlessly discover products aligned with their preferences and enhancing overall satisfaction with the shopping journey.
Increased visibility: Strategic placement of high-demand or seasonal items on category pages enhances their prominence, increasing the likelihood of user engagement and interaction with these products.
Improved conversion rates: Clear, appealing product presentations, coupled with easy navigation, encourage users to explore further and make purchases, ultimately boosting conversion rates.
Optimized product discovery: Robust filtering and sorting capabilities empower users to tailor search results to specific preferences, enabling efficient, relevant product discovery.
Adaptability to trends and changes: Regular updates to category pages ensure alignment with evolving trends, inventory fluctuations, and shifting customer preferences, maintaining relevance and keeping the website dynamic and engaging.
Customer satisfaction: Effective category merchandising prioritizes user-friendly navigation and facilitates quick access to desired products, enhancing customer satisfaction and fostering long-term loyalty among shoppers.
Maximized revenue: The cumulative impact of improved user experience, enhanced visibility of key products, and optimized conversion rates results in increased sales and revenue, driving business growth and success.
In this article, you can find answers to the following questions:
Use cases
For Valentine's Day, you, as an ecommerce professional, aim to highlight red products in the Outlet category. To achieve this, you can set a rule to boost products with the color "RED" within the "Outlet" category as the trigger category. Subsequently, customers visiting the Outlet product listing page will see red-colored products prioritized at the top.
As the ecommerce site owner, you might want to increase sales of X-branded sneakers. To achieve this, you can set a rule to boost products with the brand "X" within the "Sneakers" category as the trigger category. Subsequently, customers visiting the Sneakers product listing page will see X-branded products prioritized at the top, enhancing the visibility of X-branded shoes in the sneakers category.
Create a Category Merchandising Rule
To create a search merchandising rule,
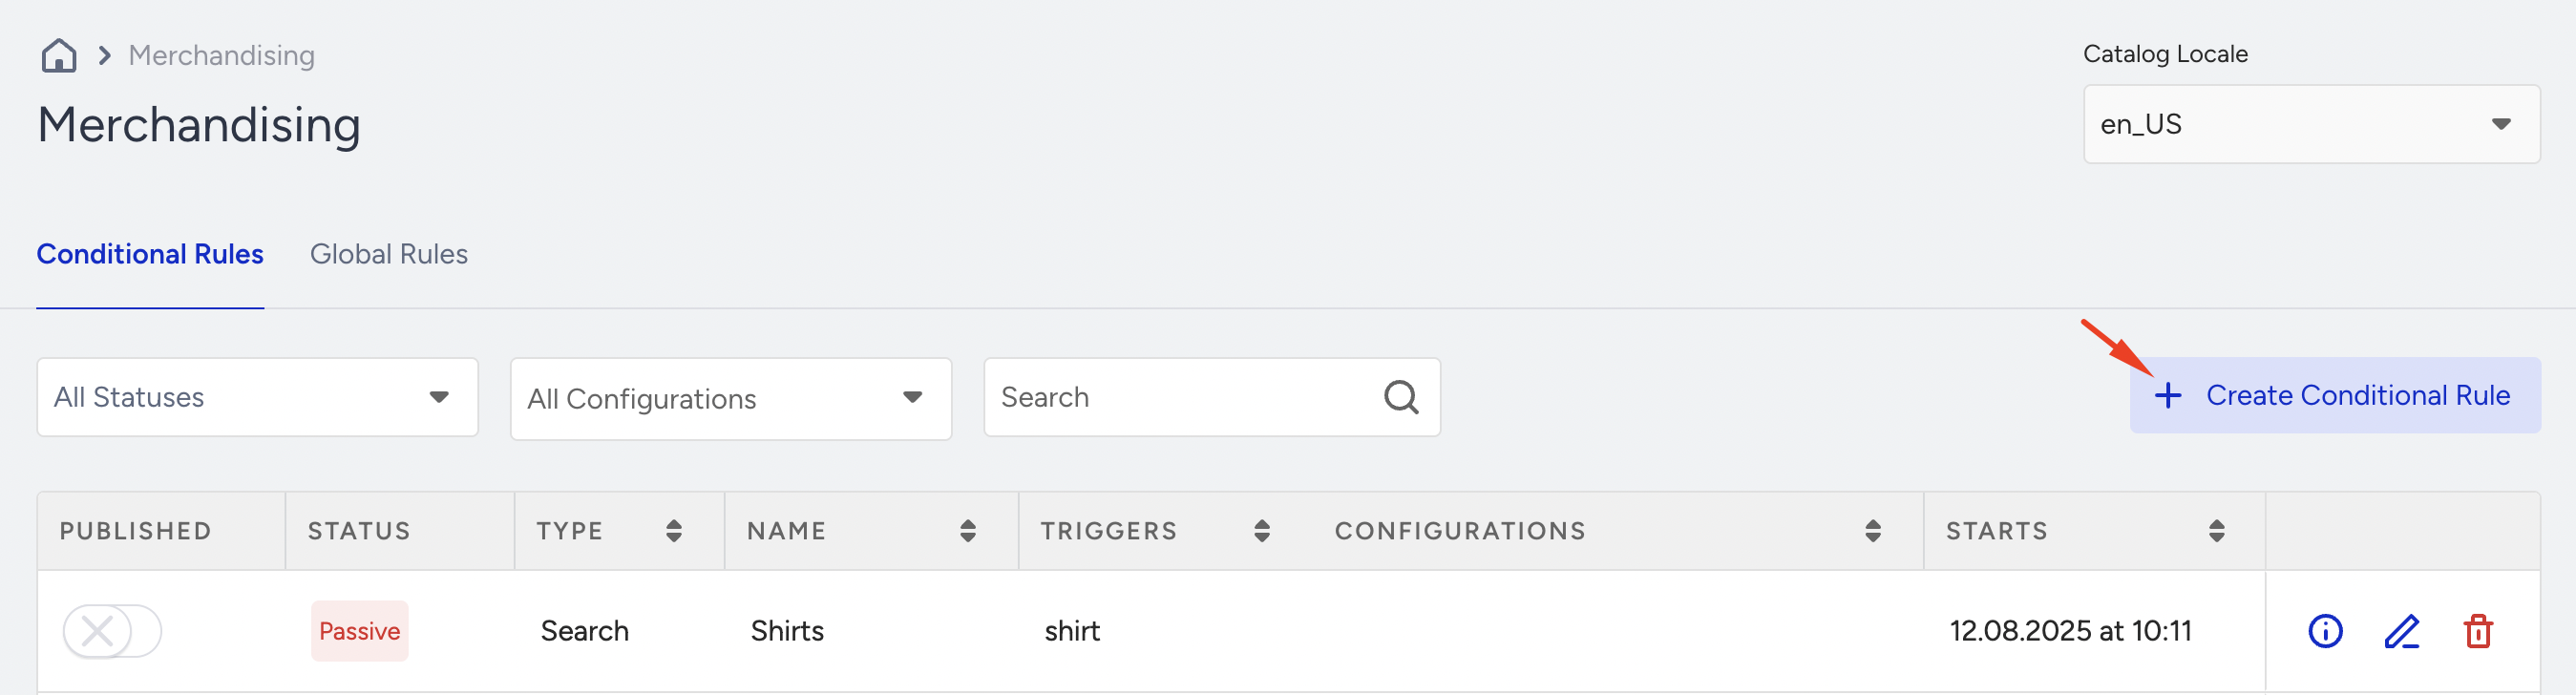
Navigate to Search and Merchandising > Merchandising Rules > Conditional Rules tab.
Click the Create Conditional Rule button.
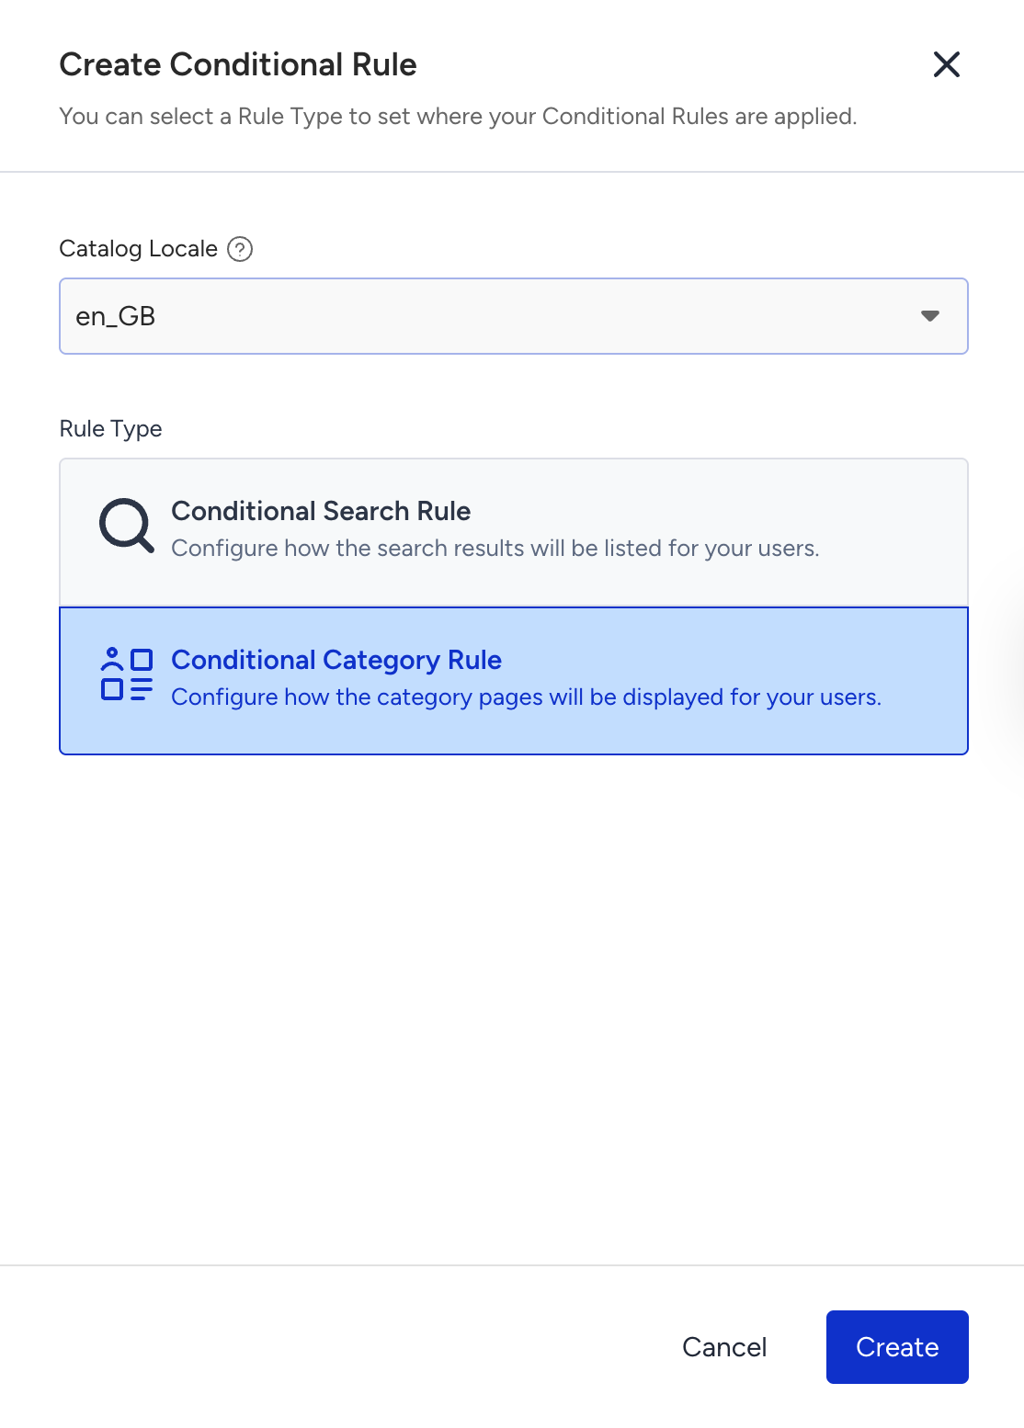
Select the Catalog Locale and Conditional Category Rule and click the Create button.
Select the category you want to set a merchandising rule for. This dropdown list lists all the categories in the product catalog.
You can select and set item actions for multiple categories. So, Item Actions can be applied to category pages selected under “Trigger Categories.”
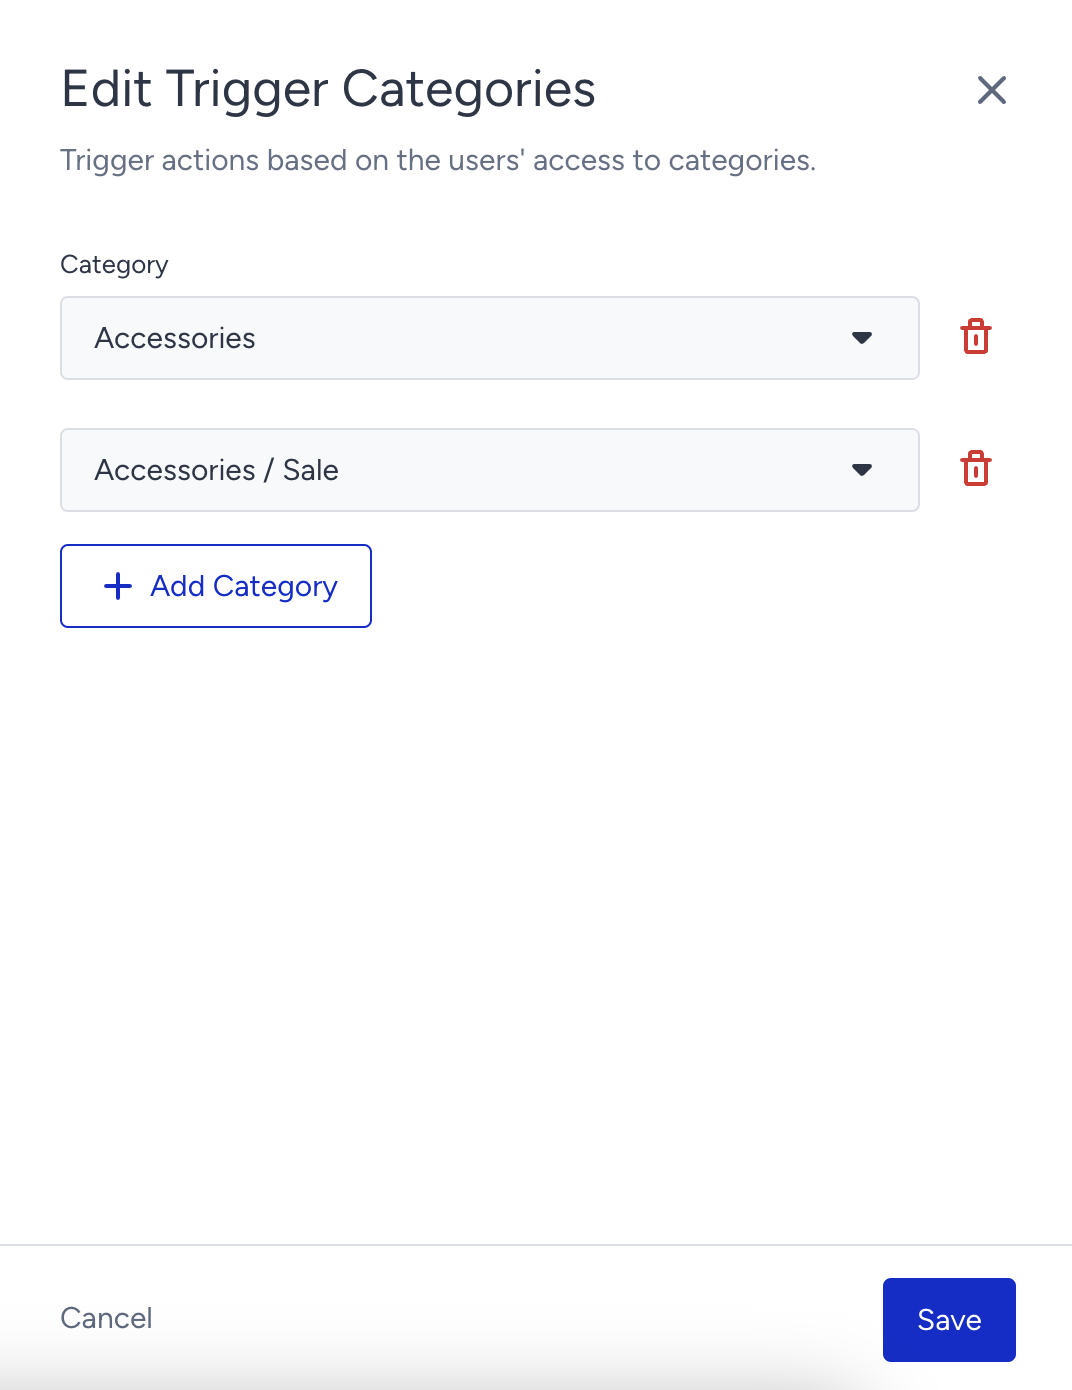
Click the Add Category button under Trigger Categories to select the categories for which you want to apply item actions.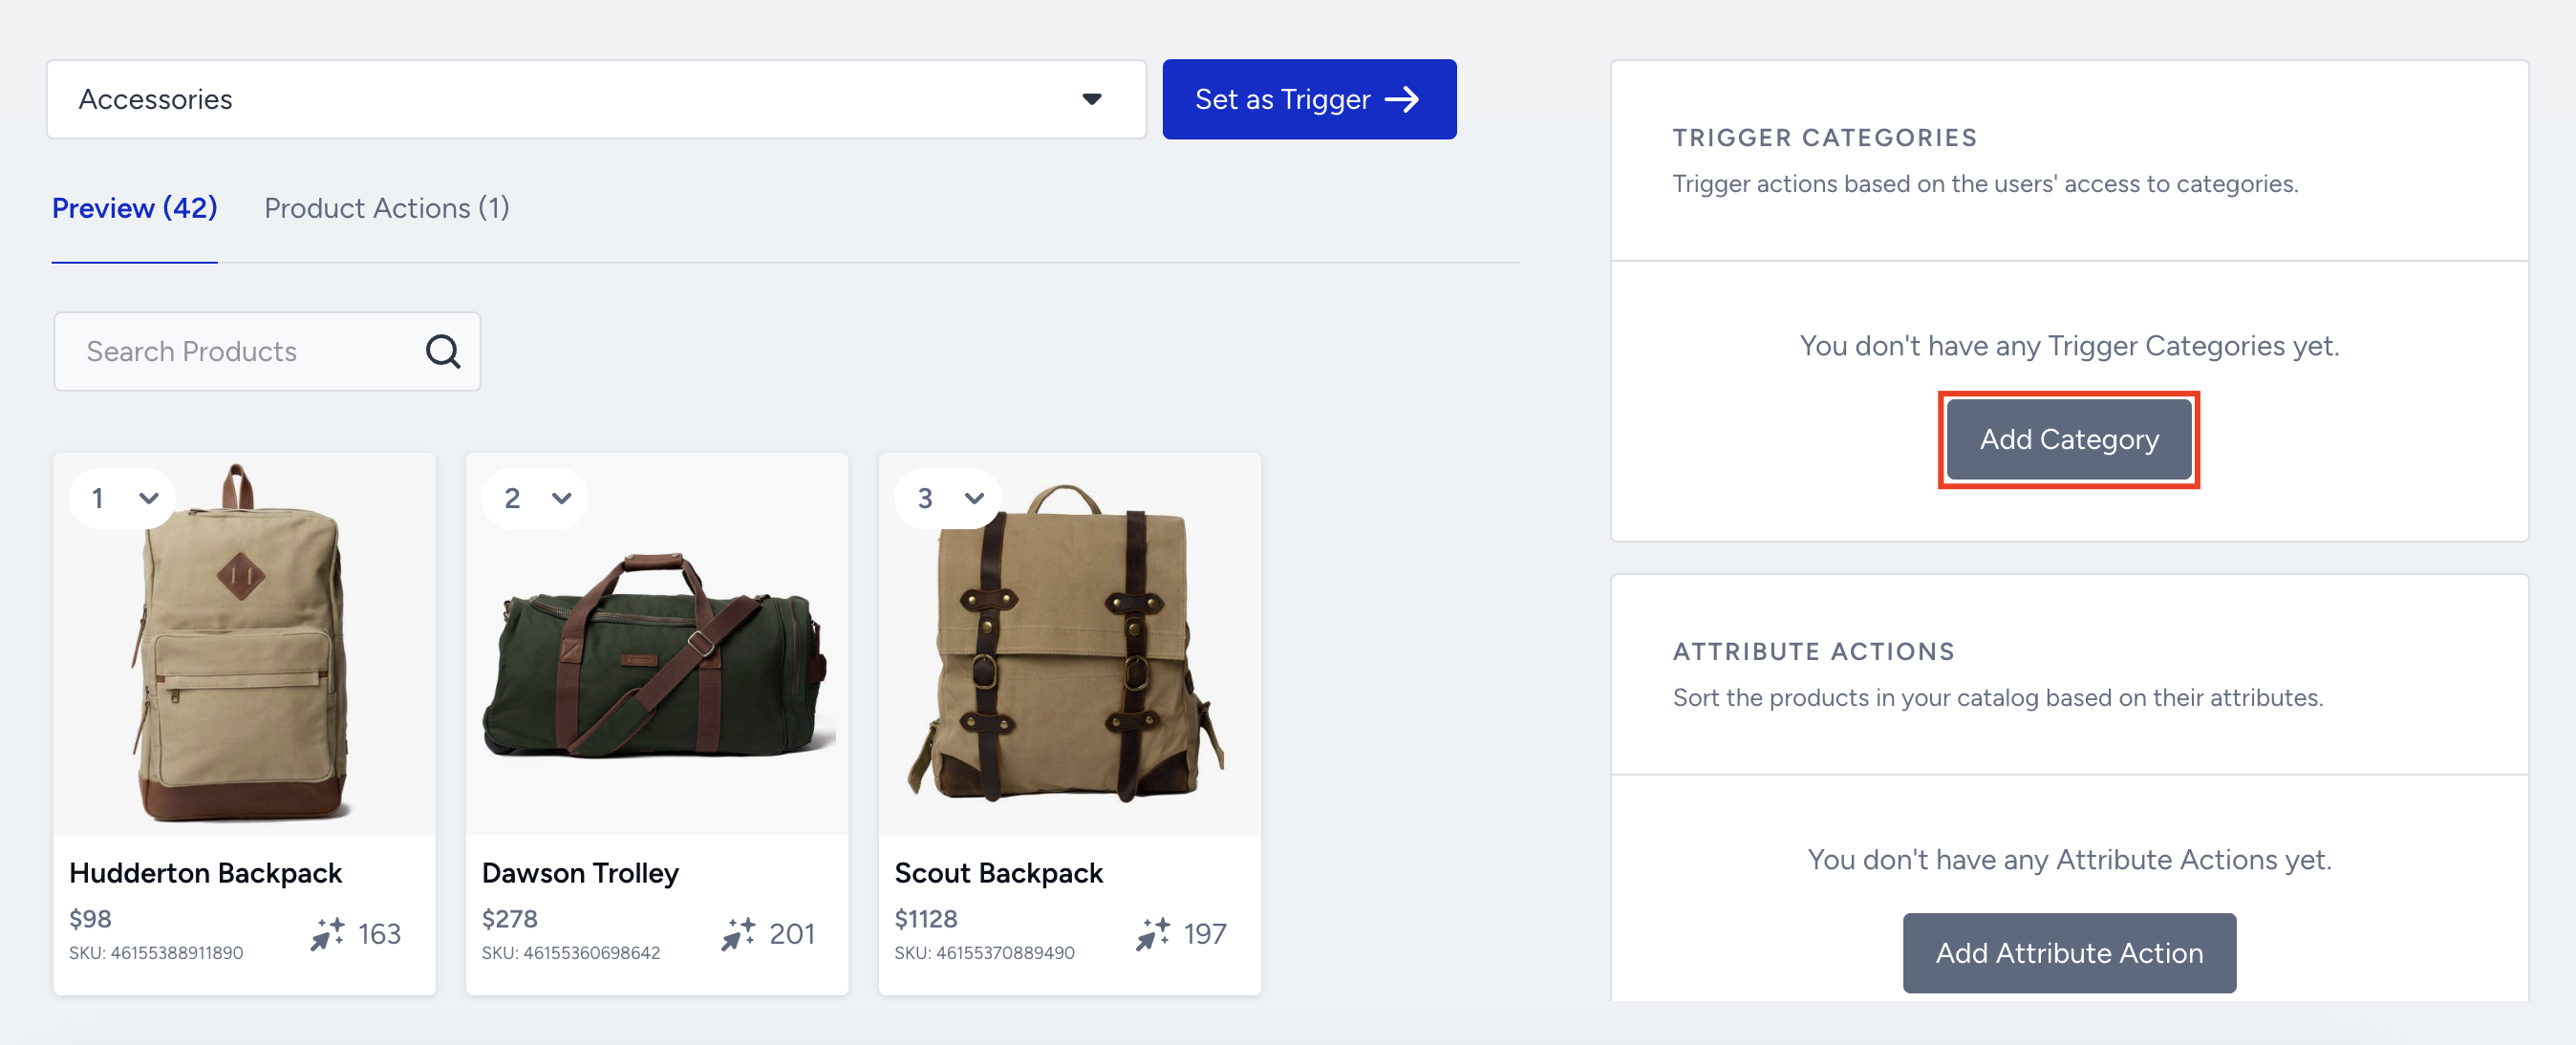
You can add up to 10 categories to set to the one rule. Each rule will be displayed in the category listing page if available for the selected category. Click the Save button to proceed.
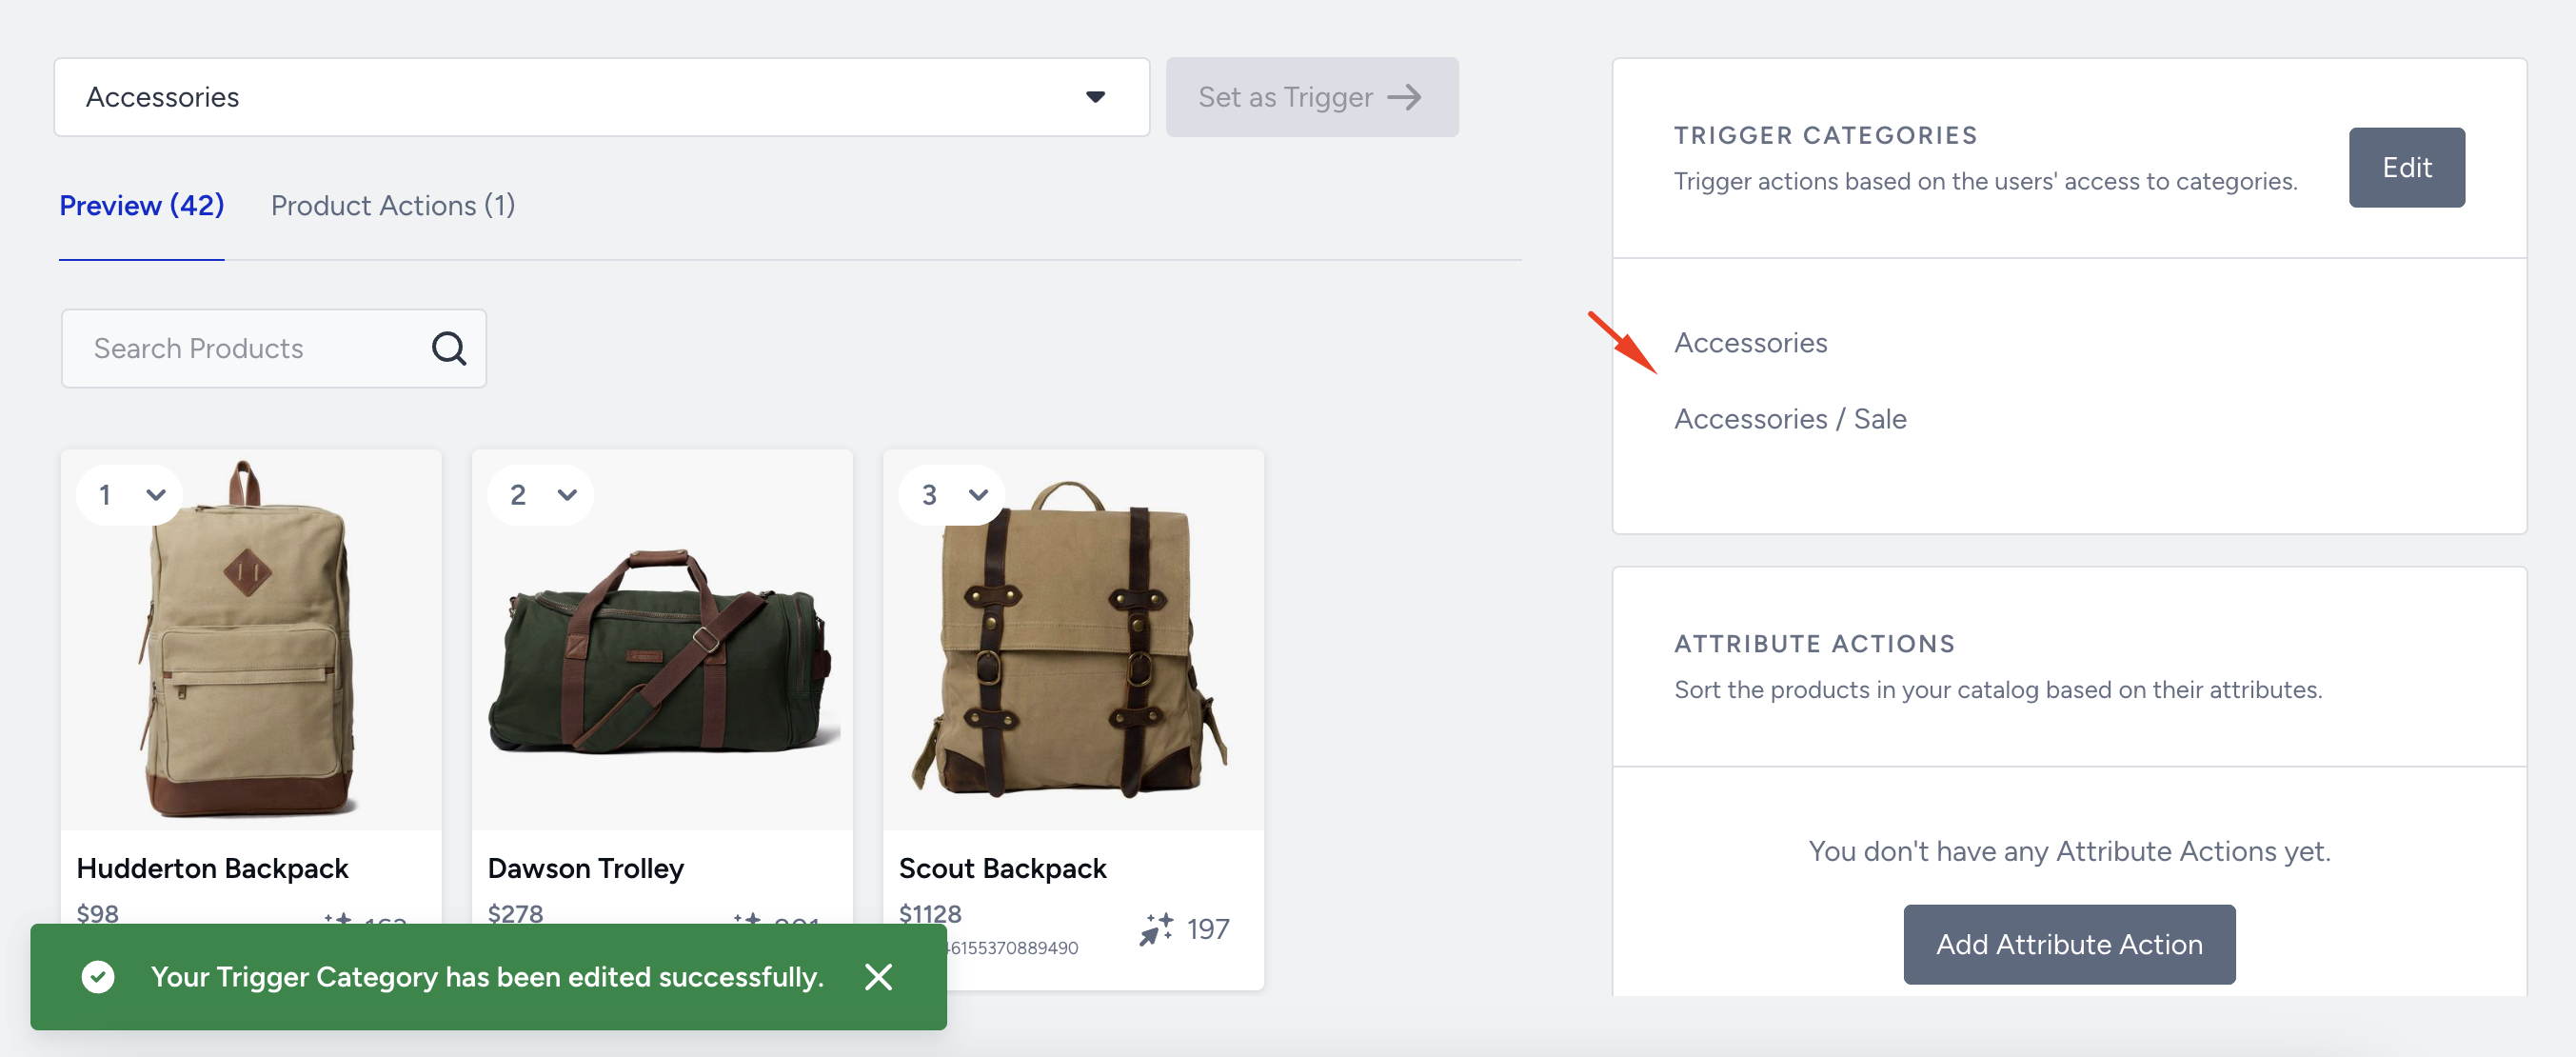
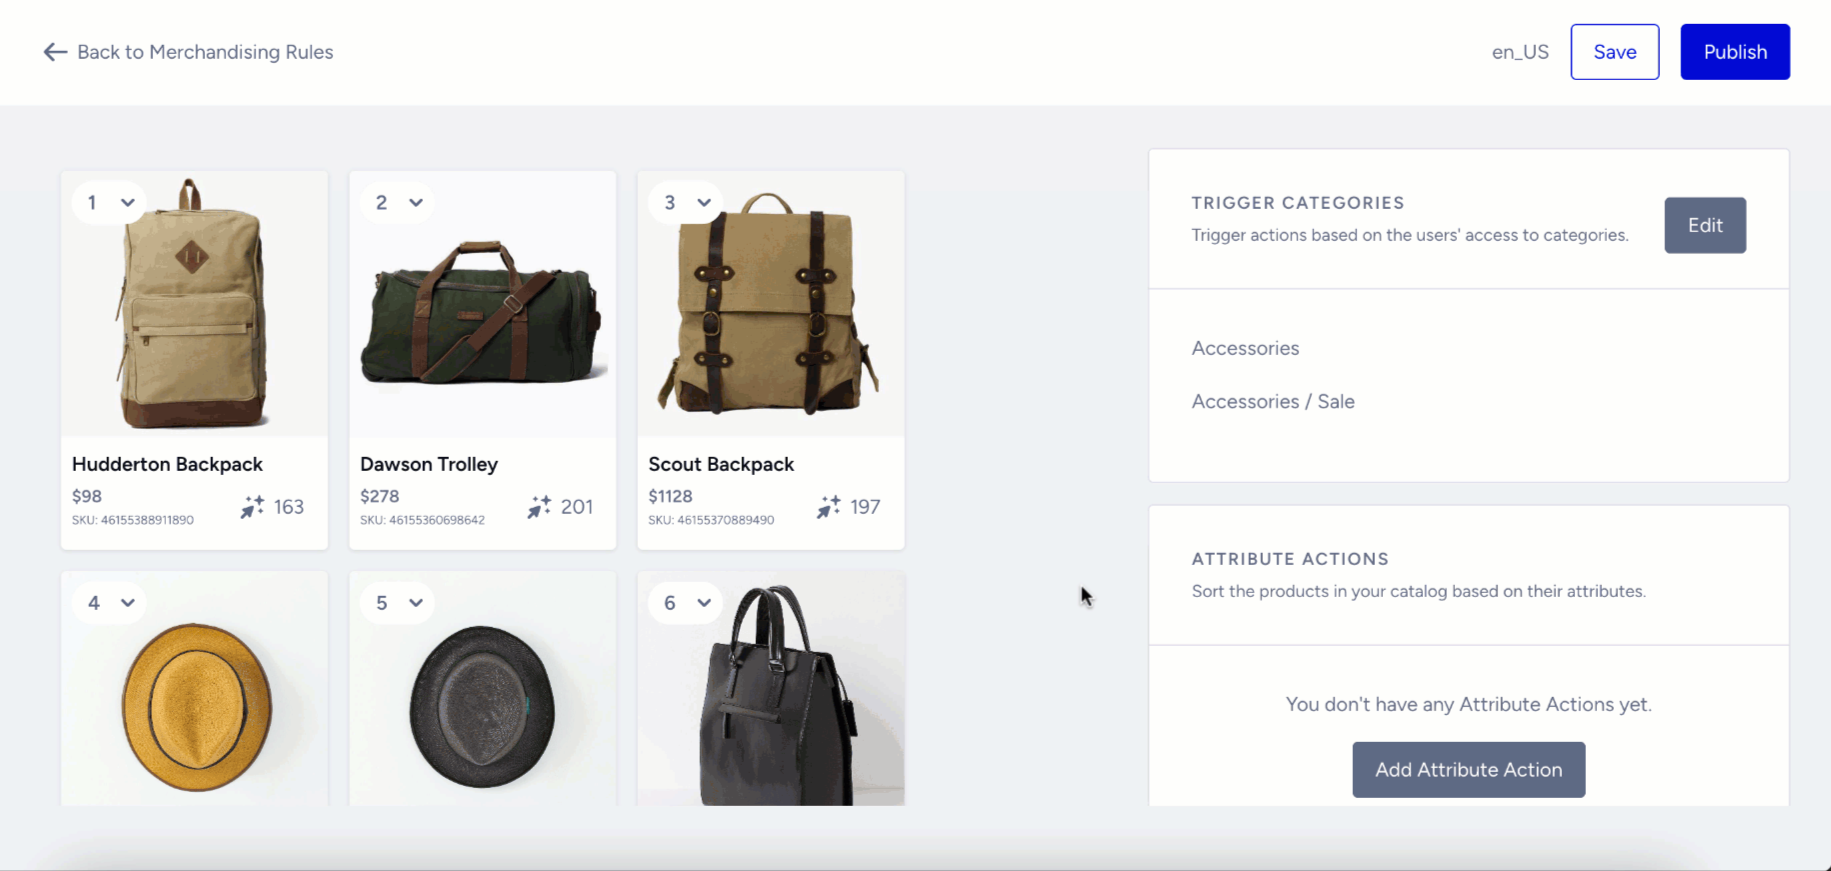
Then you will see the categories listed under Trigger Categories.
You can also follow the same steps when you click the Set as Trigger button next to the category selection dropdown.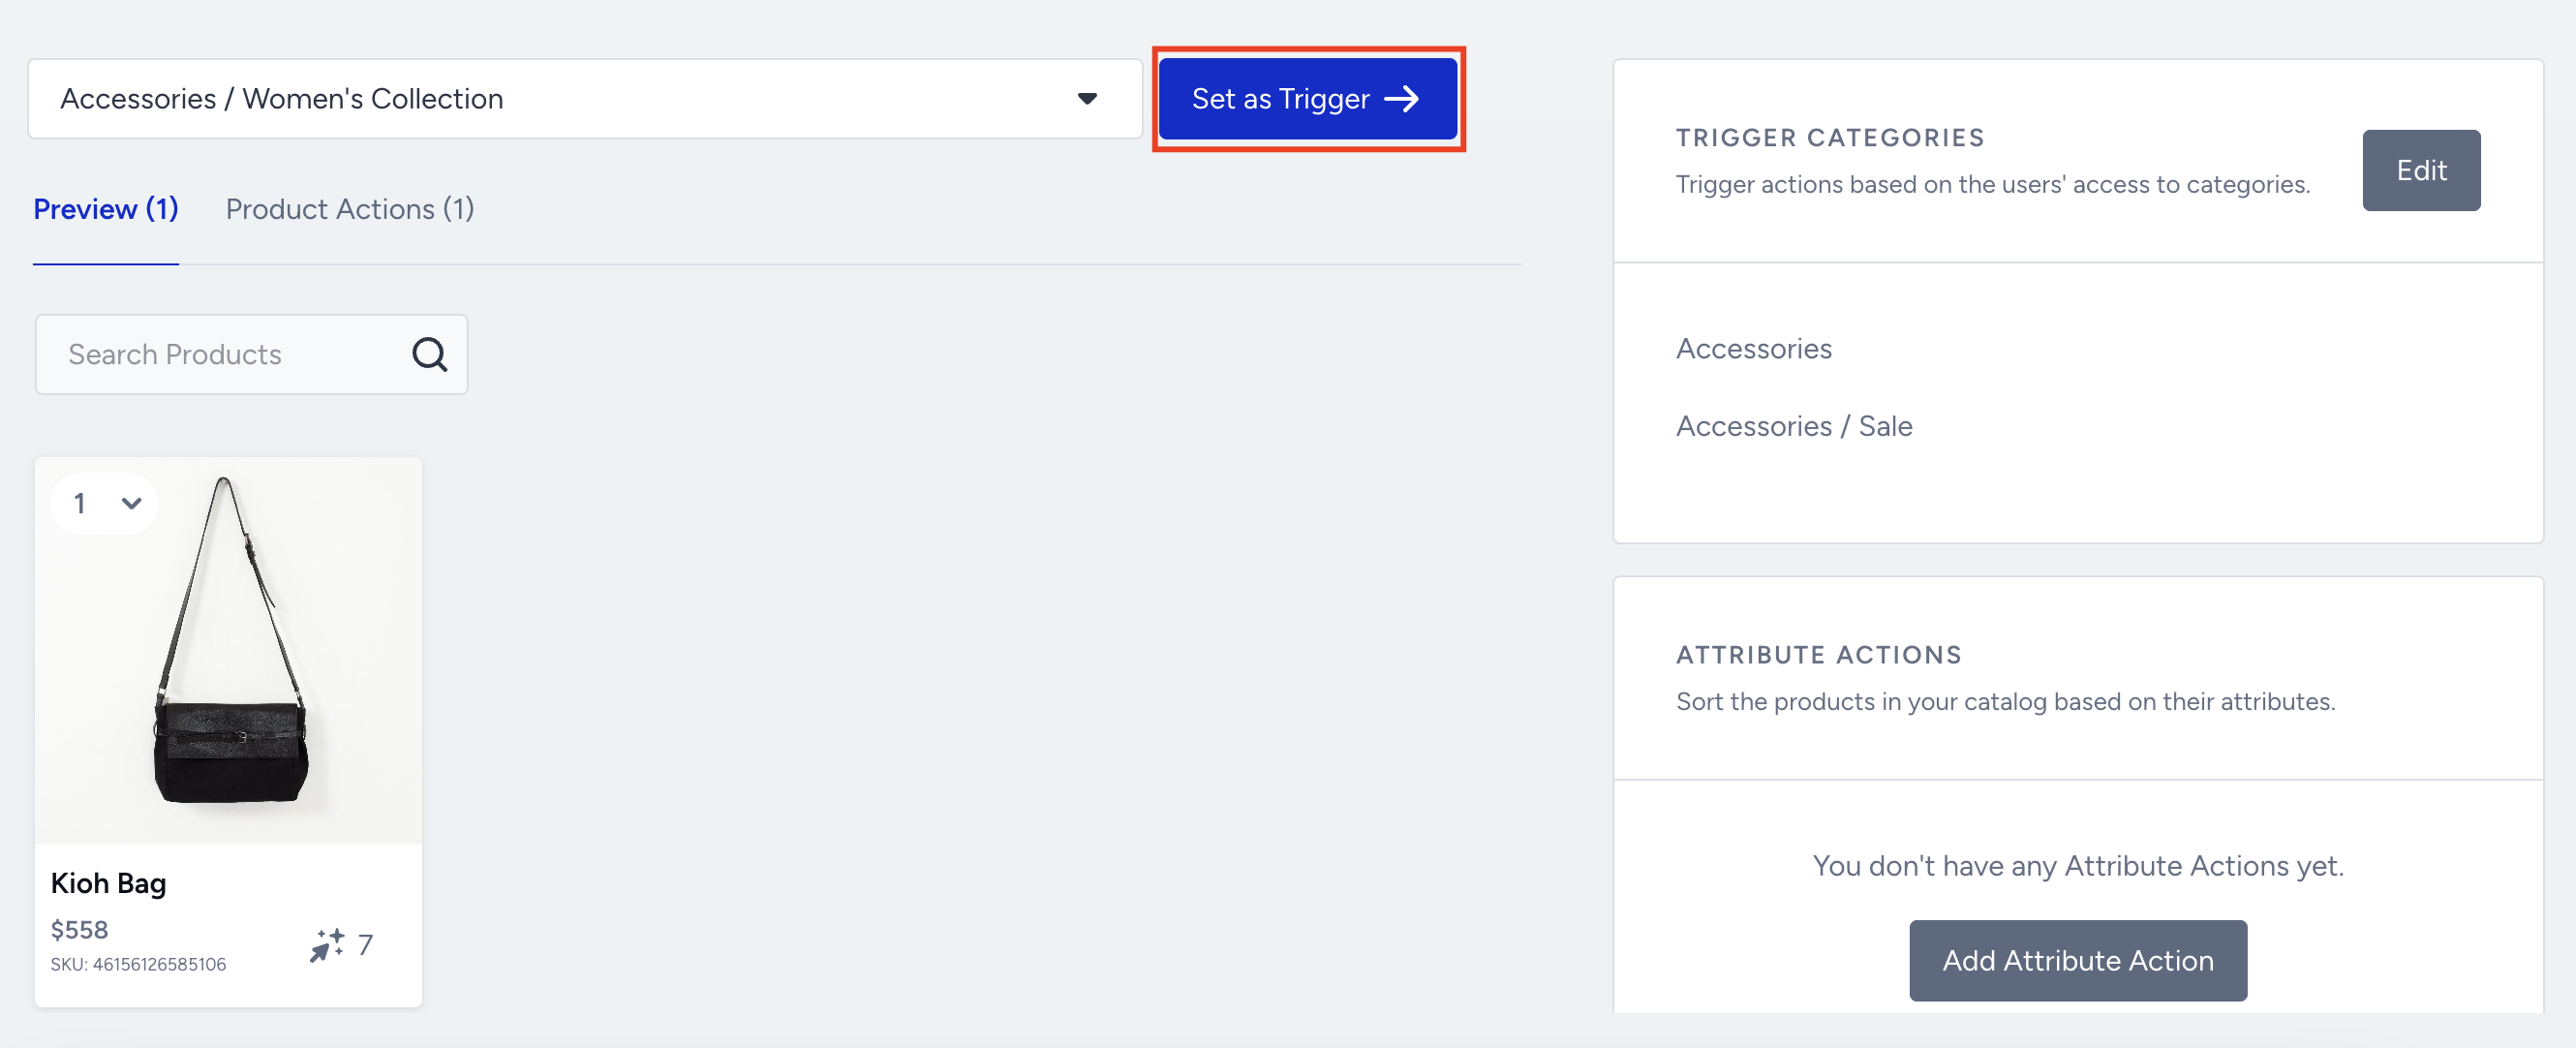
Product actions
In the preview panel, you can pin, boost, or bury a product to change its position on the Product Listing Page (Category Page).
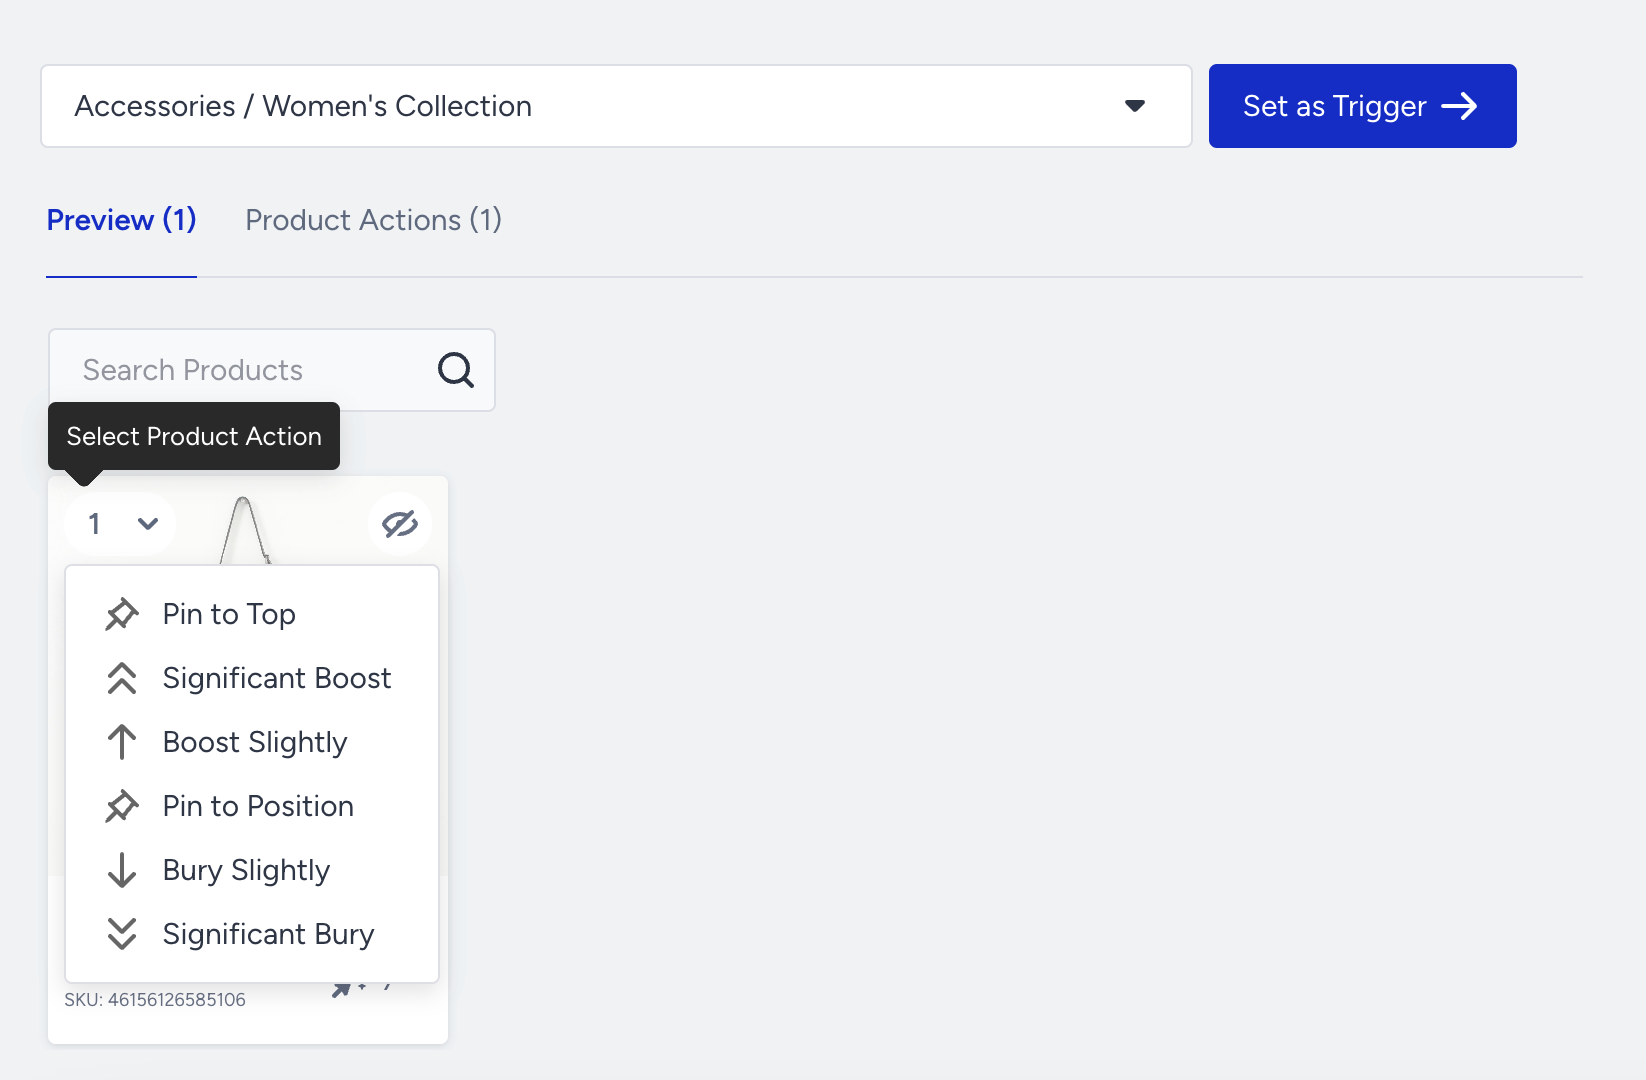 Pin to Position
This option sets the product to a specific place on the Product Listing Page (Category Page). 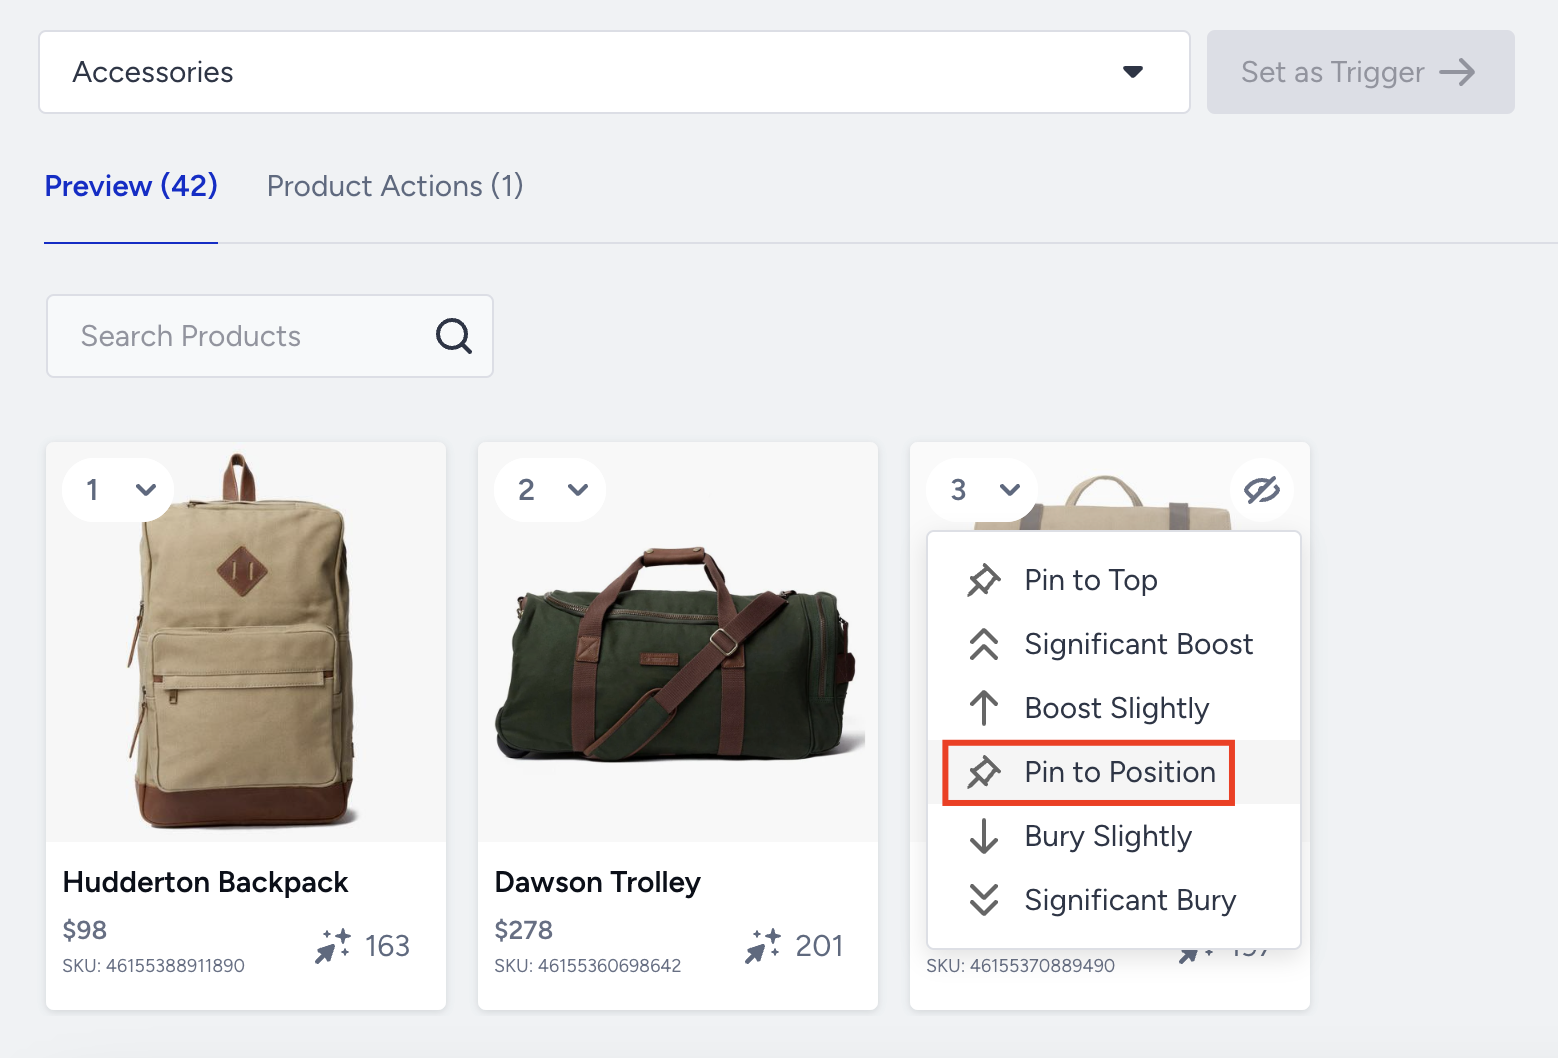
Reorder
This option helps you pin an item to a specific place and move it to its new position. You drag and drop the product card to its new position.
Significant Boost
This option puts the selected product at the top of the Product Listing Page (Category Page).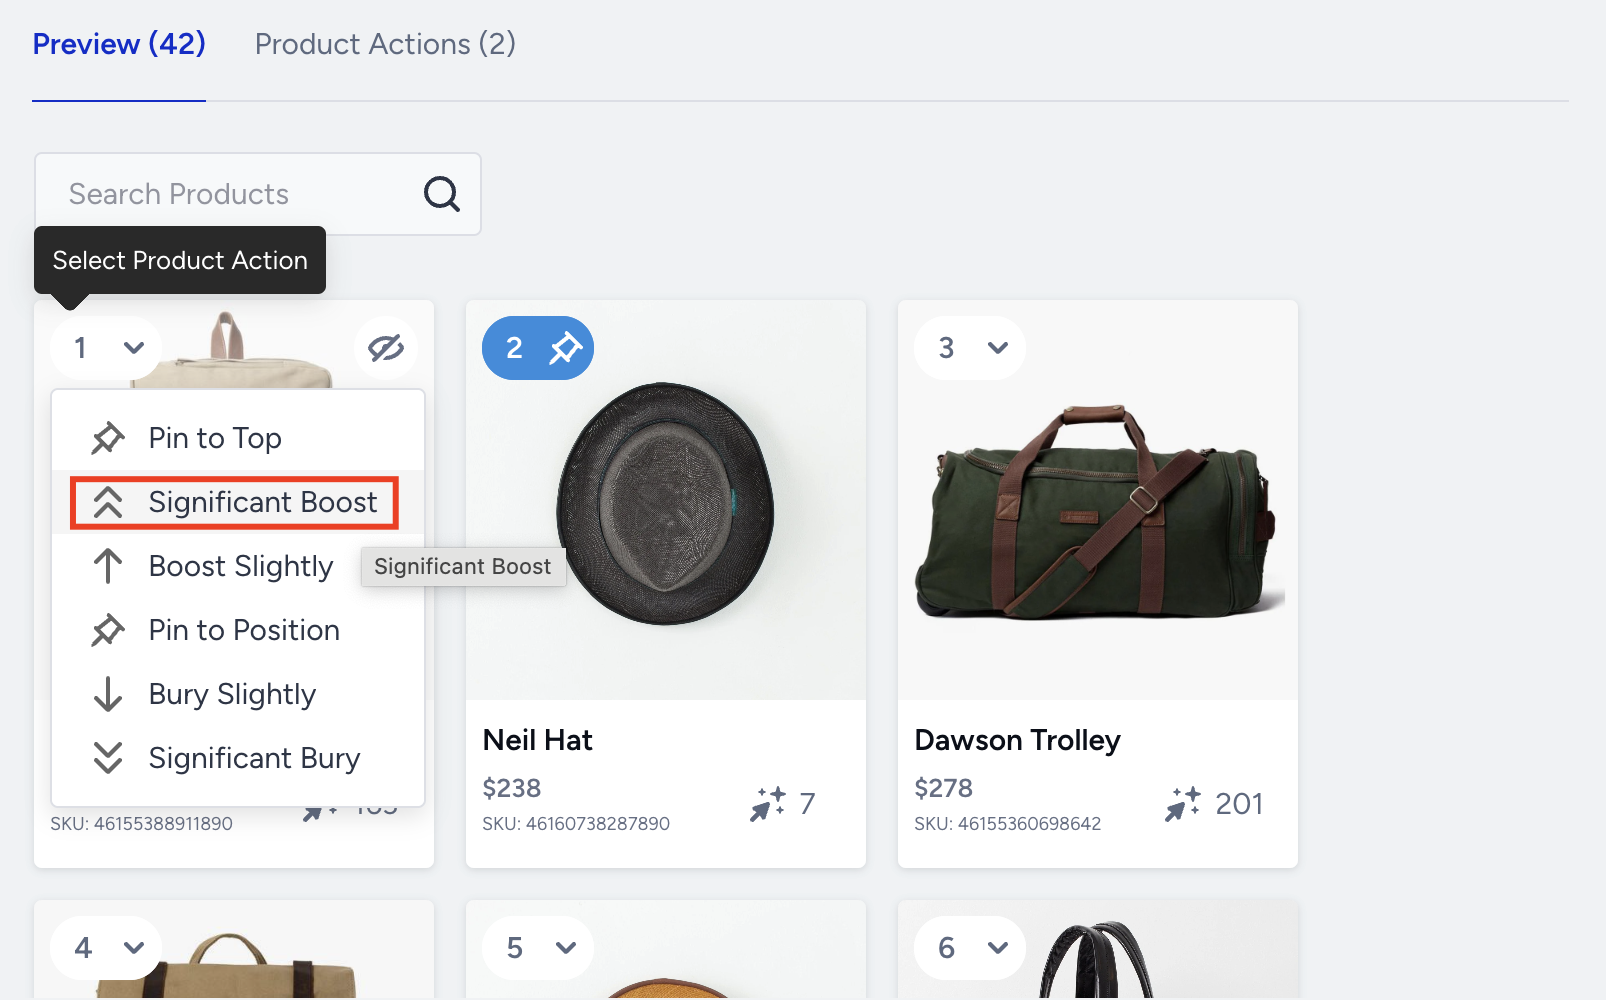
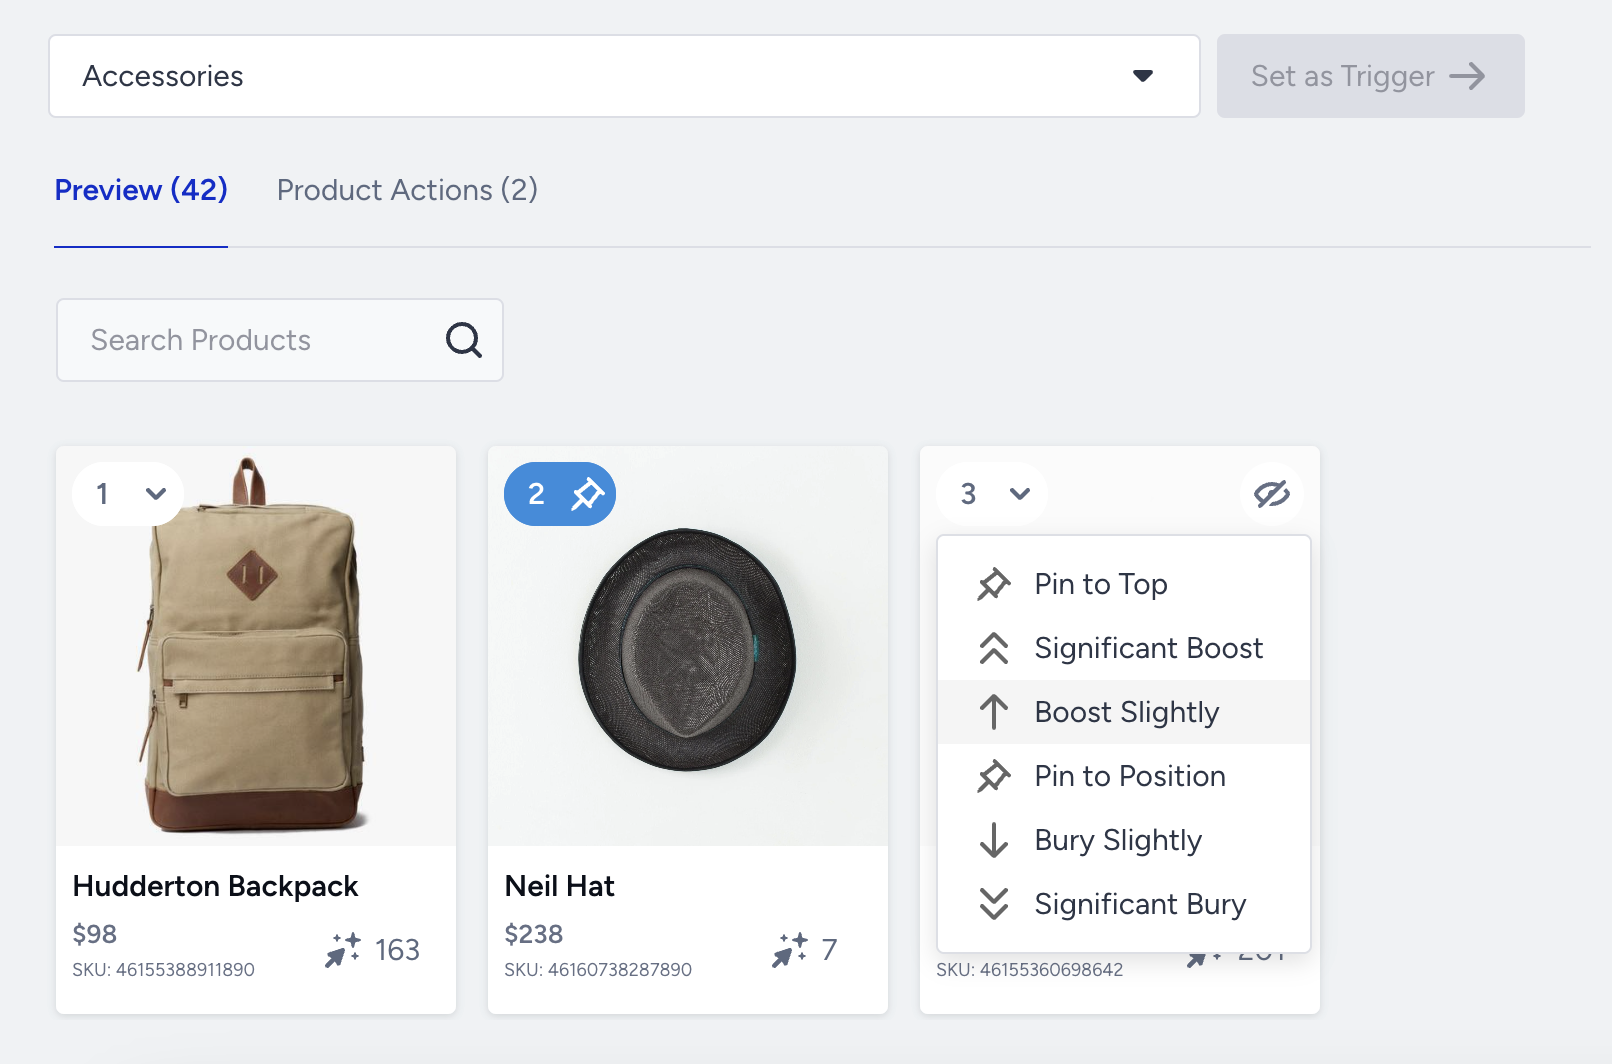
Boost Slightly
This option moves the selected product to a higher position than its original position on the Product Listing Page (Category Page).
Significant Bury
This option ensures that the selected product appears at the bottom of the Product Listing Page (Category Page).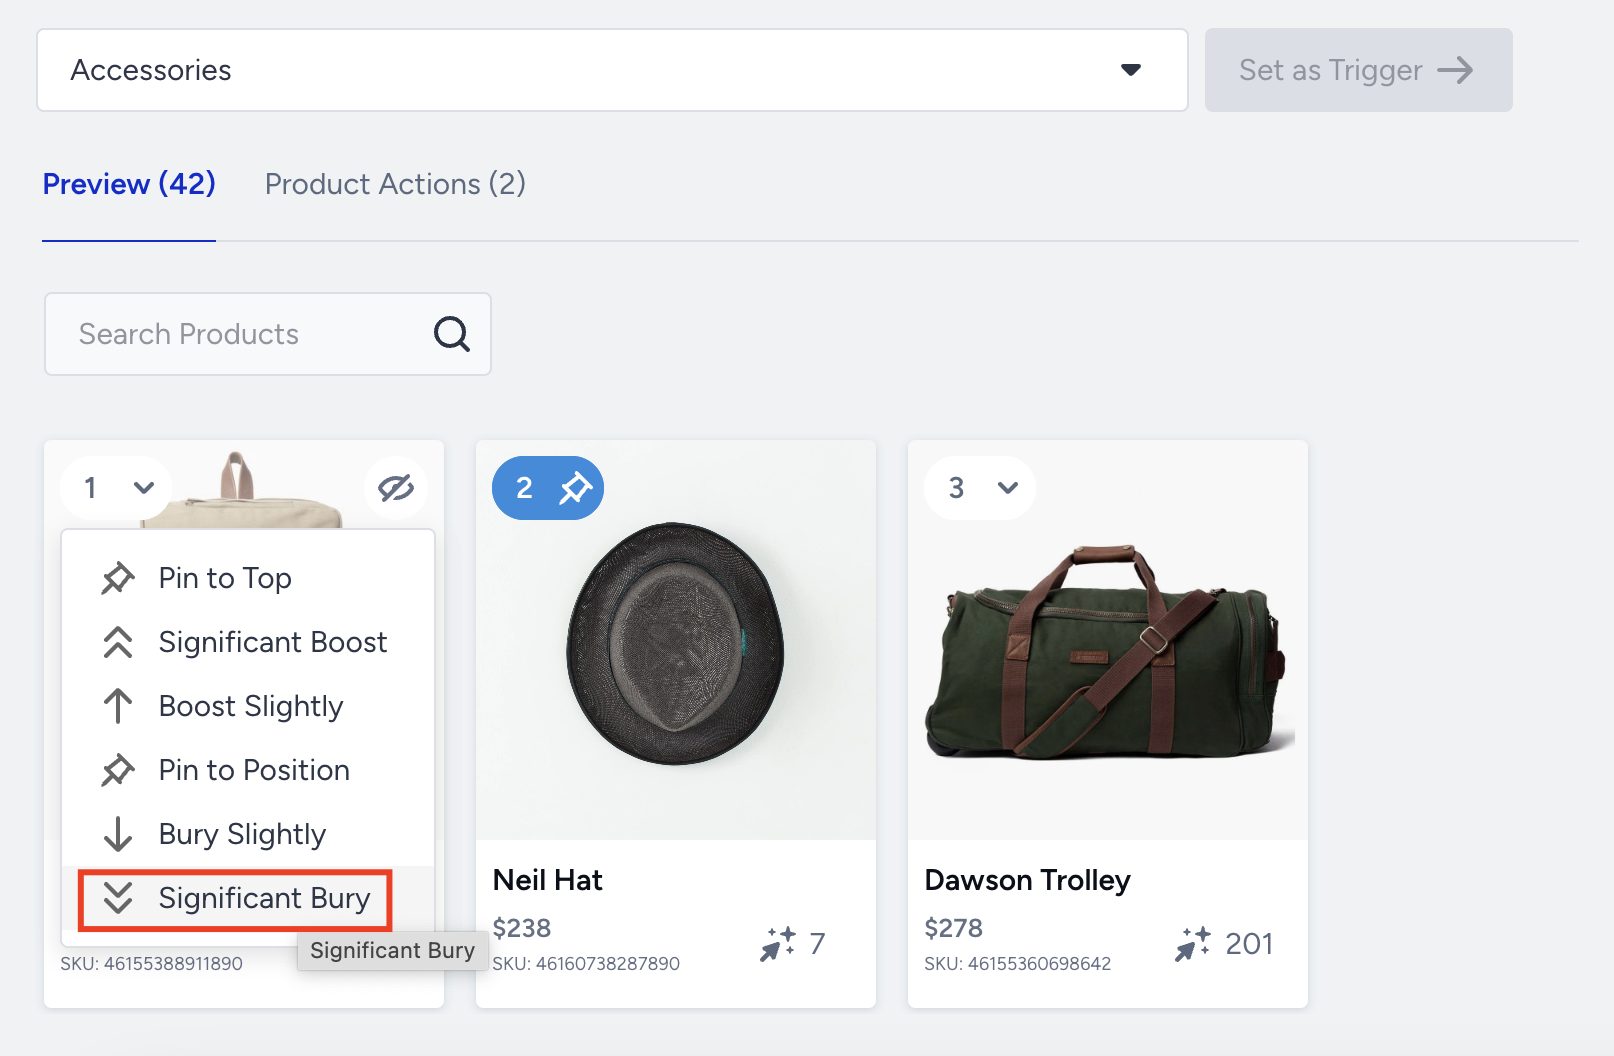
Bury Slightly
This option makes the selected product position lower than its original position on the Product Listing Page (Category Page).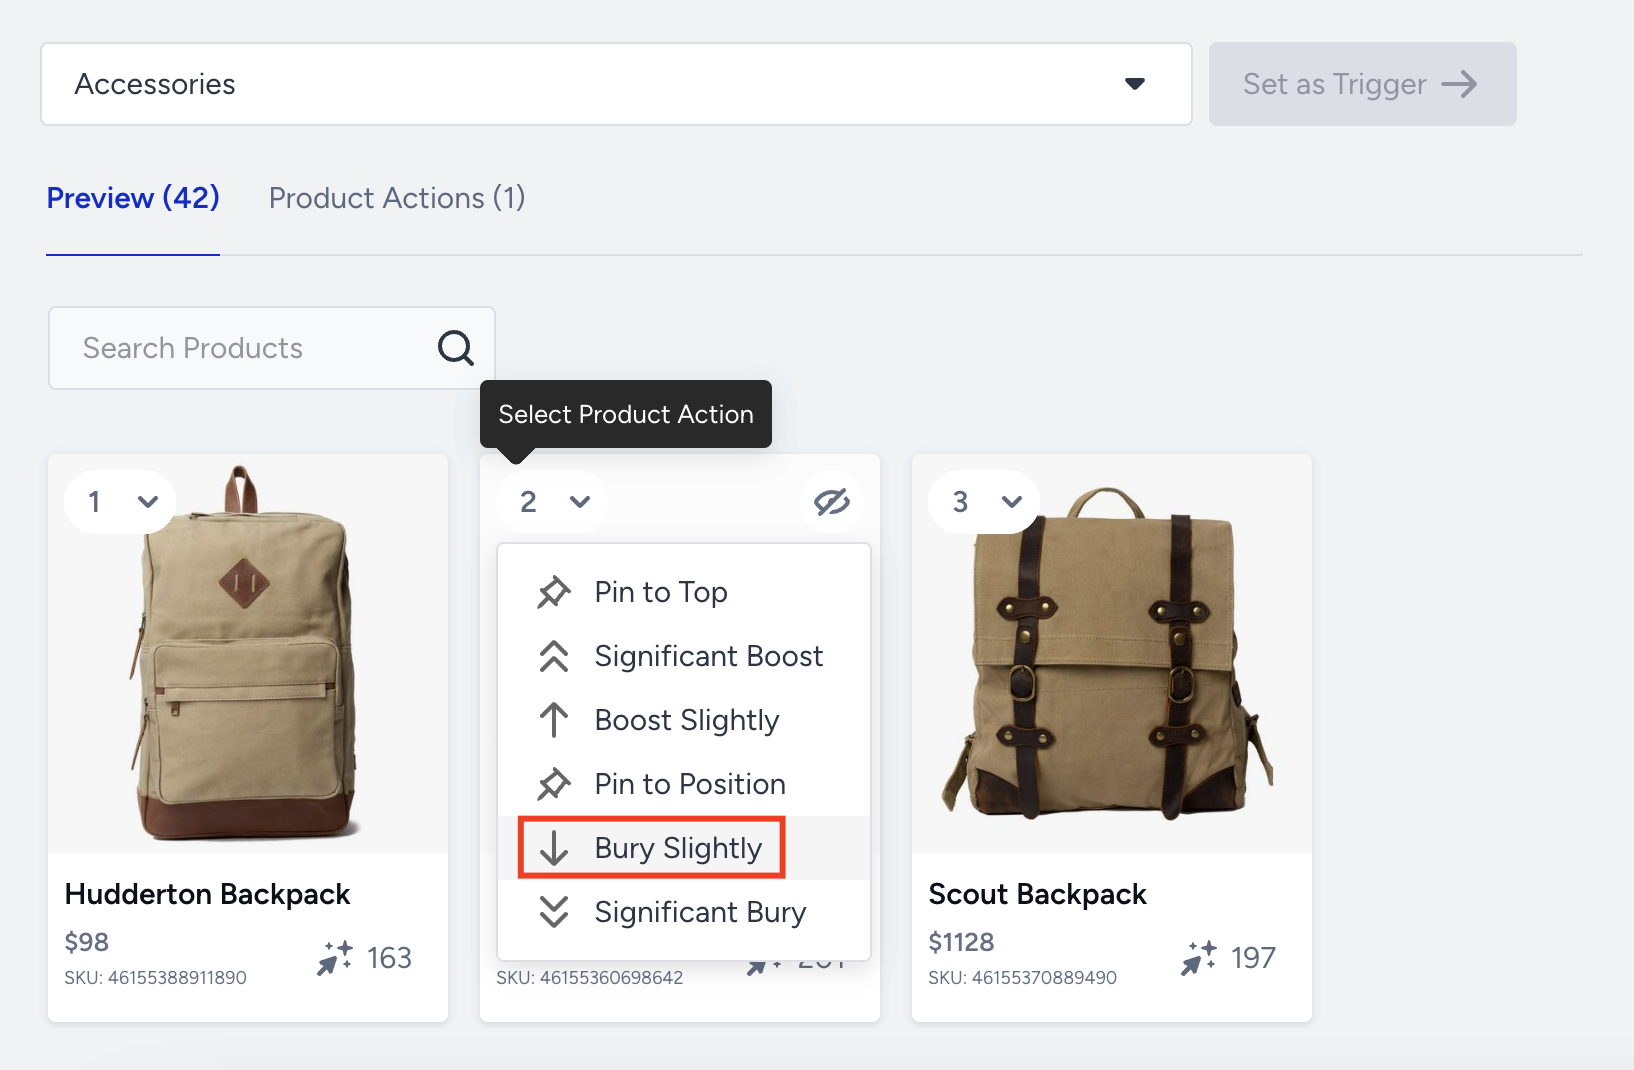
Hide
This option hides a specific product from the Product Listing Page (Category Page).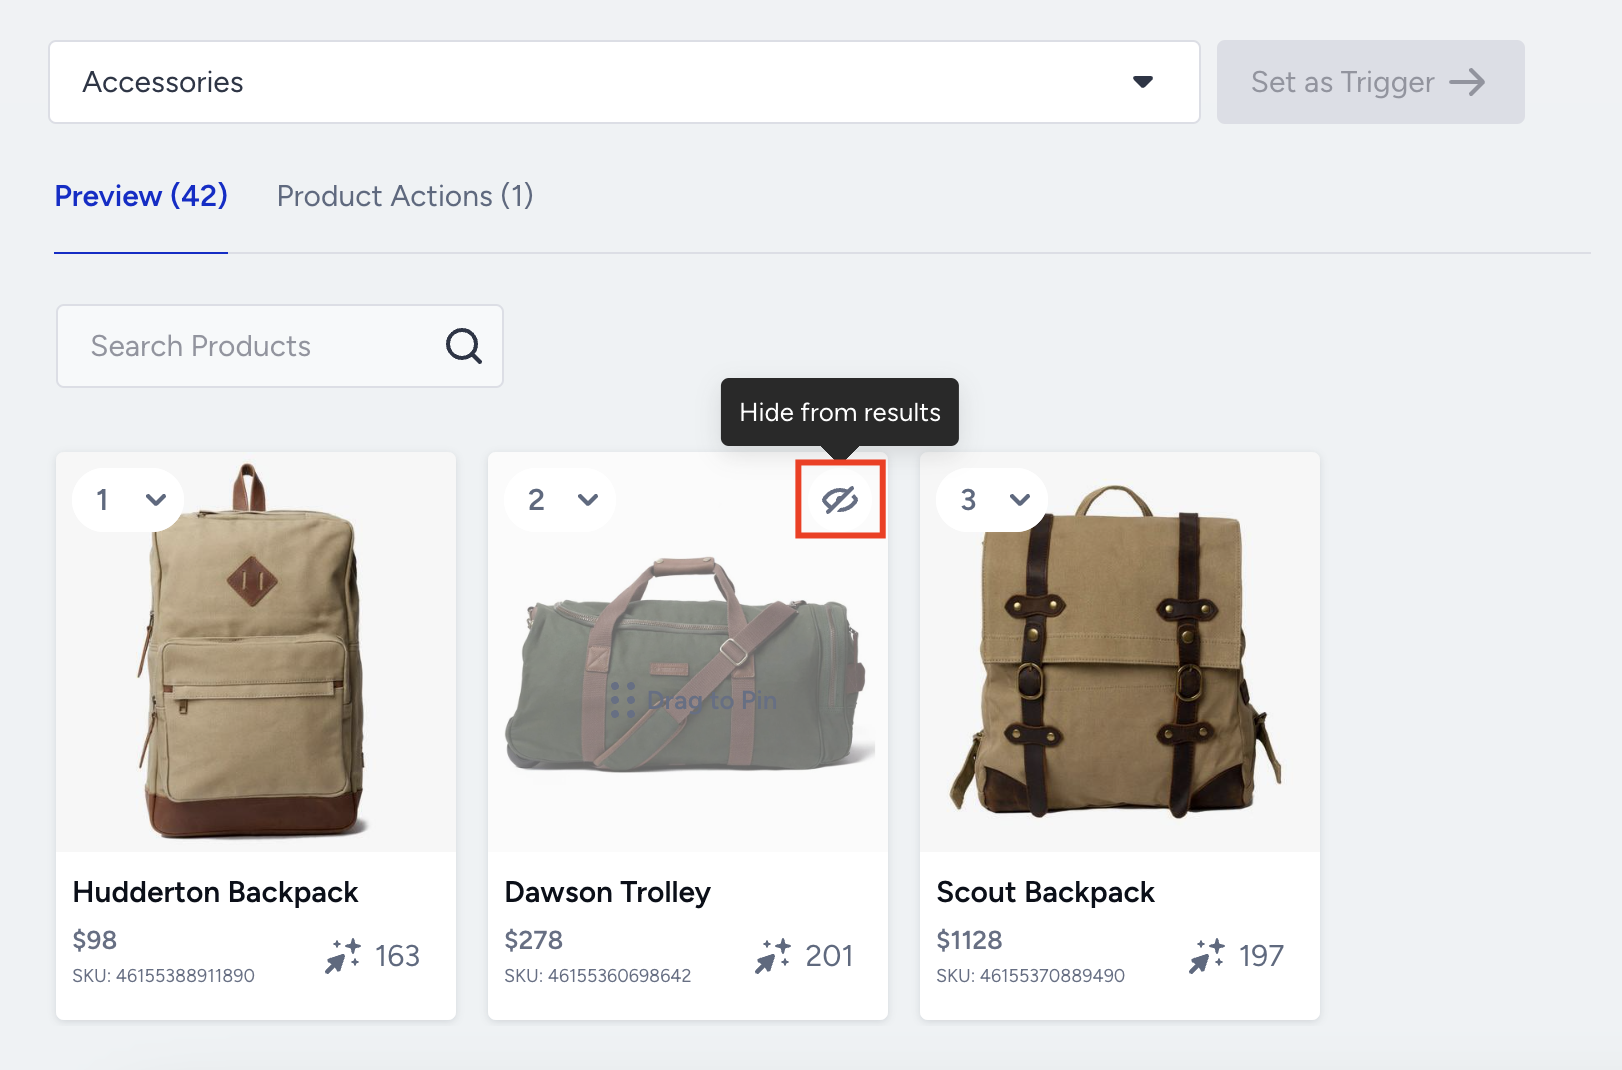
With all the merchandising rules applied to the different products, you can also view the hidden products under the Product Actions tab. 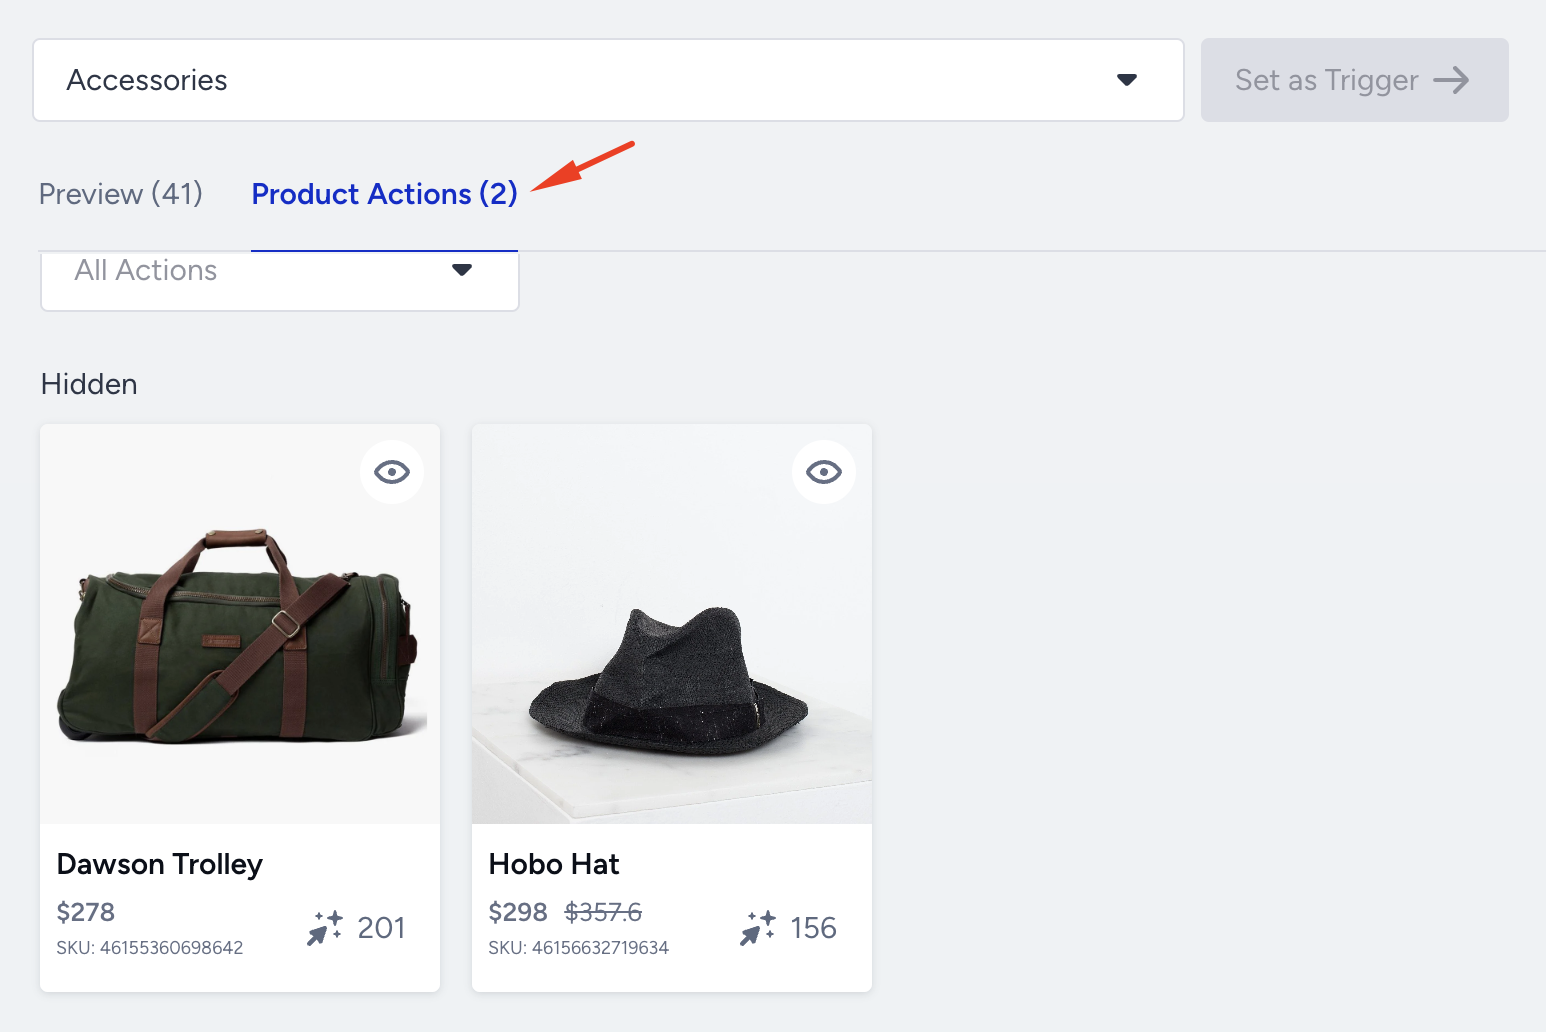
All the merchandising rules applied to the different products are displayed as item actions.
Add Attribute Actions
You can modify the display of the Product Listing Page (Category Page) according to a particular product attribute or a combination of product attributes. You can utilize attribute and item actions independently or together, serving as the category merchandising rule. For example:
If the trigger category is "Sneakers," boost "X-branded" products.
If the trigger category is "Women’s Collection," boost "red-colored" products during Valentine’s Day.
To add attribute actions,
1. Click the Add Attribute Actions button.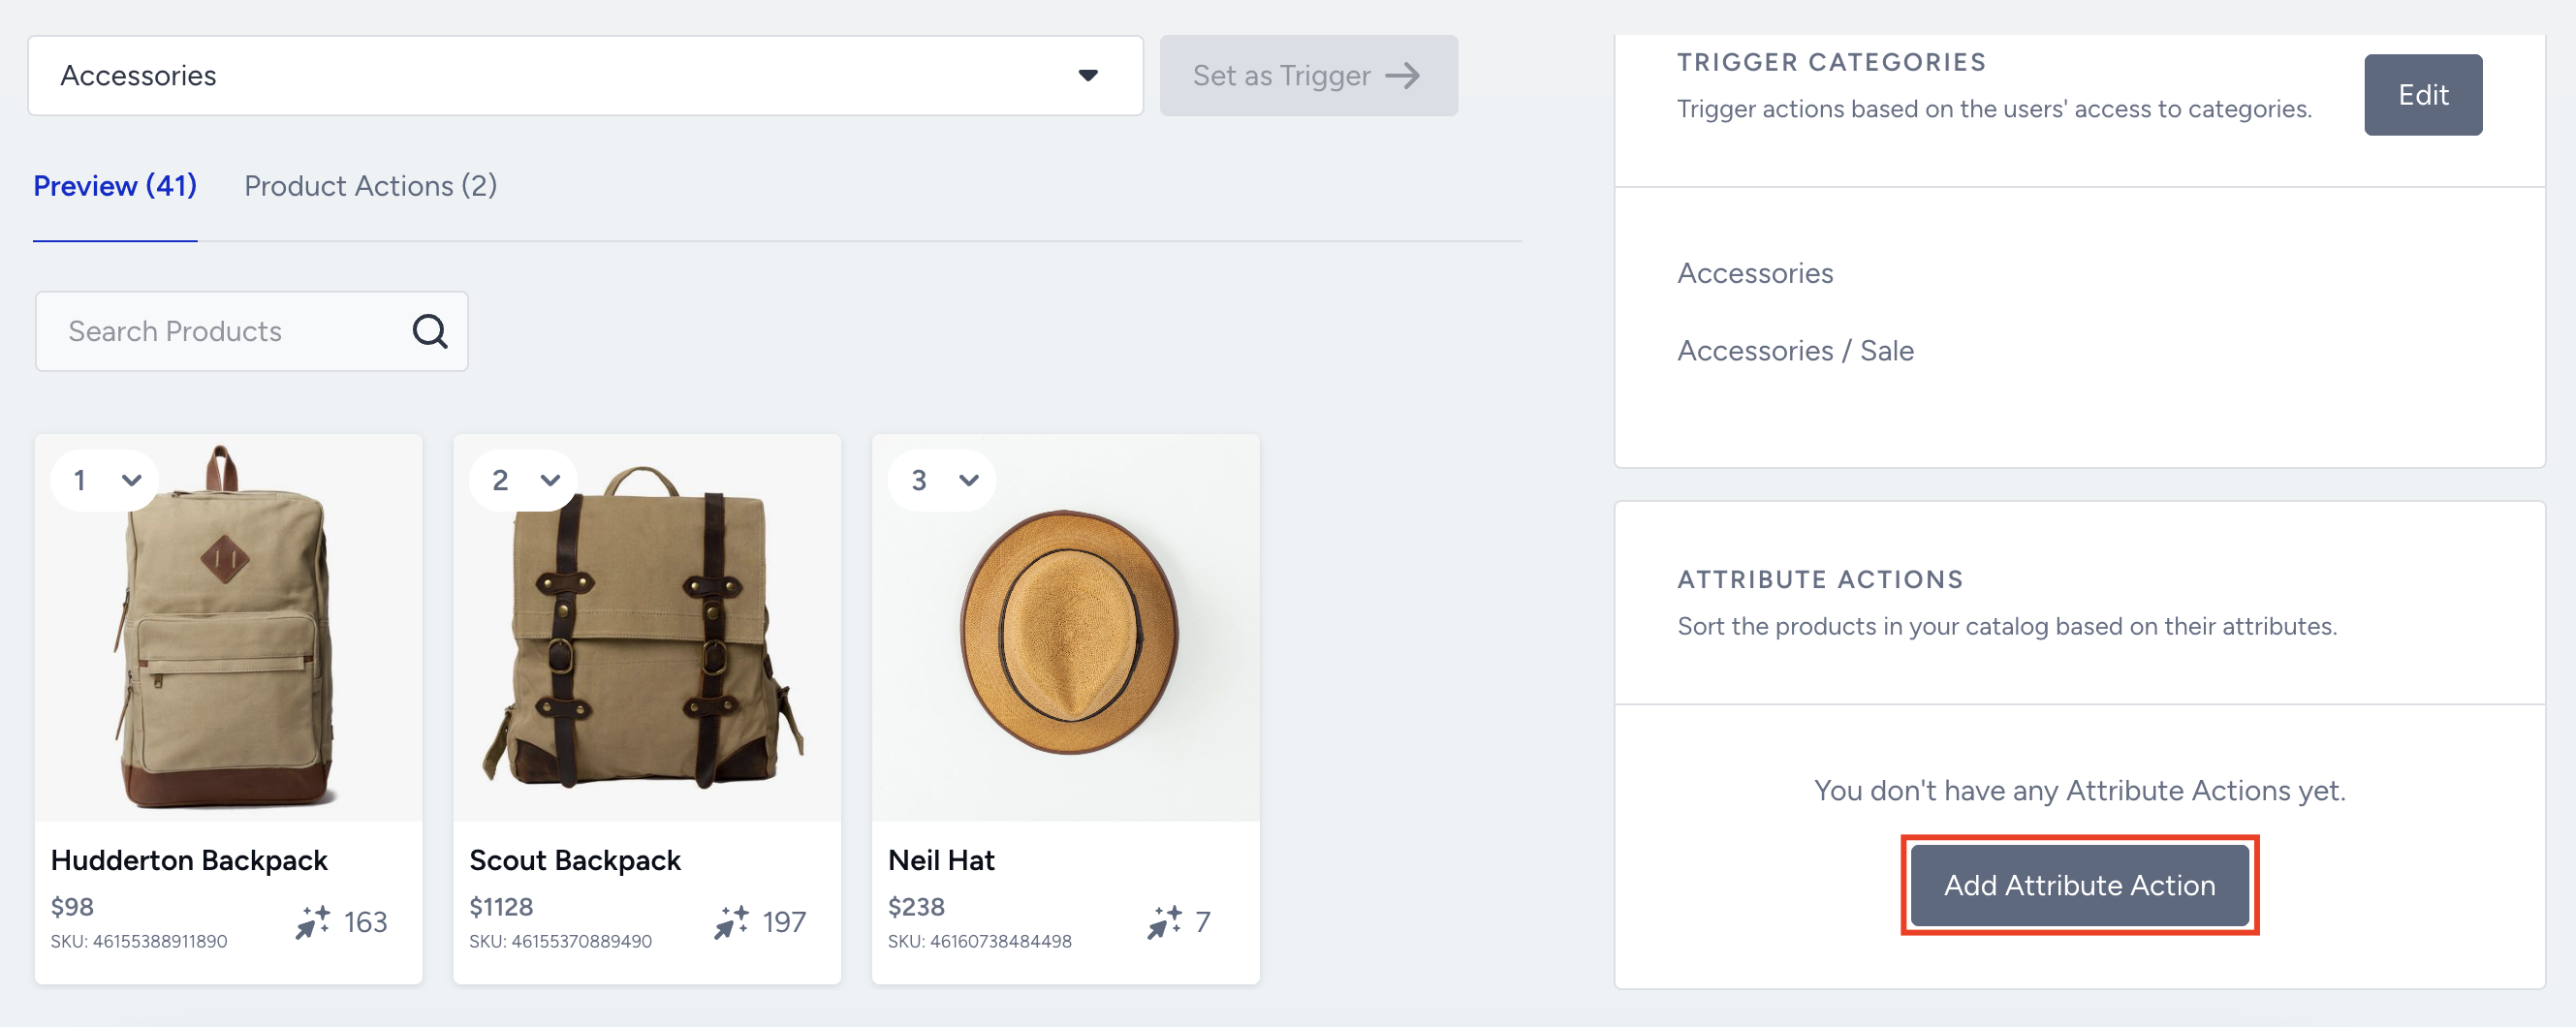
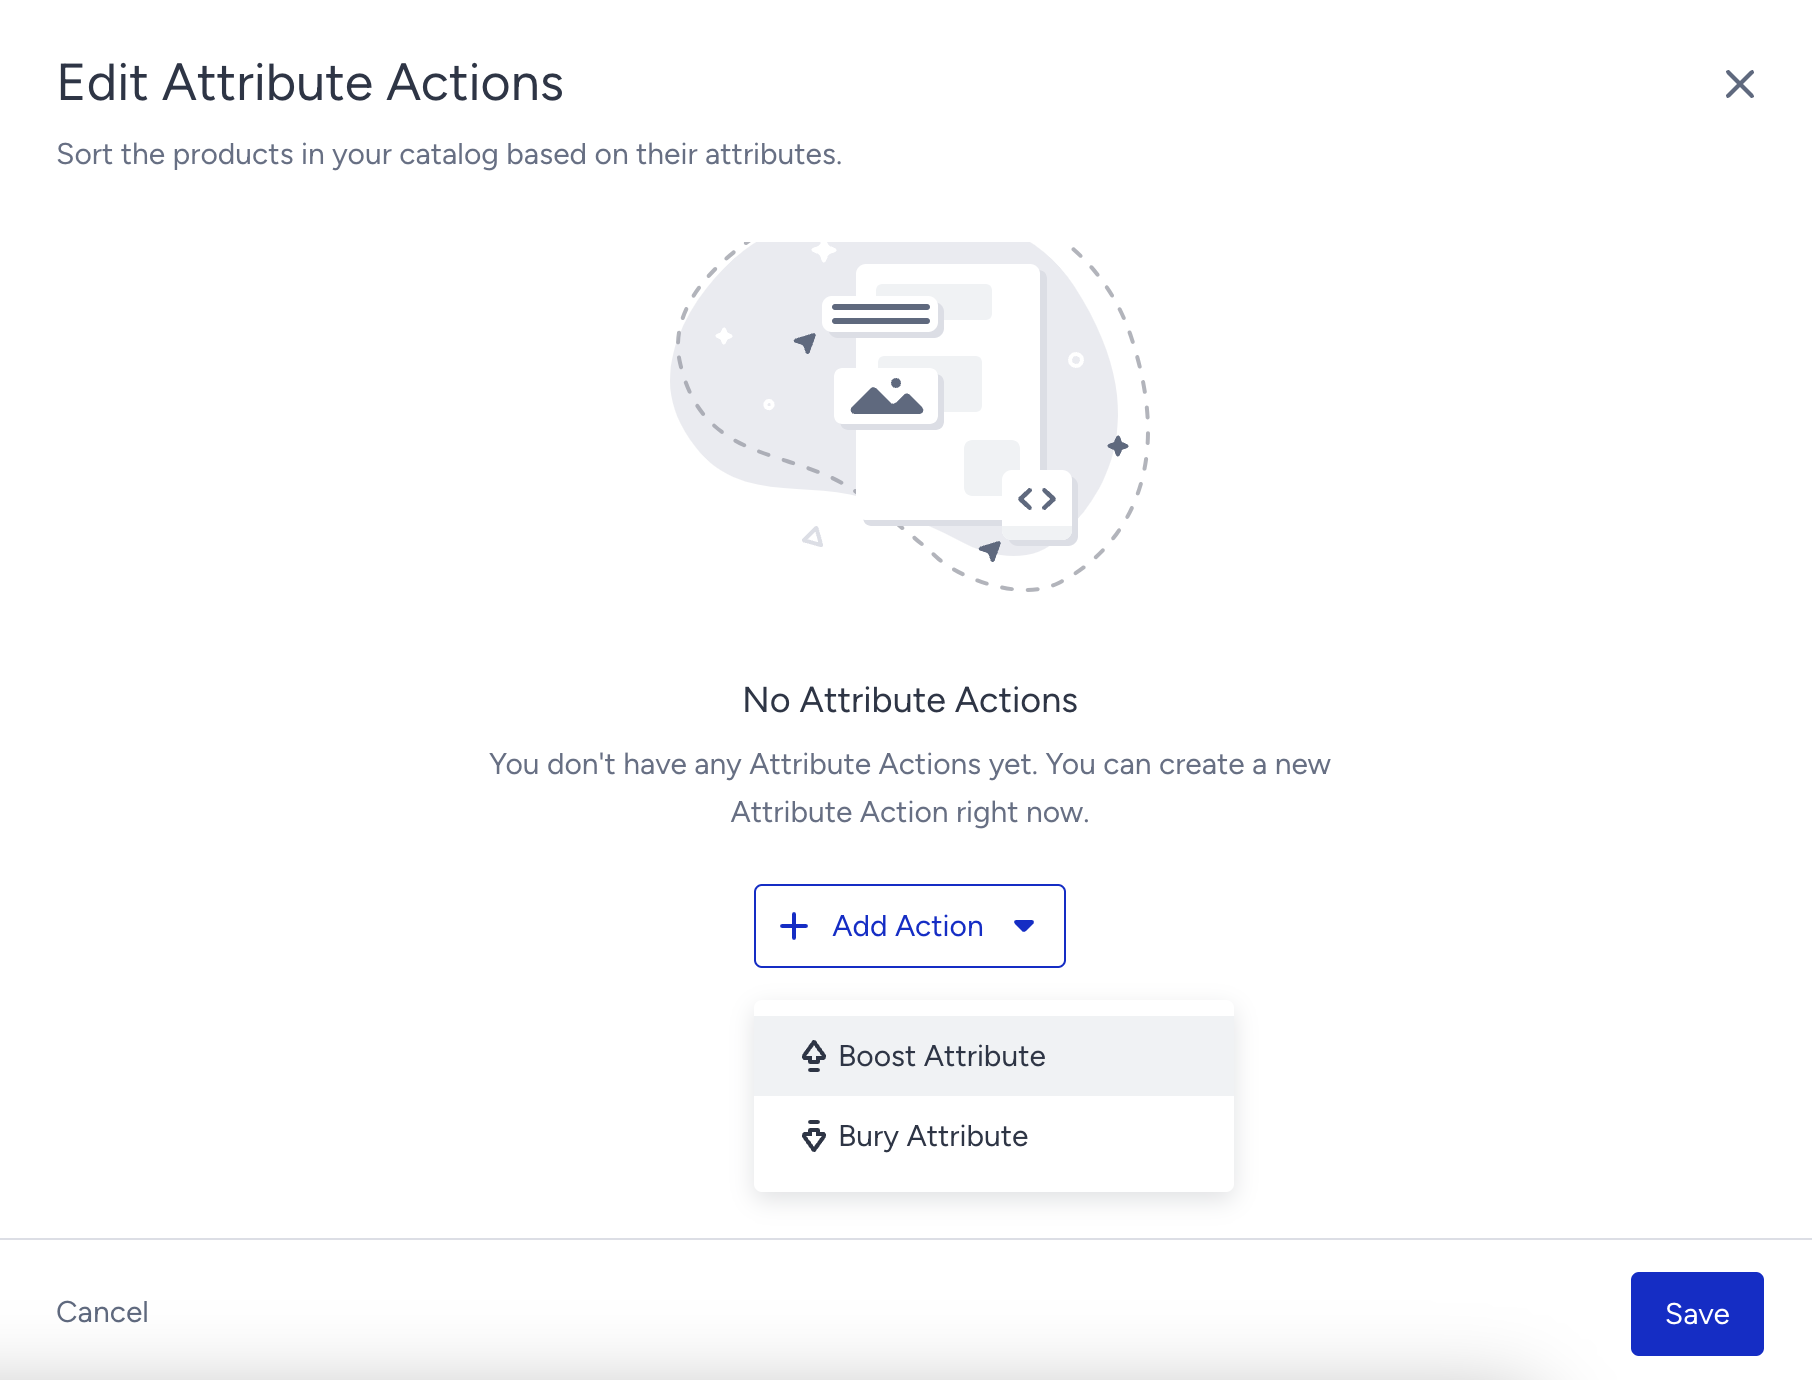
2. Click the + Edit Action button and select the action from the dropdown.
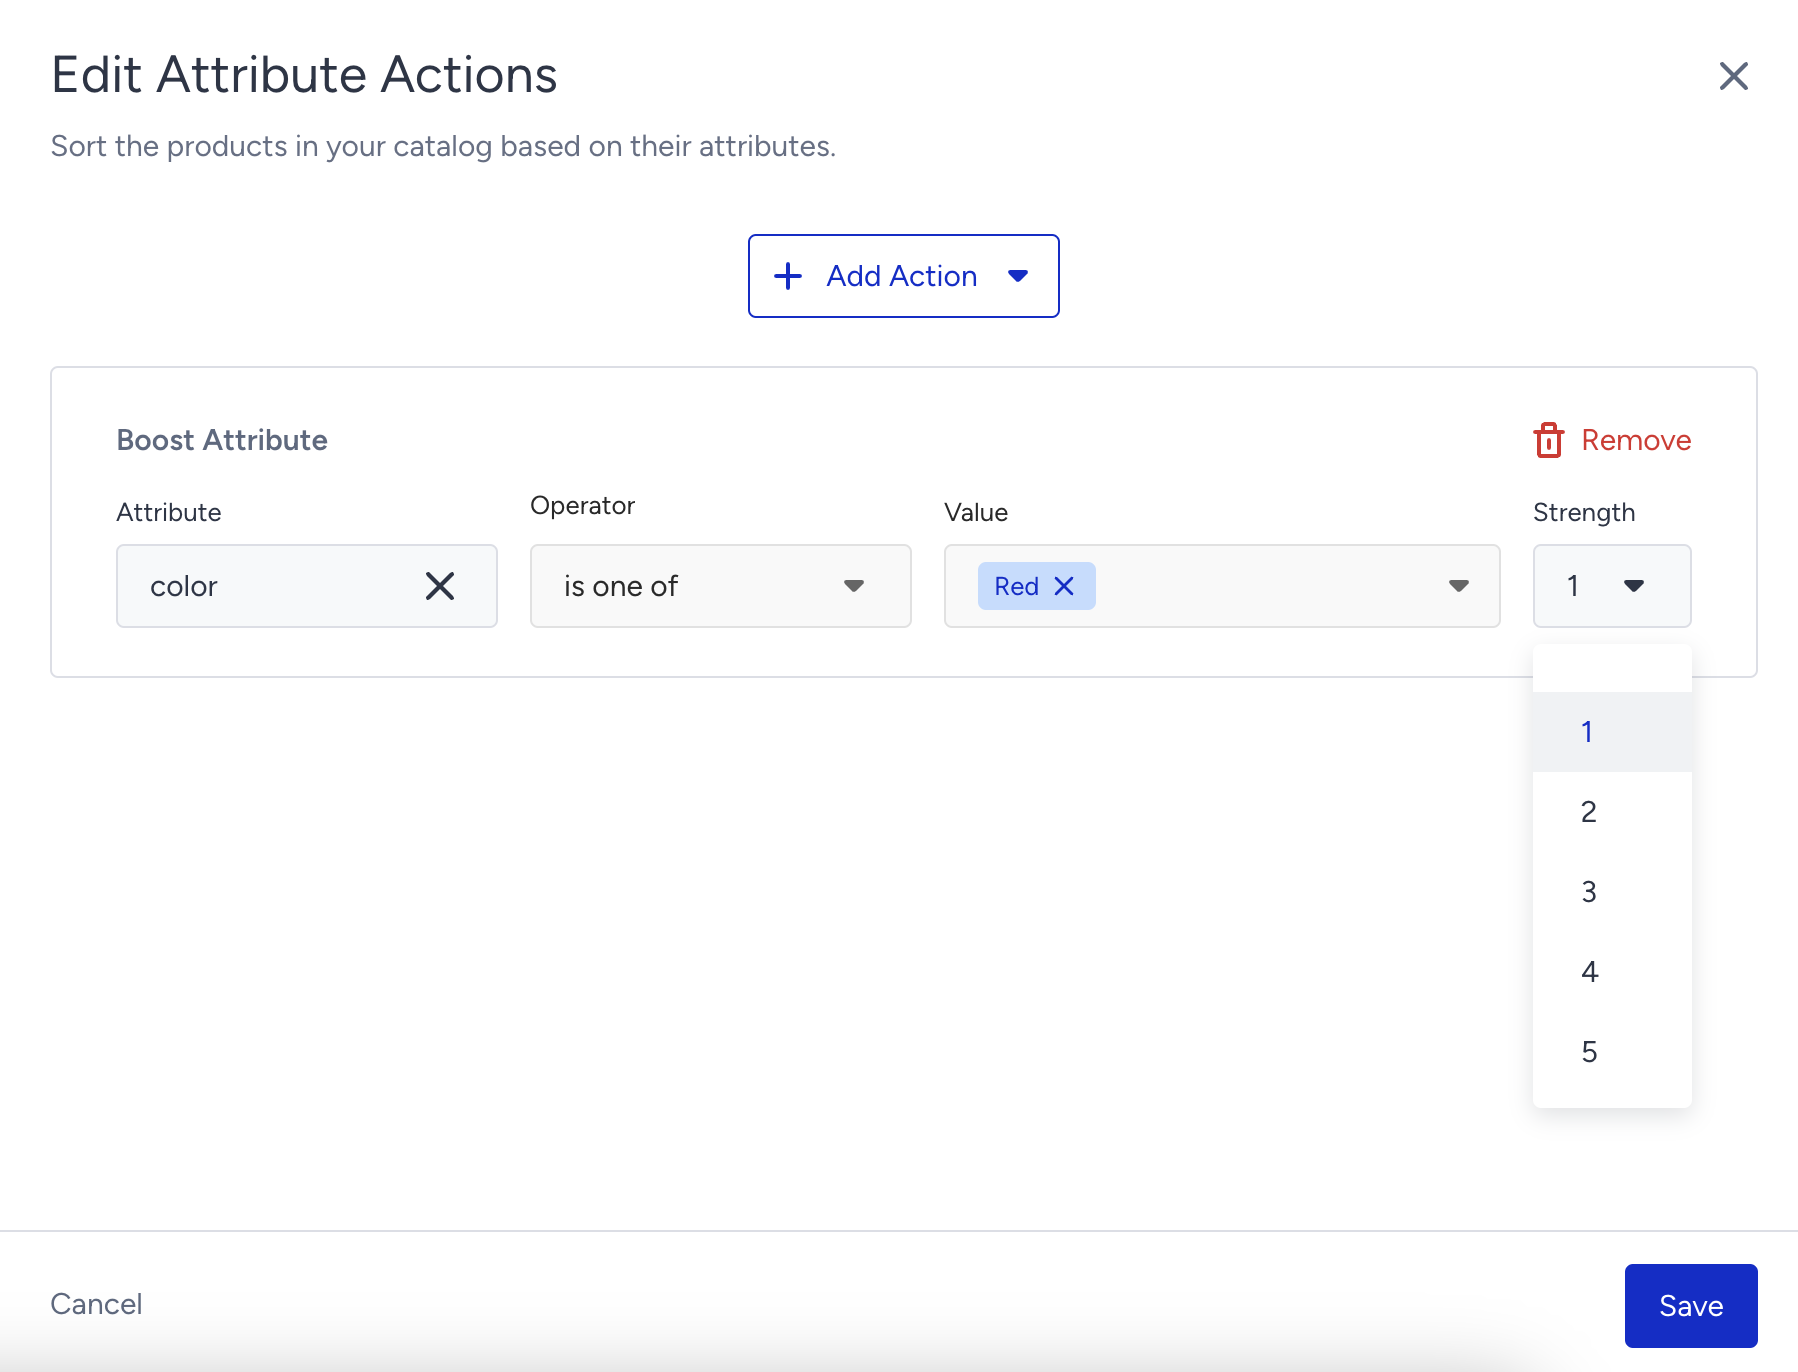
3. Select the attribute, operator, and value. The strength value indicates priority; the higher the value, the stronger the priority.
Publish a Merchandising Category Rule
If you haven’t activated Eureka Strategies for your account, you should follow these steps below. If Eureka Strategies is enabled, you should skip these steps.
When you have completed setting rules for a category, click the Publish button at the top right of the page.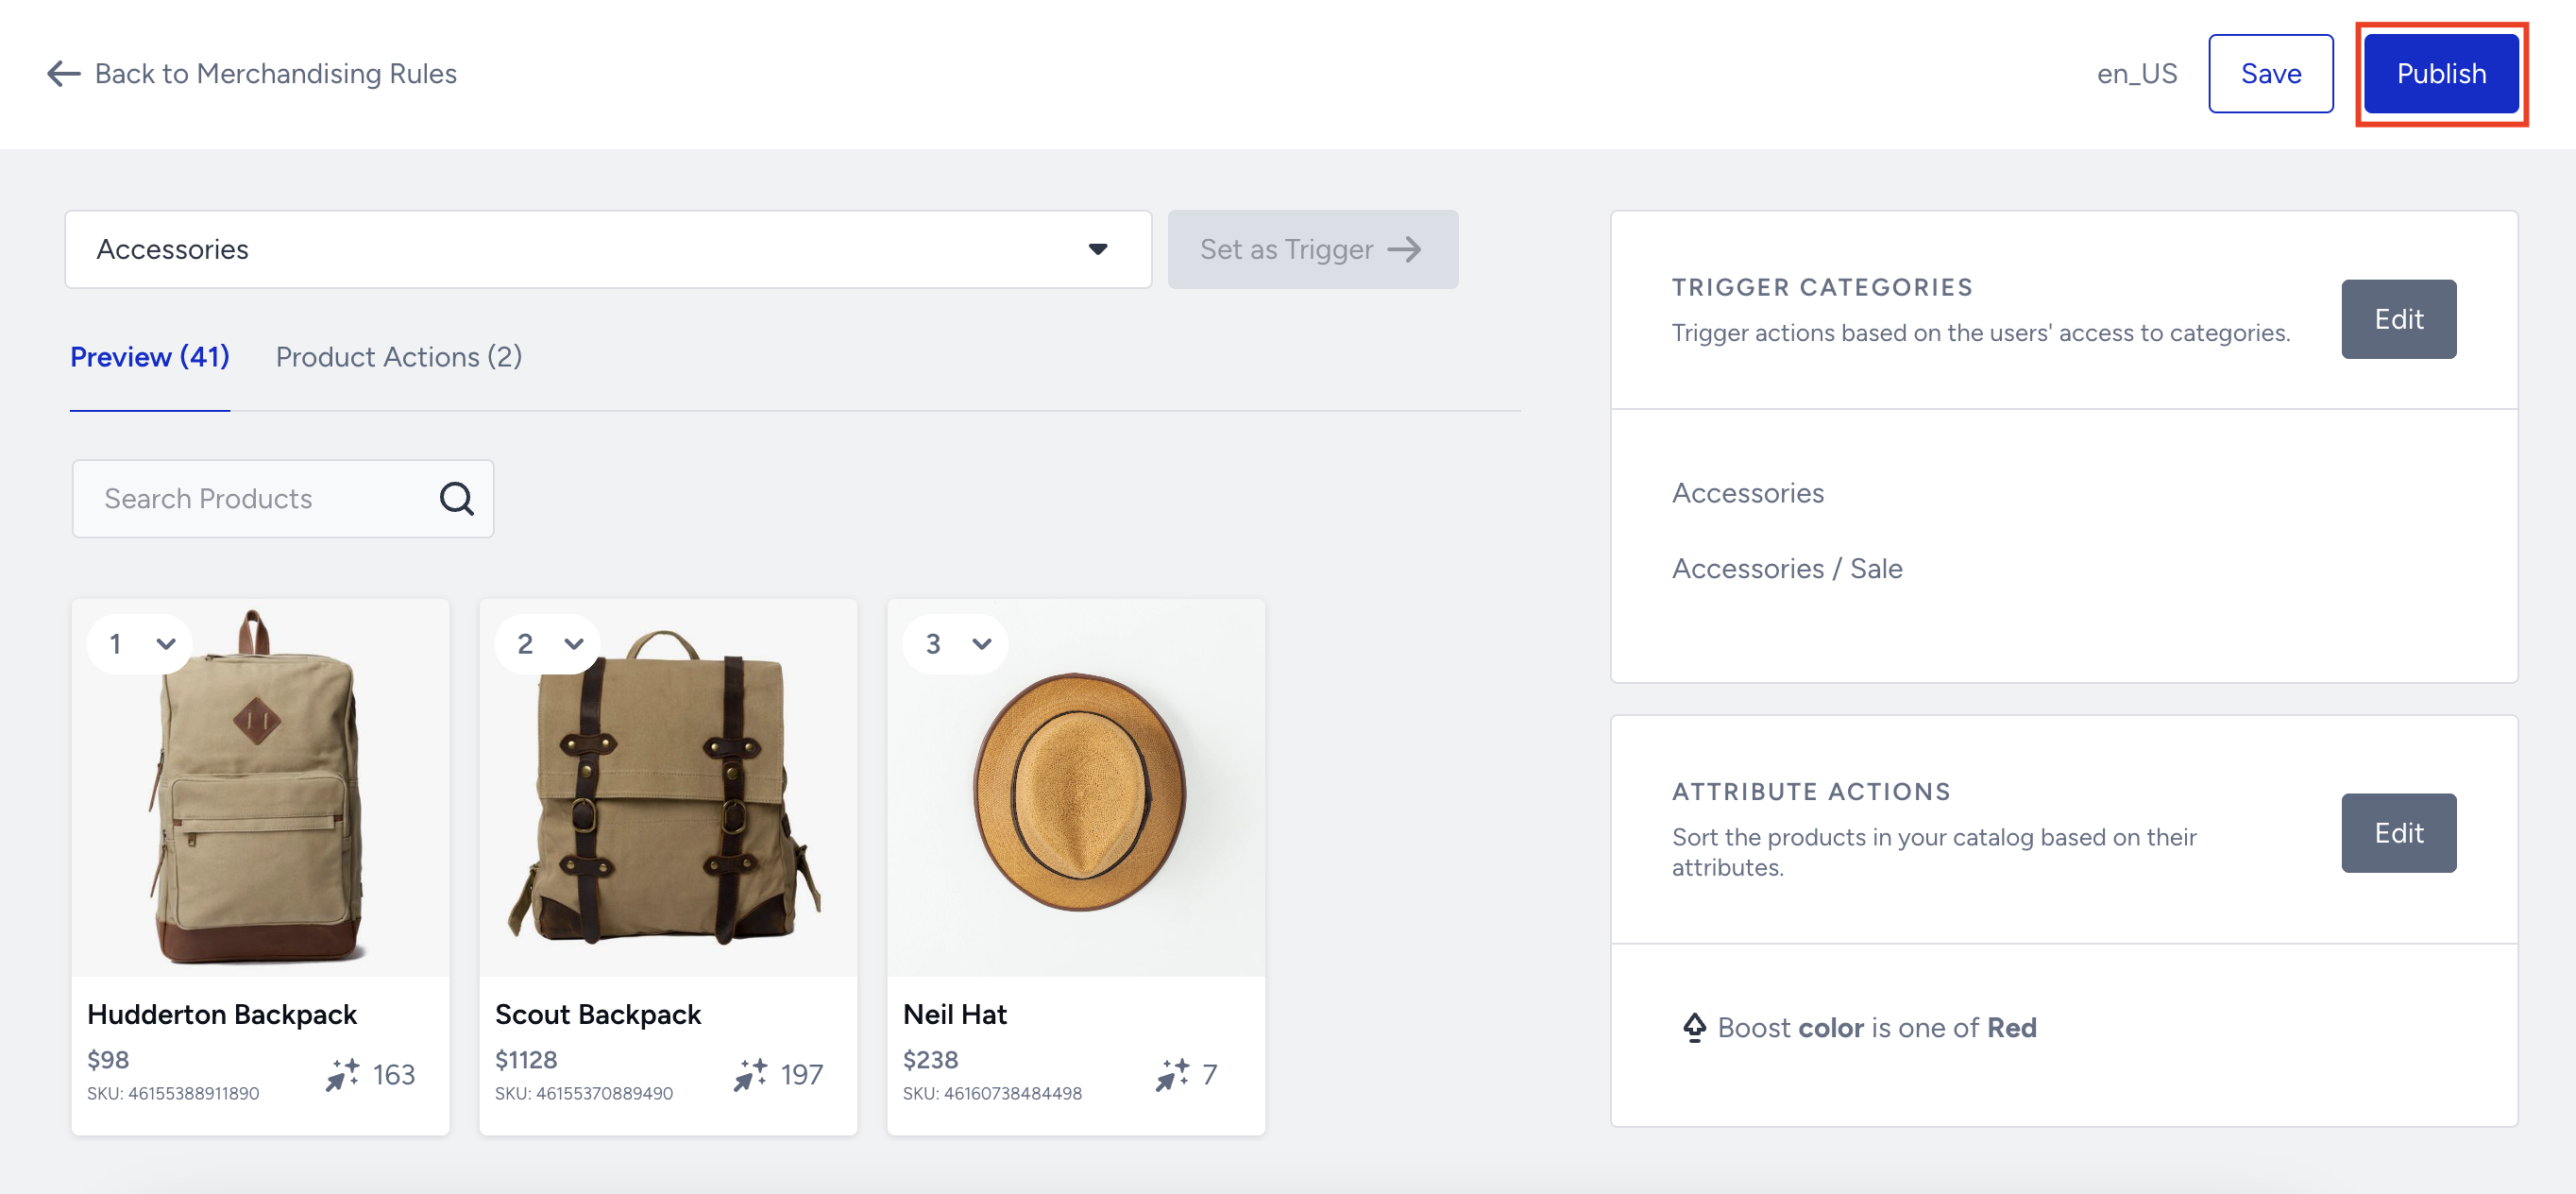
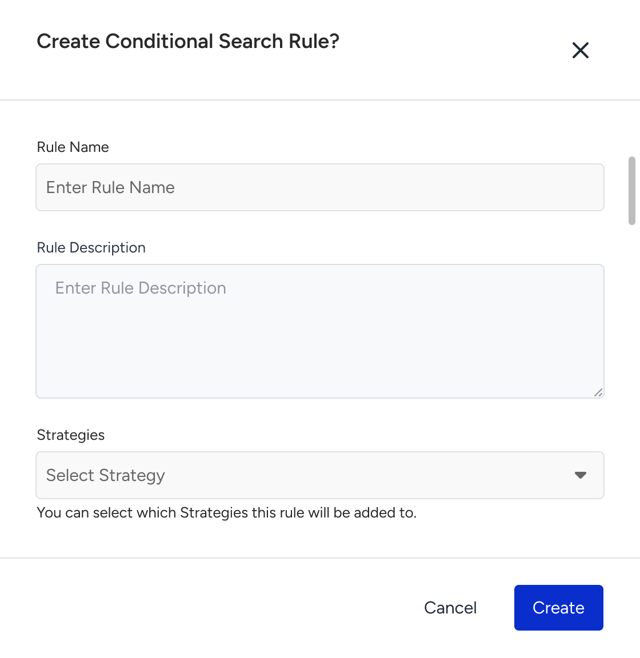
Enter a name and rule description. Then click the Publish button.

The rule you created is listed on the Conditional Rules page. To make it active or passive, you can enable/disable the toggle.
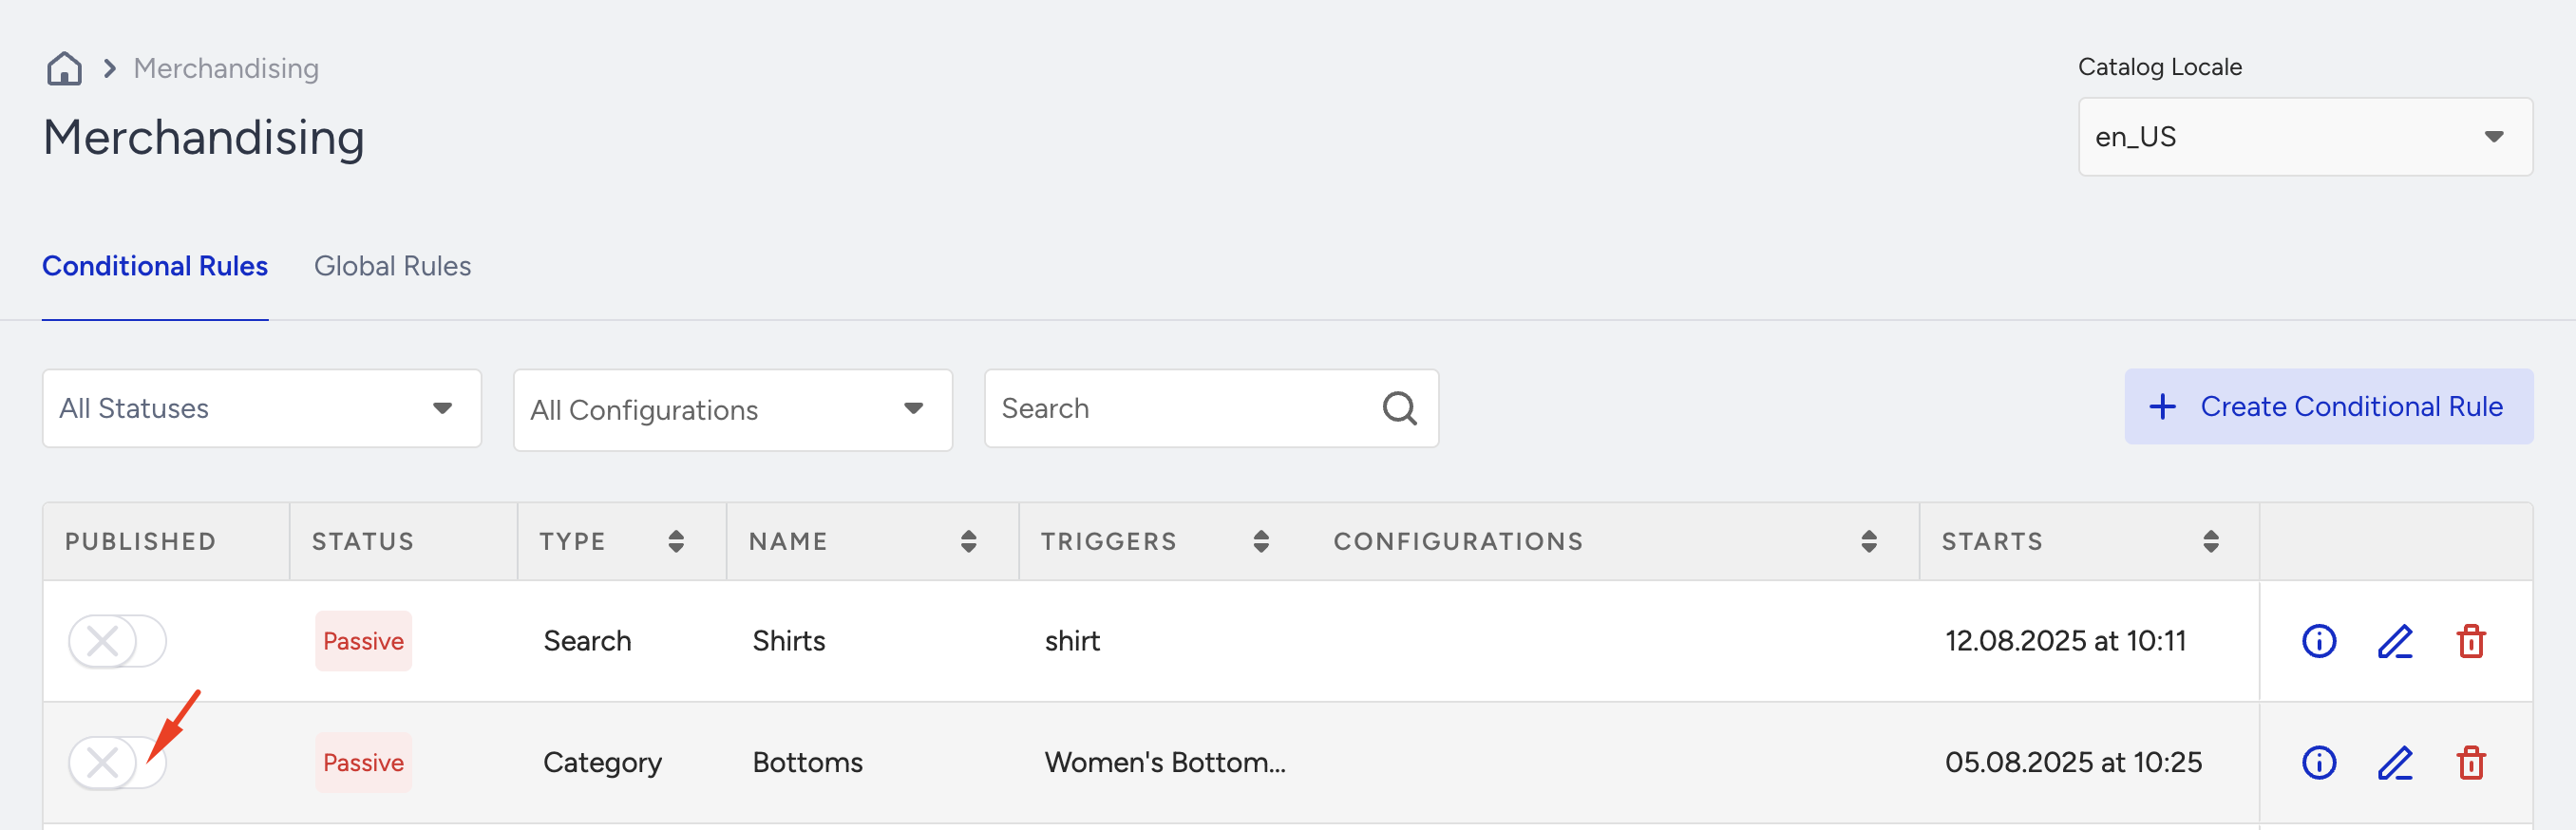
In the rule list, each category must be unique. This means you cannot create two different merchandising rules for a single category.
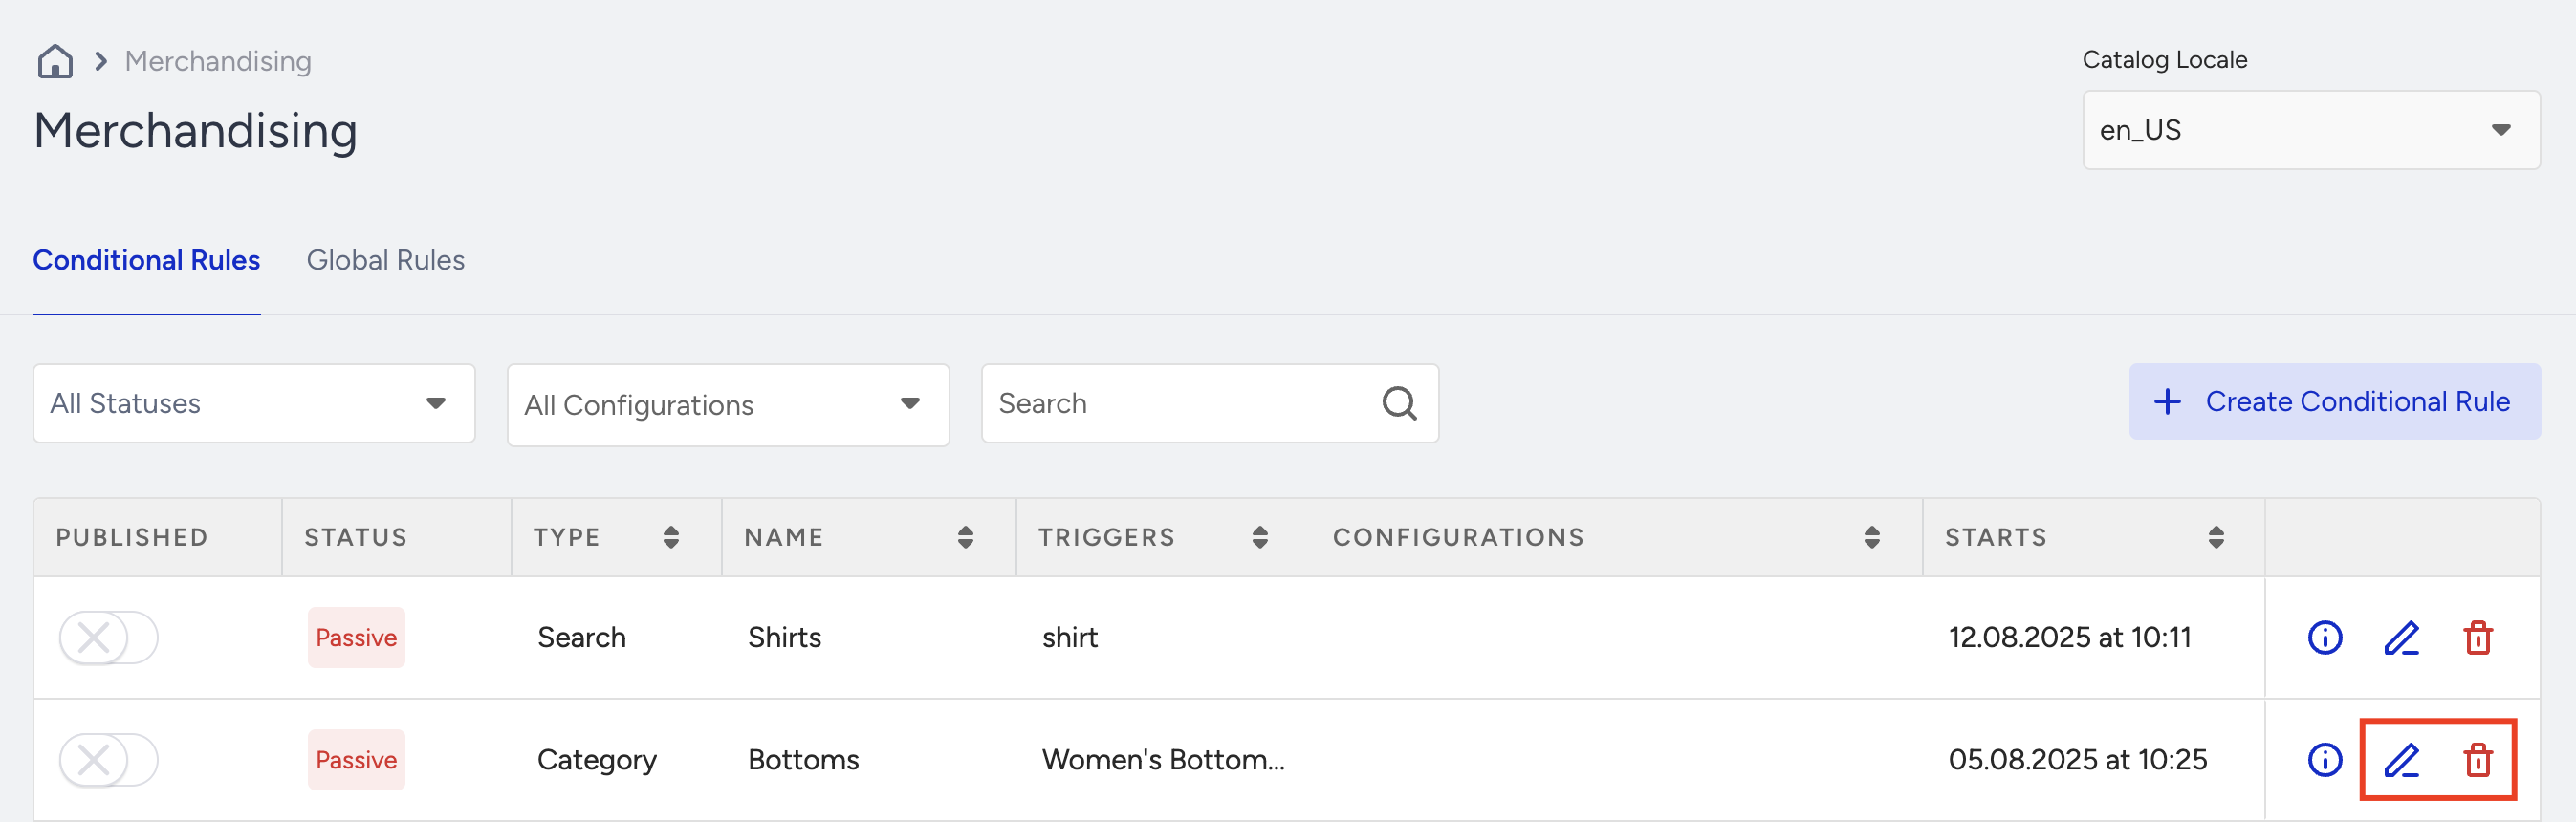
You can also edit or delete a rule by clicking the icons next to it.
You can refer to the video below to understand Category Merchandising Rules better:
If this video does not load in your region, you can watch it on our YouTube Channel.
Assign a Merchandising Category Rule to Strategies
If Eureka Strategies is enabled for your account, select one or more strategies to associate the created merchandising rule with them.