Suggested readings: Best examples of countdown timers in emails, Top elements of an email with a countdown timer
Countdown timers in emails build a sense of urgency, notify recipients about the duration of the sale, or let them know how soon a certain event will start. Using countdown timers in your emails, you can increase your conversions and revenue.
You can build, design, and add a timer to your HTML email template in the editor.
To build and add a countdown timer in emails with the Drag and Drop Editor:
1. Pull the 1-column structure into your template, and drop the Timer block.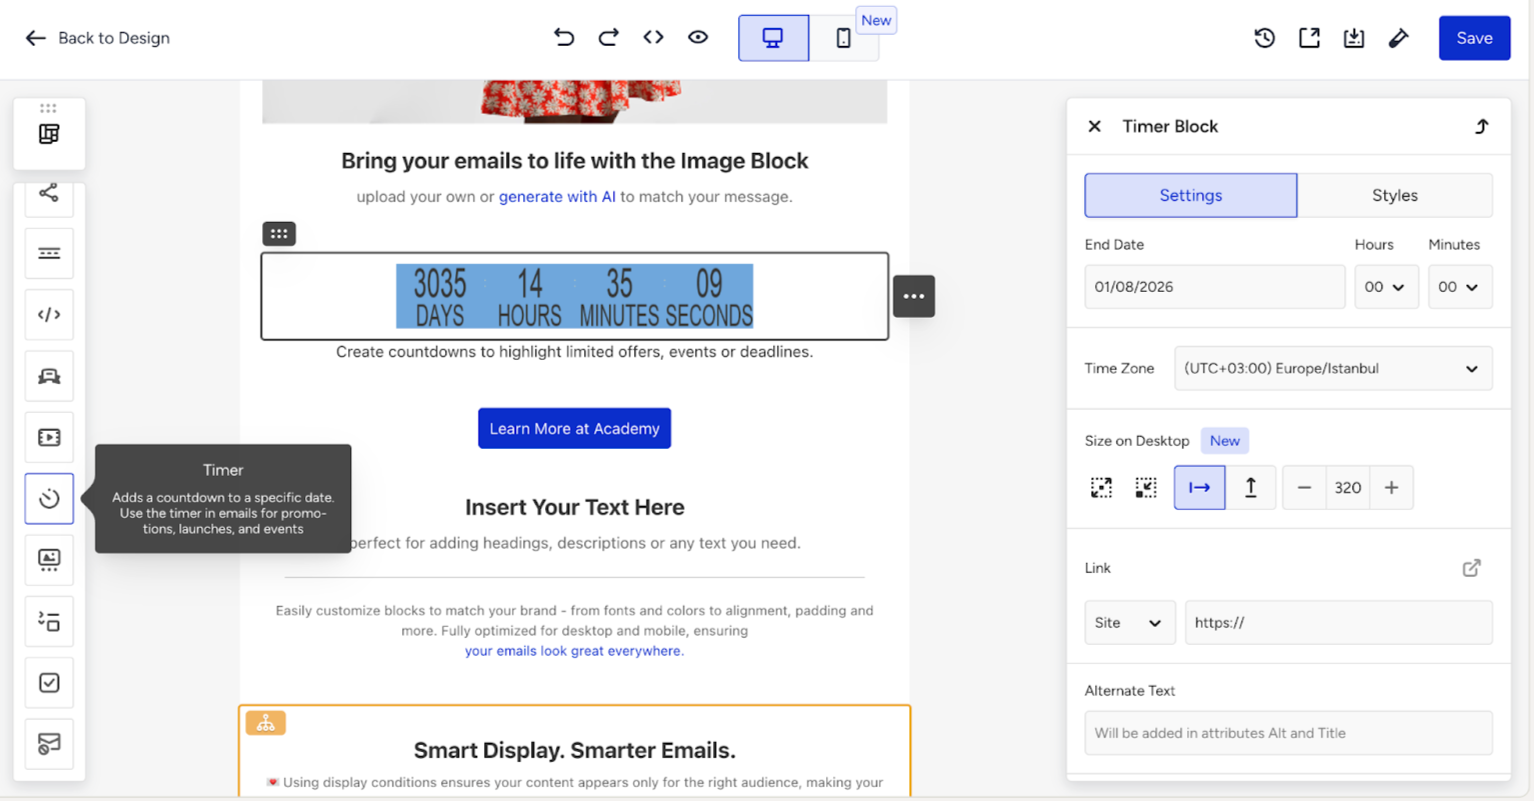
2. Left-click this container in an email template to activate the settings panel to work with the timer.
3. Set the end date and exact time.
.png)
4. In the Settings tab, you can:
- Set the time zone for an accurate countdown.
- Define timer size in Size on Desktop/Mobile.
- Insert a URL link that will take recipients either to your website or to a particular page on your site when you describe the value offered in the details. This link will also be applied to the Expired timer image.
- Specify alt text for accessibility.
- Display Days: Toggle this to show days. If it is off, only hours, minutes, and seconds will display.
- Digital Labels: Enable or disable labels like "days," "hours," etc., under each number.
- Separator: Choose a separator (e.g., ":", "-", "/") to divide time units.
- Labels Language: Select the language for labels.
- Alignment on Desktop/Mobile: Set timer alignment (left, center, or right) on both screens.
- Retina Display Support: Enable for sharp display on high-resolution devices.
- Expiration Image: Upload an image to display when the timer expires.
- Add an Anchor Link.
- Set margins.
.png)
Toggle the Expired Timer Image button. Upload the image that will be shown to customers once the timer expires. This is optional, yet strongly recommended. This will inform recipients that the coupon is expired and they cannot use it any longer.
.png)
5. Switch to the Styles tab to:
- Set the timer background color of the timer to match your email design.
- Digits Font: Choose the font style and set the required size for the digits displayed in the timer.
- Digits Font Color: Specify the color of the digits to enhance visibility and aesthetic appeal.
- Use Advanced color settings to set up the labels and digit colors for days, hours, minutes, and seconds.
.png)
- Labels Font Color: Select the color for the labels ("days," "hours," etc.) to ensure they stand out.
- Use Advanced color settings to set up the labels and Labels Color for days, hours, minutes, and seconds.
- Separator Font: Choose the font style for the separator between time units.
- Separator Font Color: Specify the color of the separator to maintain visual consistency with the timer design.
.png)