The Unified Customer Database (UCD) starts to collect data with your first integration. Once the Unified Customer Database (UCD) starts to collect data, the User Profiles page becomes available.
Personally Identifiable Information (PII) visibility on the User Profiles page
The User Profile page is accessible to all users by default. However, only users with Personally Identifiable Information (PII) permissions can view this page with complete PII data. Users without PII access still see the page in the side menu and access the listing, but all PII-related fields (such as email, phone number, etc.) will appear masked.
The Administrator role will have PII access by default and is the only role that can grant others similar access. If you have the Administrator role, you can follow the instructions on Invite a User to grant access to new users and Edit a User to change an existing user's access.
All users can access and view the listing page of User Profiles. However, only users with the Administrator role and users authorized by a user with the Administrator role can reach the Profile View Page and see the details.
The User Profiles listing page
To reach the listing page, navigate to Audience > User Profiles.
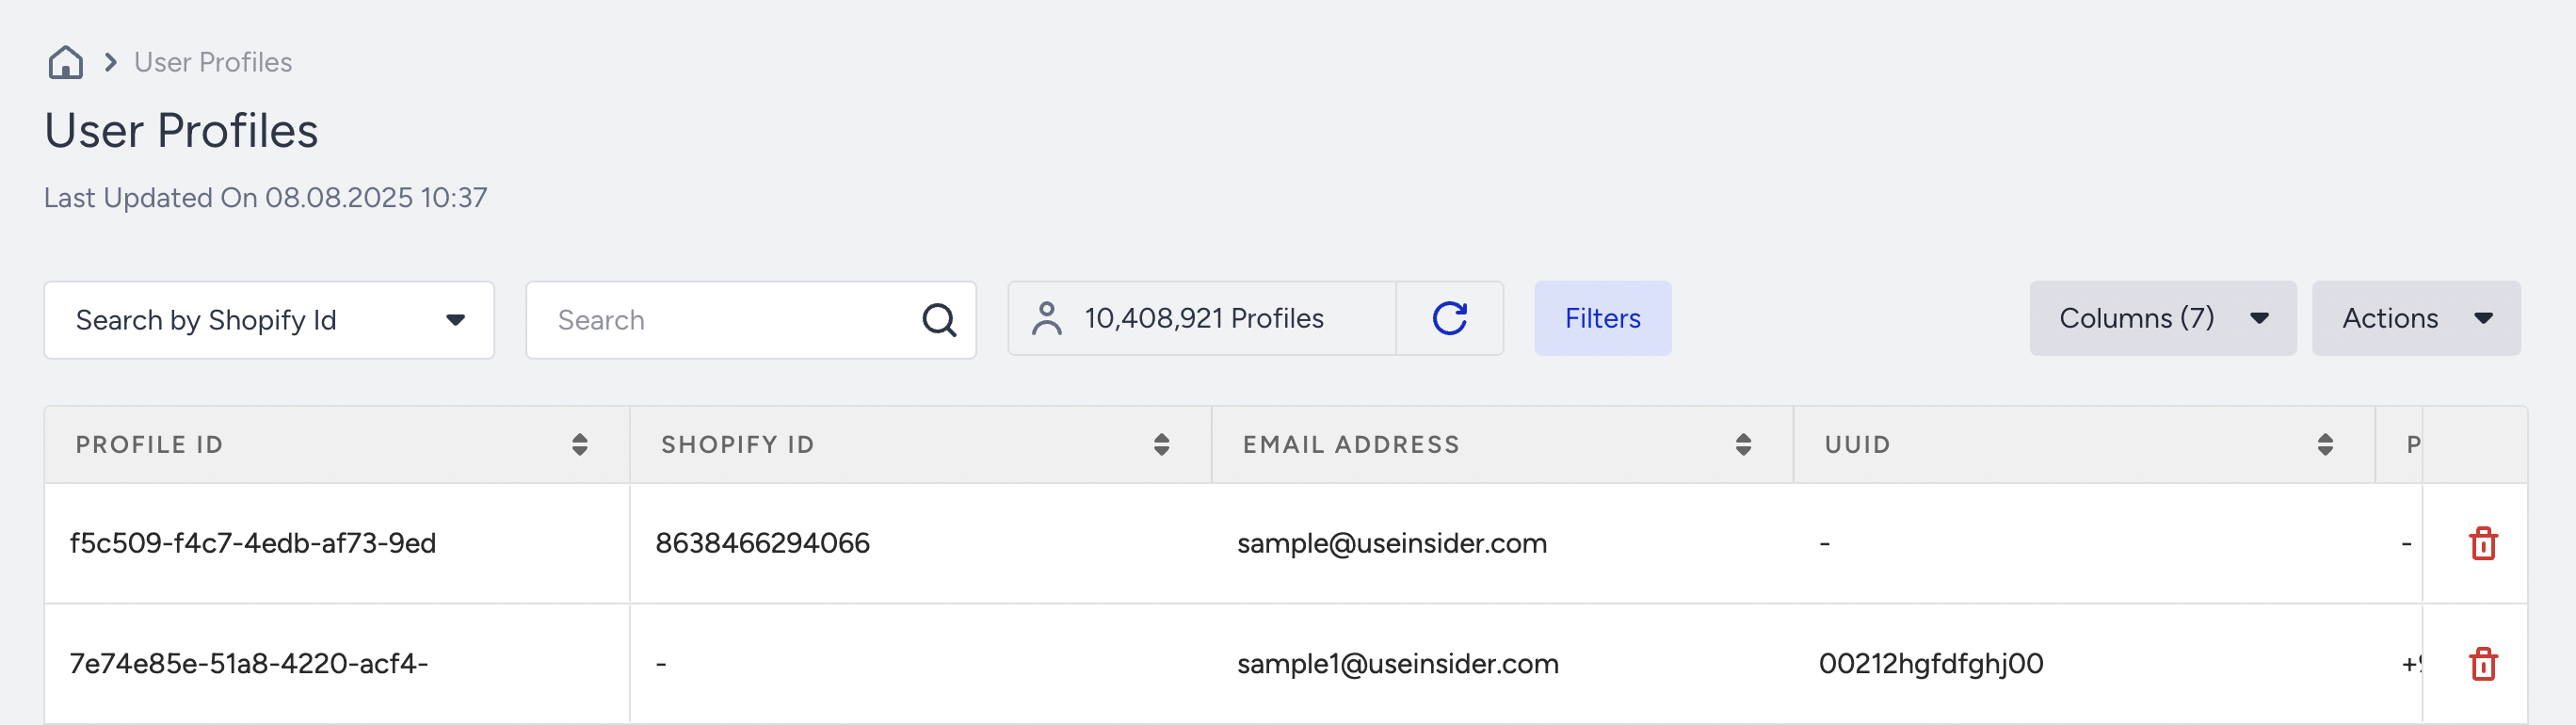
This page allows you to view user identifier information and created date, and search users by their profile IDs (Insider ID), email address, phone number, or UUID.
Identifiers listed in the search dropdown (email address, profile ID, etc.) and names of the columns on the User Profiles listing page vary based on the order set on the Identity Resolution page.
When using the Profile ID search, enter the complete profile ID in the search box.
The total profile count on the listing page is cached and might differ from the number of profiles in an exported file if the underlying data has changed since the count was last updated. Before comparing the displayed count with an export, click the Refresh icon next to the total count and wait for the refreshed result.
How bulk upserts affect your User Profile count
When user data is upserted, Insider One uses the submitted identifiers to look for an existing user profile.
If the identifiers match an existing profile, that profile is updated.
If no matching profile is found, a new profile is created.
As a result, uploading a dataset that contains identifiers not previously recognized by Insider One can increase your total user profile count. This count might then differ from the registered-member count in your internal database. Before performing a large ingestion:
Deduplicate the source data.
Use consistent and stable identifiers across integrations.
Verify identifier mapping and formatting.
Test the ingestion with a representative sample.
Review whether the sample updates existing profiles or creates new ones.
Filter Users
You can use the Filters button to search for users that match specific attributes or identifiers. This allows you to focus on users who meet certain conditions (e.g., opted in, visited within the last 30 days, purchased particular items, etc.).
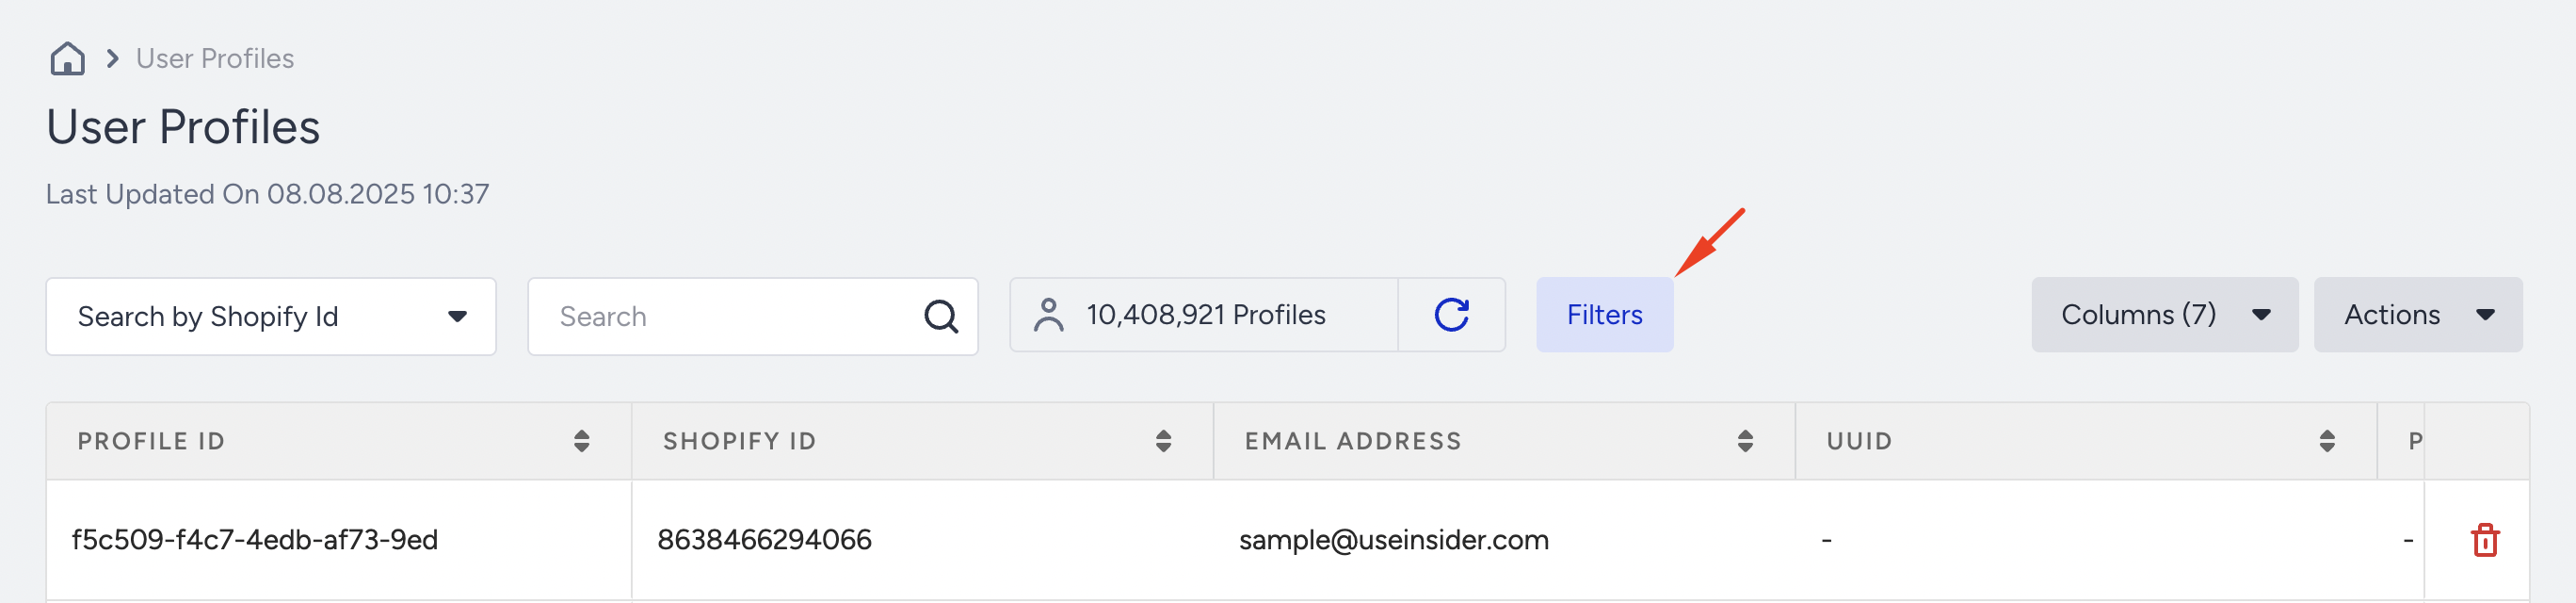
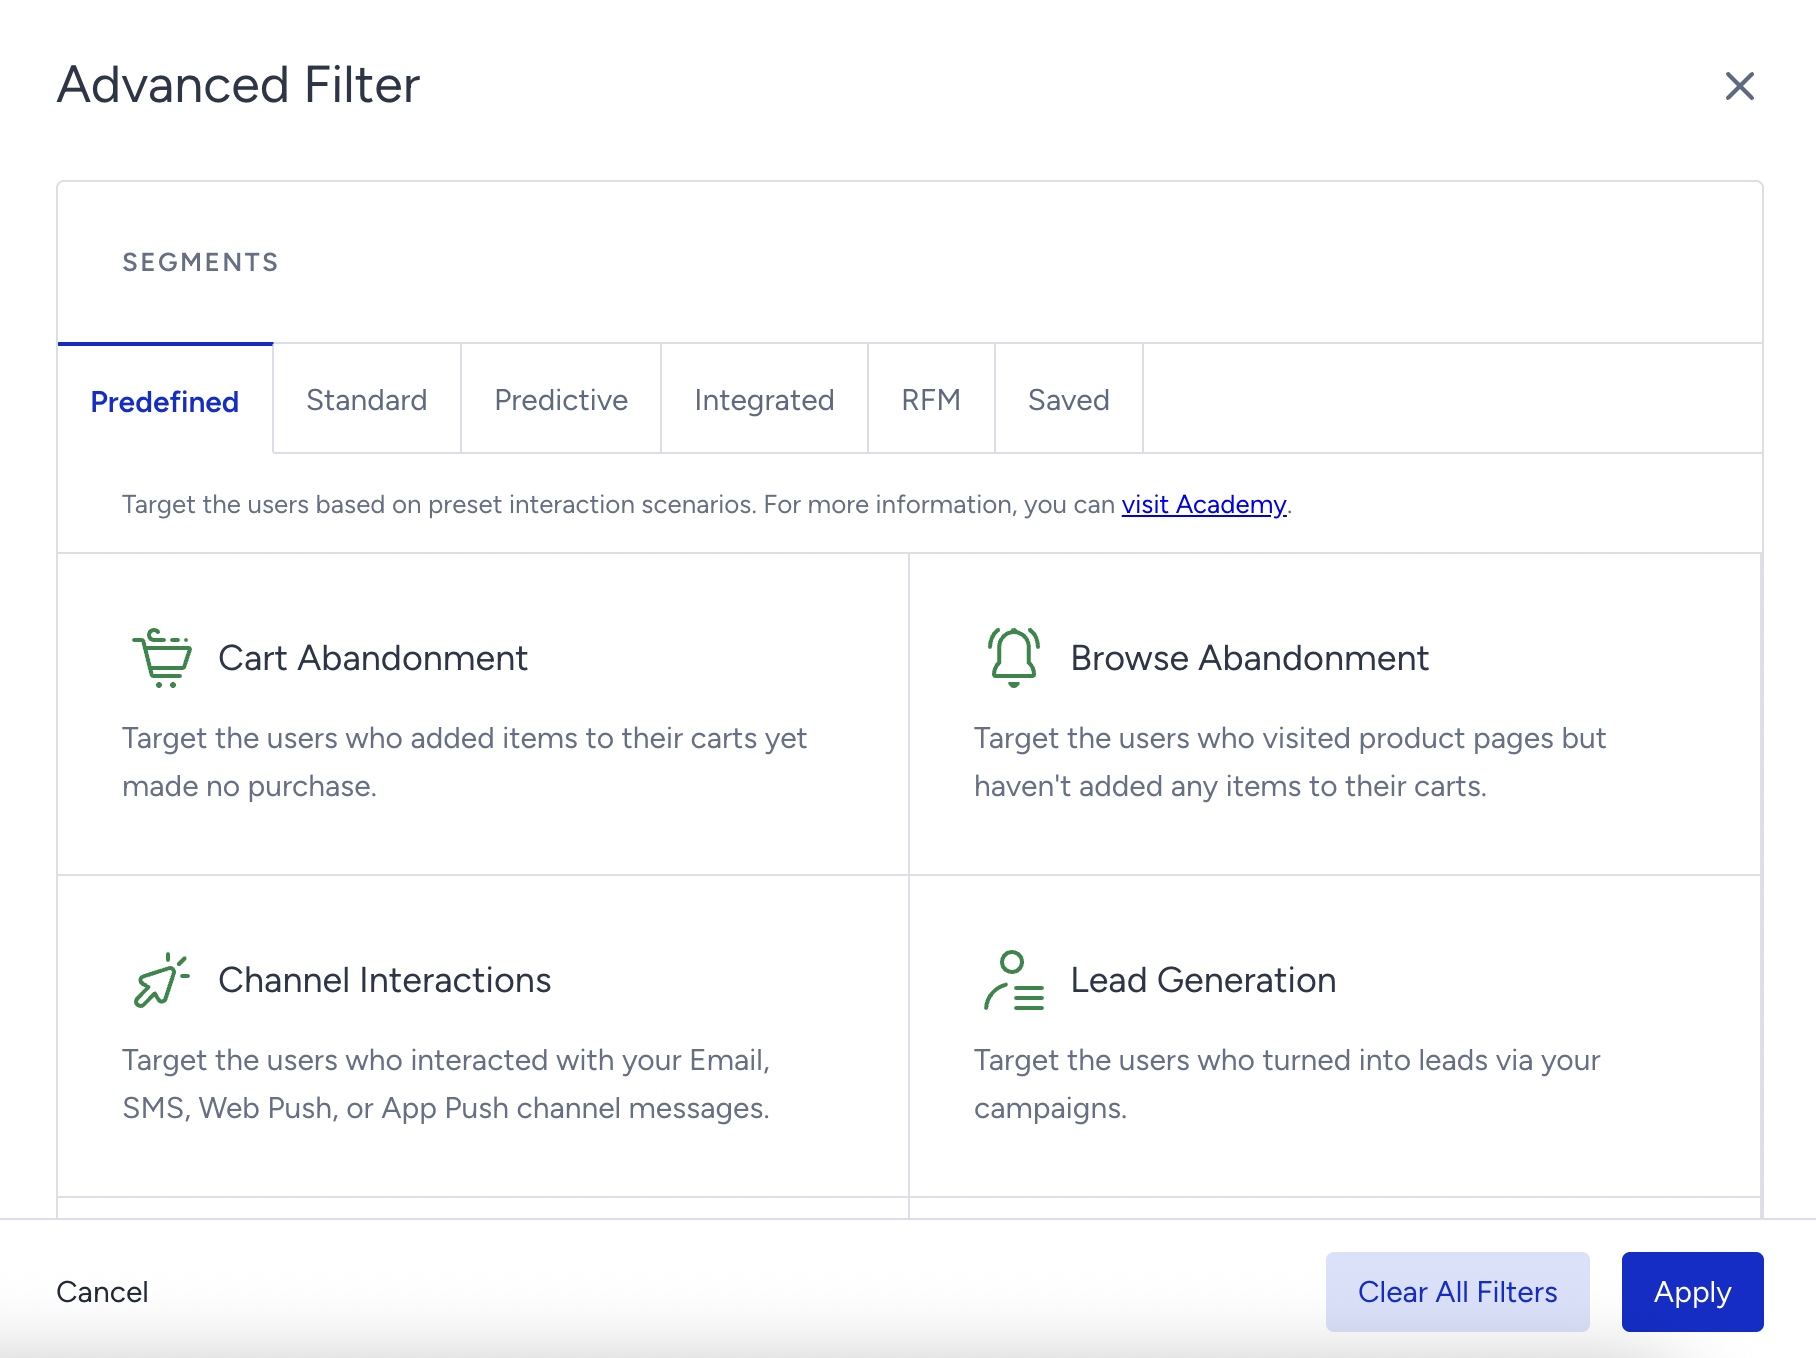
To narrow down your users, click the Filters button.
Choose the audience and click the Apply button.
Text filters are case-insensitive
Uppercase and lowercase versions of the same attribute or identifier value are treated as matches. For example, filtering by FUN can also return profiles containing fun. Letter casing does not provide exact, case-sensitive filtering.
Refer to Segments for further details.
When you filter or search users on the User Profiles page, the total count shows how many profiles match your criteria overall. The table displays up to 100 matching profiles, with 10 profiles per page. Because of this, sorting a column such as Created On helps you review the displayed records, but it does not expand the table to show every matching profile. If you need to work with the full matched audience, use pagination, refresh the listing, search, Export as CSV, or create/add to a static segment.
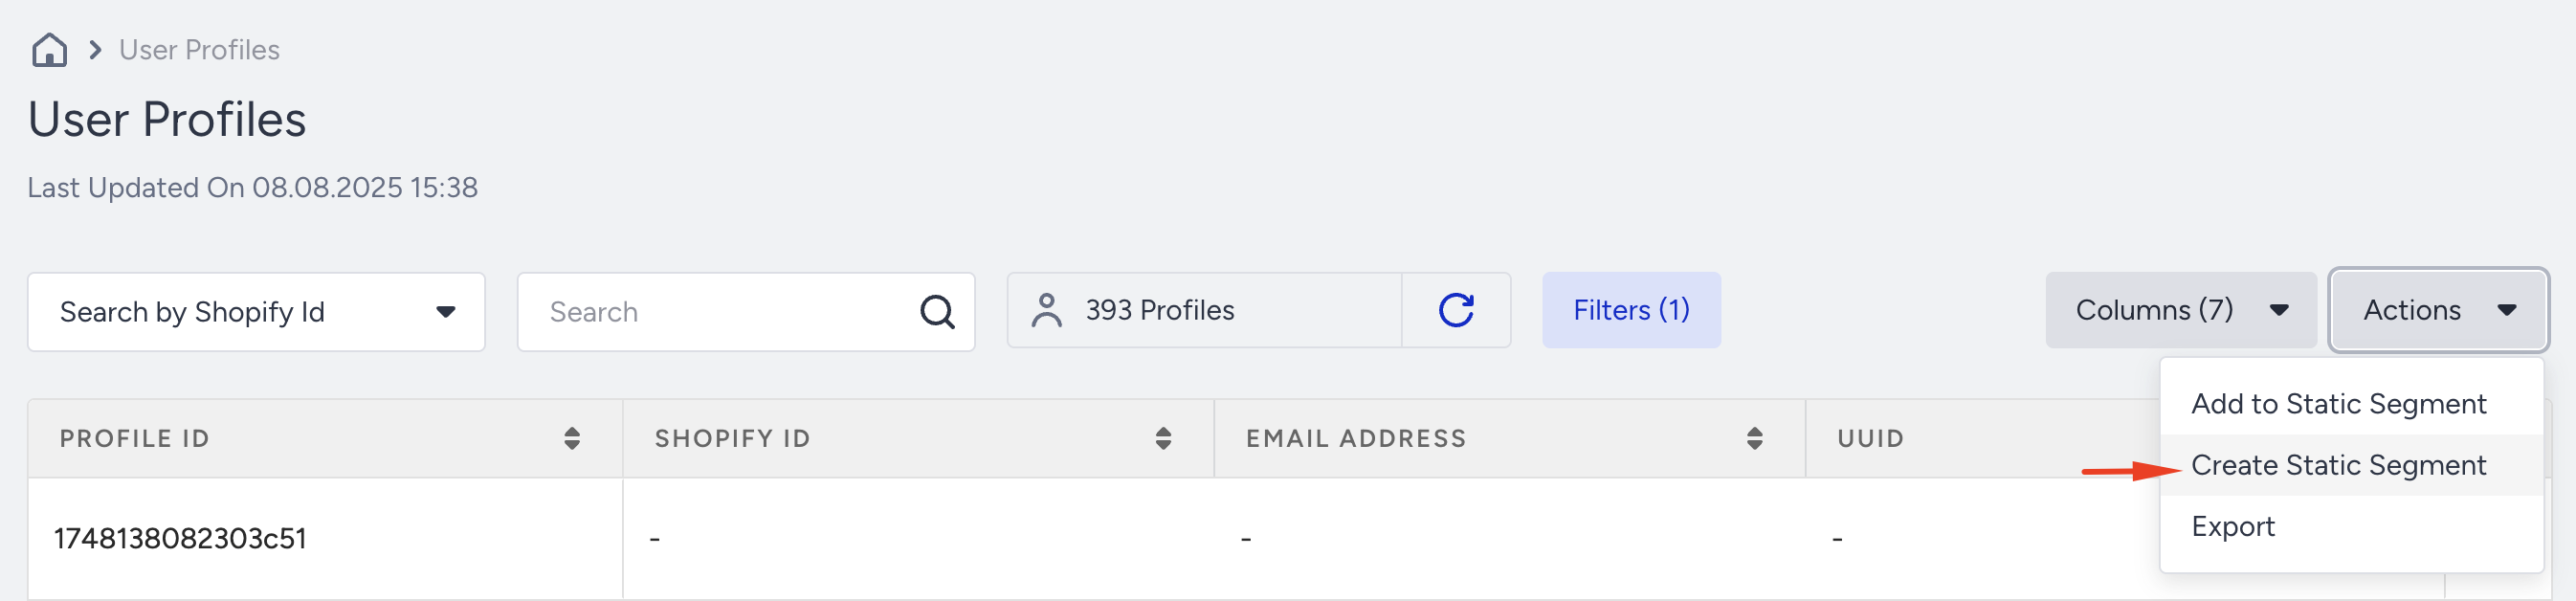
Once you've applied filters, you can take further actions on the filtered users:
Add to Static Segment
Add the filtered users to an existing static segment. After selecting this action, you can track the progress on the Static Segment page. A confirmation email will also be sent when the process is complete.

Create a Static Segment
Create a new static segment with the filtered users. This new segment can then be used in campaigns. Similar to the above, you can track progress and will receive a notification upon completion.
For those actions:
A static segment can include up to 10 million users.
You can create or add users to static segments up to three times per hour.
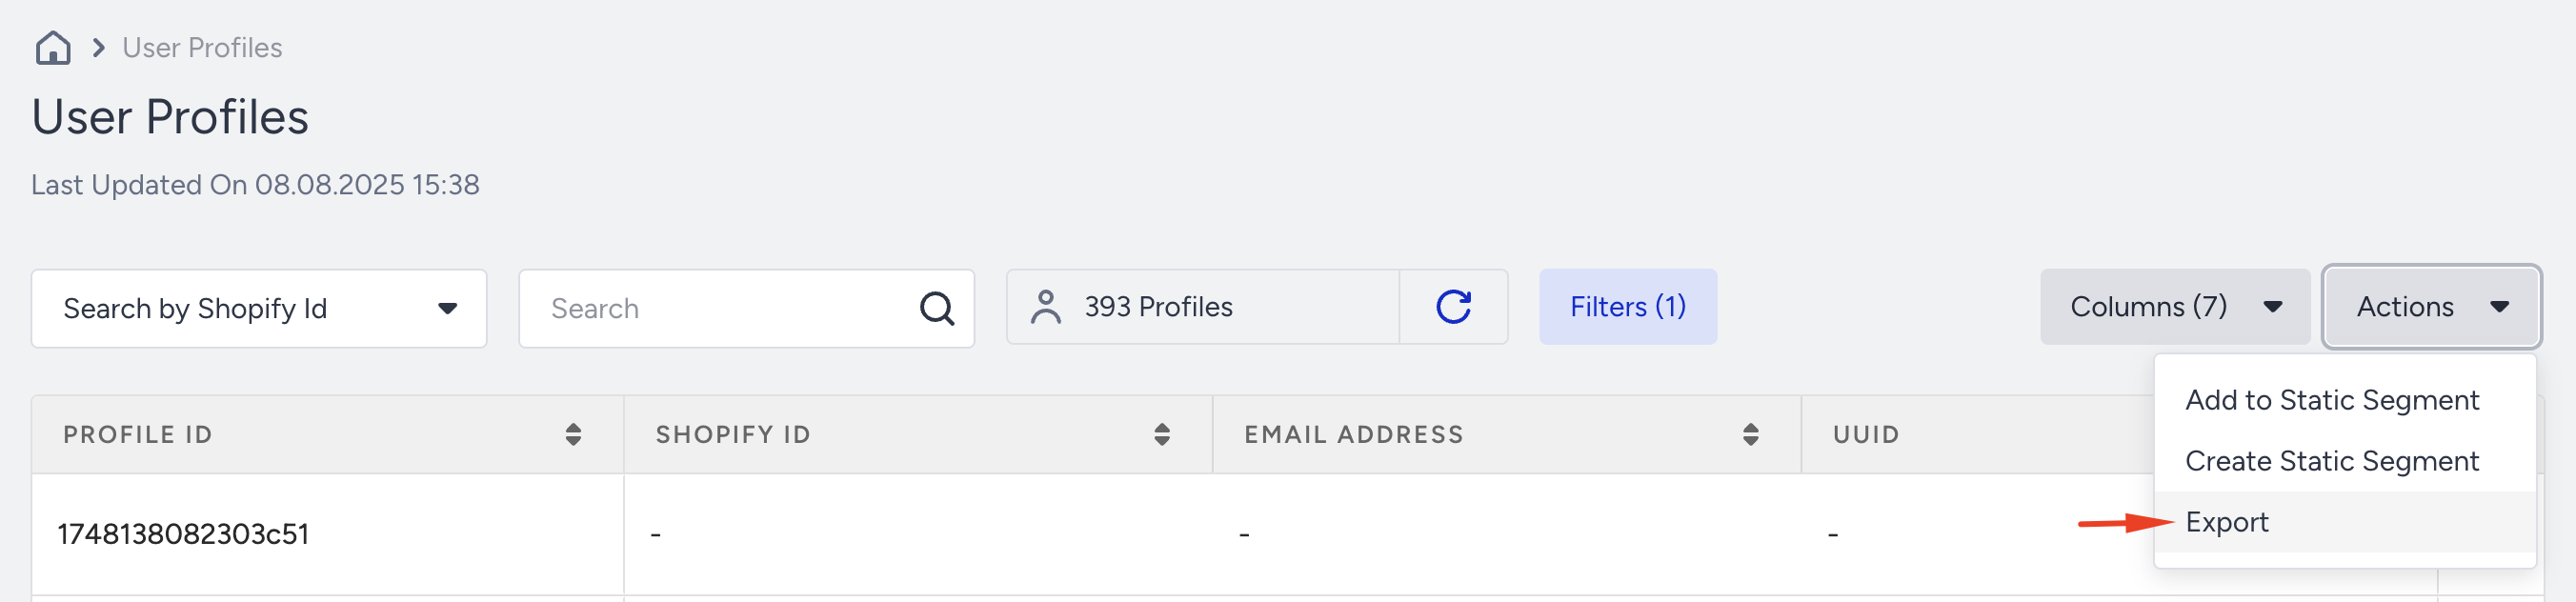
Export
Export the filtered users into a CSV file for offline analysis or other operations.
Choose the right user data export method
The appropriate export method depends on whether you need a current snapshot of User Profiles or a programmatic dataset that includes behavioral history.
Use the User Profiles export when:
You need an ad hoc export from the Insider interface.
You primarily need user identifiers and current profile attribute values.
You want to review or analyze a manageable set of user profiles without building an API integration.
Use the Raw Export API when:
You need to automate or regularly repeat the export.
You need to export users belonging to a specific segment.
You are working with a large dataset.
You need selected user attributes, event records, or both.
You need historical activities such as purchase events and their parameters.
For example, to analyze previously recorded purchases and the products associated with them, use the Raw Export API and request the relevant purchase event and product parameters. A User Profiles export is better suited to obtaining a snapshot of the attributes currently stored on User Profiles.
Before choosing a method, identify:
Whether you need current attributes, event history, or both.
Which event names and parameters contain the required information.
The date range you need.
Whether the export is one-time or recurring.
Whether the required historical records are available for that period.
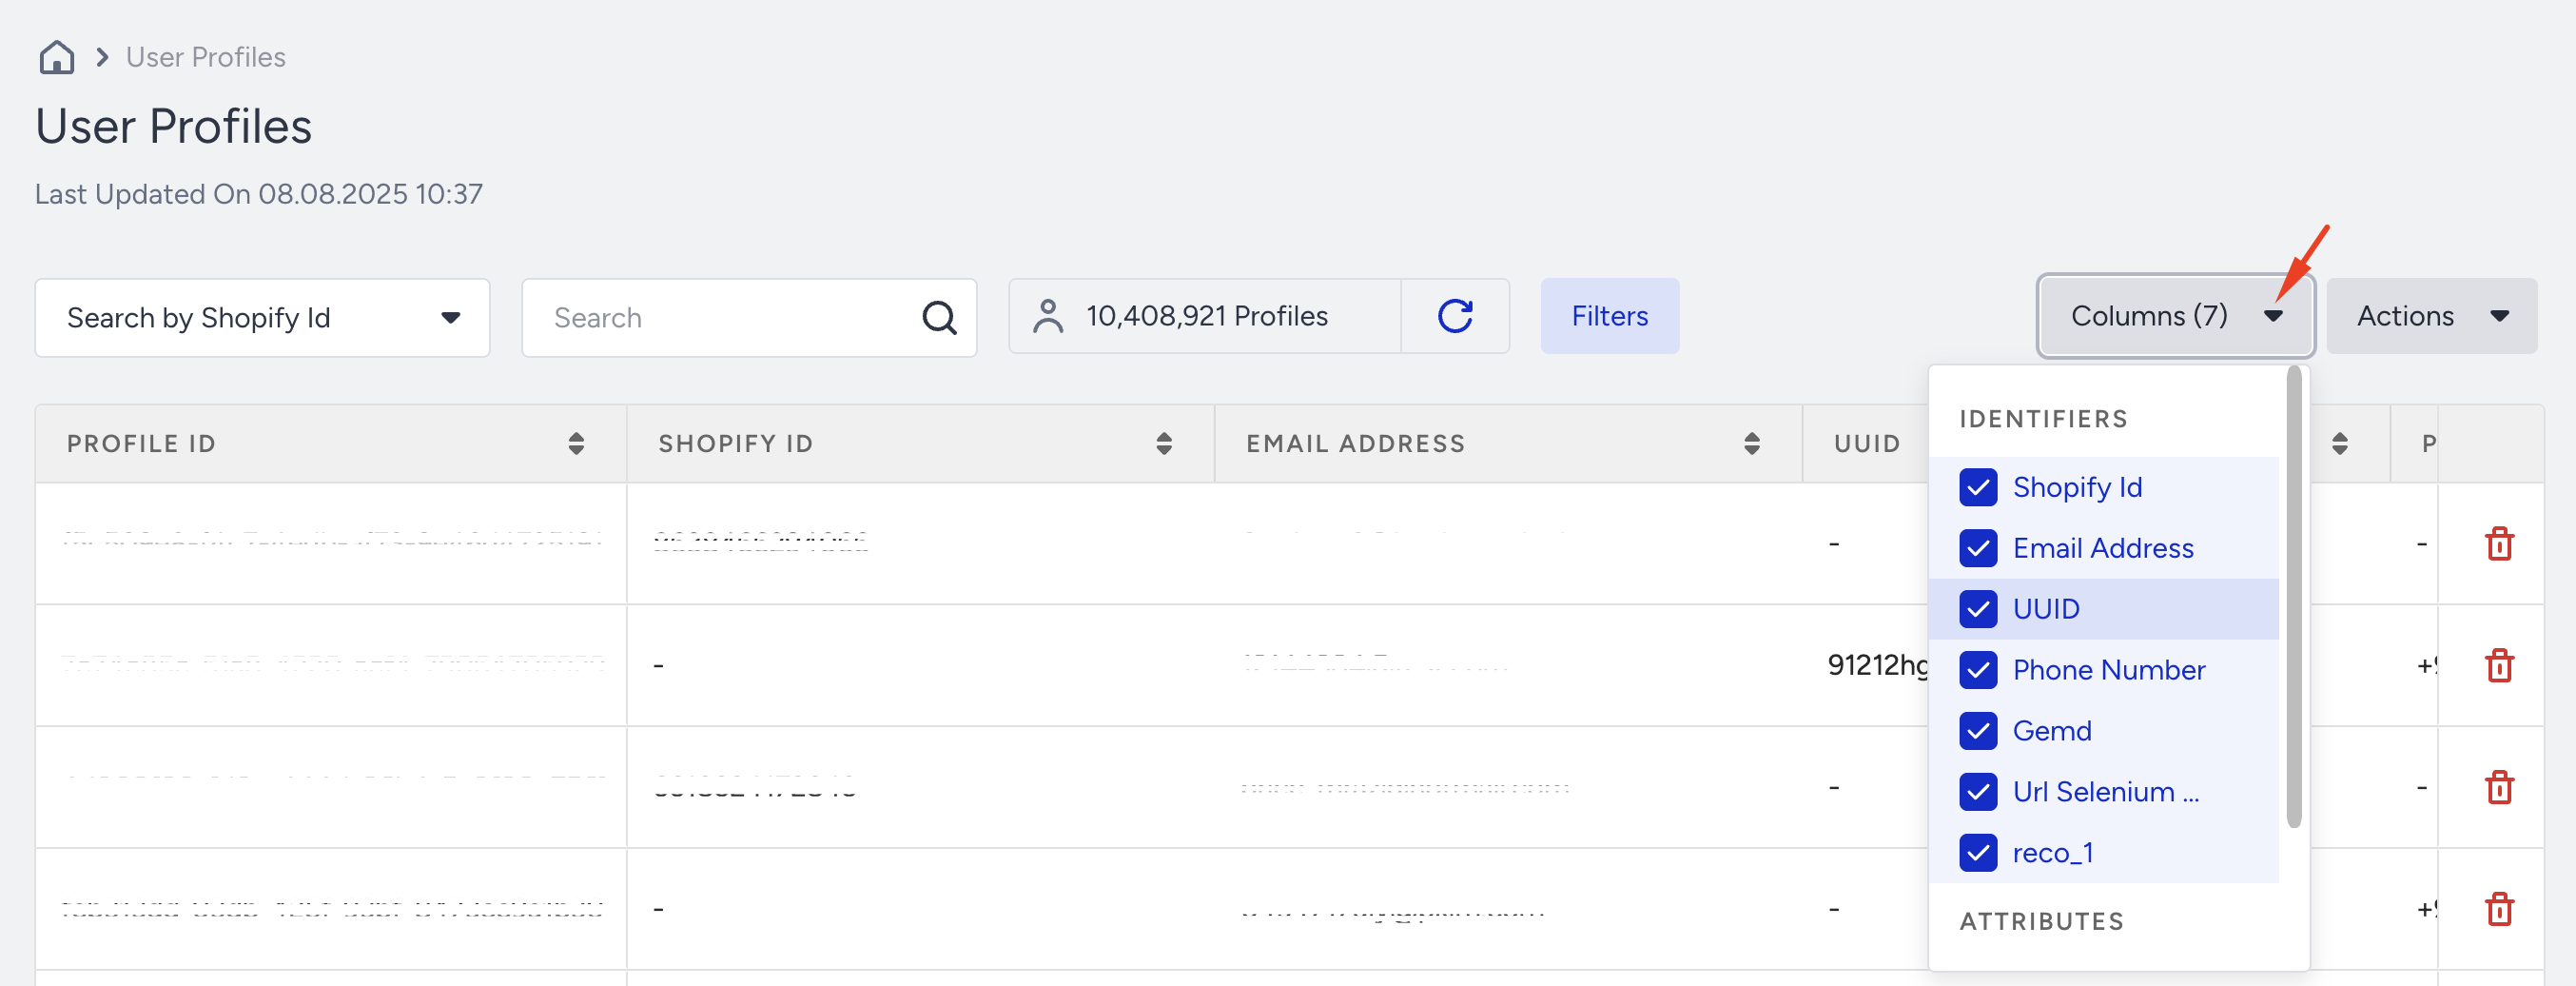
Customize Columns
You can customize which columns are shown on the listing page. This includes identifiers (e.g., Email, UUID) as well as attributes. Selected columns are also searchable and help with quick filtering.