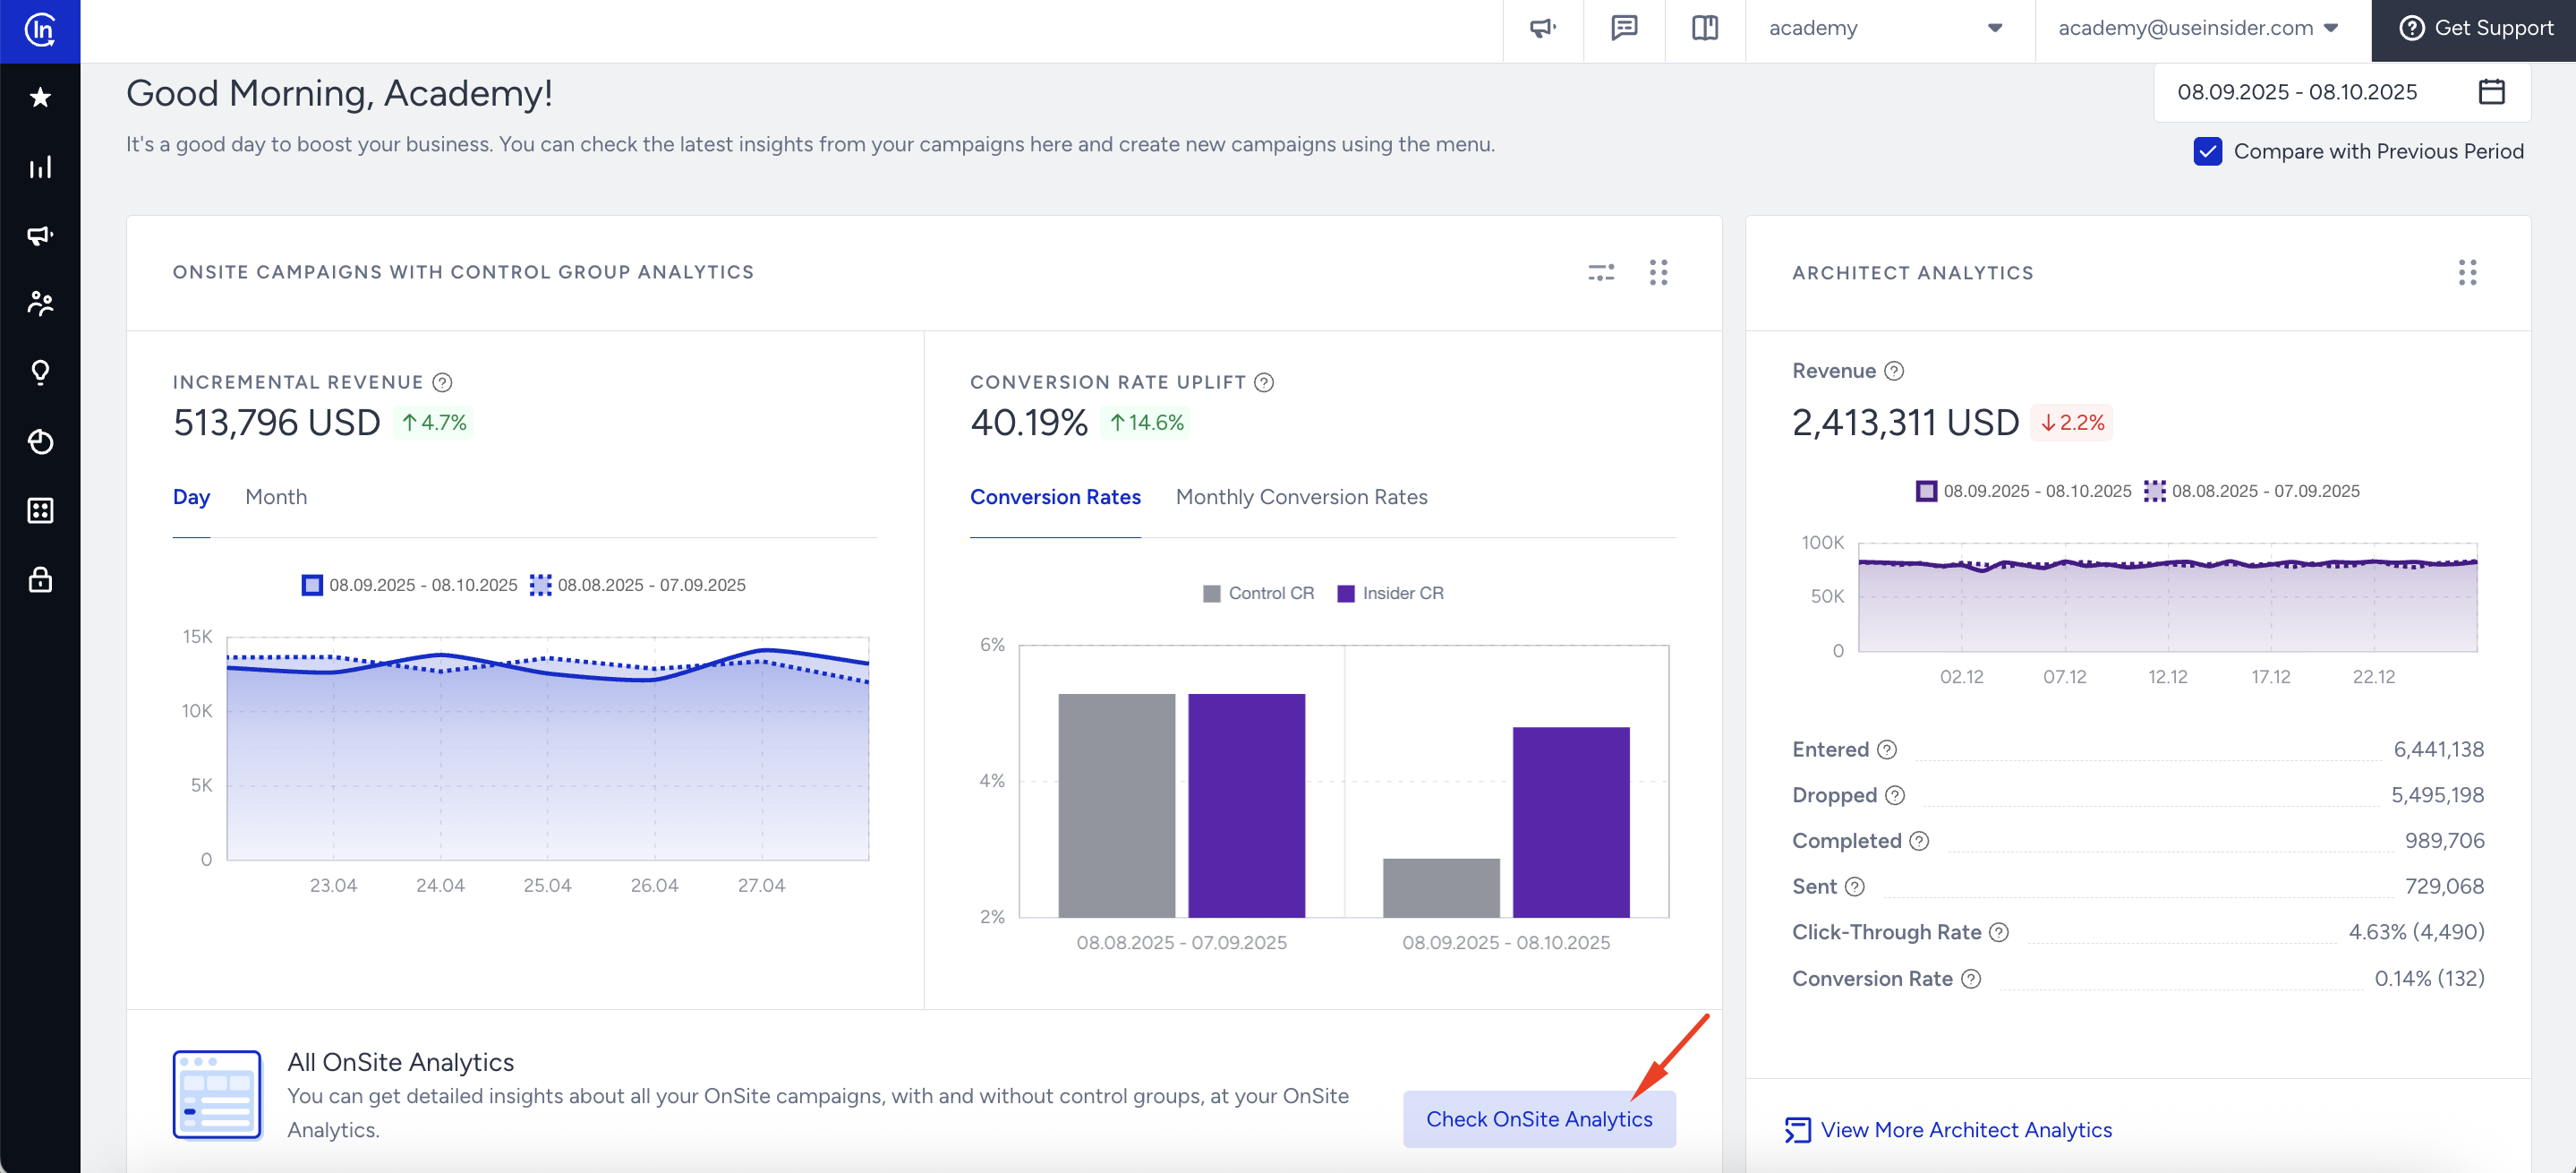
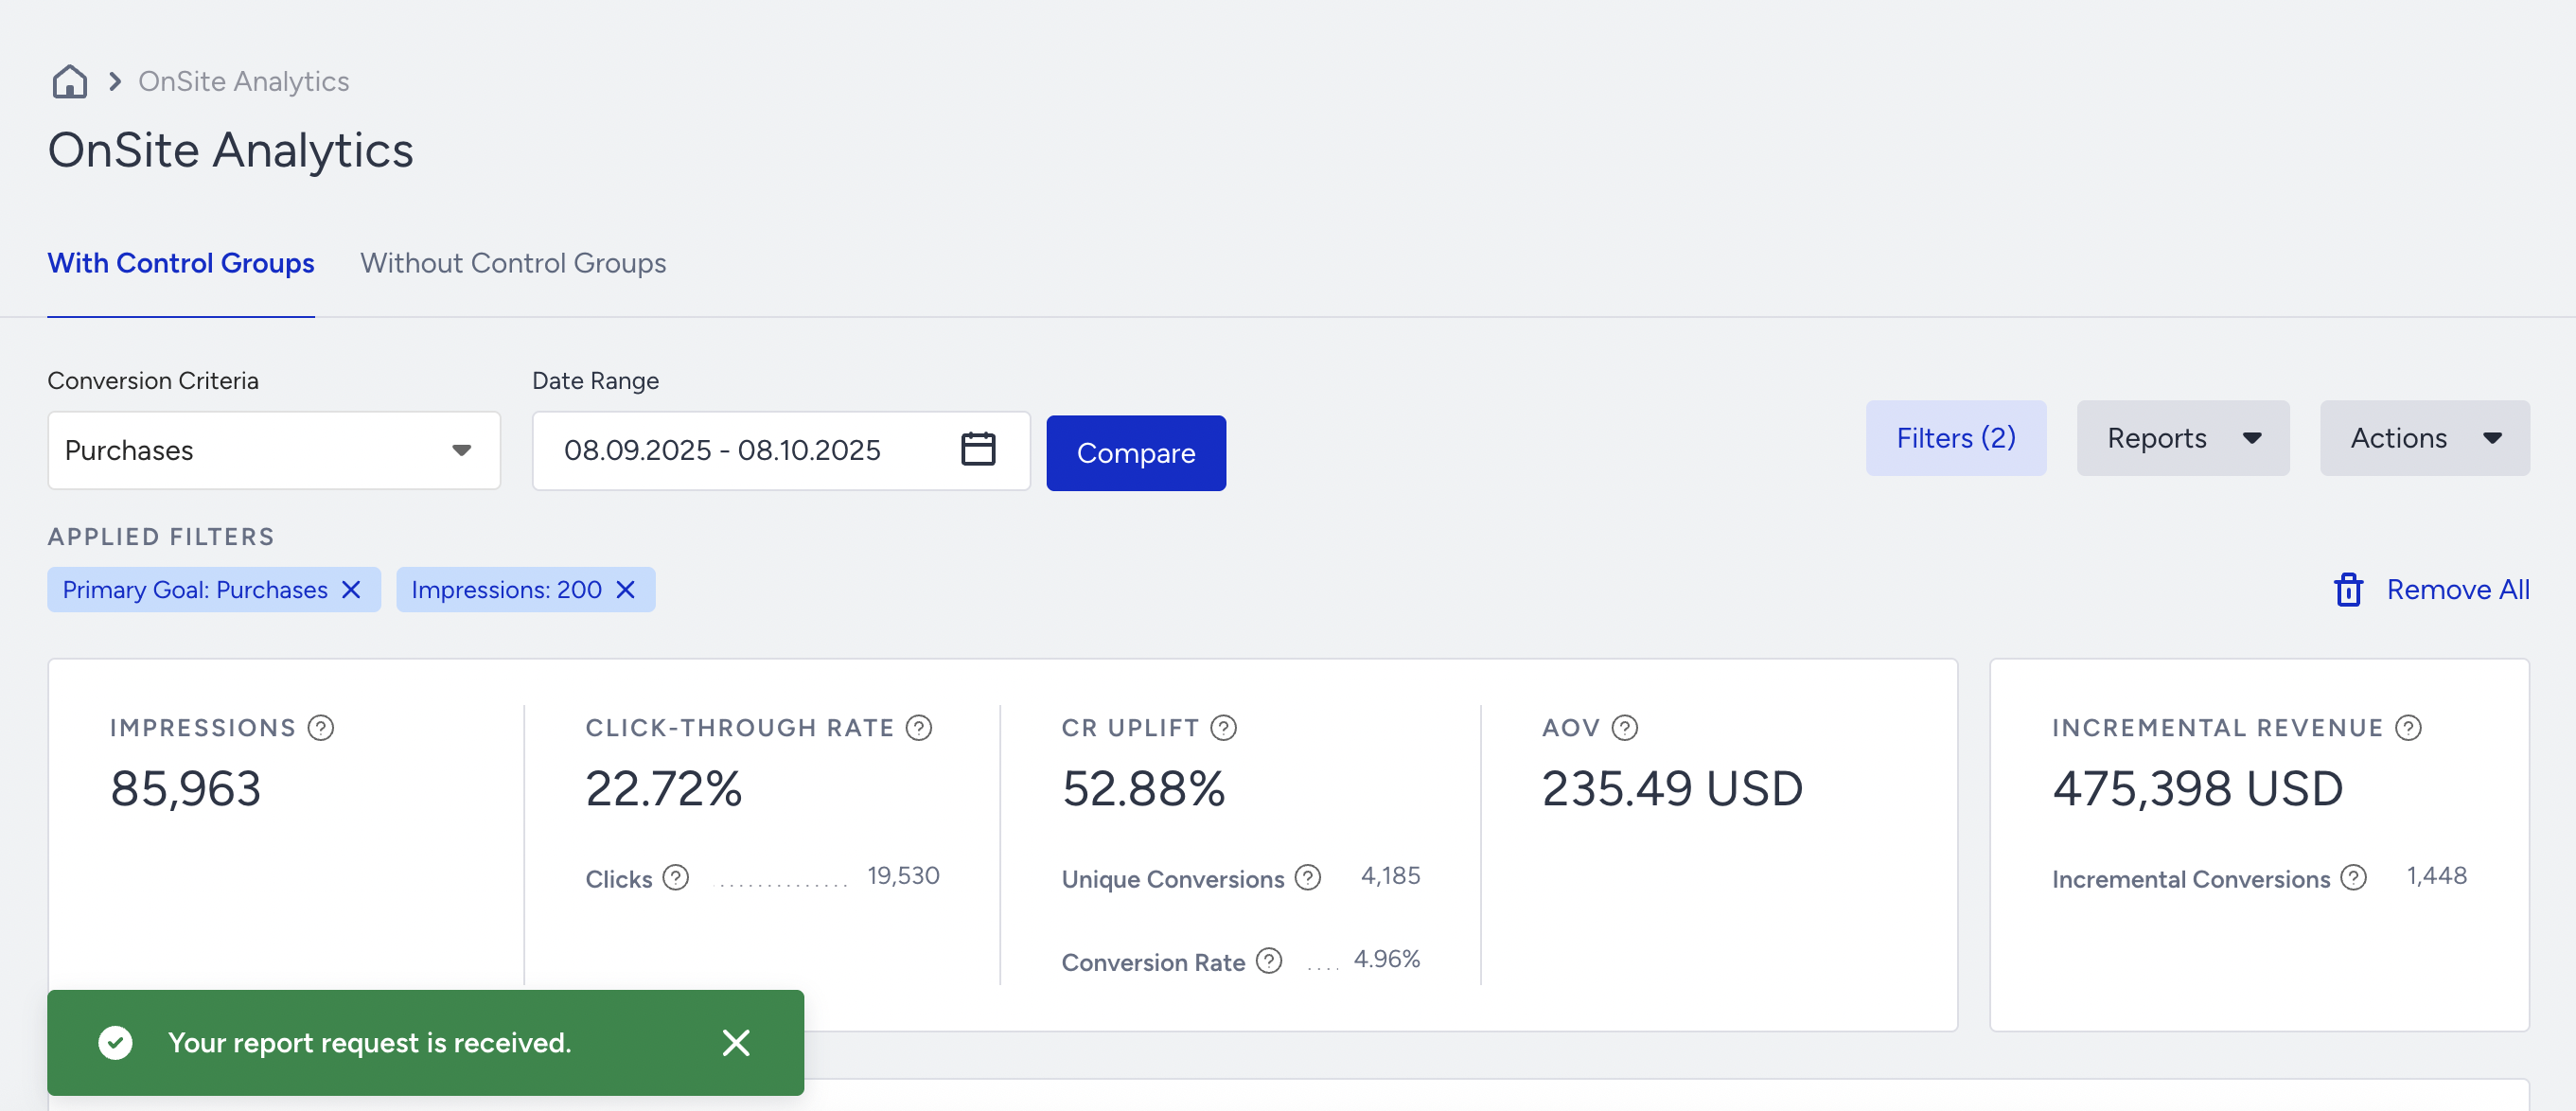
You can easily export detailed analytics of your OnSite campaigns on your Executive Summary Dashboard.
Choose the type of personalizations to view and export the performance details.
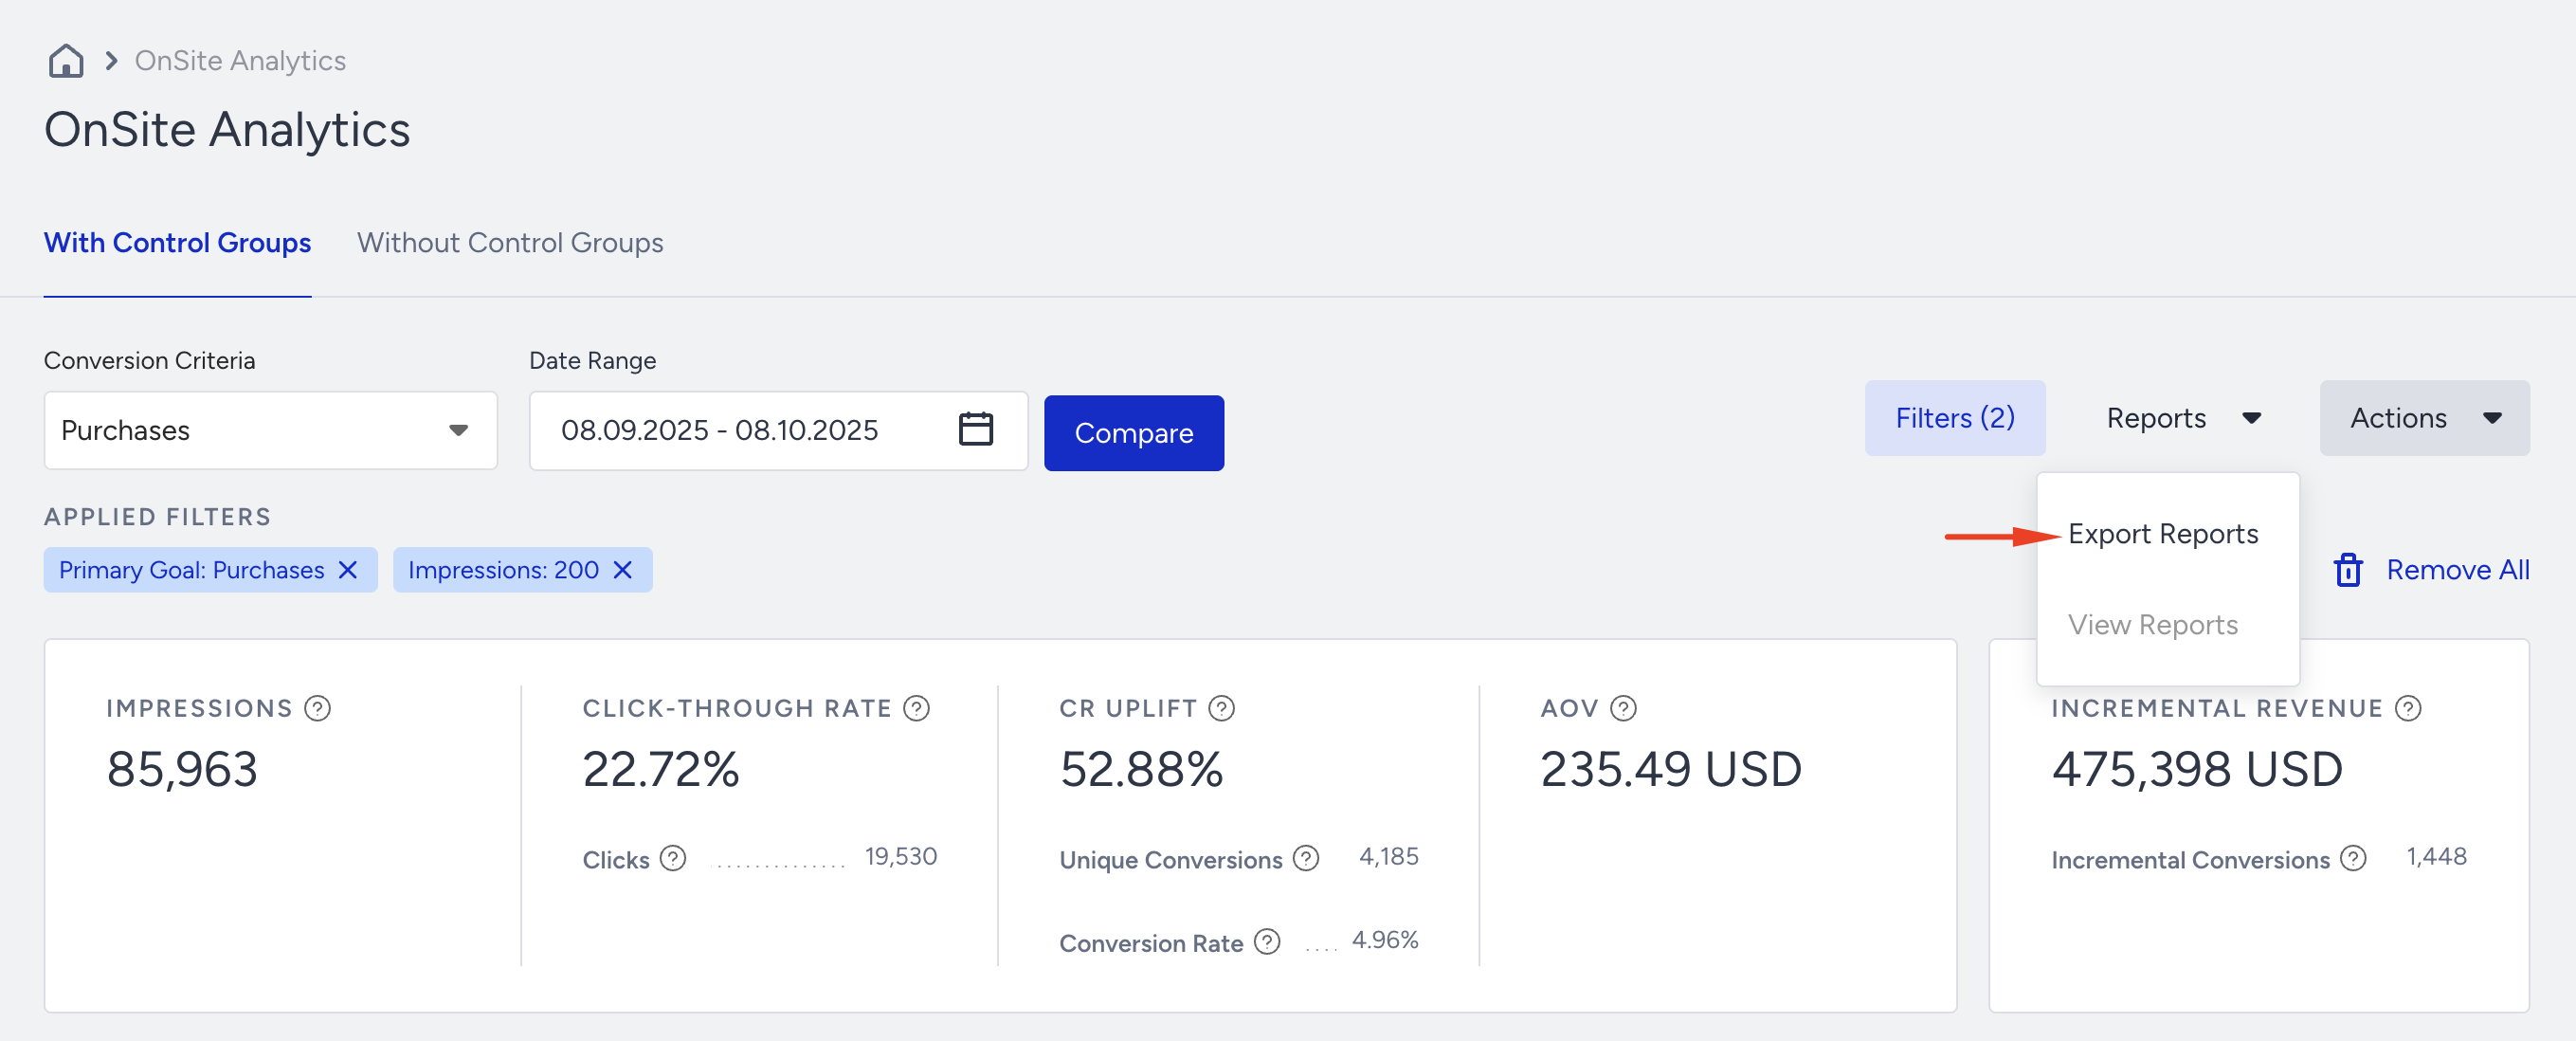
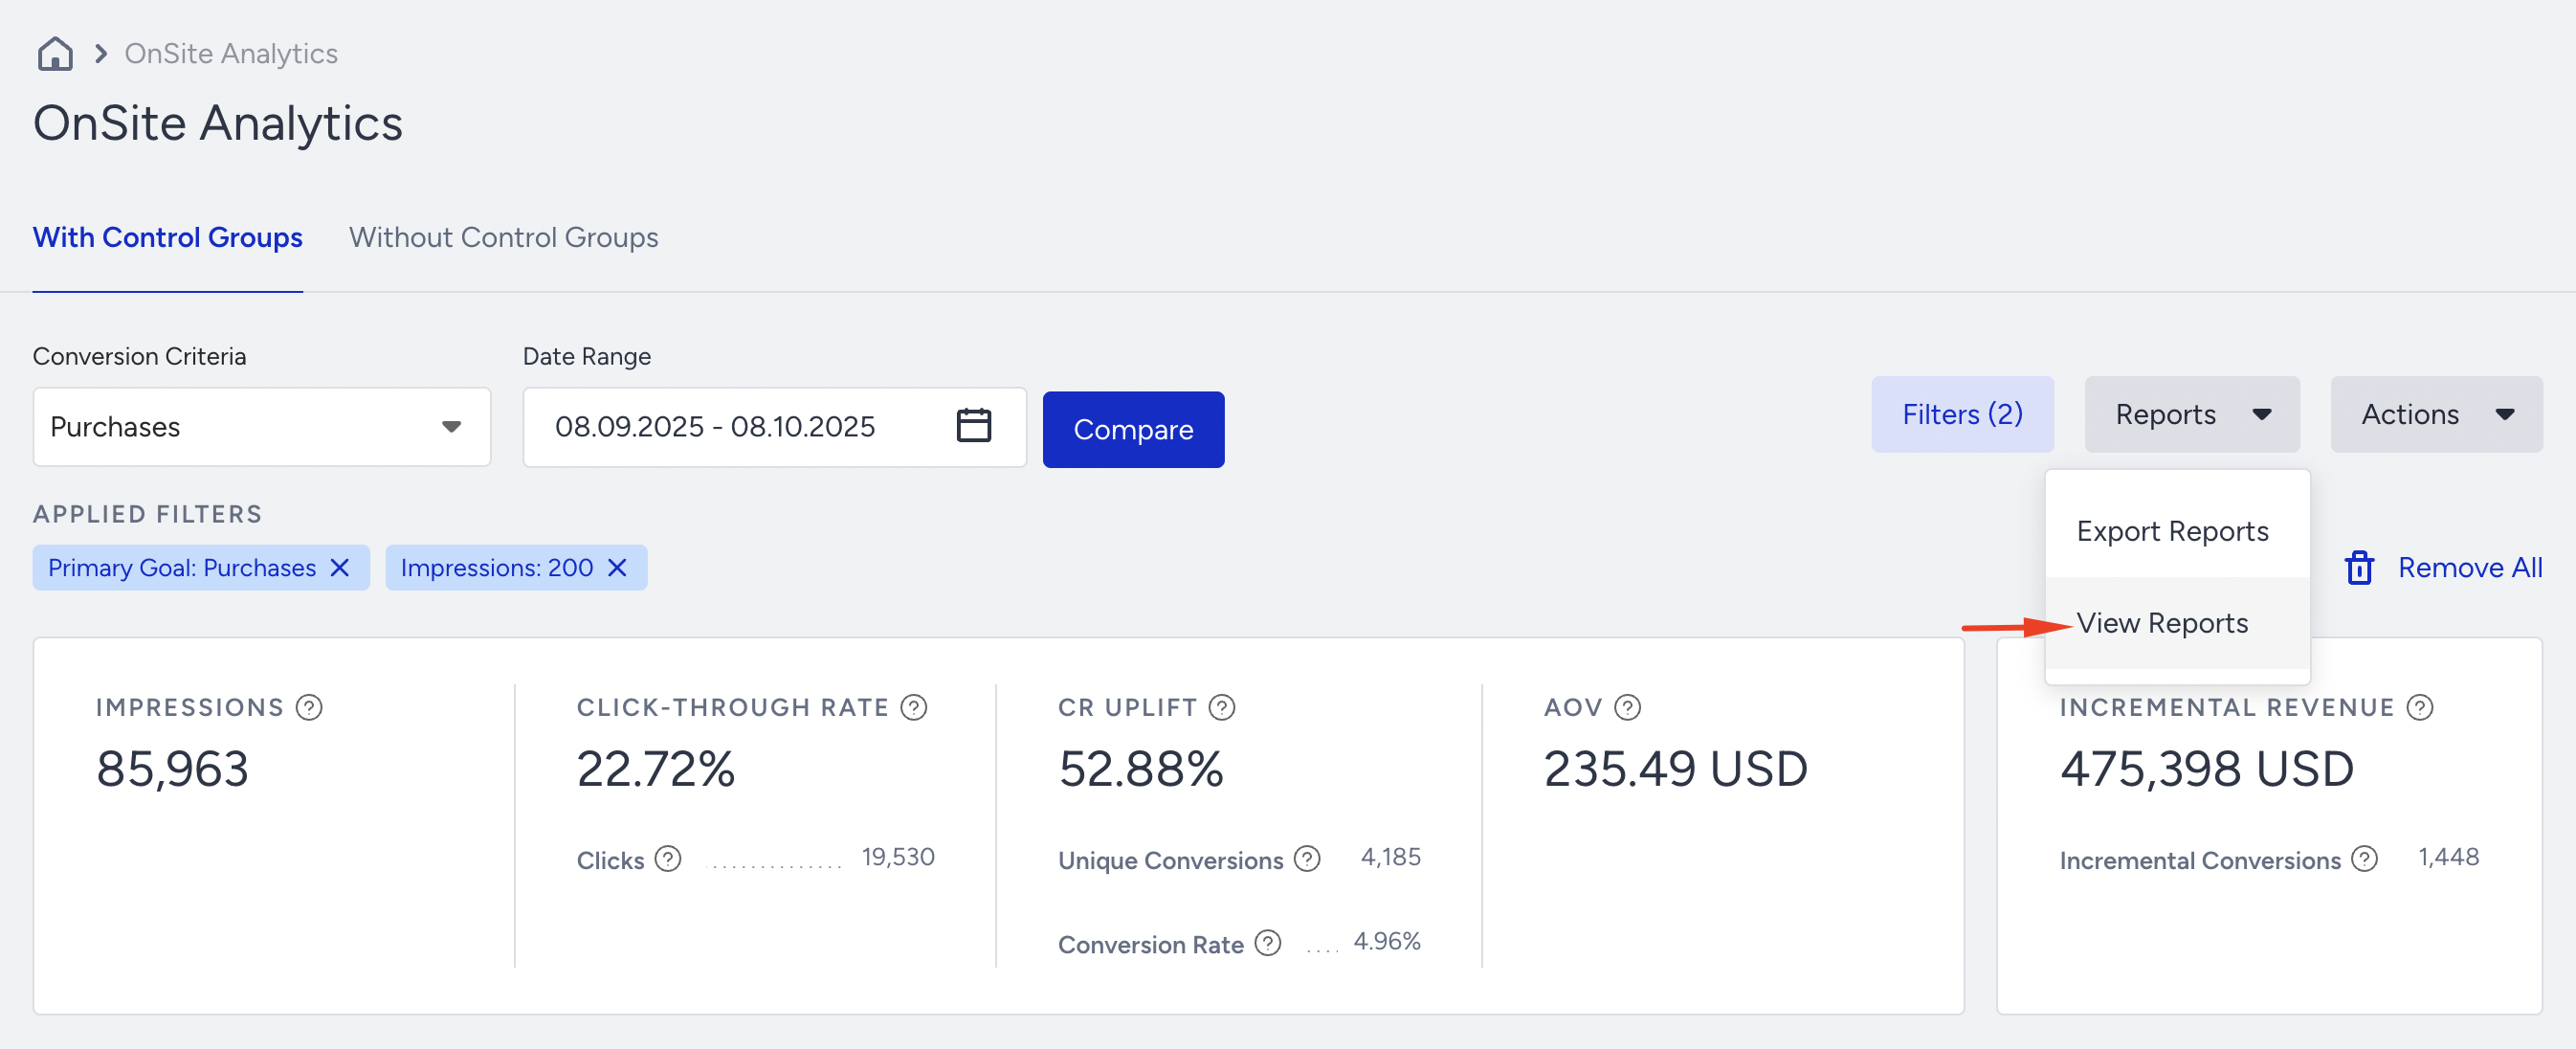
To interpret the data, you can select metrics and filters. You can also choose a date within a specific time range to receive the results. Then, you can click Reports > Export to export your results.
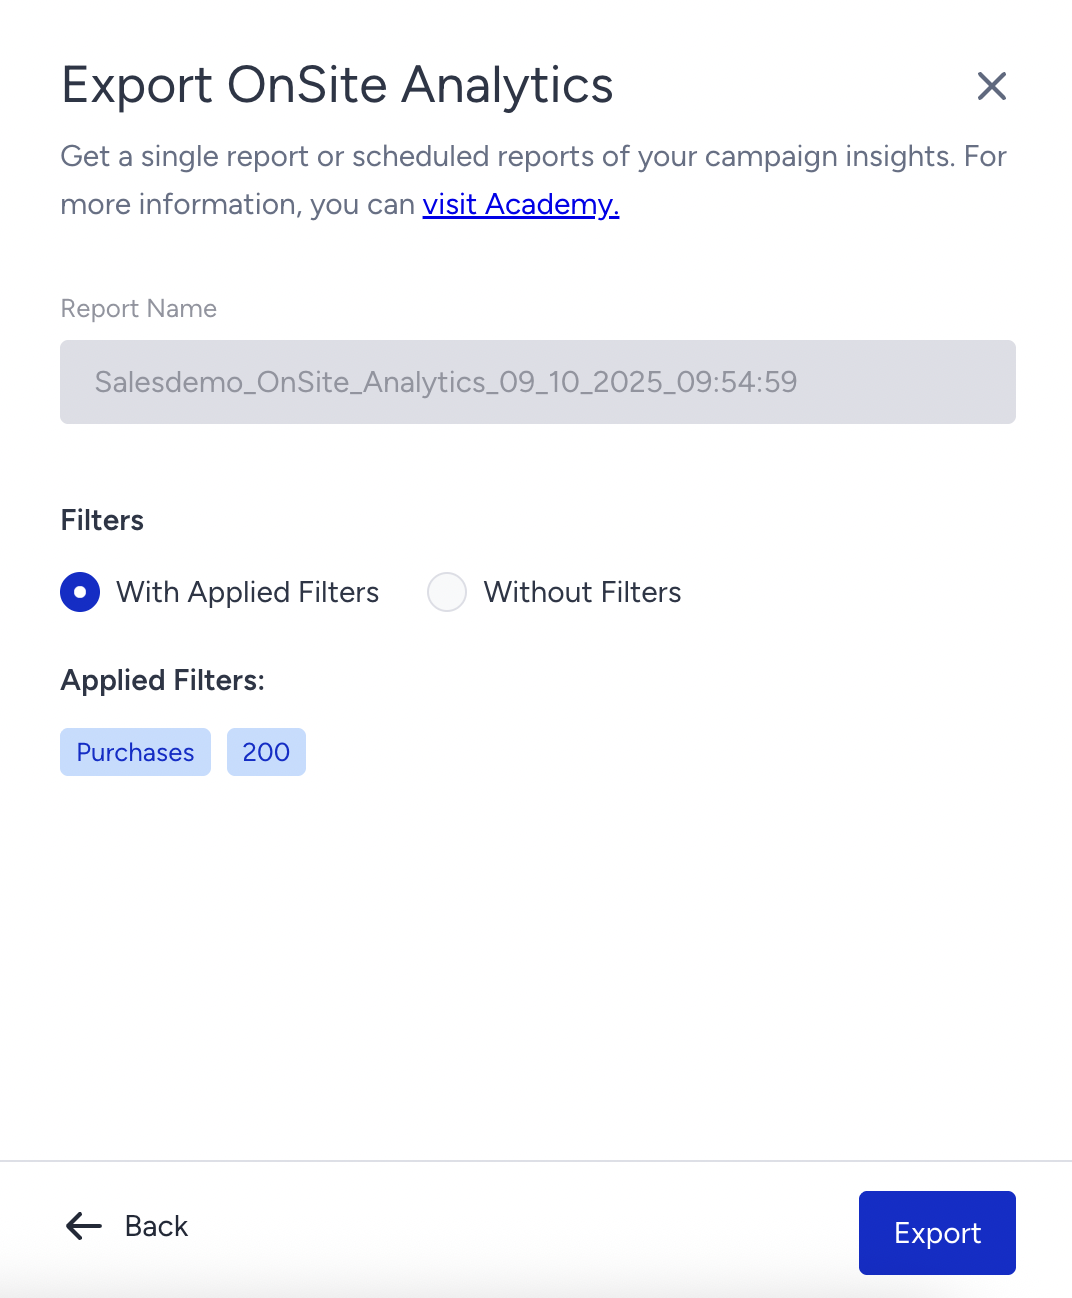
You will see the Single Report and Scheduled Report options to create your report. Choose the one you need and proceed.
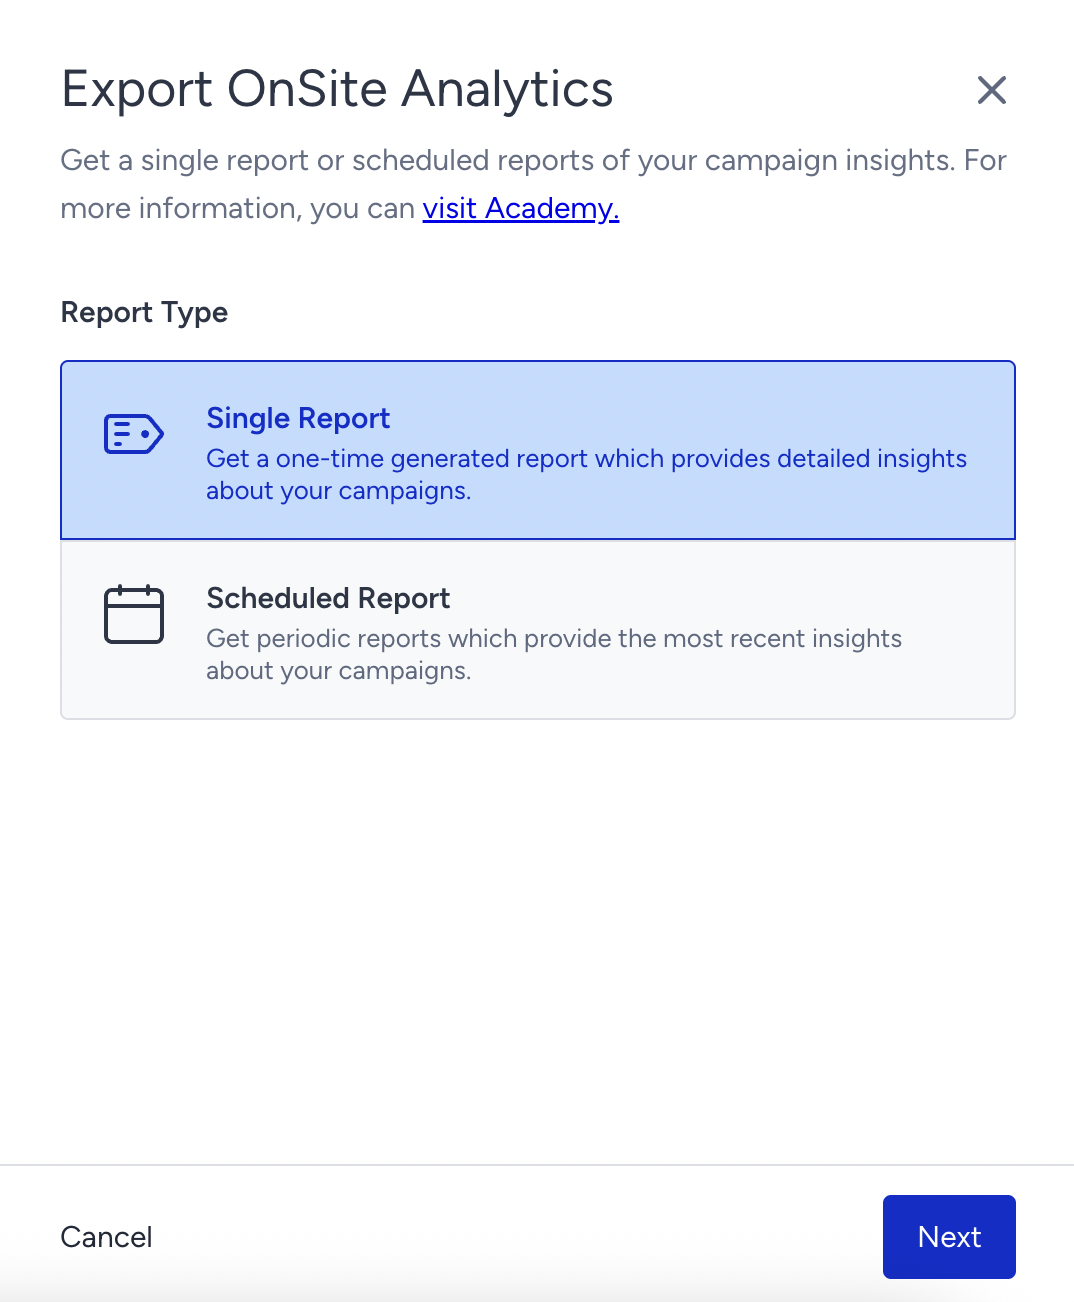
Single Report
A Single Report is a one-time-generated report that you can access anytime. It provides detailed insights into your results based on the selected metrics.
When you choose Single Report to export your data, you can include or exclude filters you applied before. Click Create Report to start exportation.
You will see a notification that your report request has been received.
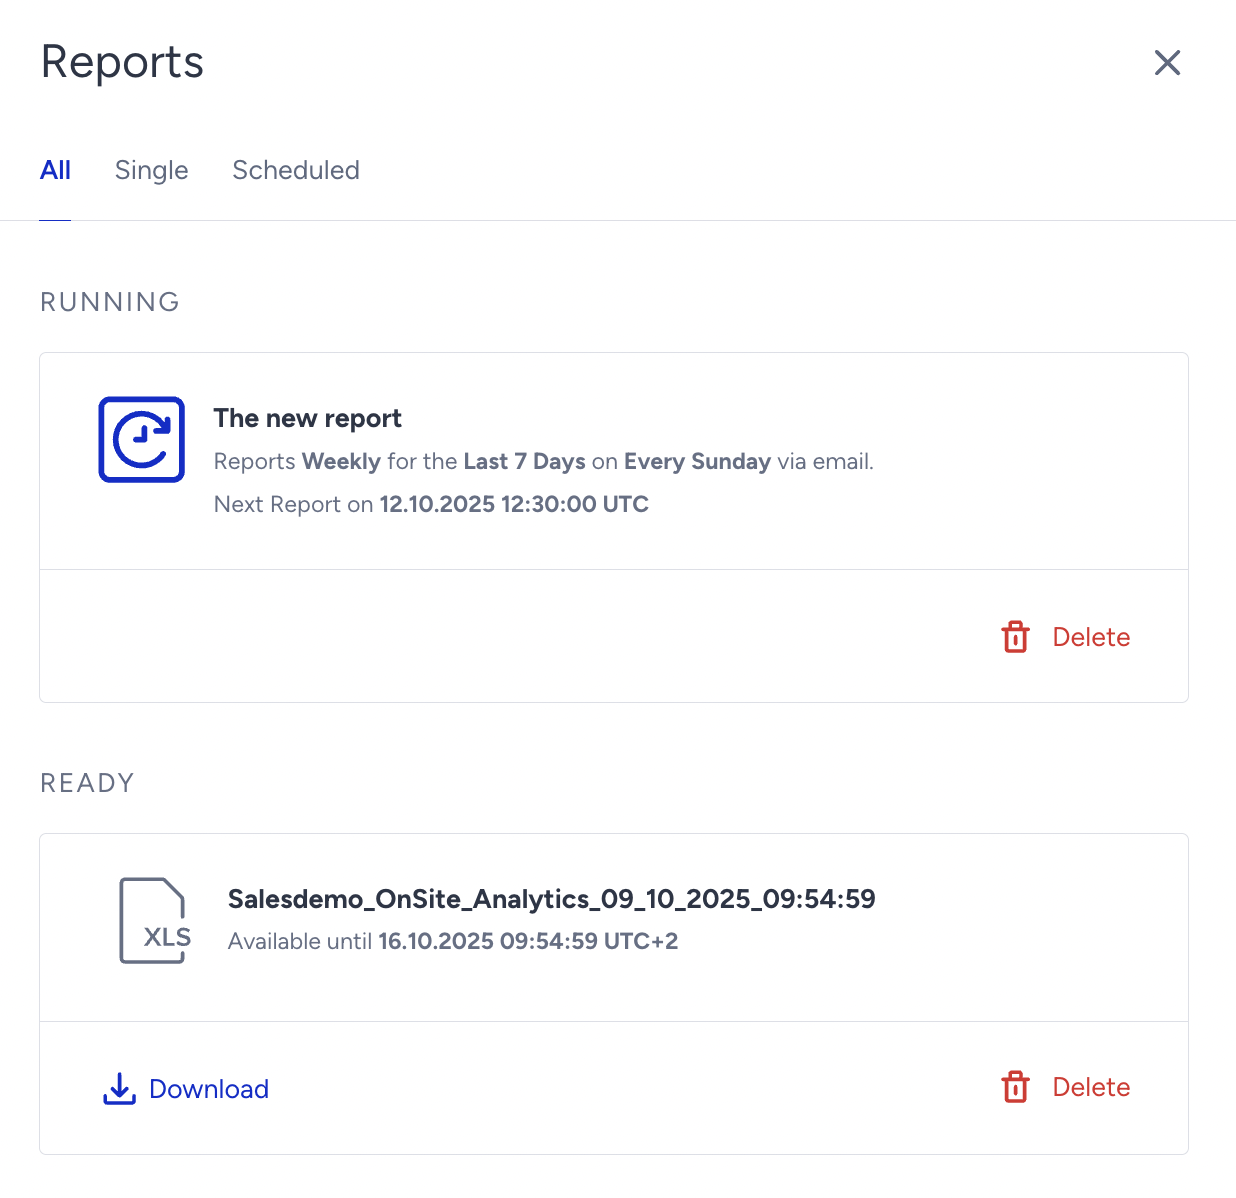
When you click View Reports located under the Export button, you will see that it is ready to download.
You can also see the expiry date information to download the file.

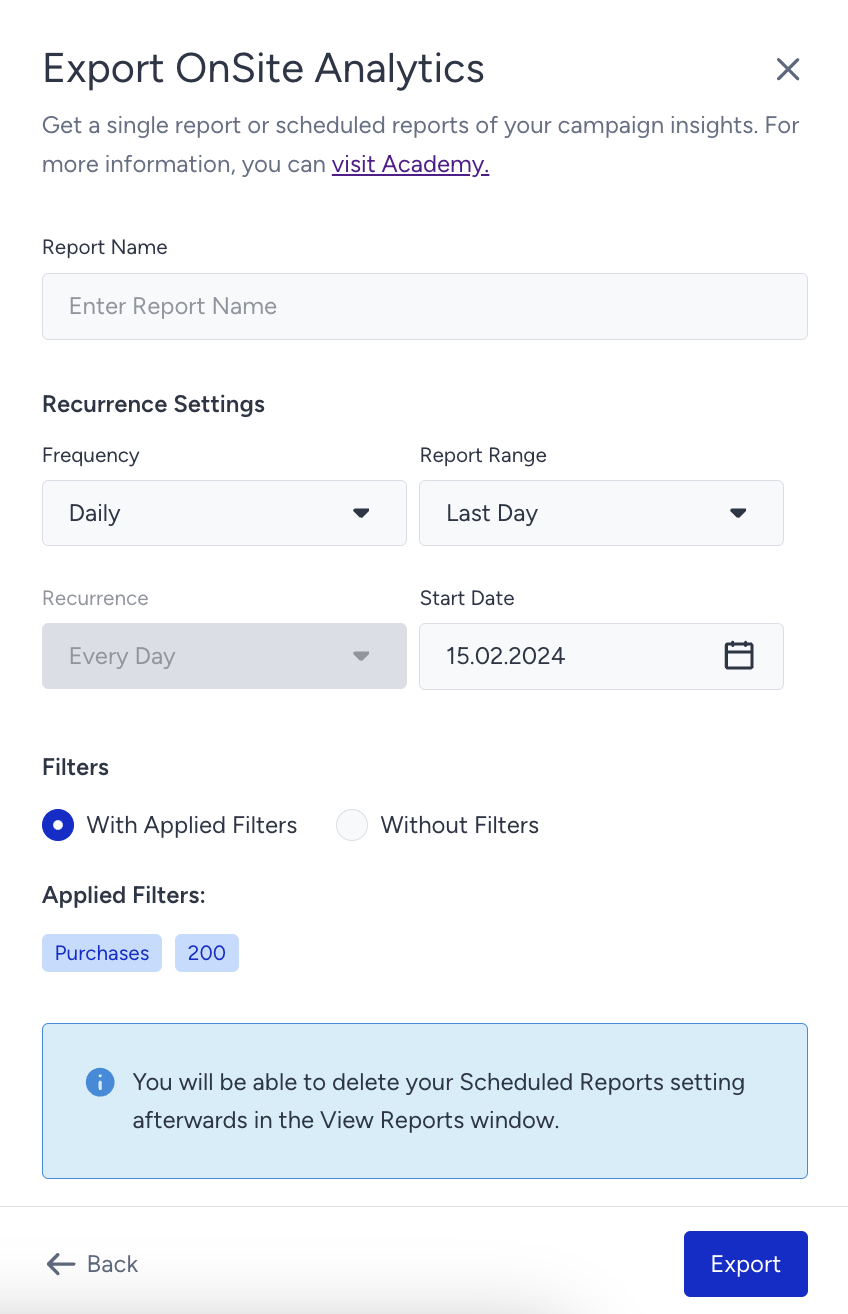
Scheduled Report
Scheduled Report allows you to automate report creation according to your preferred frequency. Therefore, you will receive the latest data as needed. It is a user-based report.
When creating a Scheduled Report, first name it.
Set the generation frequency: daily, weekly, or monthly. The frequency only affects the date the report is generated, not the date range of the data provided in the report.
Decide on its range: You can receive the data from the last 24 hours to the last 90 days with the given fixed period options in the dropdown. The report will include the data for the selected date range.
Configure its delivery recurrence: You can set it for any day of the week if the frequency is selected as weekly and the first, 15th, or last day of the month if the frequency is monthly. The report will be generated and emailed to the user on the recurrence day determined.
Set the start date to start receiving your report.
You can select the "monthly" frequency and "last 30 days" for the report range to generate monthly reports.
As for single day reports on a monthly basis, if you select the "monthly" frequency and "last day" as the report range, you will get the February report but only for the performance of February 28th. You will get this report on a monthly basis. This means that the next report will be the March report, which will display the performance of March 31st.
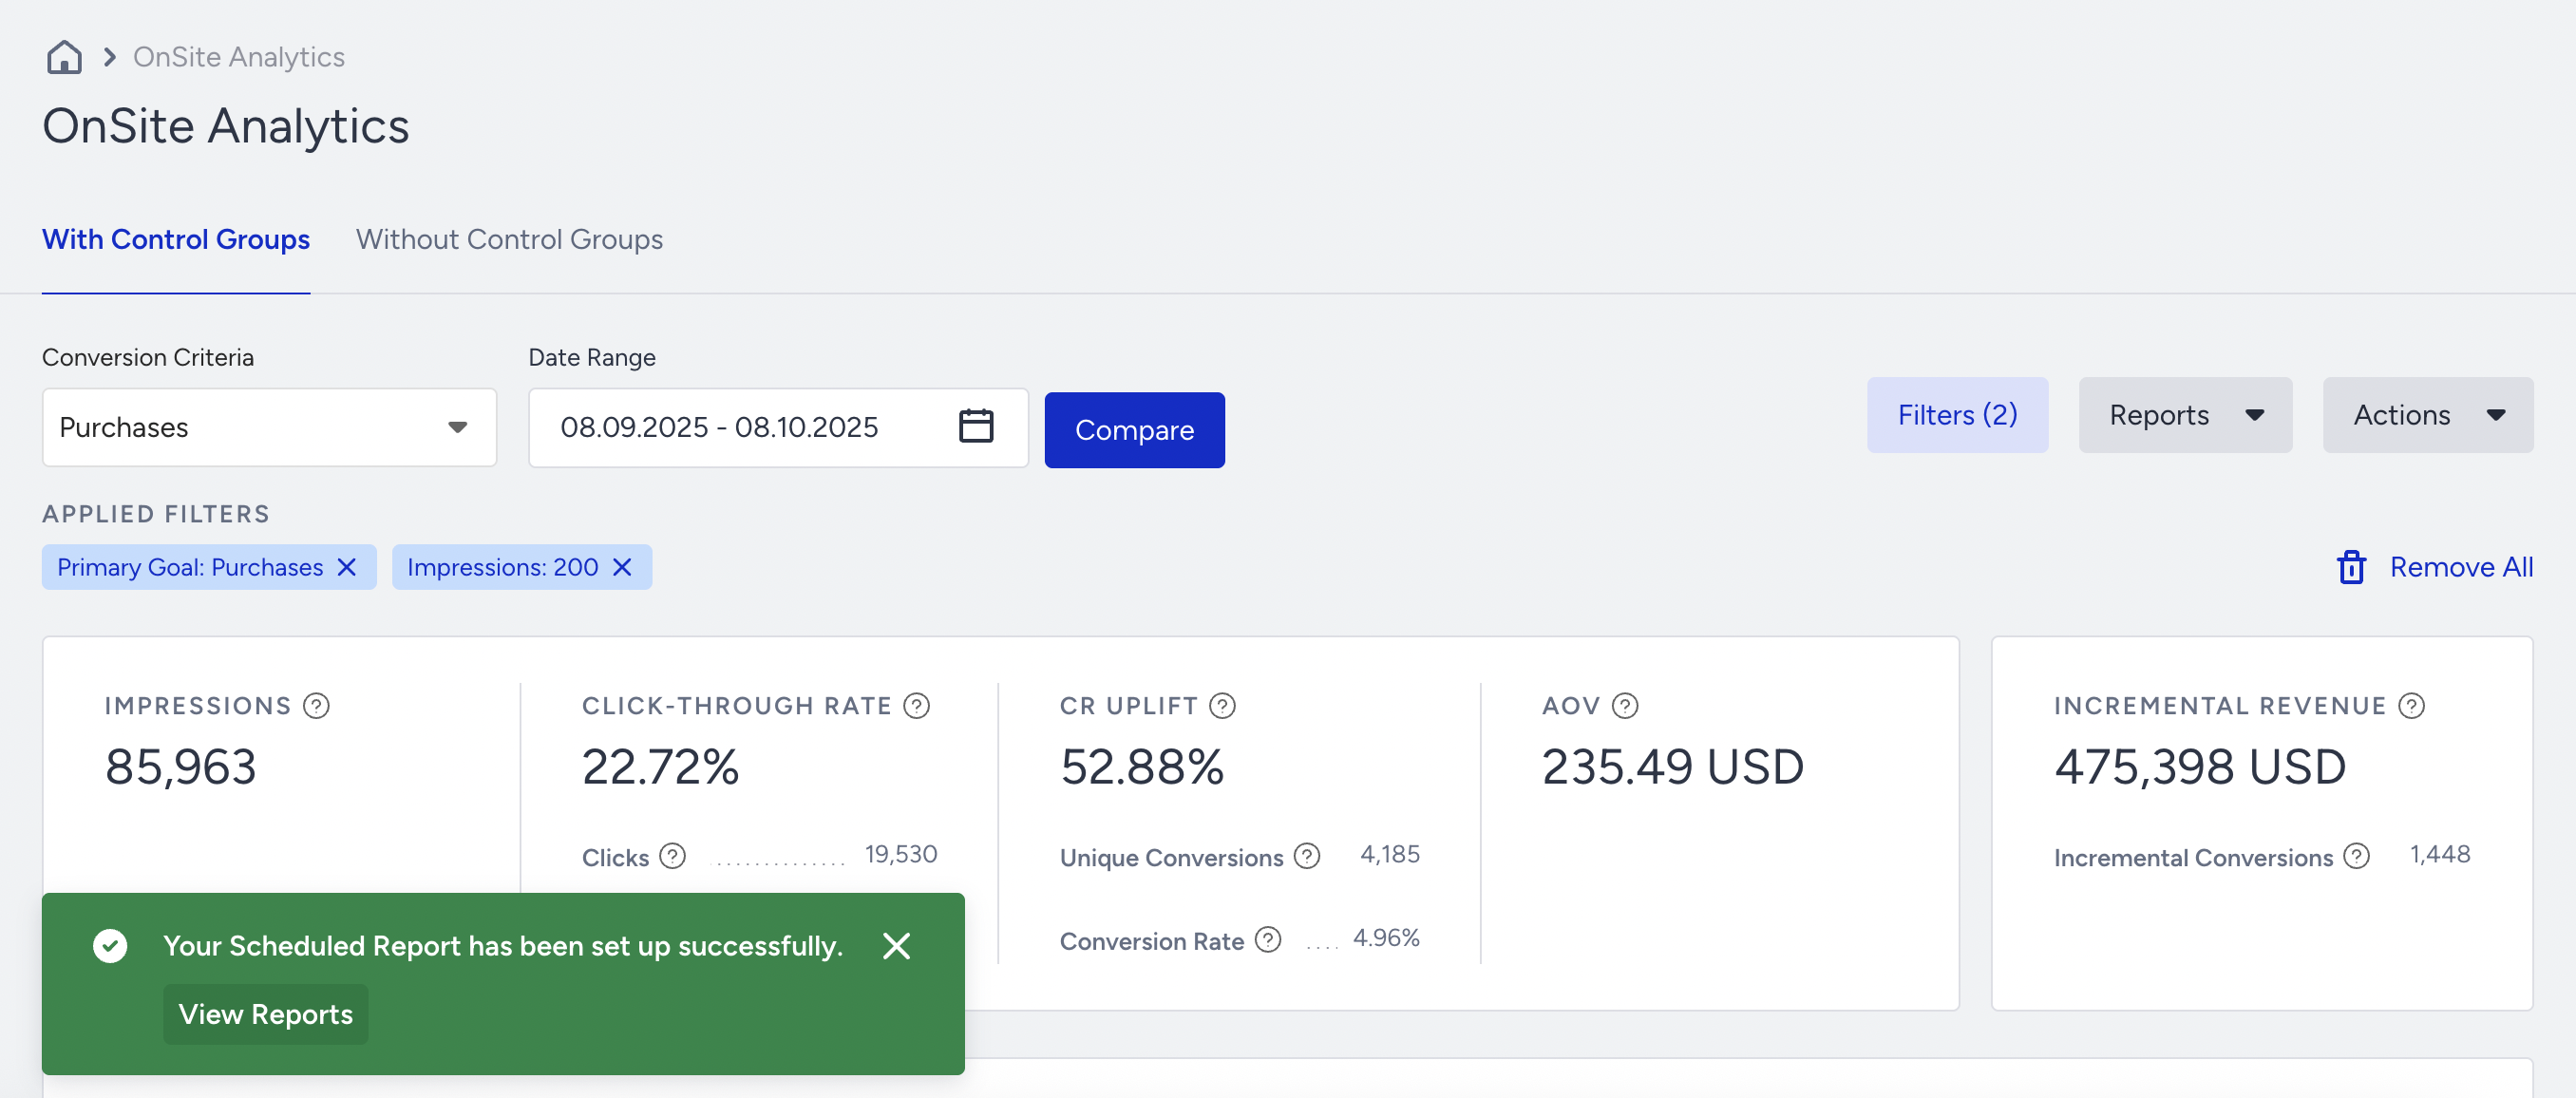
Once you configure the settings of your recurring report from the model, click the Export button. You will see a notification about the process.
When you complete requesting your reports and want to view them, click Reports > View Reports on the main page.
You will see a list of recently generated reports listed in chronological order. You can view your recently created reports by their types. The lifetime of the single report is seven days. This means one-time generated reports reside on the View Reports side model for seven days and disappear.