Call an API Response Management enables you to get data from your internal or external systems through the Call an API element. You can send information or requests to your endpoints and retrieve information from them.
To retrieve information from your requests:
1. Set up your Call an API element. You can use any request method to configure a response.
2. Check the Enable Call an API Response box underneath the payload area.

3. Fill in the Variable Name, Response Snippet, and Data Type fields.
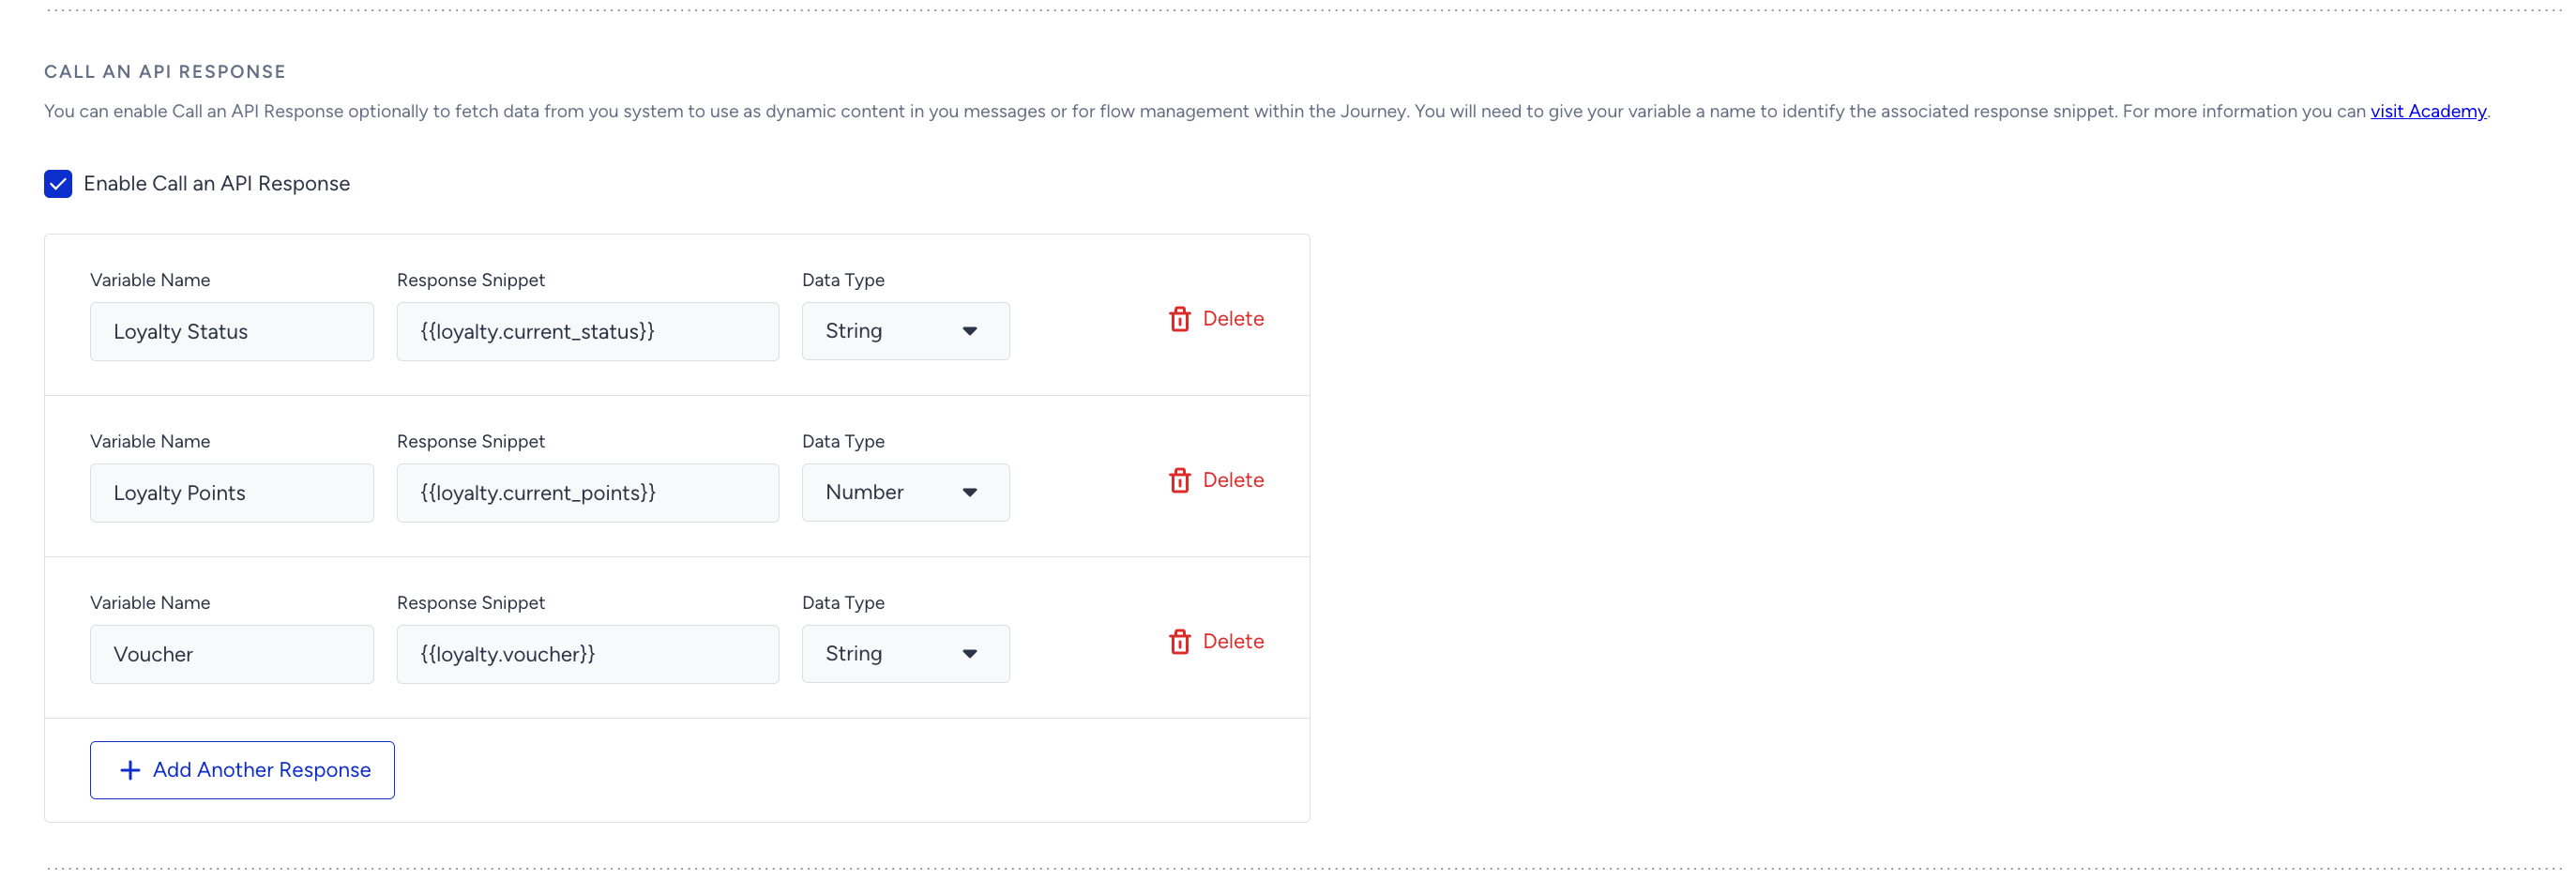
- Variable Name: The name you give to refer to the user-based property that will be fetched from the endpoint you enter.
- Response Snippet: The snippet that will be retrieved from your endpoint to pinpoint the location of the value in the JSON file.
- Data Type: The type of the variable. The available options are String, Number, and Date.
To add more variables, click the Add Another Response button.
4. Once you complete configuring your request and creating the variables, click the Save button to save this element.
This guide explains the following:
- Use variables in journeys
- Response format
- Access variables using response snippets
- Example case
- Use cases
- FAQ
Use variables in journeys
Once you create a Call an API element with the response enabled, you can use the configured variables within your journey. You can use them in your message content, in the Update User Attribute element, and in checking the response value.
Message content
When you compose your message, you can click the Add Dynamic Content button to add these Response Variables to the Email, Web Push, App Push, WhatsApp, and SMS channels.

Update User Attribute
You can update any existing user attribute with the Response Variables. If you enable response variables in a Call an API element, an additional option called “User Call an API Response” becomes available in the Update User Attribute element.
When you select this option, you can map API response variables to user attributes. This allows you to store the response values in the user’s profile. By default, response variables are temporary and are deleted once the user exits the journey.

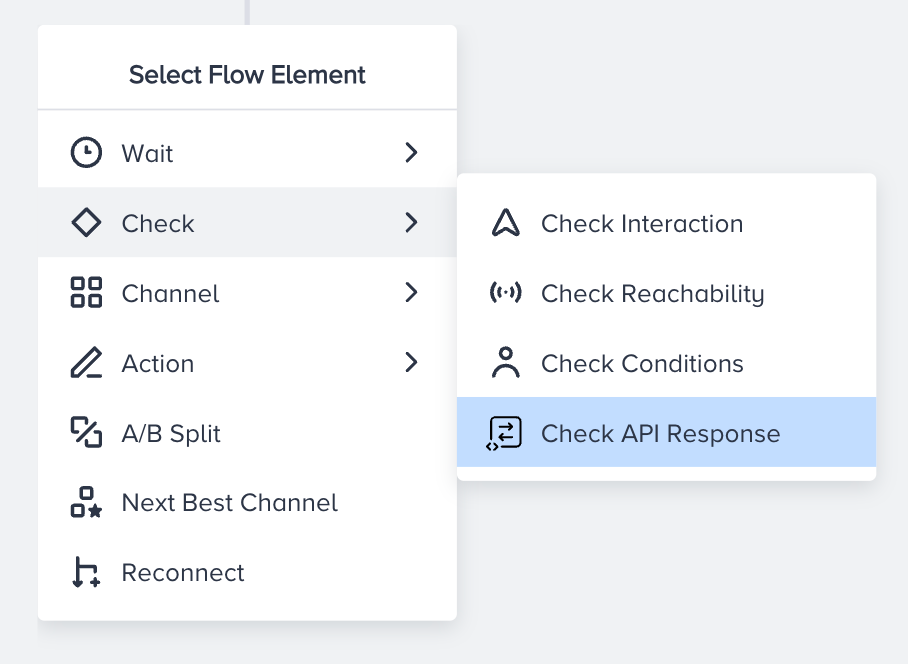
Check response value
You can also use the response variable to divide users into different paths based on the values these variables take.
Response format
When creating your variables, follow a specific format for retrieving the response. It should be in JSON format, and you should adhere to the following data formats.
Date format
The date must be in the following formats with quotation marks:
| Format | Example |
|---|---|
| “MM/DD/YYYY” | “08/31/2023“ |
| “YYYY/MM/DD” | “2023/08/31“ |
| “YYYY-MM-DD” | “2023-08-31“ |
| “DD-MM-YYYY” | “31-08-2023“ |
To add a timestamp in hours, minutes, and seconds, you can add “HH:MM:SS” and “HH:MM” to the end of the above formats as in ”2023/09/08 17:10:32” or ”2023/09/08 17:10”.
Long-form timestamp format is also supported. E.g. ”2023/09/08T17:10:32.518290Z”.
String format
You need to add your text in quotation marks. E.g. “lorem ipsum”.
Number format
It must consist of numbers. The decimal numbers are supported. E.g., 123, 3.14556, and 45000.
See below for an example payload within the provided formats.
{
  "loyalty":
    {
      "id": 5814347536269,
      "program_name": "Referred Shopper",
      "current_points": "2540",
      "status": "Super Shopper",
      "min_points": 0,
      "max_points": 6000,
      "remaining_points_untill_next_status": 3460
      "next_status": "Gold Shopper",
      "prev_status": "",
      "days_in_status": 4,
      "last_status_update": "2023/09/18",
      "calculation_period_days": 90
    },
    "location": "New York",
    "customer_type": "Newcomer",
    "signup_date": "2023-09-01 10:05:16"
  }
Access variables using response snippets
To access a variable, include the object name and the variable name in the JSON file, depending on the variable's hierarchical level. E.g. {{location}}, {{loyalty.next_status}}.
If your response includes arrays, include the index of each item in the array.
The first item in an array has the index of 0.
{
  "participation":
    {
      "events": [
        {
          "event_name": "concertXYZ"
          "event_date": "2023/06/01"
        },
        {
          "event_name": "concertABC"
          "event_date": "2023/04/18"
        },
      ]
    },
    "location": "New York"
}
For example, if you want to reach the events that the users participated in, you should include the indexes 0 and 1. To reach the name of the first event, you should use {{participation.events.0.event_name}}, and for the second event {{participation.events.1.event_name}}.
Example case
Let's say you want to retrieve the Loyalty payload above from the Call an API element, and you want to send the following message to your users:
You have collected 2540 points since 2023/09/18! There are only 3460 points until your Gold Shopper status. Drop by any store in Istanbul to earn 2x points from everything you purchase.
The variables that you need to use in the journey are the current loyalty points that the user has, the remaining points for the next status, and the next loyalty program status the user will reach. In the Call an API element, you can use these Variable Names and Response Snippets to achieve this.
| Variable Name | Response Snippet | Data Type |
|---|---|---|
| Loyalty Points | {{loyalty.current_points}} | Number |
| Status Update Date | {{loyalty.last_status_update}} | Date |
| Points Remaining | {{loyalty.remaining_points_untill_next_status}} | Number |
| Next Status | {{loyalty.next_status}} | String |
| Customer Location | {{location}} | String |
Use cases
You can manage your Call an API responses for various use cases as follows:
- If you store coupon codes in-house or in an external tool, you can retrieve them for your users via the Call an API. You can use the same coupon code for all of your messaging channels for follow-ups and reminders.
- If you have a content management system, you can retrieve the email content according to the user’s language. In the Call an API body, you can select the user's language in the dynamic content and send it, and you can configure the response so it holds the content specific to that language. However, we only support text, date, and number, so you won’t be able to retrieve HTML or any other type of content.
- You might have a referral program and generate unique referral links for your users. You can send the user ID, phone number or any other identifier information and retrieve the referral link generated by your systems.
- You might be sending NPS (Net Promoter Score) surveys or other customer satisfaction forms through your internal or external tools. You can send any user identifier via the Call an API to retrieve their last given NPS score or comments. You can use the Check API Response element to direct your users to different paths according to whether they are promoters or detractors. For detractors, you can send coupon codes to prevent churn.
FAQ
Q: Can I use the fetched variables in other journeys and/or products?
A: No, the variable of a user is stored only in the journey in which it was fetched. Additionally, the variable is only stored until the user leaves the journey. After that, it is deleted.
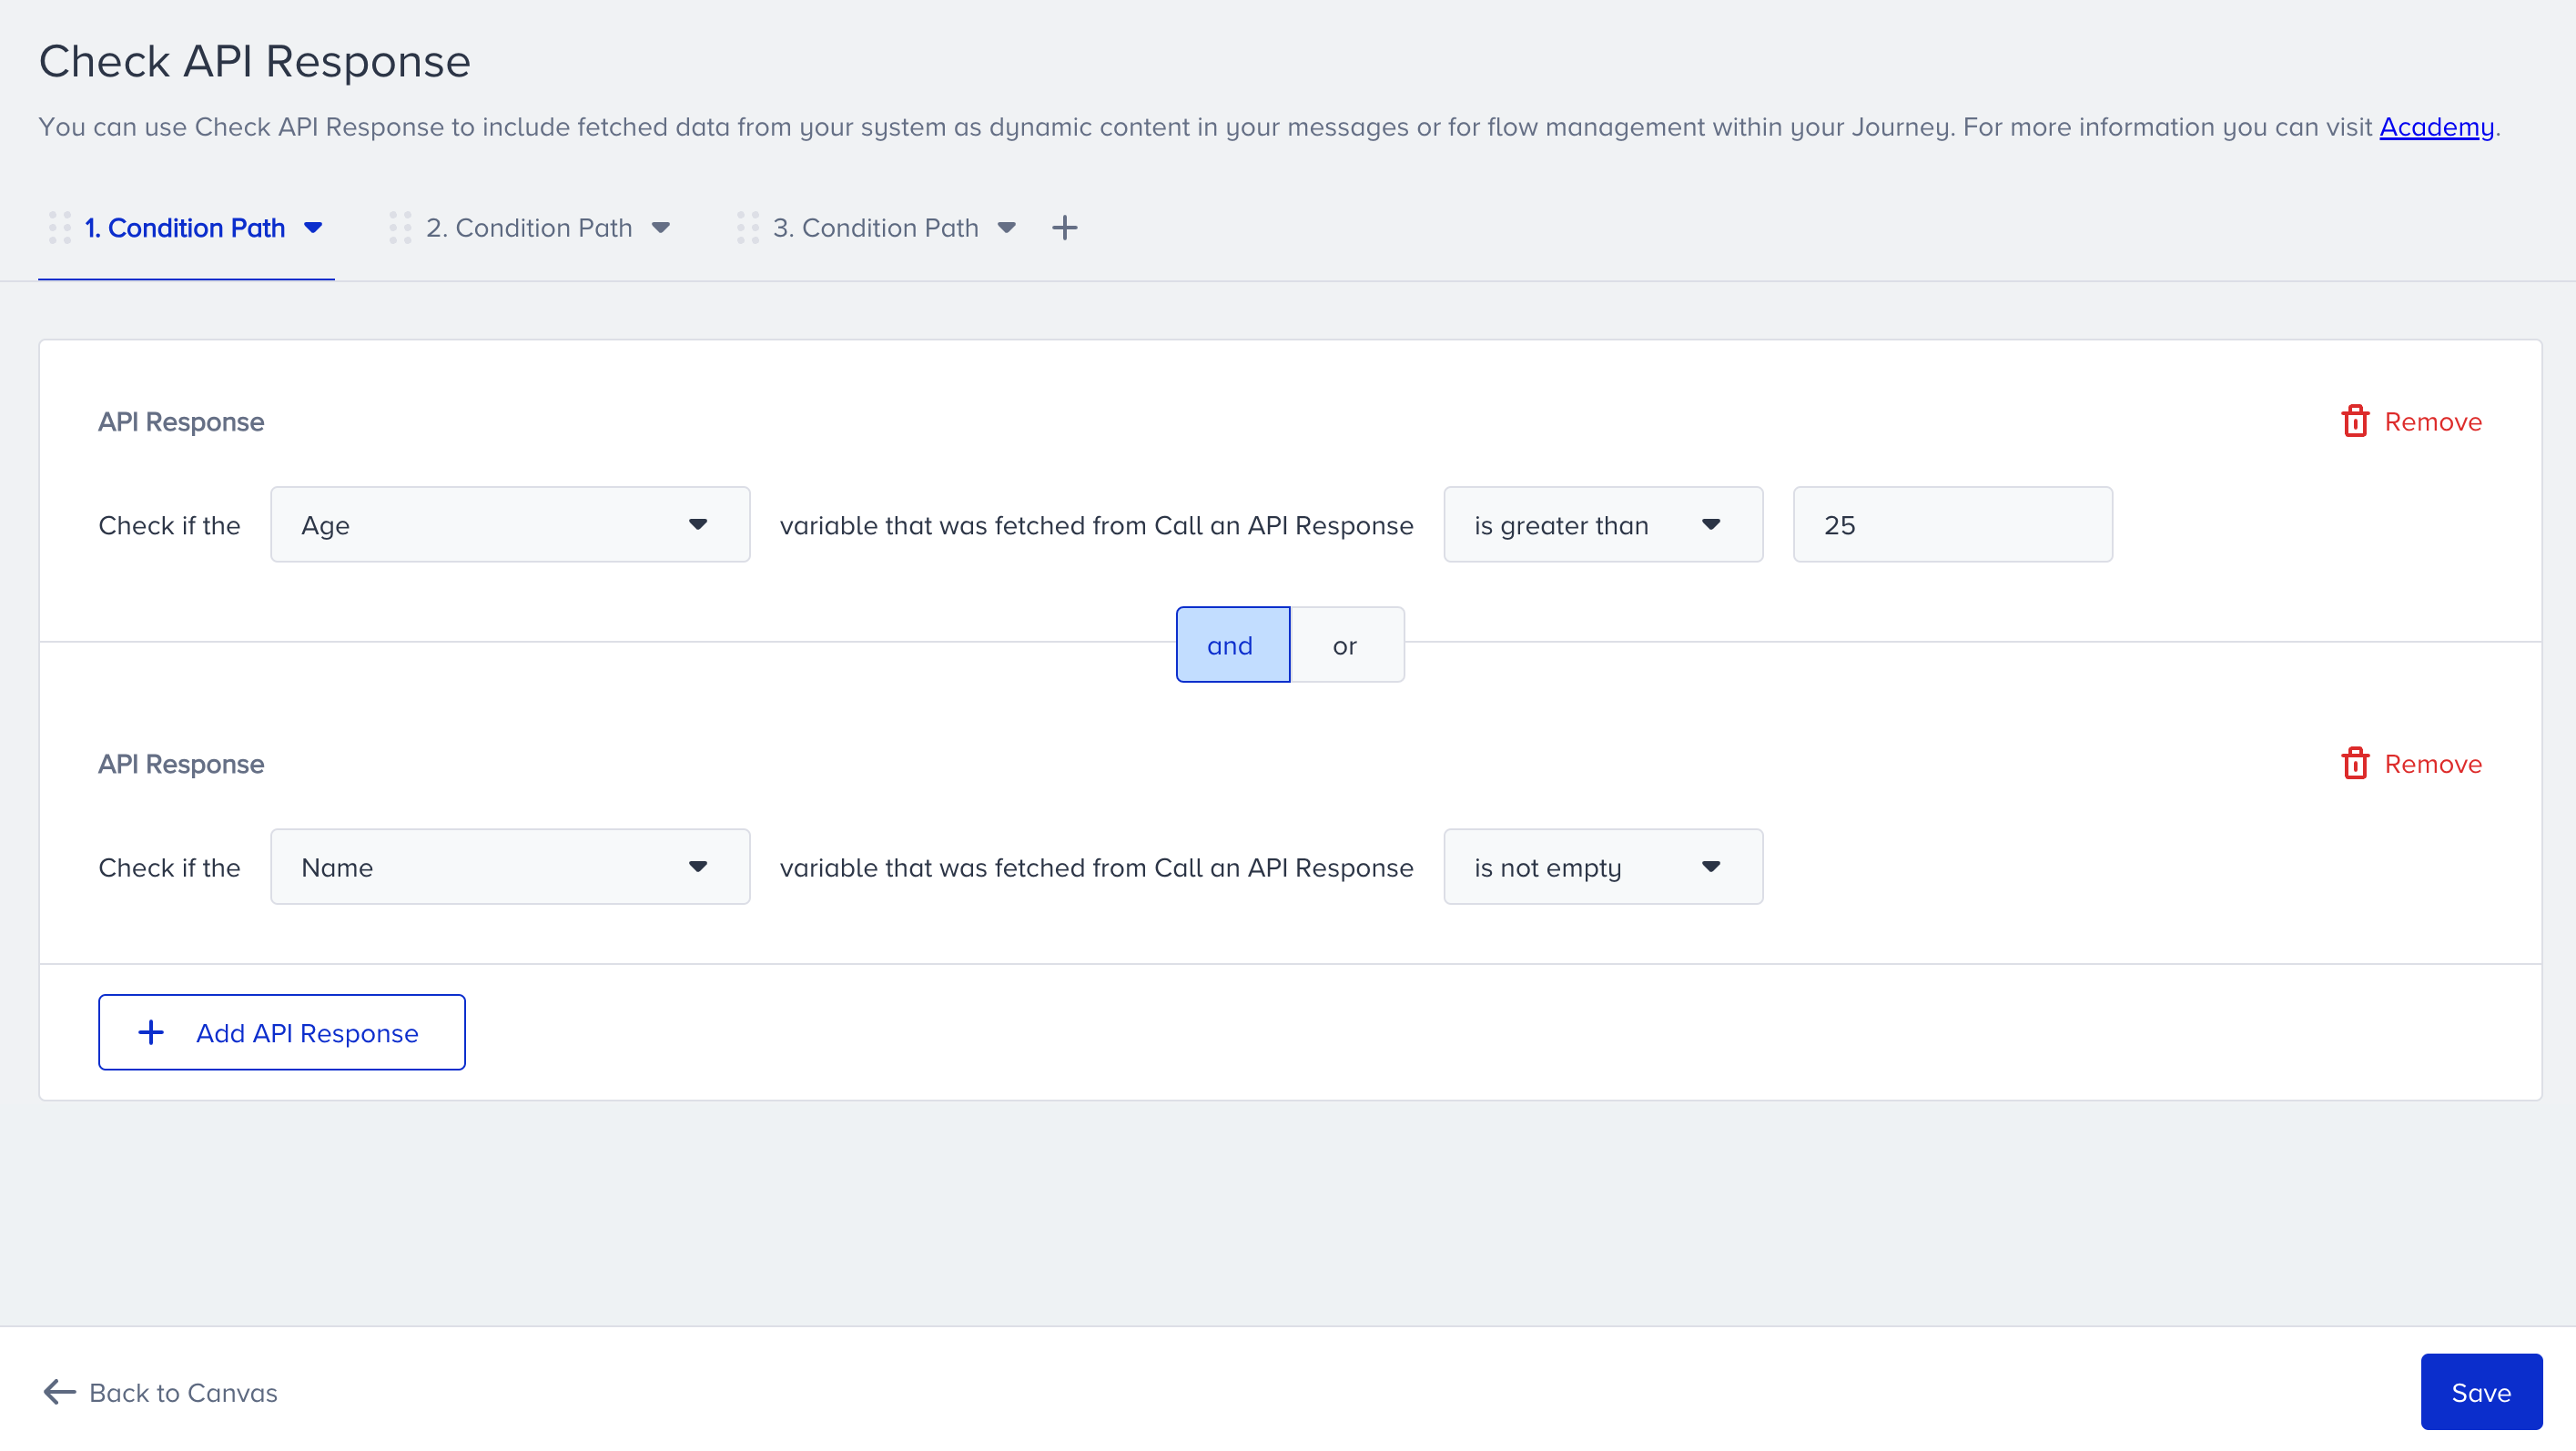
Q: Can I use the response variables in the Check Conditions element?
A: No, there is a special check element for response variables called Check API Response. You cannot use variable conditions together with segments. However, you can add the Check API Response and Check Conditions elements back-to-back in journeys to create a similar condition.
Q: What happens to the variables I used in the journey if I update the variable name?
A: All variables will be updated automatically.
Q: What happens to the variables I used in the journey if I delete the Call an API element with responses?
A: The related dynamic content in the content will turn to *variable removed” and not work. Therefore, you will receive an error when launching the journey, prompting you to remove or change the content.
- The Update User Attribute will be emptied. You need to delete or update the element.
- The Check API Response will be emptied. You need to delete the element to launch the journey.
Q: Why should I use this data ingestion method rather than UCD?
A: This method is suitable for cases when the data changes frequently and is temporary, you have many external tools and integration takes a while to complete, and the regulations state that your data is stored for a very short time period.
Q: The user left the journey, but I am curious about the variable values of the user. Can we see them?
A: No, Insider One only stores the data during the user’s progress in the journey, and deletes it as soon as the user leaves the journey.
Q: I understand that I can use Update User Attribute element to update user’s attribute with the response variables. But can I update user events as well?
A: No, events cannot be updated.
Q: Is there a limit on how many responses can be retrieved per second?
A: No, there is no limit. However, it might take a little while to record that info in our temporary database, using the extracted variables. Only after that, the users will move on to the next element. However, you can enter a maximum of 150 response variables in the Call an API element.
Q: Can I test the API Response?
A: Yes, you can. The Test API button at the bottom of the page lets you send the request to the endpoint and view the response. The response can be a simple fail/success message, or, if set correctly, the JSON file you want to send as a response.
Q: Can I use “Preview as User” functionality to view the Response Variables as the user would see them?
A: No. Since Insider One hasn't received any response from you via the Call an API requests up until that point, you would not be able to preview the dynamic content.
Q: Can I use this method to bulk update my user data on UCD using Call an API Response and Update User Attribute?
A: No, bulk updates must be done through usual data ingestion methods such as Upsert API. This feature must be used strictly for very targeted segments.
Q: For Call an API Response, what is the limit of the responses?
A: The limit of the responses is 150.