Once you create your Unsubscribe Pages, you can add them to your email campaigns while designing them in the Drag & Drop Editor.
This guide explains how to:
- Add unsubscribe pages
- Add custom unsubscribe pages in HTML editor
- Change the selected unsubscribe page
To use custom unsubscribe pages, you need to create all the steps needed for the respective page type:
- Global unsubscribe, global unsubscribe confirmation, and resubscribe for Global Unsubscribe
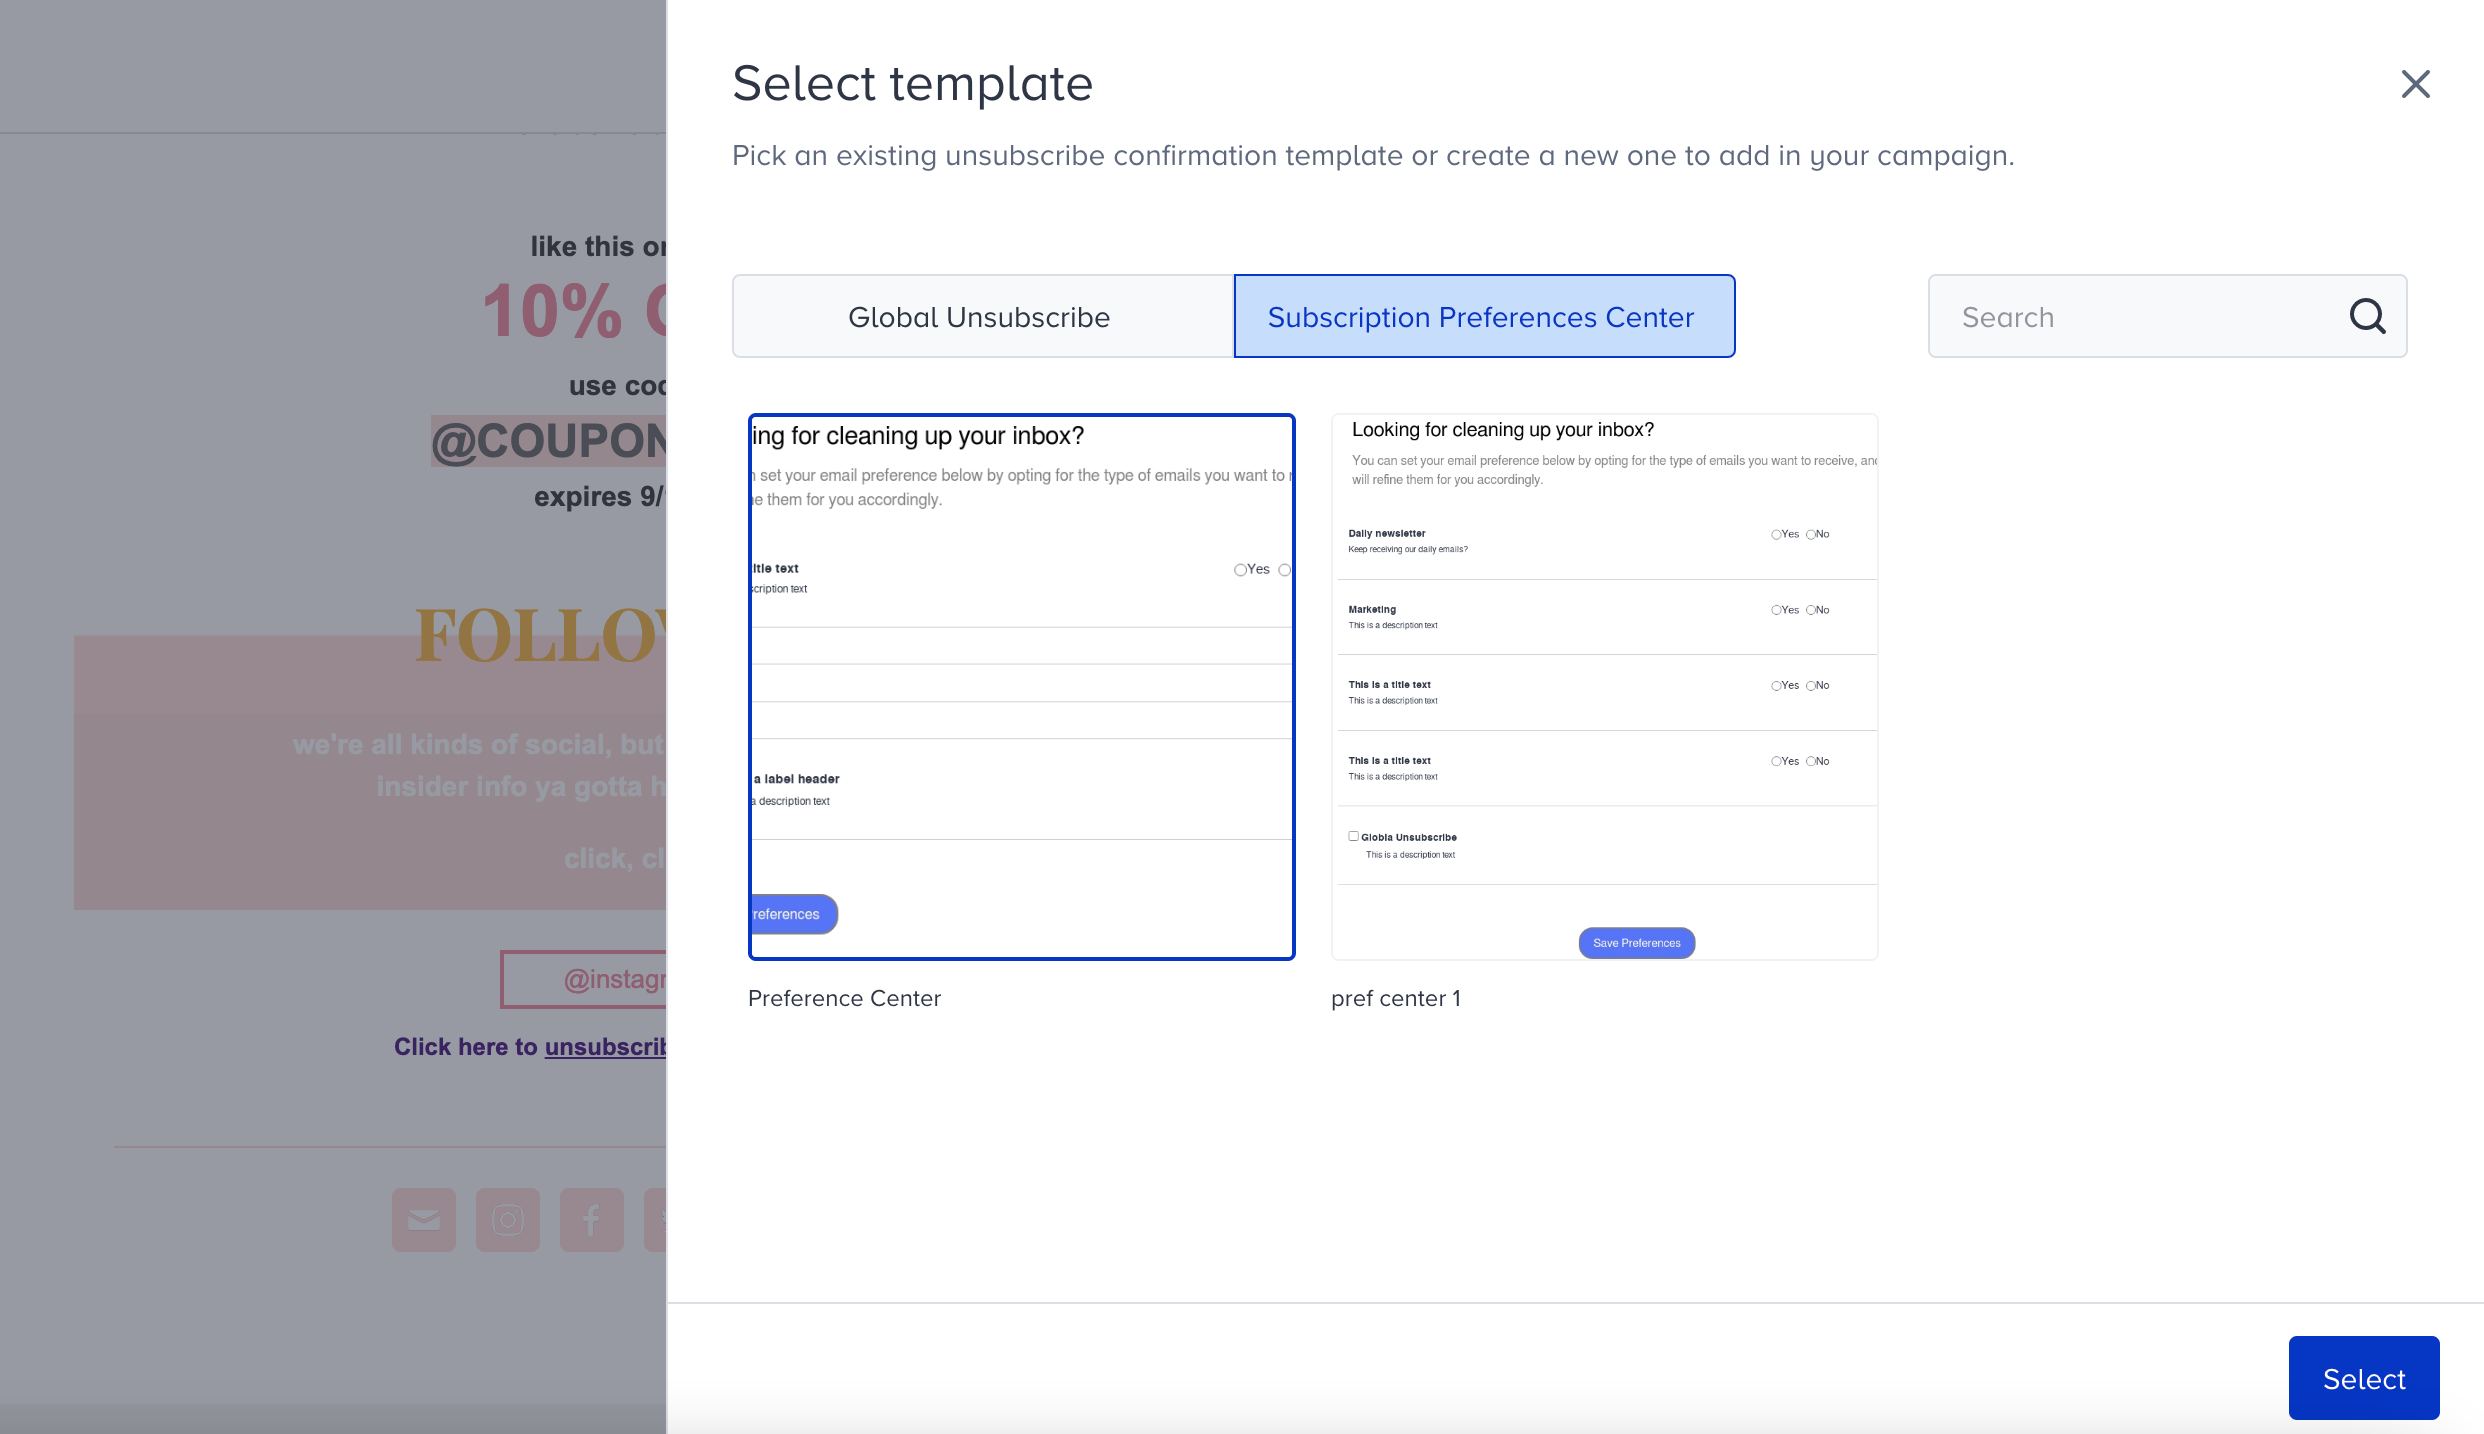
- Subscription preferences center and subscription preferences confirmation for Unsubscribe Preferences
It is recommended to not make changes on the unsubscribe, resubscribe, and submit buttons for these buttons to keep their functions.
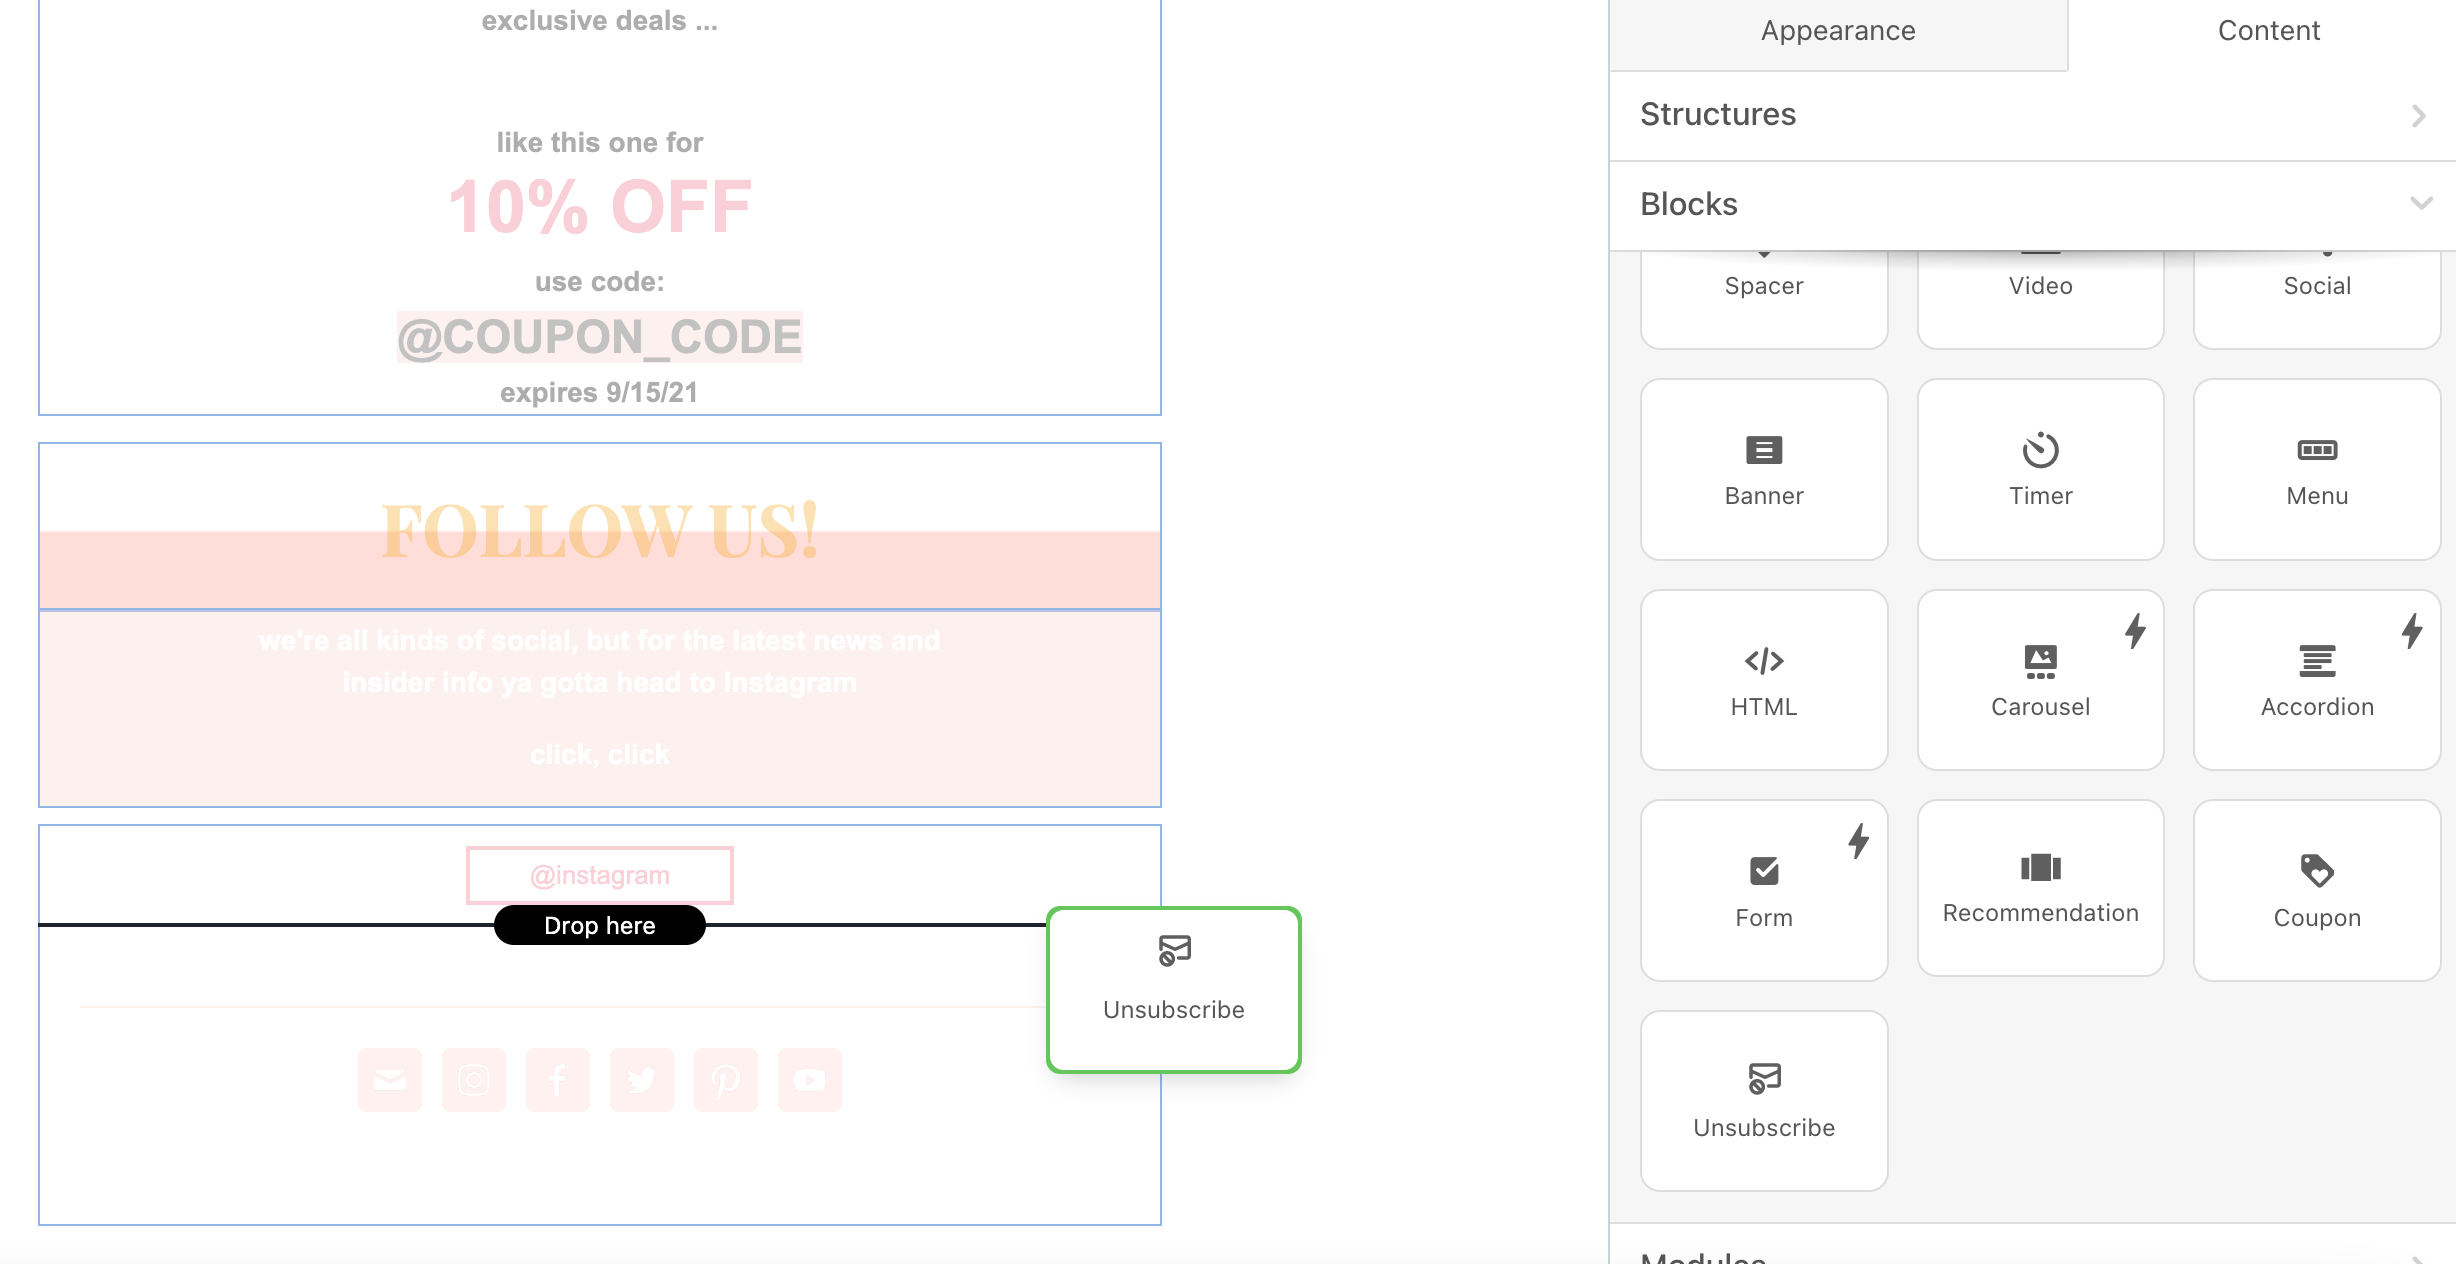
Add Unsubscribe Pages
To add the unsubscribe pages to your emails:
1. Go to the Drag & Drop editor.
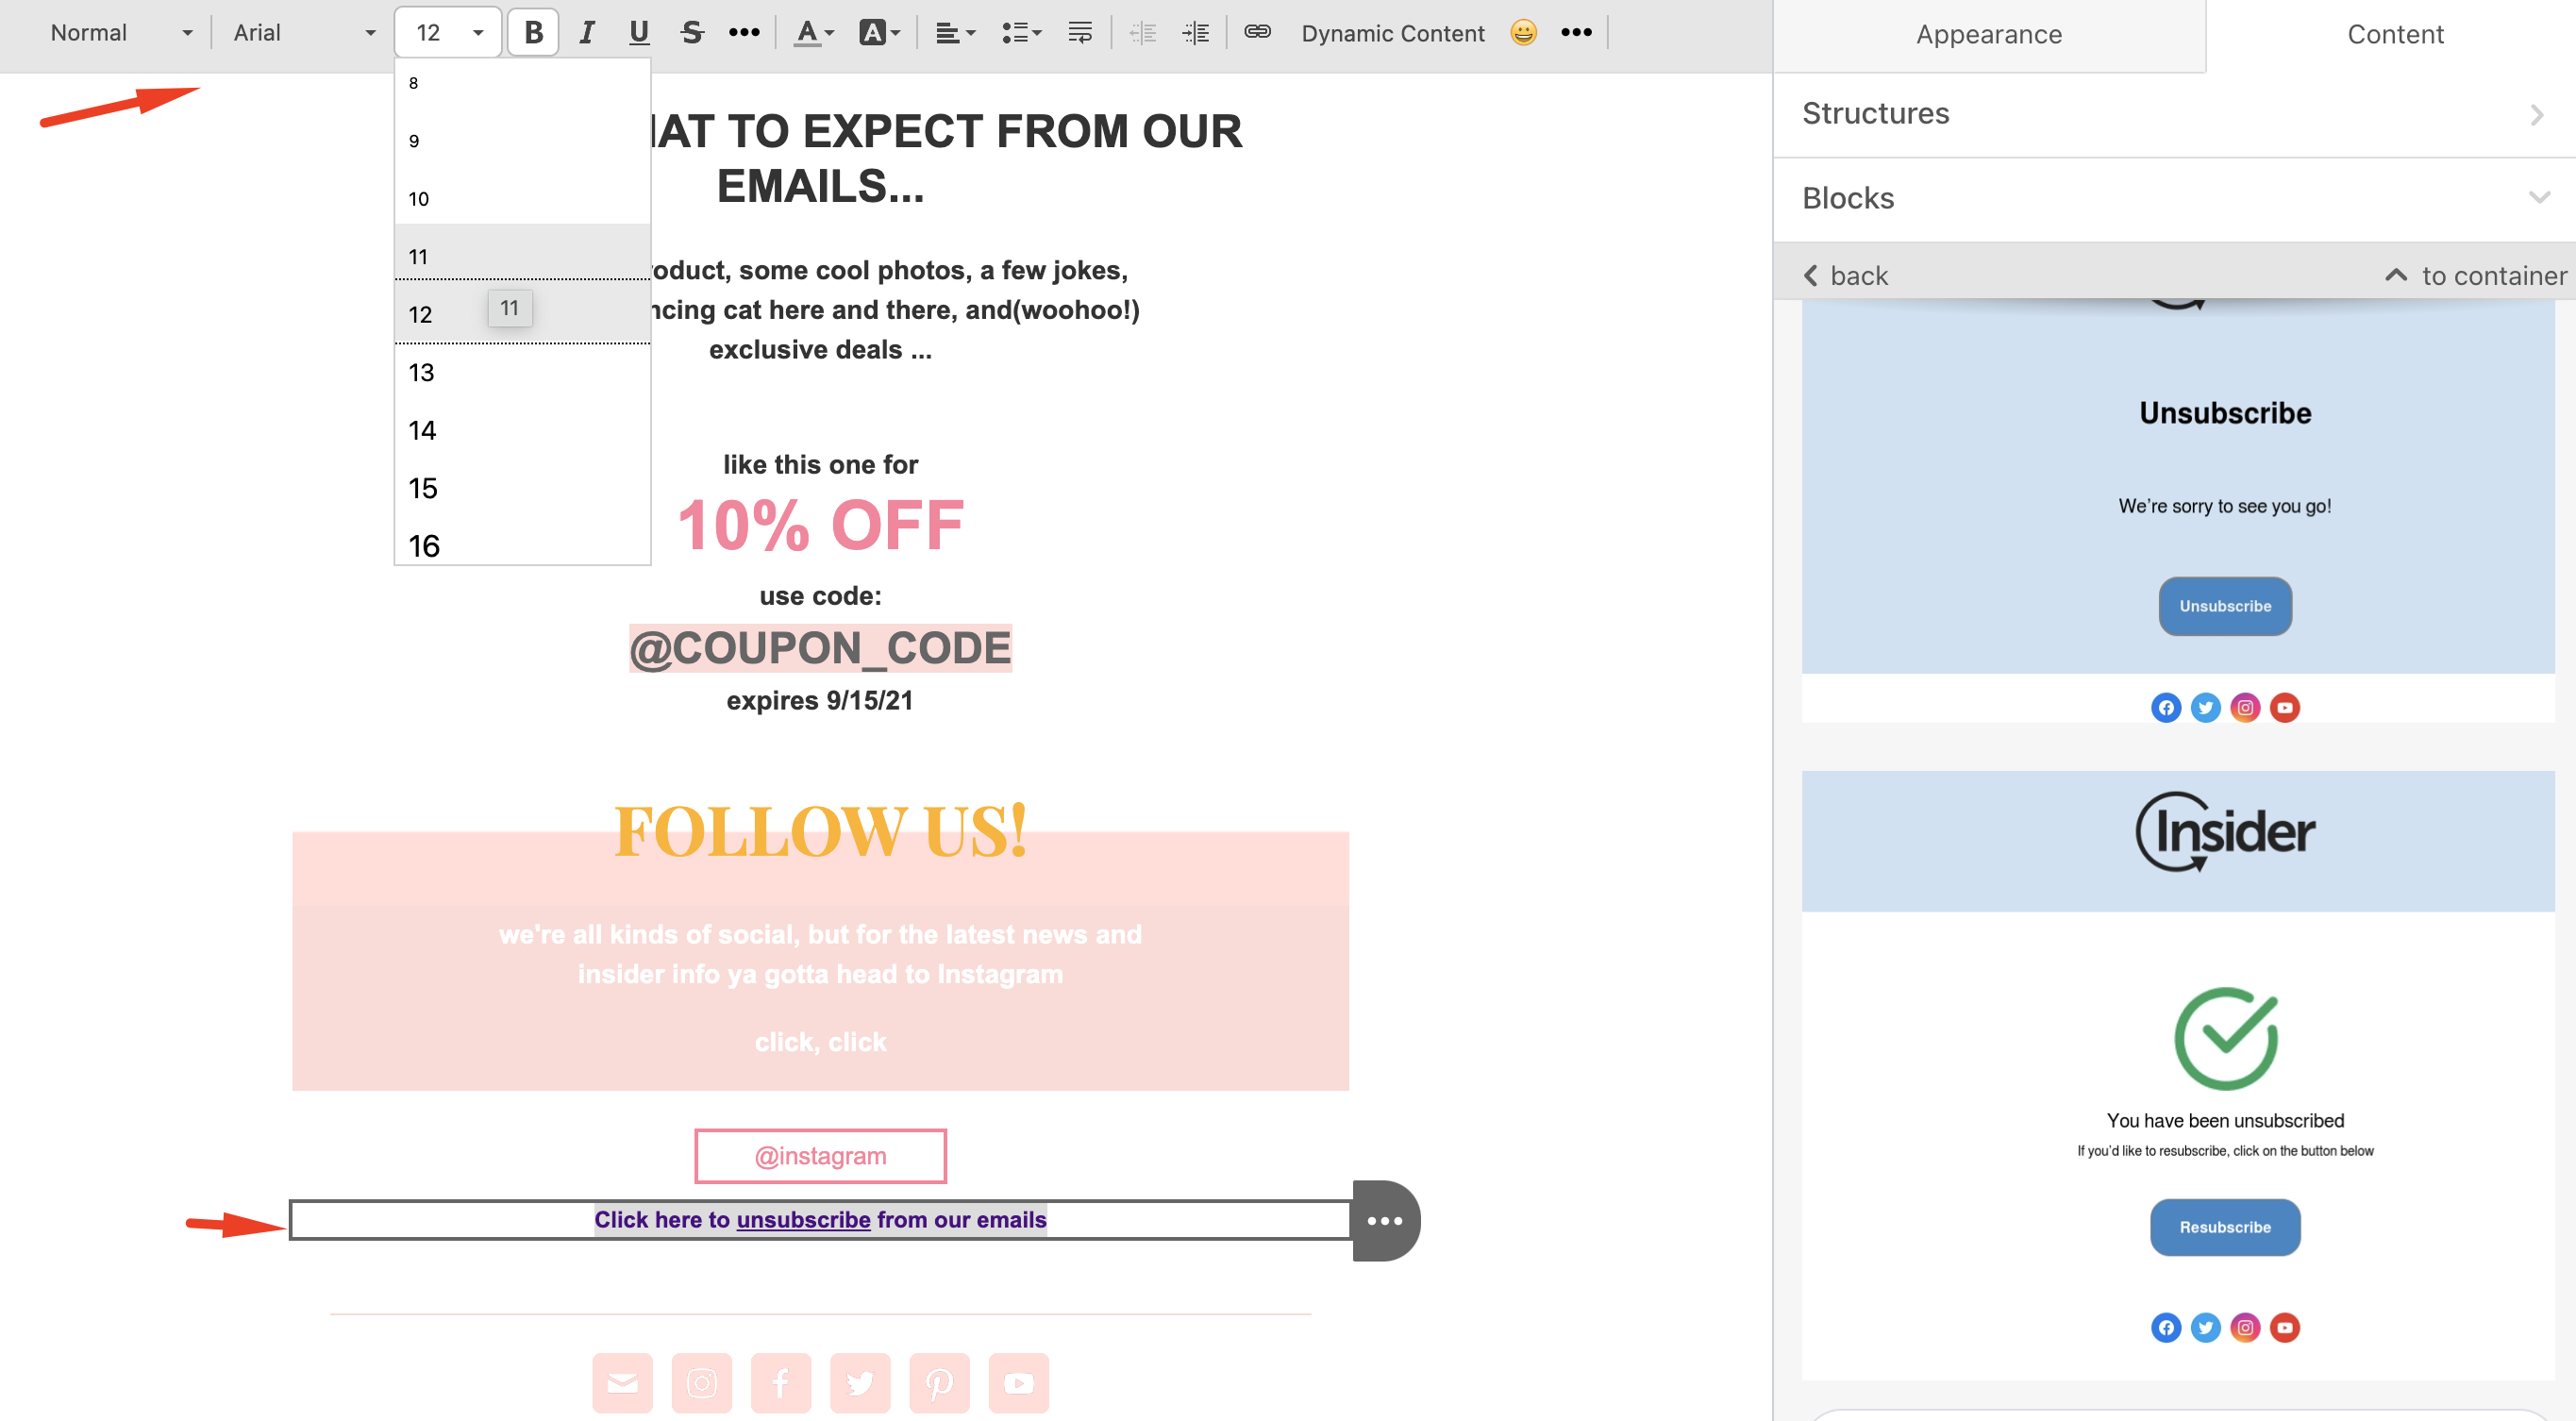
2. Drag and drop the Unsubscribe block where you want to insert the unsubscribe link.
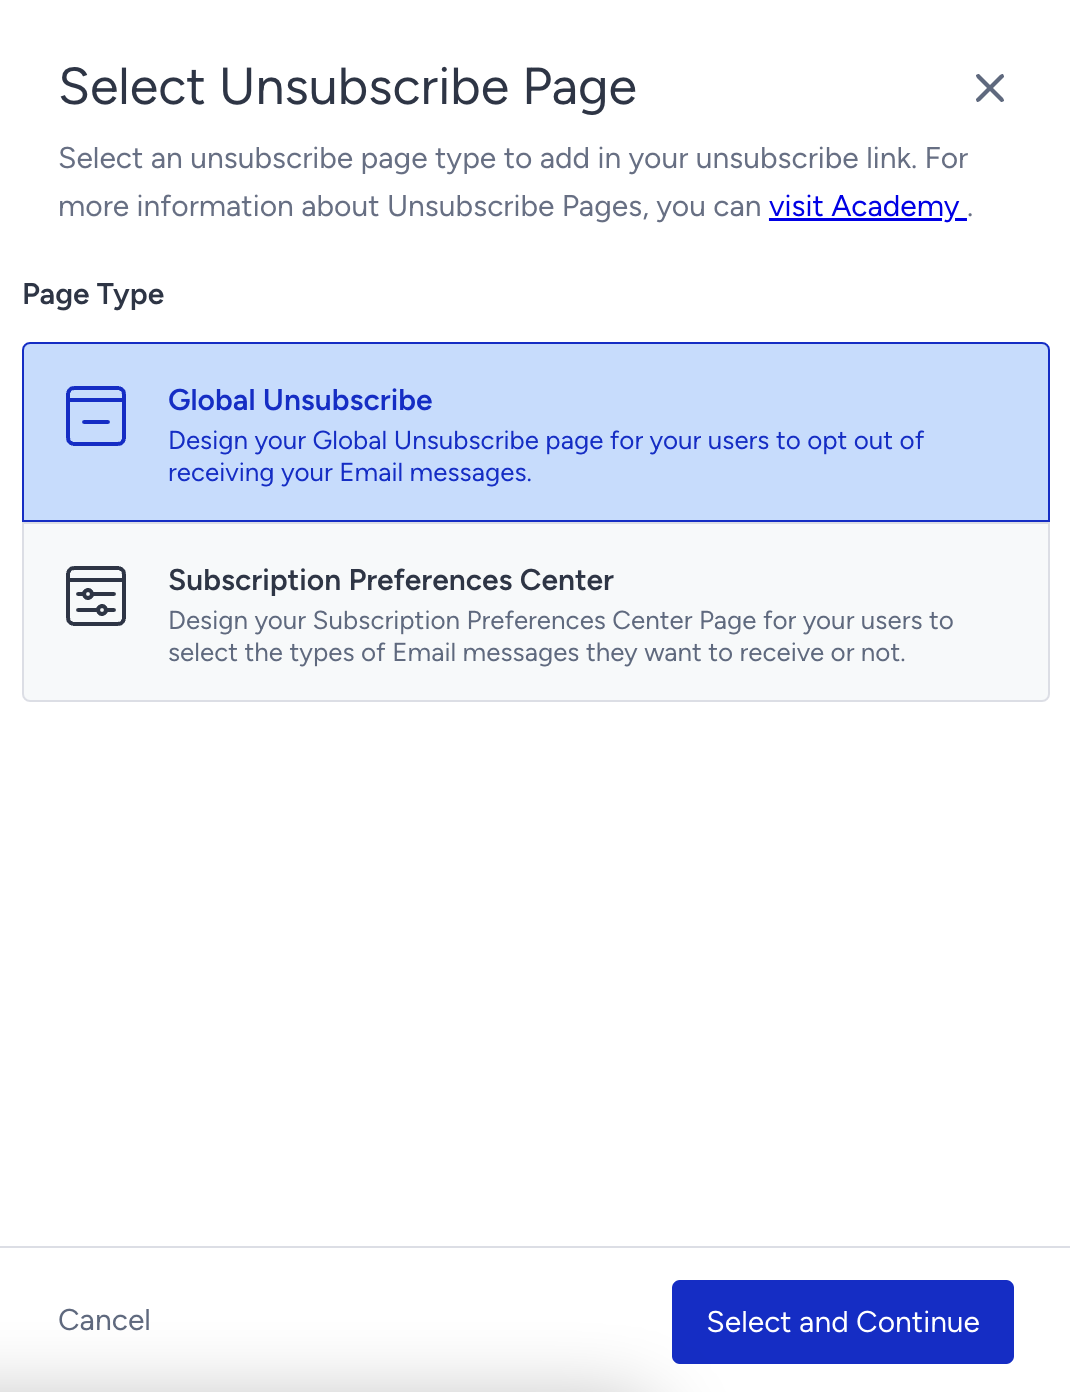
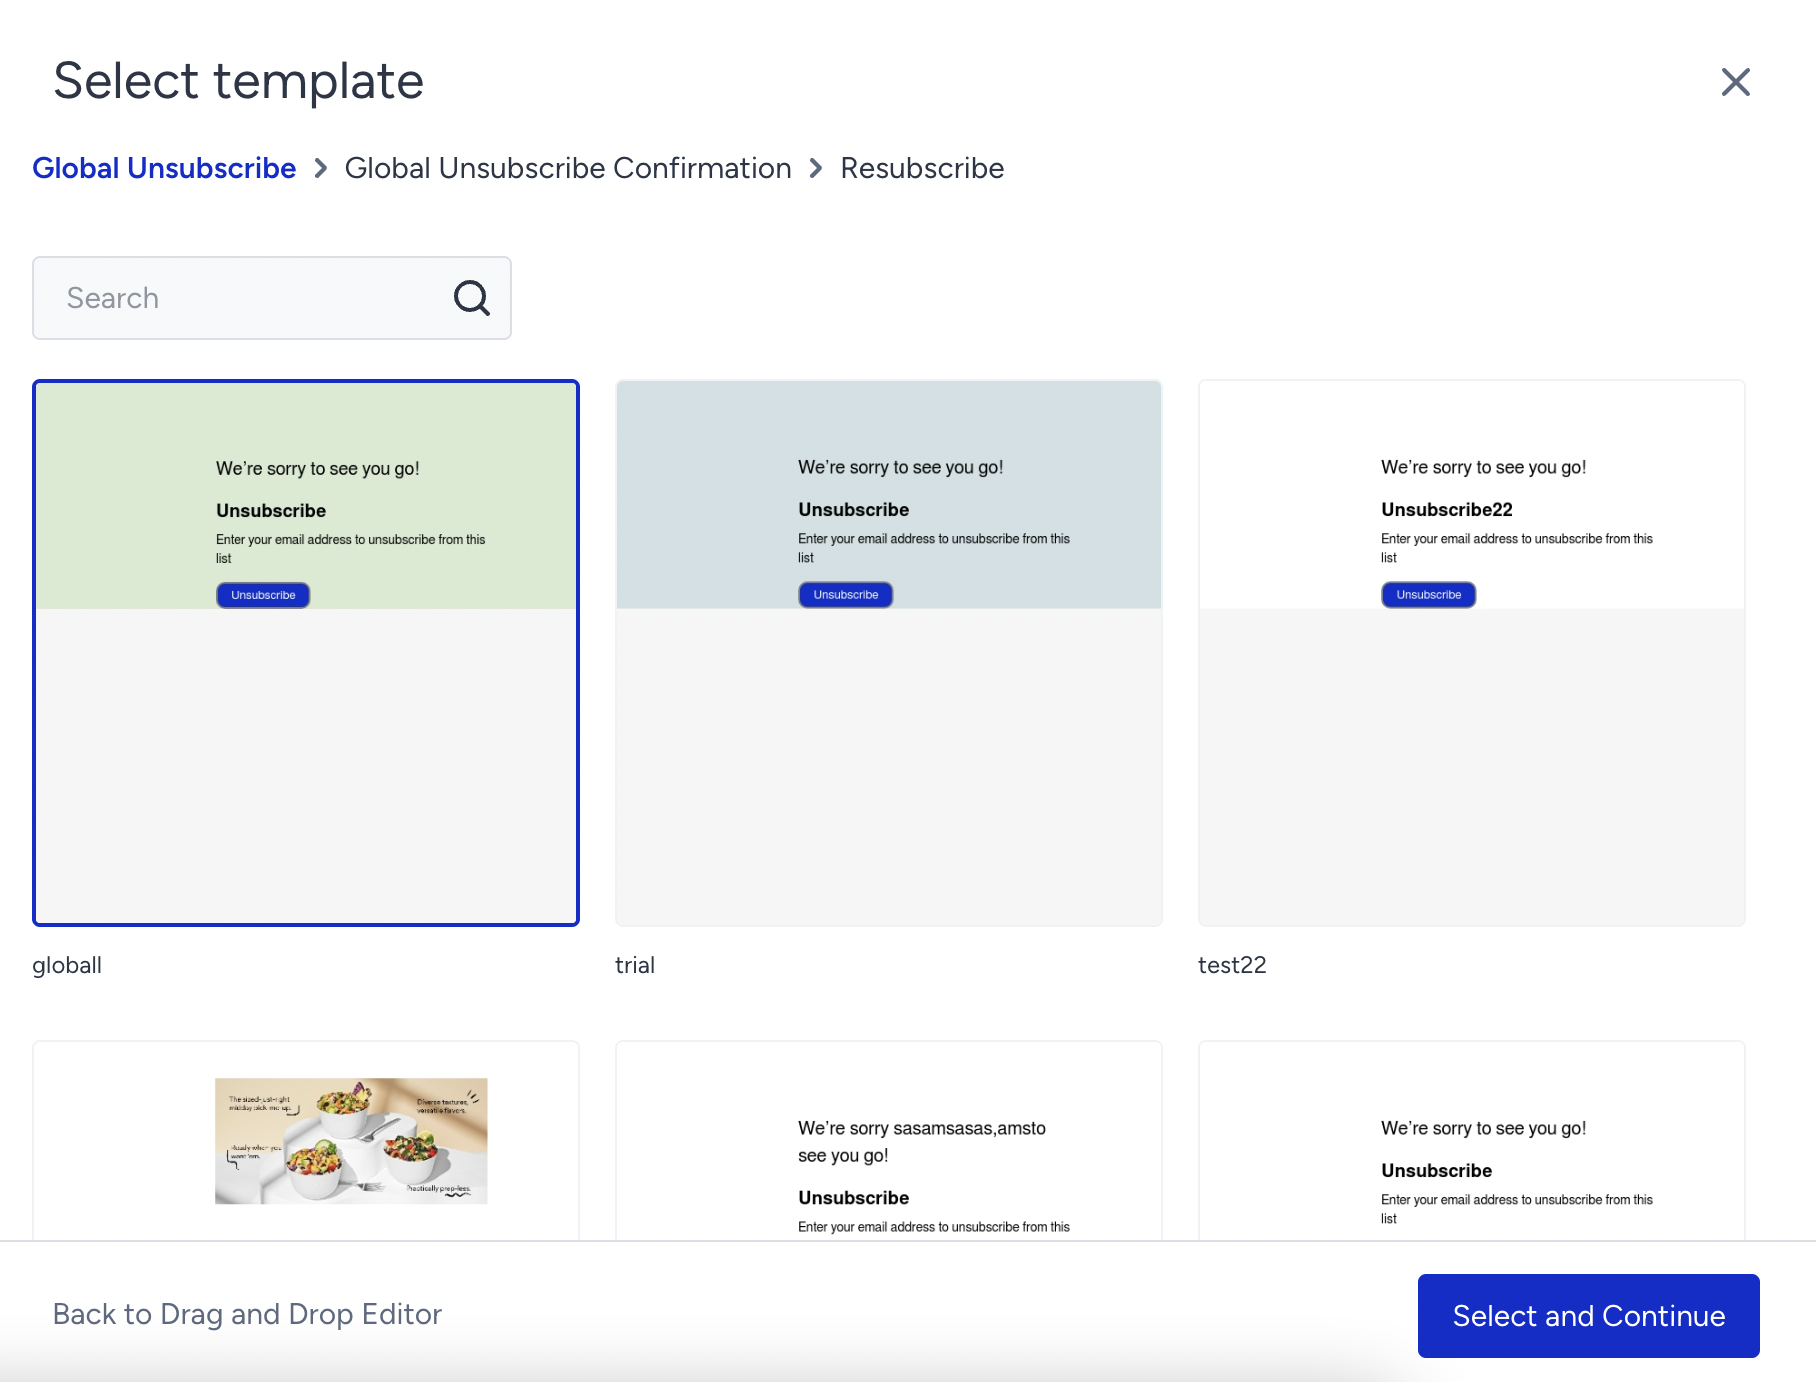
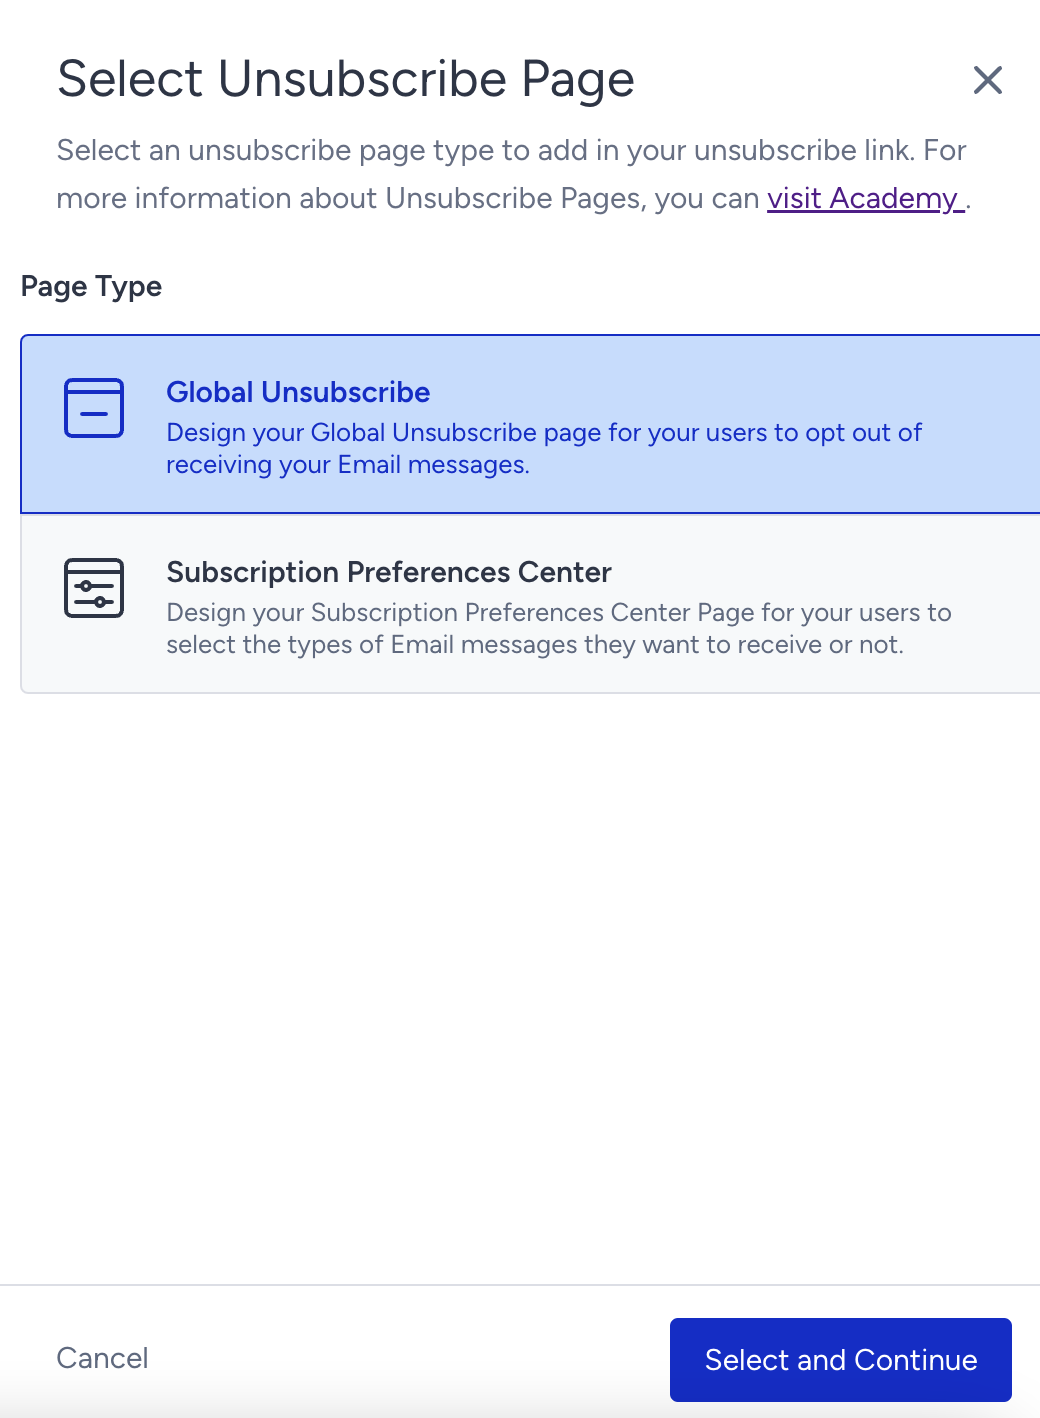
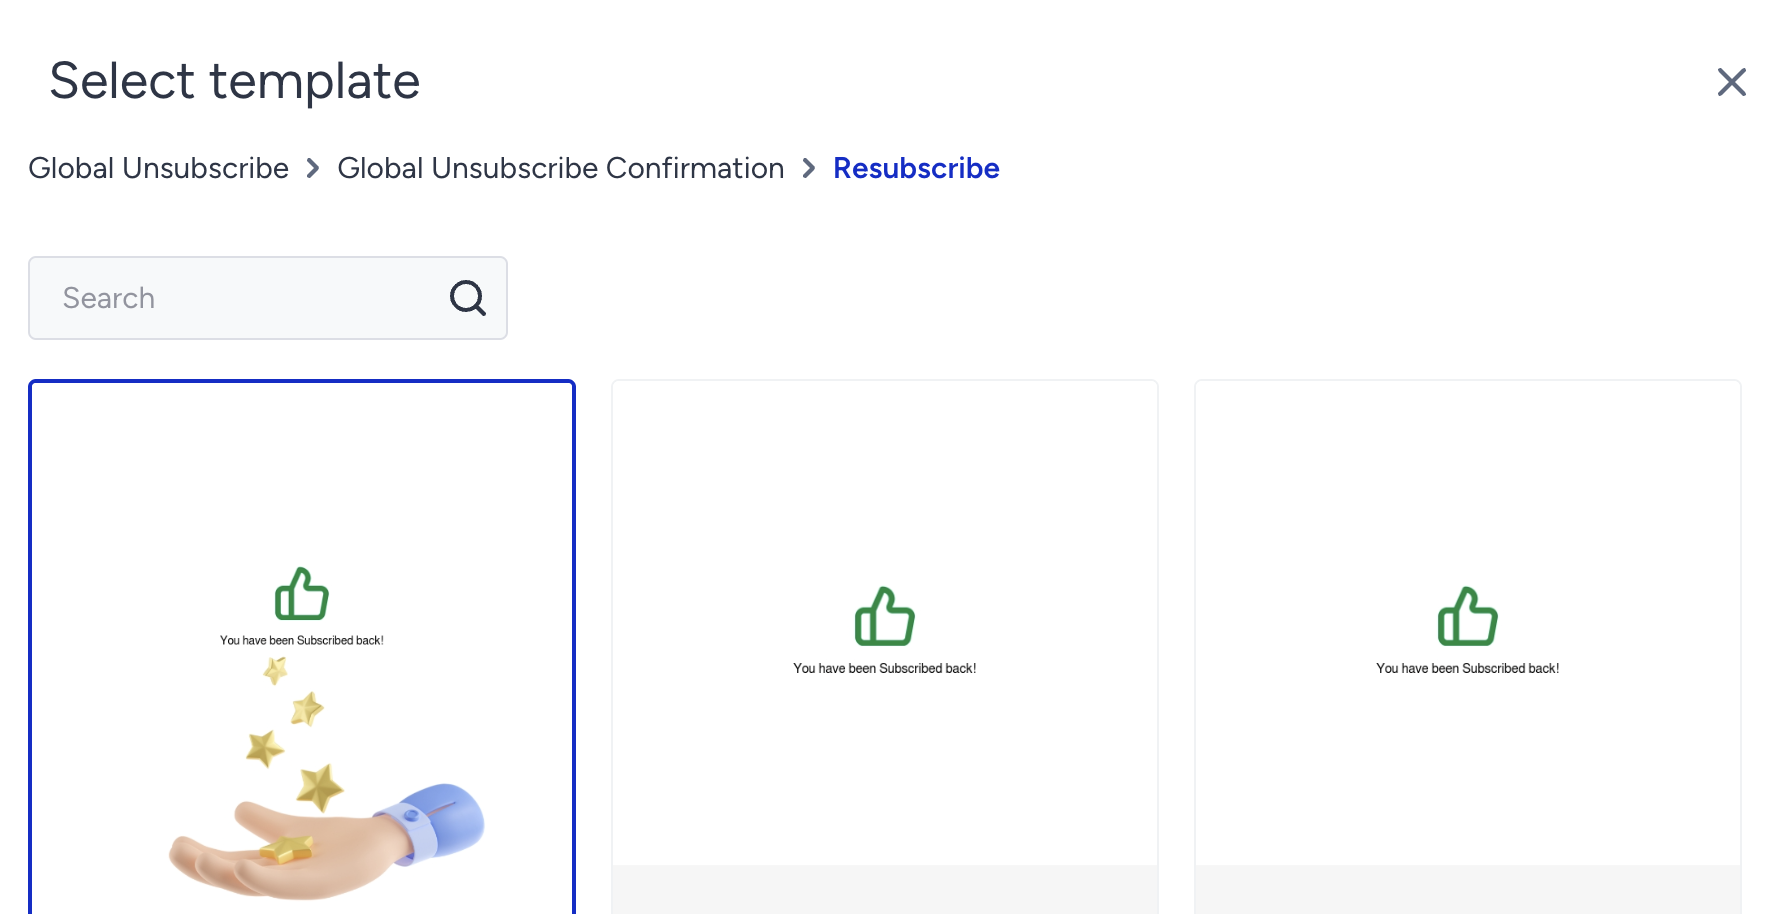
3. Select the page type you want to add, select one of the templates you created, and click the Select and Continue button.
4. Make sure to select one template from each and click the Select and Continue button.
5. Once the unsubscribe link is inserted, you can customize it per your email design. You can change its font properties, color, and position.
- When customizing the text, make sure you insert your desired unsubscribe text where the existing unsubscribe text is located. Based on your use case, you can add plain text before and/or after the custom unsubscribe text.
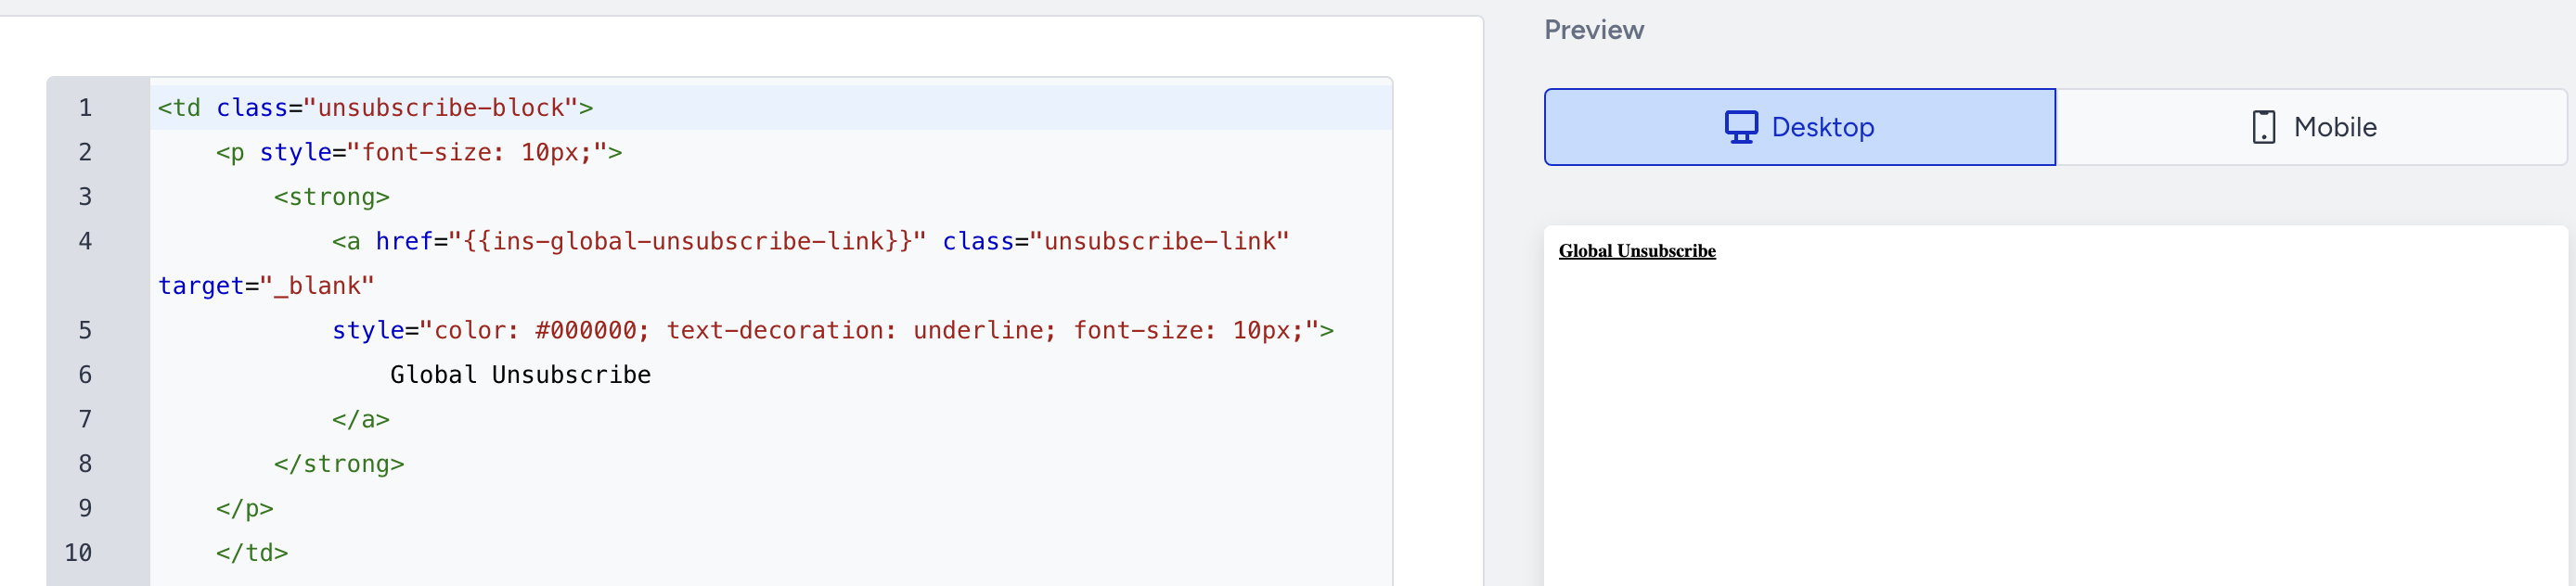
- Once your text is in place, open the HTML view of the block to confirm the required unsubscribe tags (the necessary parameters) are present. These tags are {{ins-global-unsubscribe-link}} for Global Unsubscribe and {{ins-preferences-unsubscribe-link}} for the Preference Center, and they allow the unsubscribe template to be read from your email template. If they're missing, the unsubscribe link won't work correctly.
- Always verify the unsubscribe tags in the HTML view before saving your design.
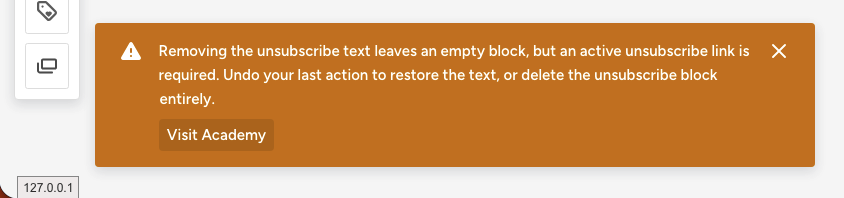
- The unsubscribe block connects your email to the unsubscribe page you select. If you delete the default unsubscribe text directly from the block, the unsubscribe page can no longer be linked to your template, leaving an empty block in your design. To resolve this, either undo your last action to restore the unsubscribe text or delete the unsubscribe block entirely. When this happens, you'll see the following message in the editor.
Add Custom Unsubscribe Pages in HTML Editor
To add custom unsubscribe pages to your email, you create via HTML Editor:
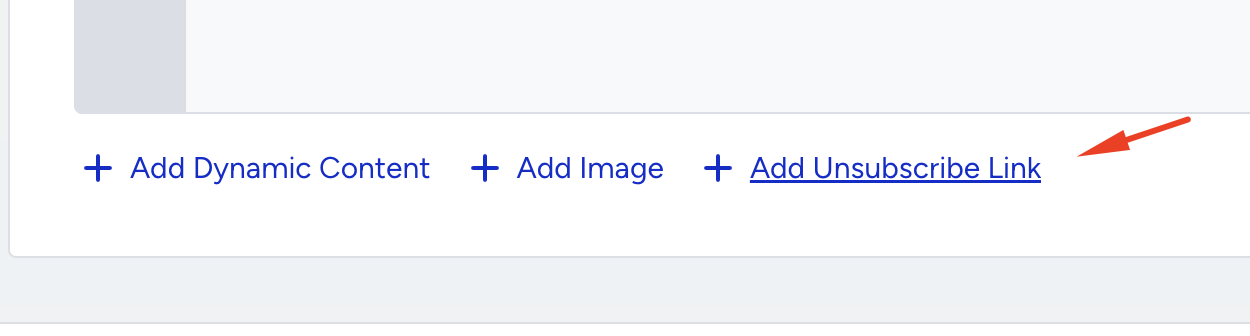
1. Go to the Design step of your email.
2. Click the Add Unsubscribe Link button at the bottom of the page.
3. Select the page type and click the Select and Continue button.
4. Select a template and click the Select and Continue button.
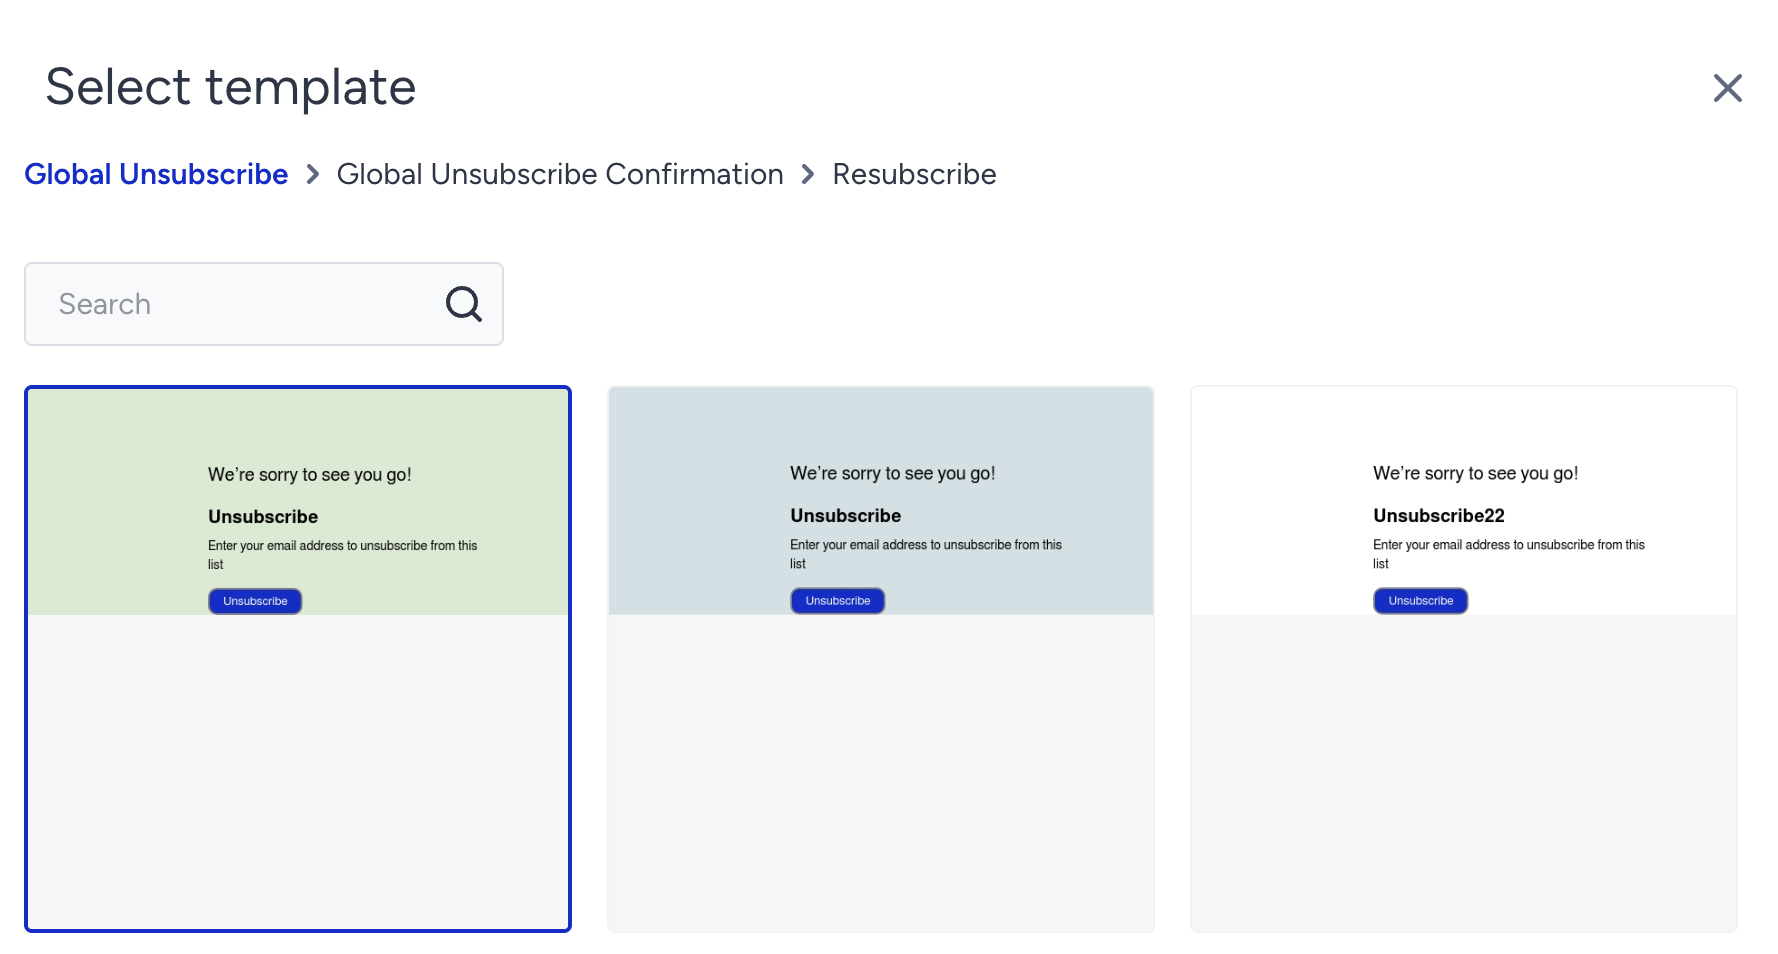
5. Select the confirmation template and click the Select and Continue button.
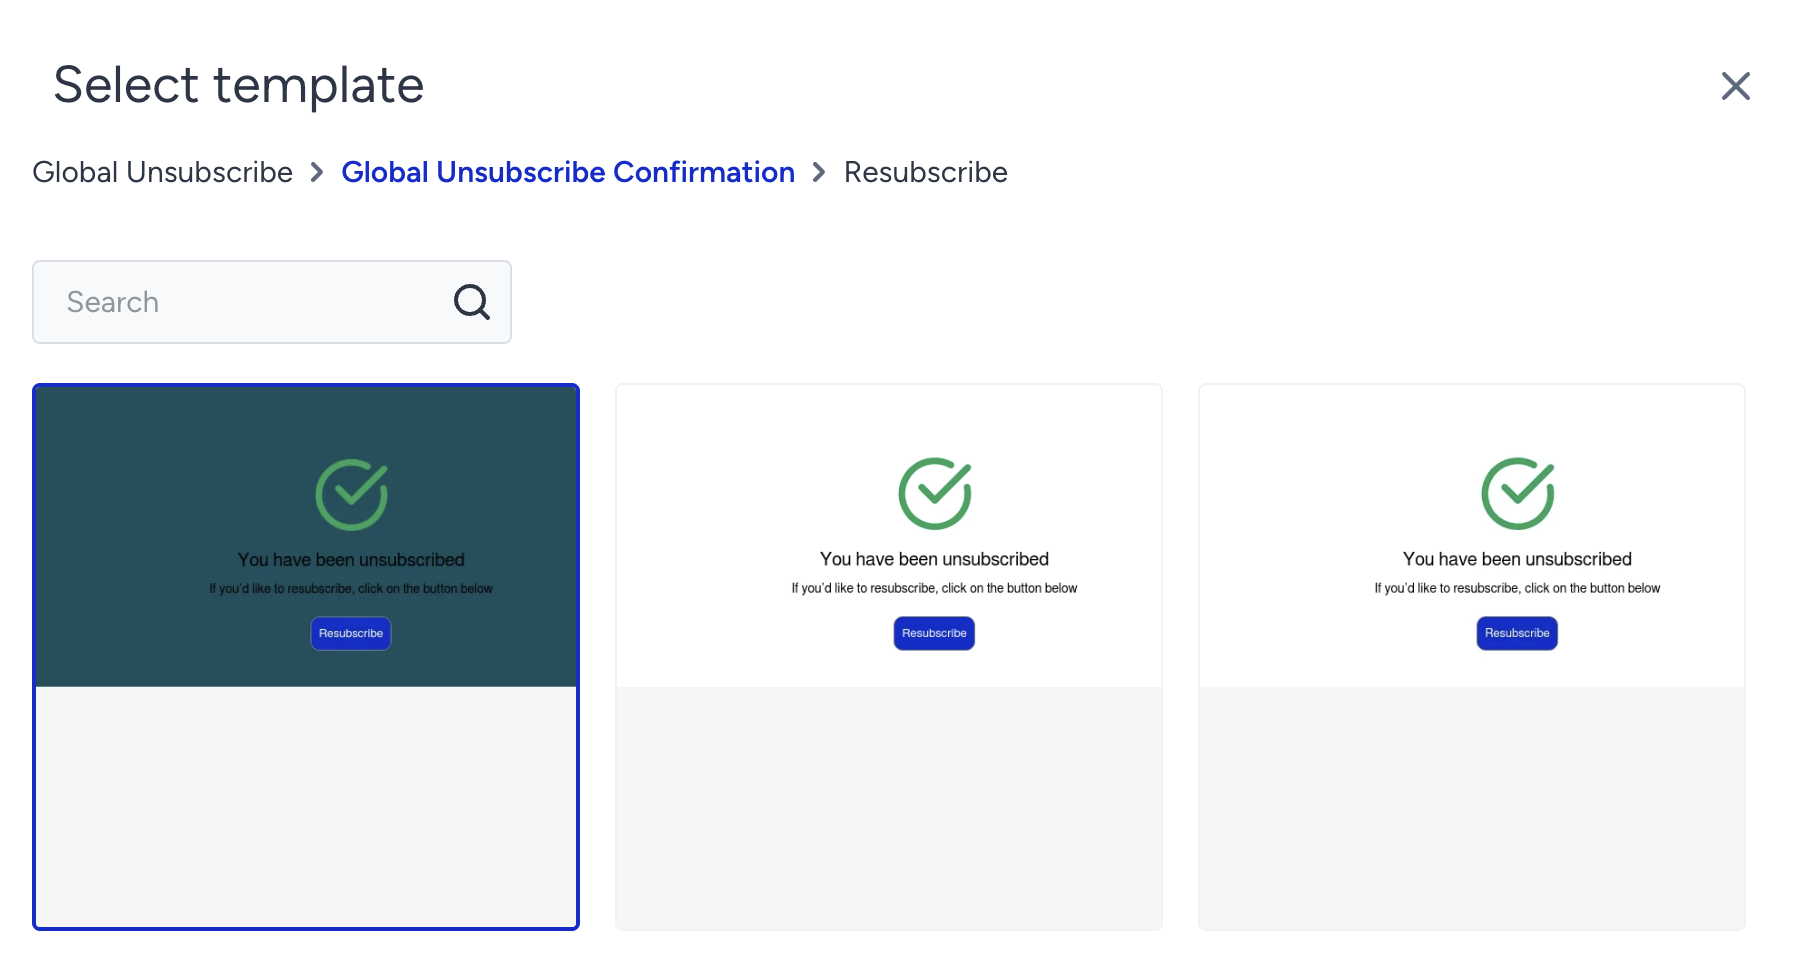
6. Select the resubscribe page and click the Apply button.
Once the unsubscribe page is added, you will see it in your HTML and the preview.
Video: Add unsubscribe pages to emails
See below for a step-by-step video showing how to add unsubscribe pages to your emails.
Change the Selected Unsubscribe Page
If you want to use another template:
1. Select the unsubscribe block in your email and click the Change Template button.
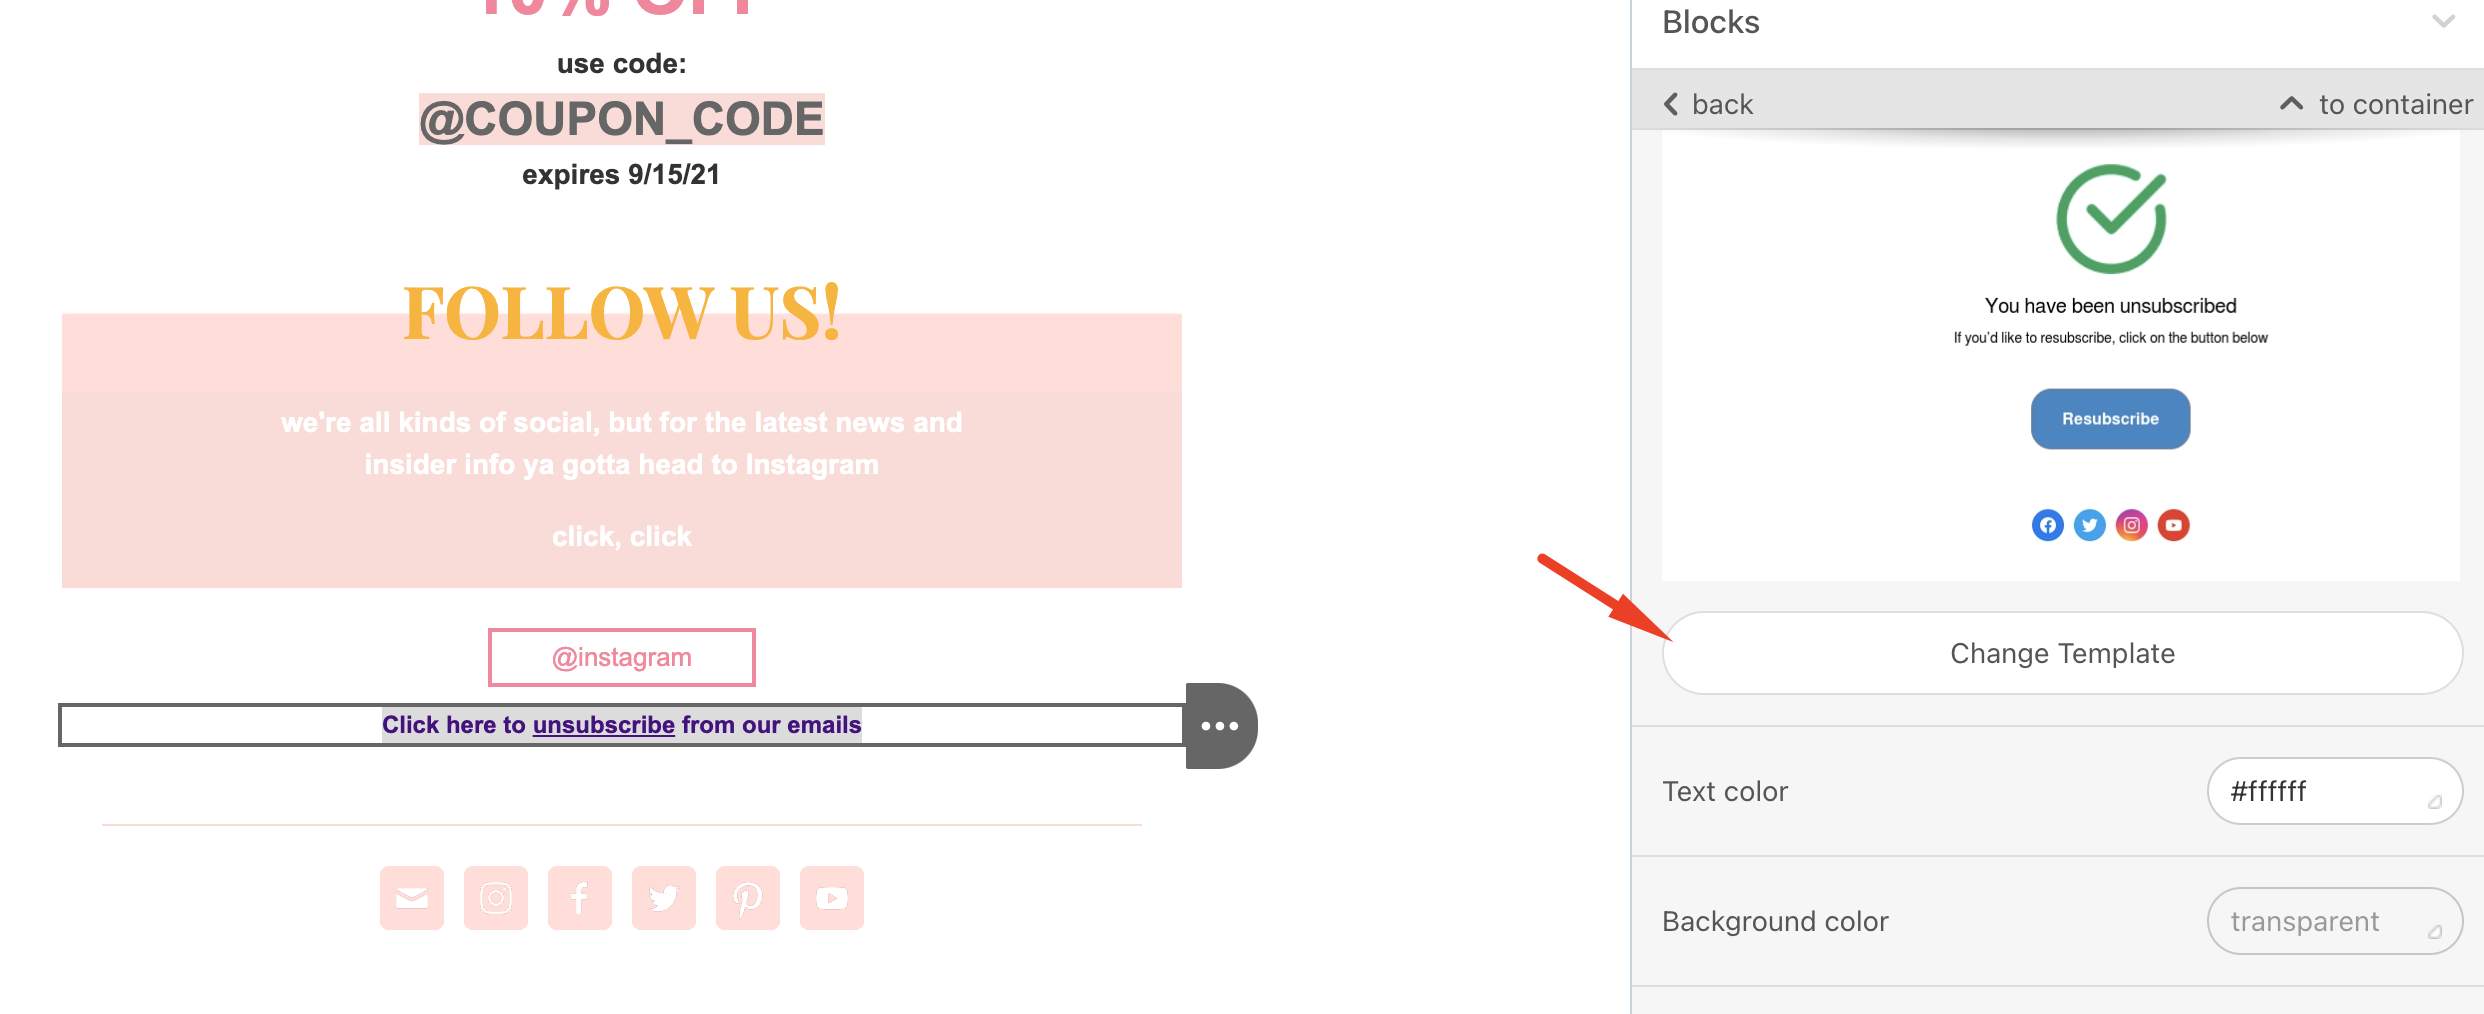
2. Select a template and click the Select button to proceed.
Video: Change unsubscribe pages in emails
See below for a step-by-step videos showing how to change the unsubscribe pages in your emails.