Suggested reading:
The Data Name Upload capability streamlines data setup by allowing you to upload your data lists in bulk. Instead of manually entering events, attributes, and parameters individually, you can upload your existing data structure within seconds. After the upload, you can quickly match your data with relevant use cases, making the setup process faster, easier, and more reliable. This capability is especially beneficial for partners who need to integrate extensive or pre-existing data structures efficiently.
Key benefits
Bulk Entry: Upload your full list of events, attributes, and parameters in a single step, significantly reducing manual workload.
Leverage Existing Data: Seamlessly import structured data lists from previous vendors, eliminating the need to re-enter information from scratch.
Built-in Validation: The system automatically validates your uploaded data to ensure accuracy before it is added to your plan.
The Data Name Upload process consists of these steps:
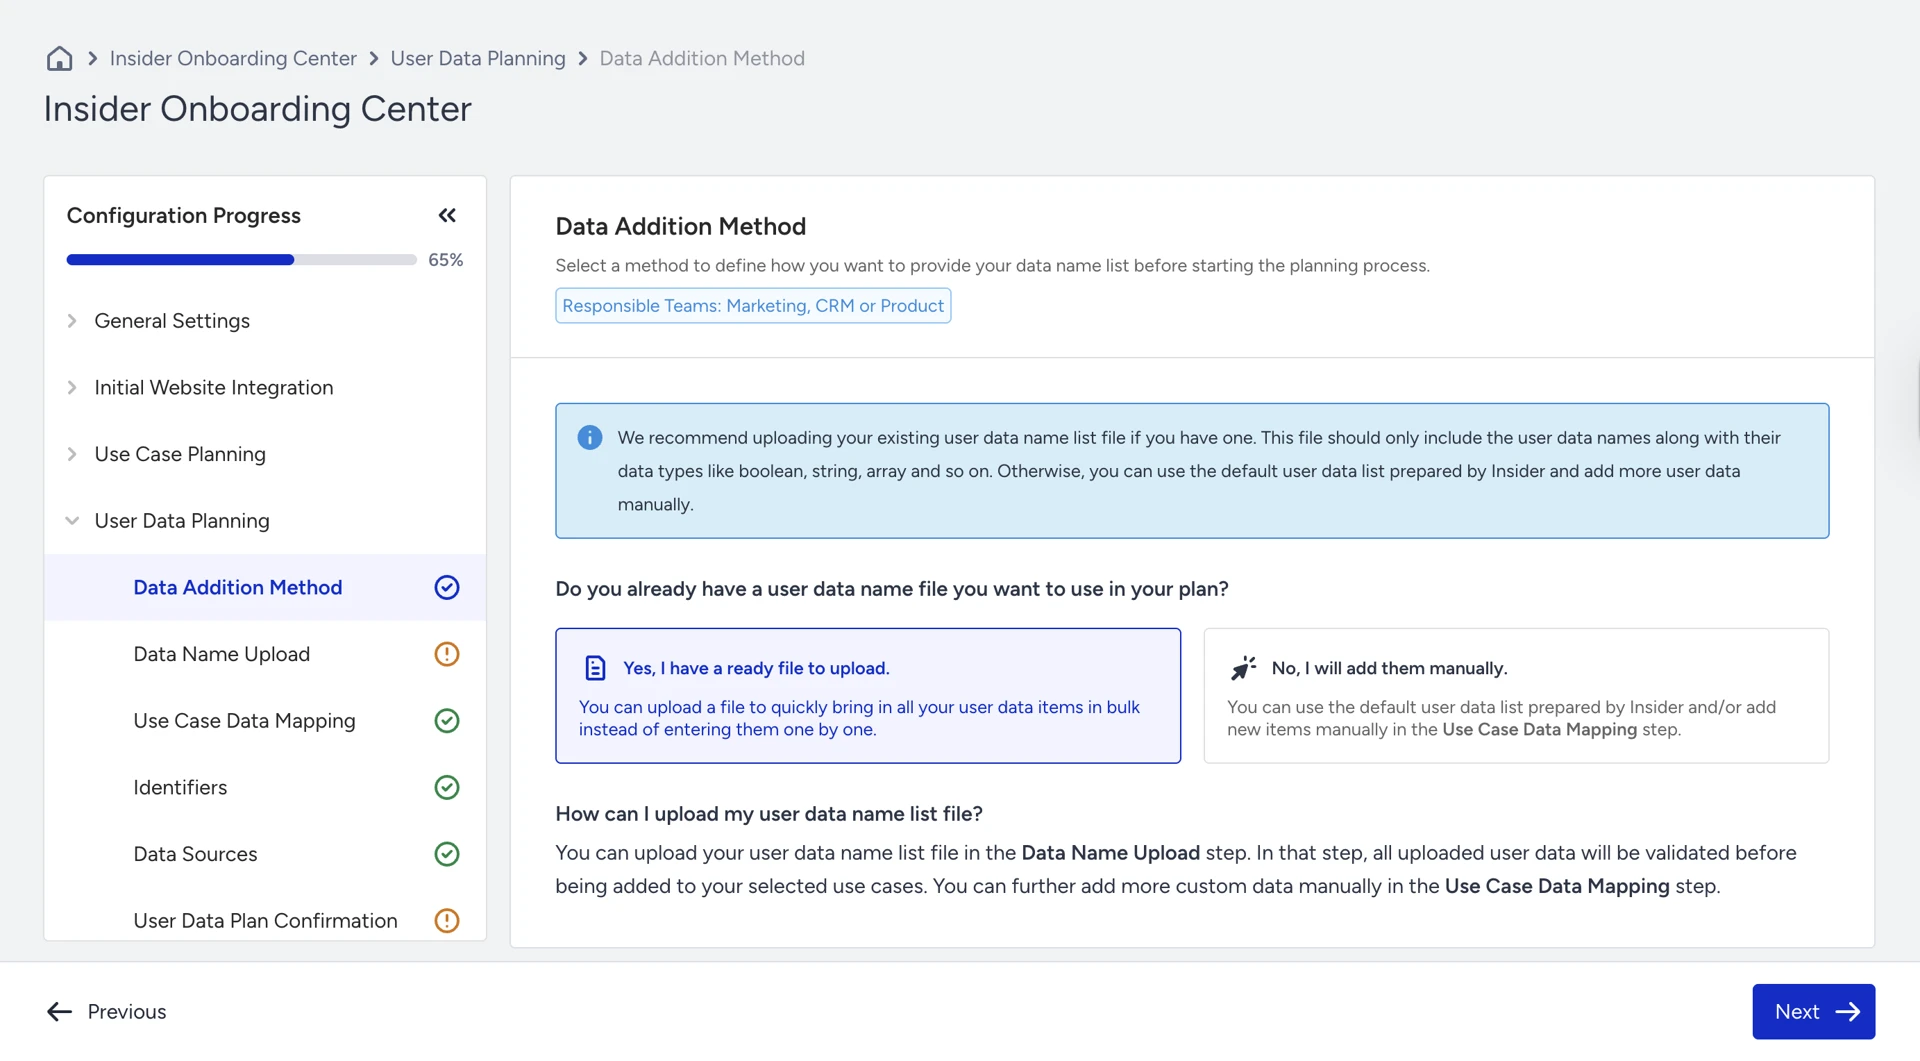
1. Data addition method
In this step, you can choose between two options: add your data manually or upload your data items in bulk.
If you have a file to upload, select the first option and click Yes. When you choose Yes, the Data Name Upload step will appear, allowing you to proceed with your bulk upload.
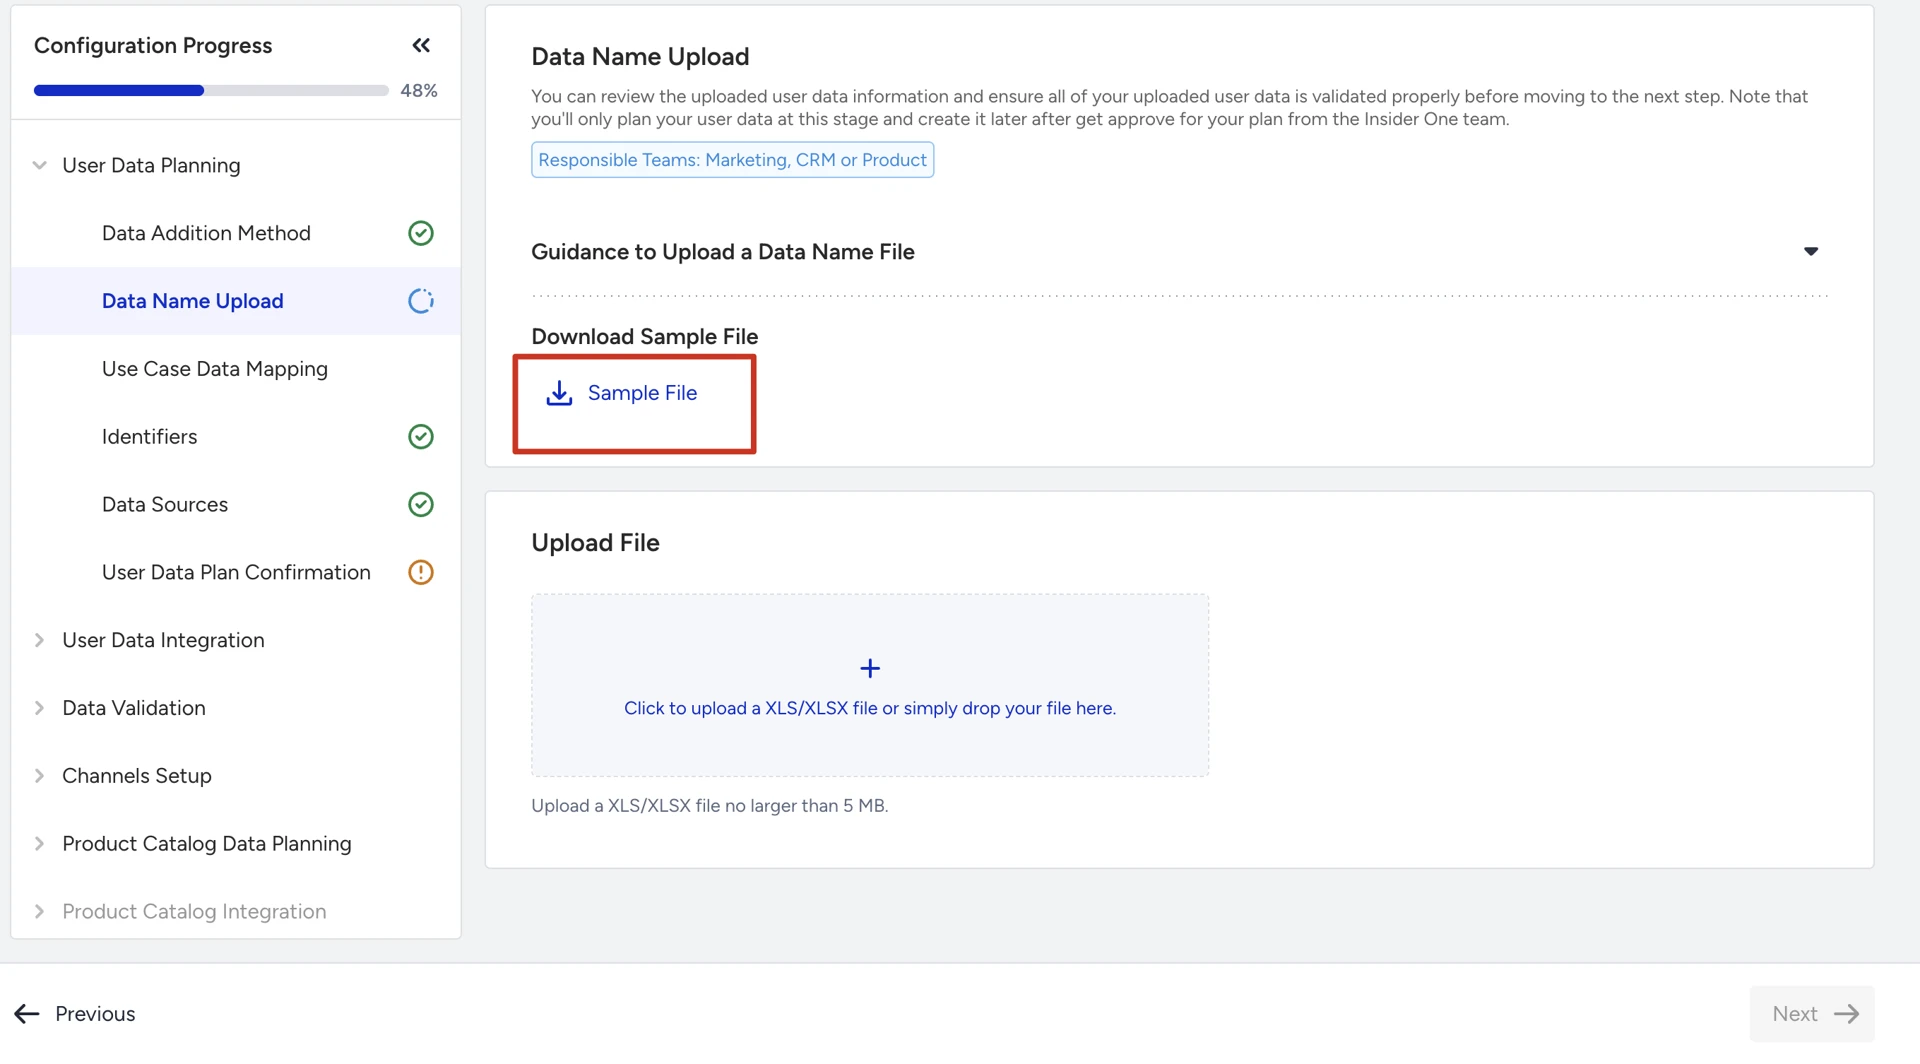
2. Upload the data
In this step, first, you need to download the sample file from here:
Then open the sample file in Excel or Google Sheets. After opening the file, you can easily copy and paste your data to match the current structure. For example:

When filling out the Events column, make sure to follow this formatting rule:
Every event parameter row must include the Event Name in the first column.
Even if multiple parameters belong to the same event, the event name must be repeated on each row, it cannot be left blank.
After you prepare the file, save it and upload it to the Onboarding Center.
Please note the following technical requirements and limitations while uploading the file:
File Format: Your file must be in the XLS or XLSX format.
File Size: The file should be no larger than 5 MB.
Row Limit: You cannot upload sheets that contain more than 2,500 rows.
Only the data types from the specified list are accepted.
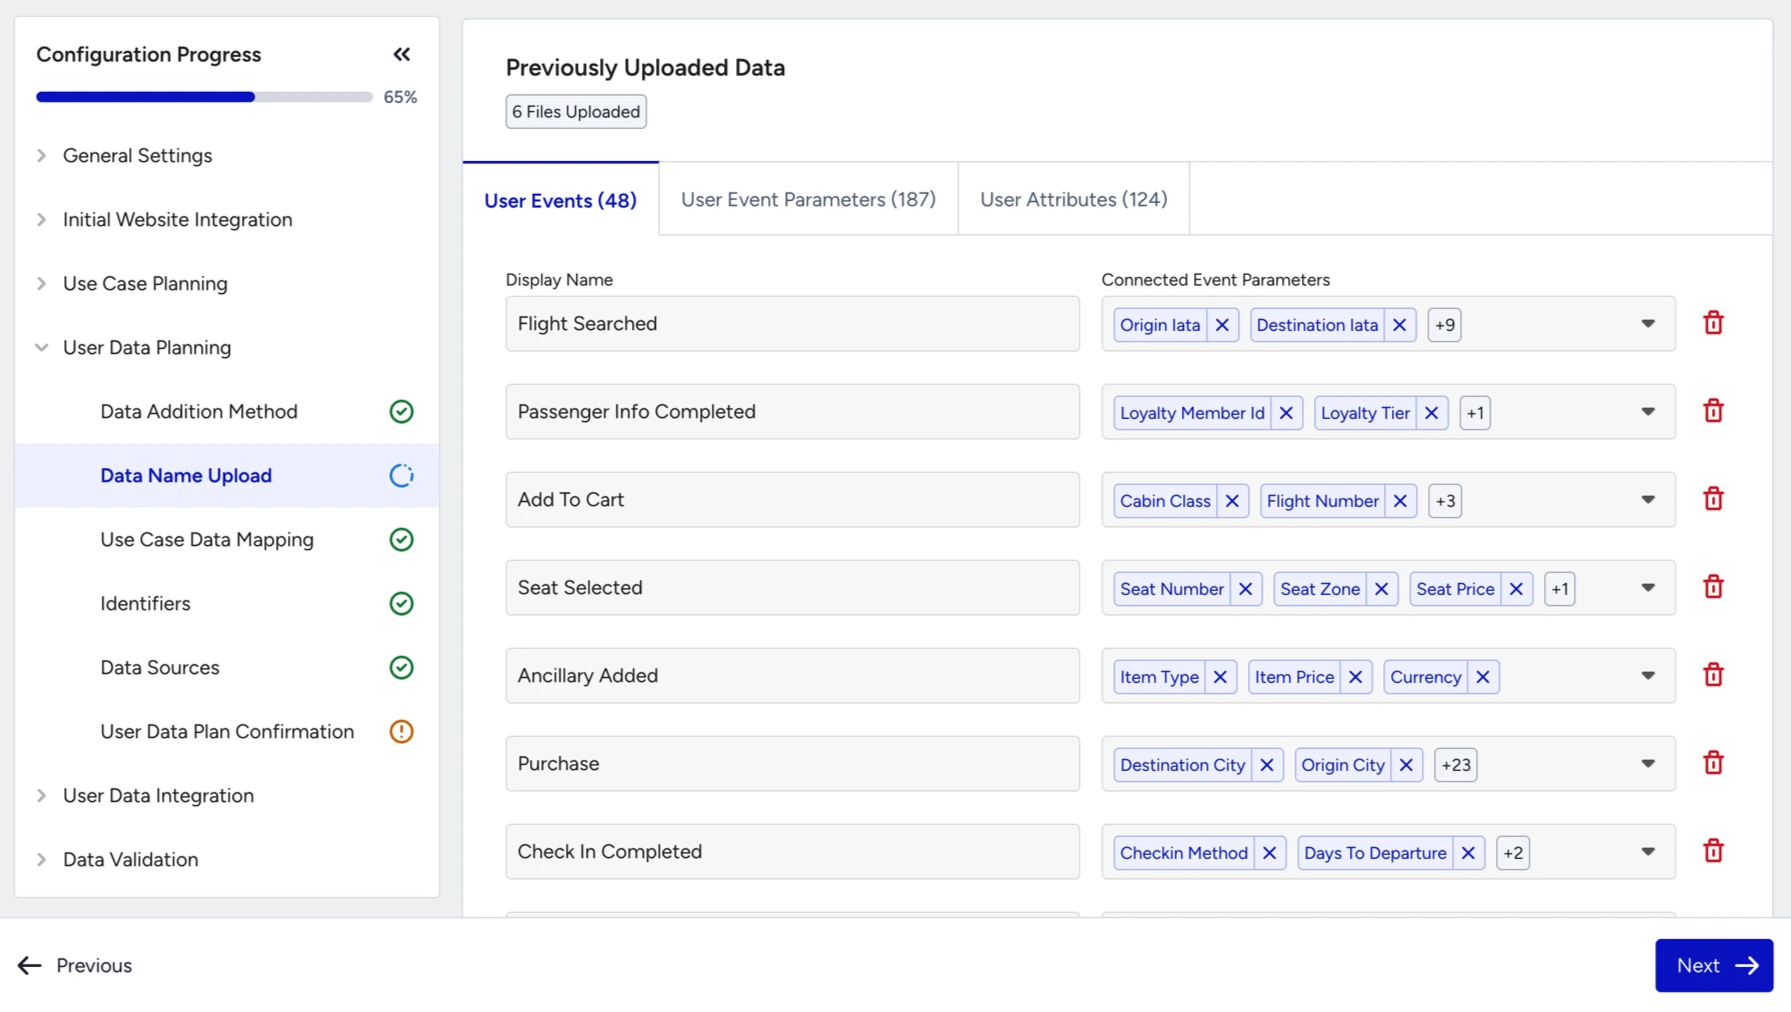
3. Review Uploaded Data
After you upload your file, the system displays your data for review and configuration across three tabs: User Events, User Event Parameters, and User Attributes. In this step, you must define the necessary details. If the name of the data is invalid, you’ll get an error, and you need to fix it before continuing to the next step.
In the next step, we recommend mapping your uploaded user data to your selected use cases to track key user actions for segmentation, personalized campaigns, and campaign performance tracking.
Use the filled sample file
For some industries, Insider One provides a pre-filled sample file in the data name upload step. This file includes recommended custom user data tailored to your industry, giving you a ready-to-use starting point for your User Data Plan. You can use the suggestions as-is, modify them to fit your needs, or upload the file directly to the Onboarding Center.
