User Data Planning is a structured tool that helps you define, organize, and validate the data you need based on your business objectives, use cases, industry, and the Insider One products you plan to activate. With this tool, you can:
Ensure complete data coverage by identifying all required data points upfront, reducing the risk of missing critical information later in your integration process.
Maintain consistent naming conventions across data sources to improve data quality and cross-team alignment.
Collaborate seamlessly with Marketing, CRM, IT, agencies, and Insider One teams by providing a unified reference for required data.
Streamline data integration and testing using automated guidance and customized wizards tailored to your selected use cases and product requirements.
It consists of the following steps:
Data addition method
Selecting business objectives
Selecting the default provided use cases or creating custom use cases for your business needs
Uploading the data
Setting data requirements or reviewing the default user data requirements of selected default use cases
Selecting data sources for defined user data
Selecting identifiers for identifying and unifying users
Confirming the plan after reviewing the data list
At the end, you have a list of required user events, event parameters, attributes, as well as the list of use cases you selected or created.
Note that User Data Planning does not include product catalog data requirements. You can use Product Catalog Data Planning in the Insider Onboarding Center for product catalog data.
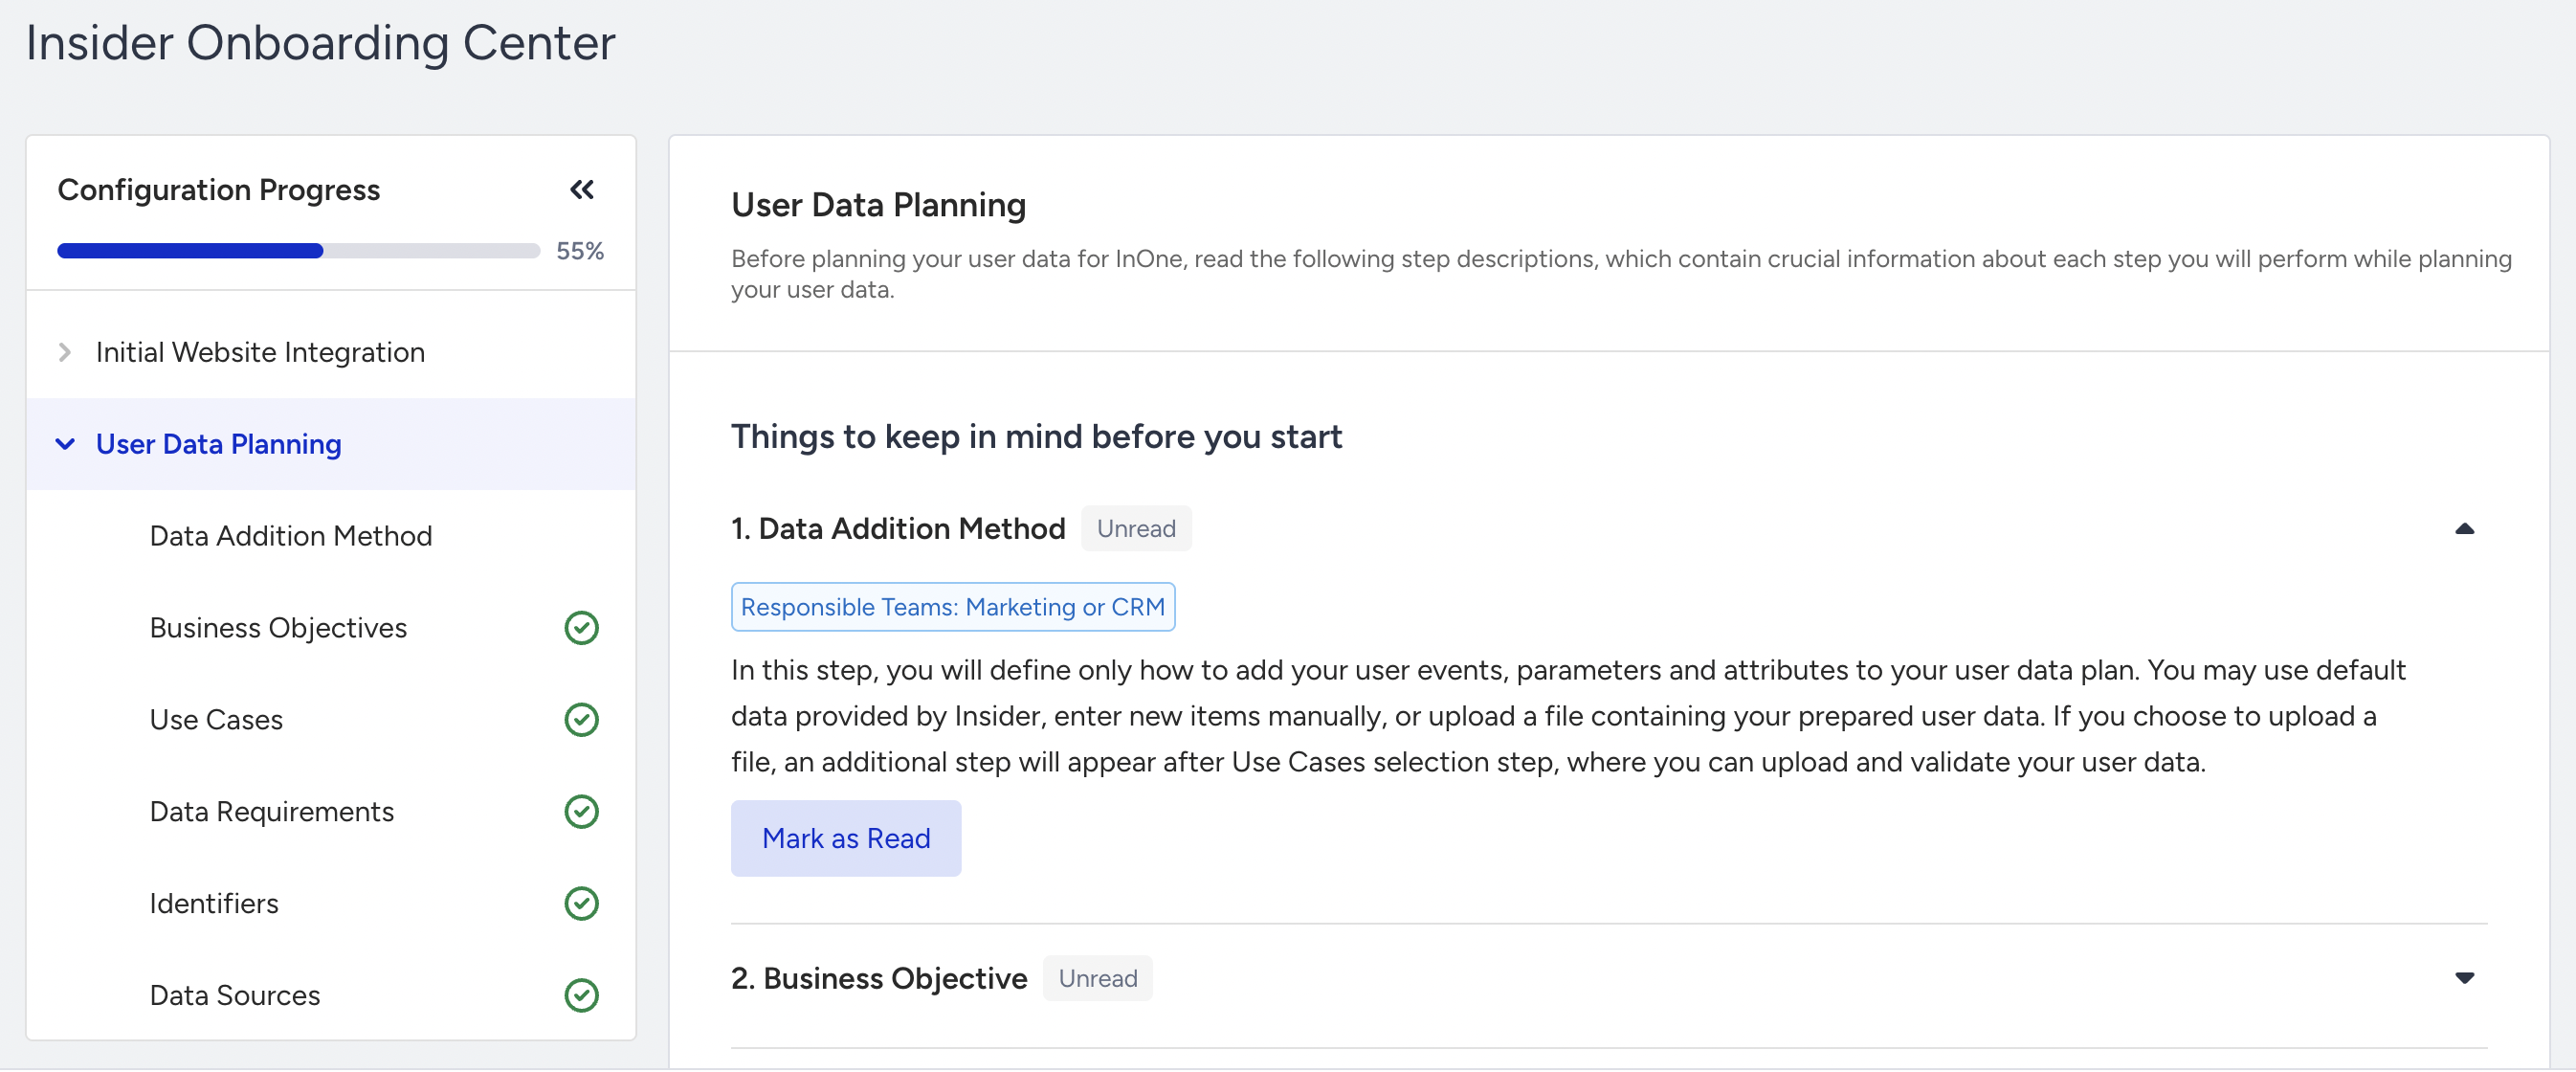
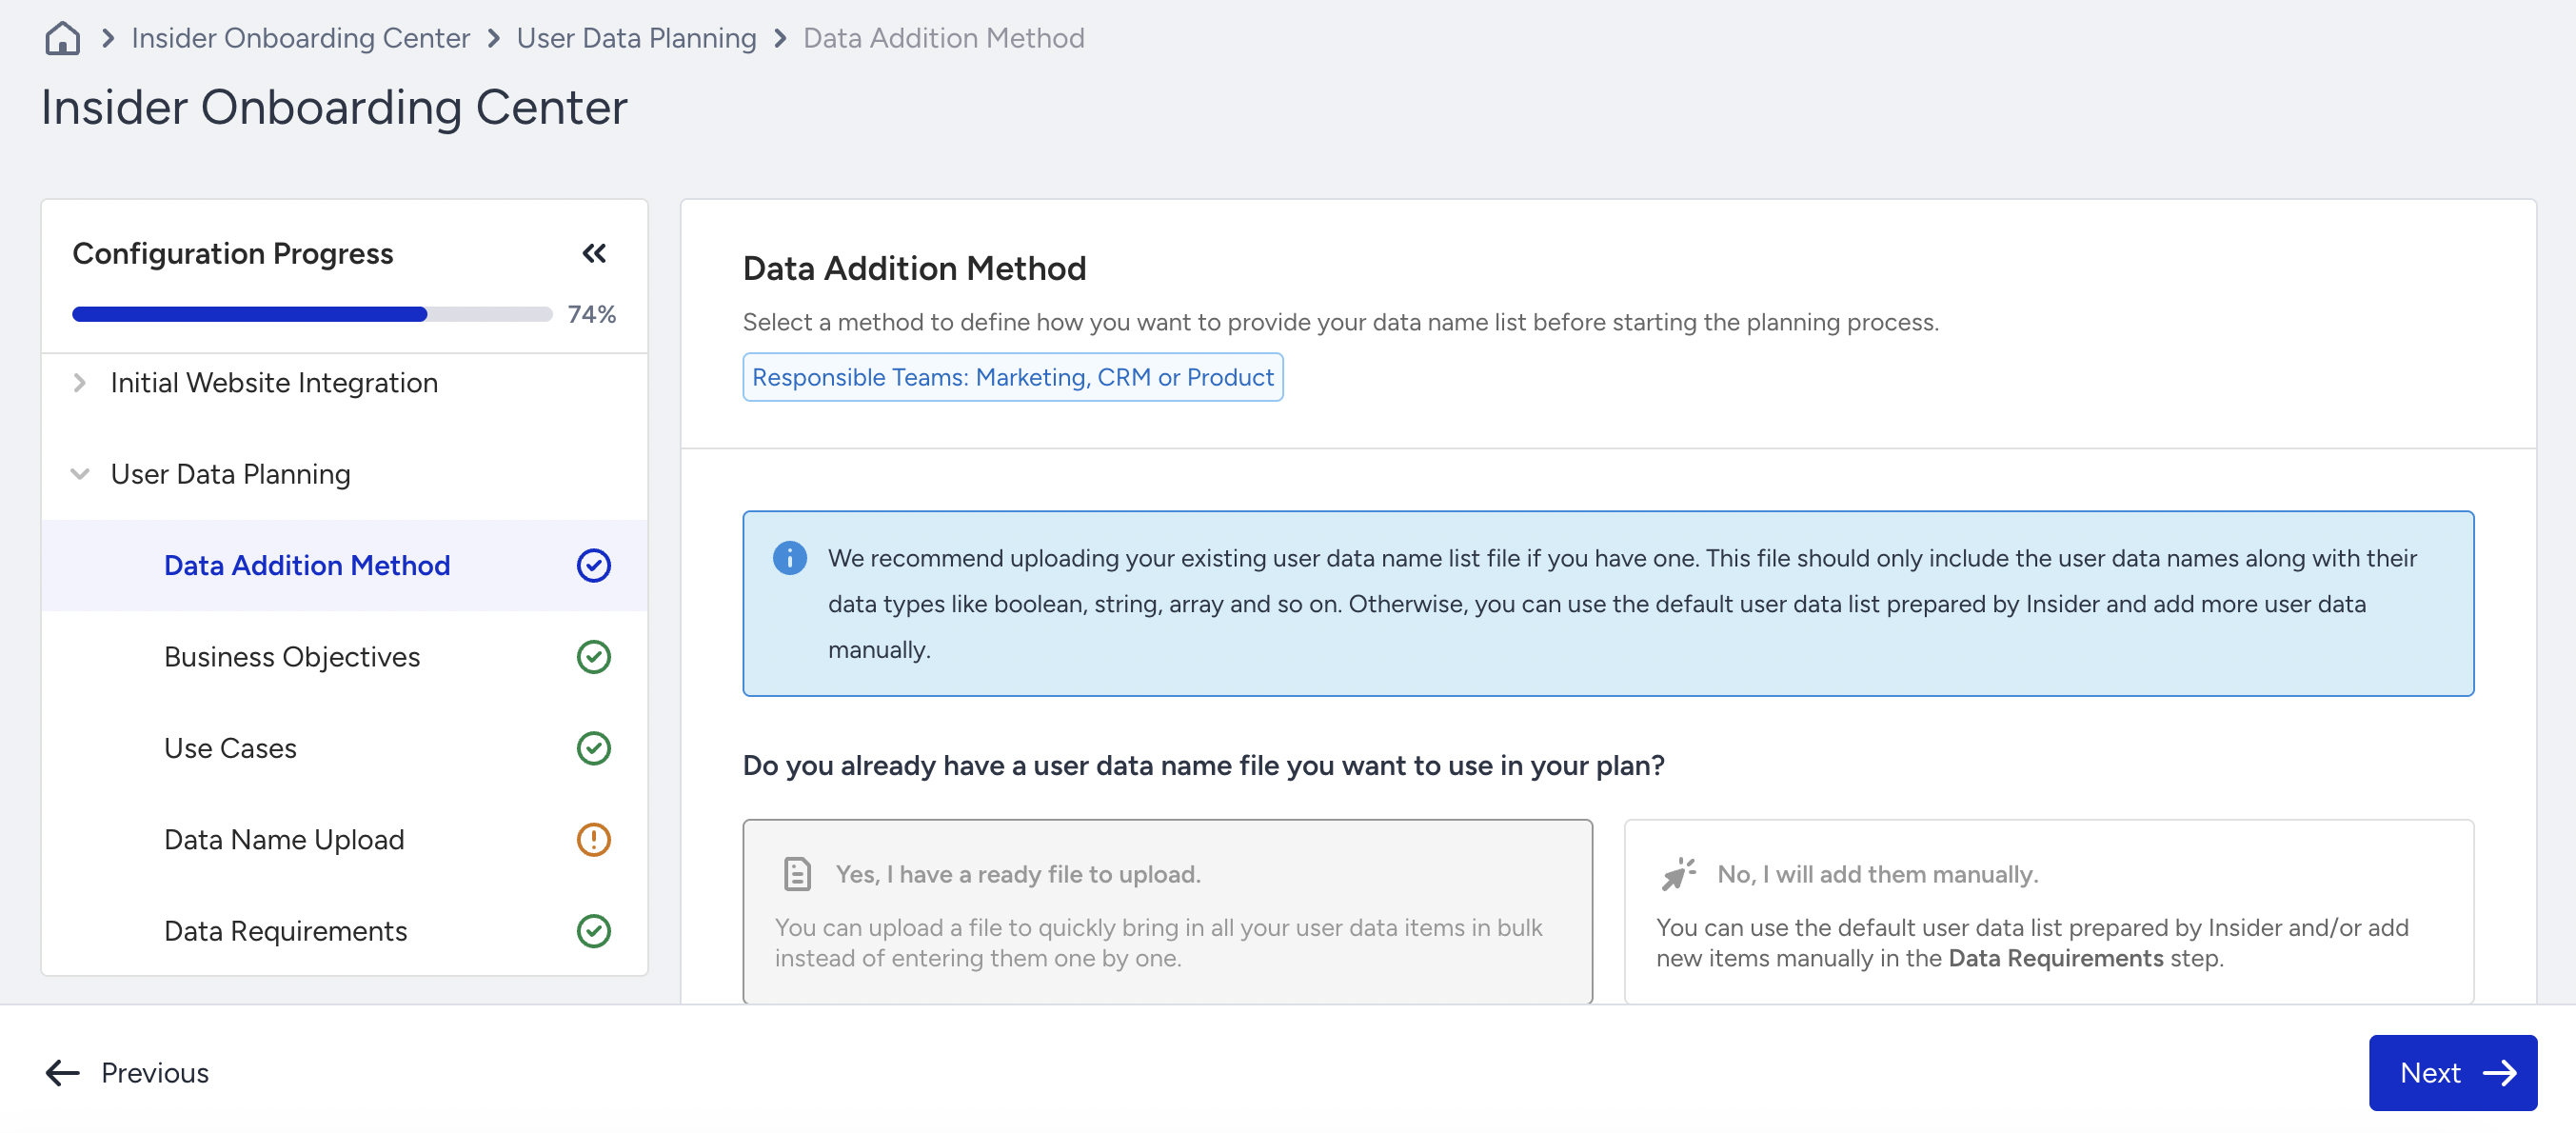
1. Data Addition Method
Select a method to define how you want to provide your data name list before starting the planning process.
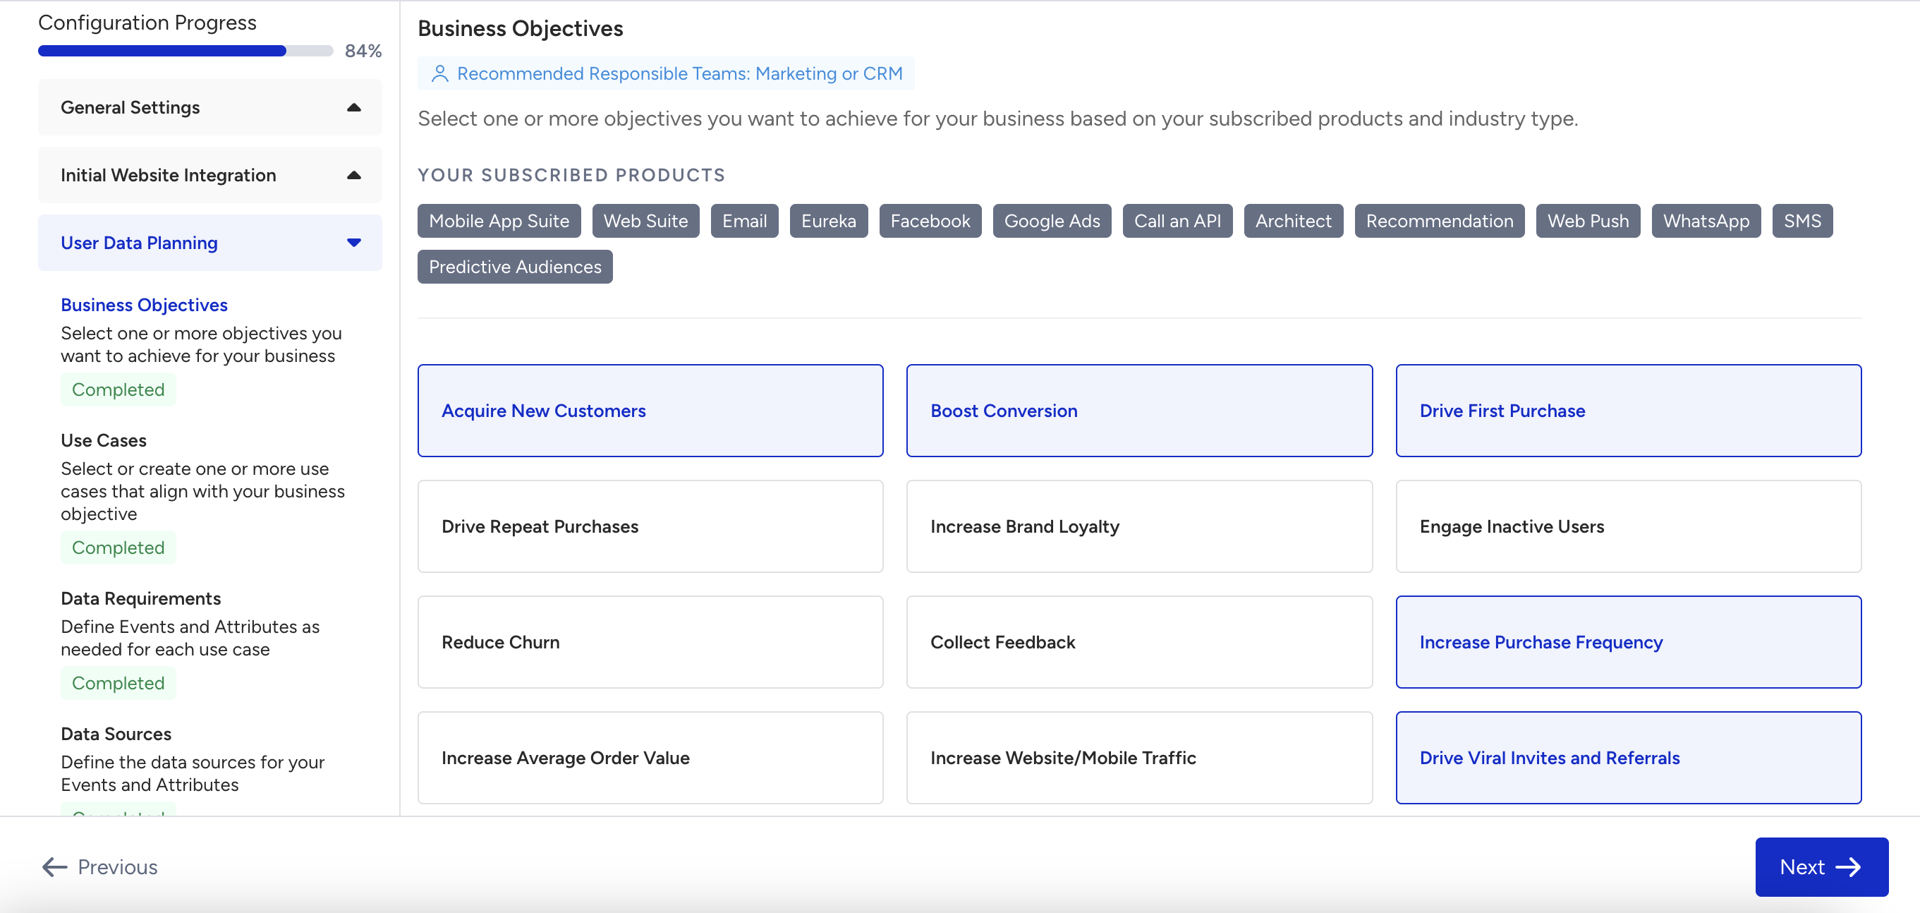
2. Business Objectives
Select one or more objectives you want to achieve for your business based on your subscribed products and industry type. Based on the selections, recommended use cases will be shown on the next page.
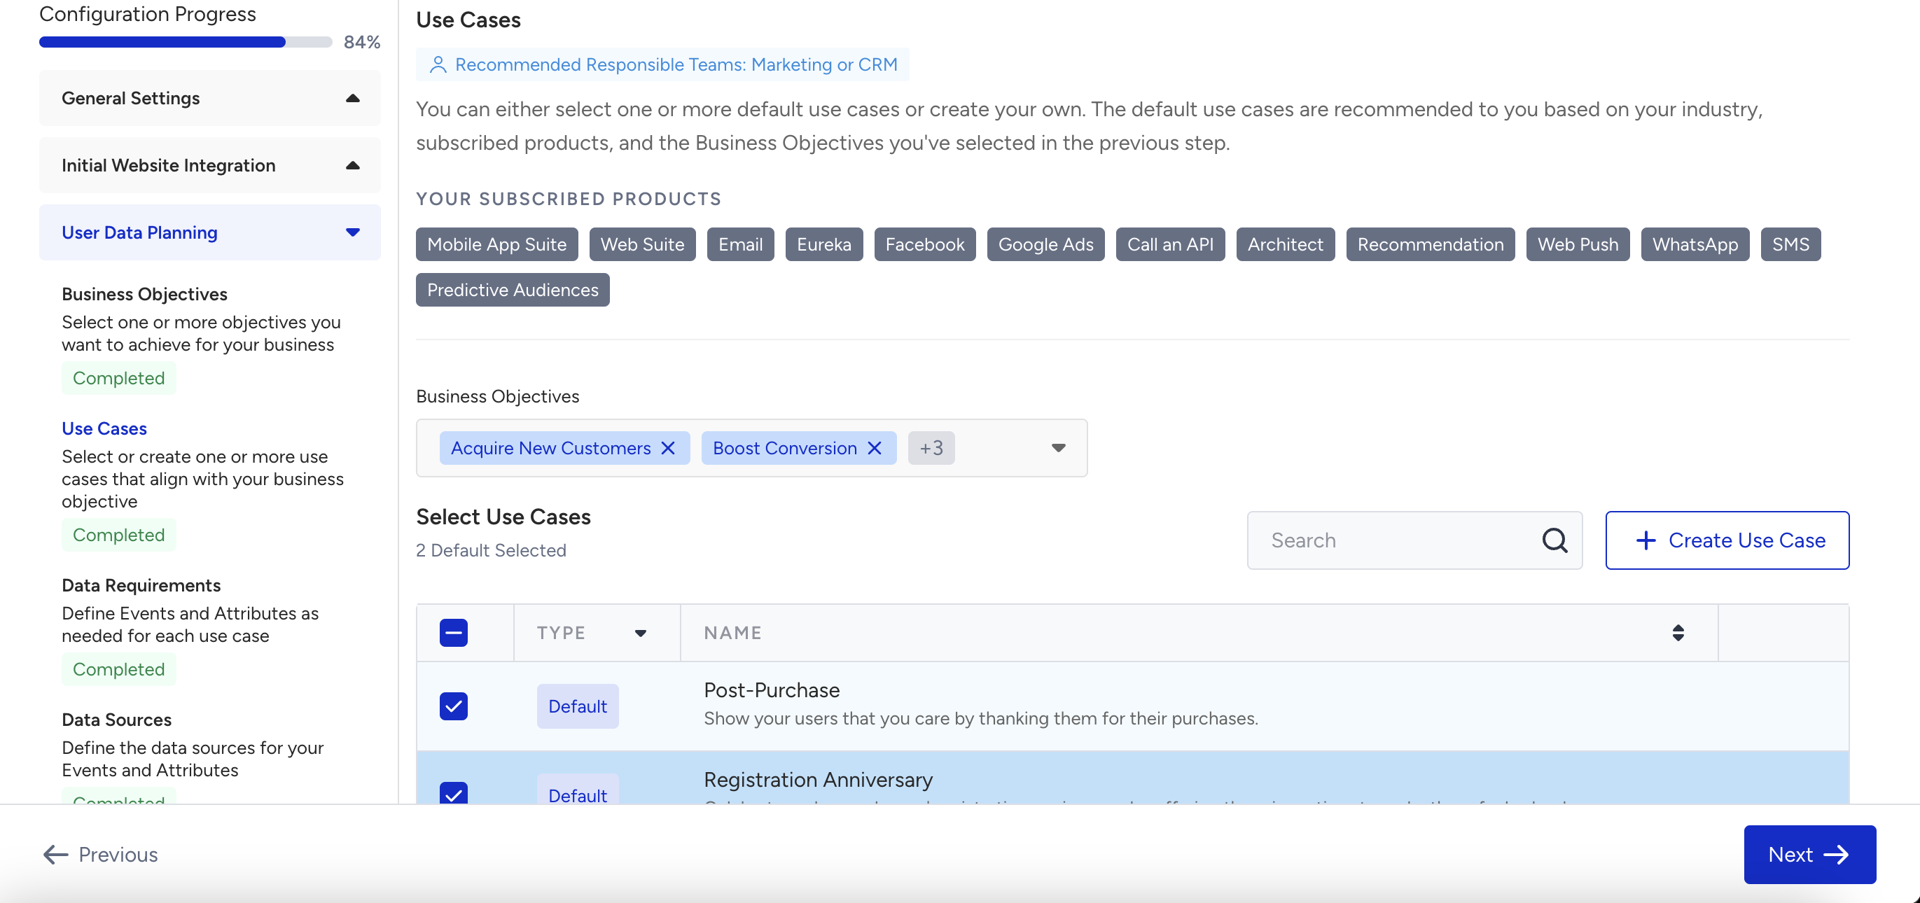
3. Use Cases
You can either select default use cases or create your own. The default use cases are recommended based on your industry, subscribed products, and the business objectives you selected in the previous step.
You can enter the use case name and description to create a custom use case.
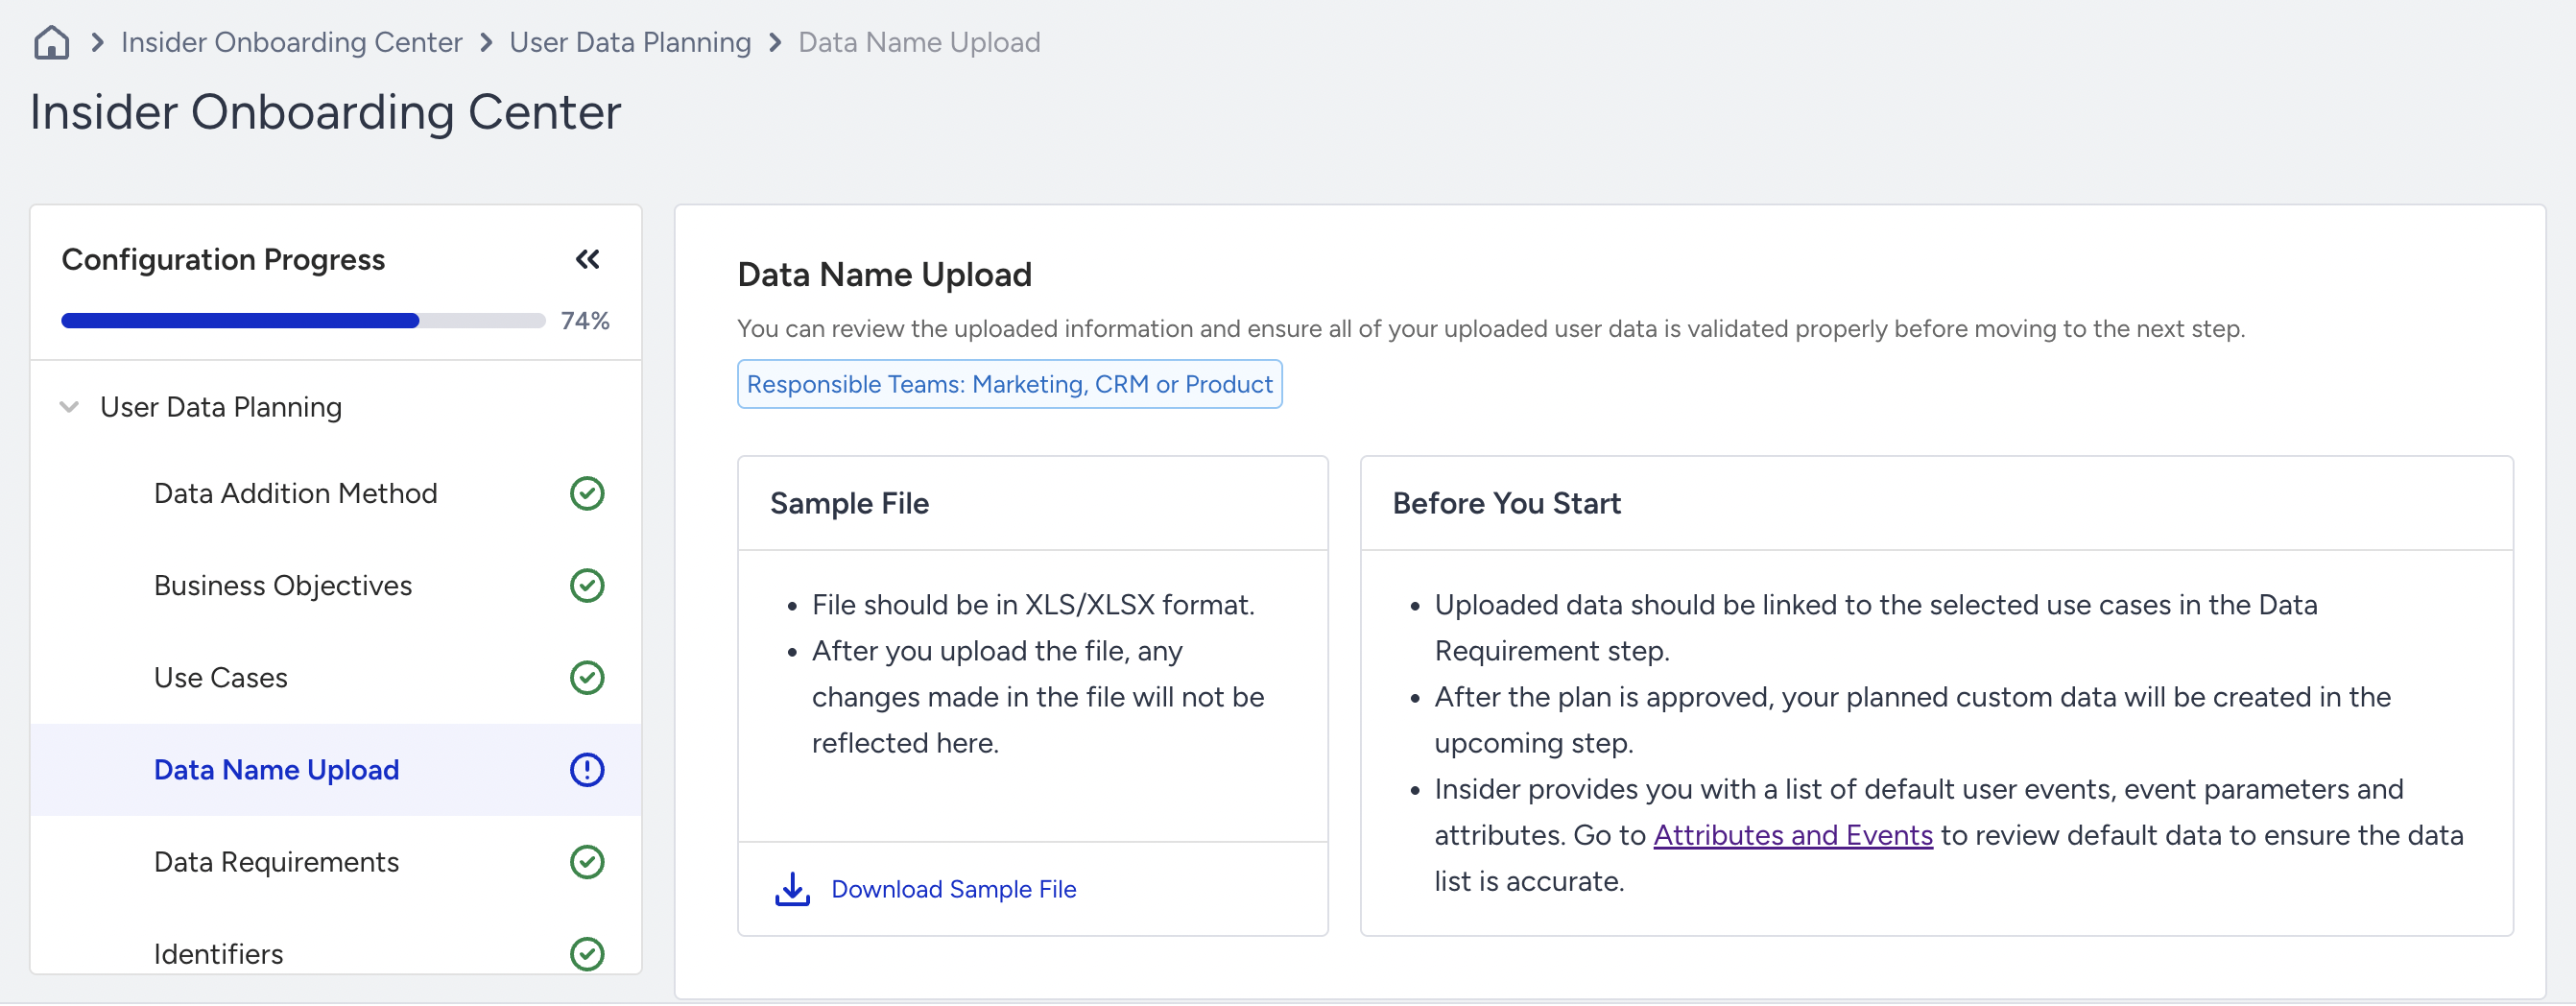
4. Data Name Upload
In this step, you can upload your ready dataset easily. Refer to Data Name Upload for further details.
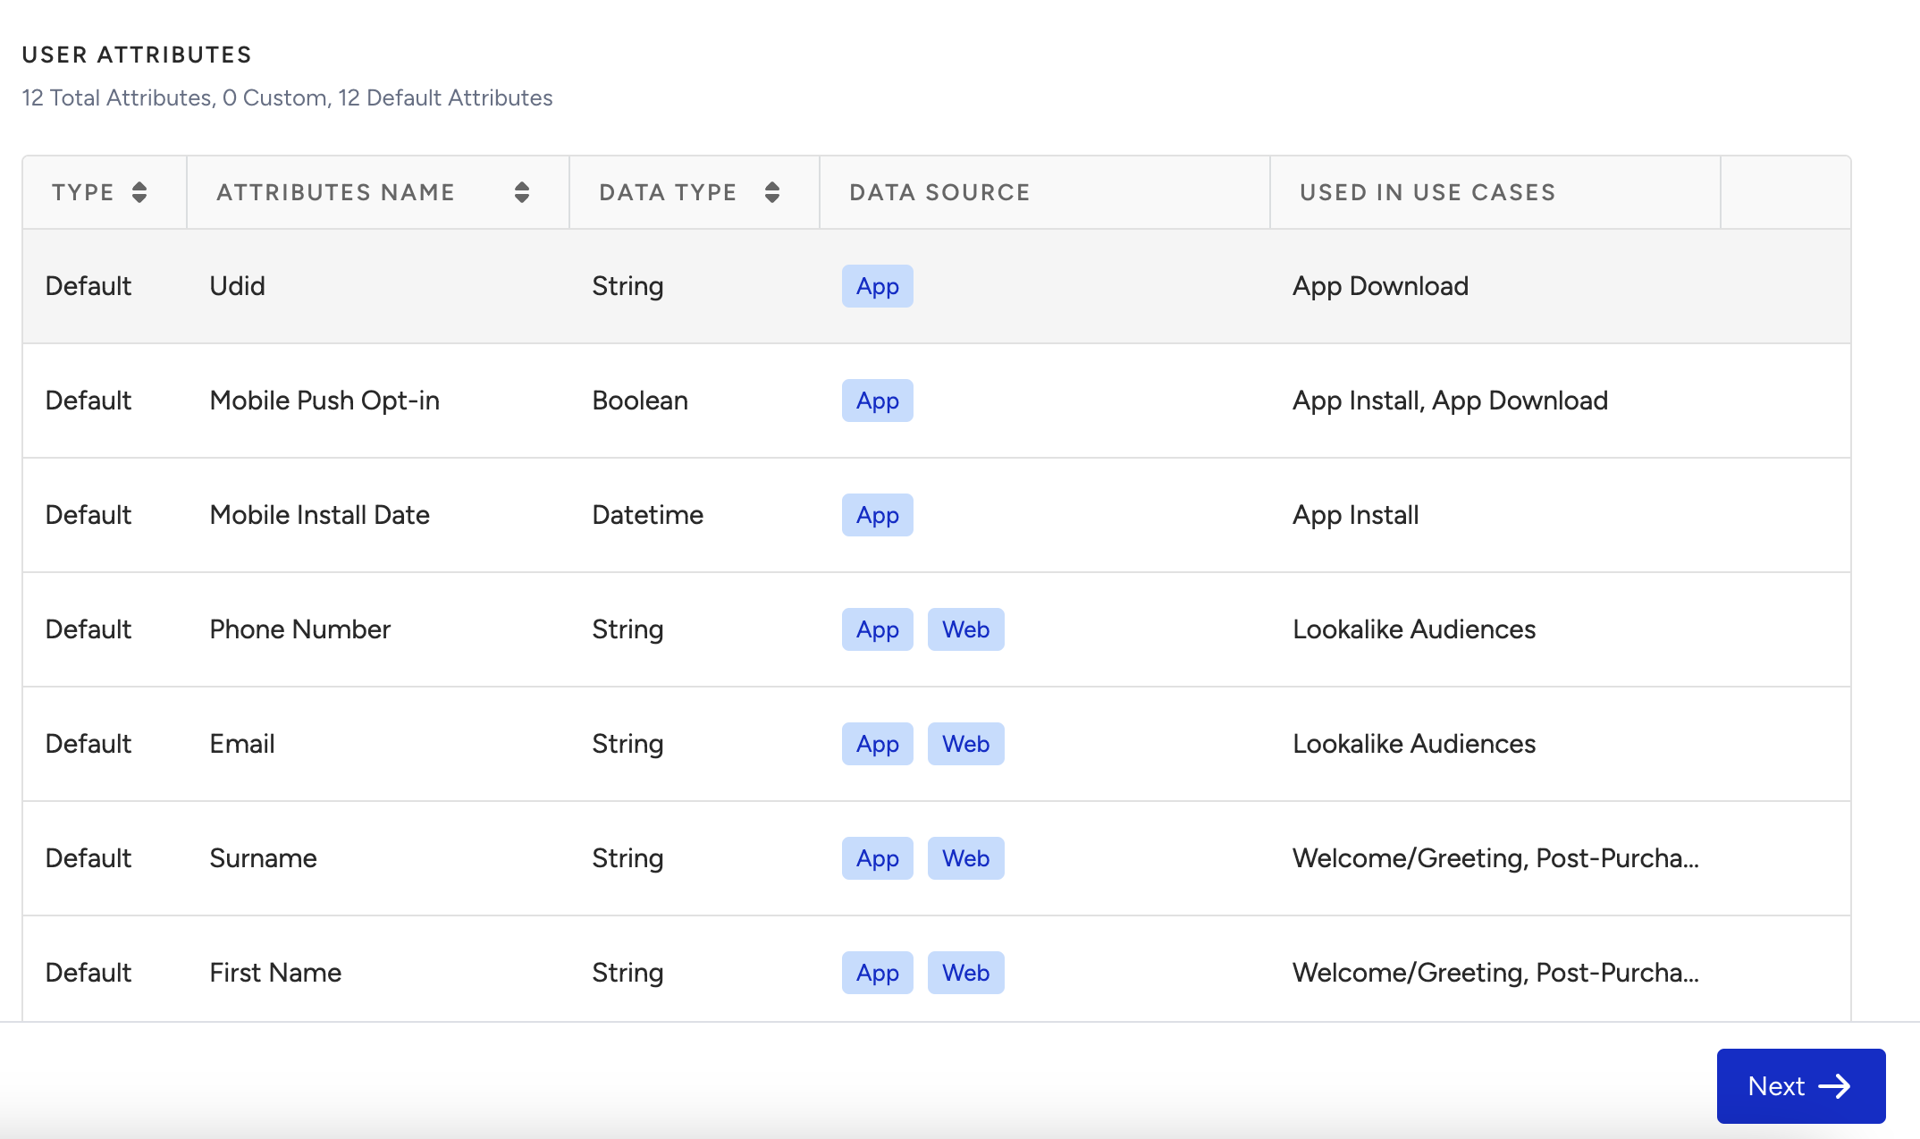
5. Data Requirements
You can add or remove Events and Attributes from each of your selected use cases. The default events and attributes are assigned to each default use case.
You can see how many events or attributes you have for a particular use case in the data column:
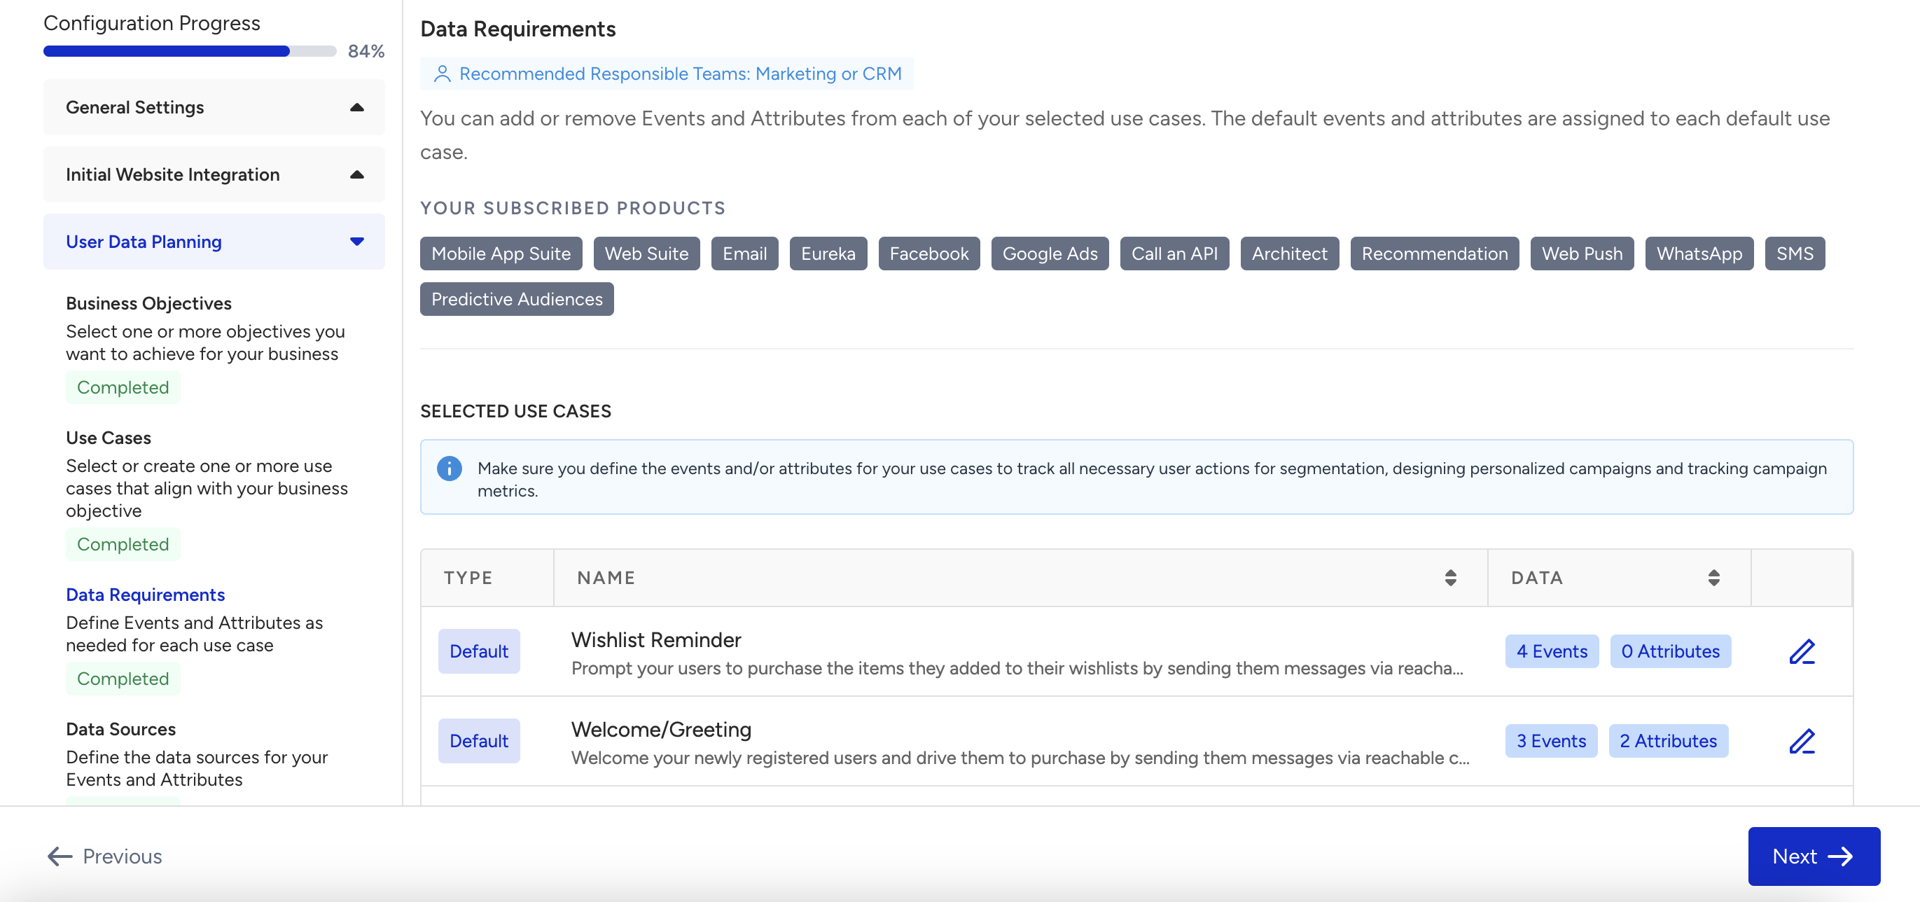
Carefully review the default use cases to determine whether you need to add or remove any data.
To modify data, click the Edit icon.
When an event or attribute is required for a use case, it cannot be removed from the screen. However, you can still:
Add additional events and attributes
Edit existing events and attributes to refine your segmentation
Update data to create more personalized content
You can also edit any data items previously added, so you don’t need to delete and re-enter them.
You can perform the following actions:
Edit custom event names and their parameters
Edit custom parameter names and data types
Edit custom attribute names and data types
Edit custom parameters for default events
You can think about the following considerations to add more data for your use case:
What event or attribute do I need to trigger a campaign?
What event, event parameter, or attribute do I need to segment users?
What event parameter or attribute do I need to personalize the content?
What event, event parameter, or attribute do I need to check on the customer journey flow?
What event do I need to add to report the campaign in analytics?

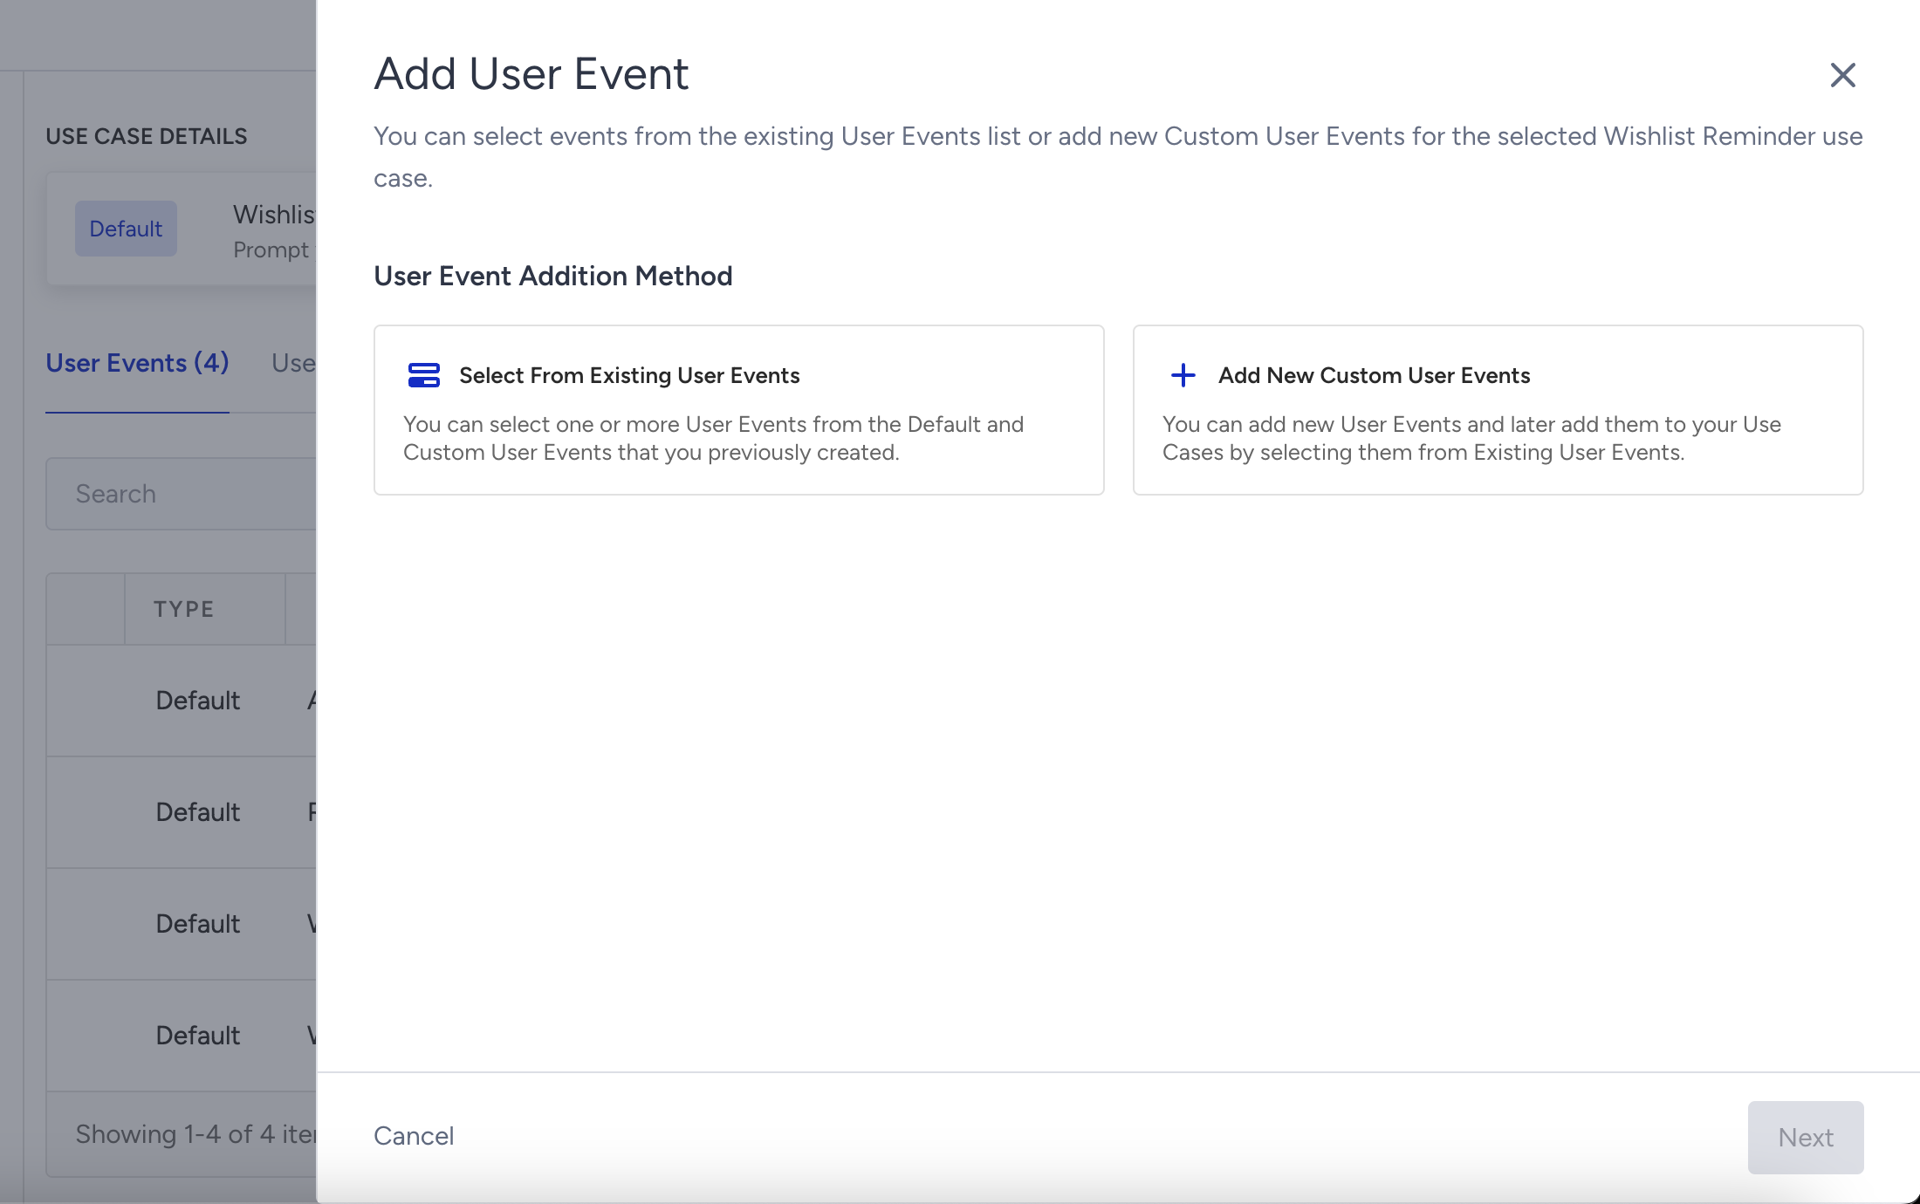
Click on the Add Event or Add Attribute buttons to add from existing events that were created before and provided by default by Insider One.
You can also choose to add a completely new event or attribute.
Note: Newly added events or attributes are not created in our database (UCD) at this stage. After you confirm your user data plan, you will be offered an option to automatically create all newly added items with a single click during the Data Integrations steps that follow User Data Planning.
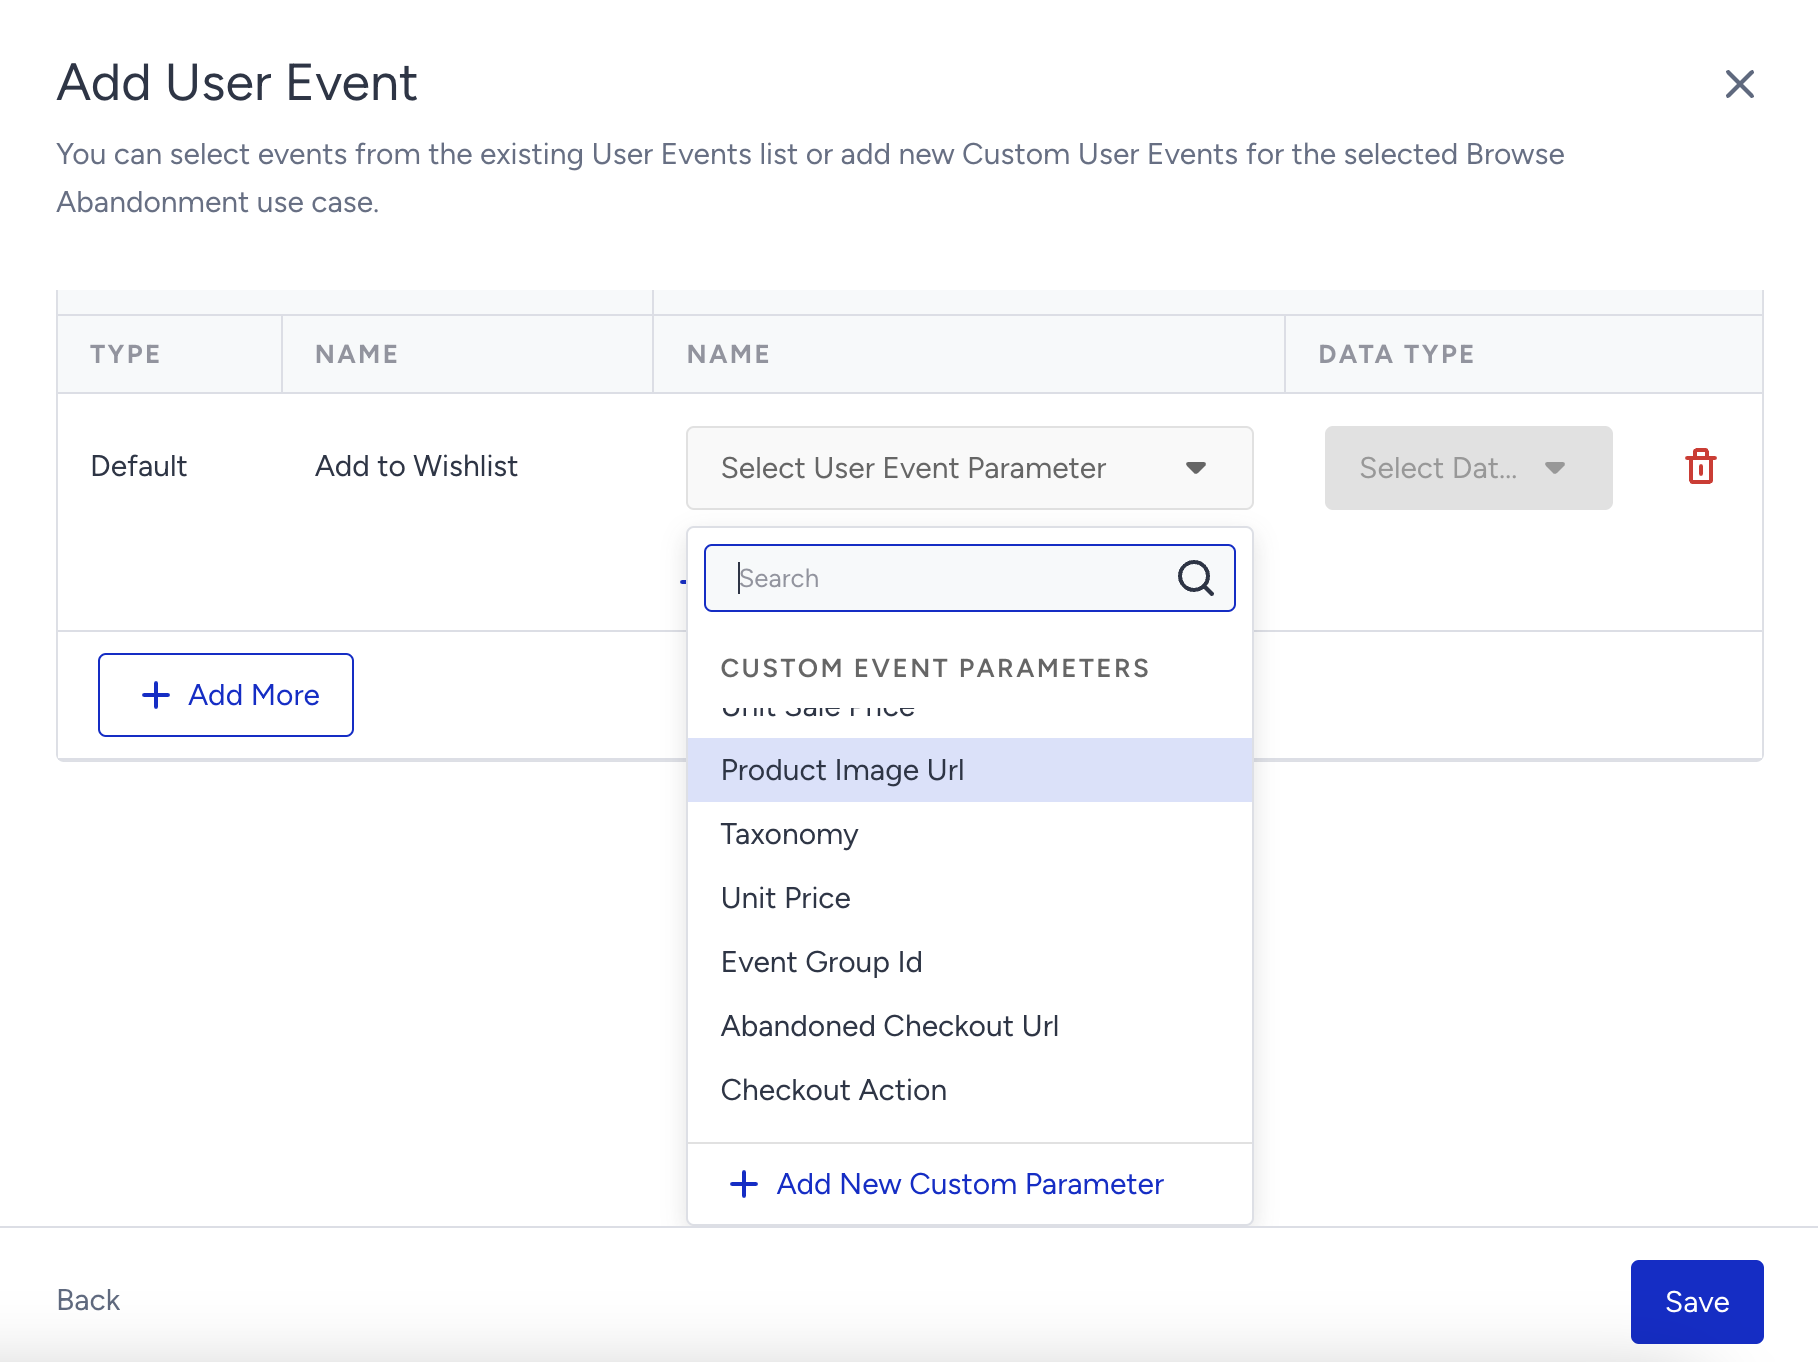
When you add a new event or select an existing event (previously added), you can define the event parameters required to support your use cases.
Both default and custom event parameters can be used in default or custom event.
You can see the data type definitions before selecting the correct one:
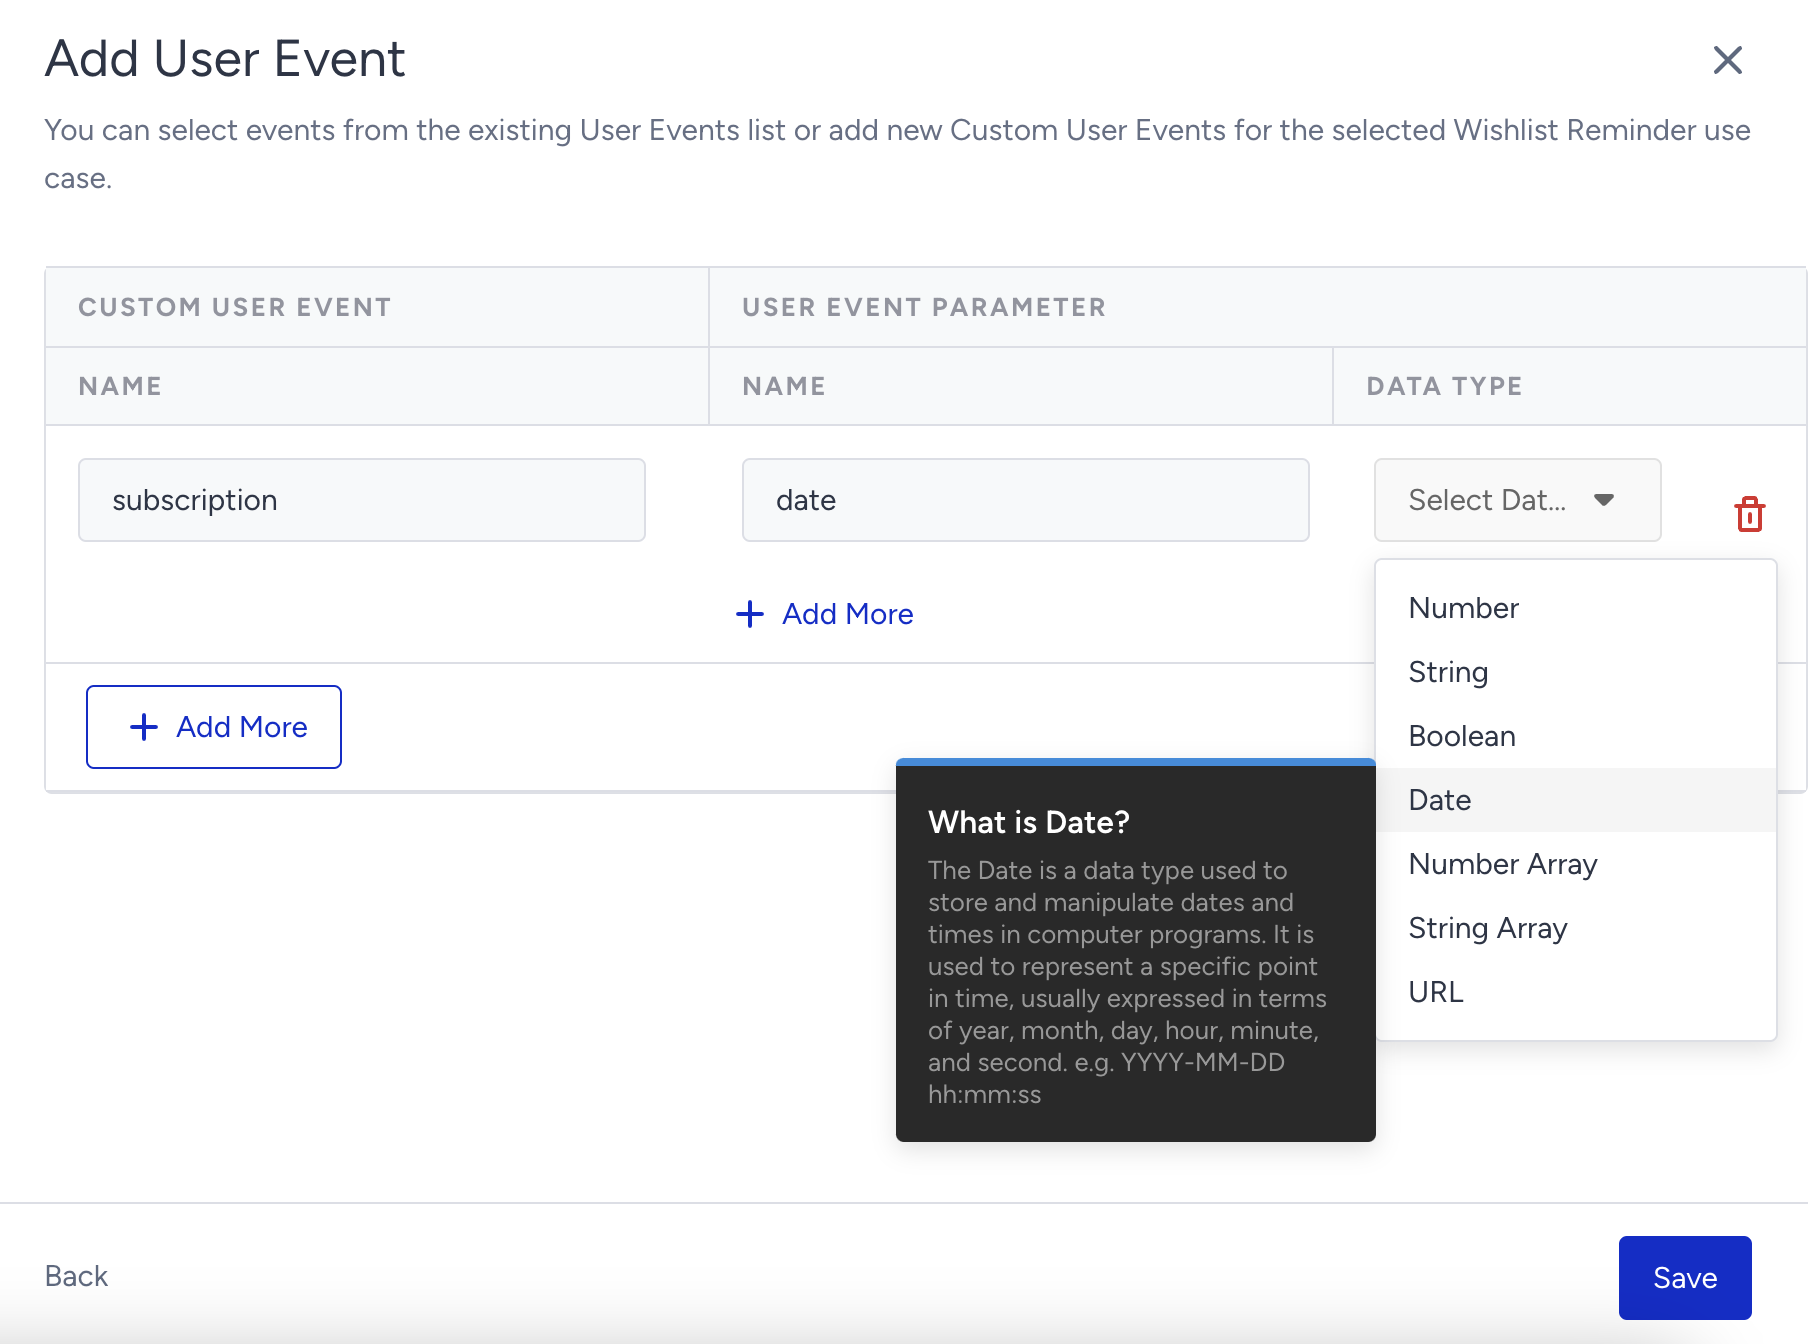
You can select the same event parameters across different events when they serve the same purpose. This helps reduce duplication and simplifies your integration process.
When you add an event or attribute, or remove one, click the Save button.
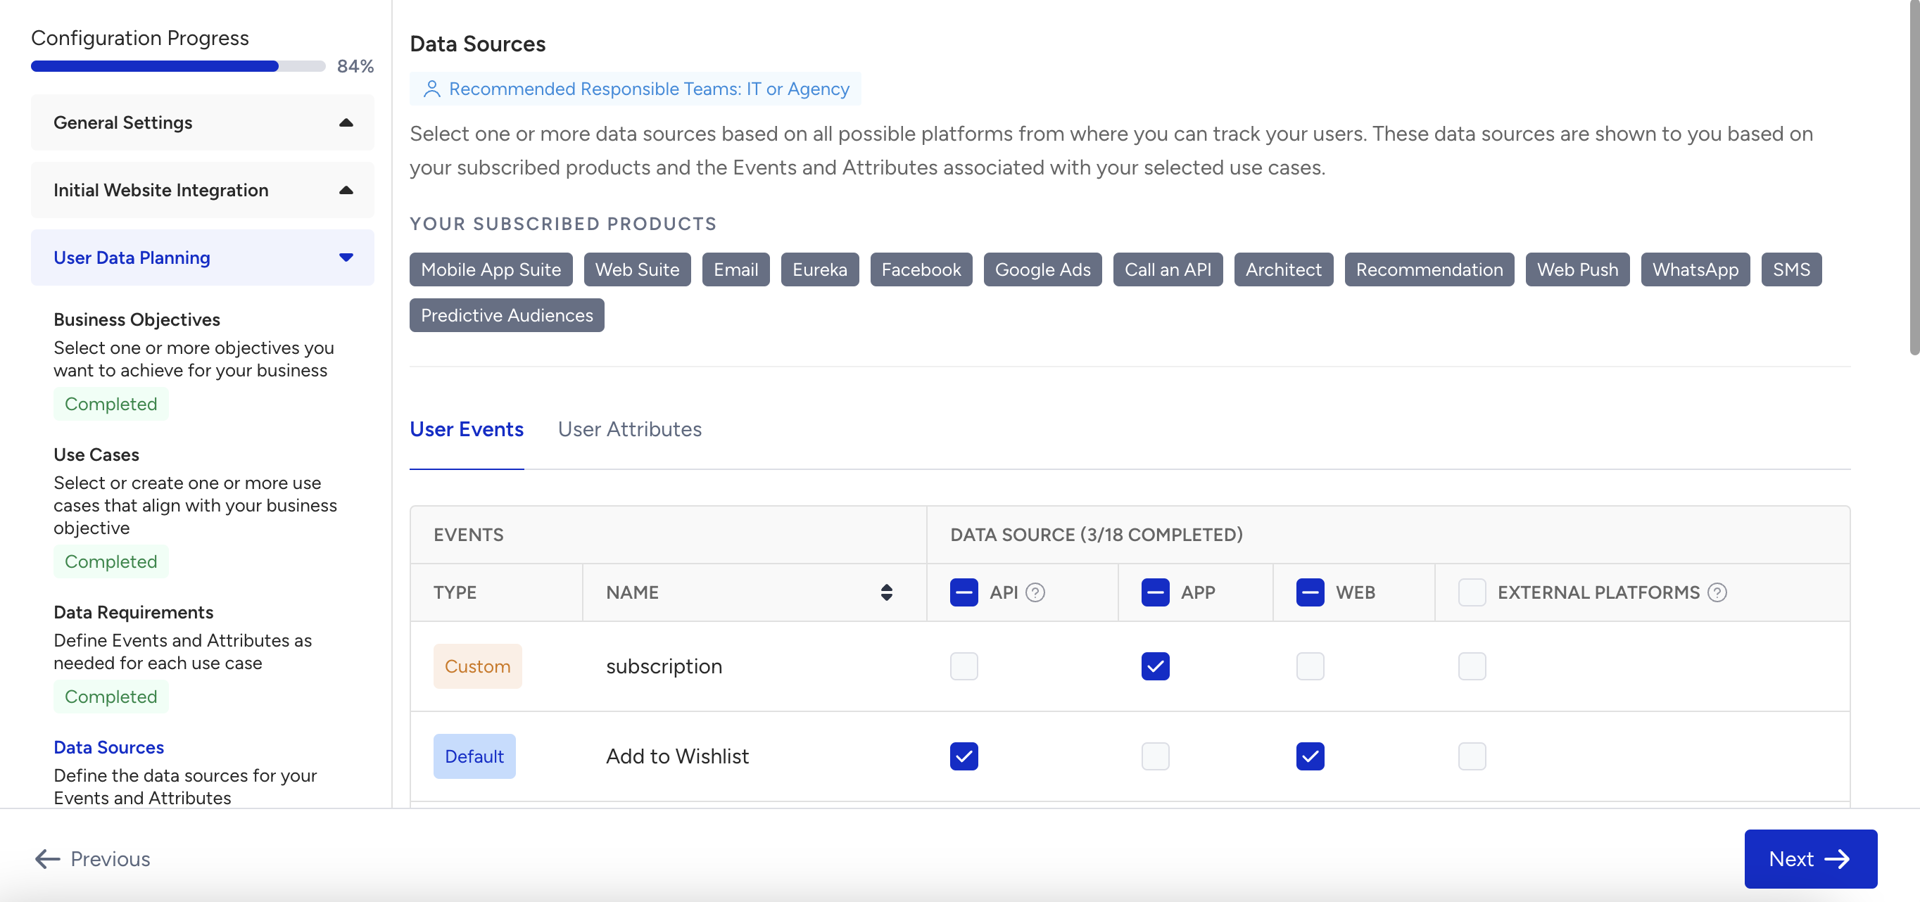
6. Data Sources
Select one or more data sources based on all possible platforms from which you can track your users. These data sources are shown to you based on your subscribed products and the Events and Attributes associated with your selected use cases.
Keep in mind that the duplication of the same data if you select different sources for a particular event or attribute. For example;
You select the web source to send the purchase event from the website.
You select the app source to send the purchase event from the mobile app.
You select the API source to send the purchase event from your CRM.
In this case, if you are already keeping all the purchases in your CRM, you are sending the same purchase events to the Insider One database twice. (web-API and app-API)
Thoroughly review the data to define sources by considering the feasibility of your platforms: app, website, CRM, external databases, and uploading attributes.
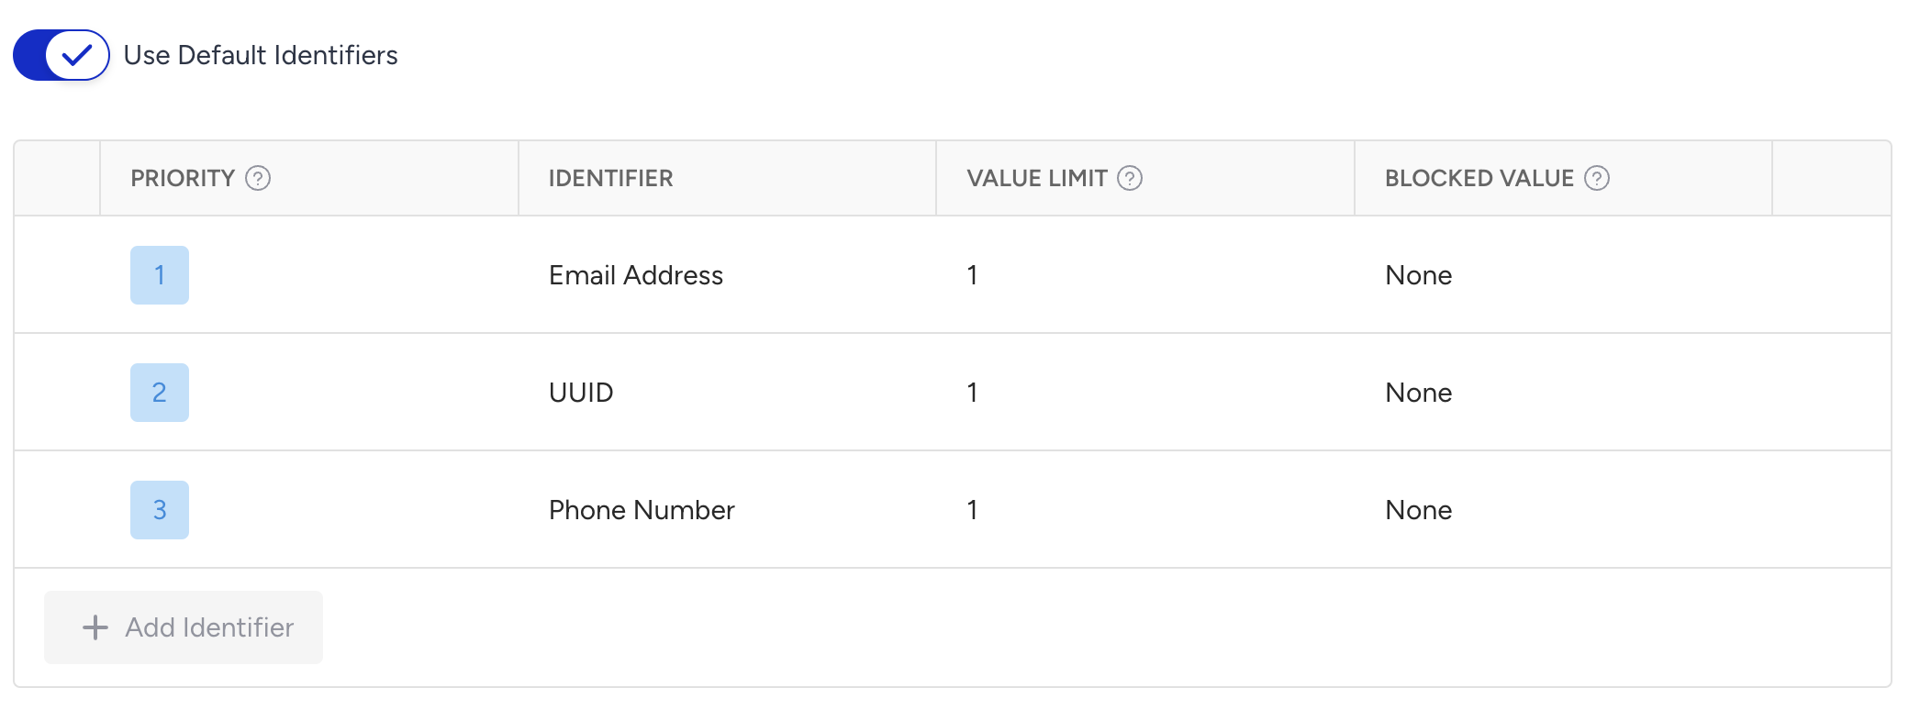
7. Identifiers
You can use default identifiers such as email addres, phone number, or a unique user ID (UUID), or add any custom identifiers you want to use to match users and establish their identities as known on your platform.
An identifier is essential for linking user behavior across platforms. It enables Insider One to recognize the same user across different environments, associate their attributes and events, and consolidate this information into a single user profile. As a result, you can track a user’s end-to-end journey, even as they move between devices or interact with your brand through multiple channels.
You can also refer to the video below to better understand how to set up your identifiers:
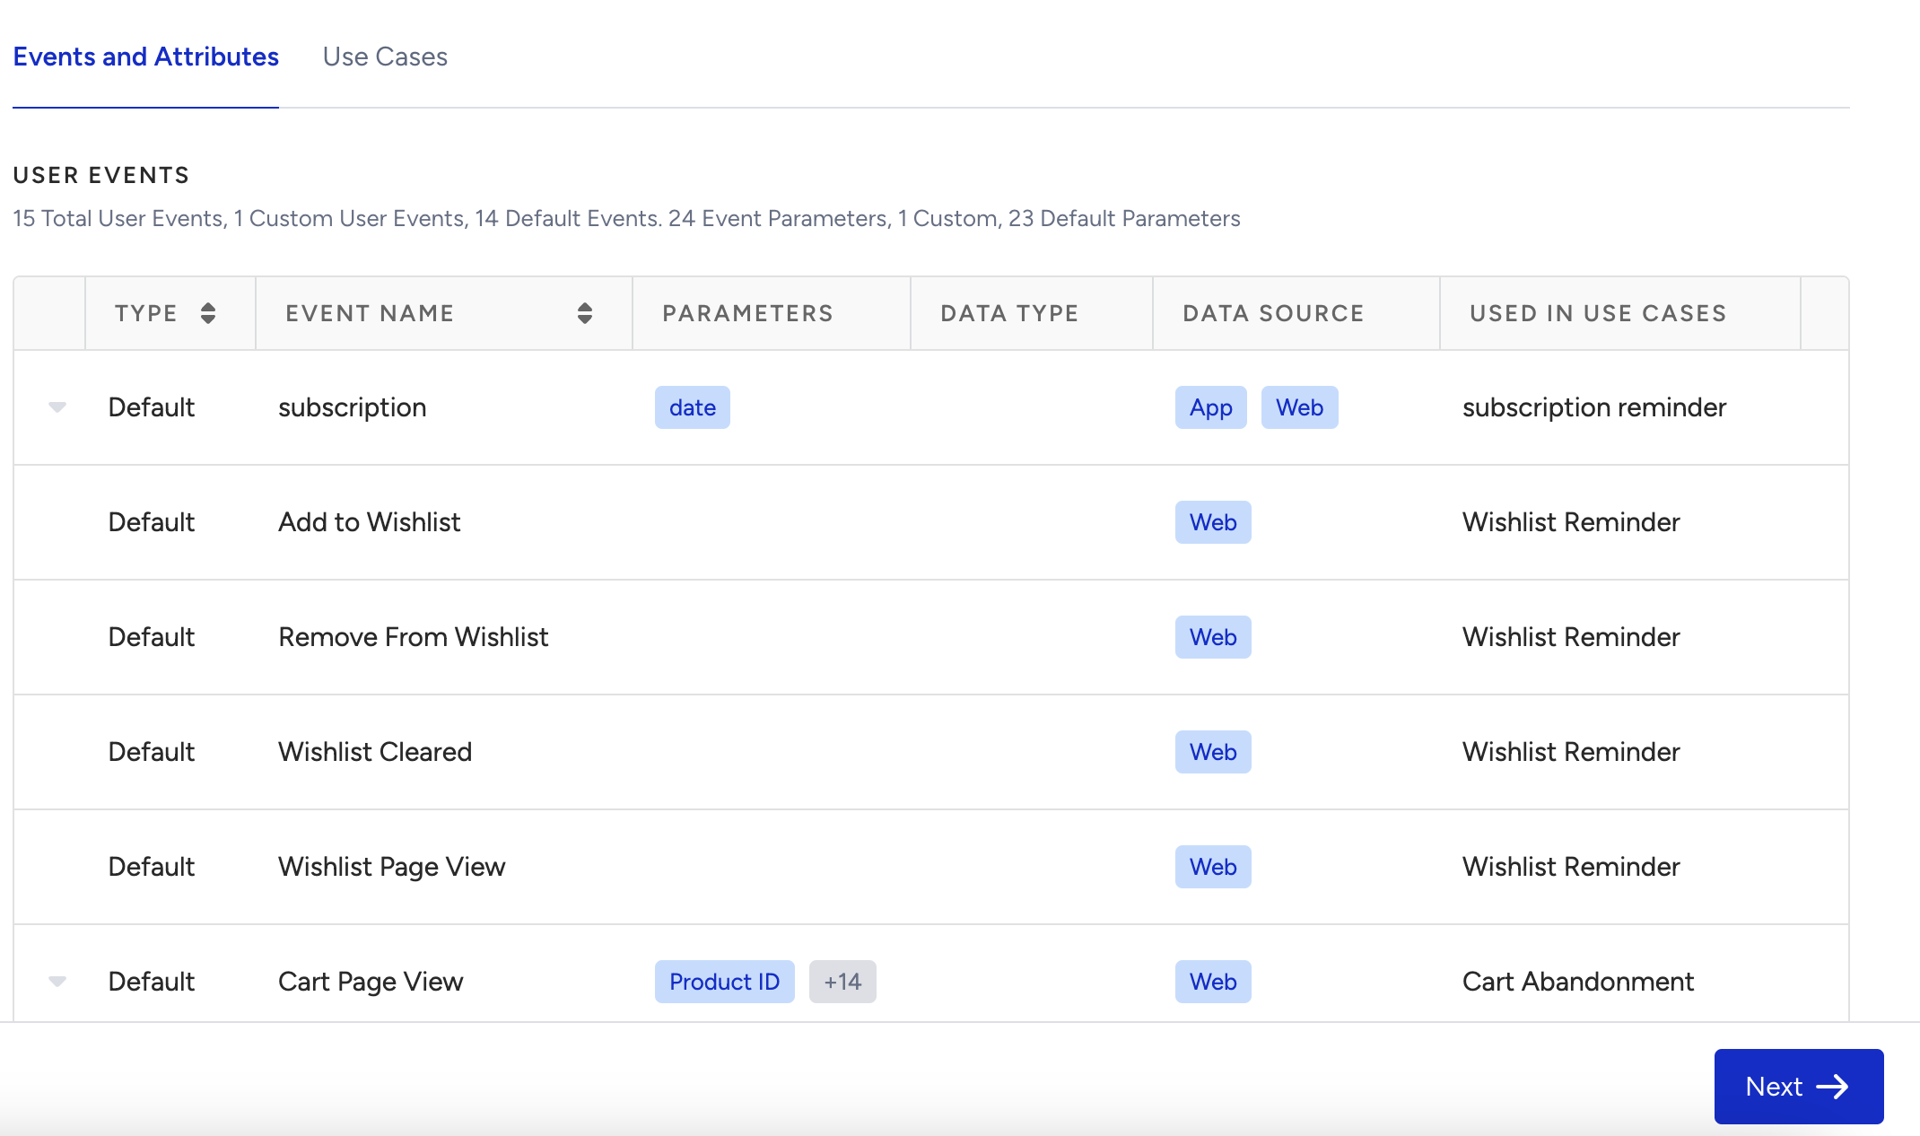
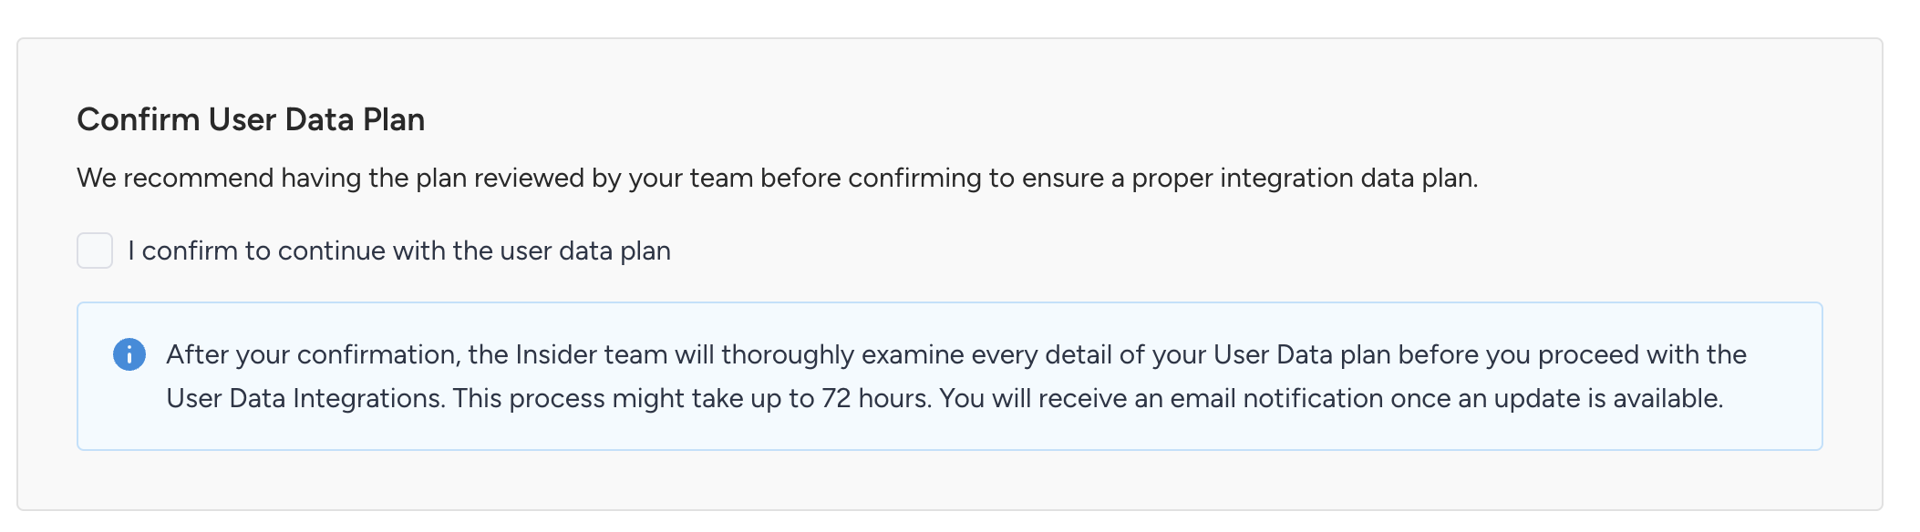
8. User Data Plan Confirmation
Review the comprehensive user data plan, including the Objectives, Use Cases, Events, Attributes, and all other items you defined in the previous steps.
Before confirming, ensure the plan is thoroughly discussed and reviewed within your team. If needed, you can export the data plan or email it to share it with teammates easily. Additionally, make sure the Insider One team reviews the plan before you proceed. This helps ensure a smooth integration process and prevents significant delays during onboarding that may result from changes made after confirmation.
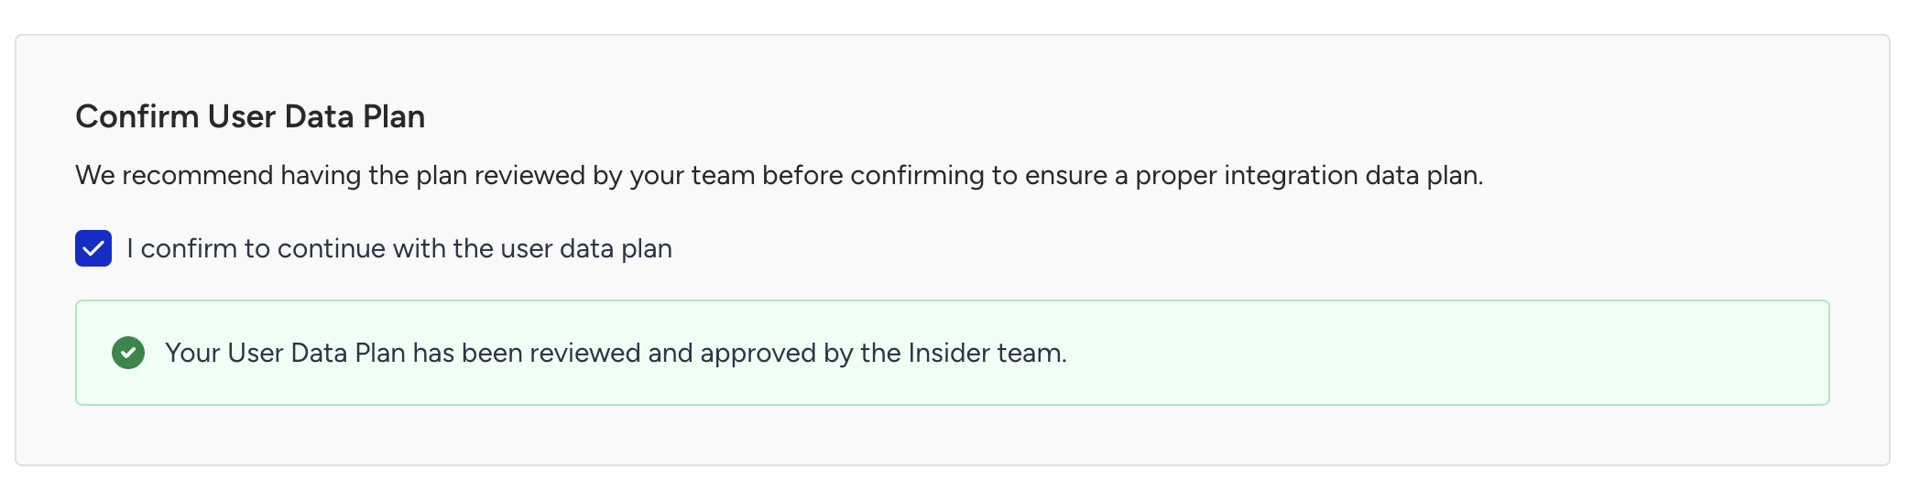
Confirm the User Data Plan after reviewing it.
When you confirm the plan, the Insider One team will examine the user data plan. If there are no missing points or issues, they will approve your user data plan. When they detect a point, they will reject the user data plan and communicate with you.
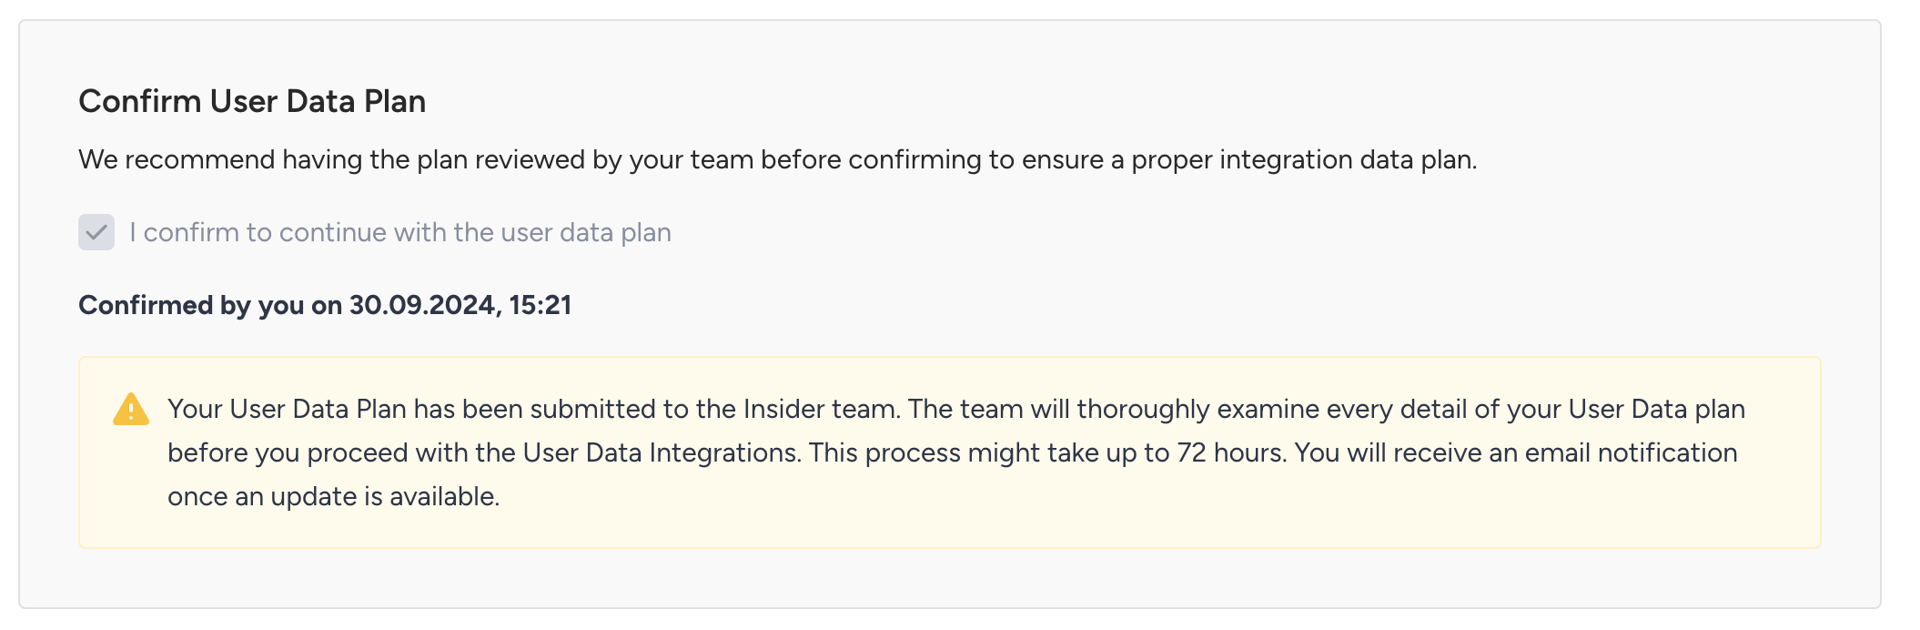
You can see the status of the plan on the page:
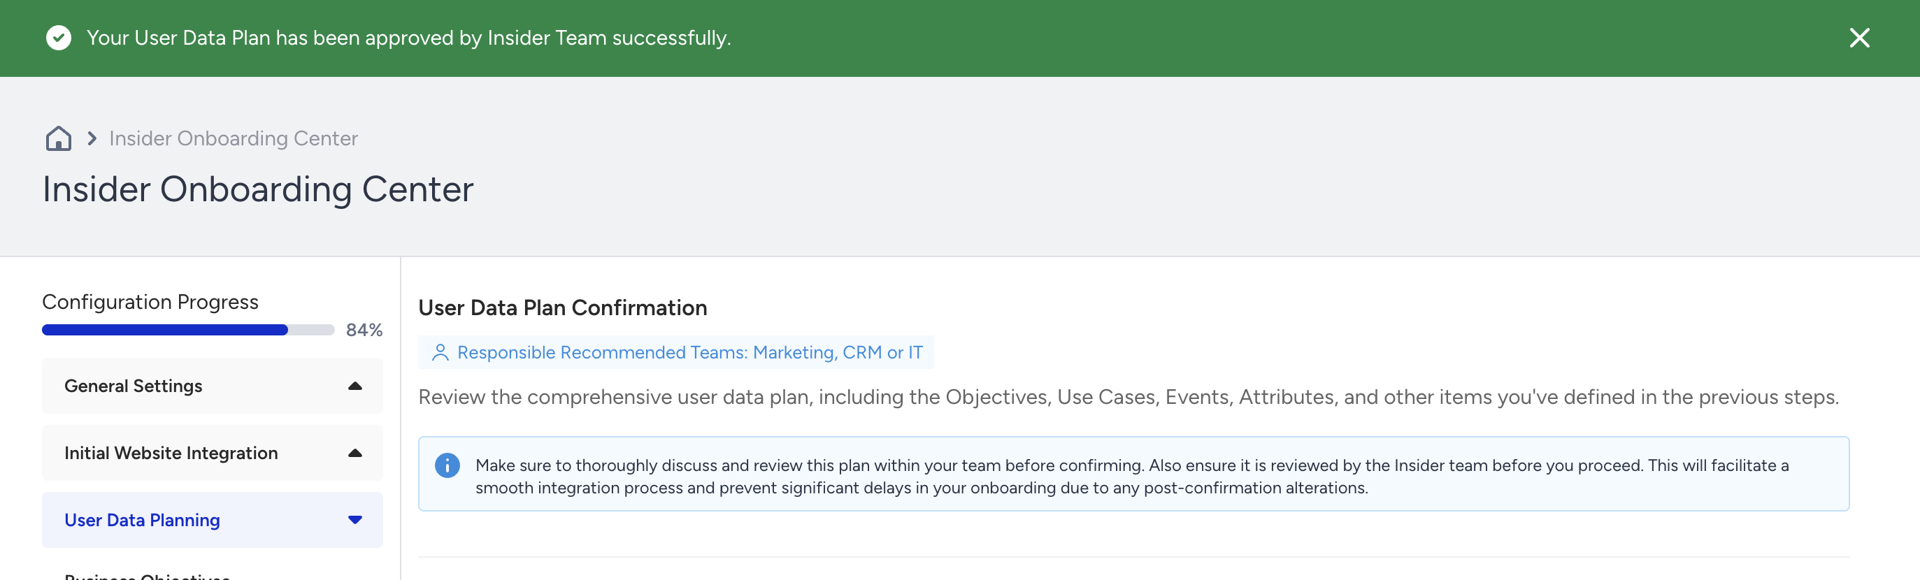
Note that you cannot edit your user data plan while it is under review by the Insider One team. Once it is confirmed, you can edit your plan and confirm it again to get a review from Insider One.