The Knowledge Base (KB) is the primary source of information for your AI Agents. It enables agents to deliver accurate, real-time responses by referencing content directly extracted from your website.
AI Agents do not use static or hardcoded answers. Instead, they dynamically generate replies based on the KB’s content, enabling flexibility and relevance across a wide range of user queries.
You can create a Knowledge Base in two ways:
Website Crawling: Enter a website URL, and the system will scan and extract relevant content from it. You can configure crawl parameters such as depth, target pages, and filters to control the scope of the information included.
Document Upload: Upload supported file formats directly, and the system will process and structure the content. This method is ideal for incorporating internal documentation, guides, or other resources that aren’t available on a public website.
To create a new Knowledge Base:
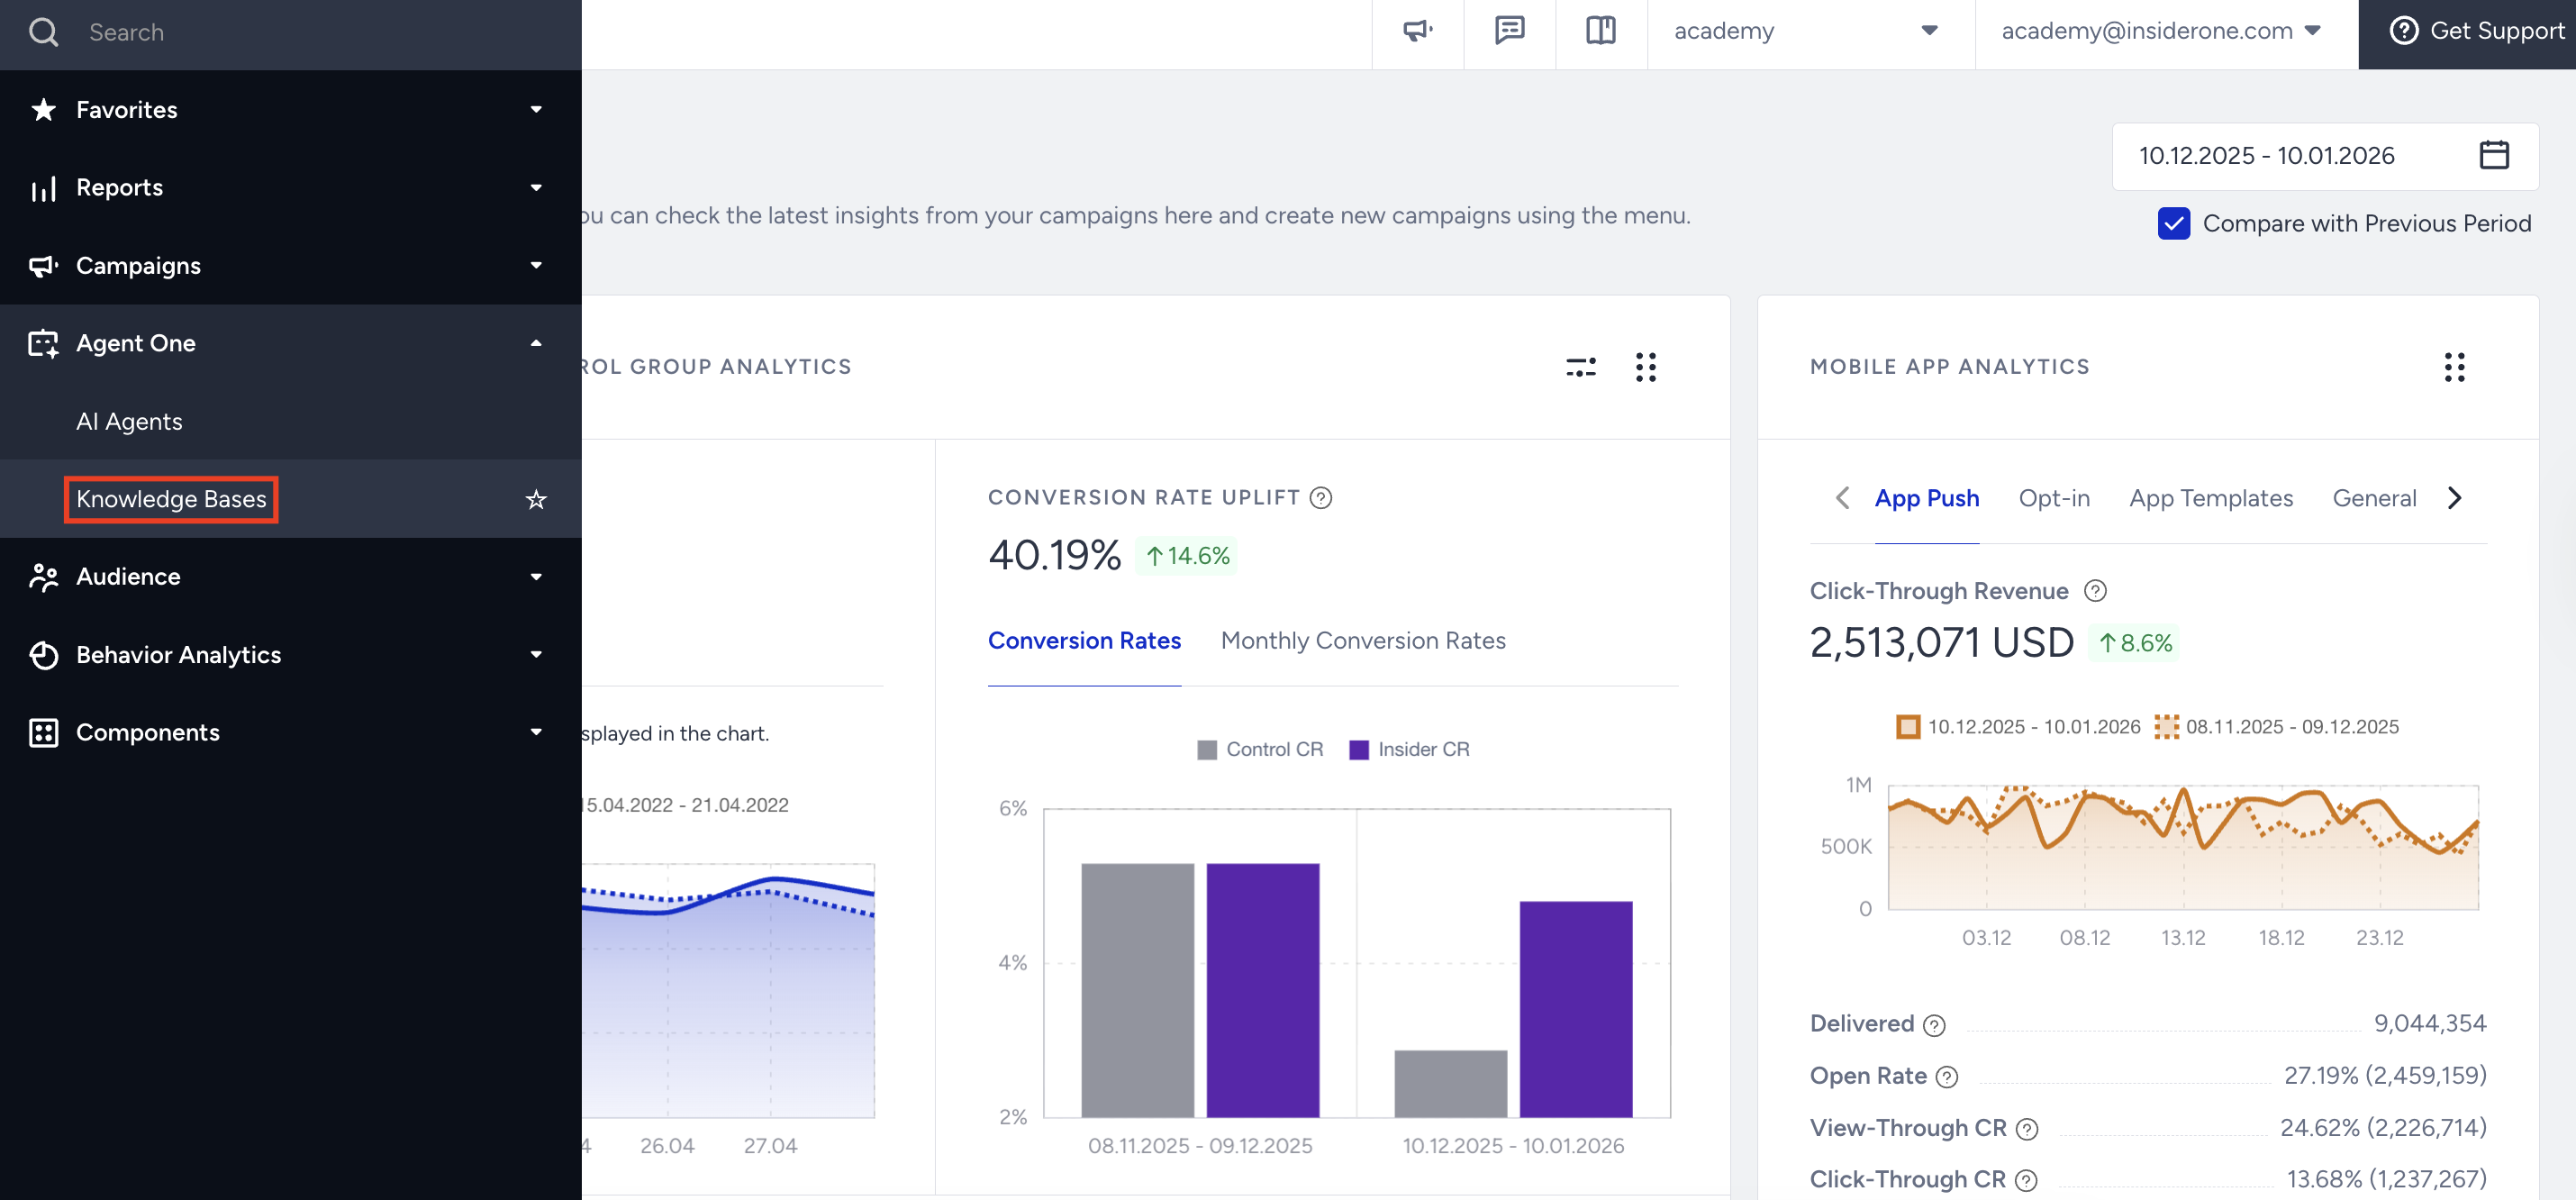
Navigate to InOne > Agent One > Knowledge Bases.
On this page, you can view all existing Knowledge Bases along with their statuses:
Active: The Knowledge Base is ready to be linked and used by your AI Agents.
Processing: The Knowledge Base is currently being generated or updated through a crawl operation.
Errored: The Knowledge Base could not be successfully created due to an issue during crawling.
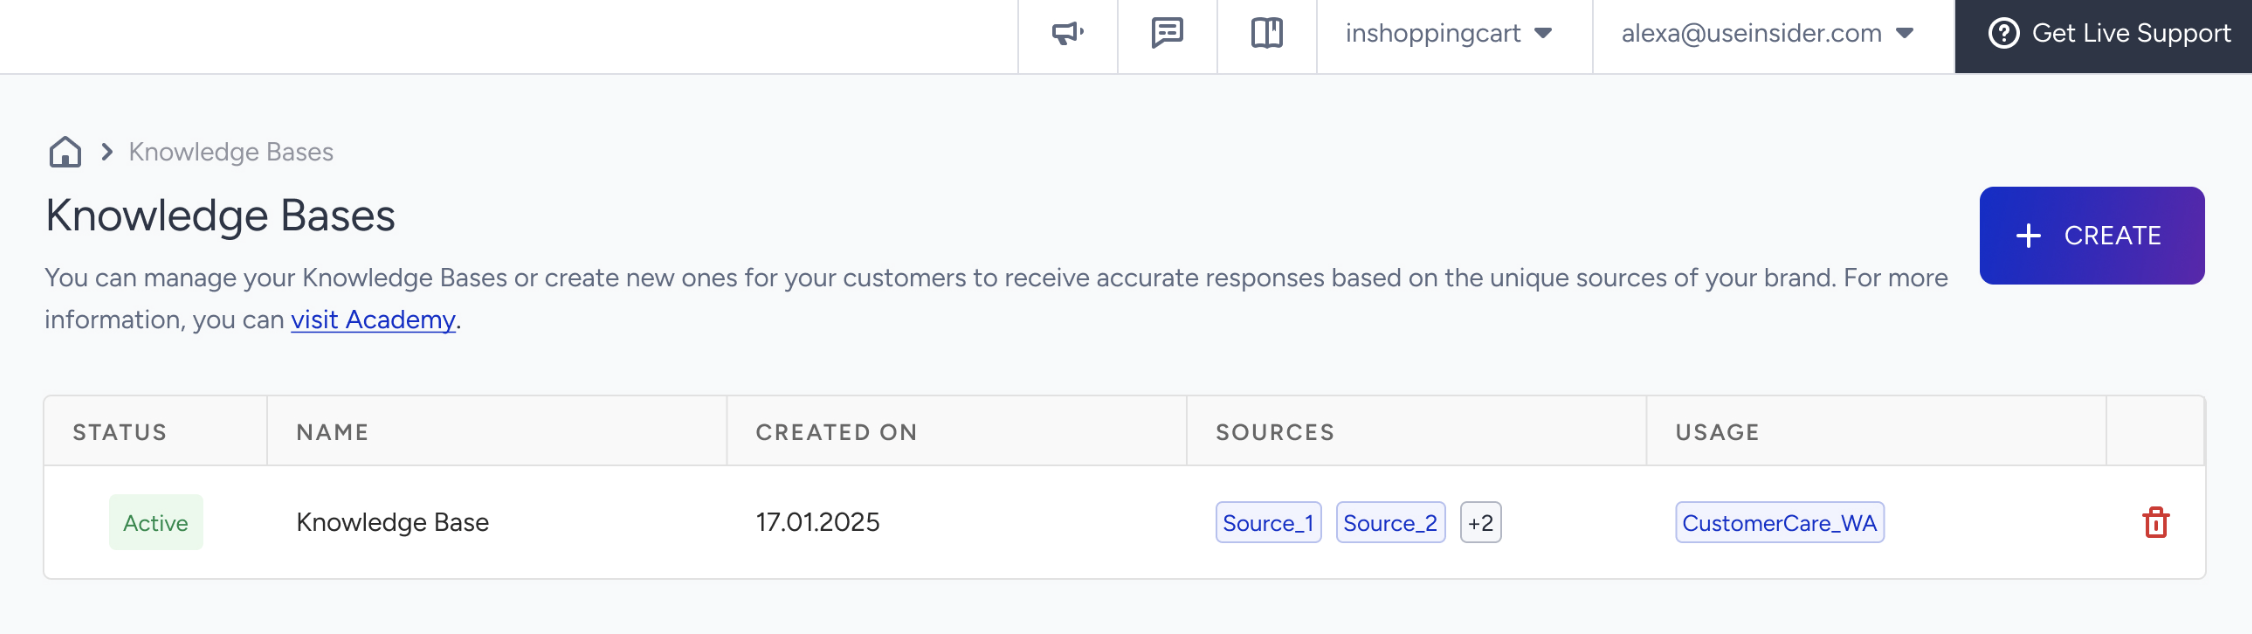
In the Sources, each Knowledge Base entry displays its associated source objects and a list of linked agents (if any).
A single InOne panel can host a maximum of 4 Knowledge Bases.
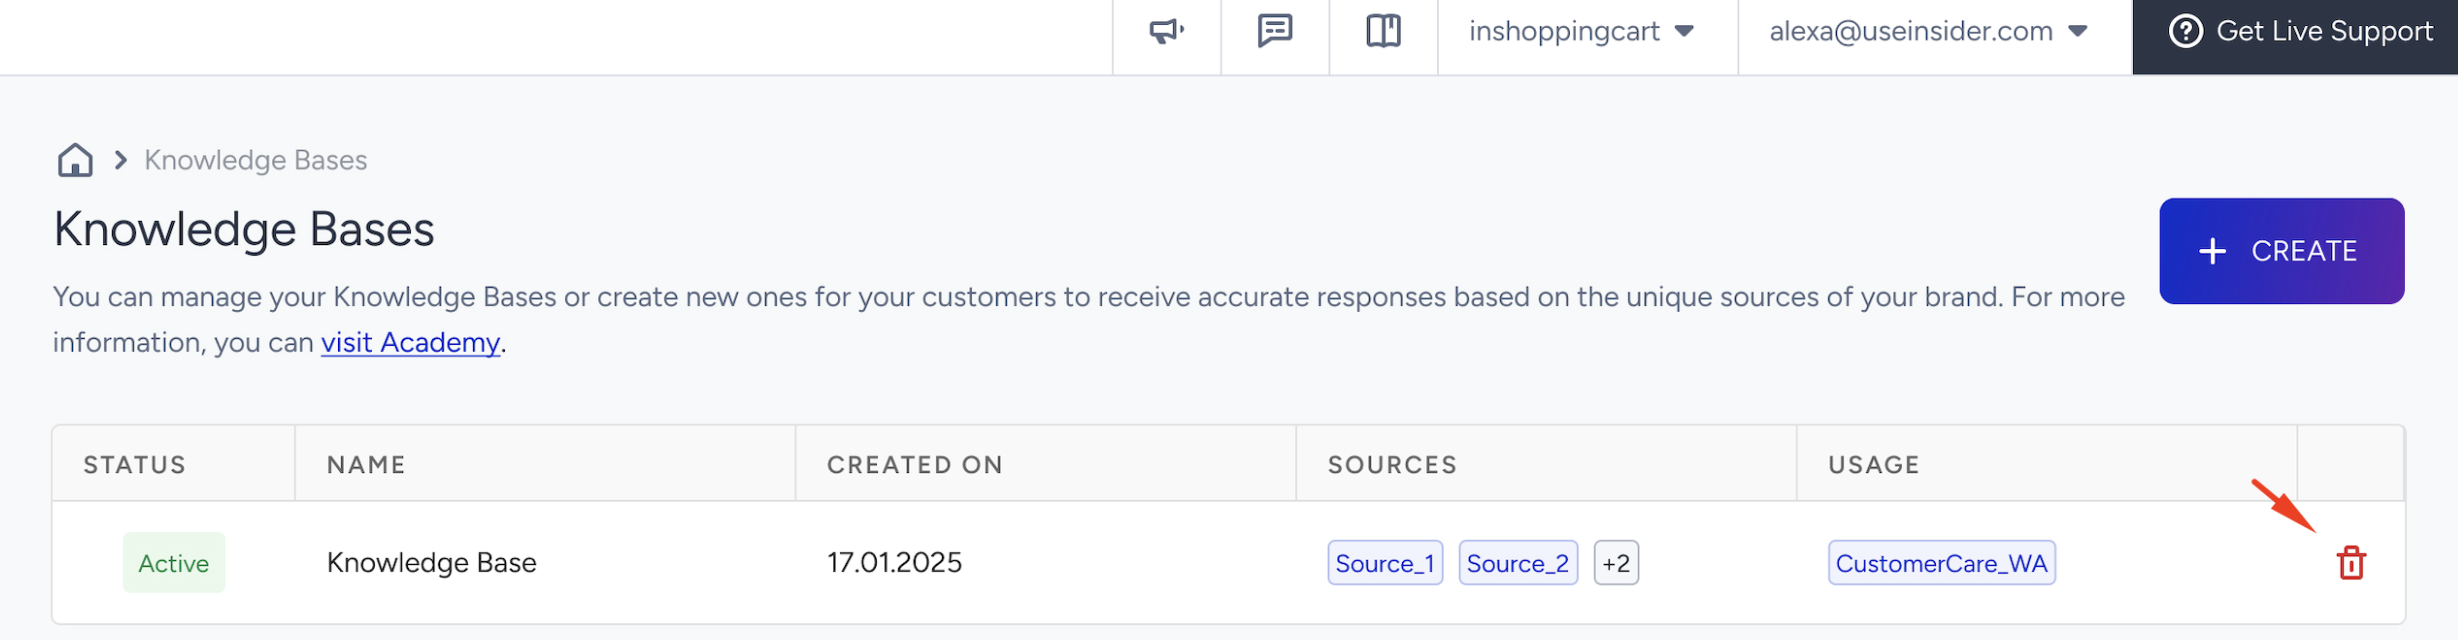
To remove a Knowledge Base, you can click the Delete button.
You cannot delete a knowledge base while it is actively used by AI Agents.
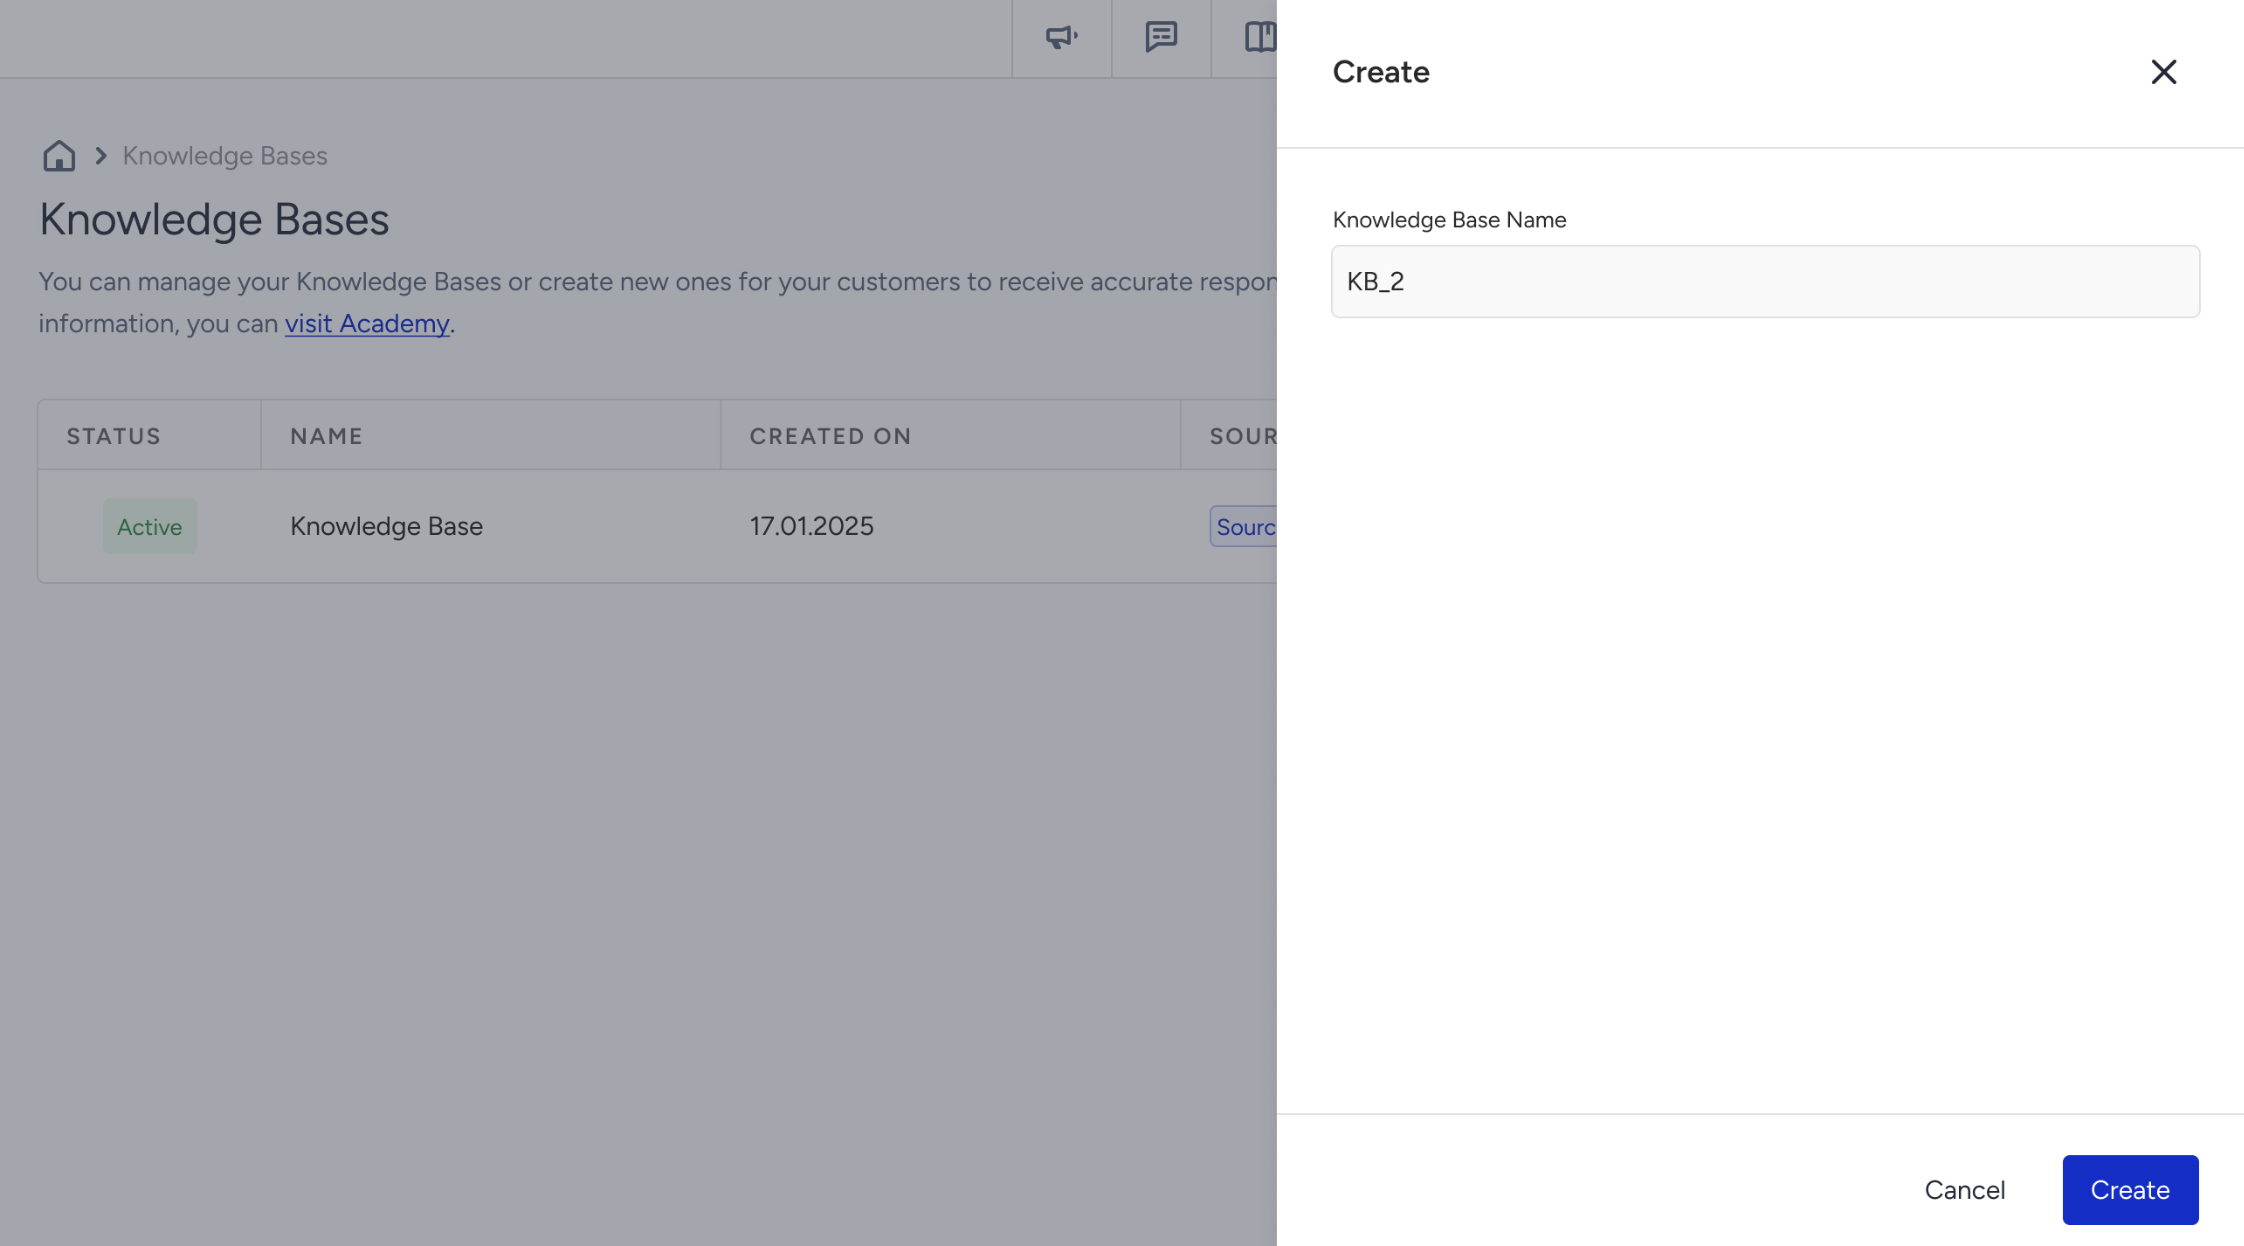
3. To create a Knowledge Base, click the Create button. 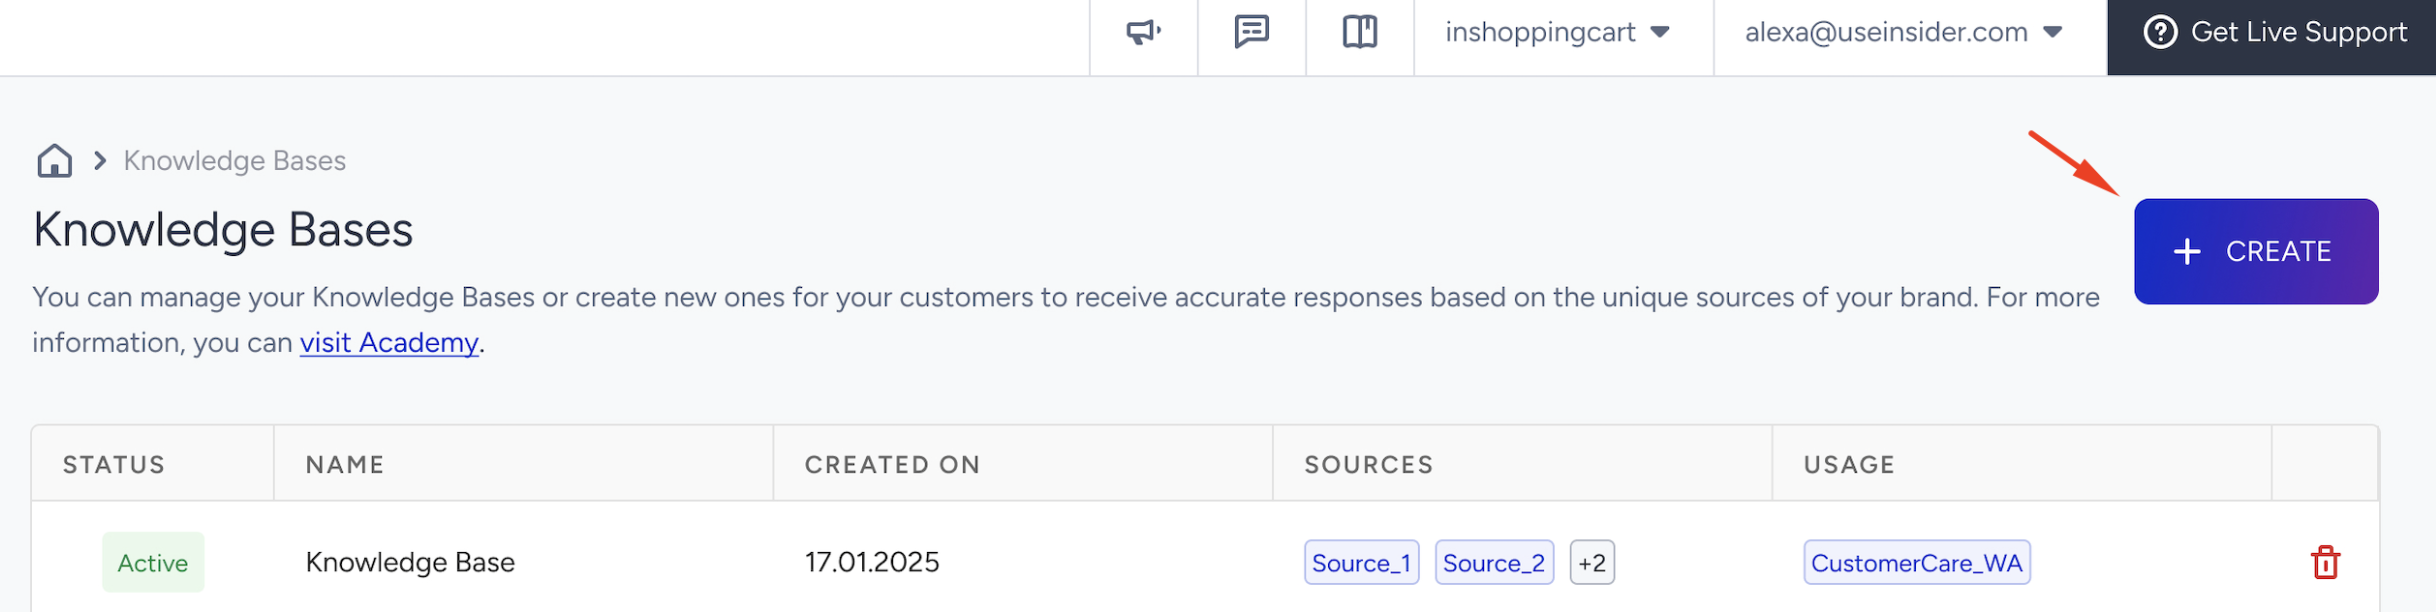
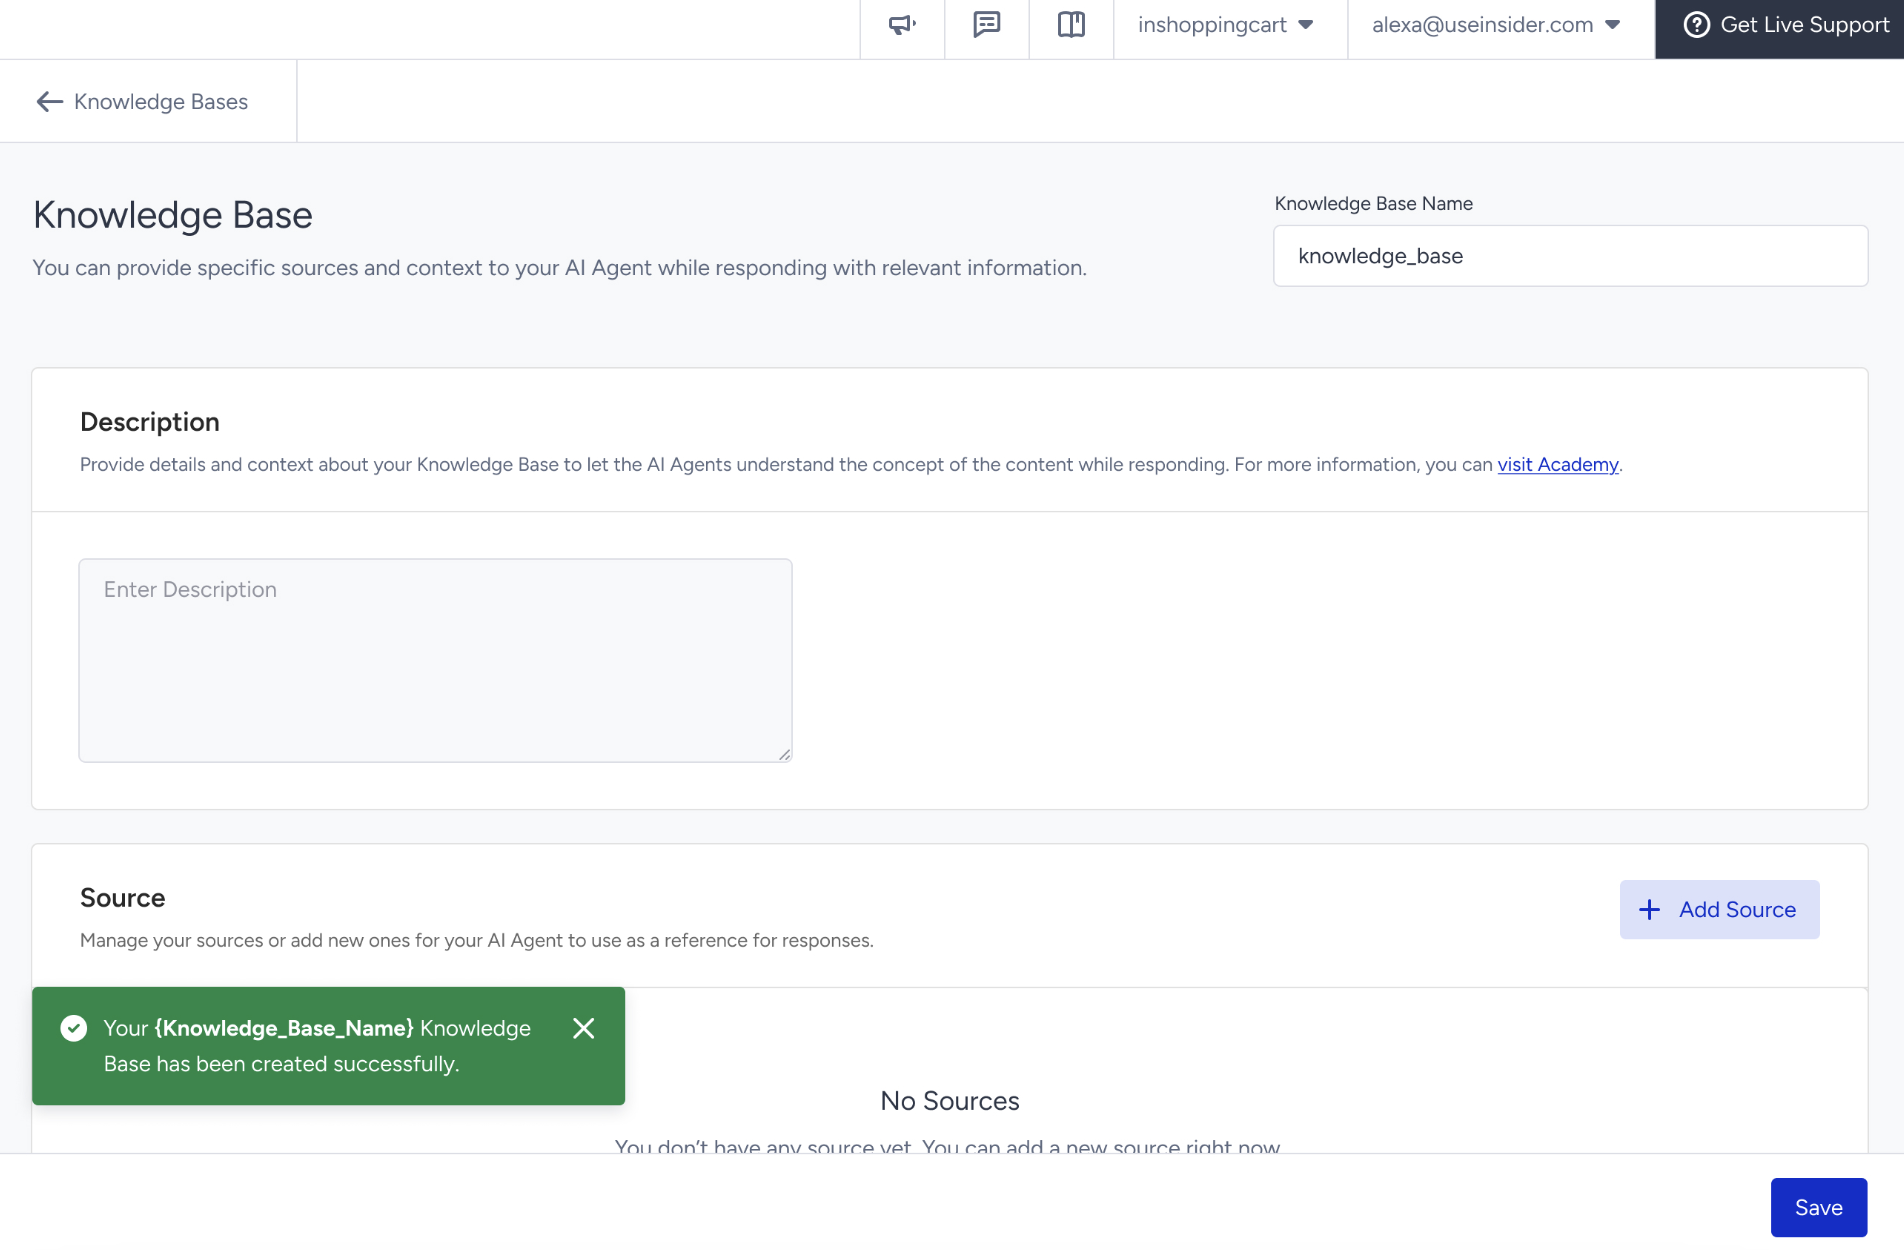
Enter a name for your Knowledge Base and click the Create button.
In the Description field, you must write a description that clearly outlines the Knowledge Base’s purpose and content. This helps the system and the agents understand the context in which the KB should be used.
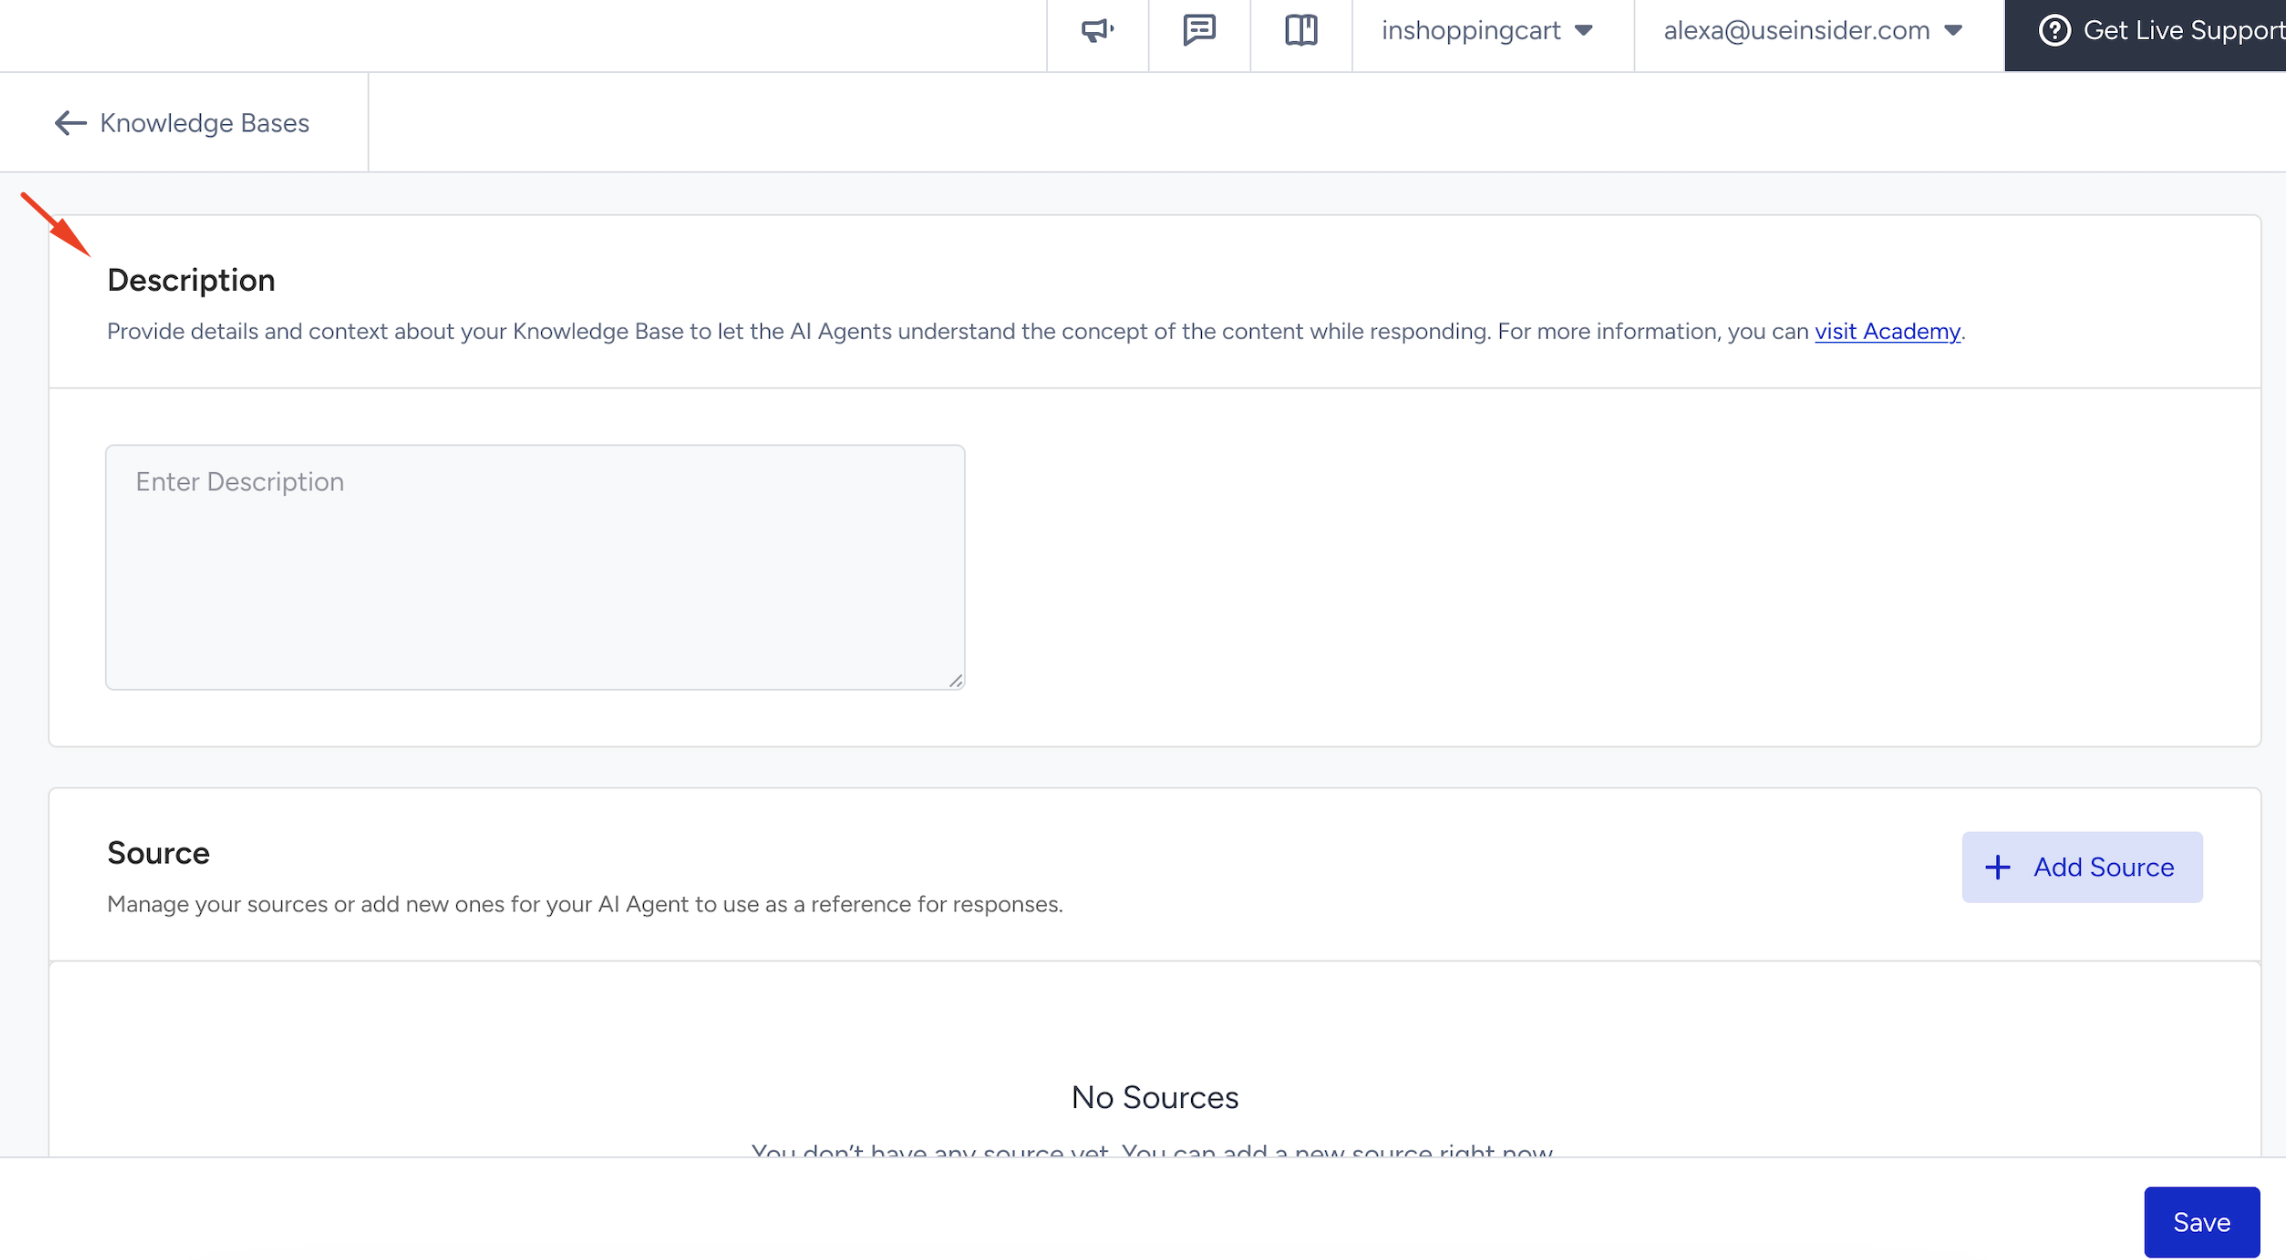
Congratulations! At this stage, you have created your Knowledge Base, but it will only become functional after you add source URLs to populate it with content via website crawling or uploading knowledge base documents.
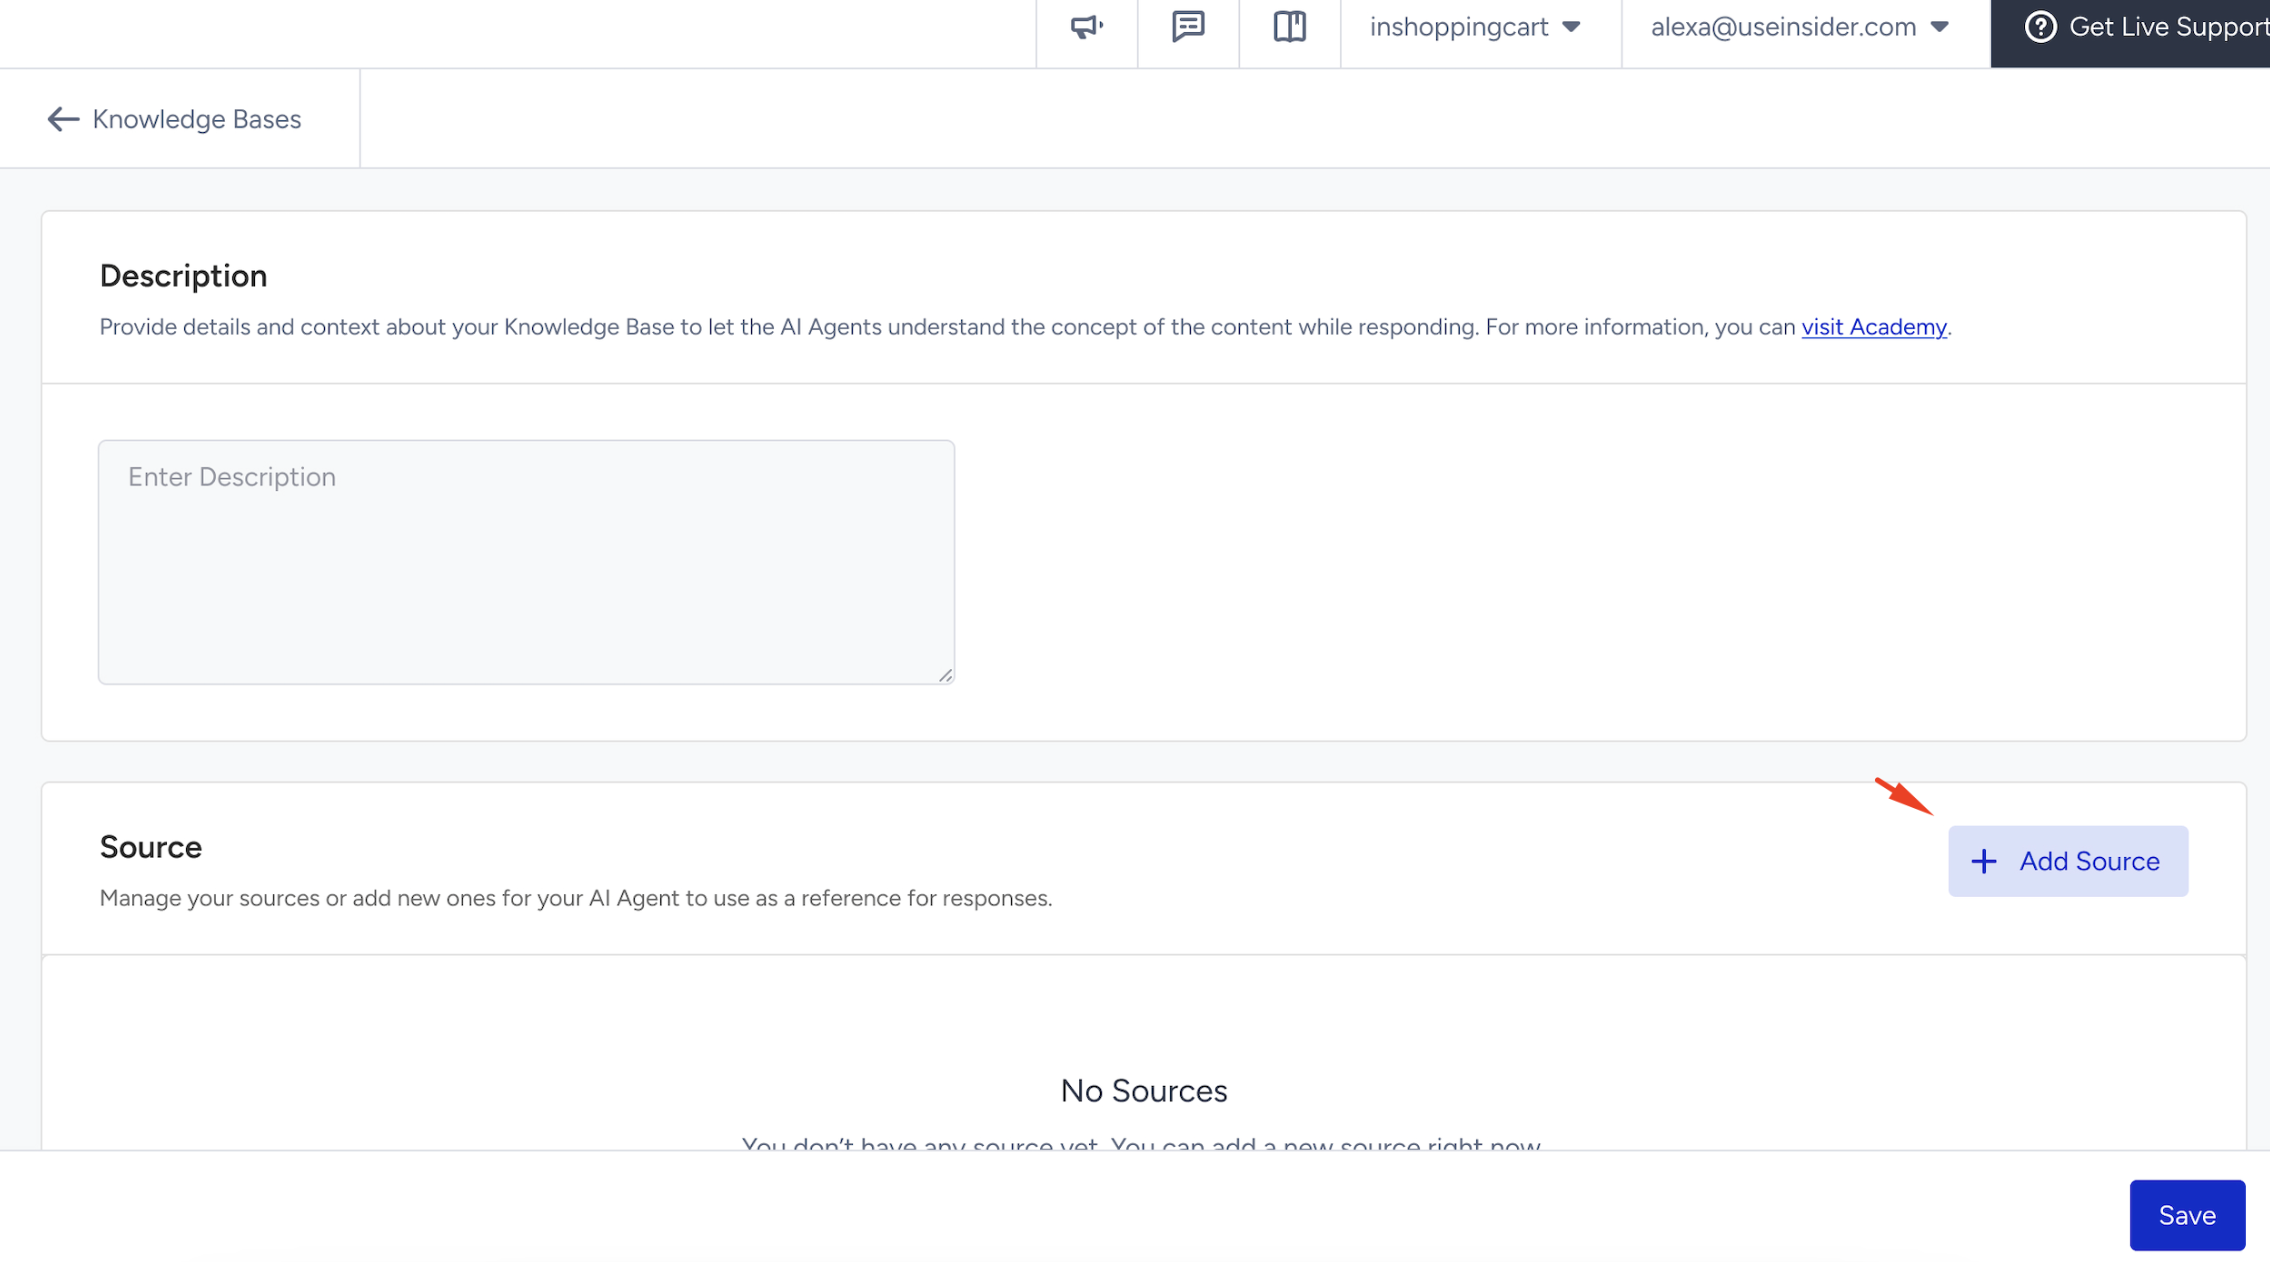
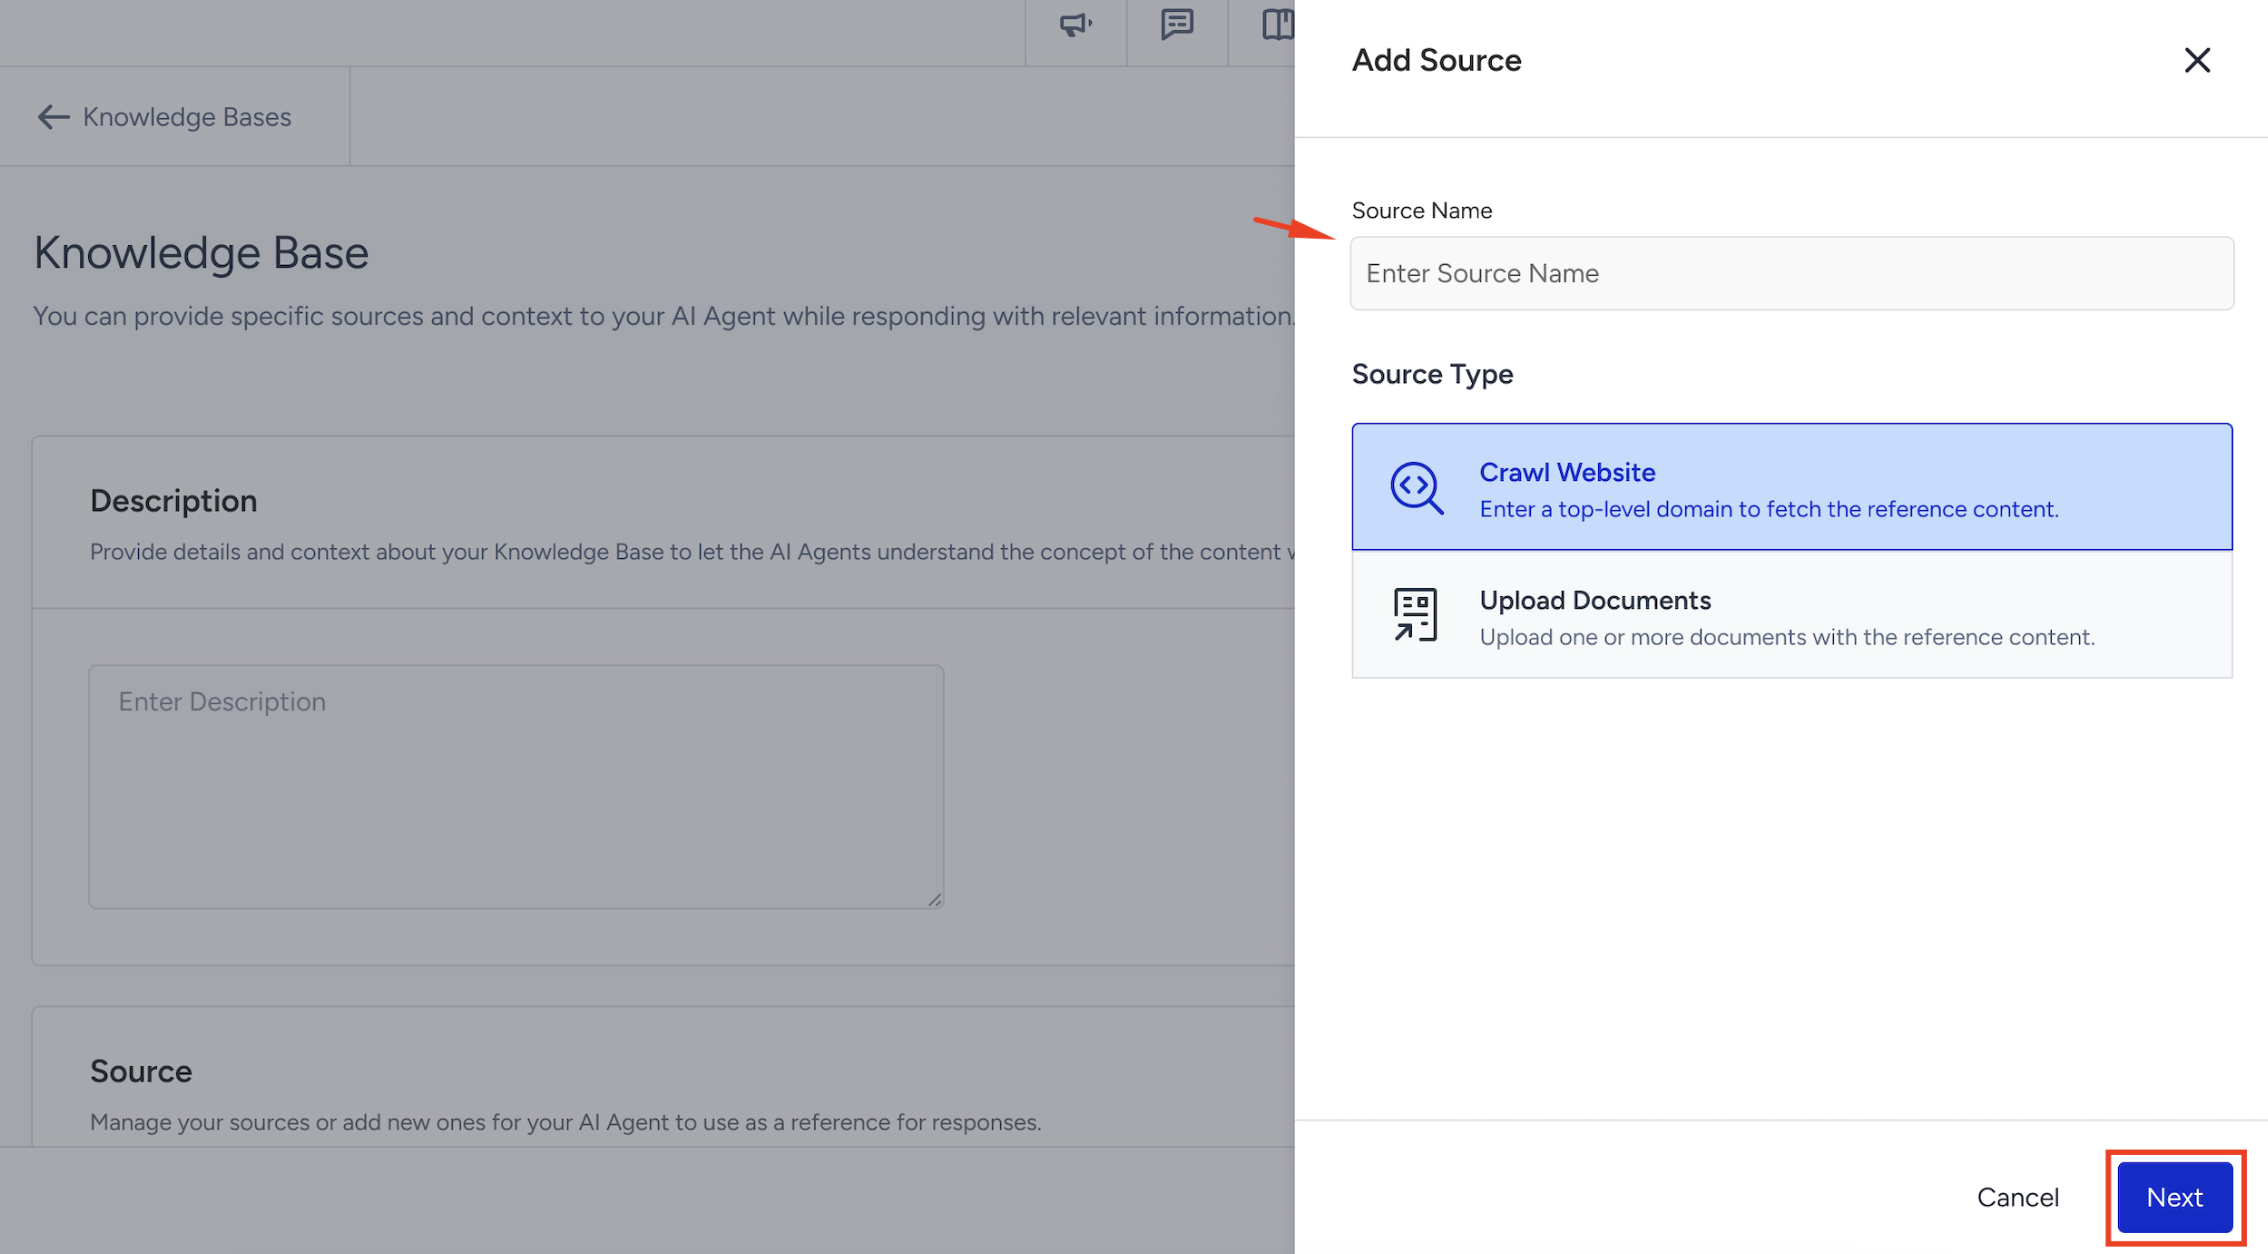
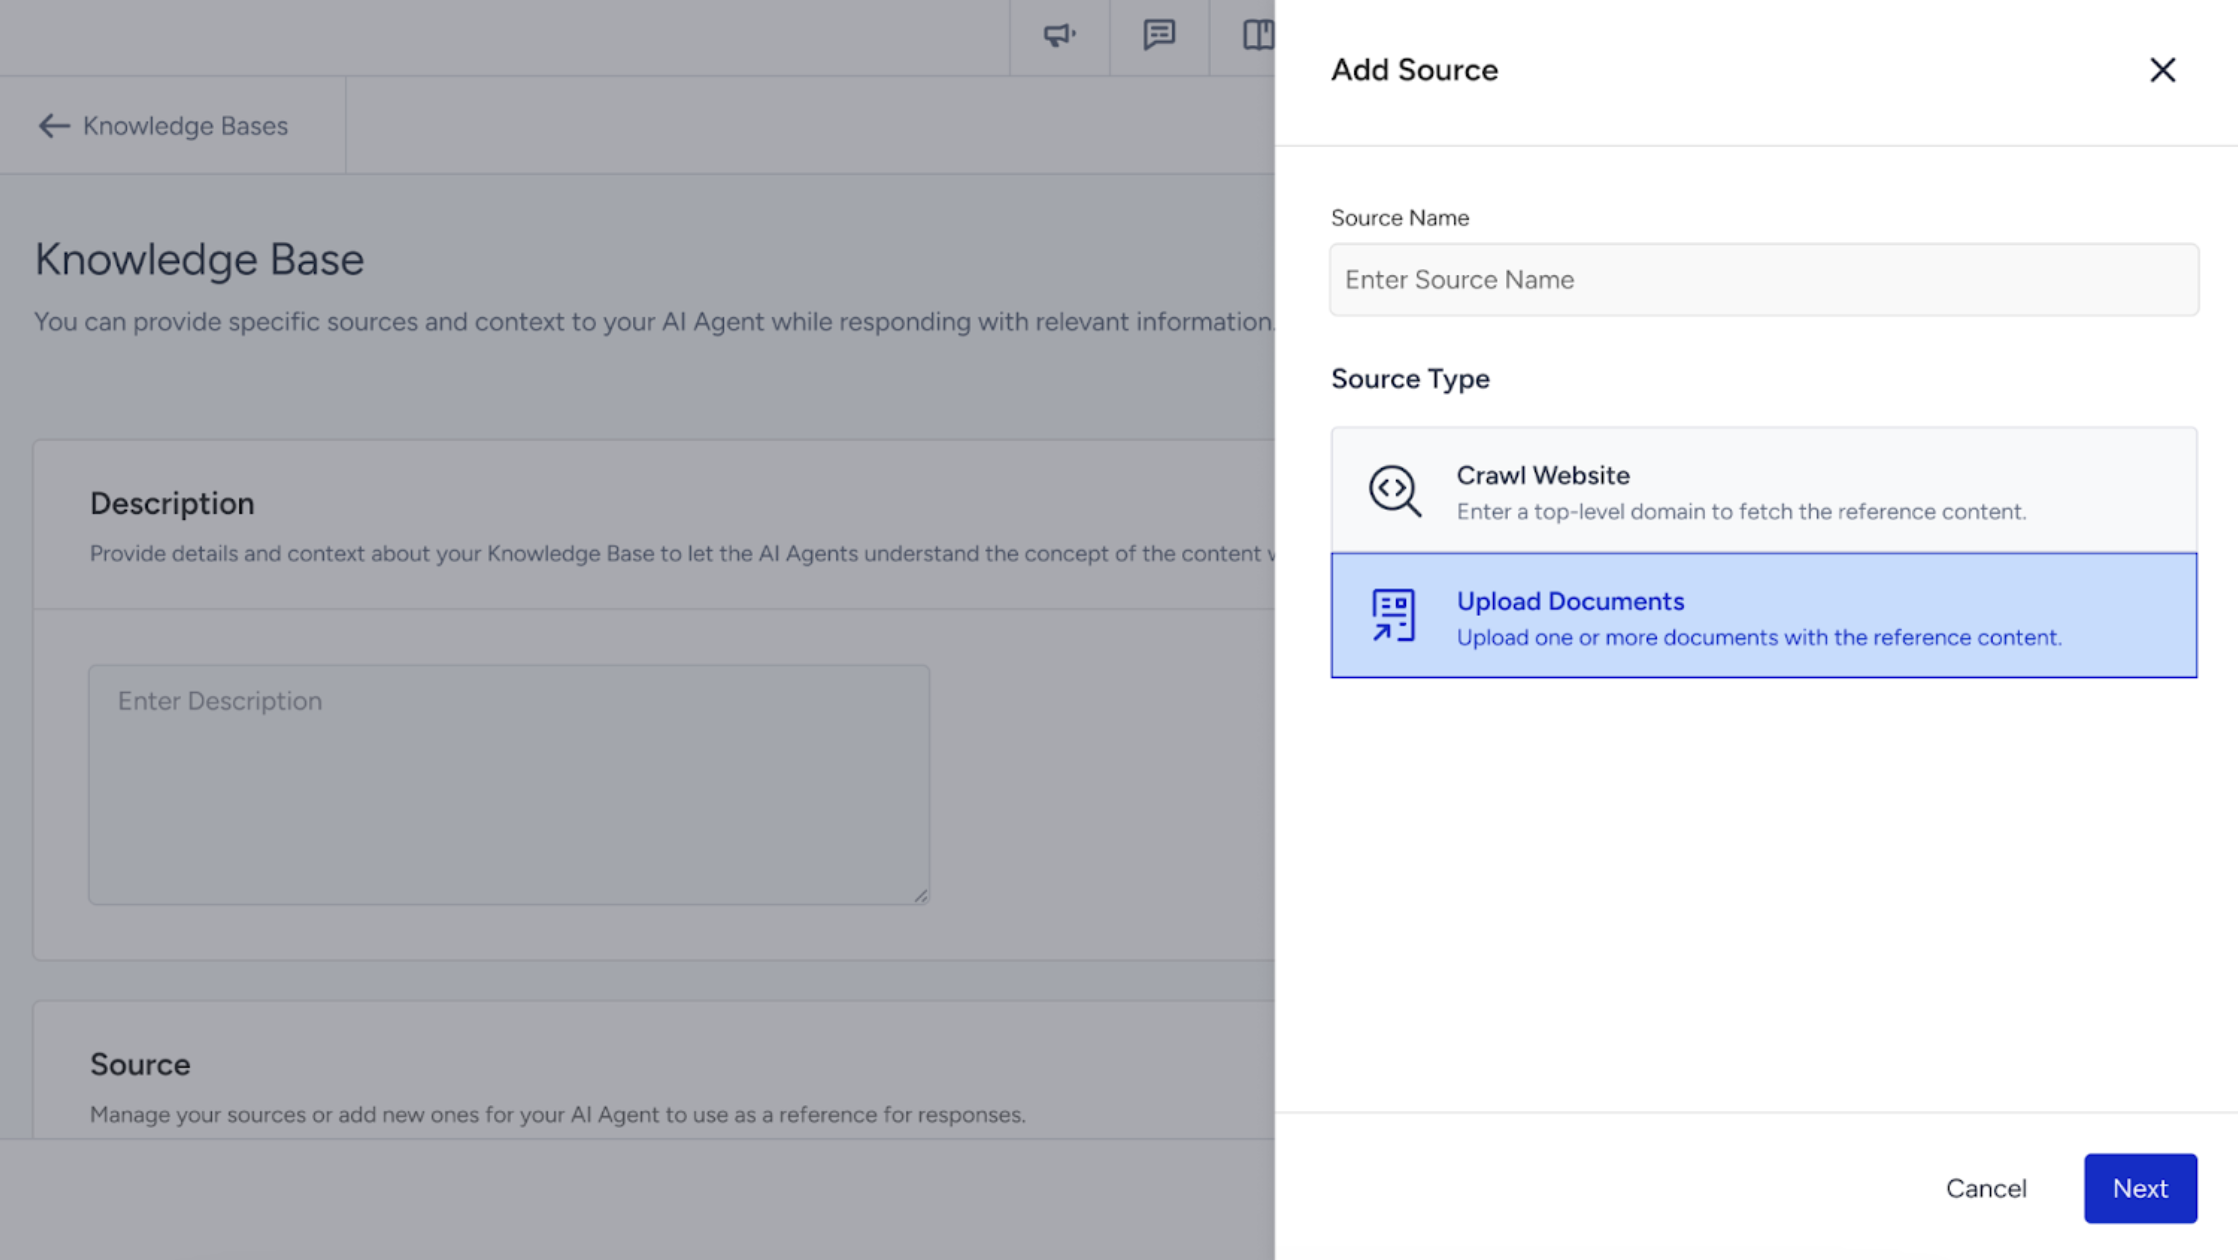
Next, in the Source field, you should create a Source. Sources are the content inputs that feed a Knowledge Base. Adding sources, the agent can extract information directly from your website, enabling it to deliver informed, dynamic responses based on up-to-date content. Click the +Add Source button.
Enter a name for your source, choose the source type, and click the Next button.
You can either select the Crawl Website or Upload Documents options for your Source Types.
Each Knowledge Base can contain up to 5 sources.
All added sources are displayed within the Knowledge Base view.
You can delete the sources, but editing is not currently supported.
To update a source, delete it and create a new one with the revised settings.
Deleting a source may immediately impact any live agent using it, potentially changing its behavior in production.
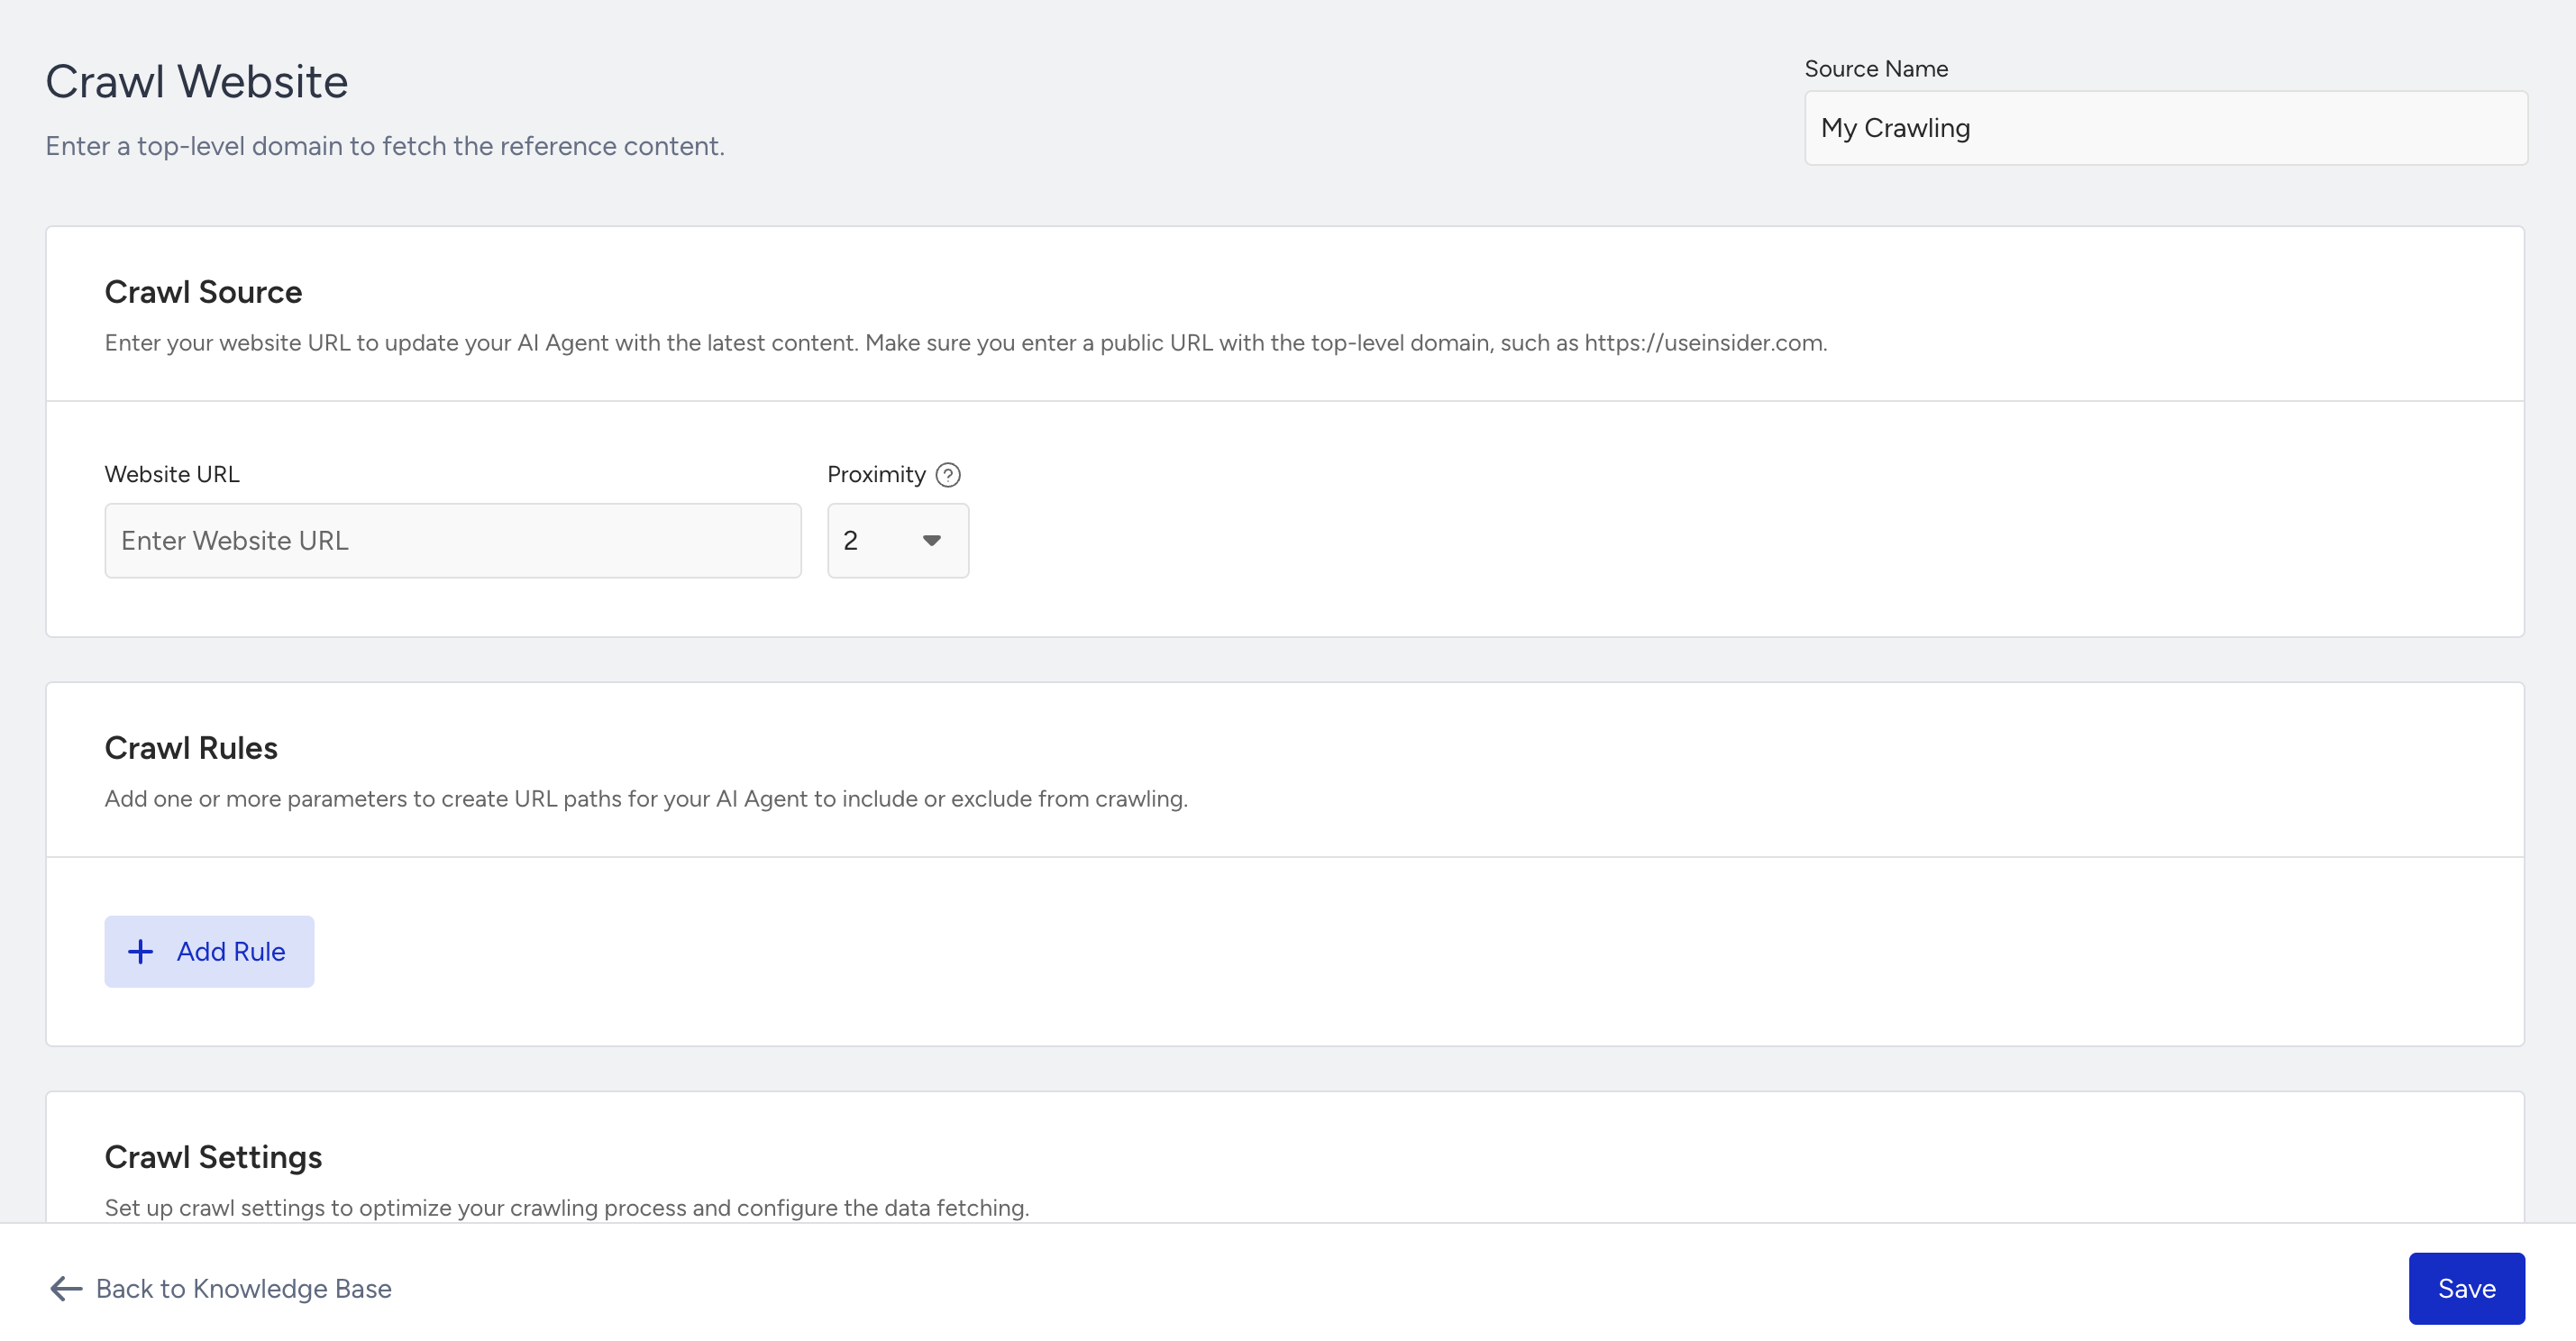
Crawl Website
The Crawl Website feature allows you to extract content from a website for your AI Agent. Enter the website URL and set the crawl depth in Crawl Source. Refine which pages to include or exclude in Crawl Rules, and further customize the process in Crawl Settings.
Crawl Source
To configure a website crawl, enter the website URL in the Crawl Source section. You can also set the proximity level, which defines how deep the crawl goes. If you don’t make any changes, the system will use the default proximity level of 2.
Proximity defines the number of internal link layers (click depths) that the crawler will follow from the starting URL. For example, if you enter https://example.com and set the proximity to 2, the crawler will scan:
https://example.com/about
https://example.com/products/product-a
https://example.com/blog/post-1
However, it will not visit any pages linked from these secondary pages.
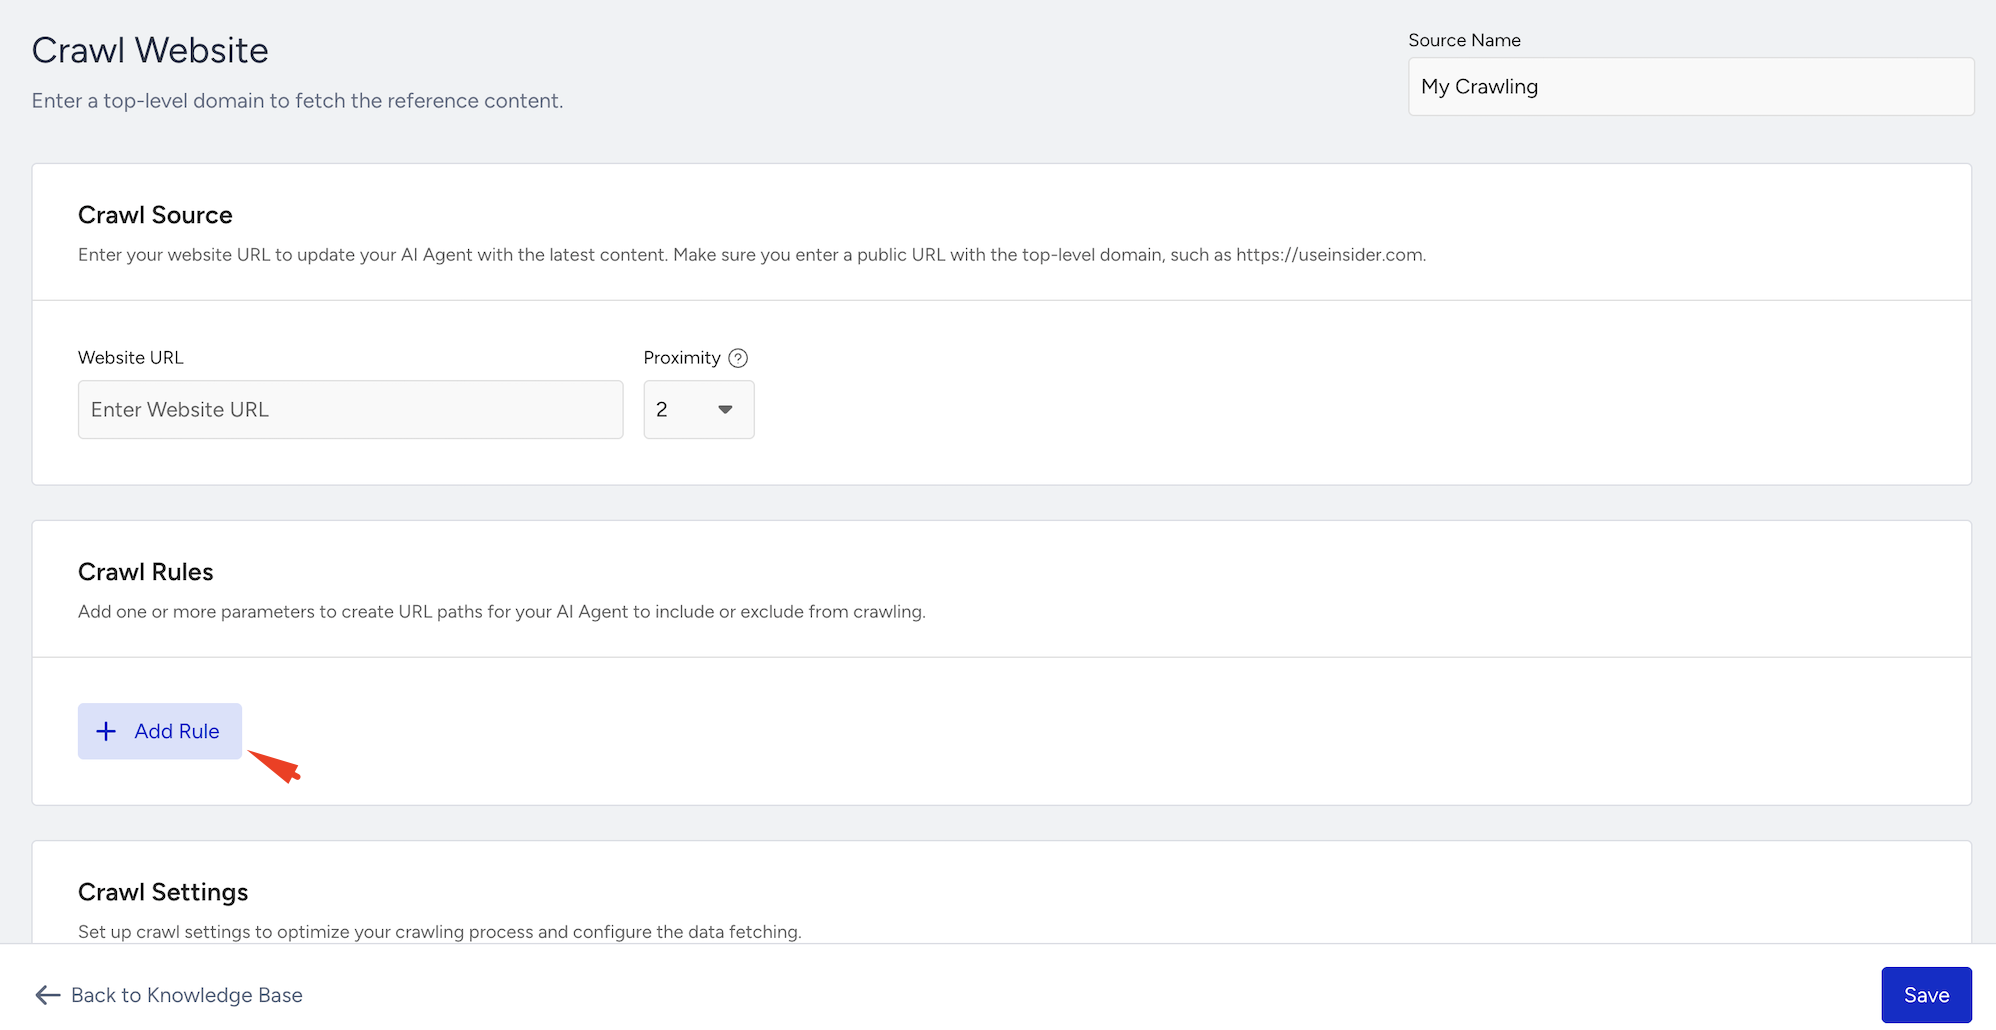
Crawl Rules
The Crawl Rules section lets you control exactly which pages are included or excluded. You can define rules using contains or not contains, and group them together to apply the same logic (AND/OR).
This provides you with the flexibility to precisely control the scope of crawling.
To create crawl rules,
Click the Add Rule button.
Choose a rule parameter:
Contains: URL must include the specified expression.
Not Contains: URL must not include the specified expression.
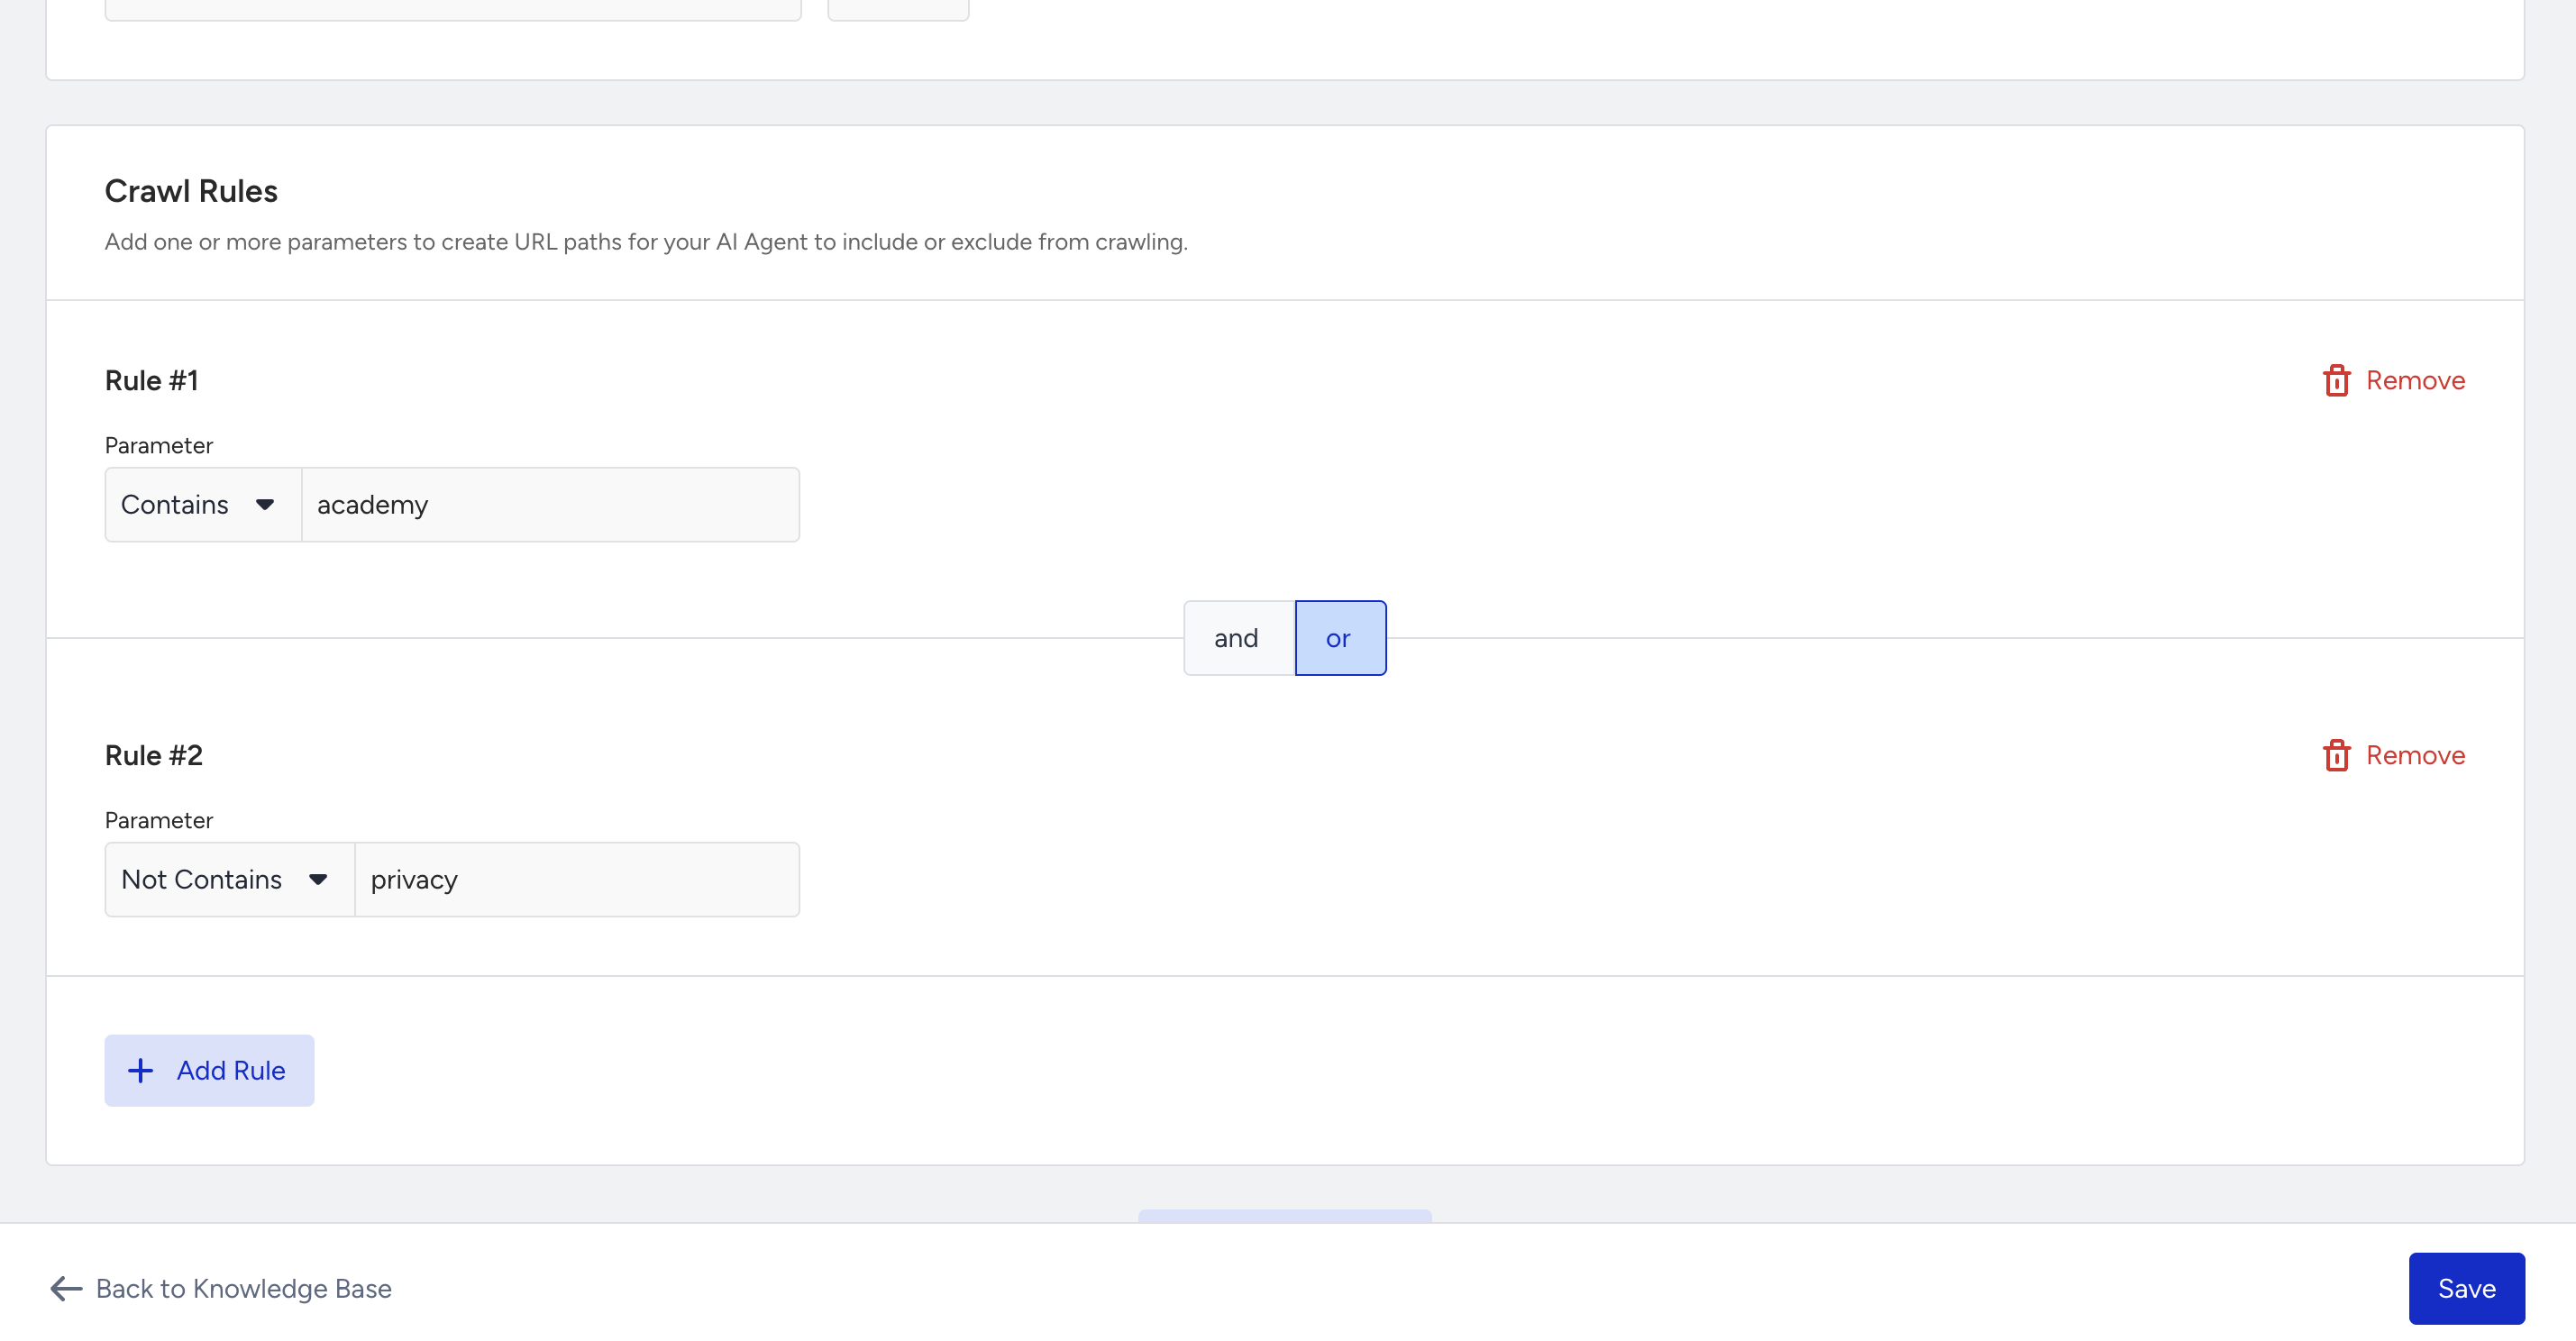
Once you add the first rule, Rule Group 1 is created automatically.
When you add rules, you can only use contains or not contains as conditions. Rules are organized into groups, and each group must follow the same logic (AND or OR).
You can create up to ten groups in total, and all groups must also use the same logic type.
Here are some use case examples for the crawling rules you might follow:
Use Case 1: Focus scope with AND conditions
This setup narrows the crawl to pages that satisfy both groups of rules:
Group 1 → contains
faqOR containsflightGroup 2 → contains
promotionAND containsdeals
As a result, only pages that match both groups will be crawled.
For example:
/faq/flight/deals→ meets all conditions/faq/promotion→ missing “deals”
Use Case 2: Restrict scope with exclusions
This setup allows pages to be displayed if they either contain certain keywords or exclude others.
Group 1 → contains
helpGroup 2 → not contains
promotionspromotions
As a result, pages are included if they have “help” in the URL, or if they don’t include “promotions.”
For example:
/help→ matches Group 1/prod/docs→ matches Group 2 (no “promotions” in the URL)
Crawl Settings
In the Crawl Settings section, you can fine-tune how the crawler behaves with additional settings. These options give you more control over what the crawler collects or skips.
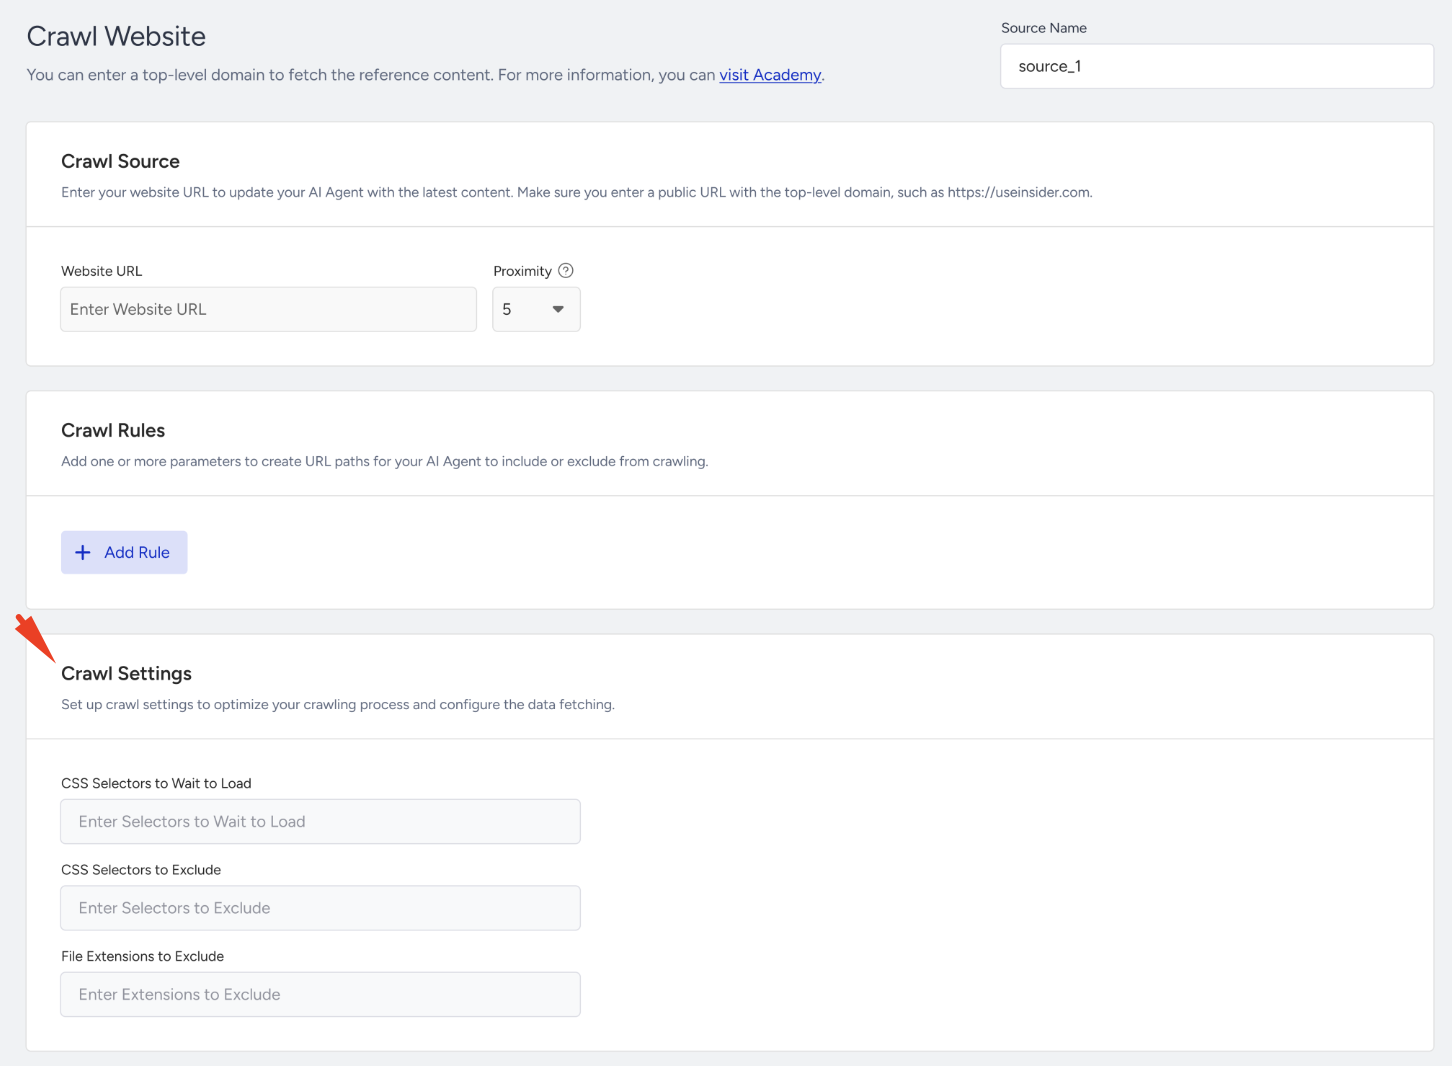
CSS Selectors to Wait to Load: You can tell the crawler to wait for specific elements to appear before collecting content. This is helpful for pages with dynamic content that loads after the initial render. For example: .product-description, #faq-section
CSS Selectors to Exclude: You can specify parts of the page you want the crawler to skip. Use this to avoid scraping unwanted elements, such as footers or banners. For example: .footer, .cookie-banner
File Extensions to Exclude: You can prevent the crawler from downloading or indexing specific file types. For example: .pdf, .jpg, .zip
Before saving your crawl settings, make sure they meet the following requirements:
Each rule must use valid URL characters.
You can create up to 5 rules per group and 10 groups in total.
Rules within a group must follow the same logic (AND or OR).
All groups must also use the same logic type (AND or OR).
The source name is fixed and cannot be edited.
Proximity must be an integer between 0 and 10 (default = 2).
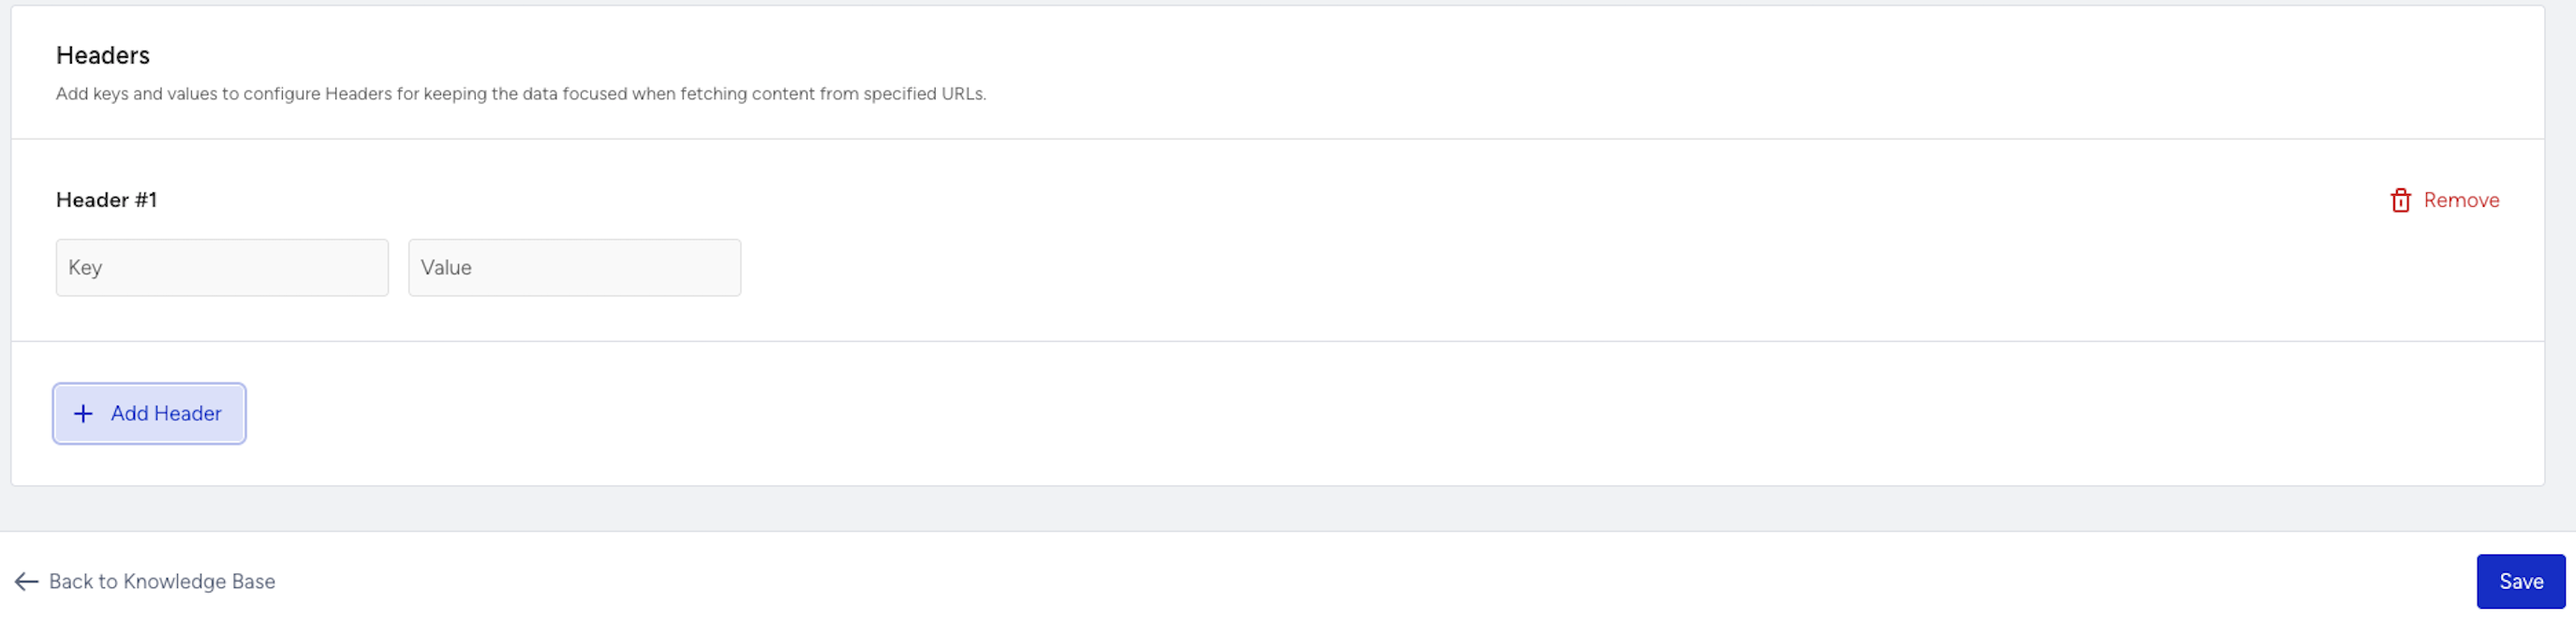
Headers
Headers let you send additional information with your crawl request, such as authentication tokens or language preferences.
To add custom HTTP headers,
Click Add Header.
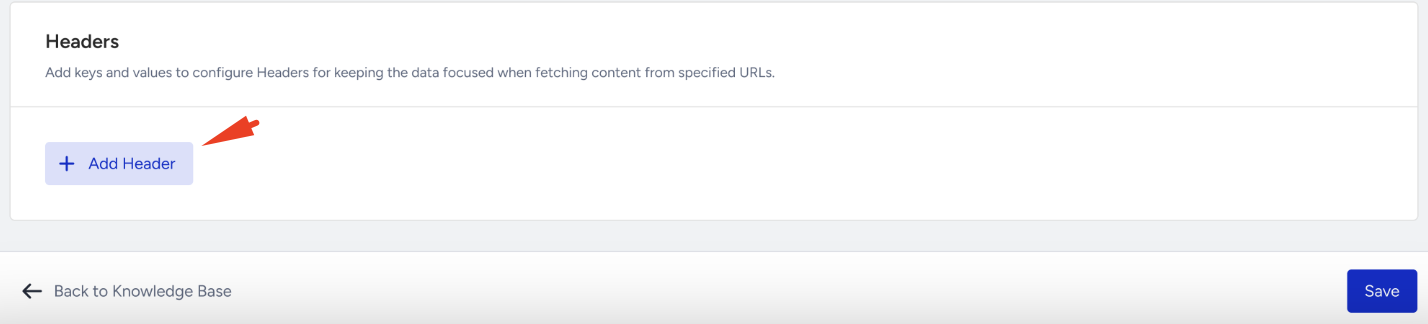
Enter a key and value pair.

Here are some common headers you might add:
Authentication → Use a header to mimic a logged-in user by passing a token.
Authorization: Bearer YOUR_TOKEN
Language Preference → Request content in a specific language.
Accept-Language: en-US(English – US)Accept-Language: tr-TR(Turkish)
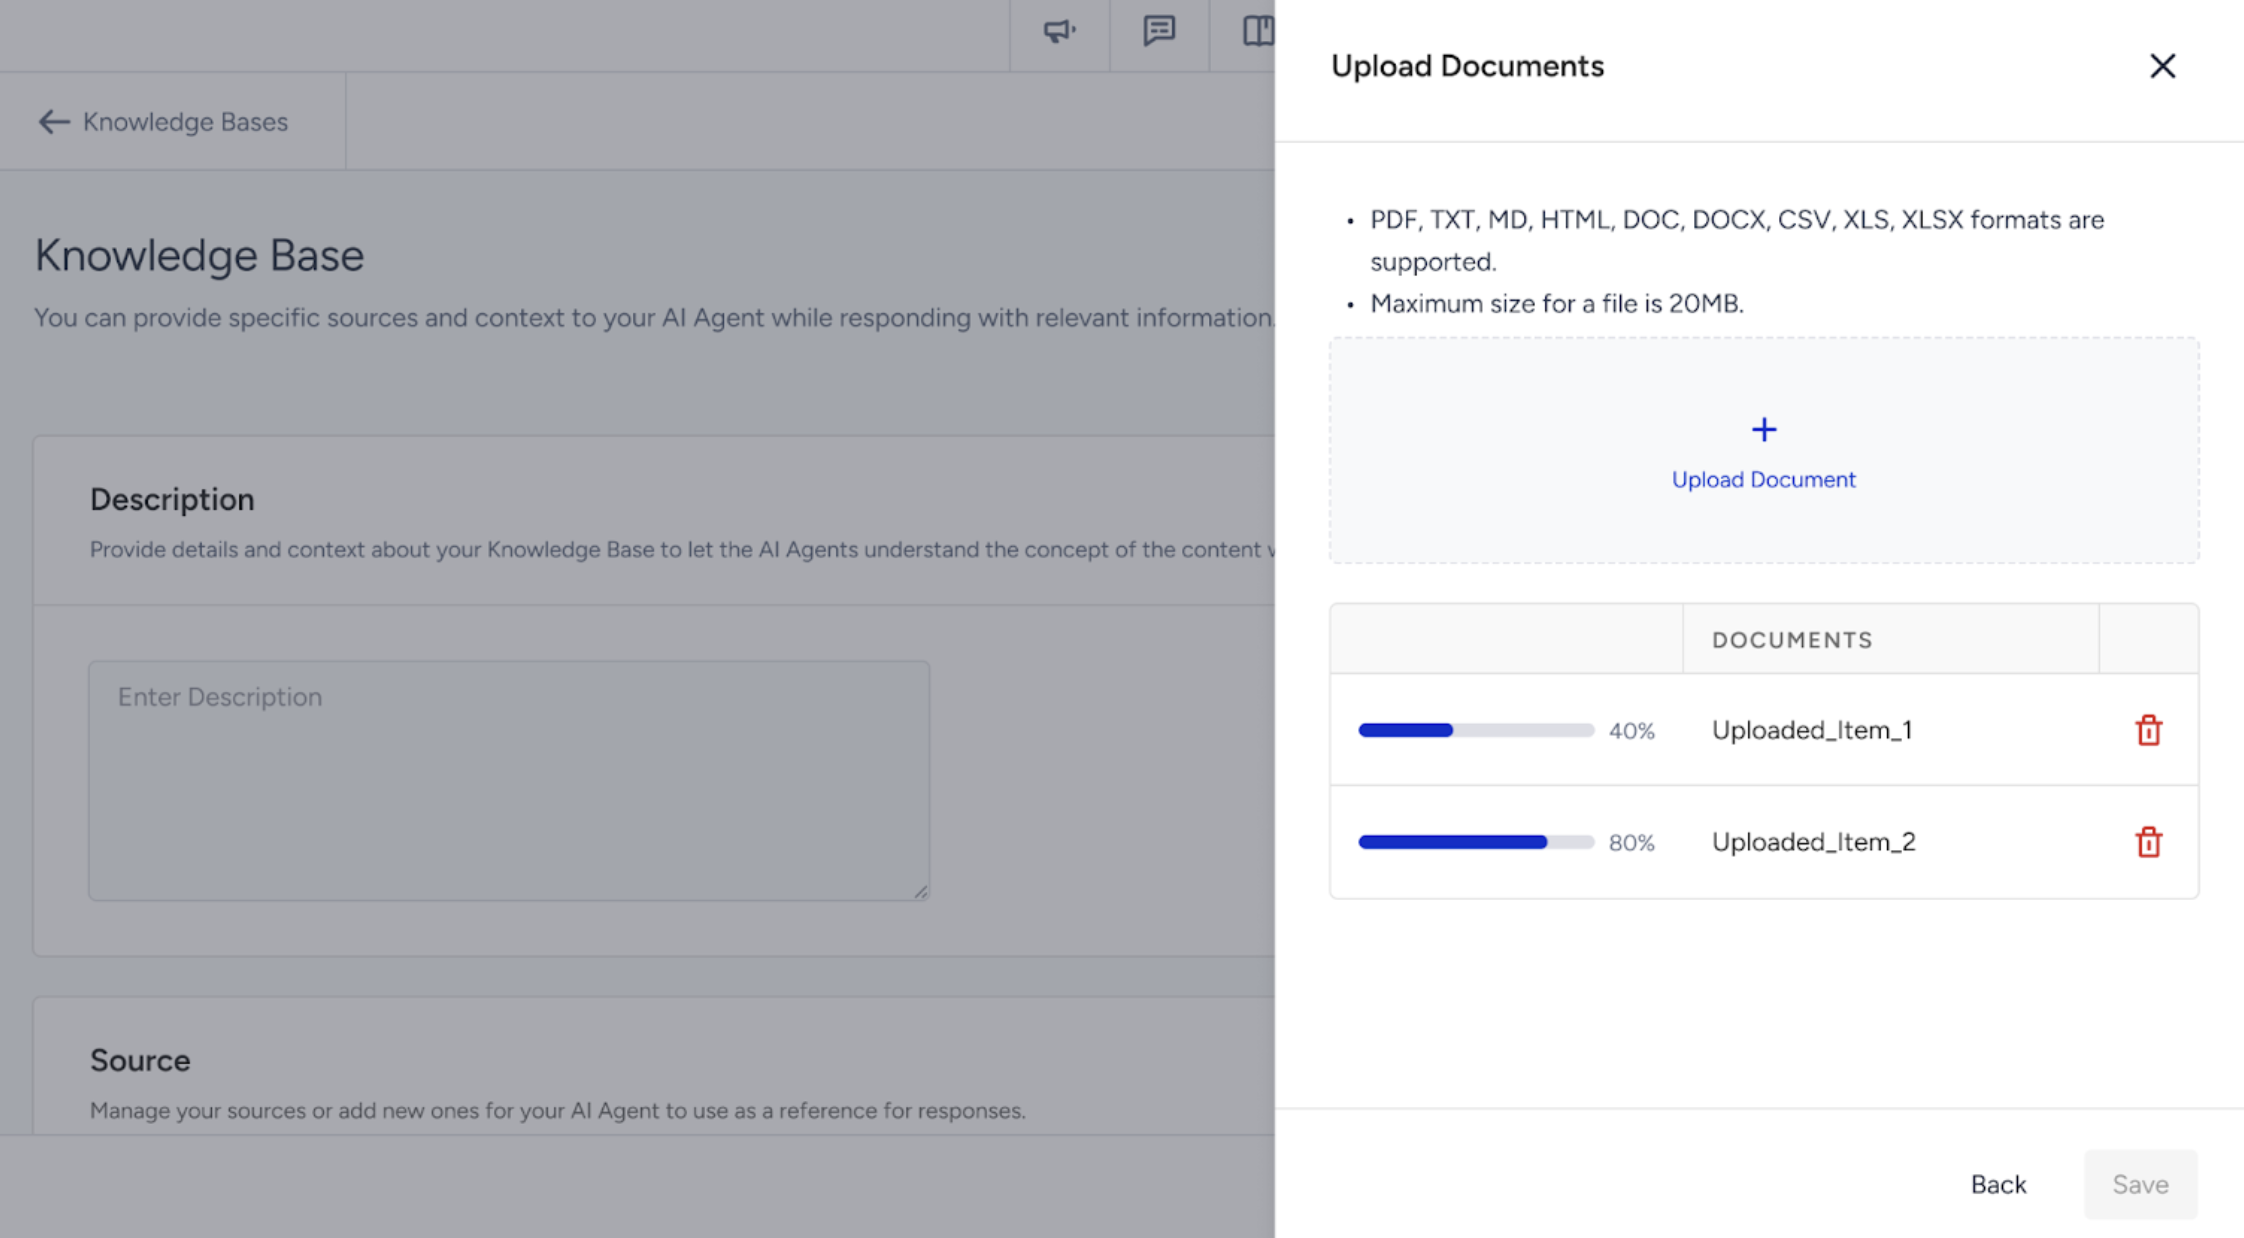
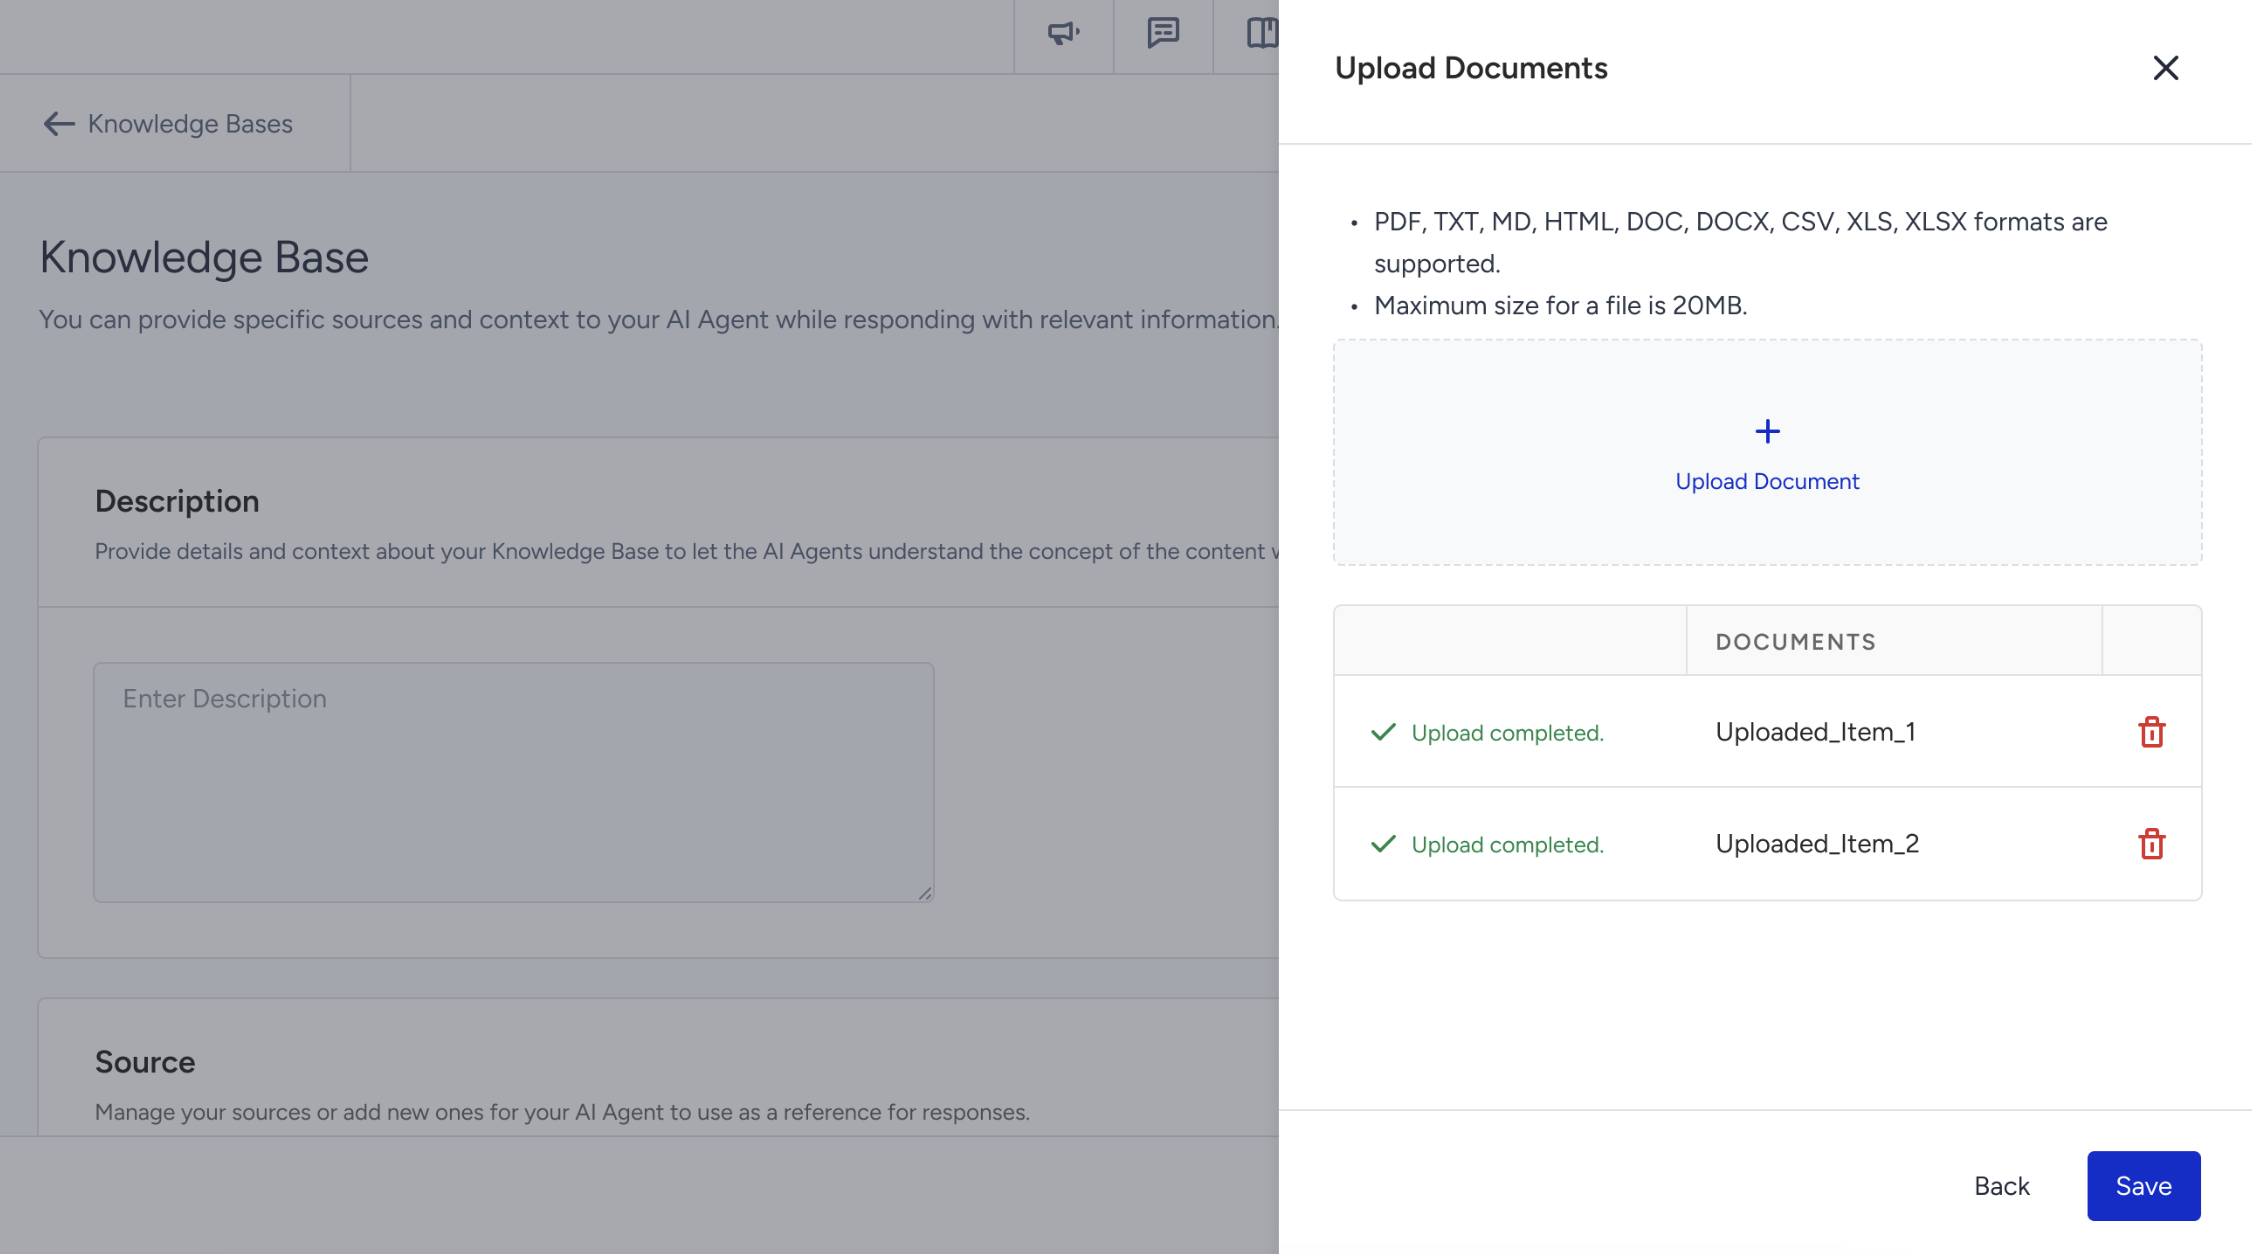
Upload Documents
In addition to the web crawling option, you can upload documents as sources for your knowledge bases.
Supported file formats:
.txt (Plain text – ASCII only)
.md (Markdown)
.html (HTML)
.doc, .docx (Microsoft Word)
.csv (Comma-separated values)
.xls, .xlsx (Microsoft Excel)
.pdf (Portable Document Format)
The maximum file size is 20 MB per file.
To upload documents as the source, you can follow these steps:
After you click the Add Sources button in the Source section, select the Upload Documents option and click Next.
Upload your files one by one and wait for each to finish uploading before continuing. Make sure not to leave the page until all files have been successfully uploaded.
Once all uploads are complete, click the Save button to add the documents to the Knowledge Base.
Uploaded files will appear in the source list with the status “Learning”.

After processing is complete, the status will update to “Ready”.

To save your changes, click the Save button.
Congratulations! Your Knowledge Base is ready for use.