Suggested readings: Global Unsubscribe & Preference Center, Create Unsubscribe Pages
You can use the unsubscribe links and preference center in the default modules to give your subscribers the option to choose which groups they no longer want to receive email communications from.
You can follow this article to learn how to:
- Use Default Global Unsubscribe in email templates
- Use Default Preference Center in email templates
- Use Default Group Unsubscribe in email templates
Use Default Global Unsubscribe in email templates
To use the global unsubscribe option in your emails:
1. Go to the design step of your email campaign to choose Drag and Drop Editor or HTML Editor.
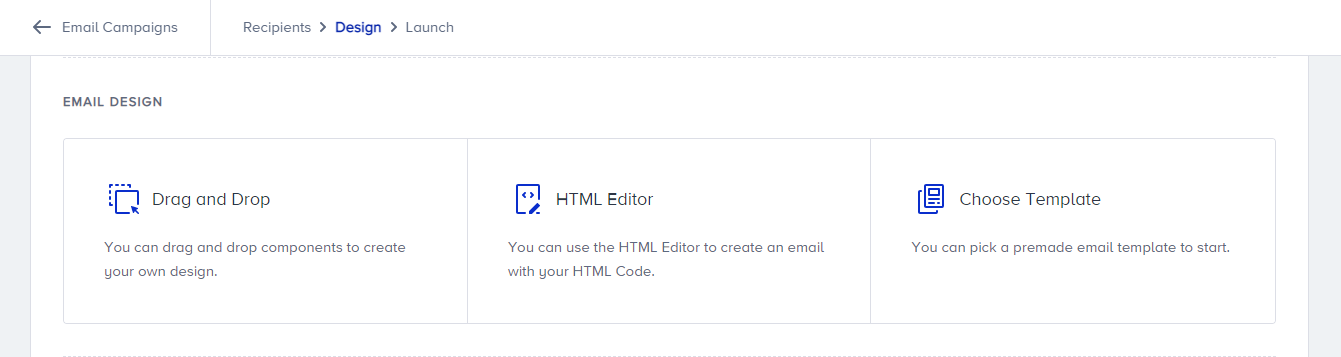
2. If you select the Drag & Drop Editor, go to Modules and add Global Unsubscribe. You can change the text and personalize it in your email templates.
If you want to use Global Unsubscribe without Unsubscribe Group and Preference Center in your email templates, you can use the first Global Unsubscribe module.
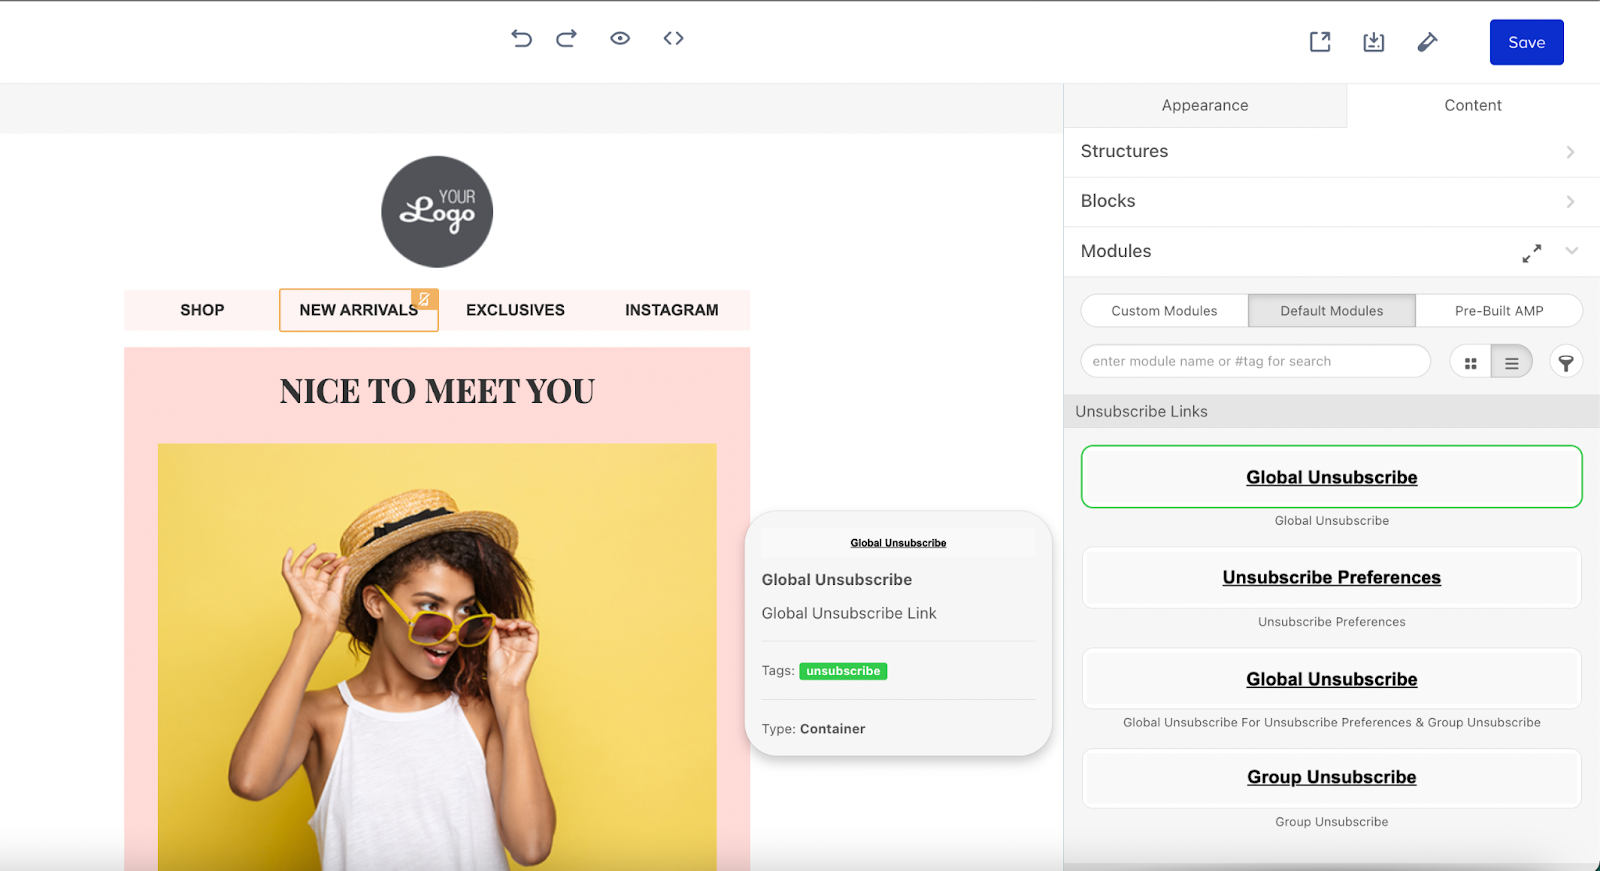
If you want to use Global Unsubscribe with Preference Center in your email templates, you can use the second global unsubscribe module, labeled "Global Unsubscribe For Unsubscribe Preferences & Group Unsubscribe."
3. If you select the HTML Editor, add the following tag in your HTML design:
- If you want to use Global Unsubscribe without Preference Center and/or Group Unsubscribes in your email templates, you can use the <%unsub%> tag.
- If you want to use Global Unsubscribe with Preference Center and/or Group Unsubscribes in your email templates, you can use the <%asm_global_unsubscribe_raw_url%> tag.
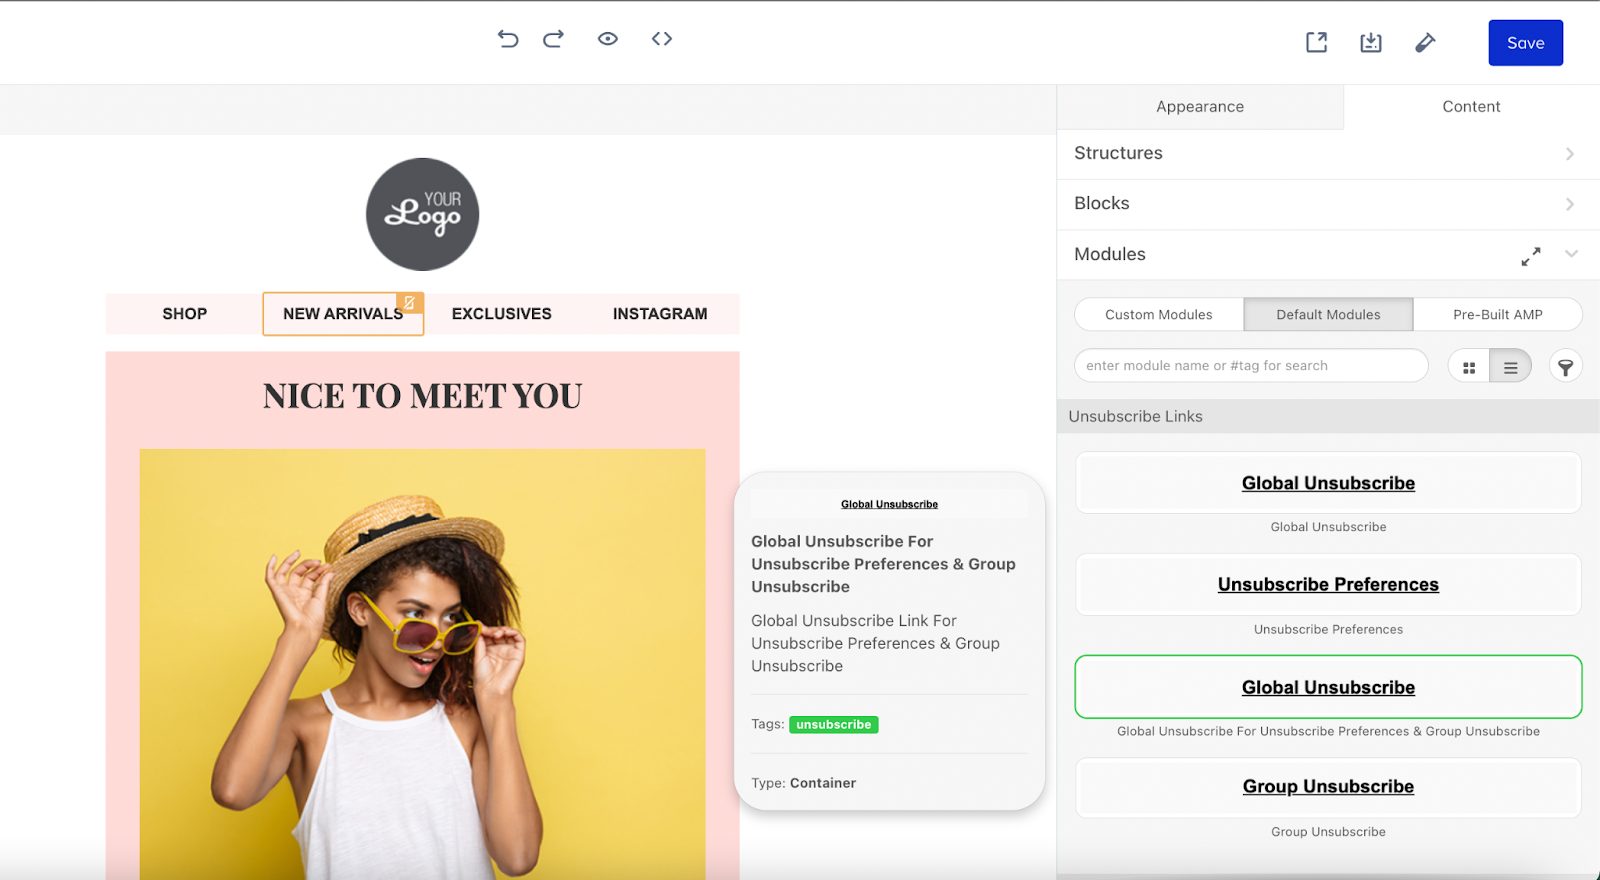
4. Once you test or launch your email, your subscribers can click the Global Unsubscribe tag and be redirected to a page where they will see the success message.
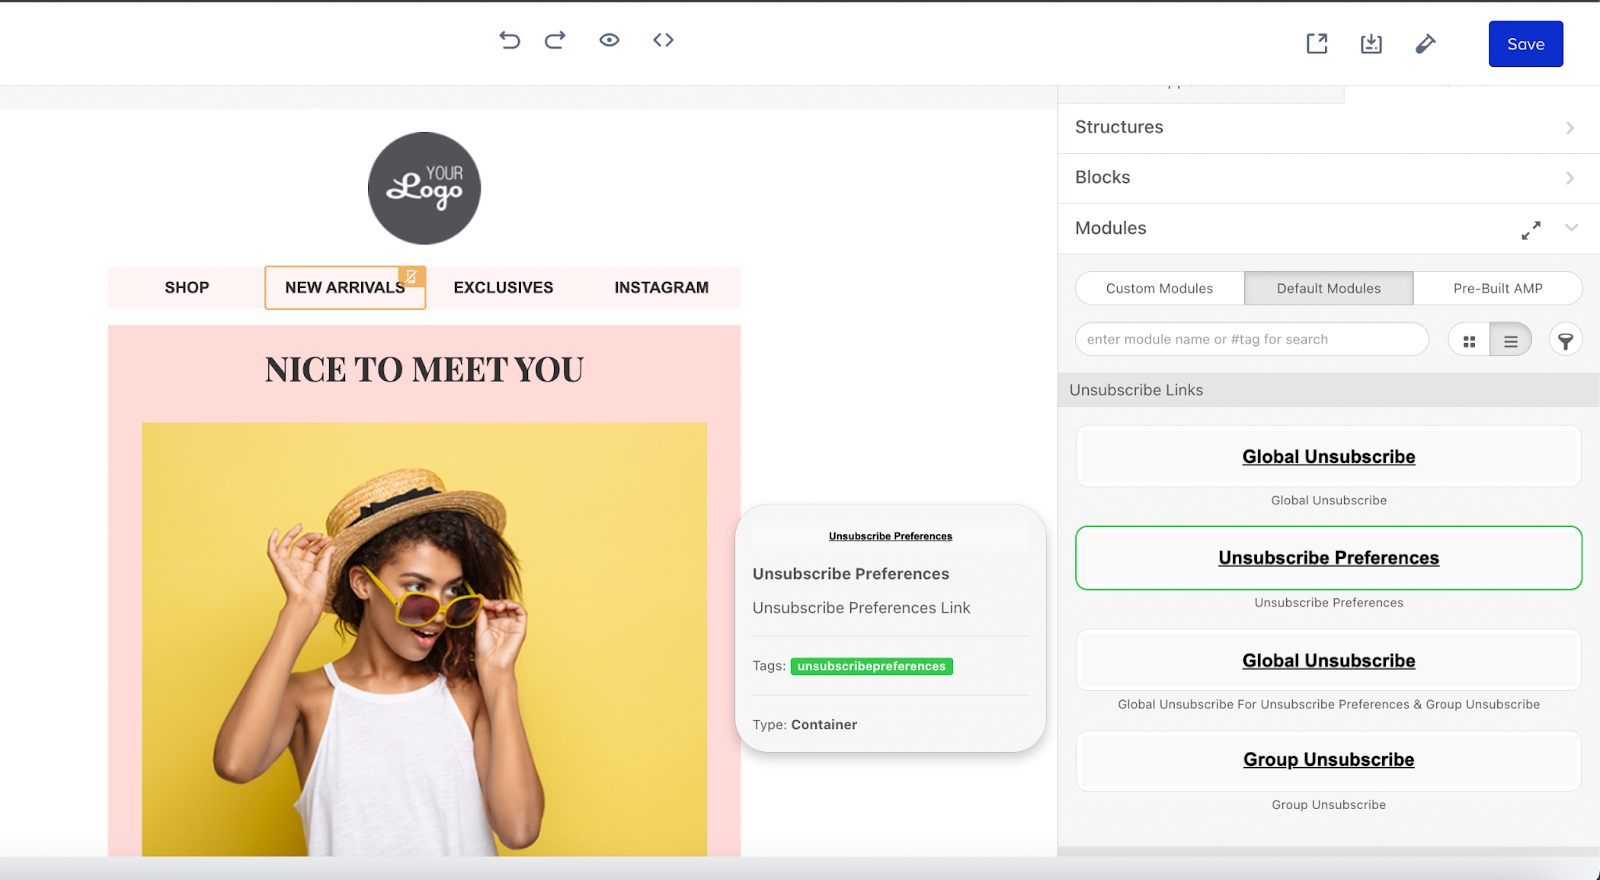
Use Default Preference Center in email templates
To use the preference center in your emails:
1. Create at least one unsubscribe group to use in the Preference Center in your email templates.
2. Go to the design step of your email to choose Drag & Drop Editor or HTML Editor.
.png)
3. If you select the Drag & Drop Editor, go to Modules and add Preference Center. You can change the text and personalize it in your email templates.
4. If you select the HTML Editor, add the following tag in your HTML design: <%asm_preferences_raw_url%>
5. Once you test or launch your email, your subscribers can click the Preference Center tag and be redirected to a Preference Center page where they will see the unsubscribe groups available for your brand.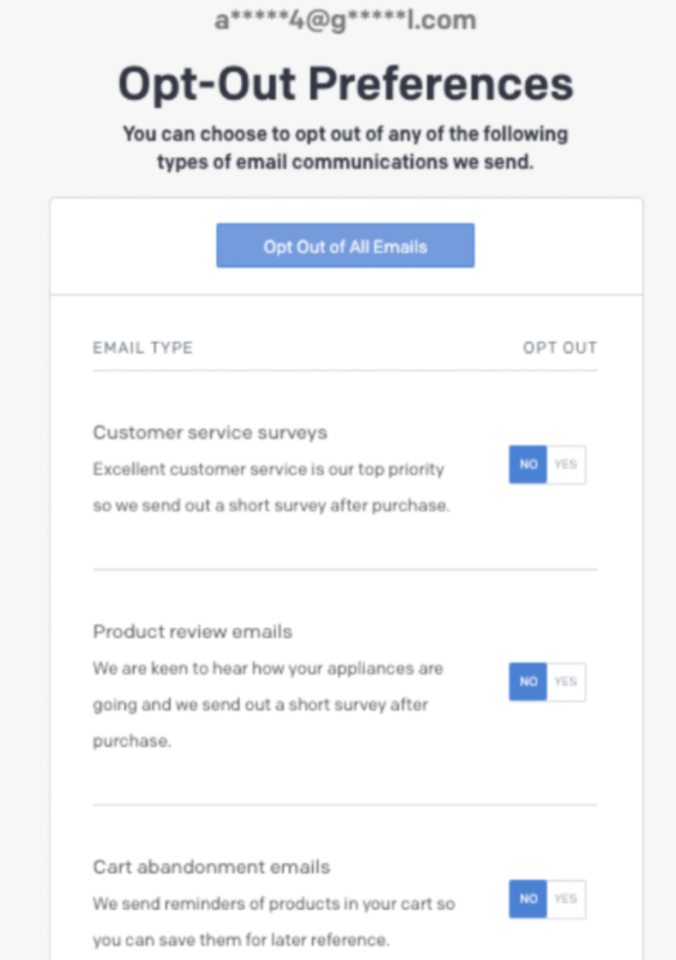
If you do not want to provide more than one group in preference, you may think of using the Group Unsubscribe tag as well.
Use Default Group Unsubscribe in email templates
To use the default group unsubscribe in your emails:
1. Create at least one unsubscribe group to use the Group Unsubscribe in your email templates.
2. Go to the design step of your email to choose Drag and Drop Editor or HTML Editor..png)
3. If you select the Drag & Drop Editor, go to Modules and add Group Unsubscribe. You can change the text and personalize it in your email templates.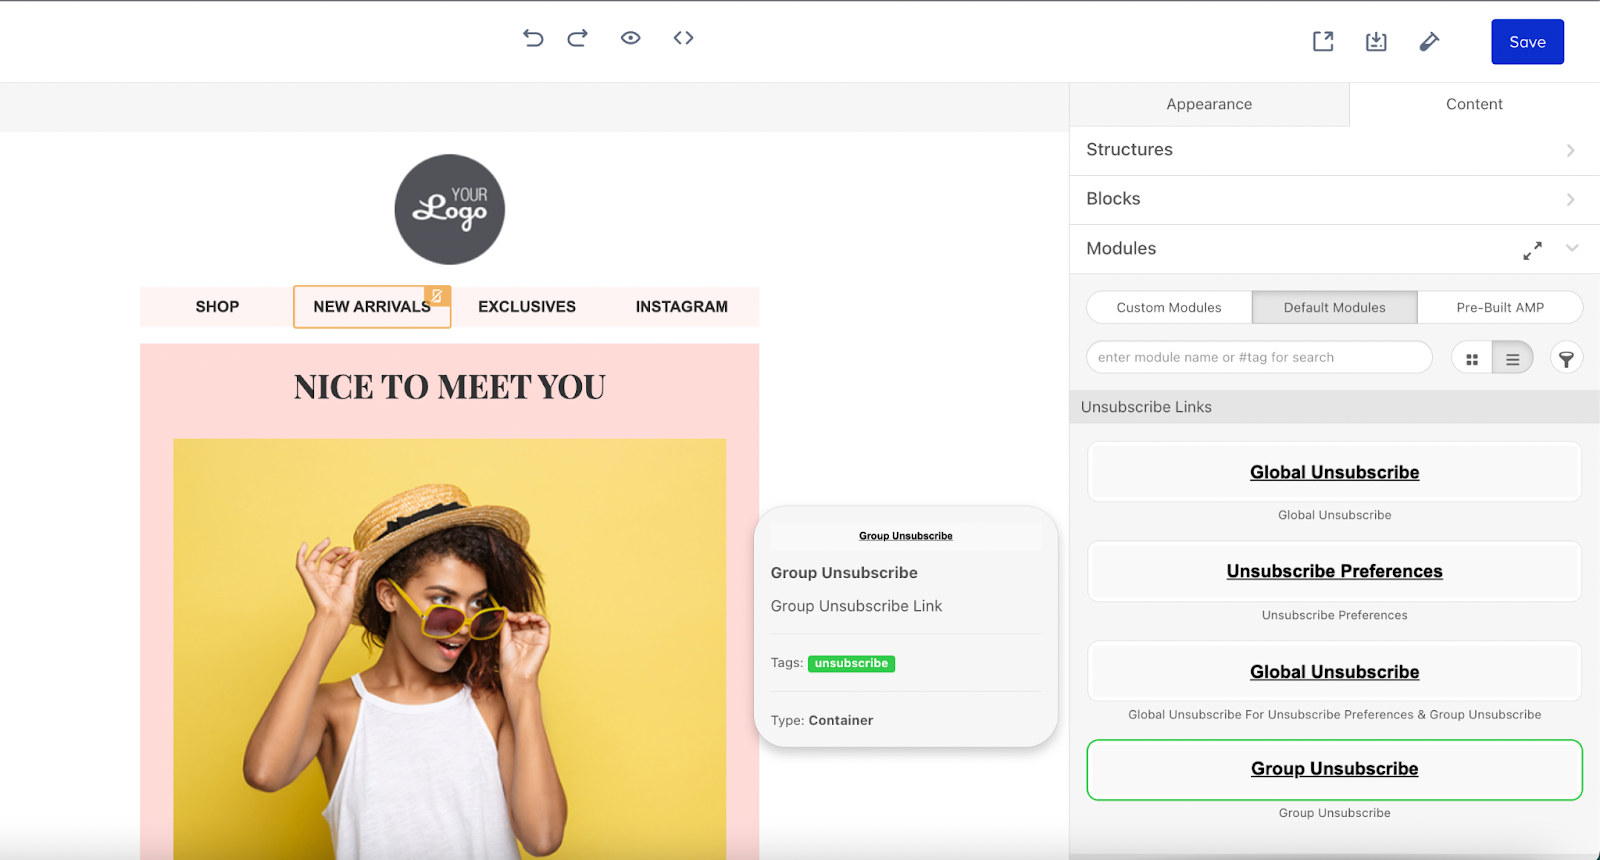
4. If you select the HTML Editor, add the following tag in your HTML design: <%asm_group_unsubscribe_raw_url%>
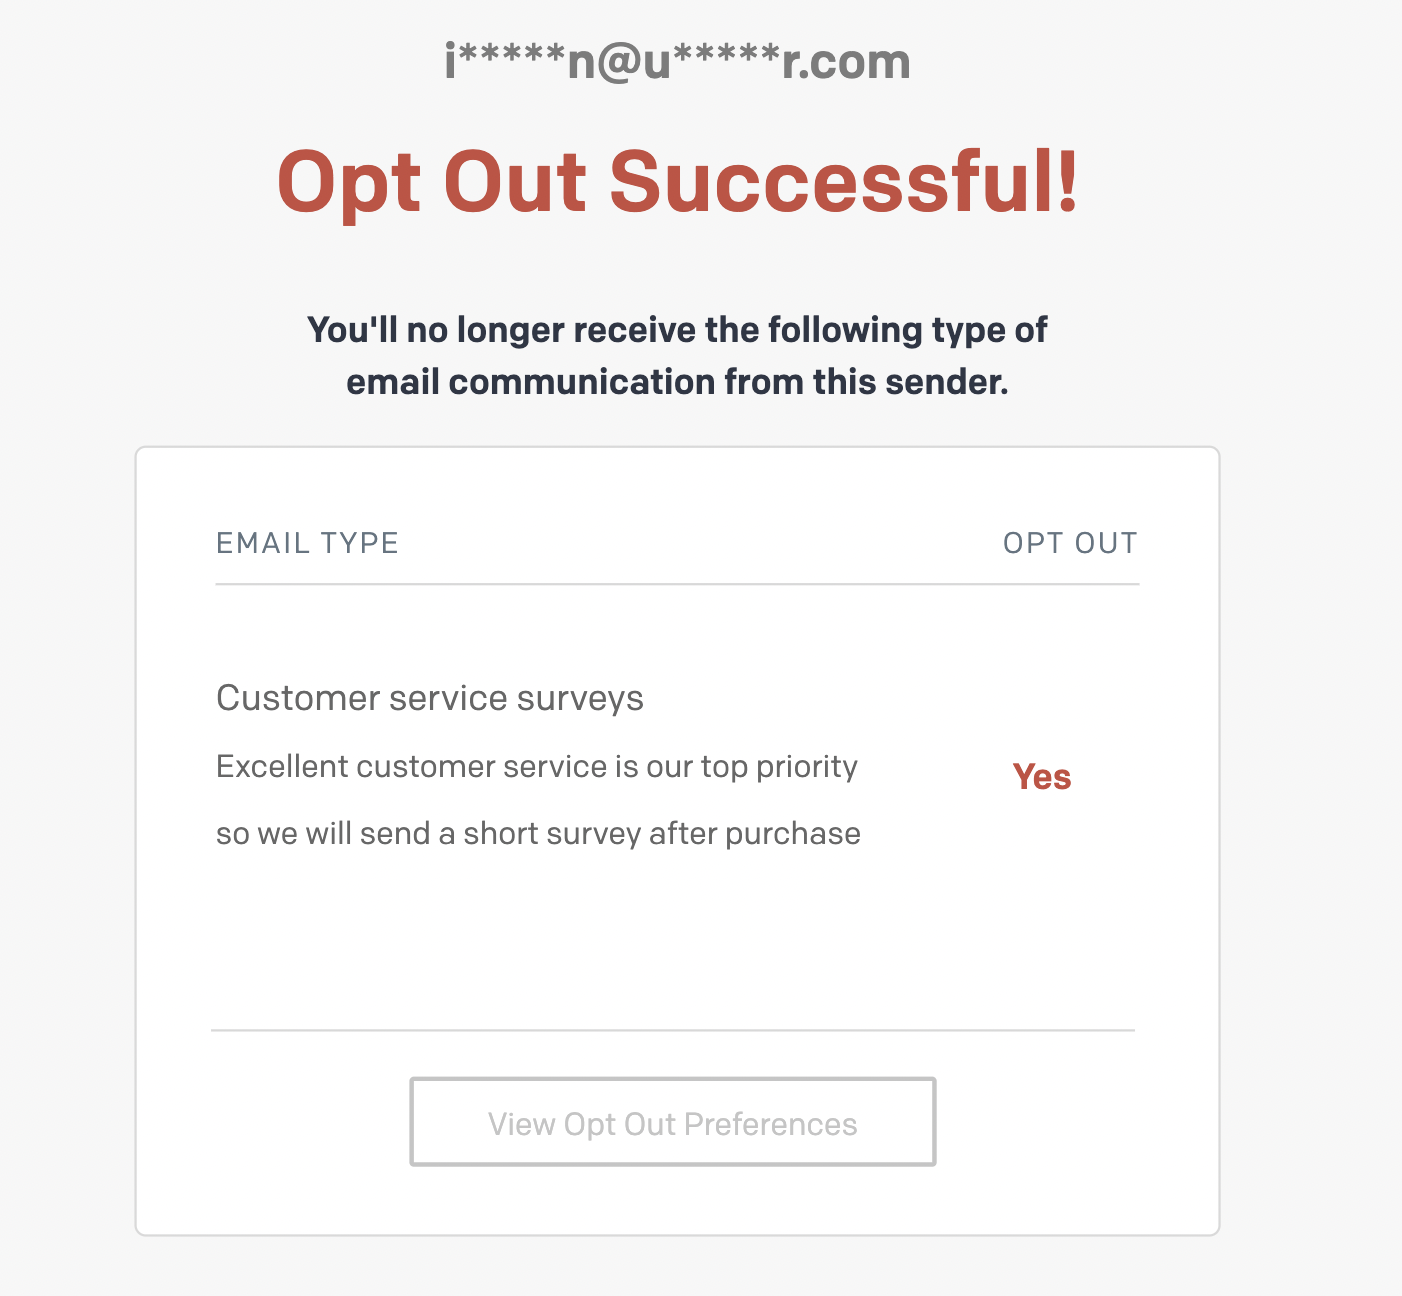
5. Once you test or launch your email, your subscribers can click the Group Unsubscribe tag and be redirected to a Group Unsubscribe page where they will see a success message.
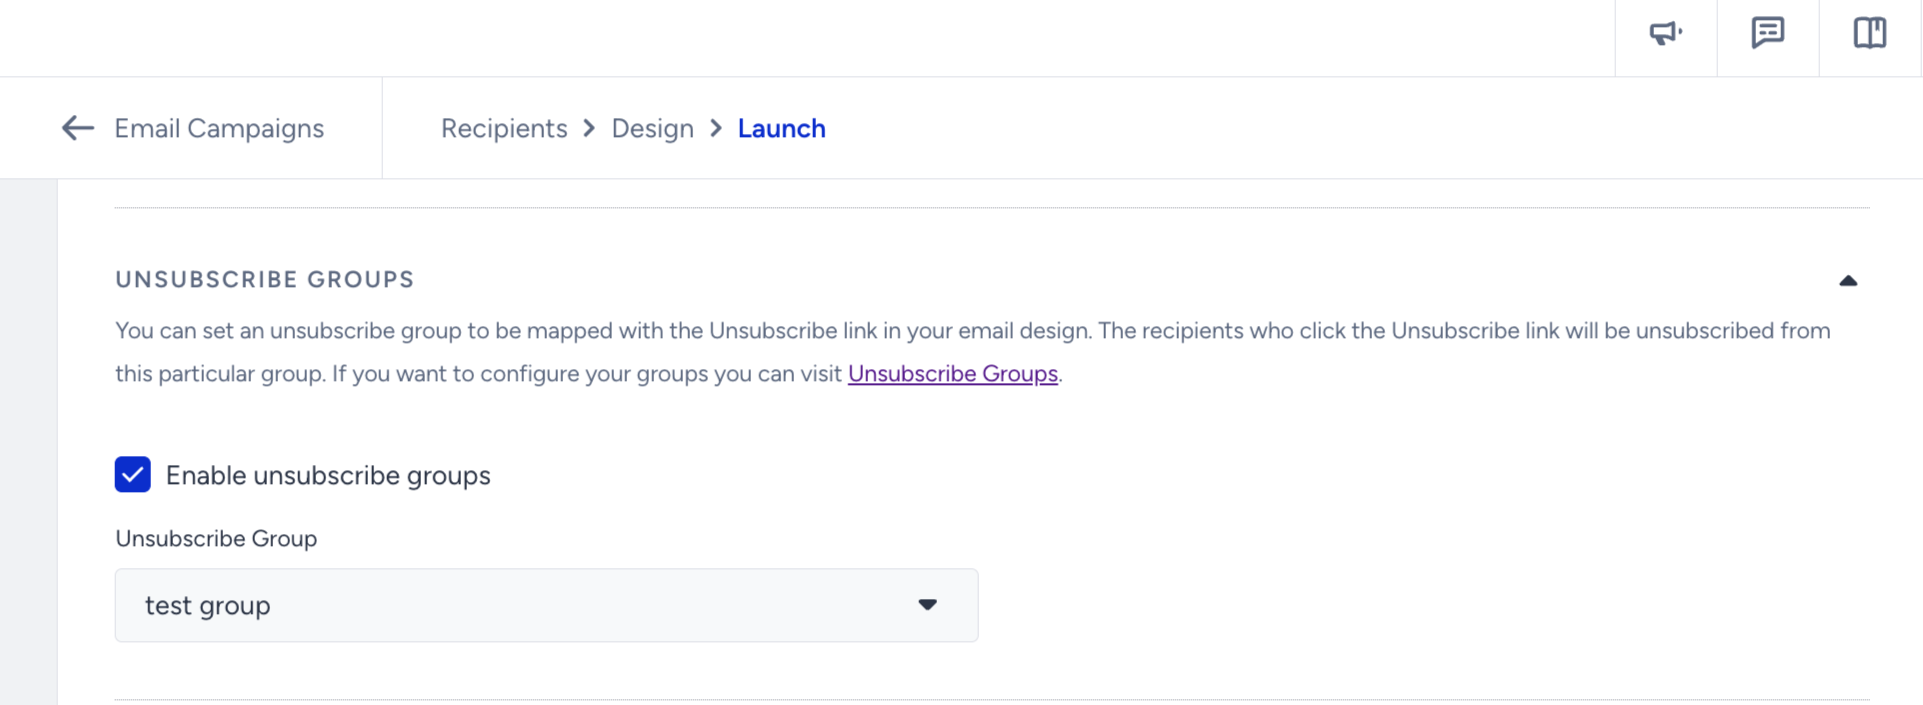
If you have a Group Unsubscribe tag in the email, it is required to enable the “Unsubscribe Groups“ setting on the Launch step and select the group that you want users to unsubscribe from upon clicking the Group Unsubscribe link in their emails. Otherwise, you will receive an error on the Launch step — in Architect, it is displayed inside the notification page — warning that you have to enable this setting and select the unsubscribe group to launch the campaign.
You need to use segmentation to exclude the users from your future email campaigns based on the unsubscribe group they opted out of.