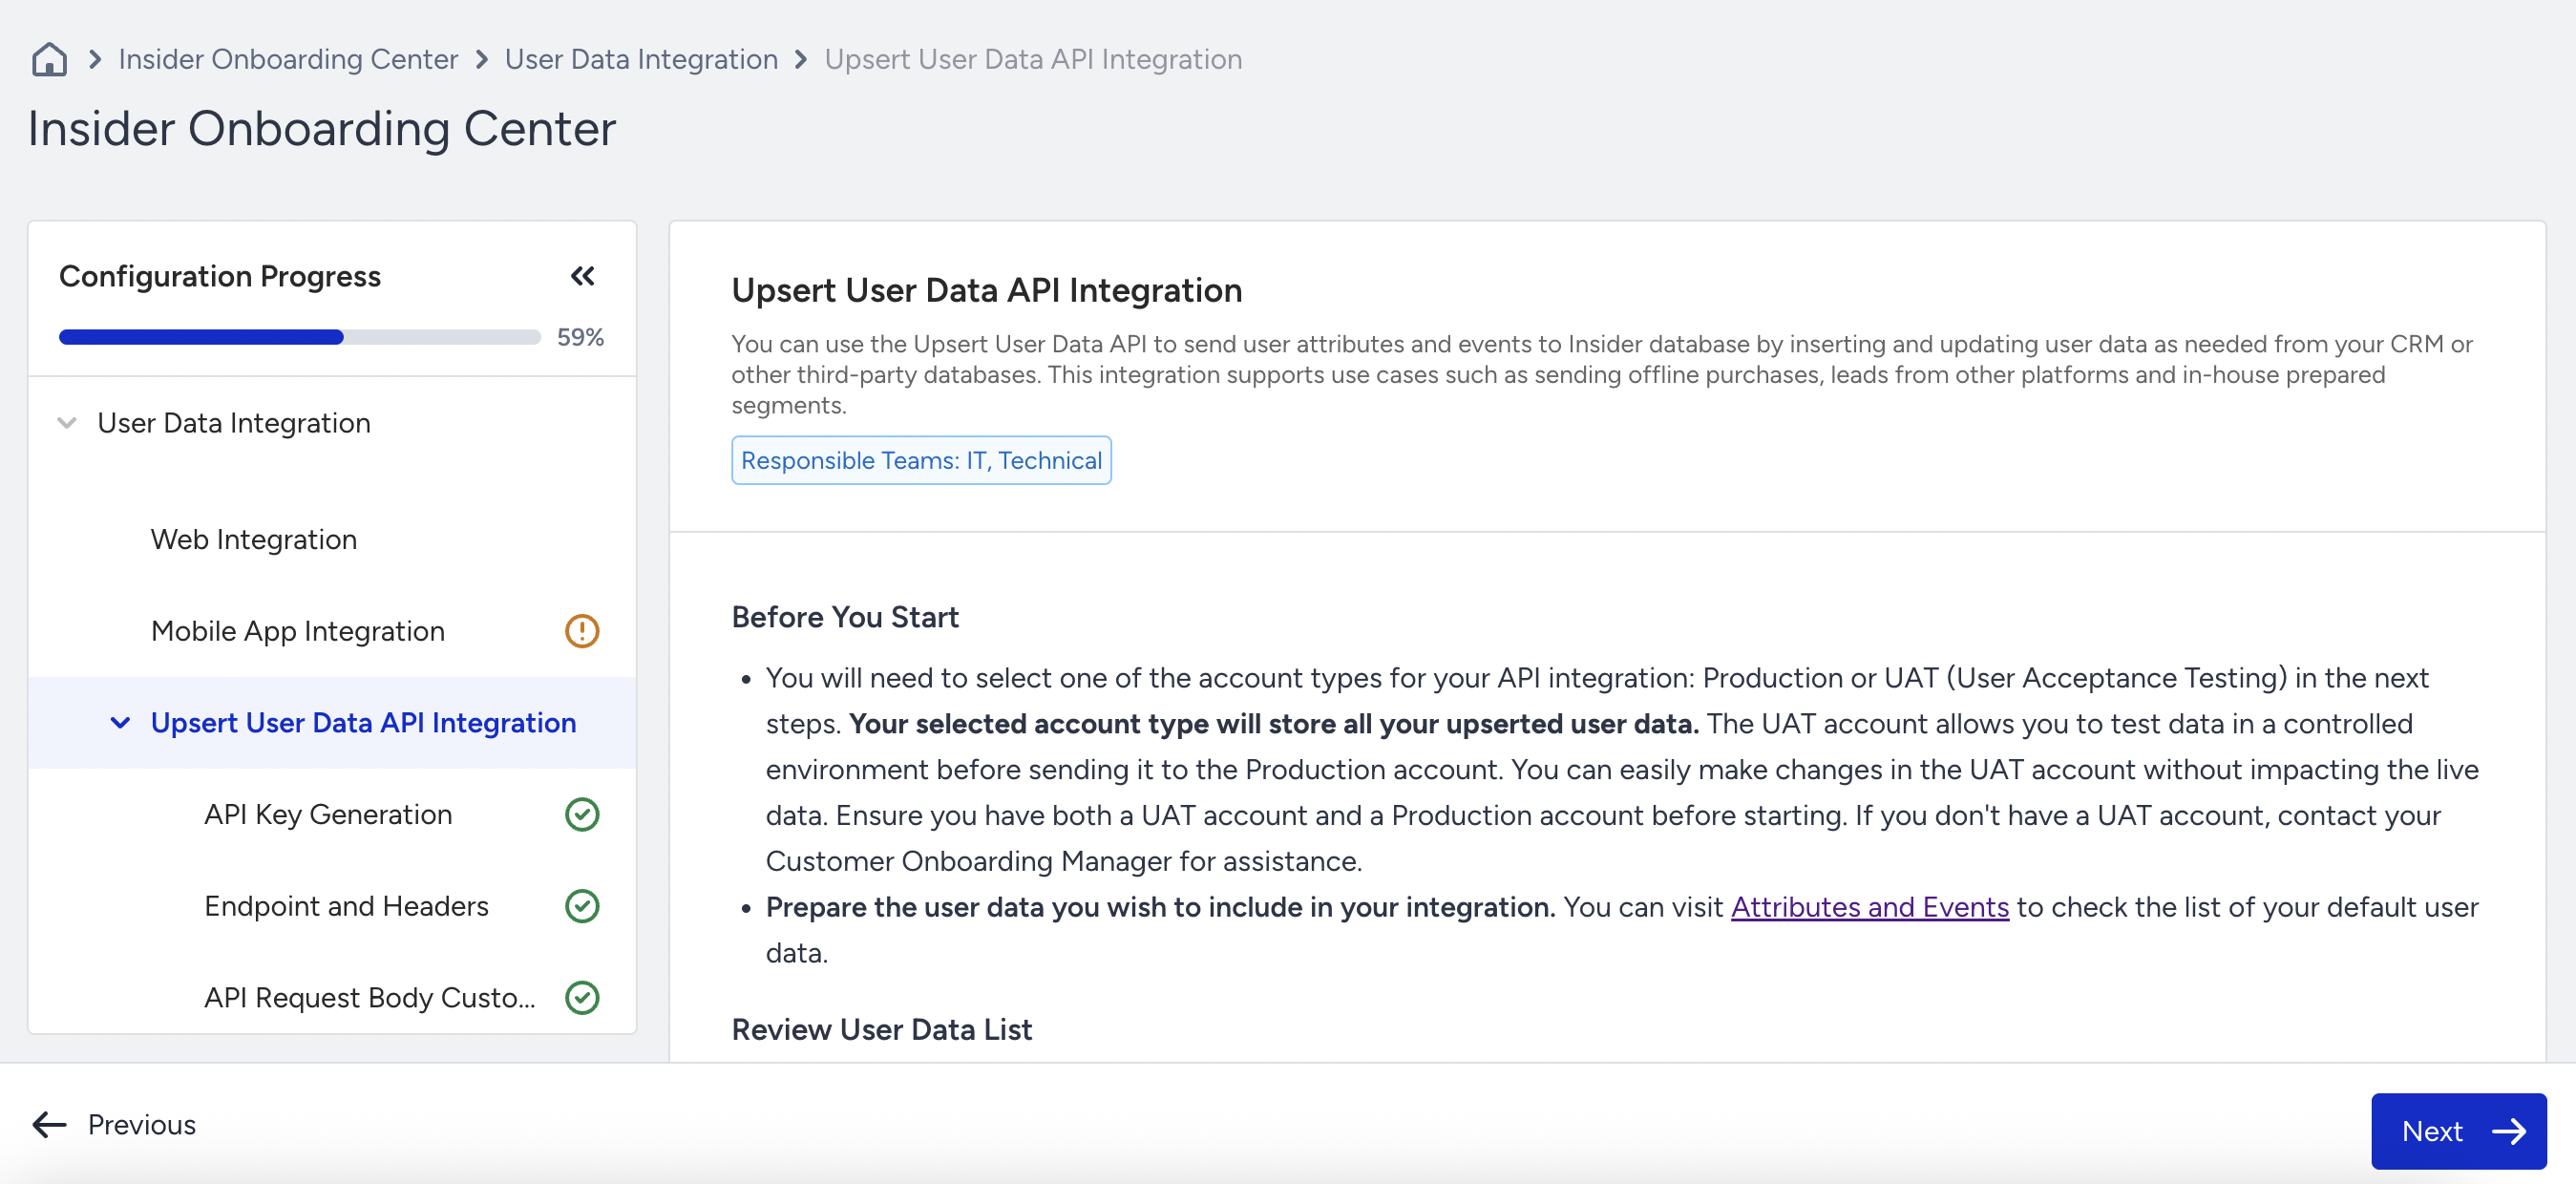
You can use the Upsert User Data API to send user attributes and events to the Insider One database by inserting and updating user data as needed from your CRM or other third-party databases. This integration supports use cases such as sending offline purchases, leads from different platforms, and in-house prepared segments.
The Upsert User Data API Wizard helps you generate an API key, configure headers, and create API payloads based on planned user data. This step-by-step wizard simplifies the data integration process, ensuring accuracy and efficiency.
To have the generated API payload you need to make User Data Planning and get approval from the Insider One team after you confirm the user data plan.
1. Review the Data List with the API source
When you create a user data plan and select the API source, it goes through approval by the Insider One team. Once approved, the data list appears on the first page of the Upsert User Data API Integration.
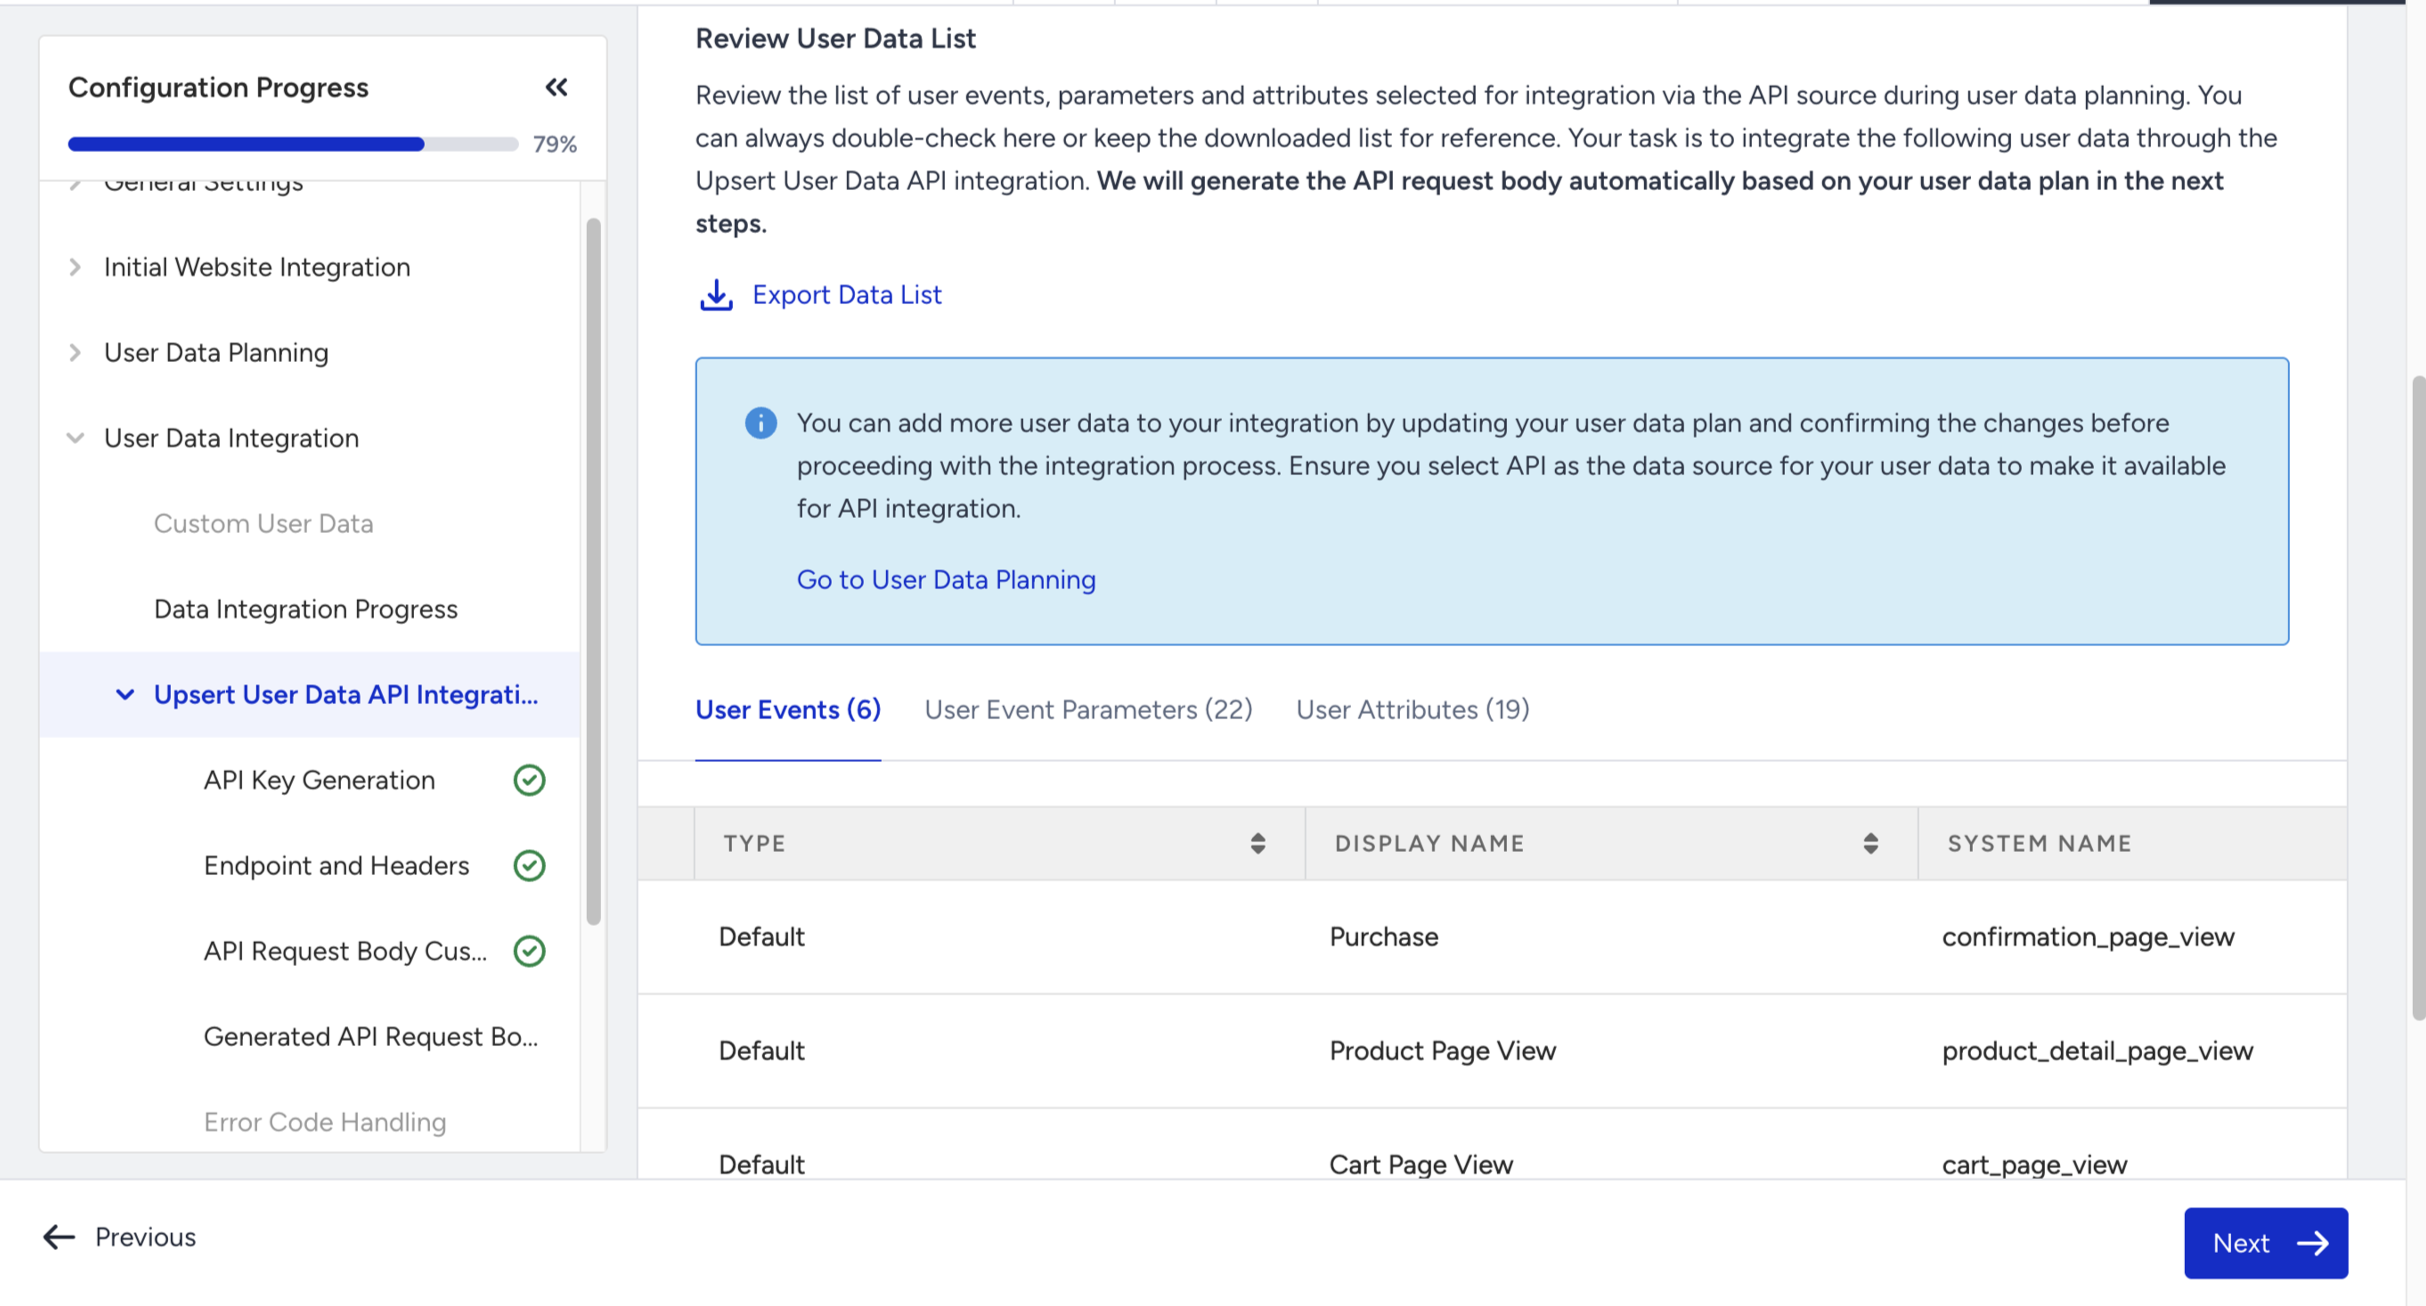
Click Next to proceed with the API Key generation.
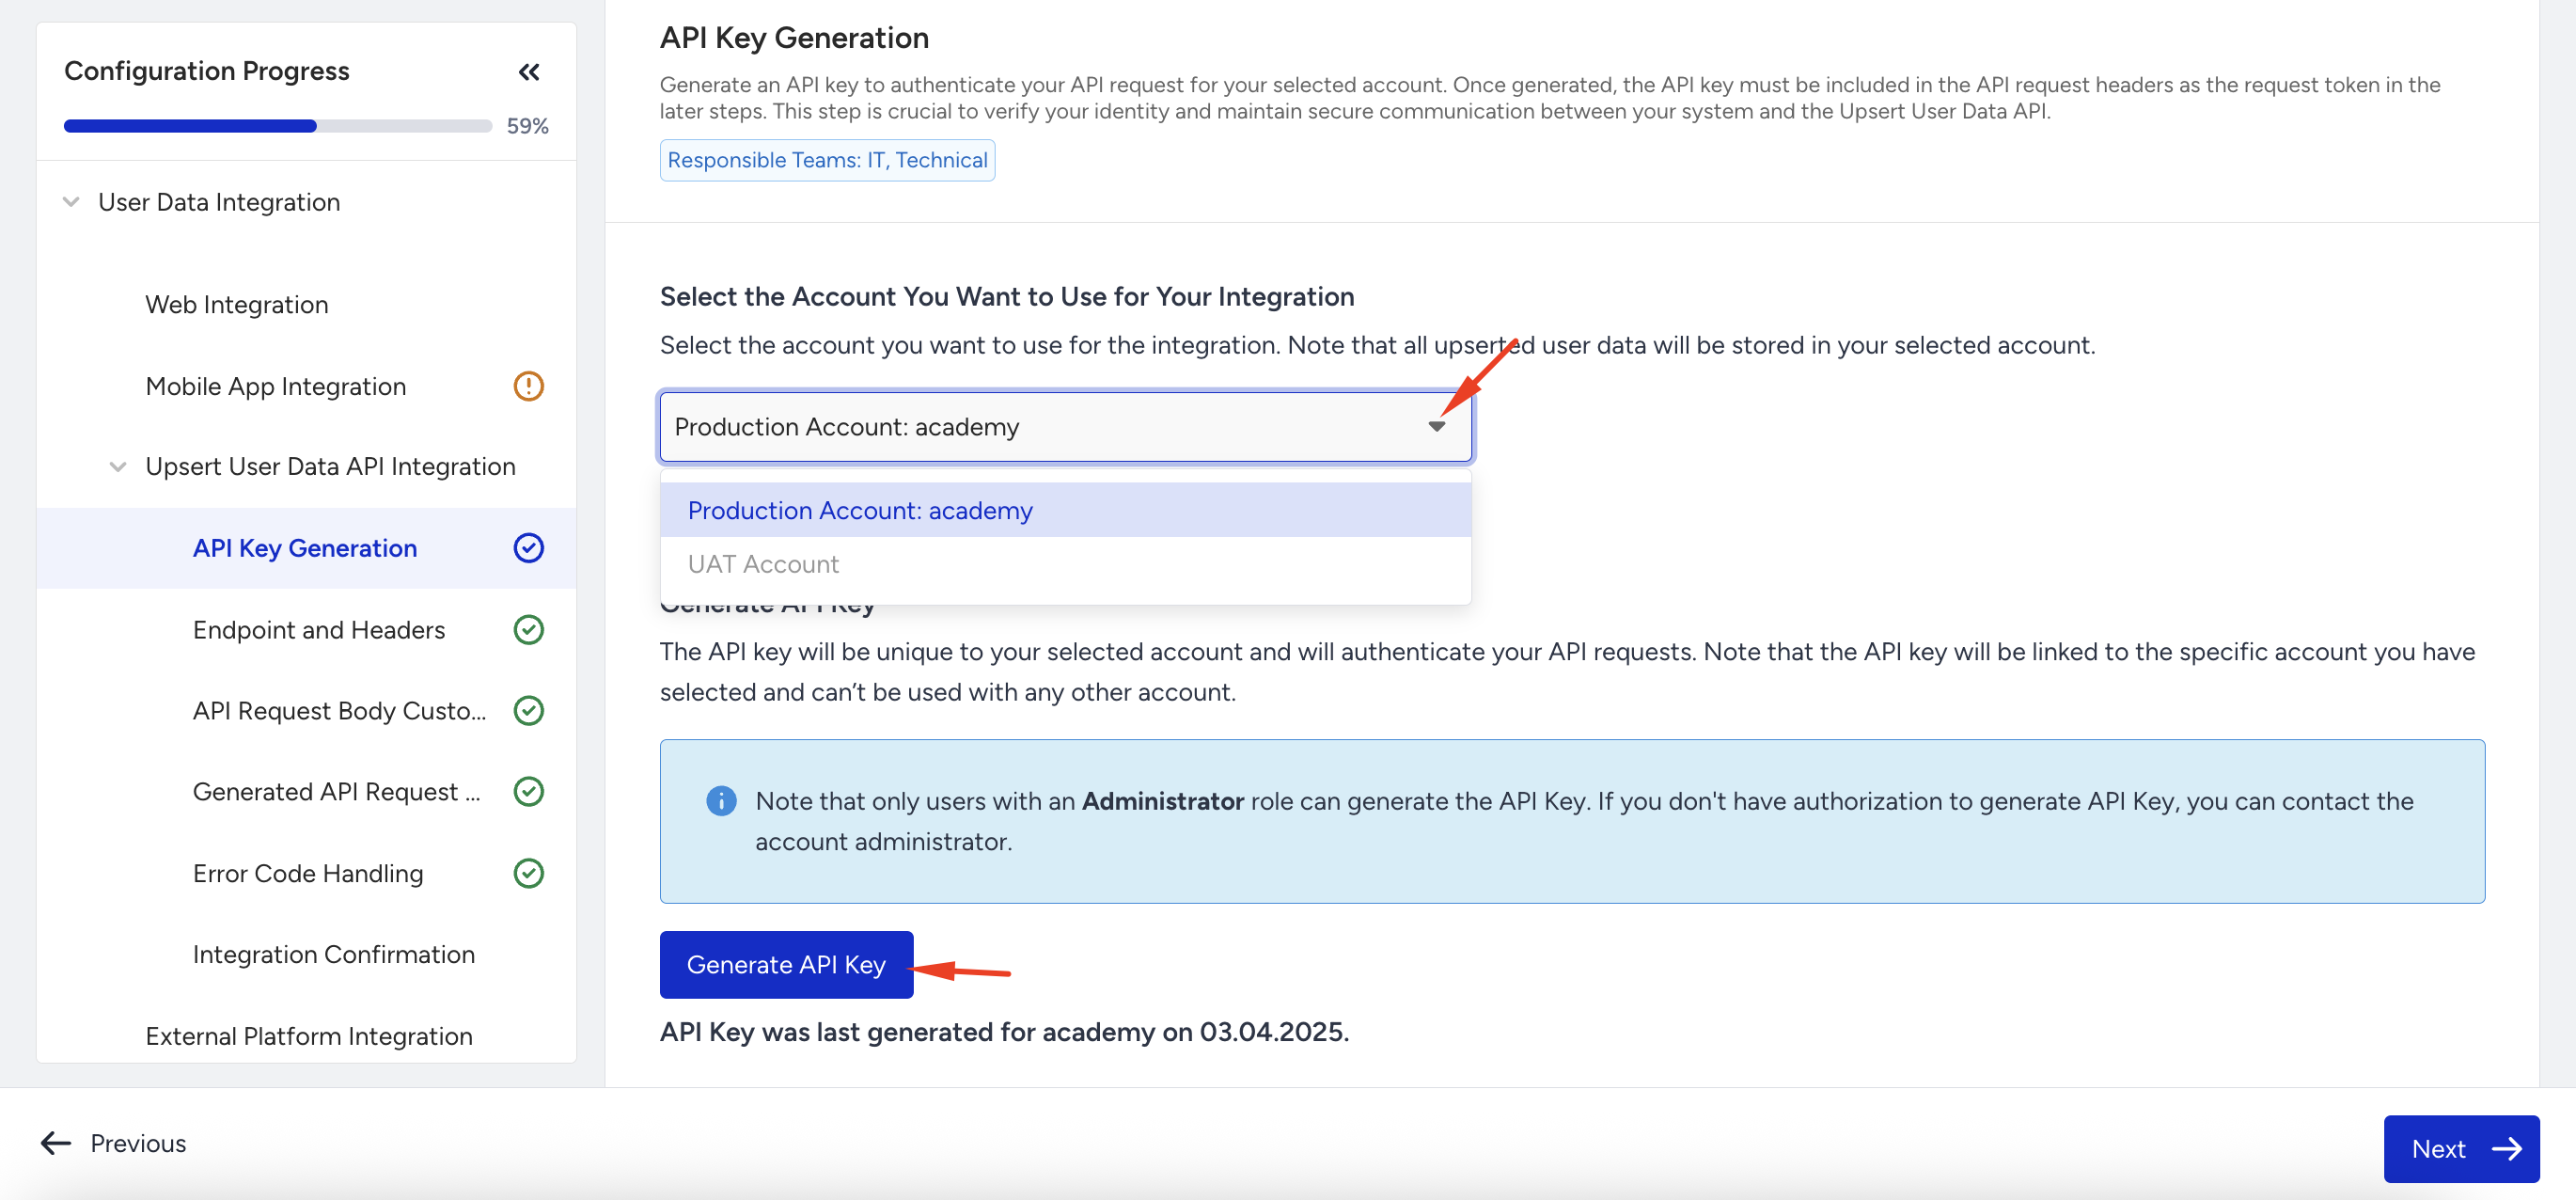
2. API Key Generation
Only users with an Administrator role can generate API Keys.
Generate an API key to authenticate your API request for your selected account. Once generated, the API key must be included in the API request headers as the request token in the later steps. This step is crucial to verify your identity and maintain secure communication between your system and the Upsert User Data API.
You need an API key to begin using the Upsert User Data API. The wizard guides you through generating a unique API key:
Select the account you want to use for the integration.
Click Generate API Key.
Copy and securely store the key, as it will be required in subsequent steps.
You should keep API keys confidential and not share them.
You can use your UAT account to test the integration before going live. When generating the API key, you will see the option to select the UAT account (if it is linked to your production account). Once selected, the wizard generates the request headers and payload based on the UAT account, enabling you to safely validate the integration before pushing to production.
If you proceed with the integration using your UAT account, you will be reminded to switch to your production account once the integration is successfully completed.

If you are logged in with your UAT account, you will not have the UAT/Prod account selection option and you will proceed with the UAT account integration only.
3. Endpoint and Headers
In this step, you review the API endpoint and required headers. These elements ensure your request reaches the correct destination and is appropriately authenticated.
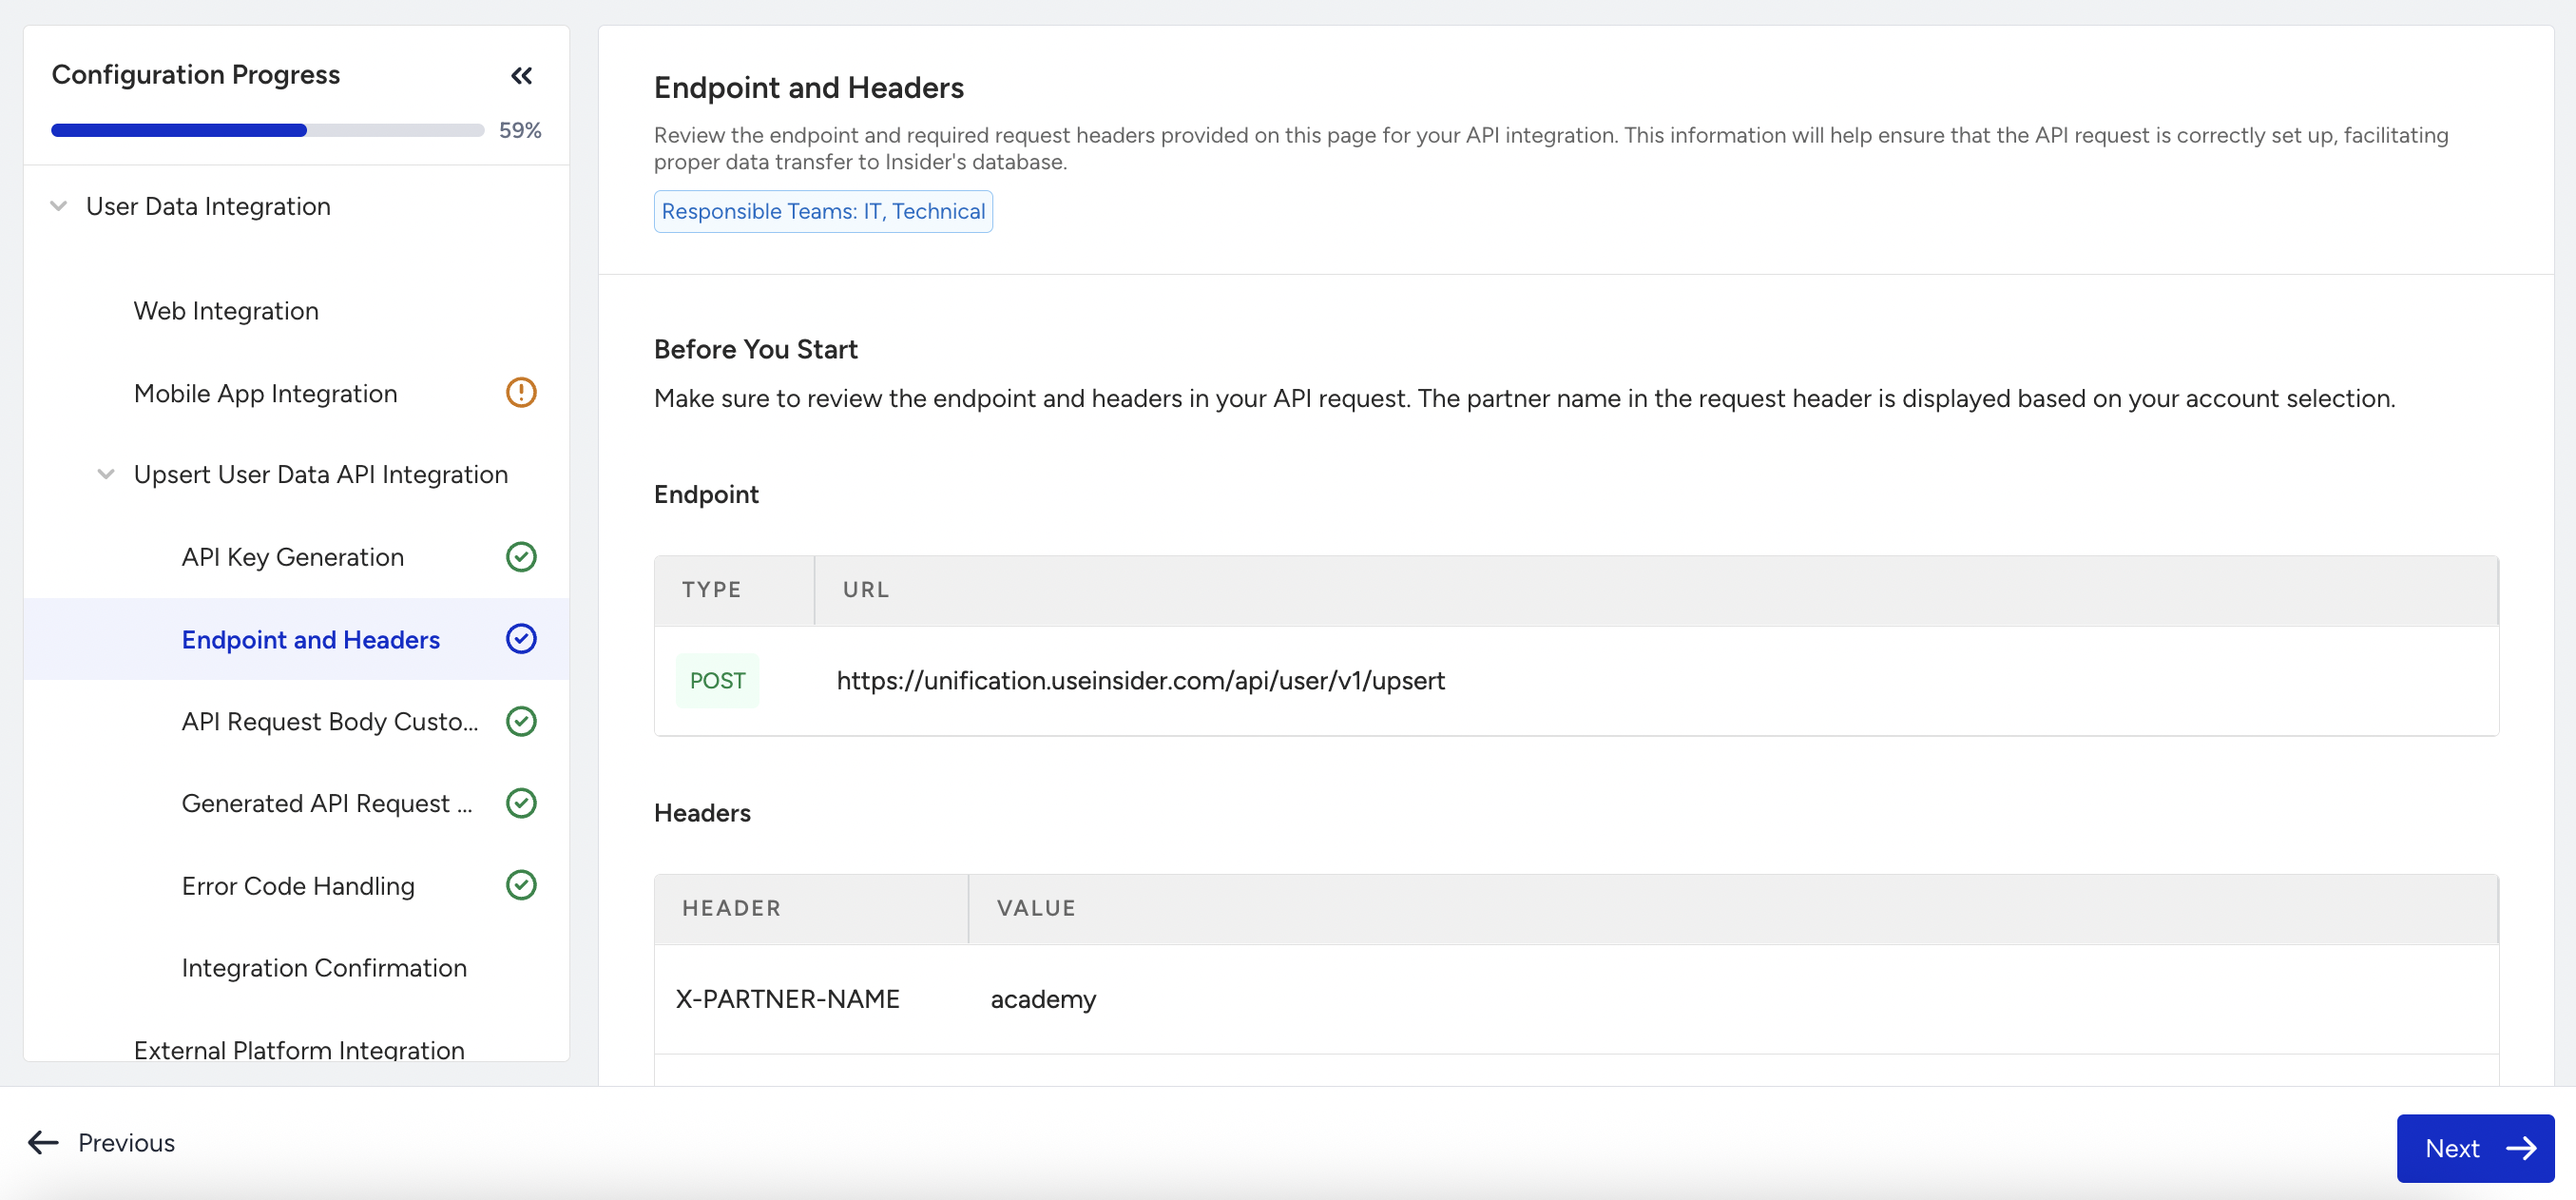
Endpoint
POST https://unification.useinsider.com/api/user/v1/upsert
Required Headers
Include the following headers in your API request:
X-PARTNER-NAME: Your partner name will be filled automatically for the account you have generated your API Key with (e.g., academy)
X-REQUEST-TOKEN: The API key generated in the previous step.
Content-Type: Must be application/json.
curl --location --request POST '<https://unification.useinsider.com/api/user/v1/upsert'> \
--header 'X-PARTNER-NAME: academy' \
--header 'X-REQUEST-TOKEN: YOUR_API_KEY' \
--header 'Content-Type: application/json'
Ensure that you place your generated API Key in the header section when sending an API request.
4. API Request Body Customization
In this step, you can adjust how your data is handled during the upsert process. These settings influence how the API request body is generated and how Insider One processes your data.
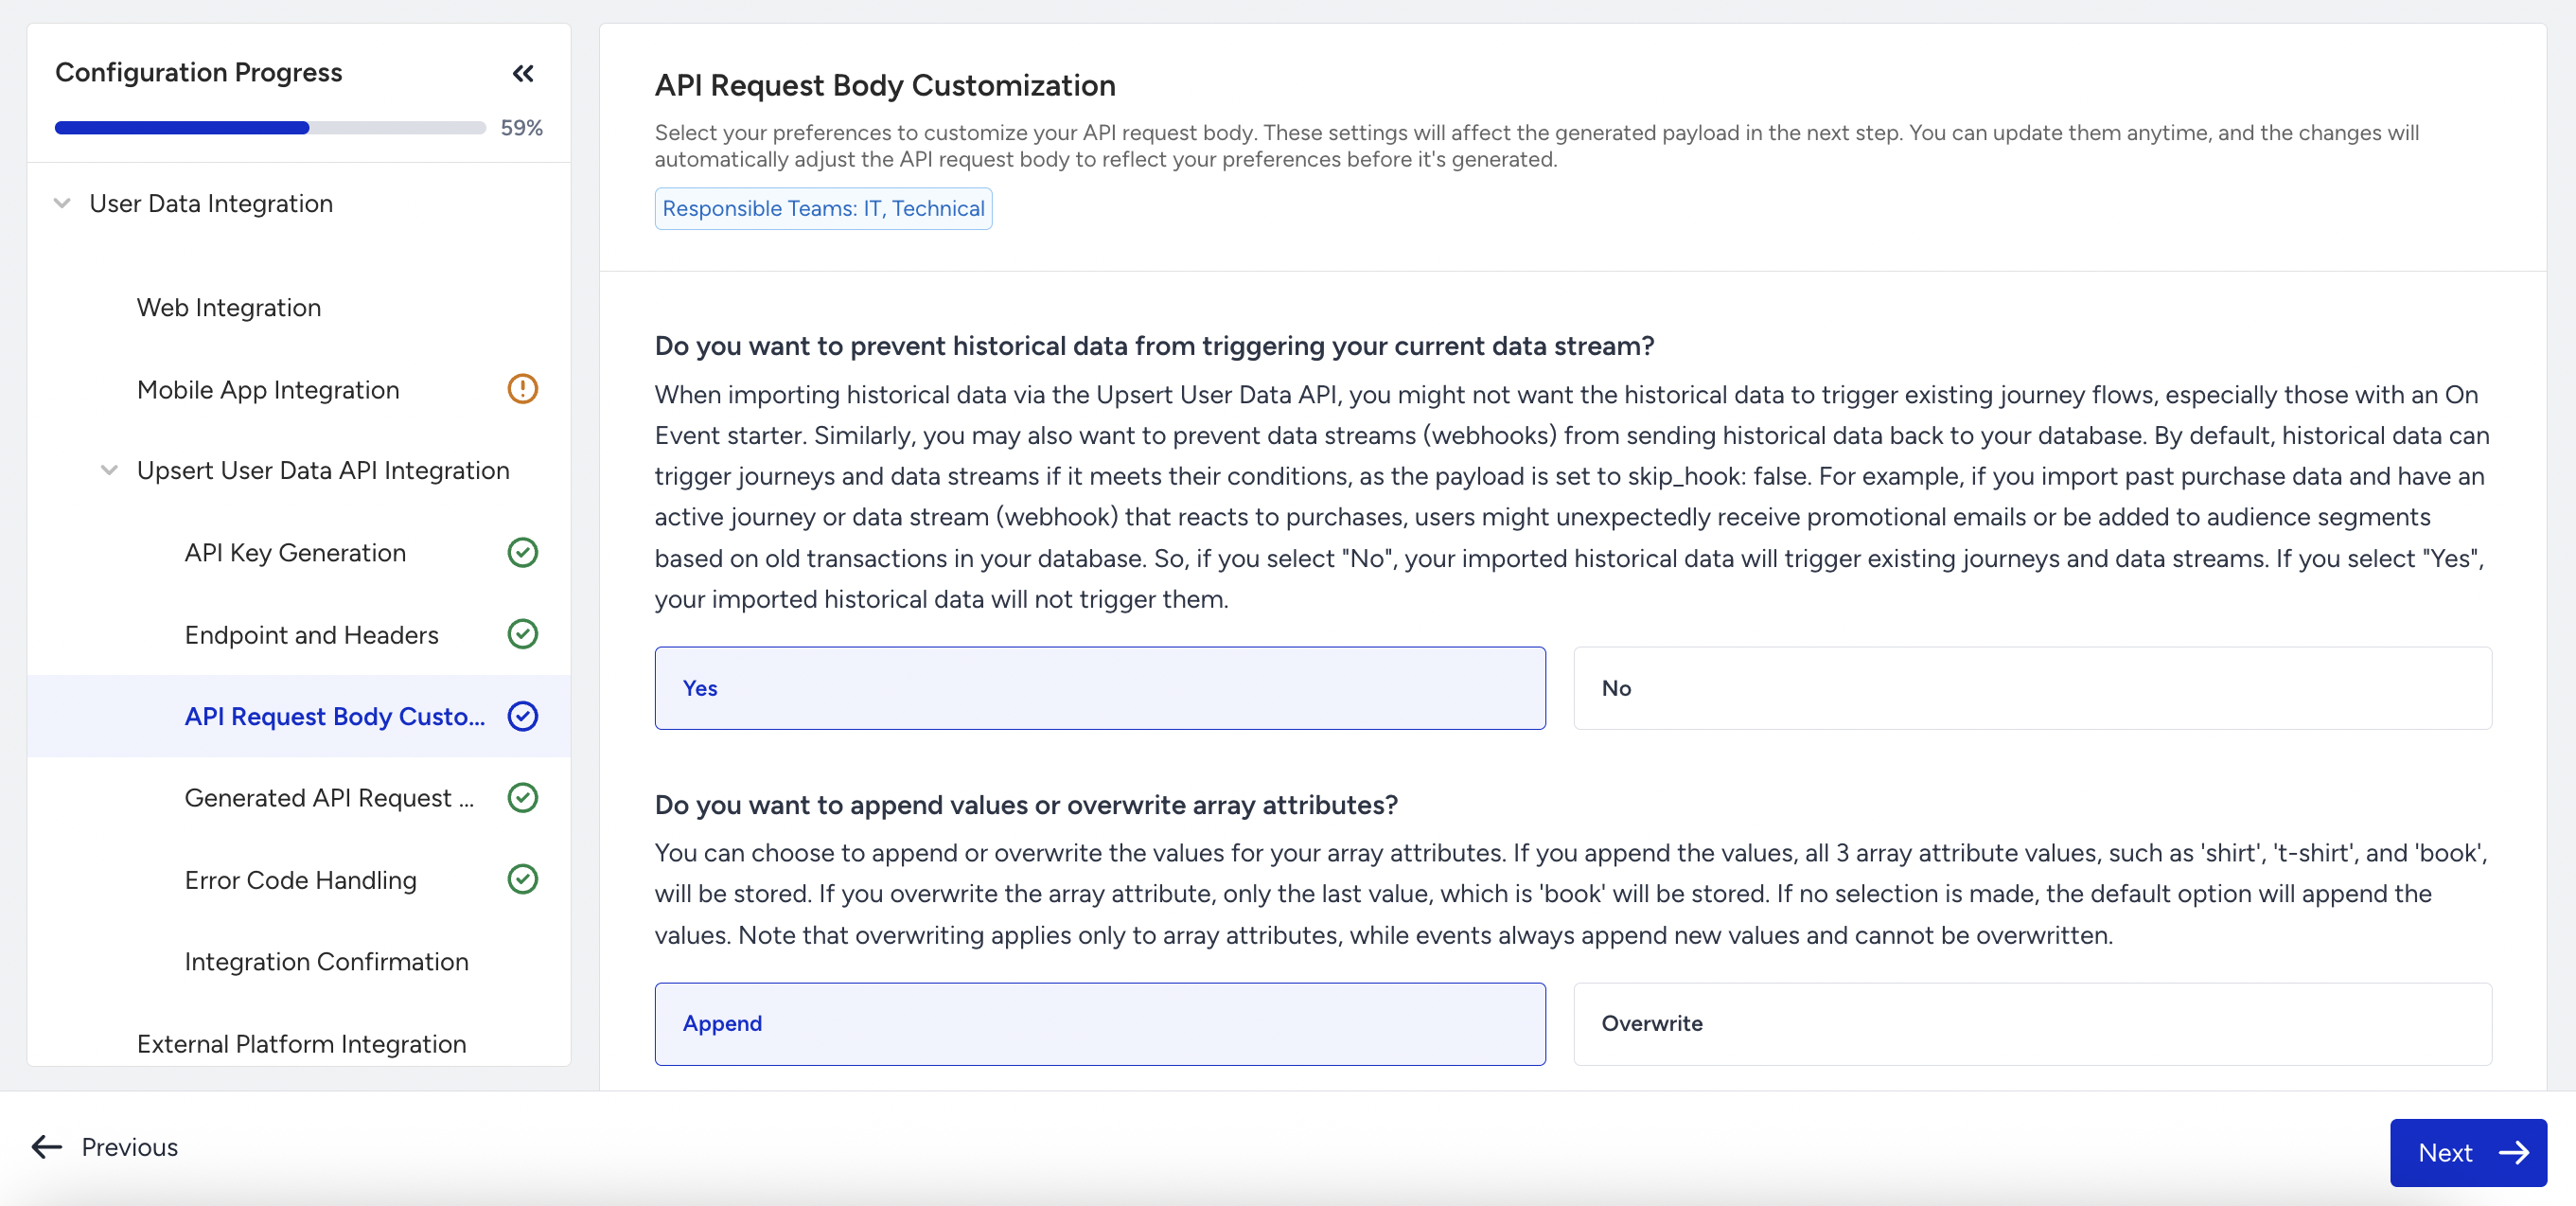
Skip Hooks for Historical Data
If you're importing historical data, you can choose to prevent it from triggering existing journeys or webhooks.
When you select Yes, "skip_hook": true will be added to your payload, suppressing automated flows like “On Event” journey starters or webhook syncs.
When you select No, historical data will activate real-time campaigns or triggers, potentially leading to unintended messaging or segmentation. For example, if one of your Architect Journeys has On Event: Purchase as a starter, it will look for users who have done the Purchase event to start the journey for them. In this step, if you select No and send historical data through the Upsert User Data API, each user who has made a Purchase event in the past will be added to the Journey and will receive messages.
Note that by default Insider One expects false value in the payload. Thus, when you select No, you will not see “skip_hook”: false in your API Payload.
Array Attribute Behavior
You can control how array attributes behave during data updates.
Append (default) means new values will be added to the existing array (e.g., a user’s interests list grows over time).
Overwrite replaces the existing array with only the latest value. This setting only applies to array attributes; events are always appended and cannot be overwritten.
If you have more than one array attribute, you cannot select Append for one and Overwrite for the other. The selected option will be applied to all attributes with array data type.
Enable Error Callback
Enabling the error callback allows you to receive real-time notifications if an upsert request fails due to a unification error.
When enabled, you’ll provide an endpoint URL where Insider One will send the same payload you originally submitted for that user, along with details about the unification error. This helps maintain data quality and troubleshoot issues quickly.
If the error callback is not enabled, you’ll need to monitor integration health manually by checking logs or API responses.
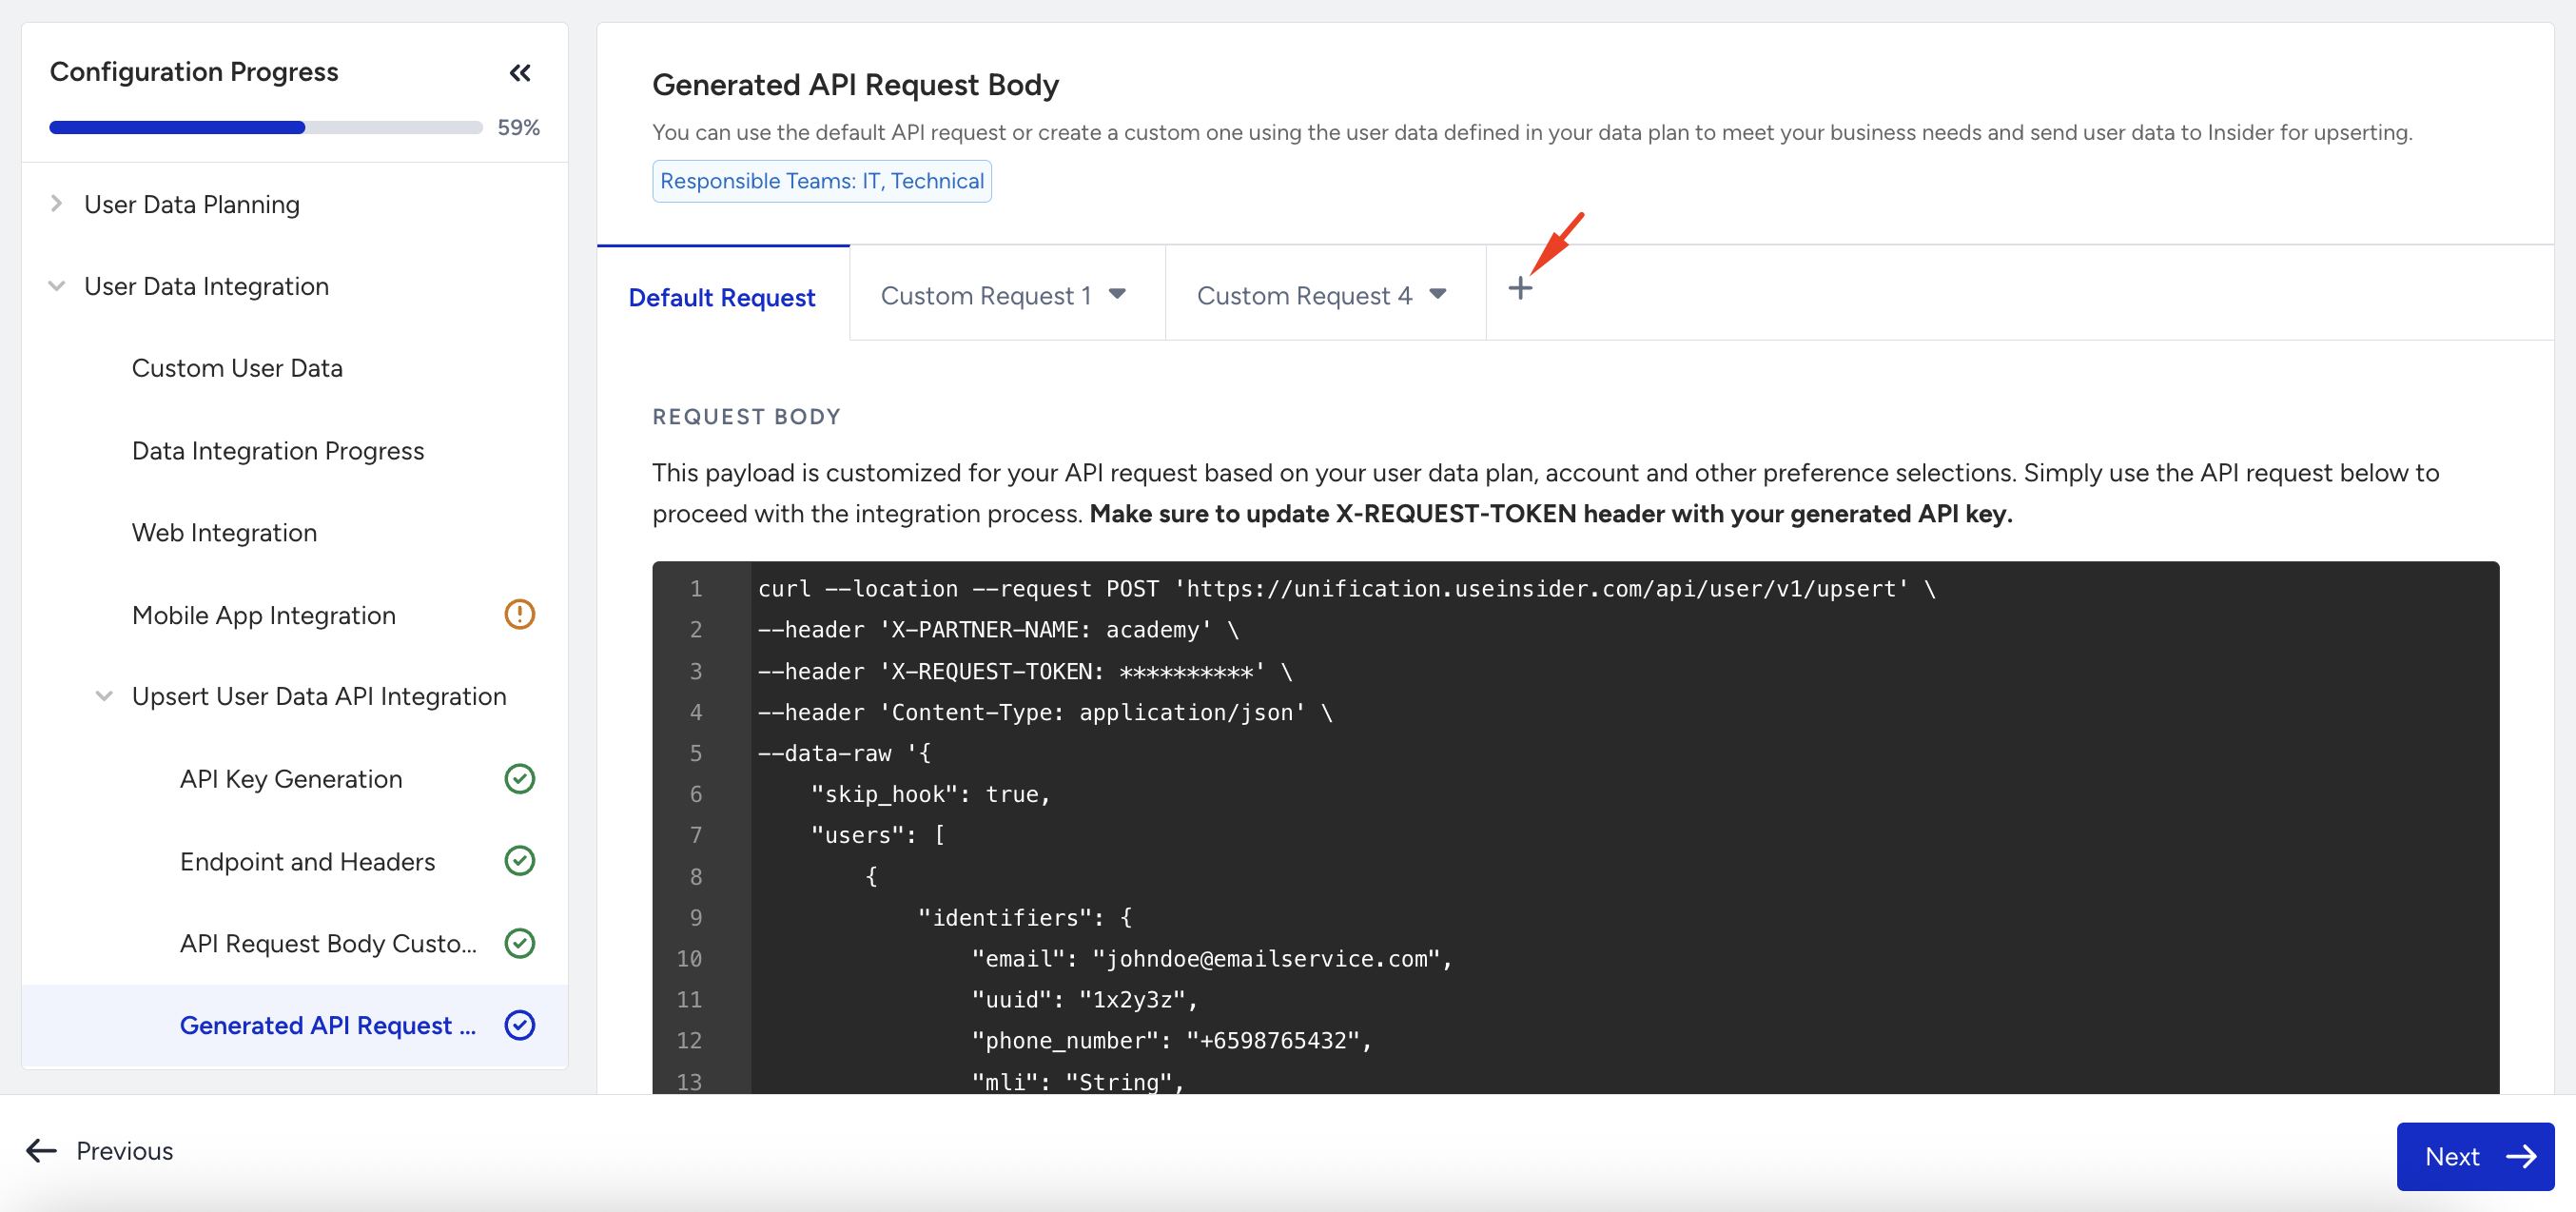
5. Generated API Request Body
The API payload is generated based on your data plan and selected preferences in the API Request Body Customization step. This payload includes user identifiers, attributes, events, event parameters, and your selections in the previous step.

Until you confirm the User Data Plan, the page title will appear as API Request Body and will show an example payload. Please ensure you update the payload if you want to proceed with your Upsert API Integration without confirming your User Data Plan. Additionally, the Custom Request tab allows you to generate different payloads for various use cases. For more information, refer to Create Custom API Requests.
Once you confirm the User Data Plan, you will see the page title as Generated API Request Body. You can see the custom-generated API Payload according to your preferences.
In the Default Request tab, you find the automatically generated payload that includes the events, event parameters, and attributes that were previously planned in the User Data Plan step. Only the data with the data source marked as “API” is included in the generated payload. Make sure to follow the API Body Request Guides explained on the page if you want to add data points directly into the payload on your side.
Note that historical data can be sent in bulk, while real-time data should be sent as it occurs or changes. For scenarios requiring multiple API requests, prepare and trigger them based on your business needs. Ensure alignment by coordinating with your CRM or marketing team before proceeding.
Make sure that when sending Events via the Upsert User Data API, the values of the events fall within the TTL (Time-to-Live). Events with timestamps exceeding the TTL will not be recorded. For more information, you can visit Data Retention.
Create a Custom API Payload
In the (Generated) API Request Body step, you can create Custom Requests.
Click the + (Plus) icon next to the Default/Example Request tab.
When you click the + (Plus) icon, it opens a new tab where you can customize the API Request Body payload. Here you will find the customization options below:
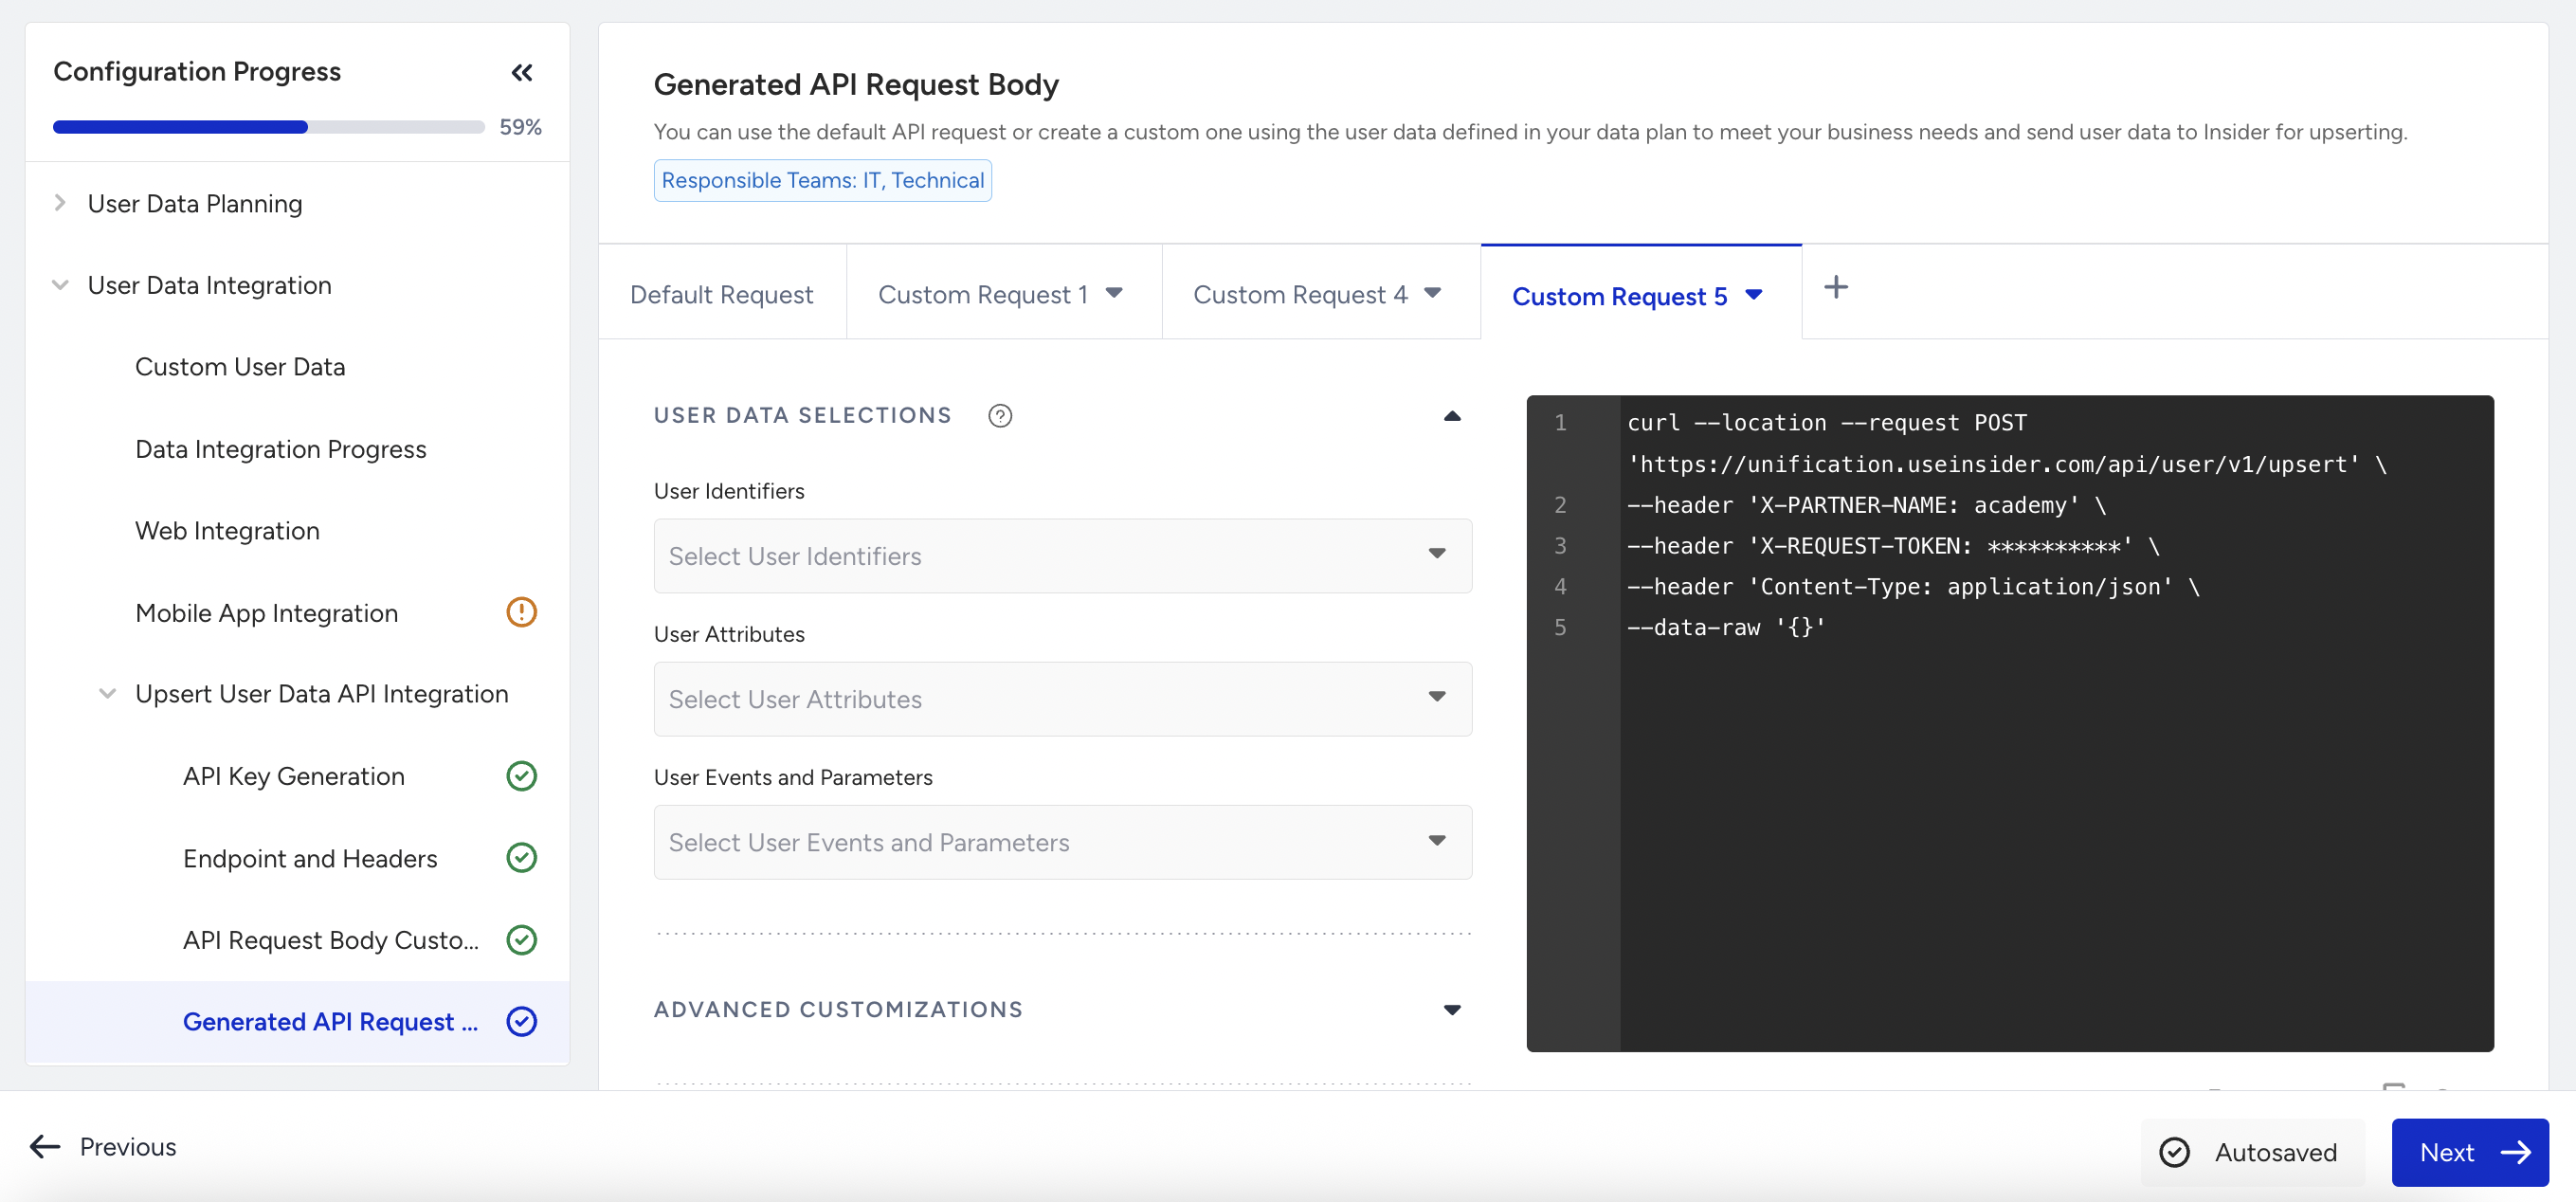
User Data Selections:
User Identifiers
User Attributes
User Events and Parameters
Advanced Customizations:
Include Multiple Users (include data of multiple users in your request)
Allow historical data to trigger an active journey
Overwrite Array Attributes
Enable Callback Function (if selected, you need to provide the callback URL)
6. Error Code Handling
Review API responses and handle errors proactively.
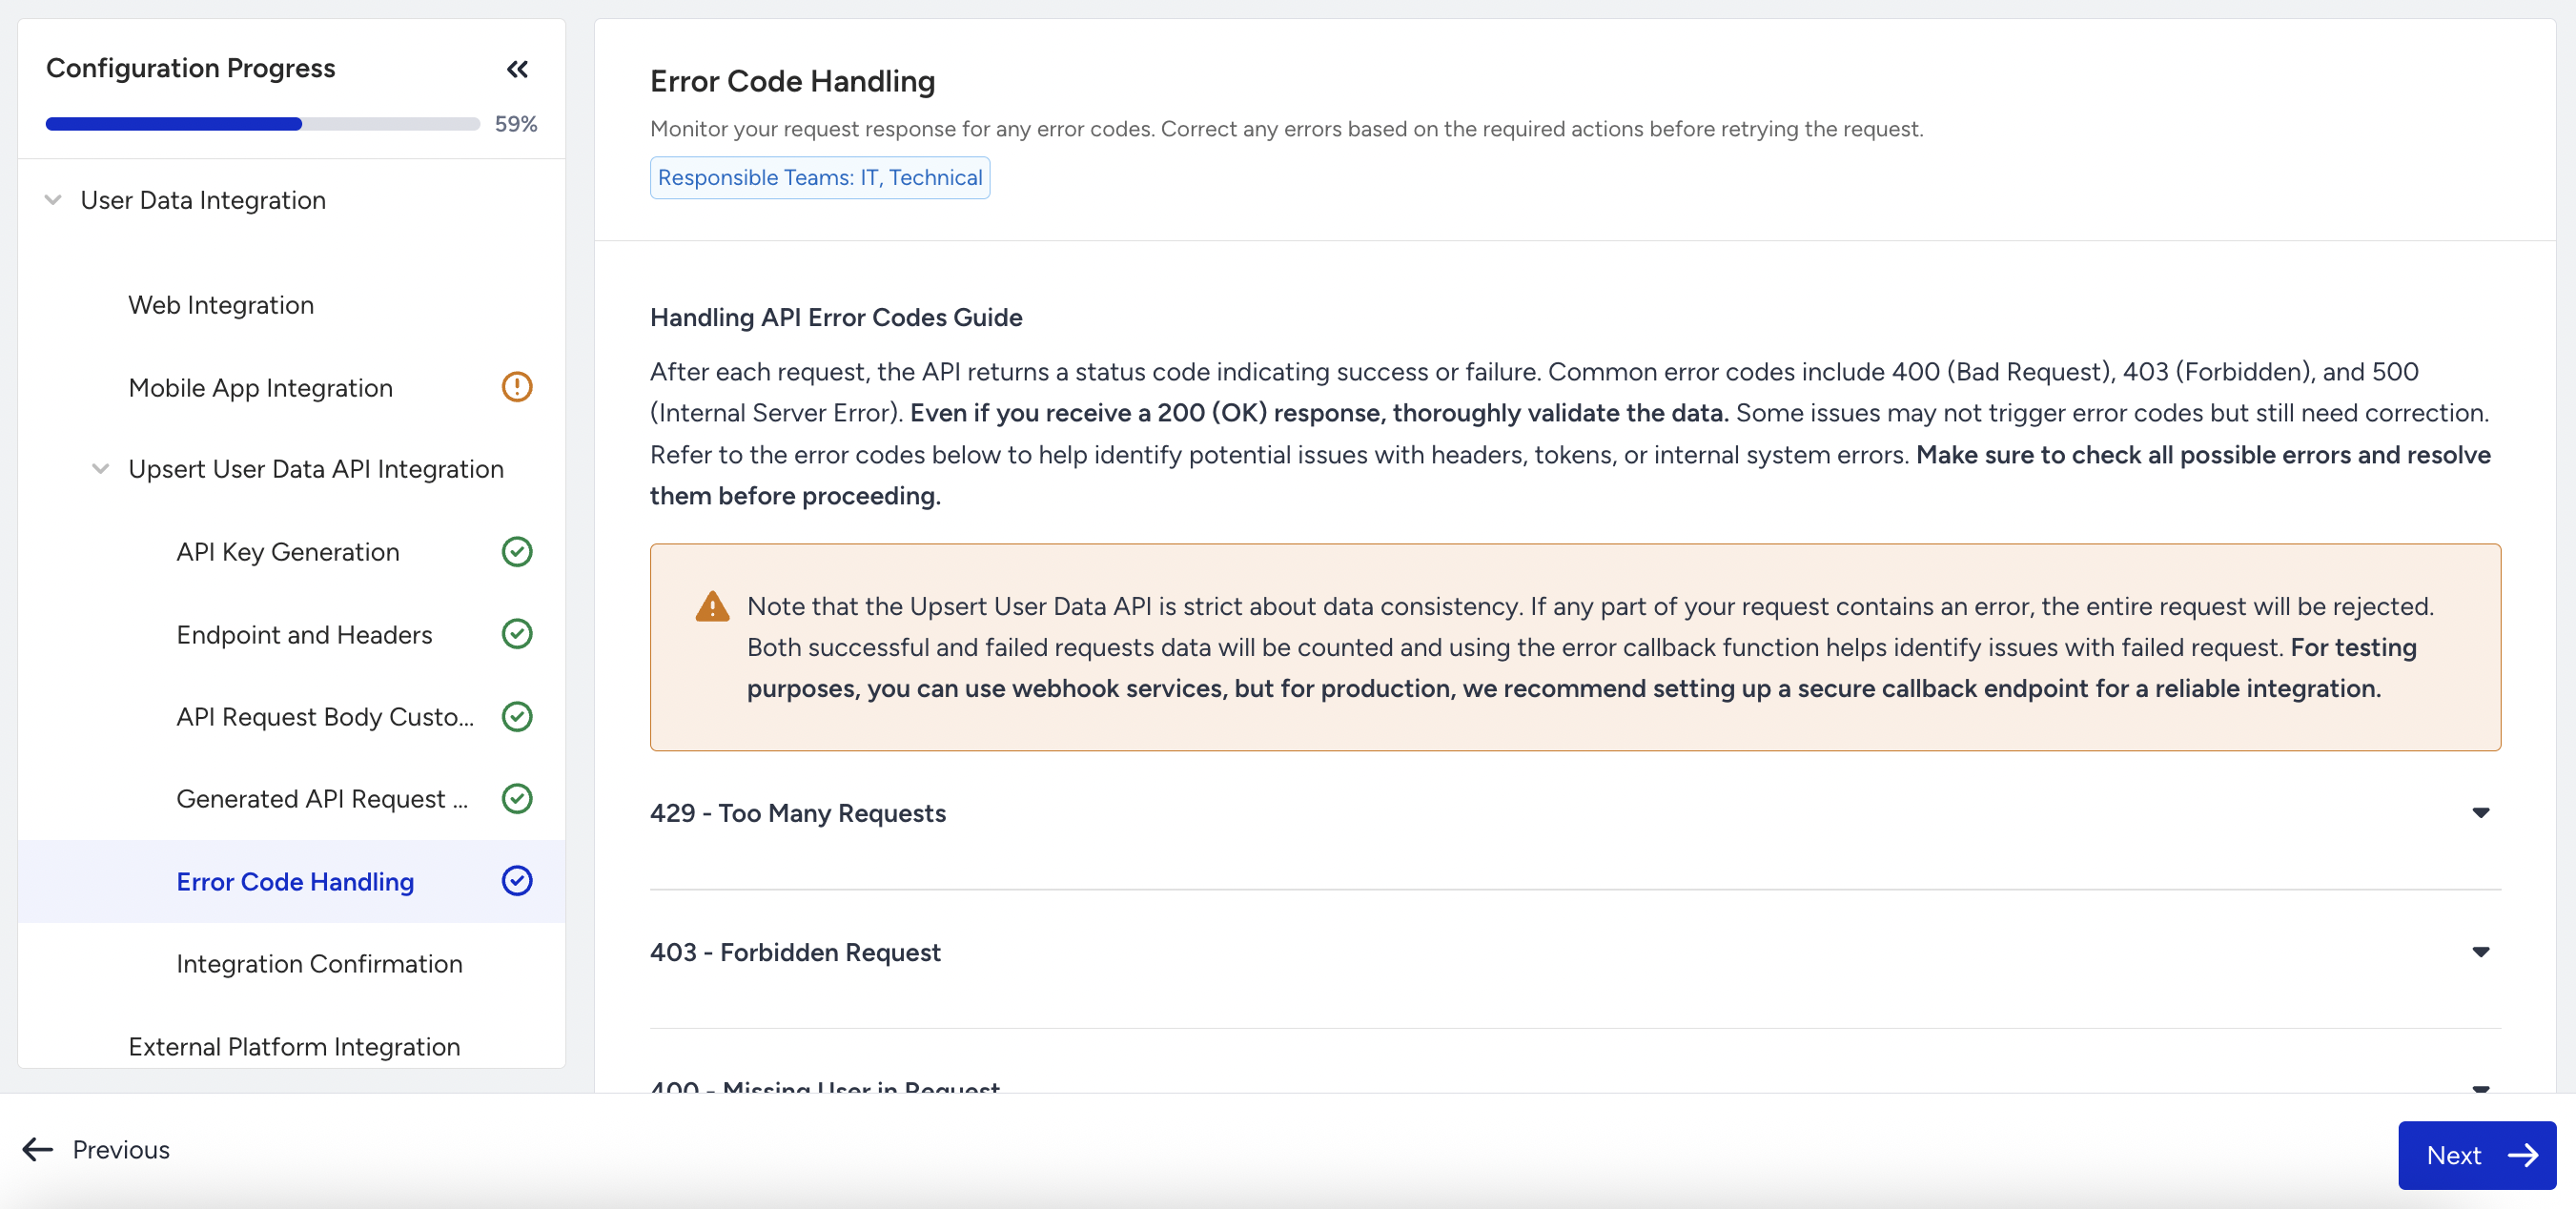
Even if you receive a 200 OK, the payload may contain validation issues.
Common Errors and Fixes
Code | Explanation | Action |
|---|---|---|
429 | Too Many Requests | Throttle requests and retry |
403 | Forbidden Request | Check partner name and API key |
400 | Missing User in Request | Be sure to add user to your payload |
200 OK with fail block | Missing/invalid data | Check event_group_id, data type, value format, missing data, or missing identifiers |
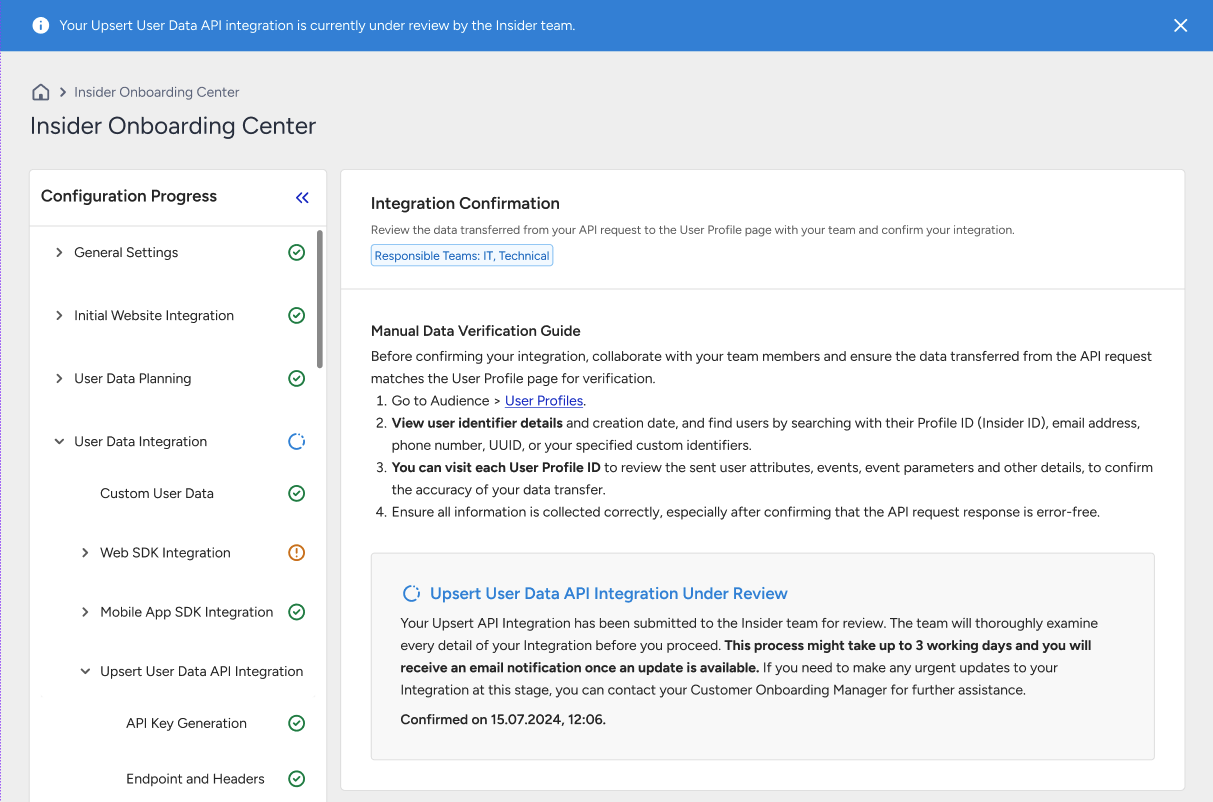
7. Integration Confirmation
Once the API is set up and sending data, verify everything is working correctly.
Steps to Confirm
Before confirming your integration, collaborate with your team members and ensure the data transferred from the API request matches the User Profile page for verification.
Go to Audience > User Profiles in Insider One’s InOne panel.
Search for users using their identifier (email, phone, UUID, etc.).
Review user attributes and events to confirm that data matches the payload sent.
Ensure all information is collected correctly, especially after confirming that the API request response is error-free.
Confirm and Submit
Once you have reviewed your User Profiles for identifiers, events, and attributes and confirmed that the API request response is error-free, click the Confirm and Submit button. Once you have clicked Confirm and Submit, the Insider One team in charge will be notified that you have completed and reviewed your Upsert User Data API Integration.
The Insider One team checks your API integration and either approves or disapproves your integration according to their technical audit.
If disapproved, you will receive an email and will work on the integration again with the help of the Insider One team.
If approved, congrats! You will receive an email that notifies you about successful user data integration through Upsert User Data API.
Integration Confirmation (if UAT account was used)
If you have selected a UAT account during the API Key Generation step and completed the integration for your UAT account, you’ll be prompted to switch to your production account once the integration is approved.
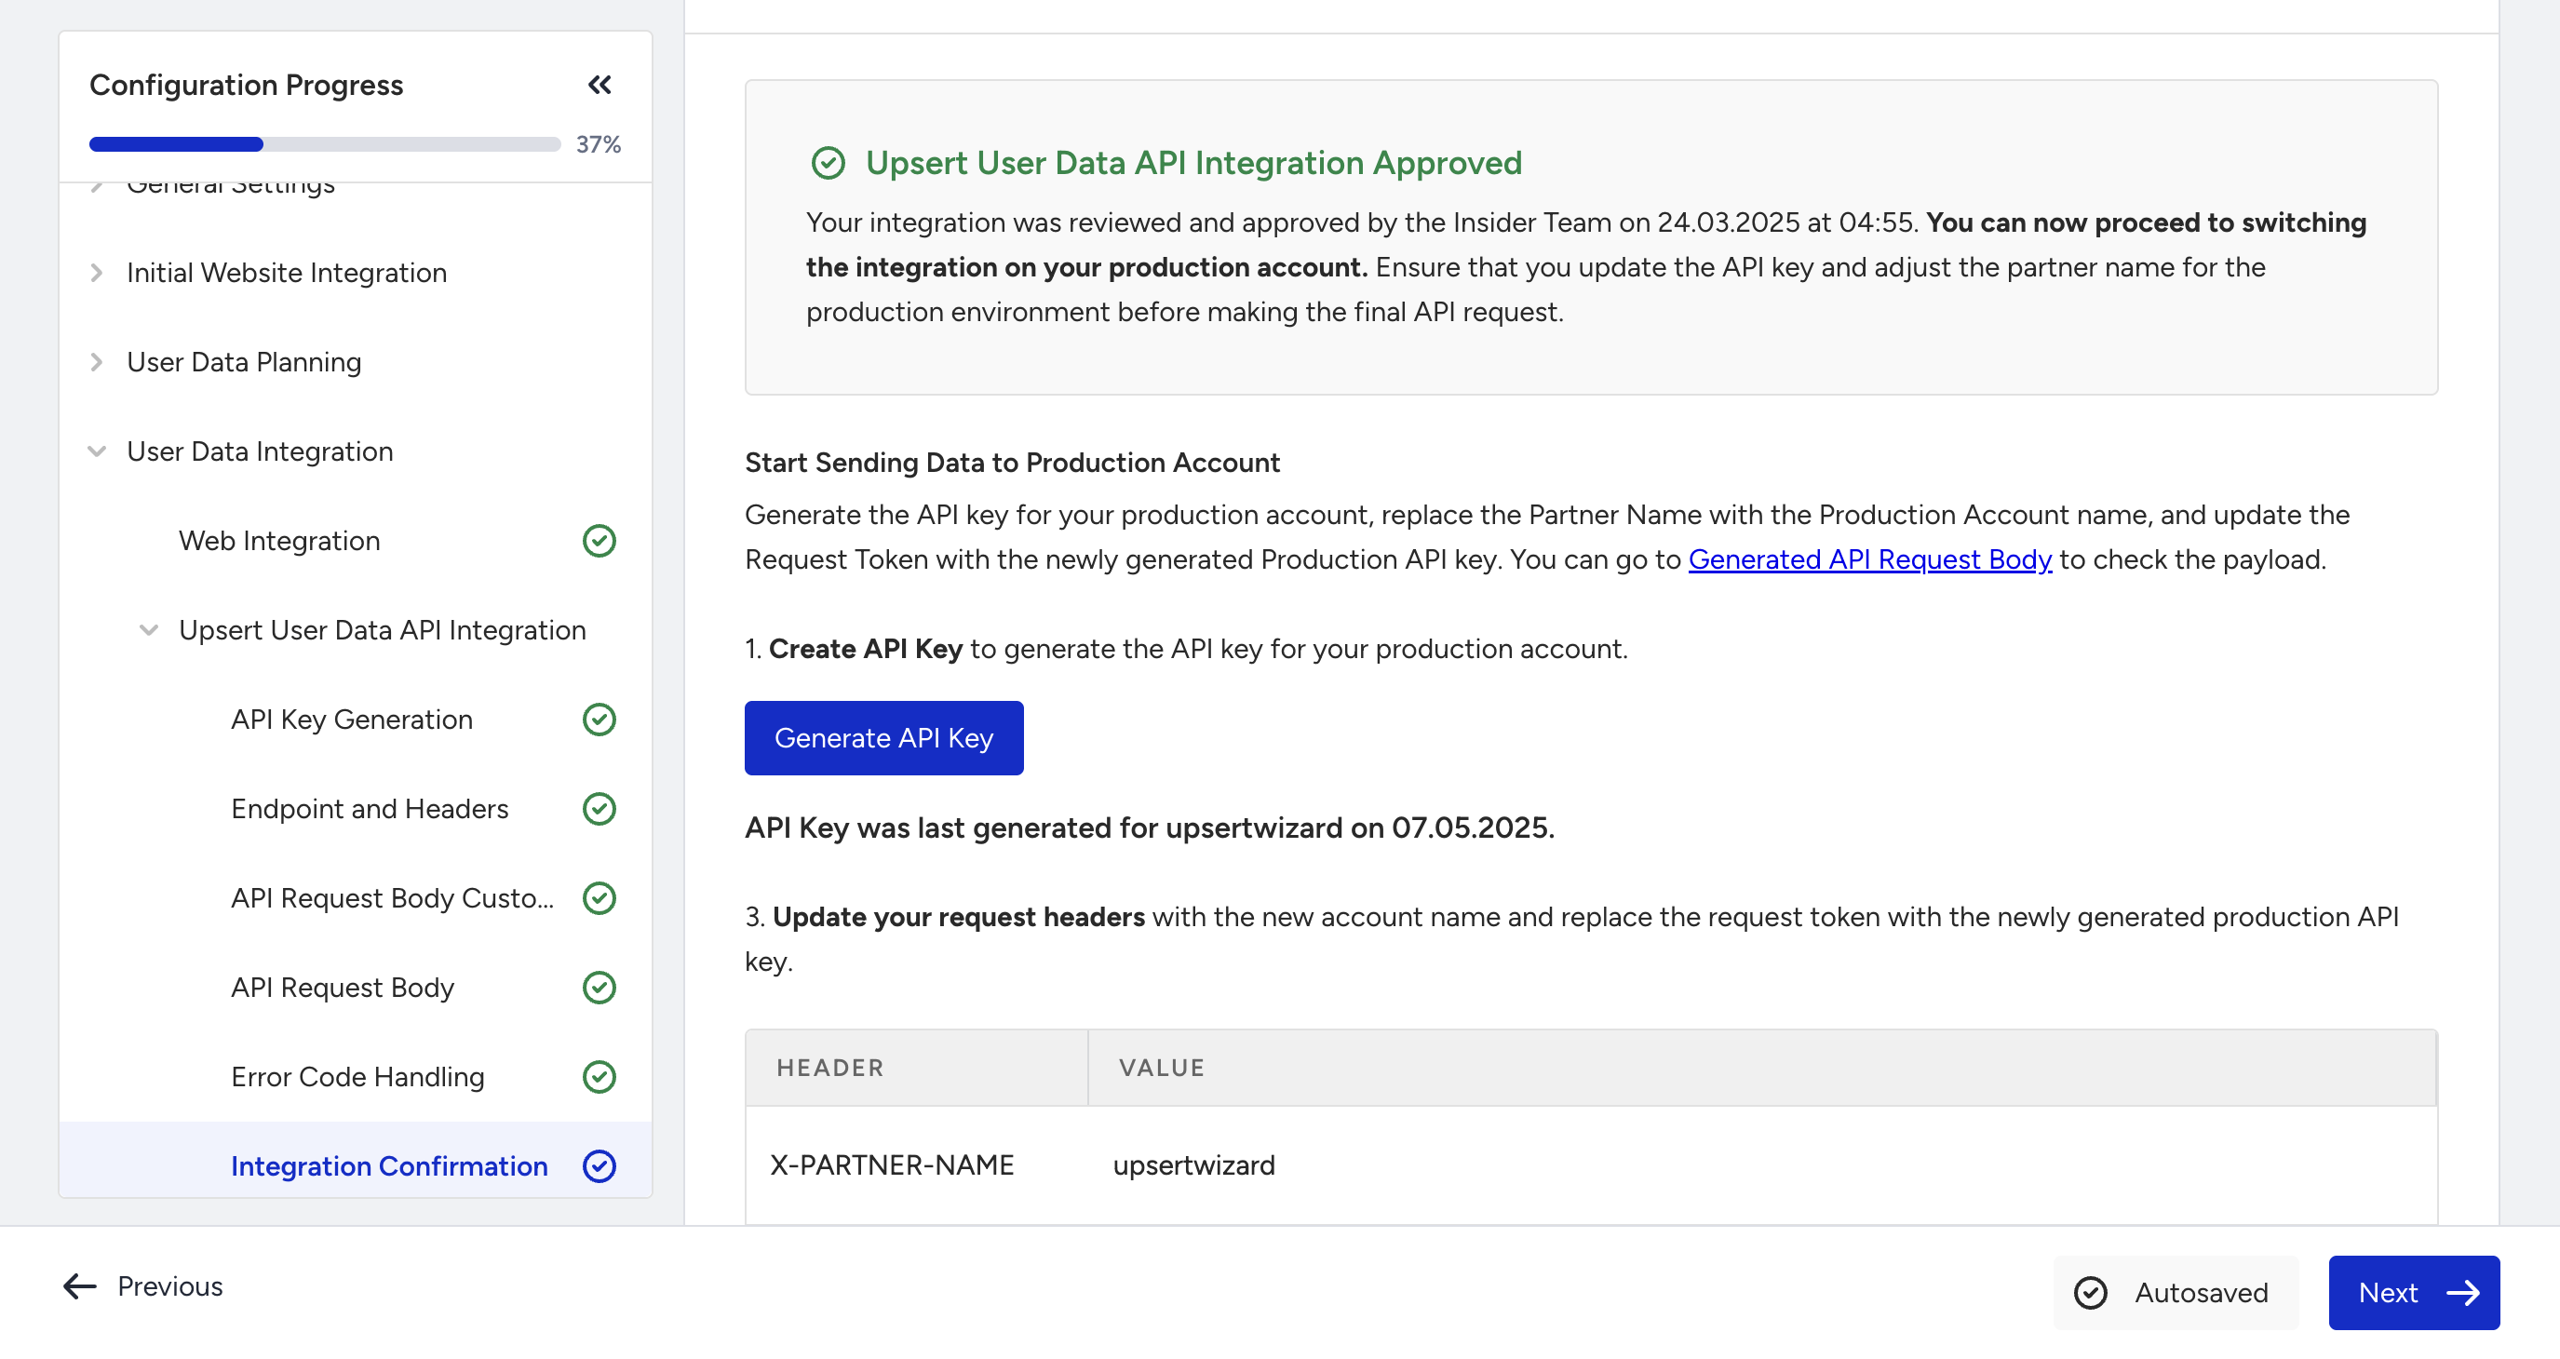
After approval by the Insider One team, this page will guide you through the transition. You can generate a new API key for your production account by clicking the Generate API Key button, and the appropriate request headers for production will be displayed to help you complete the switch smoothly.
FAQ
Q: What is the TTL (Time-to-Live) for events, and why does it matter?
A: Events sent through the Upsert API must fall within Insider One’s TTL window. If the timestamp is outside this range, the event will not be recorded—even if the request returns a 200 OK. Refer to the Data Retention for TTL details.
Q: Why should I use the UAT account to test the Upsert User Data API Integration?
A: Using a UAT account allows you to validate the Upsert User Data integration safely without impacting live data or triggering active campaigns. If any issues arise, you can make changes without affecting production. Once the UAT integration is approved, you’ll be guided to switch to your production account.
Q: Why did I get a Bad Request error after including only identifiers in my payload?
A: Every payload must include at least one of the following for each user: attributes or events. If your payload only contains identifiers and nothing else, you will receive a 400 Bad Request error.
Q: Can I test my API requests using Postman or similar tools?
A: Yes. You can use the endpoint and required headers stated in the article. You can paste these into Postman, attach your API key, and test your requests.
Q: I don’t have access to the User Profiles page. How can I confirm the integration?
A: If your role doesn't include access to User Profiles, collaborate with a team member who has the Administrator role.
Q: Do I need to change the endpoint or payload when switching from UAT to production?
A: No. The endpoint remains the same. You only change the API key and the partner name in the headers. If you're using error callbacks, ensure you update the callback URL if it's different for production.
Q: How should I handle array attributes? Should I append or overwrite them?
A: Array attributes (e.g., user interests) can be handled in two ways: choosing Append keeps all submitted values in the array over time, while choosing Overwrite replaces the array with only the most recent values. This applies only to attributes—event parameters are always appended.
Q: What should I do if the generated payload is missing "skip_hook" when I select "No"?
A: This is expected. The payload only includes "skip_hook": true when you choose Yes. If you select No, "skip_hook" is omitted entirely because false is the API’s default behavior.