Suggested readings: Starter elements, Events and Attributes, Track User
Once you complete designing your journey and change its status to test, you can test it as an end user to make sure it functions fully. The test steps depend on the starter of your journey.
This guide explains the following concepts:
Test a journey with On Event, On Attribute Change, On Past Behavior, or On Dynamic Date starters
Test a journey with On Price Drop or On Back in Stock starters
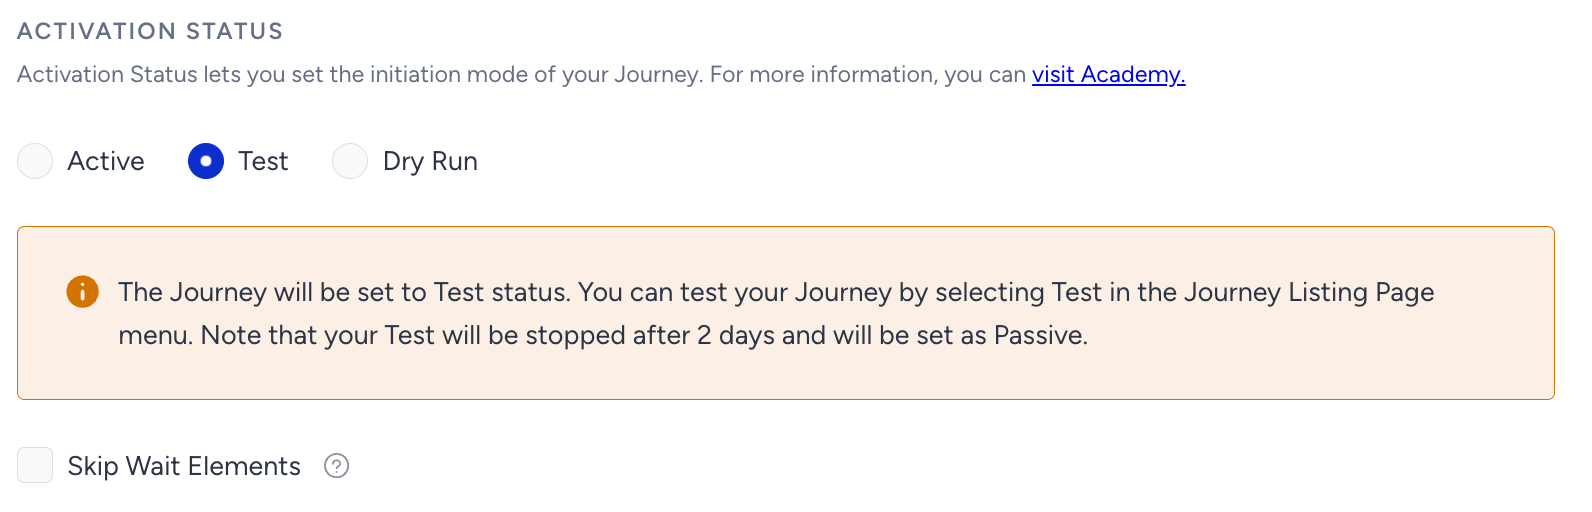
Launch your journey on test status
After designing and completing the settings of the journey, launch your journey on test status. You can also use the skip wait element option to make a fast test.
Test a journey with the User Website Action starter
Step 1: Generate your panel
You need to generate your panel only for the User Website Action starter. This starter works directly on the website, while the other starters read website data without working on the website itself.
Step 2: Click the Test Journey button
After launching your journey on test status, click the Test Journey button on the listing page.

You will be redirected to your website, and you will see a test bar at the bottom of the page.

Step 3: Test your journey with the test bar
You need to meet the User Website Action starter segments/rules on your website to test your journey.
If you want to bypass the starter element, you can click the Enter Journey button on the test bar.

In this case, you can see the test bar status as In Progress. You can see whether you trigger the journey following the status options: Not in Journey, In Progress.

If you want to proceed to the next step in your journey, you need to meet the Check Conditions on your website.
When you go back to your journey canvas, you can see your user enter the journey and proceed on the flow.
Test a journey with On Event, On Attribute Change, On Past Behavior, or On Dynamic Date starters
Step 1: Click the Test Journey button
After launching your journey on test status, click the Test Journey button on the listing page.
If the starter is On Event, On Attribute Change, On Past Behavior, or On Dynamic Date, you will see the Journey Test pop-up on the listing page.
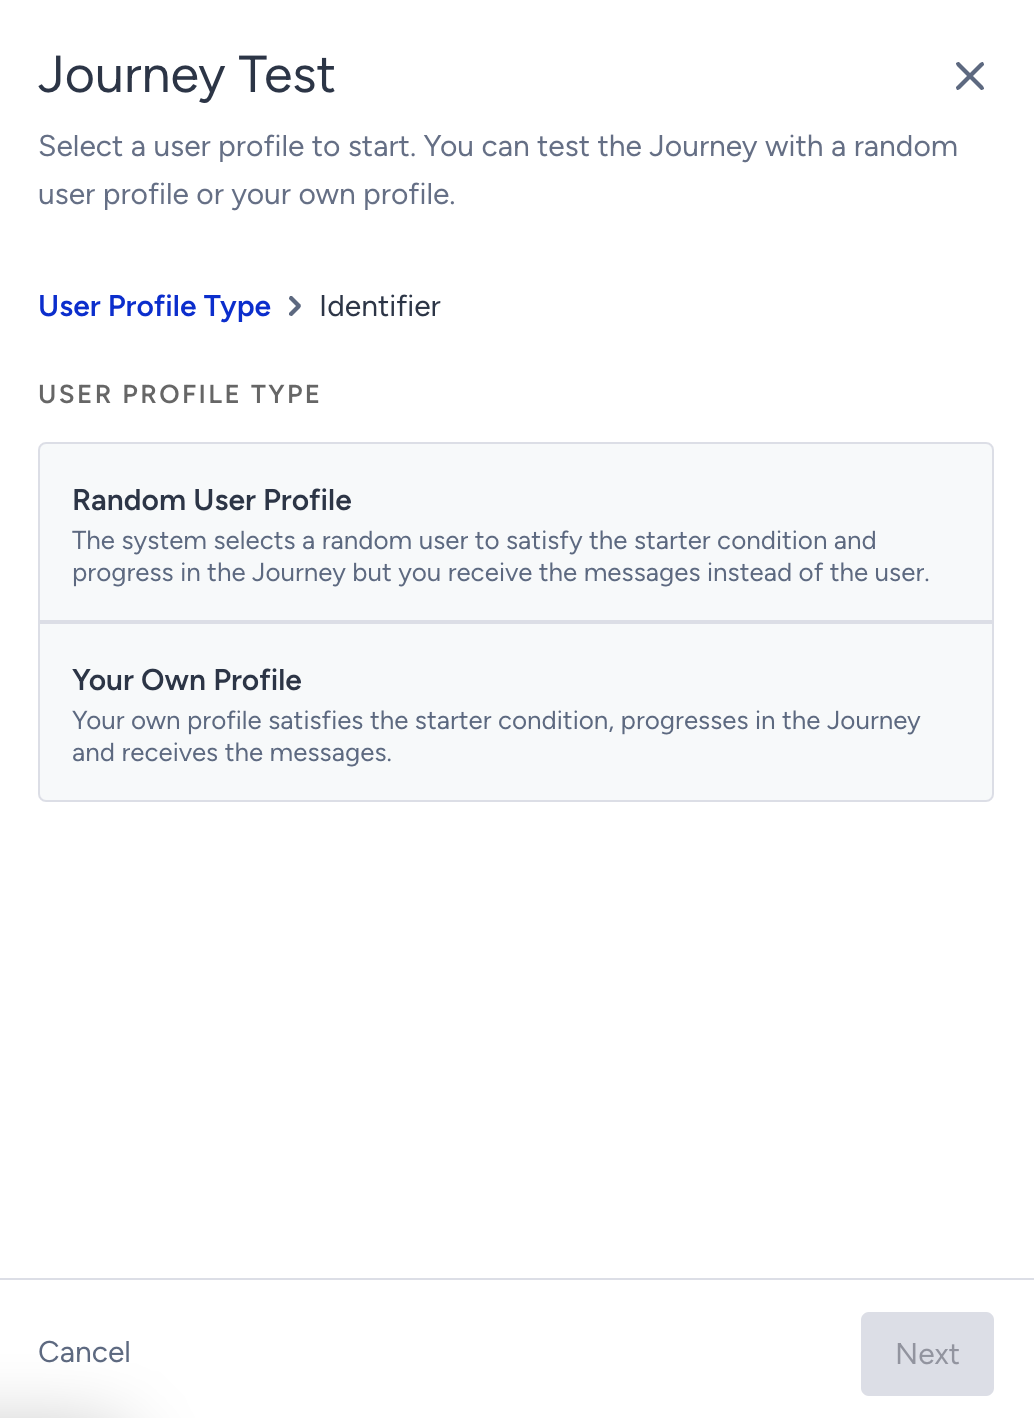
Step 2: Select a test method and start the test
Your own profile
Select Your Own Profile as the User Profile Type on the Journey Test pop-up, then enter your Profile ID or Email Address to take your user on the journey. You will be directed to the journey canvas. You can start testing by meeting the starter condition manually on the related platform, such as your website or mobile app. Once you meet the starter condition, you will enter the journey.
On the related platform, fulfill the conditions of check elements or messaging channel opt-ins and provide the required information to proceed to the correct path on the journey flow and receive messages.
- Go to your website.
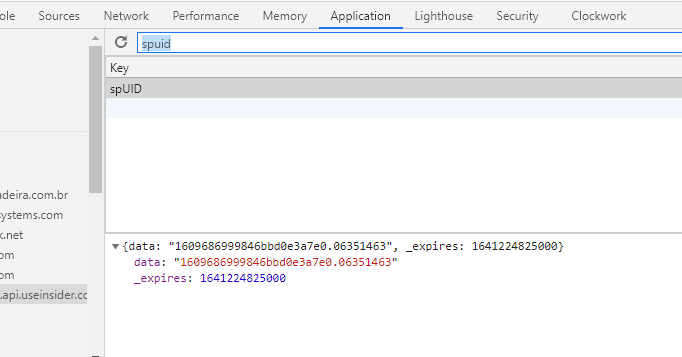
- Right-click and select Inspect to open the developer console.
- Go to Application > Local Storage.
- Select api.useinsider.com under local storage.
- Type spUID in the search bar. The value of this key is your user ID.
If you are sending user attributes or events via Upsert User Data API, you can query by email address on the User Profiles page.
If you are trying to trigger a journey from your mobile app, you can take your Unique Device Identifier (UDID) which is also considered a profile ID.
If you want to bypass the starter element, you can click the Bypass the starter element option on the test pop-up.
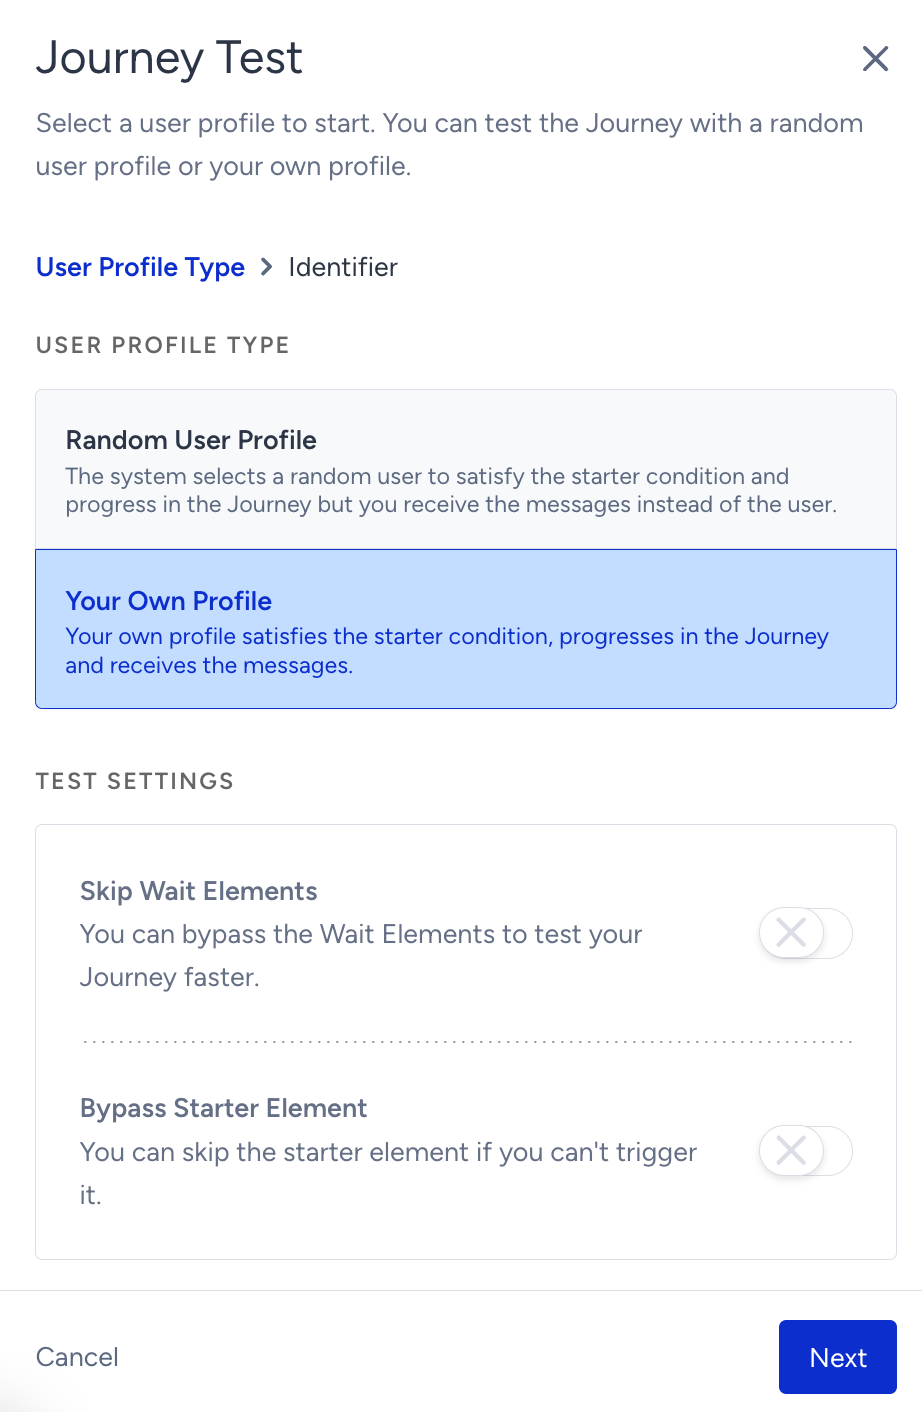
After entering the Profile ID or Email Address and activating the Bypass Starter Element option, you will be directed to the journey canvas. You will see the following information to notice you were not segmented according to your starter condition but you skipped the starter.
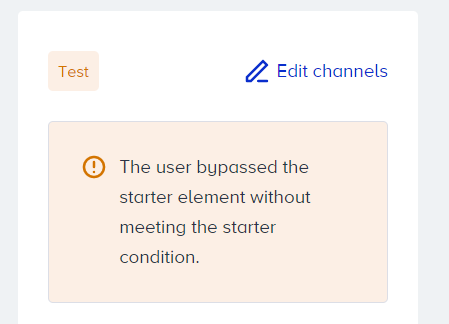
Even if you skip the starter element, you need to fulfill the conditions of the check elements or messaging channel opt-ins and provide the required information on the related platform to proceed to the correct path on the journey flow and receive messages.
Constant event parameters are filled even when you bypass the starter element. For journeys with an On Event or On Dynamic Date starter, the test uses the values from the tested user's latest event that matches the starter event and the event parameter conditions set in the starter. This way, the test message shows the same content the user gets when they enter the journey through the starter.
Random user profile
On the Journey Test pop-up, Architect offers two options to test your journeys: Random User Profile or Your Own Profile. If you want to randomly select an end user that is eligible to enter the journey and receive messages instead of the end user, select the Random User Profile option and simulate how your journey would work.
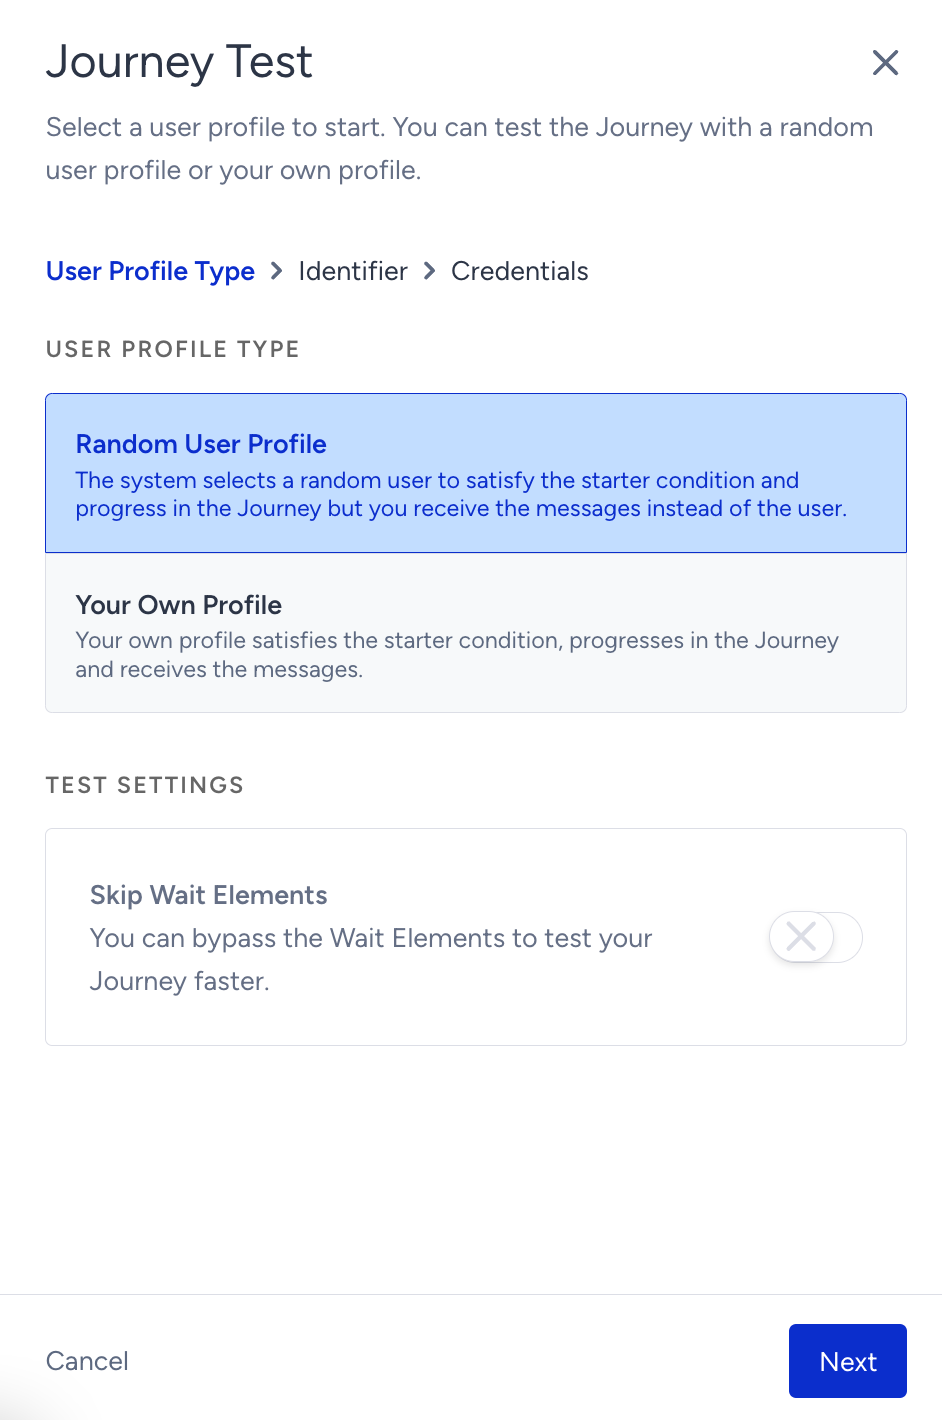
With the Random User Profile option, the end user who enters the test journey will not receive any messages from the channels in your journey. Instead, you will receive the end user's messages to ensure your journey functions correctly. If you set the live action of your channels to On Click, On Reply, On View, or On Close, you need to take the required action to allow the end user to continue the journey.
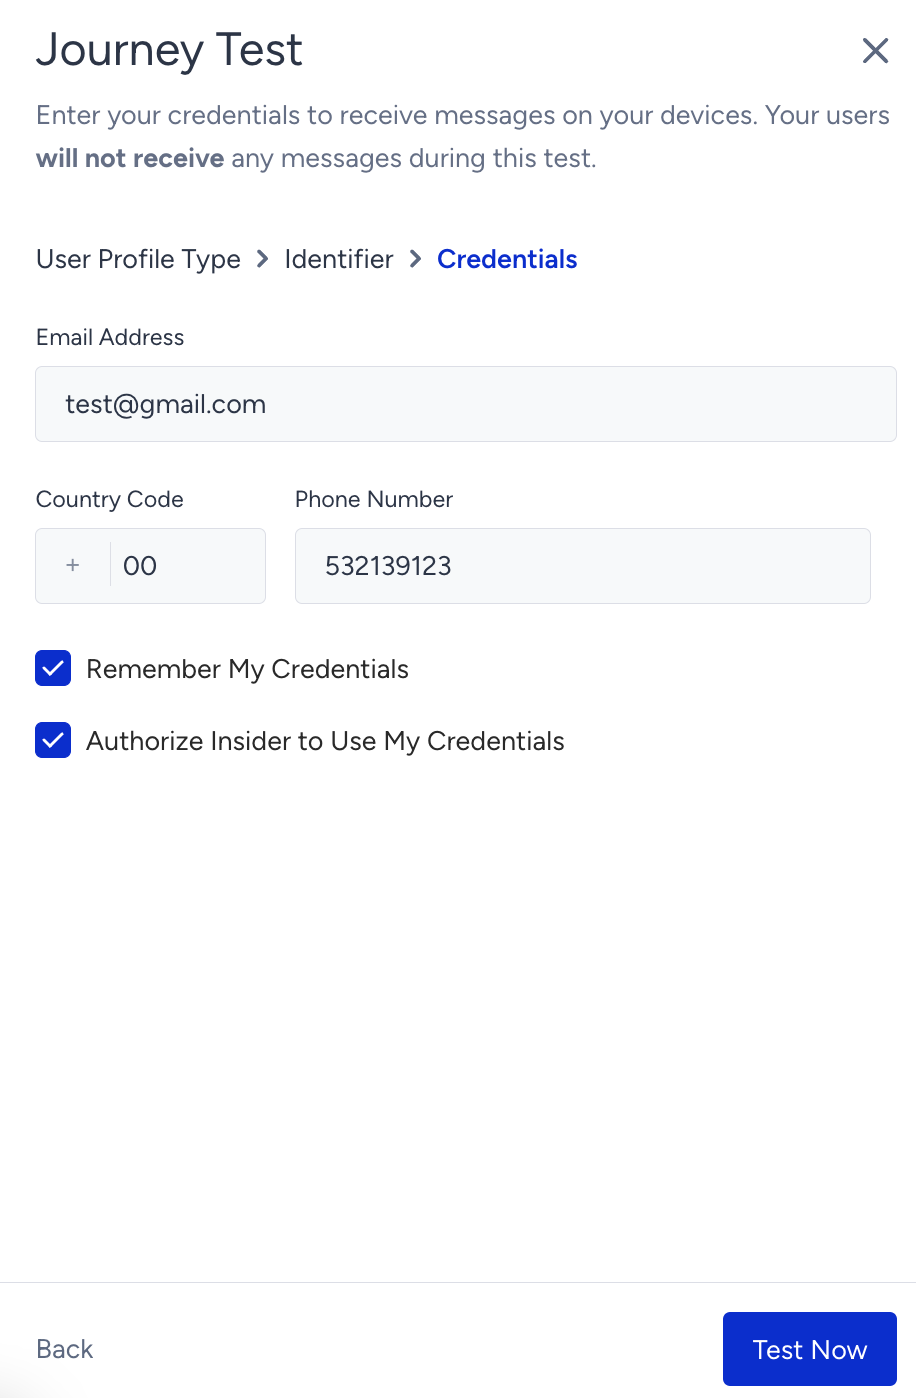
After selecting the option, enter your identifier in the next step. On the Credentials step, review your credentials and select the Remember My Credentials option to save your credentials for testing journeys later.
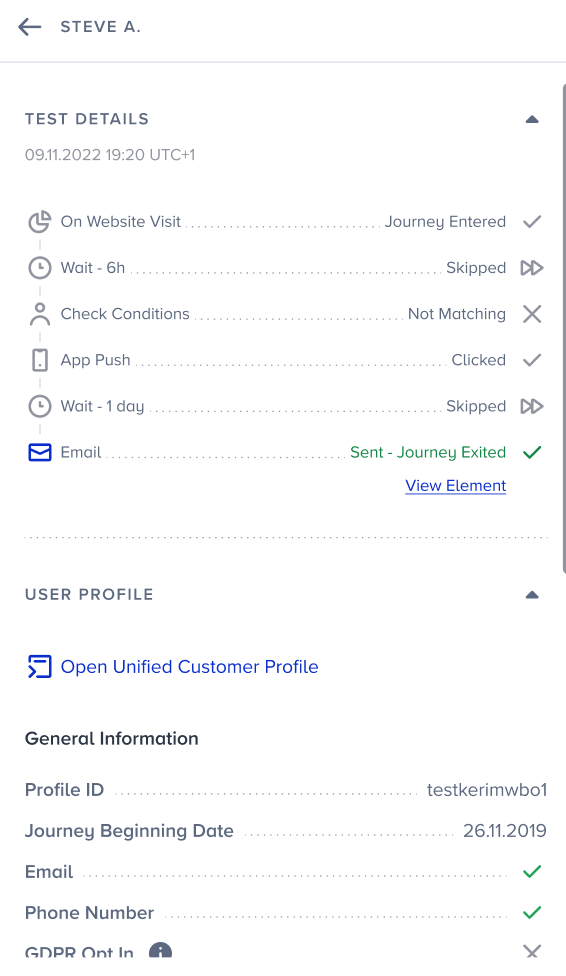
The Random User Profile List shows the test results, test details, and the user profiles of each end user you test. When an end user is eligible and enters the journey, you can view the details of the end user on the modal.
When the end user completes the test, you can see the end user listed in the Random User Profile List and click the Test Another User button to test another user. The test for the new end user begins when another end user is eligible to enter the journey.
Test a journey with On Price Drop or On Back in Stock starters
Step 1: Click the Test Journey button
After launching your journey on test status, click the Test Journey button on the listing page.
Step 2: Enter the identifiers of the profile who will enter the test journey
For the On Price Drop and On Back in Stock starters, first enter a Profile ID or Email Address. The specified user will enter the journey and receive the related messages.
- Go to your website.
- Right-click and select Inspect to open the developer console.
- Go to Application > Local Storage.
- Select api.useinsider.com under local storage.
- Type spUID in the search bar. The value of this key is your user ID.
If you are trying to trigger a journey from your mobile app, you can use your Unique Device Identifier (UDID), which is also considered a profile ID.
Step 3: Choose how you want to test
You can choose between three testing options, and each requires a different level of condition validation. Be mindful when selecting an option. Even if certain conditions are not actively checked during testing, they can be assumed as satisfied to allow the user to enter the journey. This means you might not be fully validating the starter logic.
Apply all starter conditions
When you select this option:
The user (based on the identifier you provide) must satisfy all user conditions defined in the starter.
The product ID you enter must have an actual price drop or back-in-stock update (depending on the starter type), and meet all product filters defined in the starter.
This is the most comprehensive testing method. It validates whether the product change correctly triggers the starter and whether user conditions are evaluated properly. It most closely reflects a live journey scenario.
Apply only product conditions
With this option:
You do not enter product IDs manually.
Only locale and currency are considered.
A real product in the database must experience the required change (price drop or back in stock) and meet the product filters.
User conditions are not checked. For example, if the starter requires the user to have viewed the product, this condition does not need to be satisfied.
The specified user will enter the journey as long as a product meets the product conditions.
Apply no starter conditions
When you select this option:
Neither user conditions nor product conditions are validated.
The user enters the journey directly using the product information you provide.
This is the easiest testing method, as it does not require any real user or product actions. However, it is best suited for testing the rest of the journey flow, rather than validating whether the starter conditions are correctly triggered.
Step 4: Click Next and start testing
Click Next to proceed to the canvas and start testing.
Depending on the selected testing option, it can take some time for the user to enter the journey. If the user does not enter after a few minutes, the required user or product conditions might not be met. You can review the user's profile or check the Catalog Manager to identify which conditions are not satisfied.