A button is a beautifully designed URL link. It should be visible, and its copy needs to be clear and concise.
Build a CTA button
1. Drop the basic Button block into your template and put it right next to the necessary element.
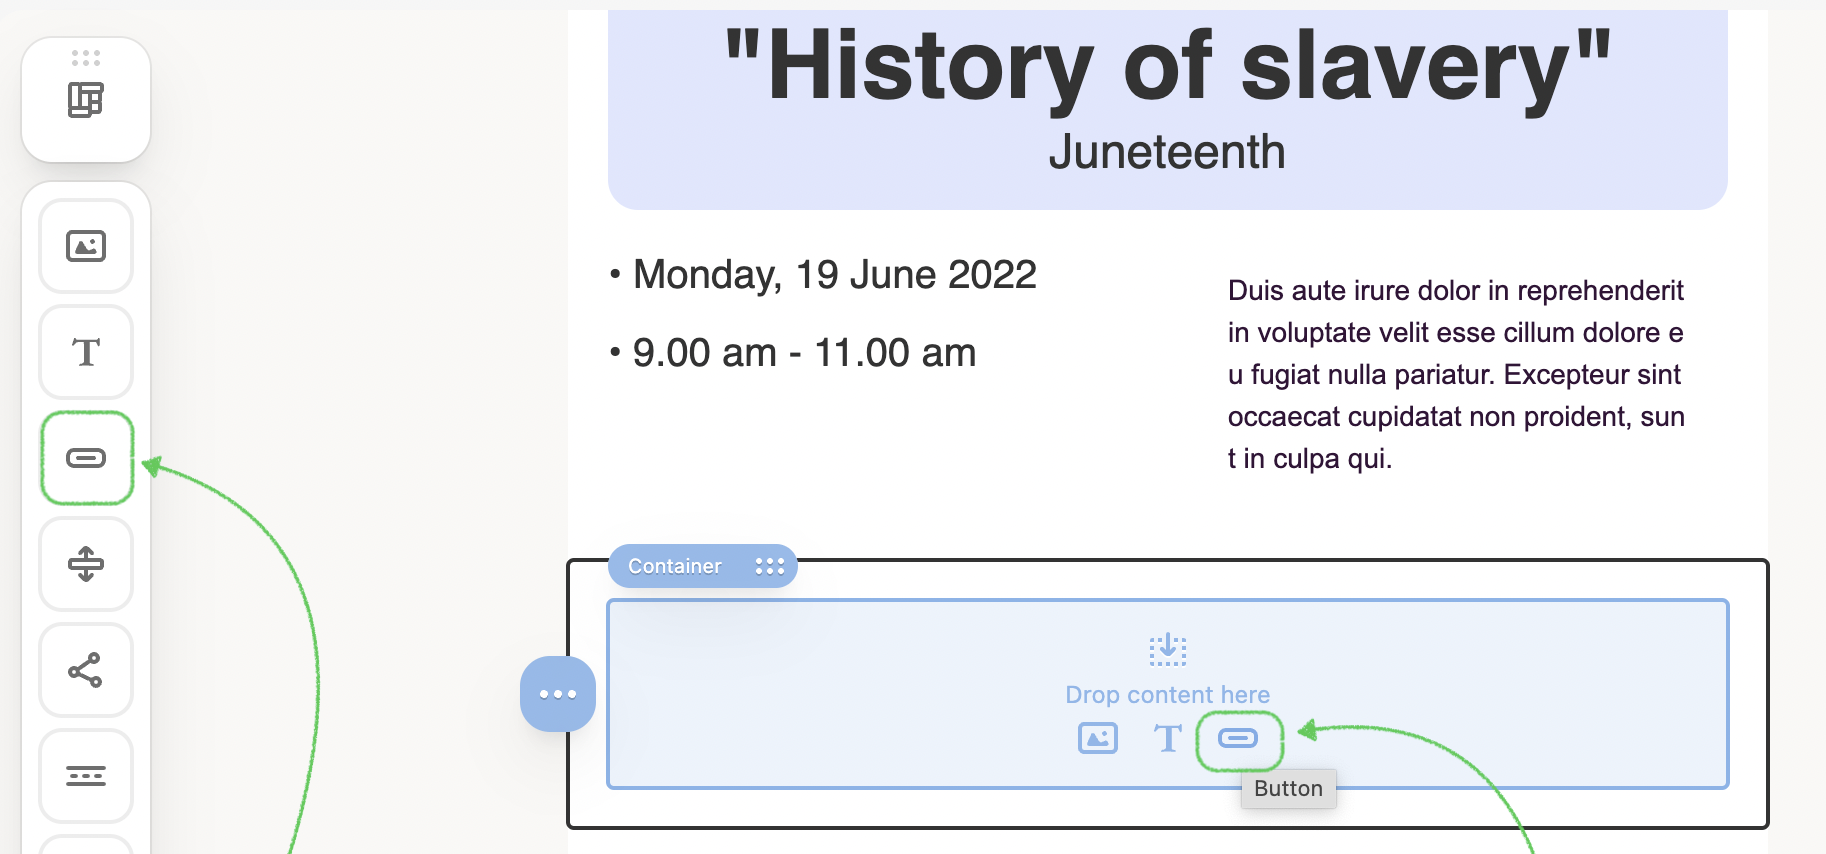
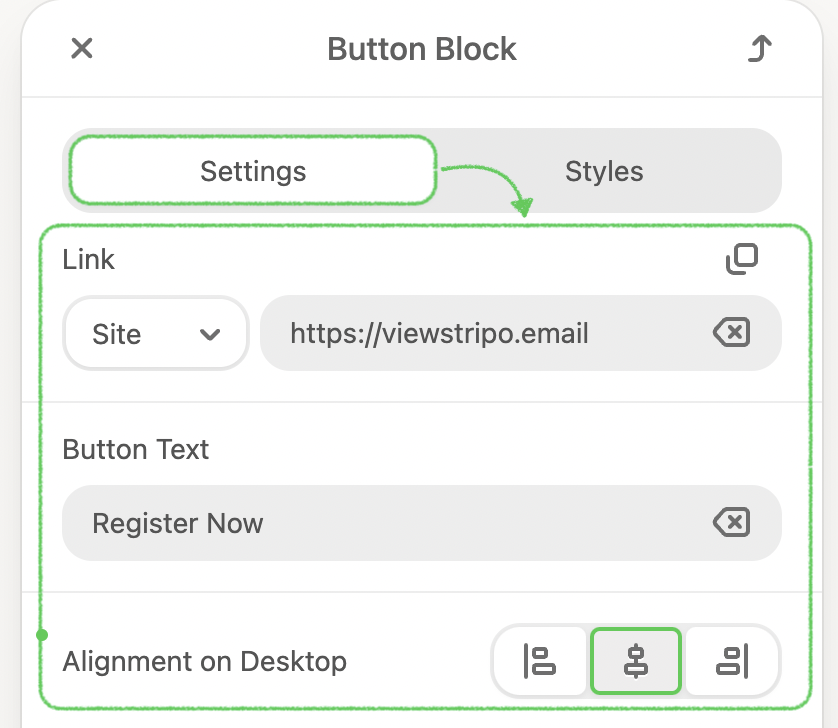
2. Click the Button block in the template to activate the Settings panel.
- Insert a necessary URL link.
- Enter your button text (aka button label).
- Set a correct alignment.
- Fixed Height, where you can apply the needed height of the block without using the code editor, and set the alignment for it.
3. Also, you can add an Icon directly to the button, making it more attractive, where you can set up: alignment, width, and indent.
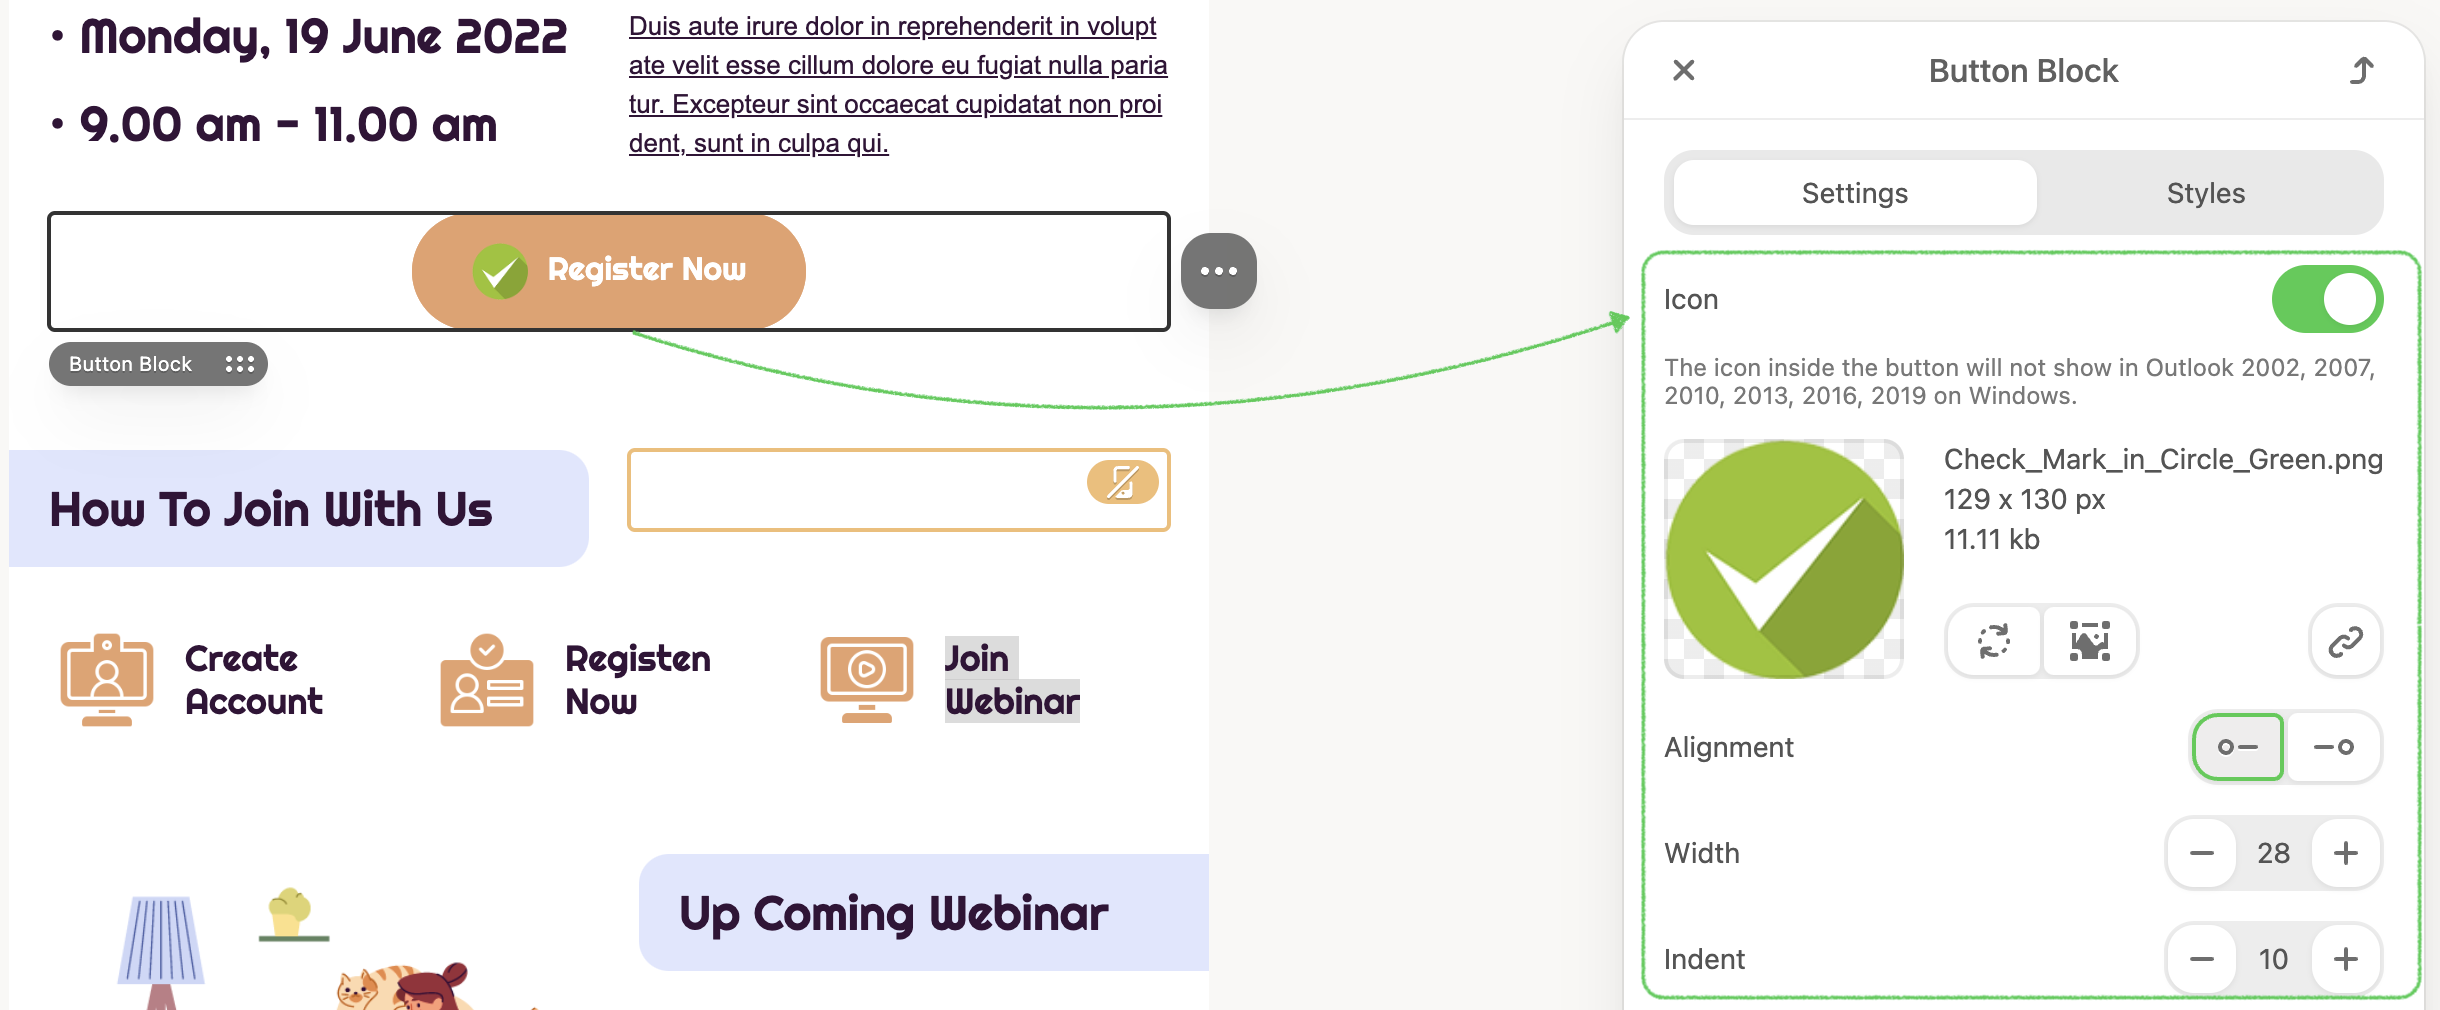
The icon inside the button will not show in Outlook 2002, 2007, 2010, 2013, 2016, and 2019 on Windows.
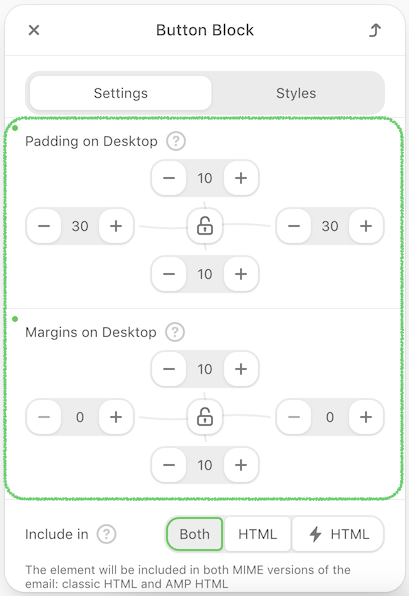
4. Set internal padding. They are responsible for the space inside your button. Because of the button layout method, it does not matter exactly where in the button your customers click. This space is also clickable, which makes the buttons more appealing and clearer.
Also, you can set up margins around the button.
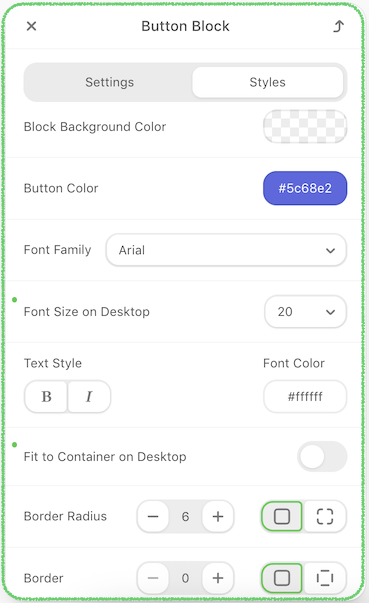
5. Click the Styles tab and set up the following:
- Block Background Color, which is applied to the entire button block
- Button color
- Text styles, such as font family, font size, and colors
- Fit the button to Container.
- Border radius to the entire button. Click the Radius per corner to set the radius for the needed corner.
- Set a border to make your buttons more interesting, where you can customize: a border for all sides, a border for each side, border color, and border style.
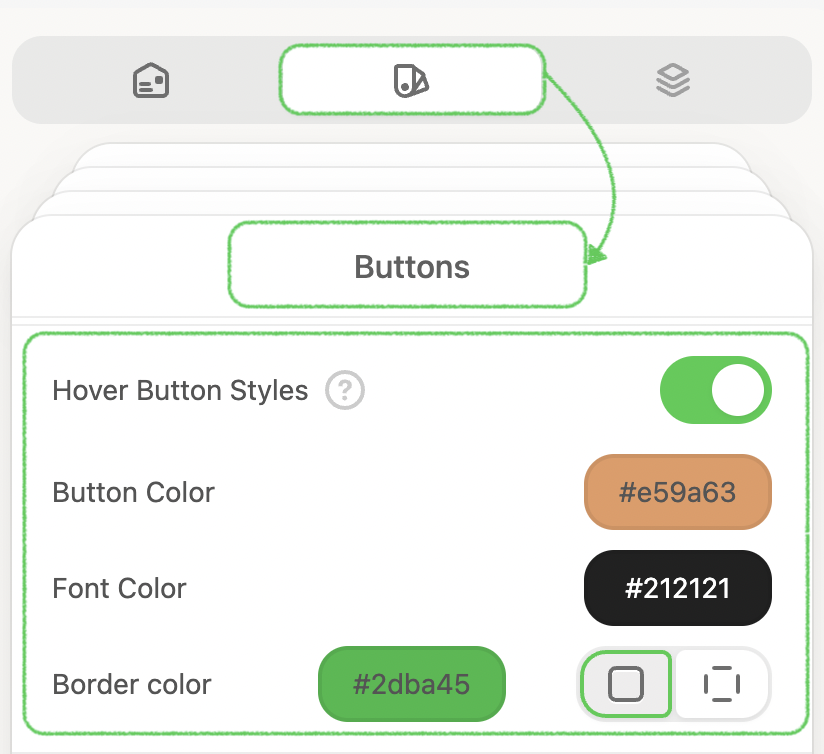
Apply a hover effect to your buttons
After adding your button, activate Hover Button Styles to enable animation.
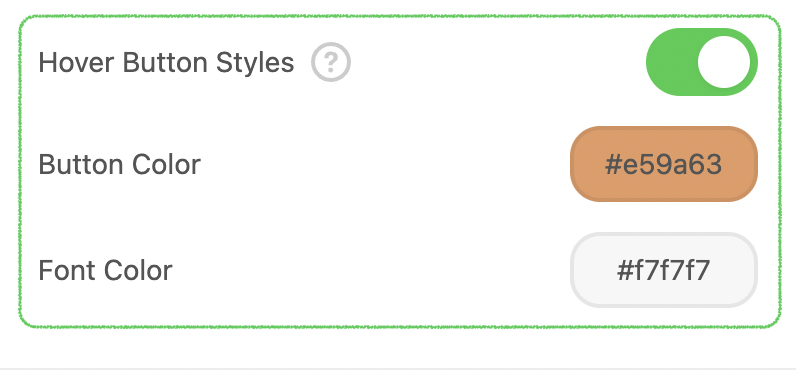
The button color represents the primary color; the highlighted button color shows the color your users see when they hover over it; and the text color changes with the highlighted font color.
.gif)
Here, you can set the default Hover Button Styles that will be applied to all buttons in the email template.