In your email texts, you inform users about events, sales, etc.
This article explains how to:
Add a text block
To add the text block:
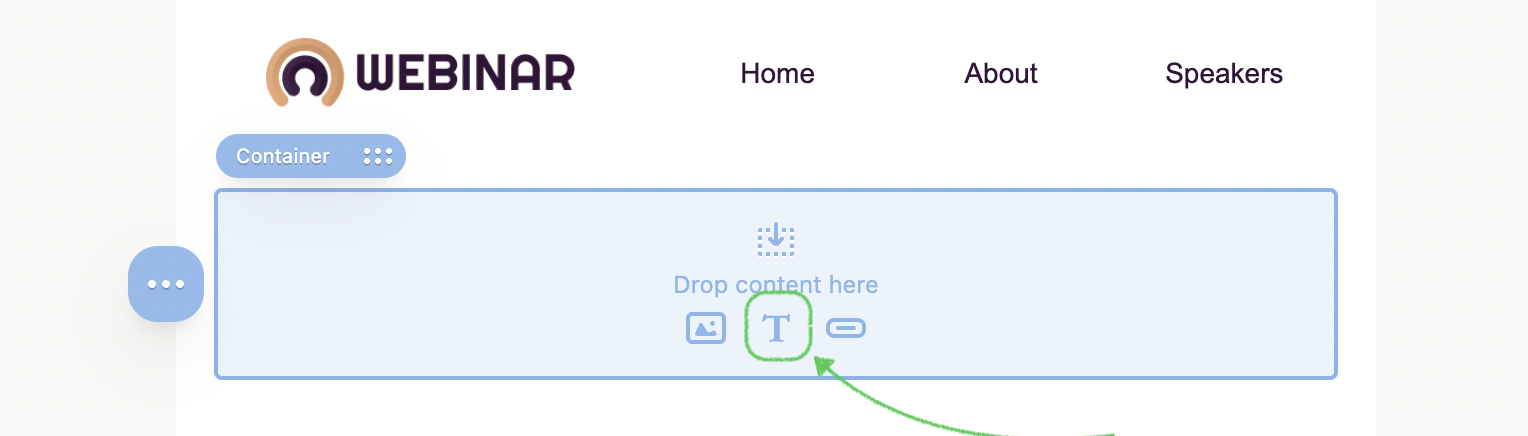
1. Drop the 1-column structure into your email template.
2. Drop a Text block into it, or click the Text button right in the structure.
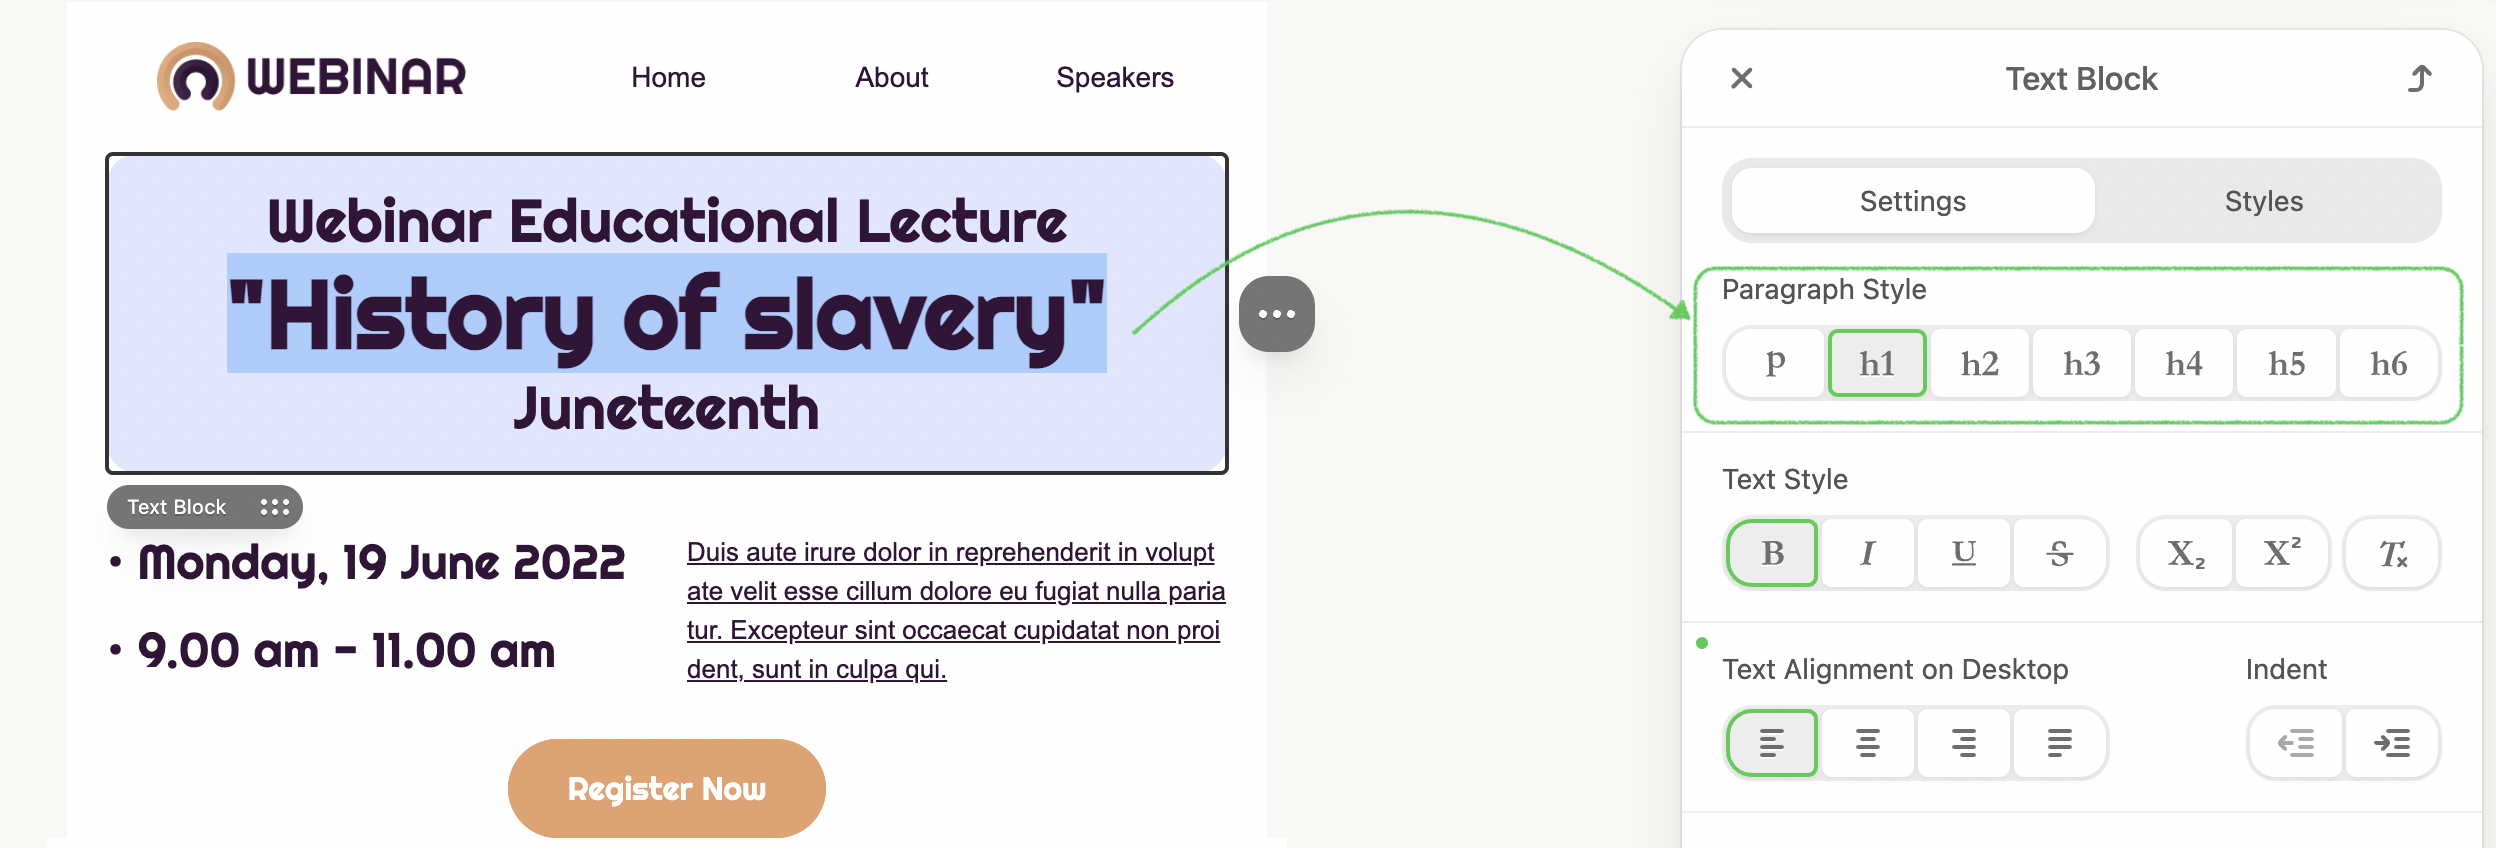
3. Enter your text. A block can contain both regular text and headings.
To apply a heading to a piece of text, you need to highlight it with the mouse pointer and pick the Paragraph Style in the Text block menu.
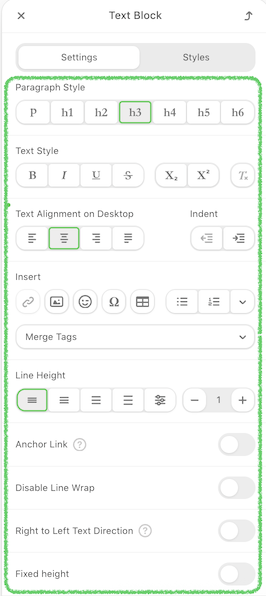
4. With the text block in the Settings tab, you can set up the following:
- Paragraph Style: You can apply the headings to your text.
- Text Style: You can apply text styles such as bold, italic, underline, strikethrough, subscript, and superscript.
- Text Alignment: Center alignment is the default. If you need to change it, click left, right, or justifyalignment.
- Increase Indent/Decrease Indent: You can add/remove an indent to the text by highlighting the necessary word/text.
- Fixed Height: You can apply the desired block height without using the Code Editor and set its alignment.
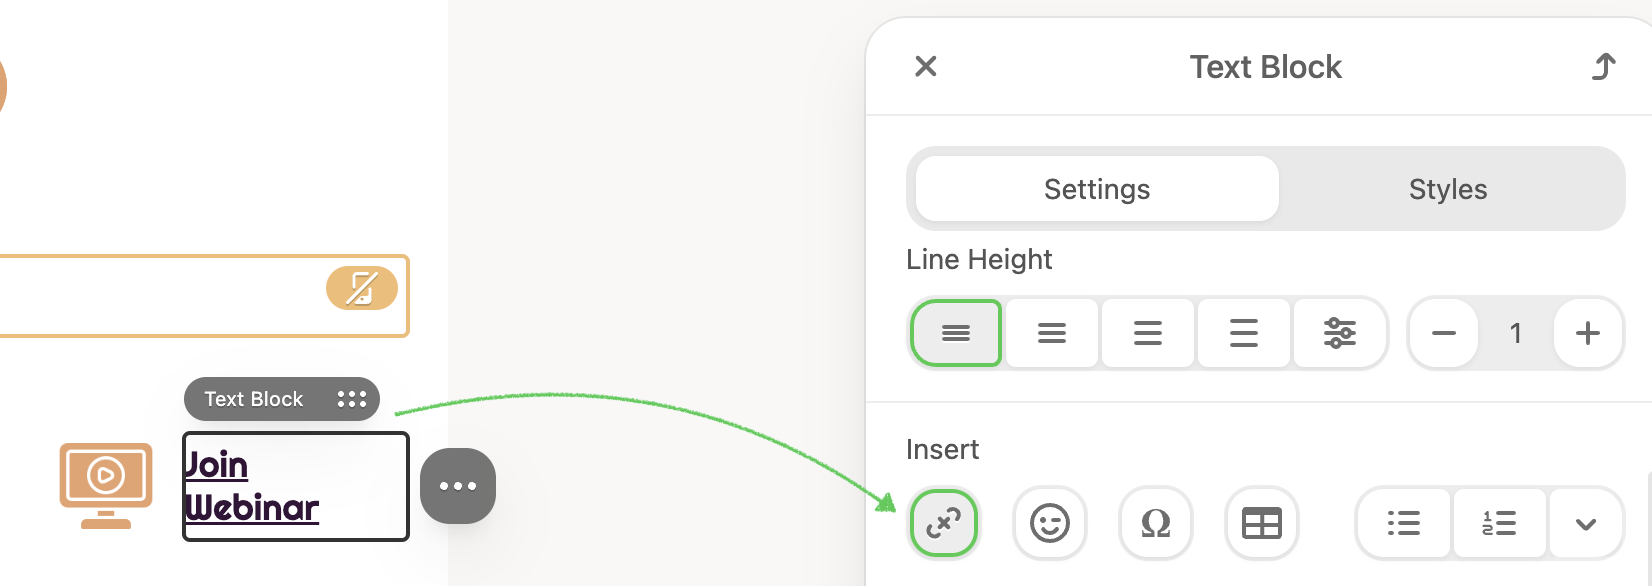
- Line Height: The distance between the text lines in the text block. You use them to give your email a more formal or informal style. This is totally at your discretion.
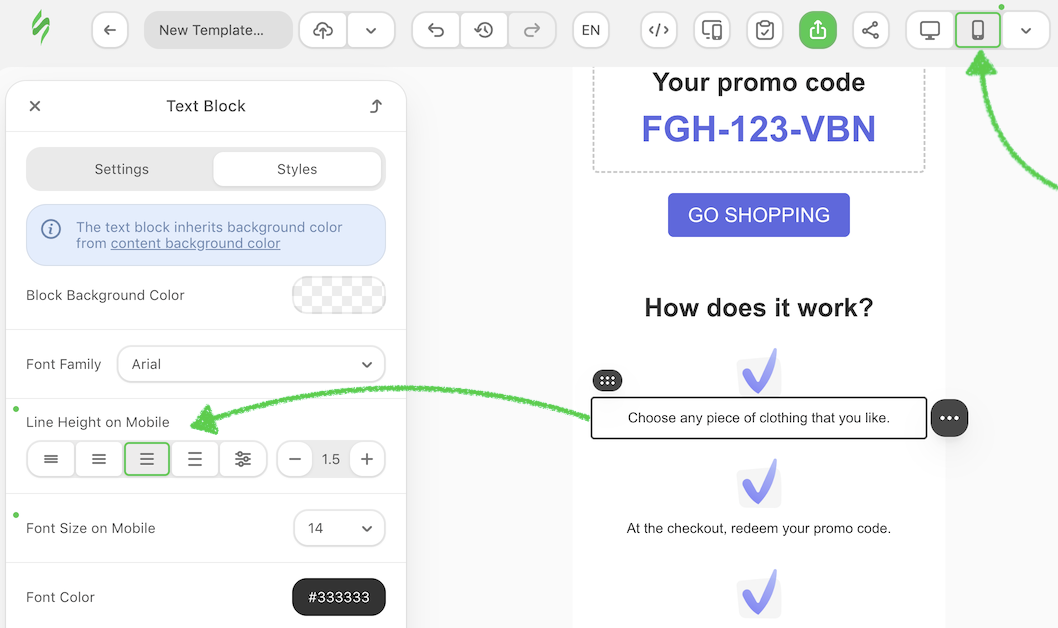
To set a separate Line Height for the mobile version, switch to the Mobile view, select the Text block, open the Styles tab, and adjust the Line Height on Mobile control.
Insert an image into your text block
In addition to adding plain text, headings, and links, you can insert images directly into your text block. This option is useful for small inline elements such as icons, logos, or small images that should appear within a line of text.
To insert an image into your text:
1. Drop a Text block into your email template and, in its Settings panel, open the Insert section to click the Image button.
.png)
2. The Image Library will open. Select an existing image or upload a new one.
.png)
After selecting, the image will appear in the text at its original size and aligned to the left by default.
2.1. Click the image to open its settings menu, where you can:
- Set Text Wrapping to align the image to the right.
- Specify the required size.
- Add a link, alttext, and border radius.
- Adjust margins to define the spacing around the image.
.png)
Margins are not supported in Outlook.
2.2. Click on the text itself to edit it directly within the block.
Add links to text
To add a link to text:
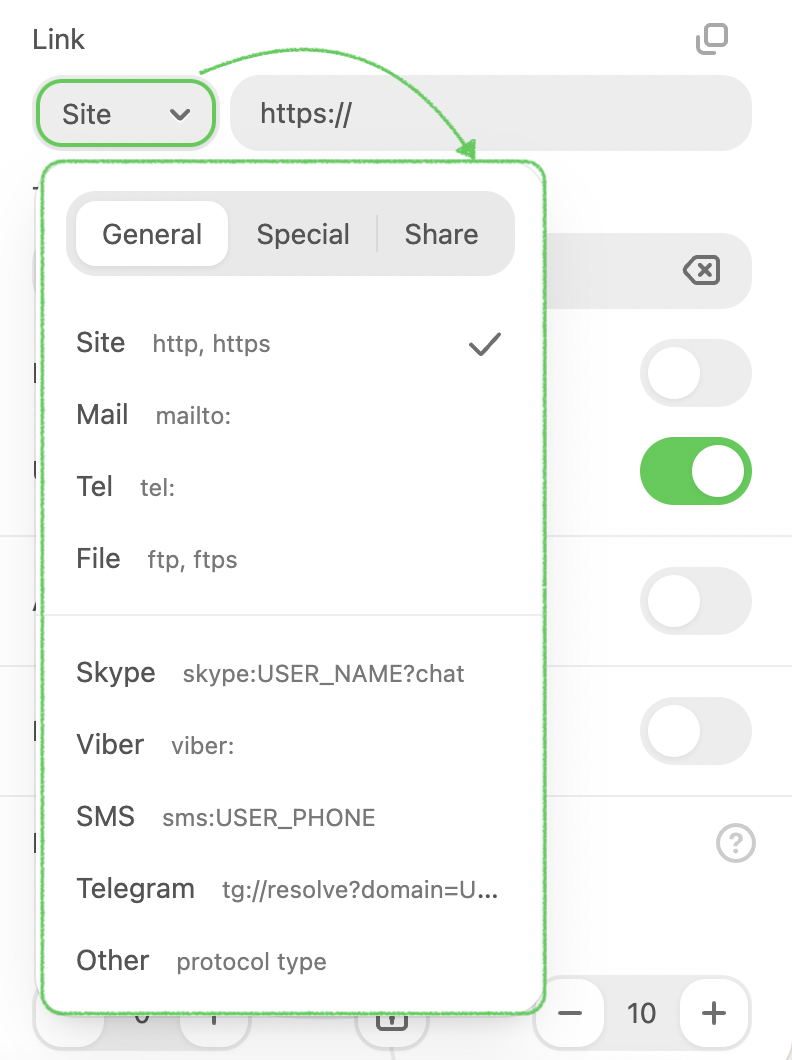
1. Highlight the necessary word/text and click the label Chain from the right Settings panel.
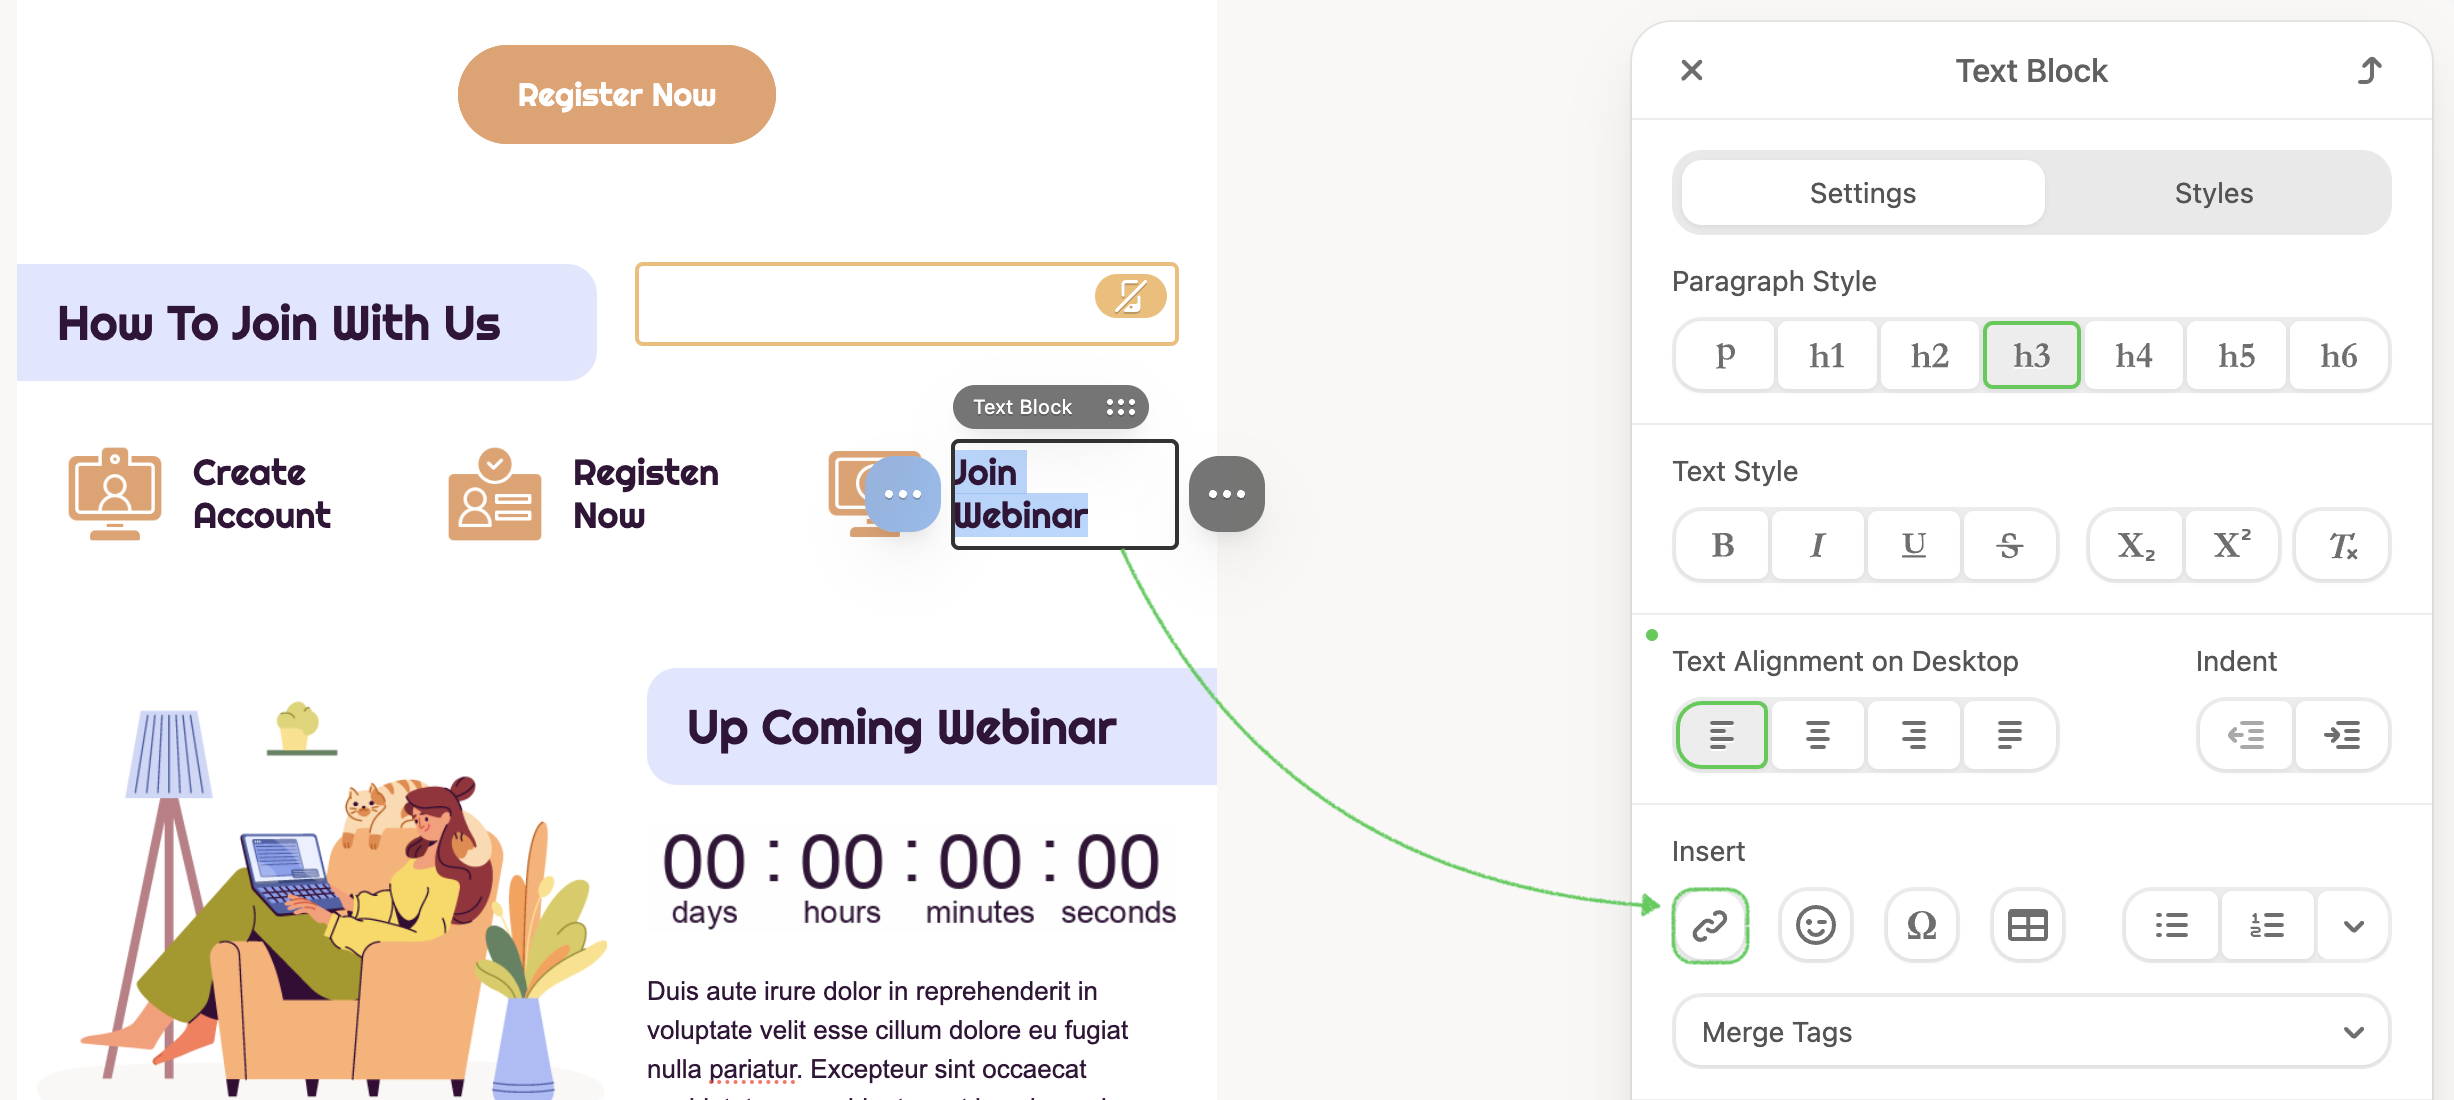
2. Then, in the settings panel, select the link type (protocol) that fits best and insert its data.
3. To remove the text link, highlight the text and click Chain again in the Settings tab.
4. In the text settings tab, you can also:
- Enable Word Break: Enforces a line wrapping so the text is within the specified block width. The option does not work for Chinese, Korean, and Japanese text.
- Activate the Underline Links with which you can mark your text links.
- Set up emojis, special characters, table, and bullet list.
- Add Merge-tags for personalizing your content in a template.
- Add the Anchor Link.
- Disable Line Wrap: Helps you put text in one line.
- Set Paddings.
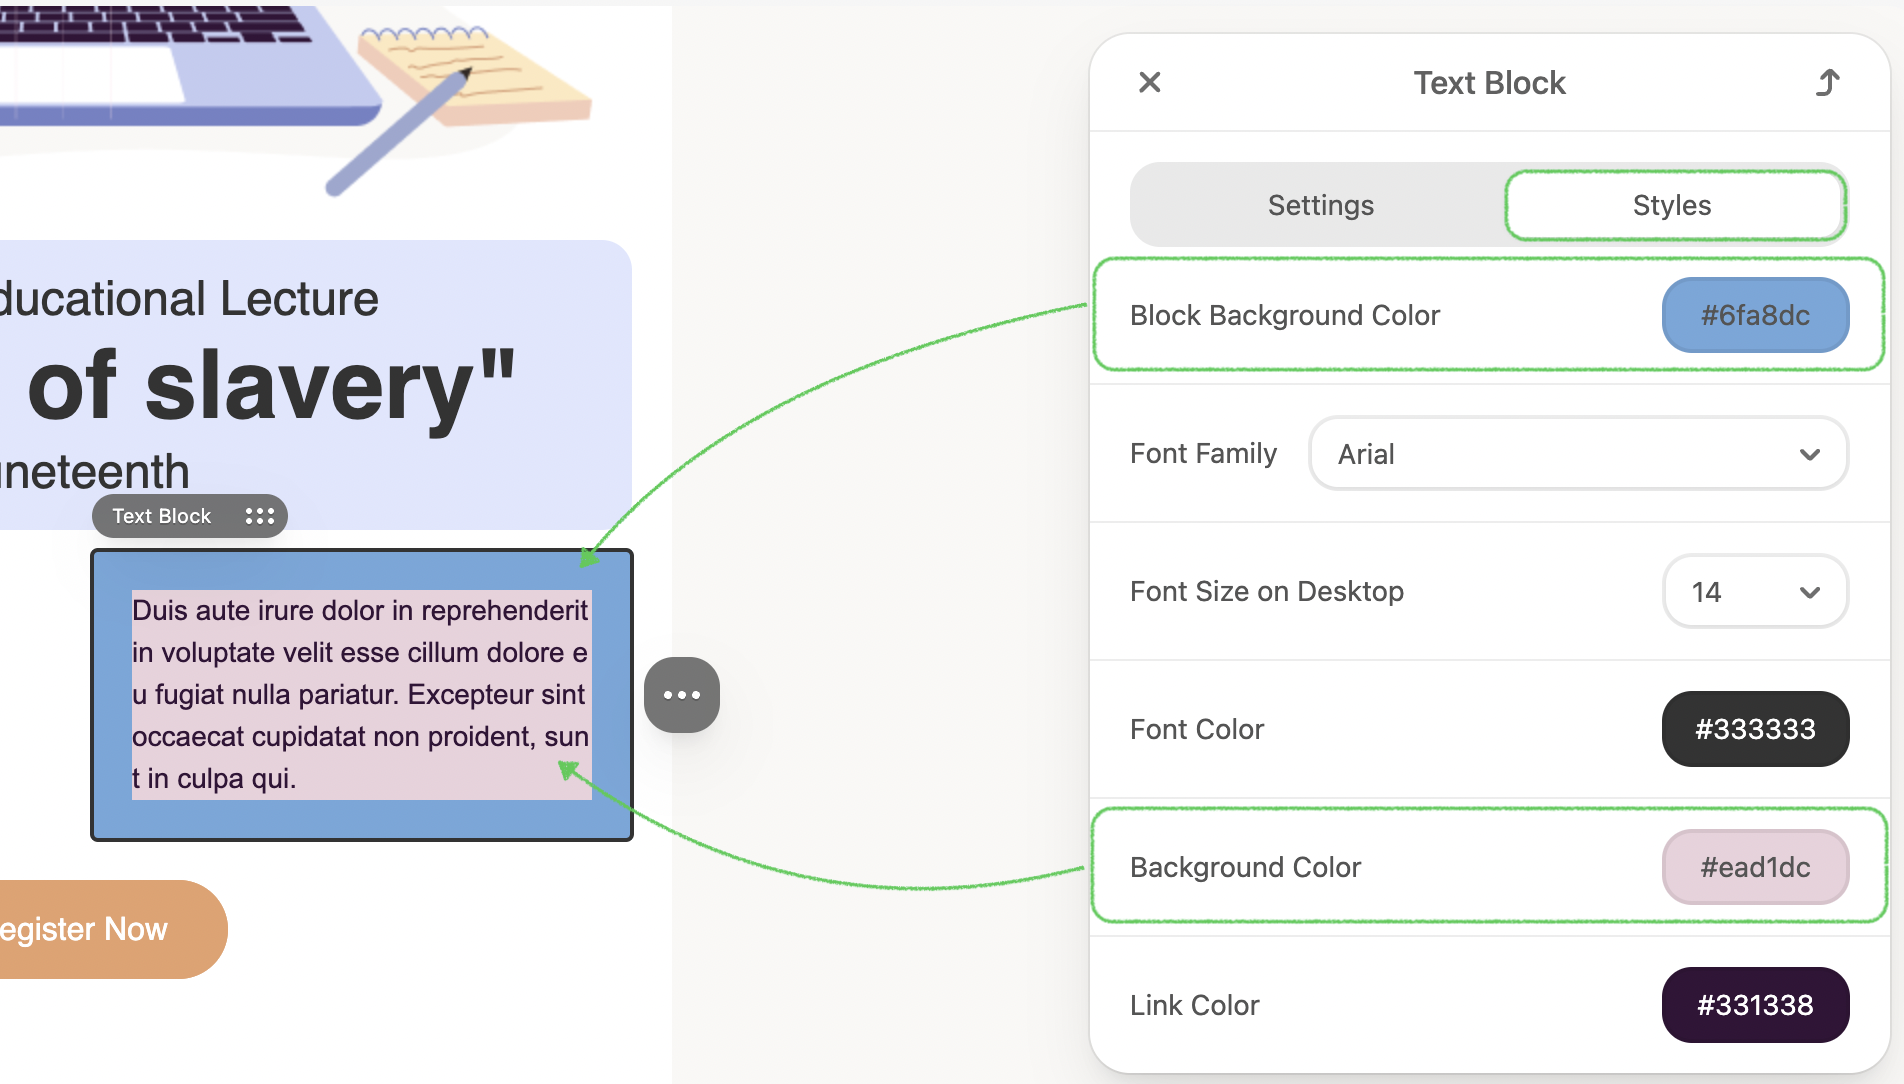
5. In the Styles tab, you are able to set up as well:
- Block Background Color: Applied to the entire text block as well as a Background Color covering the text area.
- Font Family and Font size
- Font and Links color
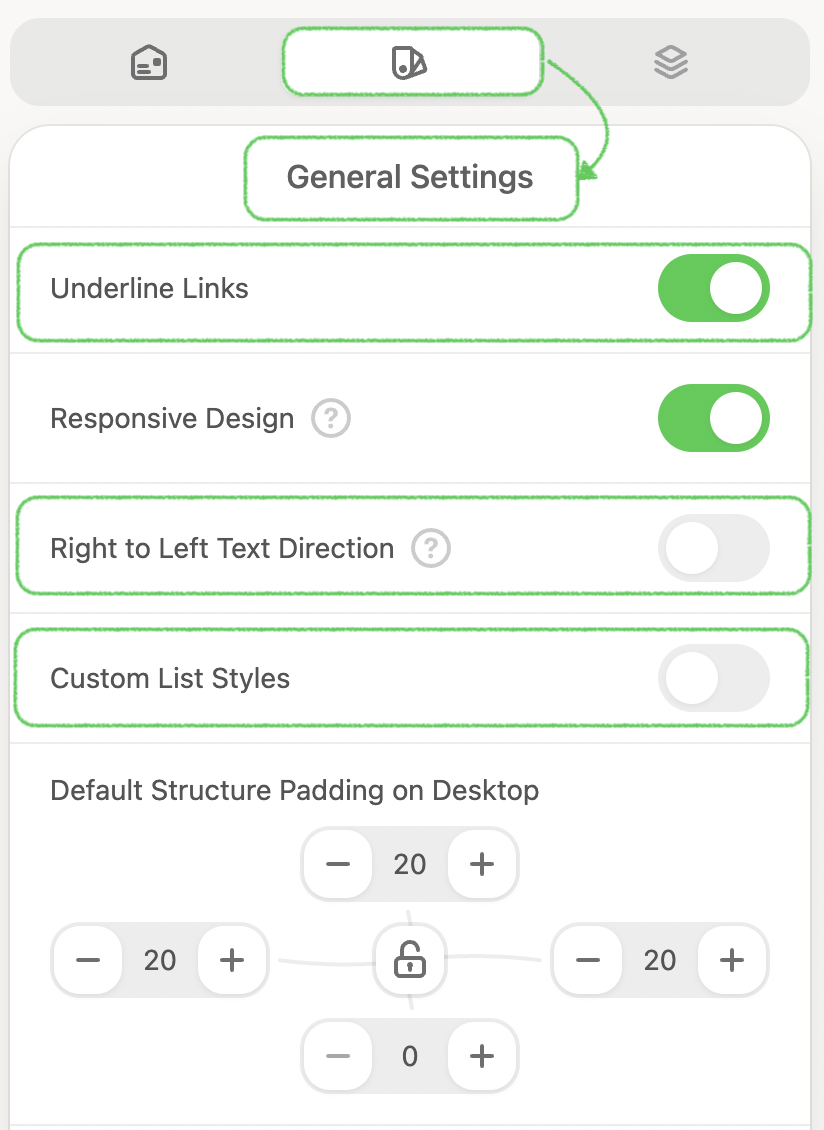
6. In the General Settings tab, you can set up the following:
- Underline links: Once you add a link to your email template, it will be underlined automatically.
- RTL direction: Enables right-to-left text direction in emails for the most widely used language scripts, such as Arabic, Hebrew, Persian, Pashto, Urdu, Kashmiri, and Sindhi.
- Custom List Styles: Once you add a bullet list to your email template, these settings will be applied.
7. Moreover, in the Stripes tab, you can simultaneously set all stripes' font family, line height, and letter spacing. And set the content background color, font size, and color, link and hover link color, and enable the Paragraph Bottom Space for all stripes of the same type.

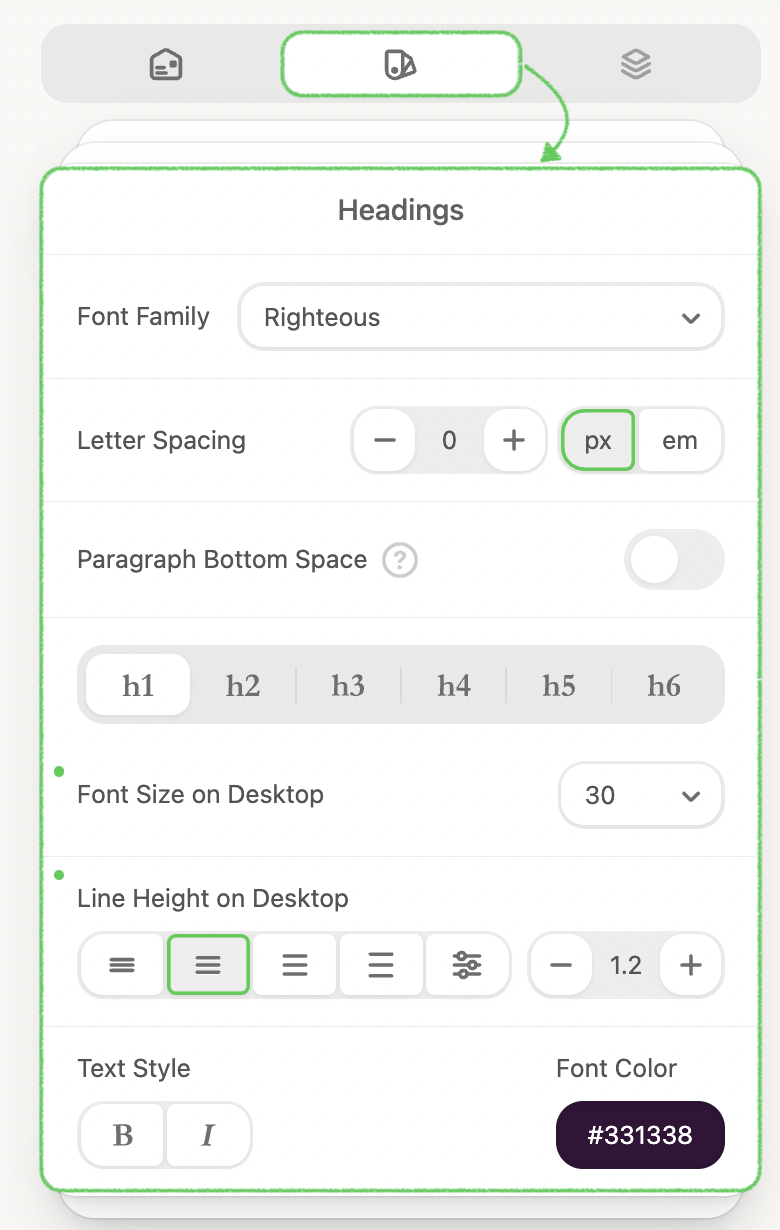
8. As well as in the Headings tab, you can set the font family for all headings in the email template, letter spacing, indent at the bottom of the paragraph, font size, line height, font style, and color at the same time.
Improve your text with AI
1. Drag and drop your desired text block into your email template.
2. Navigate to the three dots on the right side of the text block and click the Improve with AI button.
.png)
3. Once the AI text generator is enabled, you can enter your suggestions for improving the text in the displayed field and click Send query.
.png)
Alternatively, you can use these frequently used prompts to streamline the process:
- Generate a random title: Get a creative and attention-grabbing headline instantly.
- Generate a random text paragraph: Receive a ready-made paragraph to use as filler or a starting point for your content.
These options help you quickly enhance your content while maintaining control over the creative direction.
.png)
Imagine you’re working on a promotional email, and your starting point is: “Explore our product features.”
.png)
If you request “Rewrite it in two sentences,” AI could transform it into: "Discover what our product can do for you. Learn about its features!"
.png)
If you’re not satisfied, you can effortlessly undo changes or tweak the AI-generated text further.
4. Moreover, you can quickly enhance your content with these prompts:
- Fix grammar issues for a polished, professional touch.
- Make the text shorter or longer to adjust its impact.
- Add emojis for a fun and engaging vibe.
.png)
- Translate the text to connect with a global audience.
.png)
- Adjust the tone to suit your audience, whether formal or casual.
.png)
AI tools allow you to focus on creativity while automating repetitive tasks. Instead of sweating over grammar or sentence structure, you can direct your energy toward designing visually stunning templates or brainstorming innovative campaigns.
This streamlined approach not only enhances your content’s overall appeal but also frees up precious time for other priorities.