This guide aims to explain how to create a project on CLU. To create a project on CLU,
- Create an account from Azure Portal or log in to your account if you already have one.
- To create an AI Provider on MindBehind, you must have an endpoint, subscription key, project name, deployment name, training model name, and language.
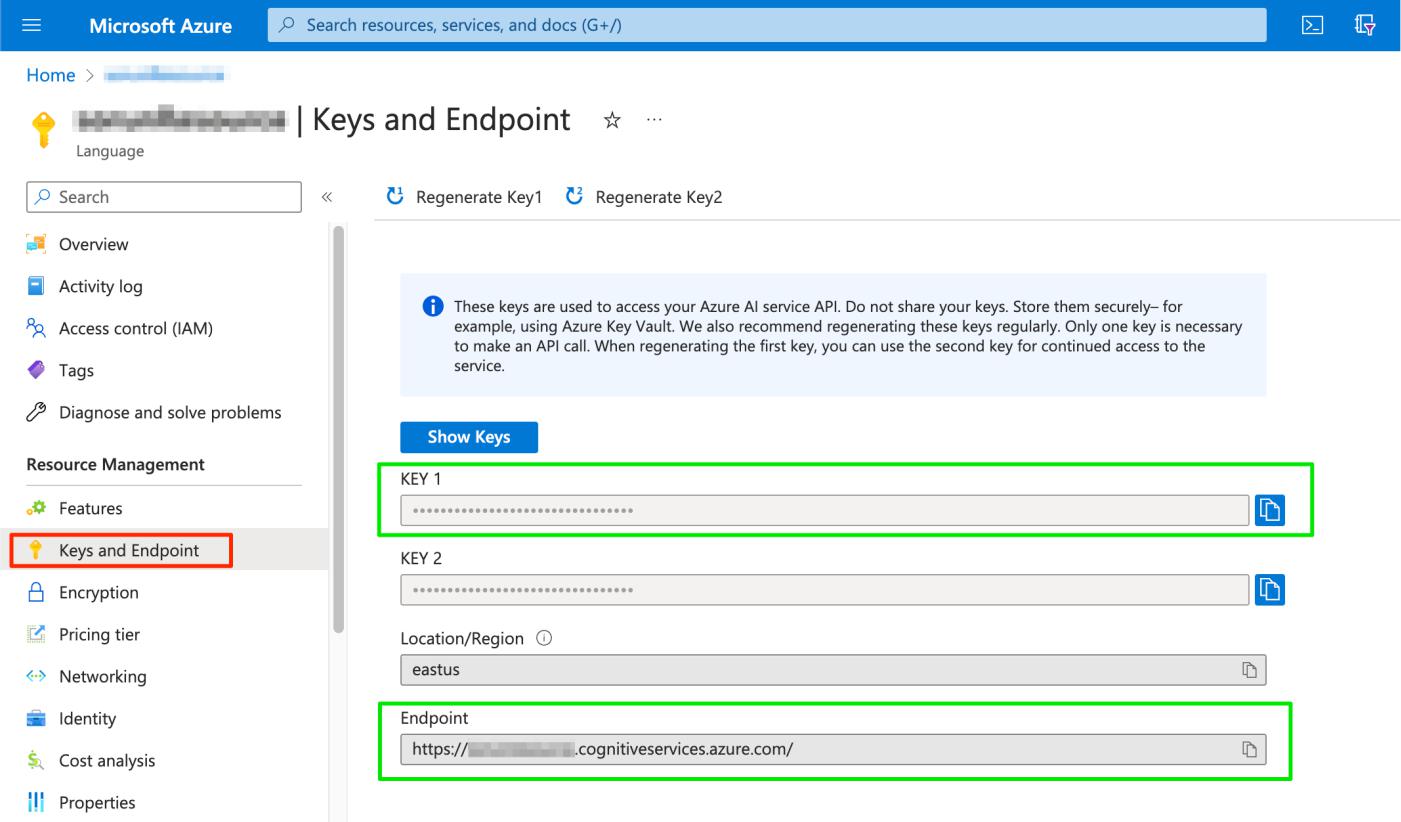
- Go to your language resource on the Azure Portal. Click on the "Keys and Endpoints" menu. You will find Key 1, which is the subscription key and endpoint URL.
- Go to the Language Studio. To create a new project, you should have an Azure Subscription and Resource. The Resource type must be "Language". Select the already existing ones. If you do not have an account, click the "Create a free account" link.
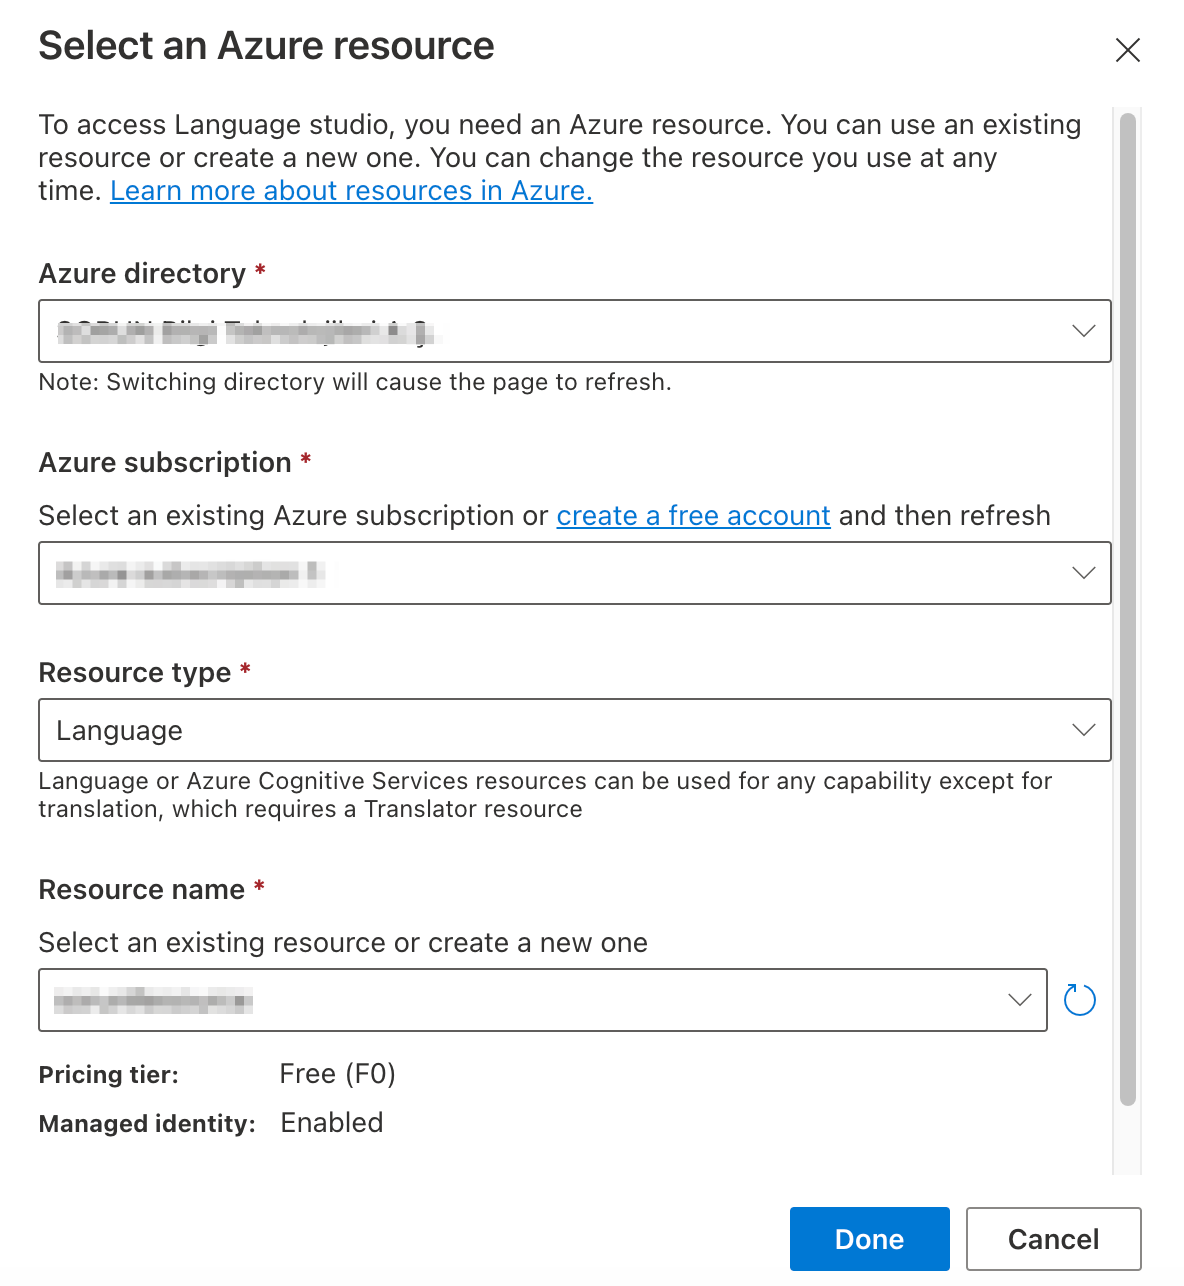
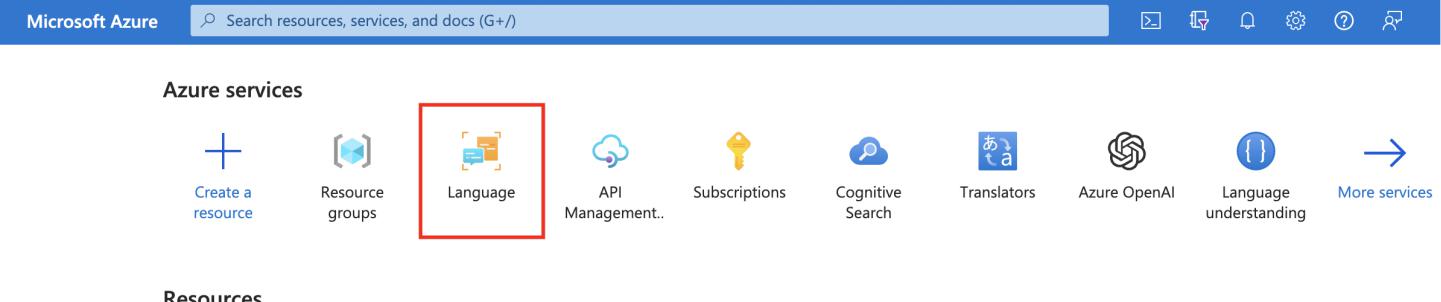
- If you do not have a resource, go to the Azure Portal and click on the Language menu or click on the link under the "Select an Azure resource" window to create a new language.
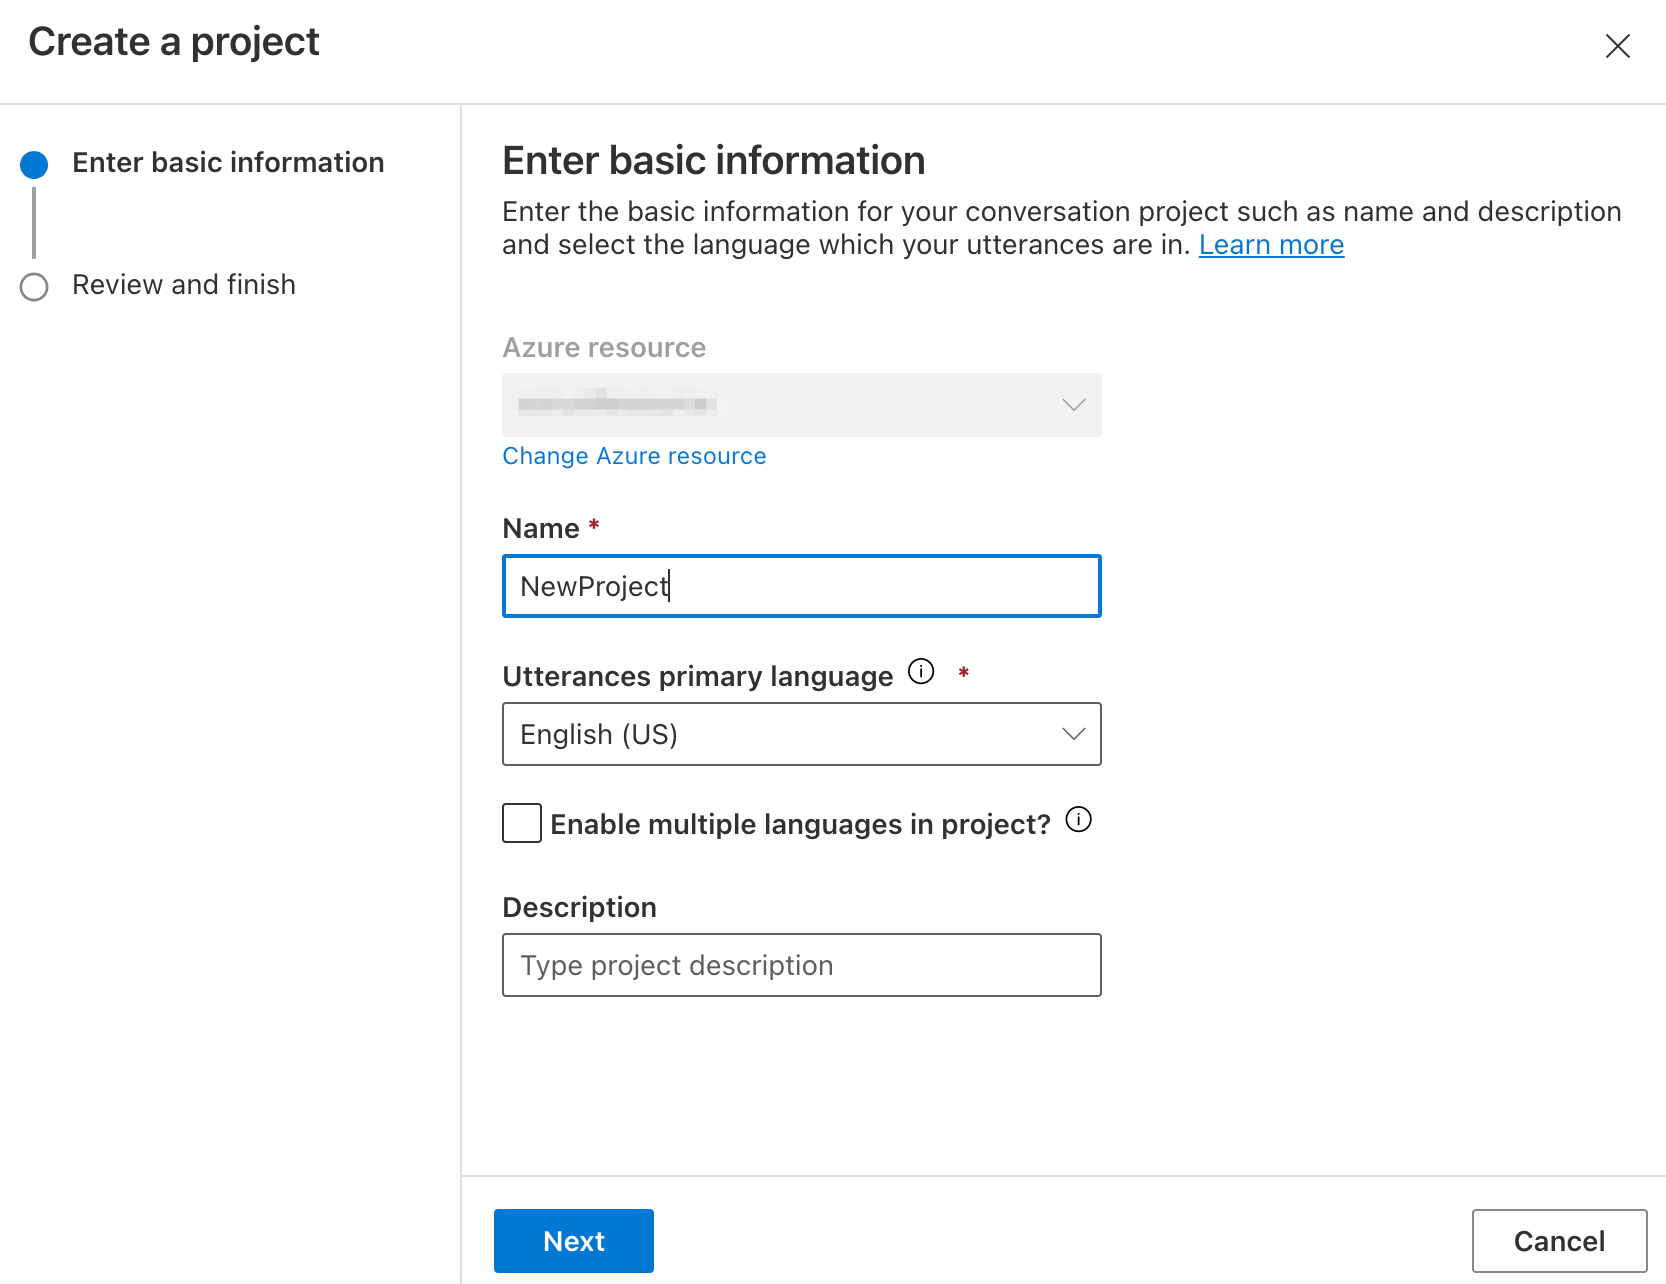
- After clicking the Done button, click "Create new project". Type the project name and primary language and click the Create button. This will be your project name on Configurations. Your title goes hereThe Turkish option is currently not supported.

- Language must be in Language Tag (BCP 47) format. Refer to Language and voice support for the speech service to get the related tag. For example, if you select the "English(United States)" option while creating the project, you should type en-US to language on Configurations.
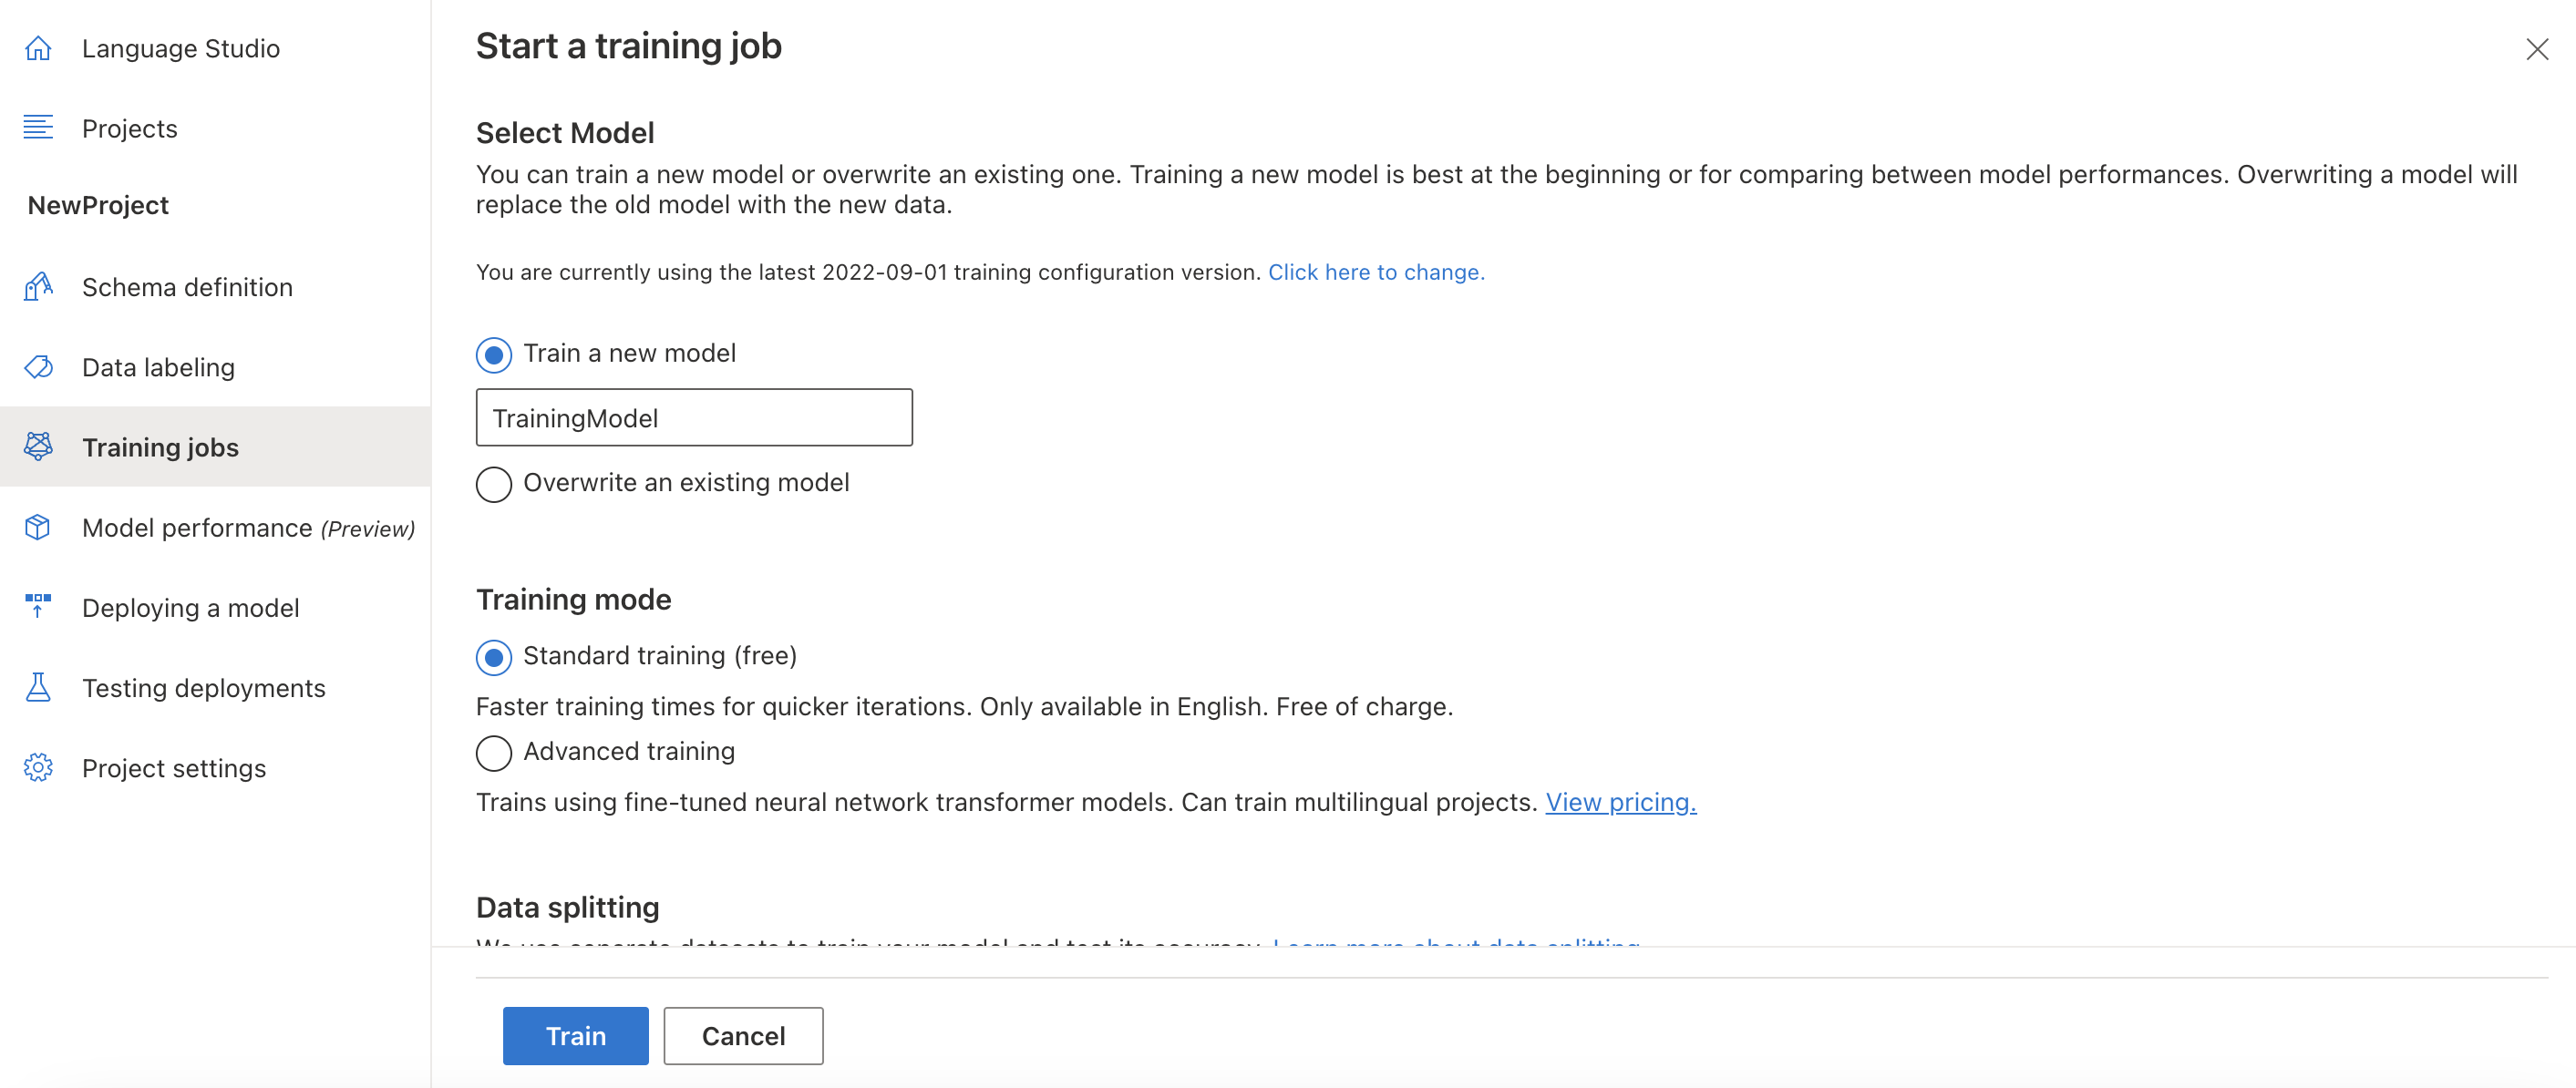
- Click on "Start a training job" to create a training model from training jobs. Your title goes hereTo be successful in the training, you must have at least one intent, and this intent must have at least one utterance.
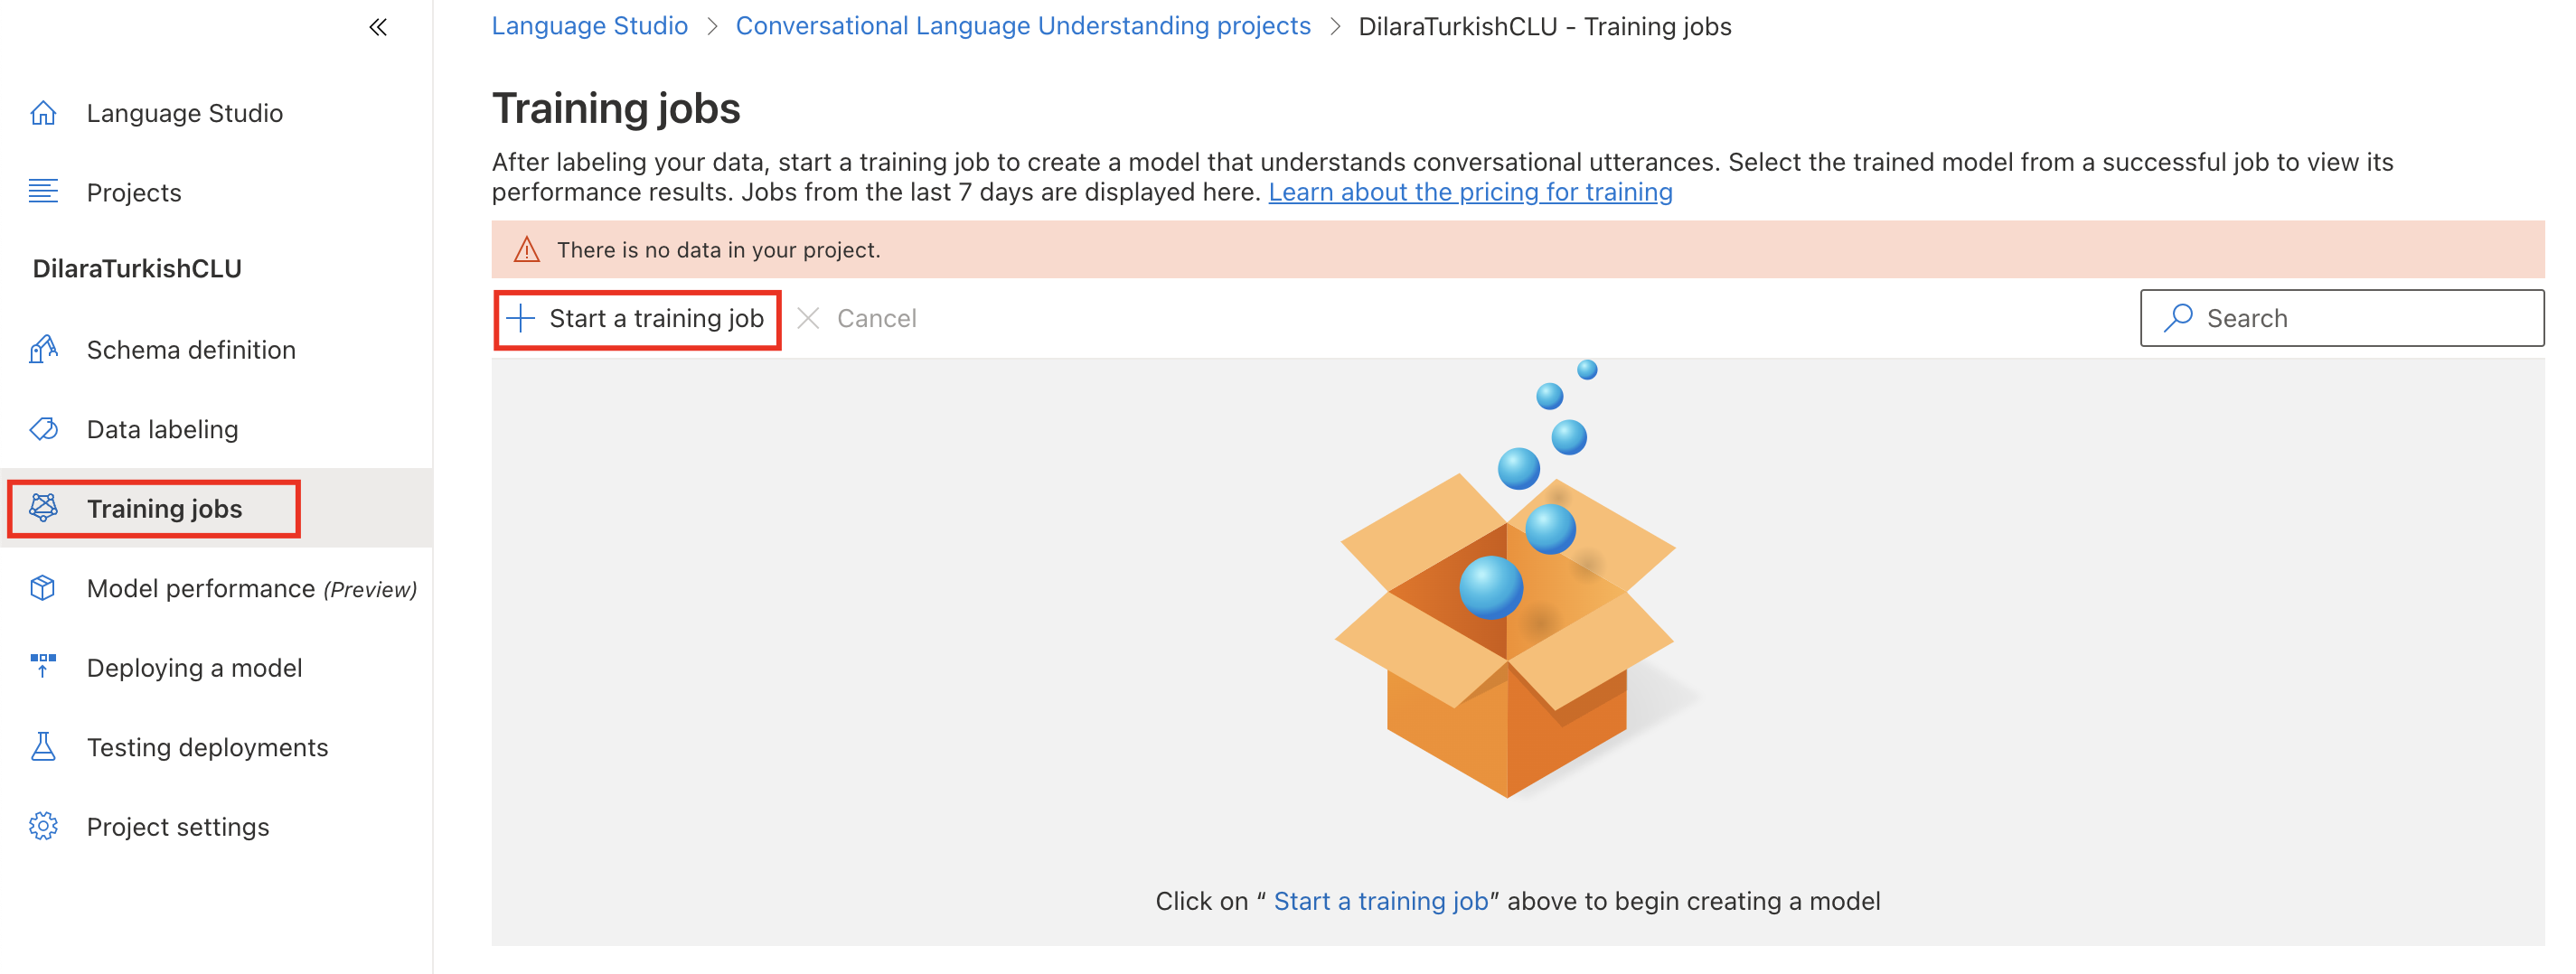
- You can get the training model name from here.
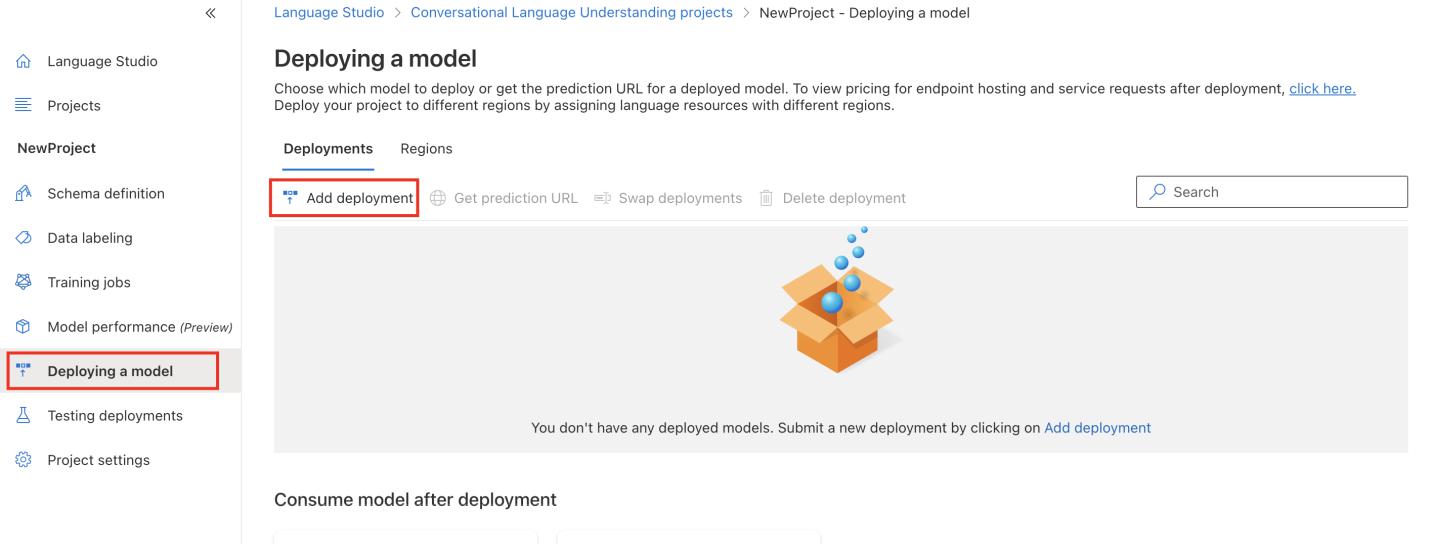
- Before adding a new deployment, you must train your model successfully at least once. If you do not have any "Add deployment" button, it will be deactivated. To create a new deployment, click the "Deploying a model" option on the left menu and click the Add deployment button.
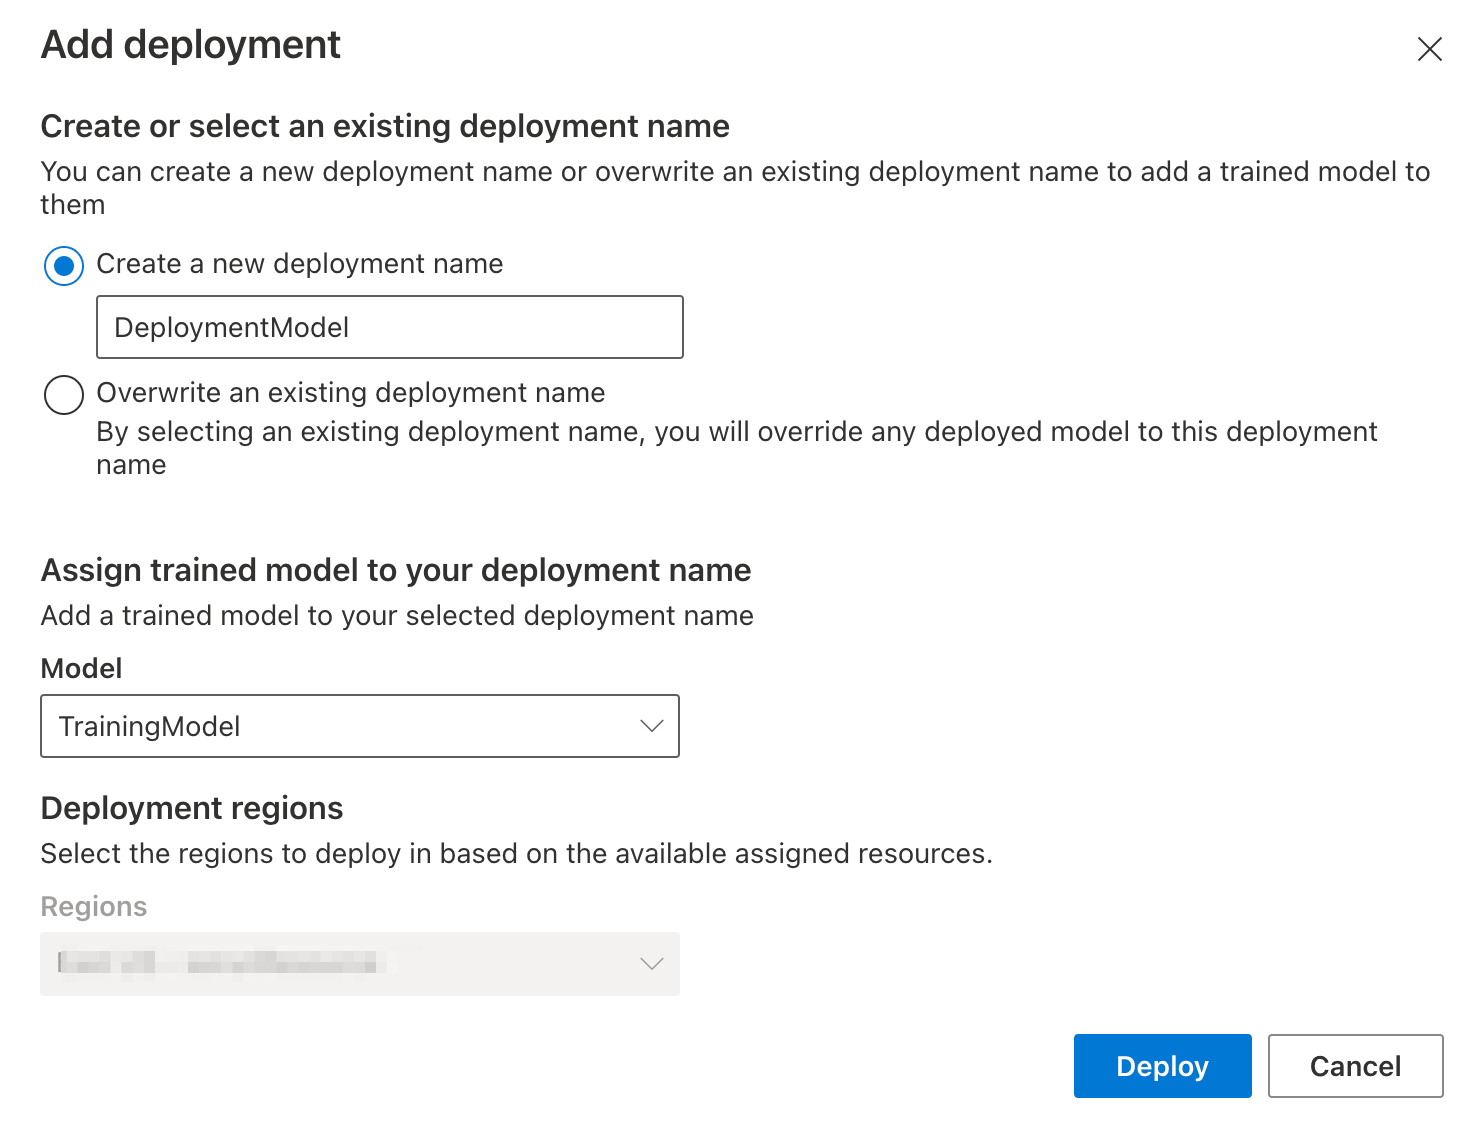
- Select your trained model and click on the Deploy button. This will be your deployment name.
 Your title goes hereThe training model and deployment model must be the same values you will provide when creating the AI integration on the MindBehind panel.
 - Go to the MindBehind home page and click the Companies from the left menu.
.png)
- On the Company page, select the company where you want to add the AI integration for CLU.
- Select the AI / NLP option on the panel.
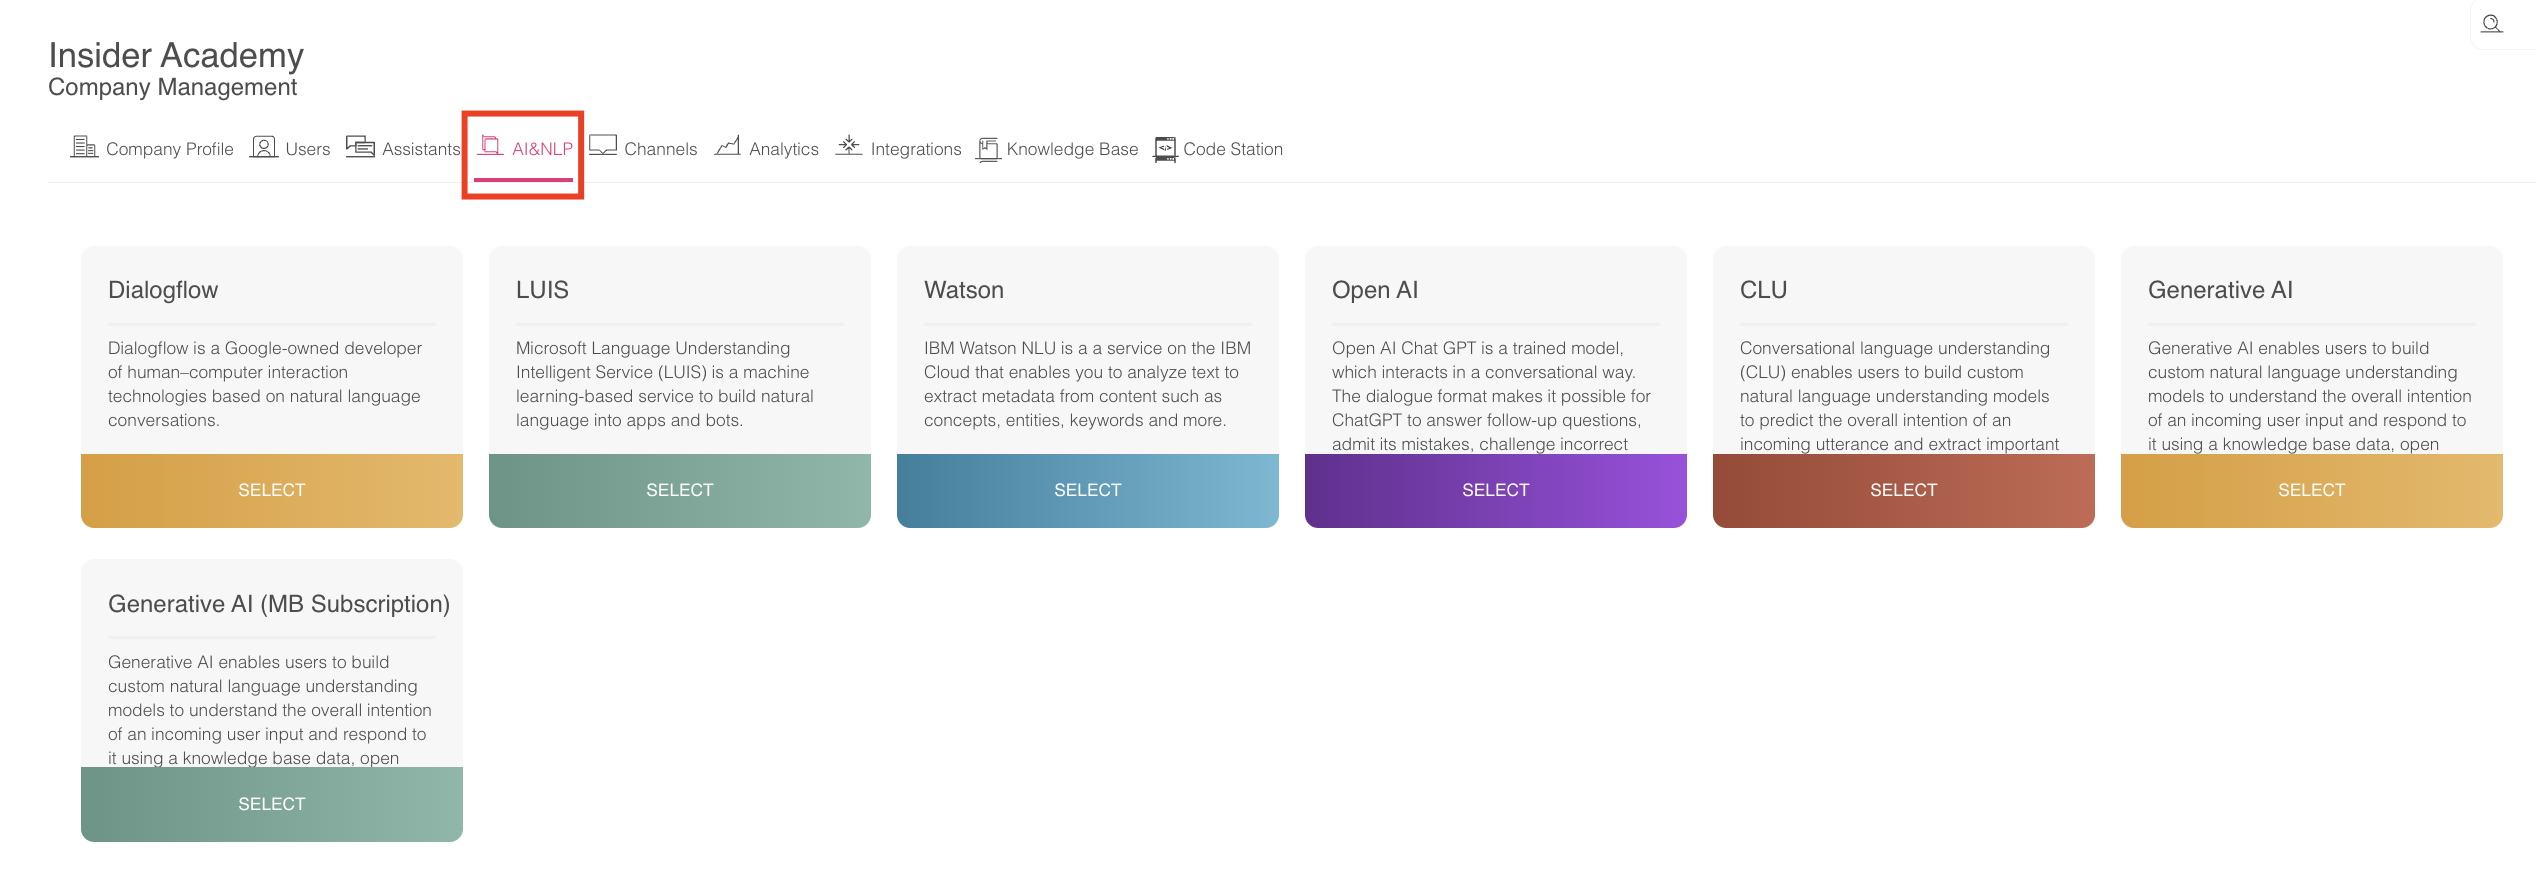
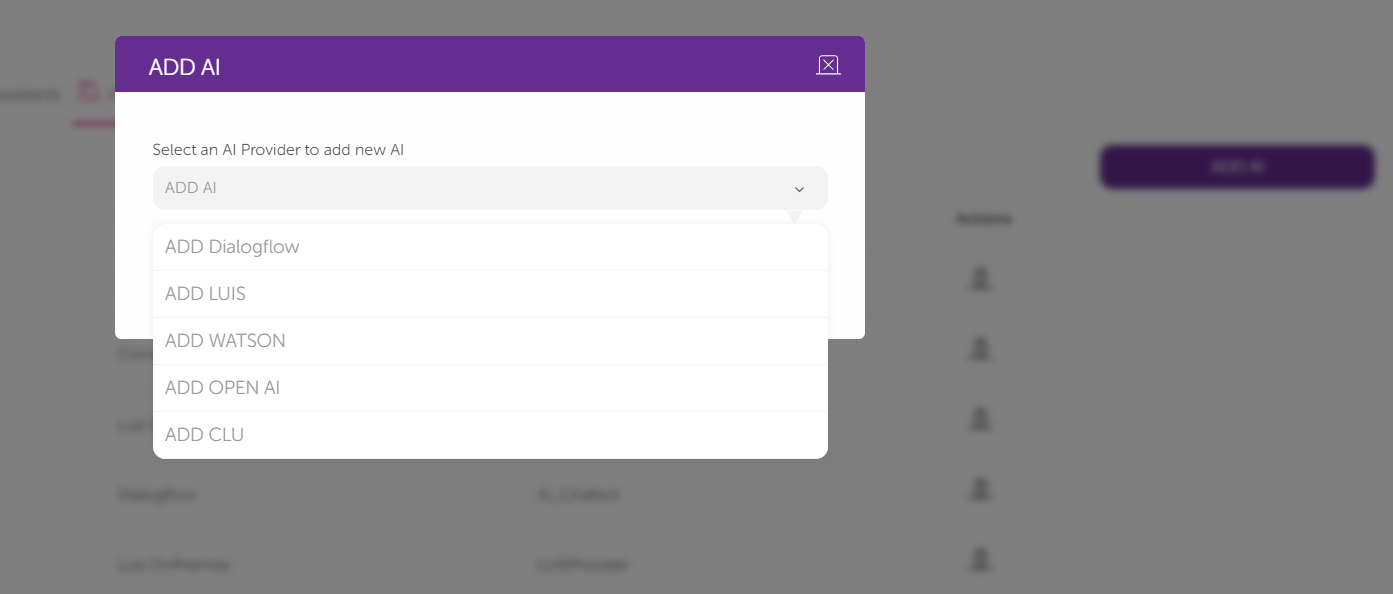
- After clicking the Add AI button, select the "ADD CLU" option.
- After selecting the Configurations, fill in the table below.
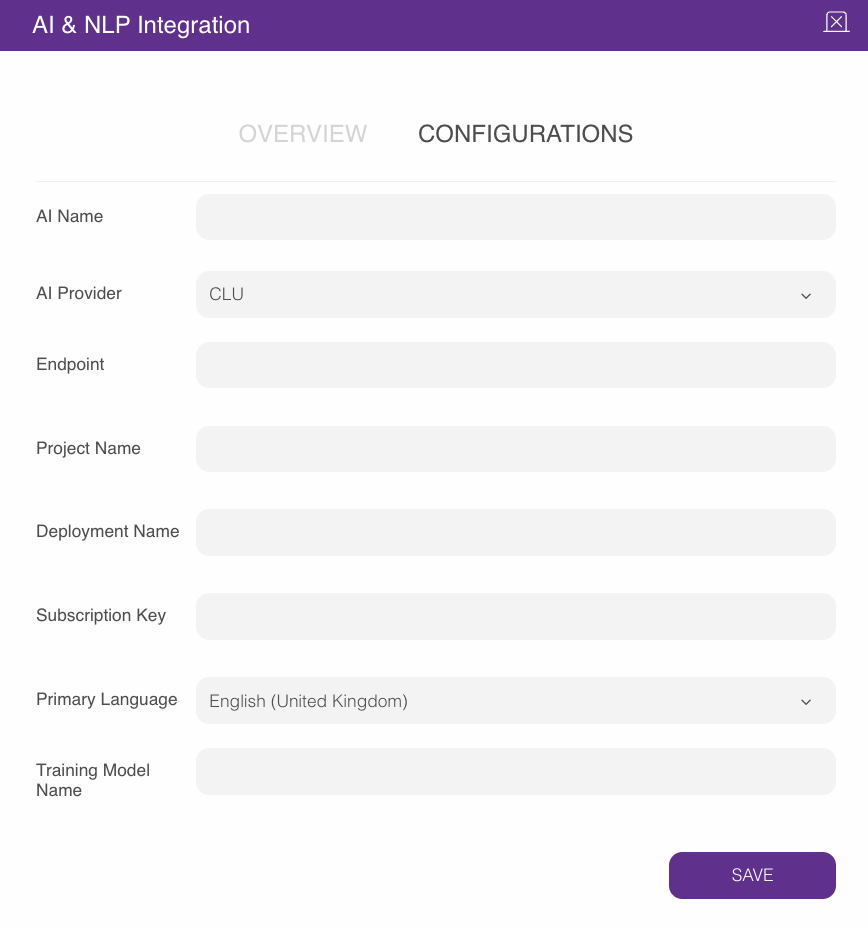 Your title goes hereRefer to Step 2 of this guide to gather the values needed in the table above.
 - After successfully adding the credentials, you can see the CLU provider in the list:

Congratulations! Now, you can use the newly added CLU Provider in the assistants you create.