The Localization feature enables you to create and send a single email campaign with various designs tailored to different languages and country attributes. This option allows you to customize your content based on linguistic and cultural preferences with a single campaign and reach a global audience. This way, you do not need to create and manage email campaigns for different country-language combinations.
Email localization aims to enhance efficiency, increase engagement, simplify analytics, and boost conversions as follows:
- Enhance efficiency: Reduce the time and effort required to create and manage multiple email campaigns.
- Increase engagement: Deliver content that resonates with different cultural and linguistic groups to improve engagement rates.
- Simplify analytics: Track performance and insights of a single campaign for different lingual segments.
- Boost conversions: Tailor messages to specific audiences to increase the likelihood of conversions.
This article explains the following concepts:
- Requirements
- User locales
- How can you create user locales?
- How can you create a localization campaign?
- How can you test your localization campaign?
- How can you launch your localization campaign?
Requirements
To create localization campaigns:
- You should create a ticket to Insider's Operational Excellence Team to enable this feature for your account.
- You should create user locales for your account.
The Localization feature cannot be activated while the automated email warm-up is on. It cannot be used in transactional emails.
User locales
A user locale is a variable that represents a combination of user attributes such as a language and/or a country in the Insider database, and it defines the specific recipients who will receive a particular localized email message.
A user locale is a set of parameters that identifies a user's language, country, or regional preferences. This could include combinations as follows:
- Language only (e.g. English, Spanish, French, etc.)
- Country only (e.g. USA, Germany, Japan, etc.)
- Language and country (e.g. English-USA, French-Canada, Spanish-Mexico, etc.)
Each user locale specifies which localized version of an email should be sent to a corresponding segment of your audience.
The recipients should have language and/or country user attributes to receive a localization campaign.
(1).png)
How can you create user locales?
To identify the language and/or country segments (e.g. English_UK, Spanish_Mexico, etc.) you want to target, follow these steps:
1. Navigate to Components > User Locales to reach the User Locales page.
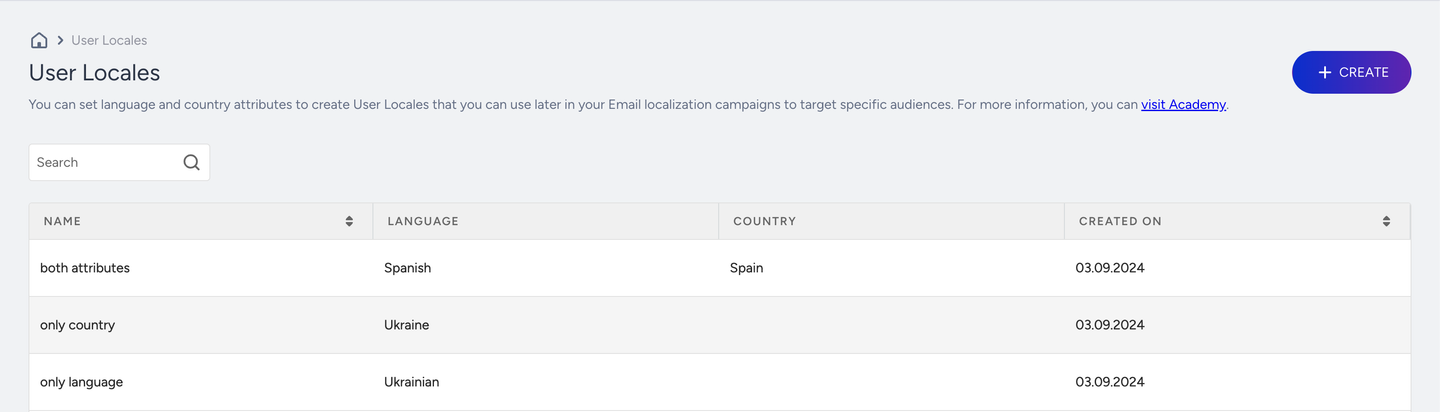
2. Click the Create button to give each user locale a unique name and select language and/or country user attribute(s). You can use default or custom attributes in a single or multiple selection.
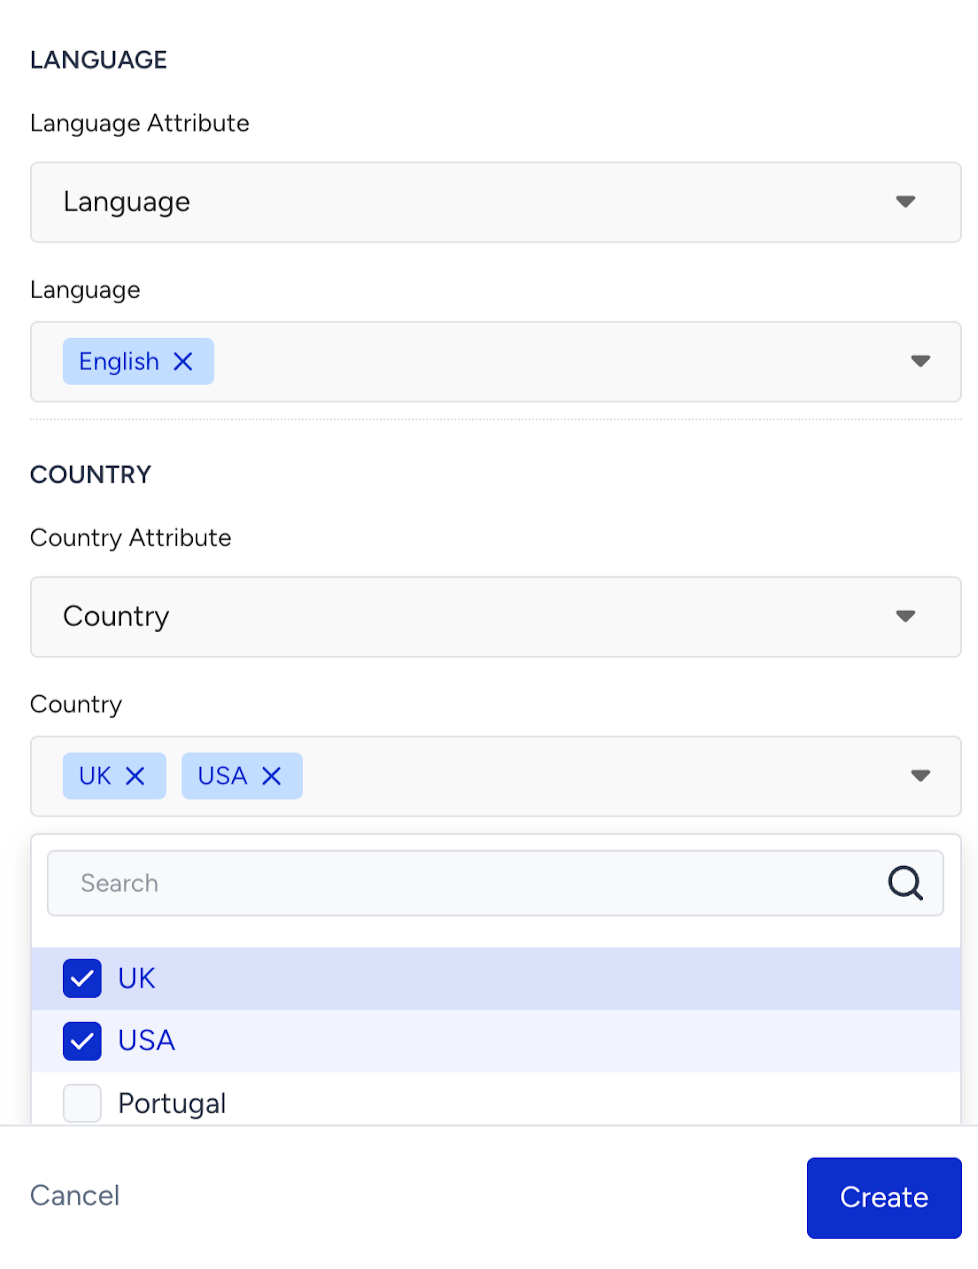
The following is the English_AU locale example.
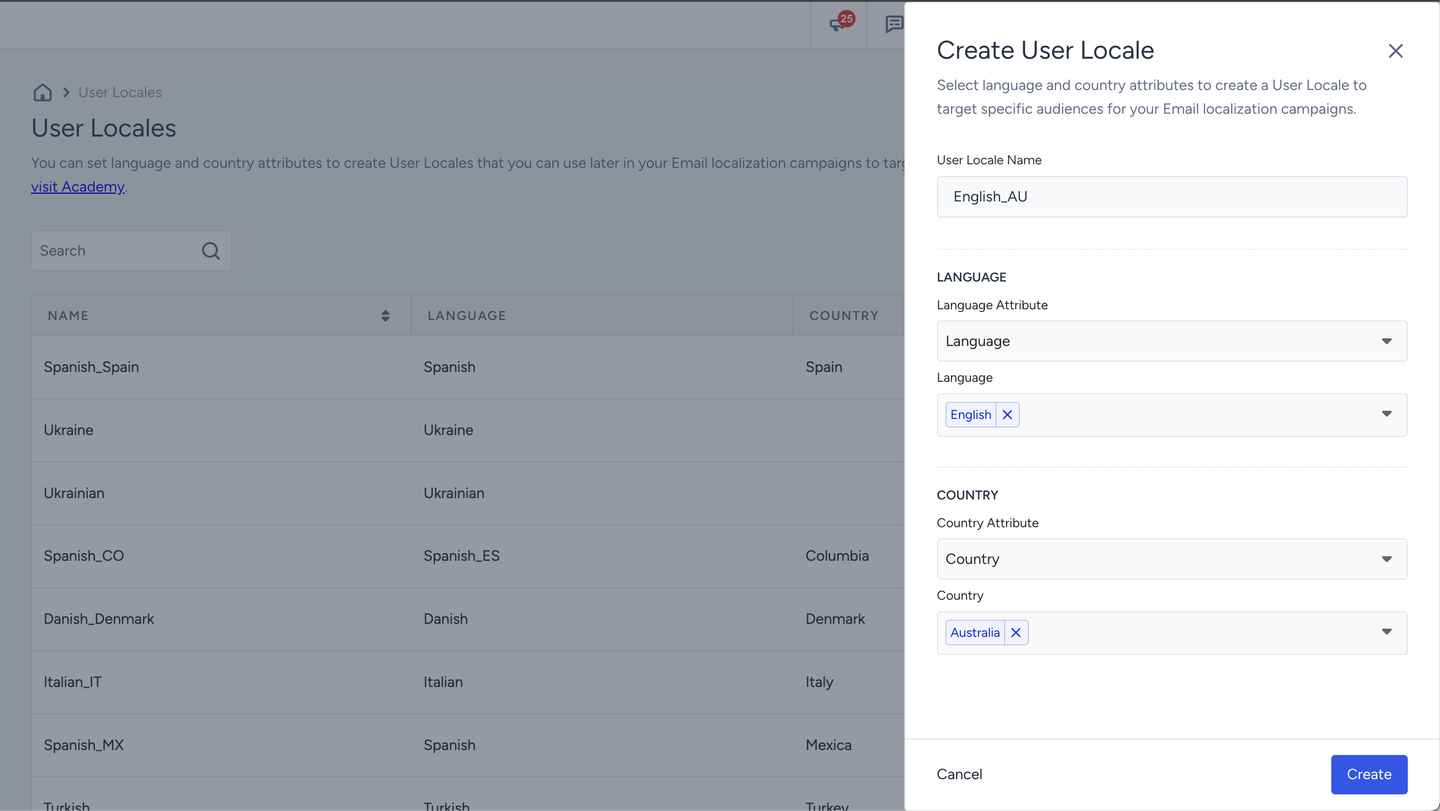
Currently, editing user locales is not supported.
How can you create a localization campaign?
A localization campaign involves several key steps to ensure your email marketing efforts are tailored to your audience's linguistic and cultural preferences.
You can efficiently manage and deliver personalized email content to diverse user segments, enhance engagement, and improve overall campaign performance.
A localization campaign can be a single or a recurring email campaign.
Experiment (A/B) email campaigns do not support localization.
To create a localization campaign, follow these steps:
1. Create your email campaign and go to the Design step.(1).png)
2. Toggle on the Localization option.
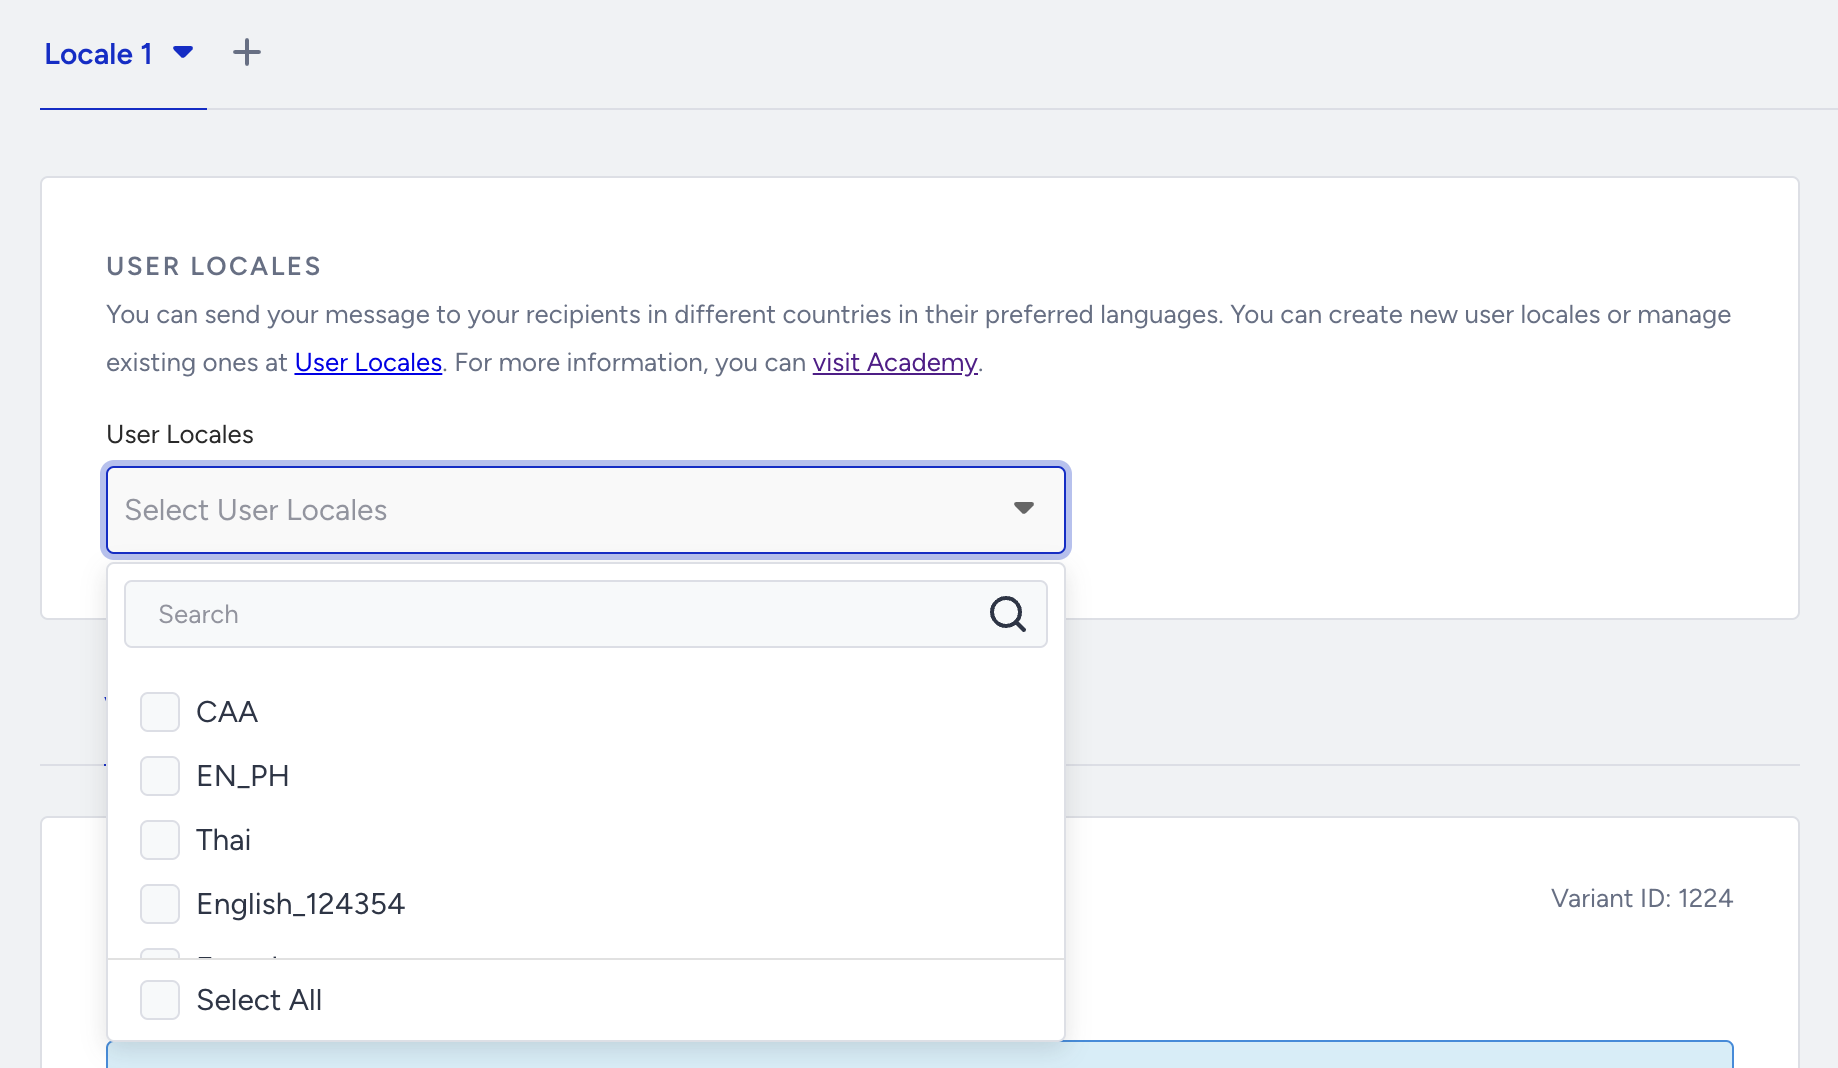
3. Select one or several user locales for each localization message.
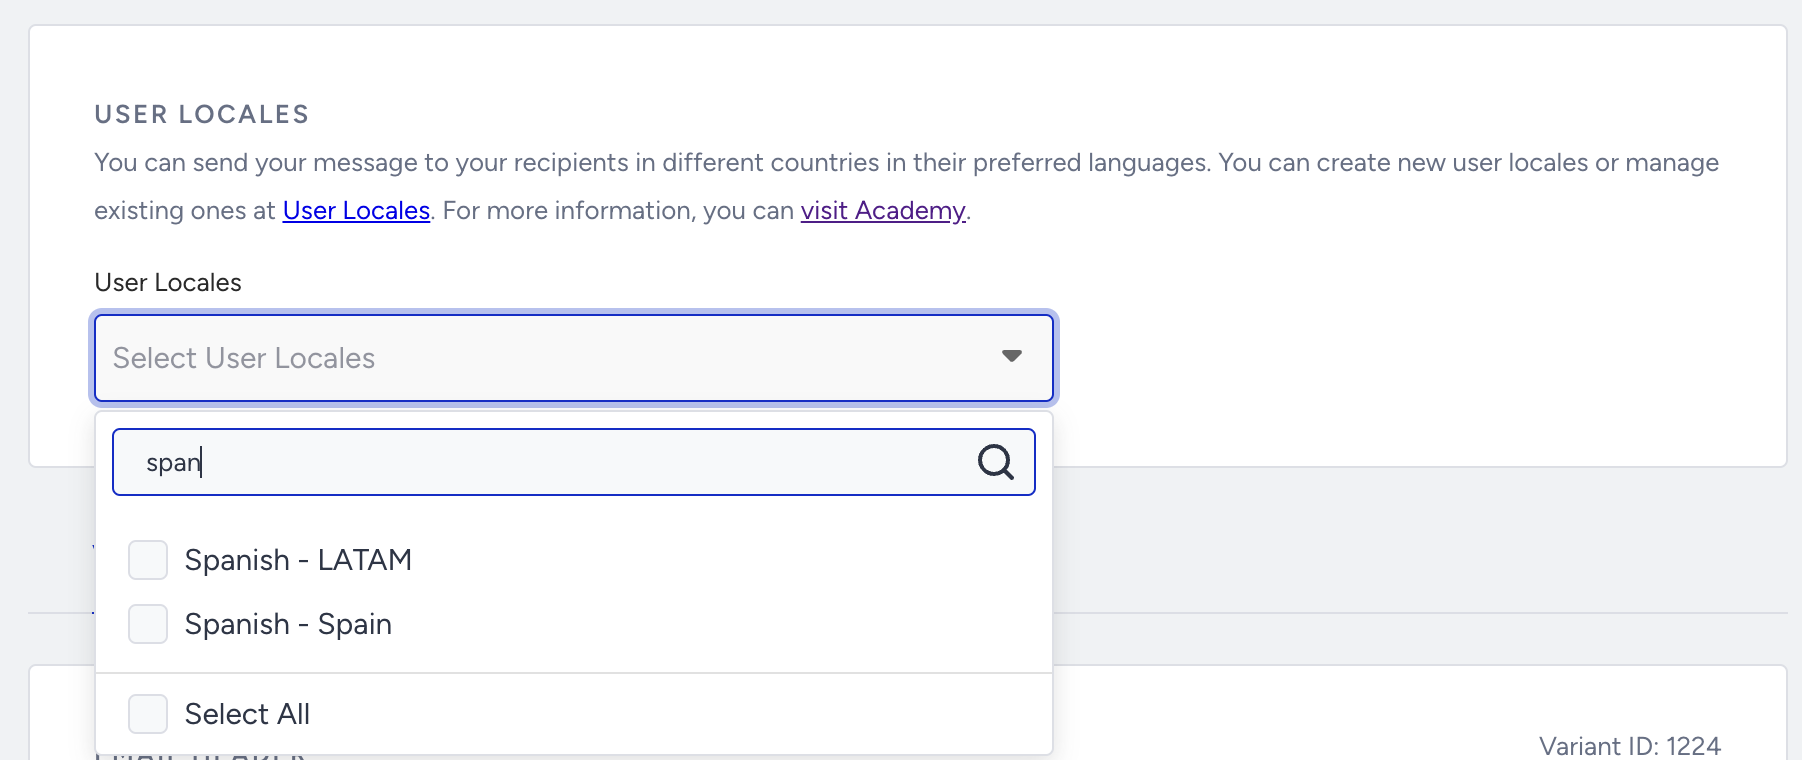
Click the + (plus) button next to the Locale 1 tab to add multiple localizations or duplicate the already created locales. 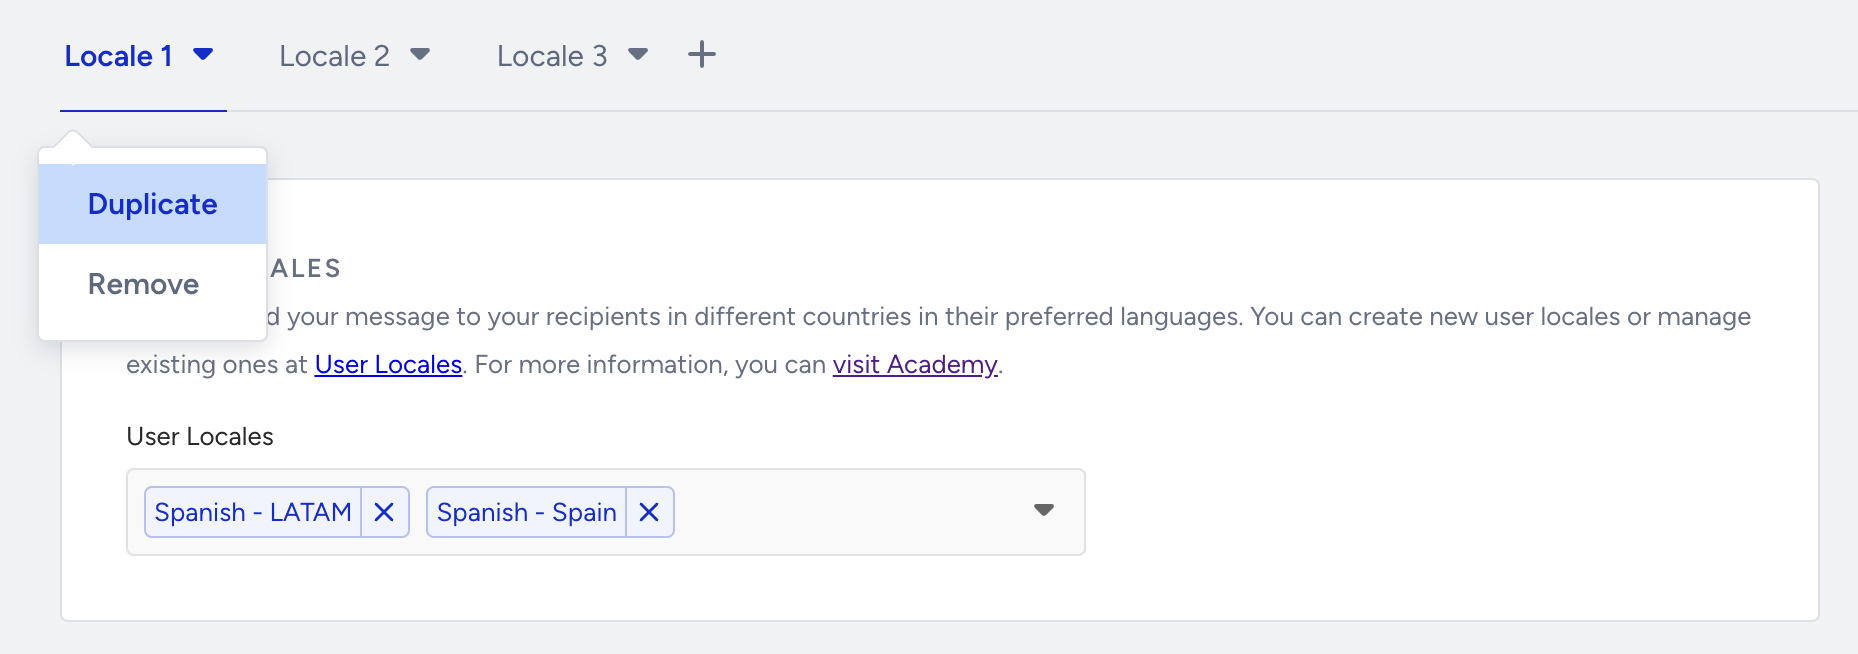
Duplicating will copy the whole design to the new localization message, including from and reply-to addresses, subject, preheader, design template, and UTM parameters. You can add up to 25 localization messages per each email campaign.
The default limit shown here is a standard baseline. If your use case requires higher capacity, feel free to reach out to the Insider One team — we can adjust it to fit your needs.
(1).png)
Each localization message must have unique locales selected. Otherwise, only one localization email will be delivered to those users who fall into the locale selected in multiple localized messages.
(1).png)
To delete any locale, expand the dropdown on the respective locale to click the Delete button.(1).png)
Toggling off the Localization option converts your localization campaign into a single email campaign, and deletes all locales except Locale 1.(1).png)
When designing your localization campaign, you have two main approaches to consider: translating content and creating unique designs for each segment. You can start with translating the essential elements like the subject line, preheader, and email body copy to ensure the message is clear and engaging for each locale. Additionally, you can customize the design of each localized message to better resonate with specific cultural aesthetics and preferences. This might involve altering images, color schemes, and layout structures to align with the visual norms of each target audience. A thoughtful translation and design can help you create a more personalized and impactful email experience for every segment.
Once you complete designing your localization campaign, you can test it.
How can you test your localization campaign?
Testing your localization campaign before launching it is crucial to ensure its success and effectiveness. A thorough testing helps identify and rectify any issues that could impact the delivery of your localized emails.
You can send a test message of some or all locales from the launch step. Select the locale variants you want to test and click the Send button.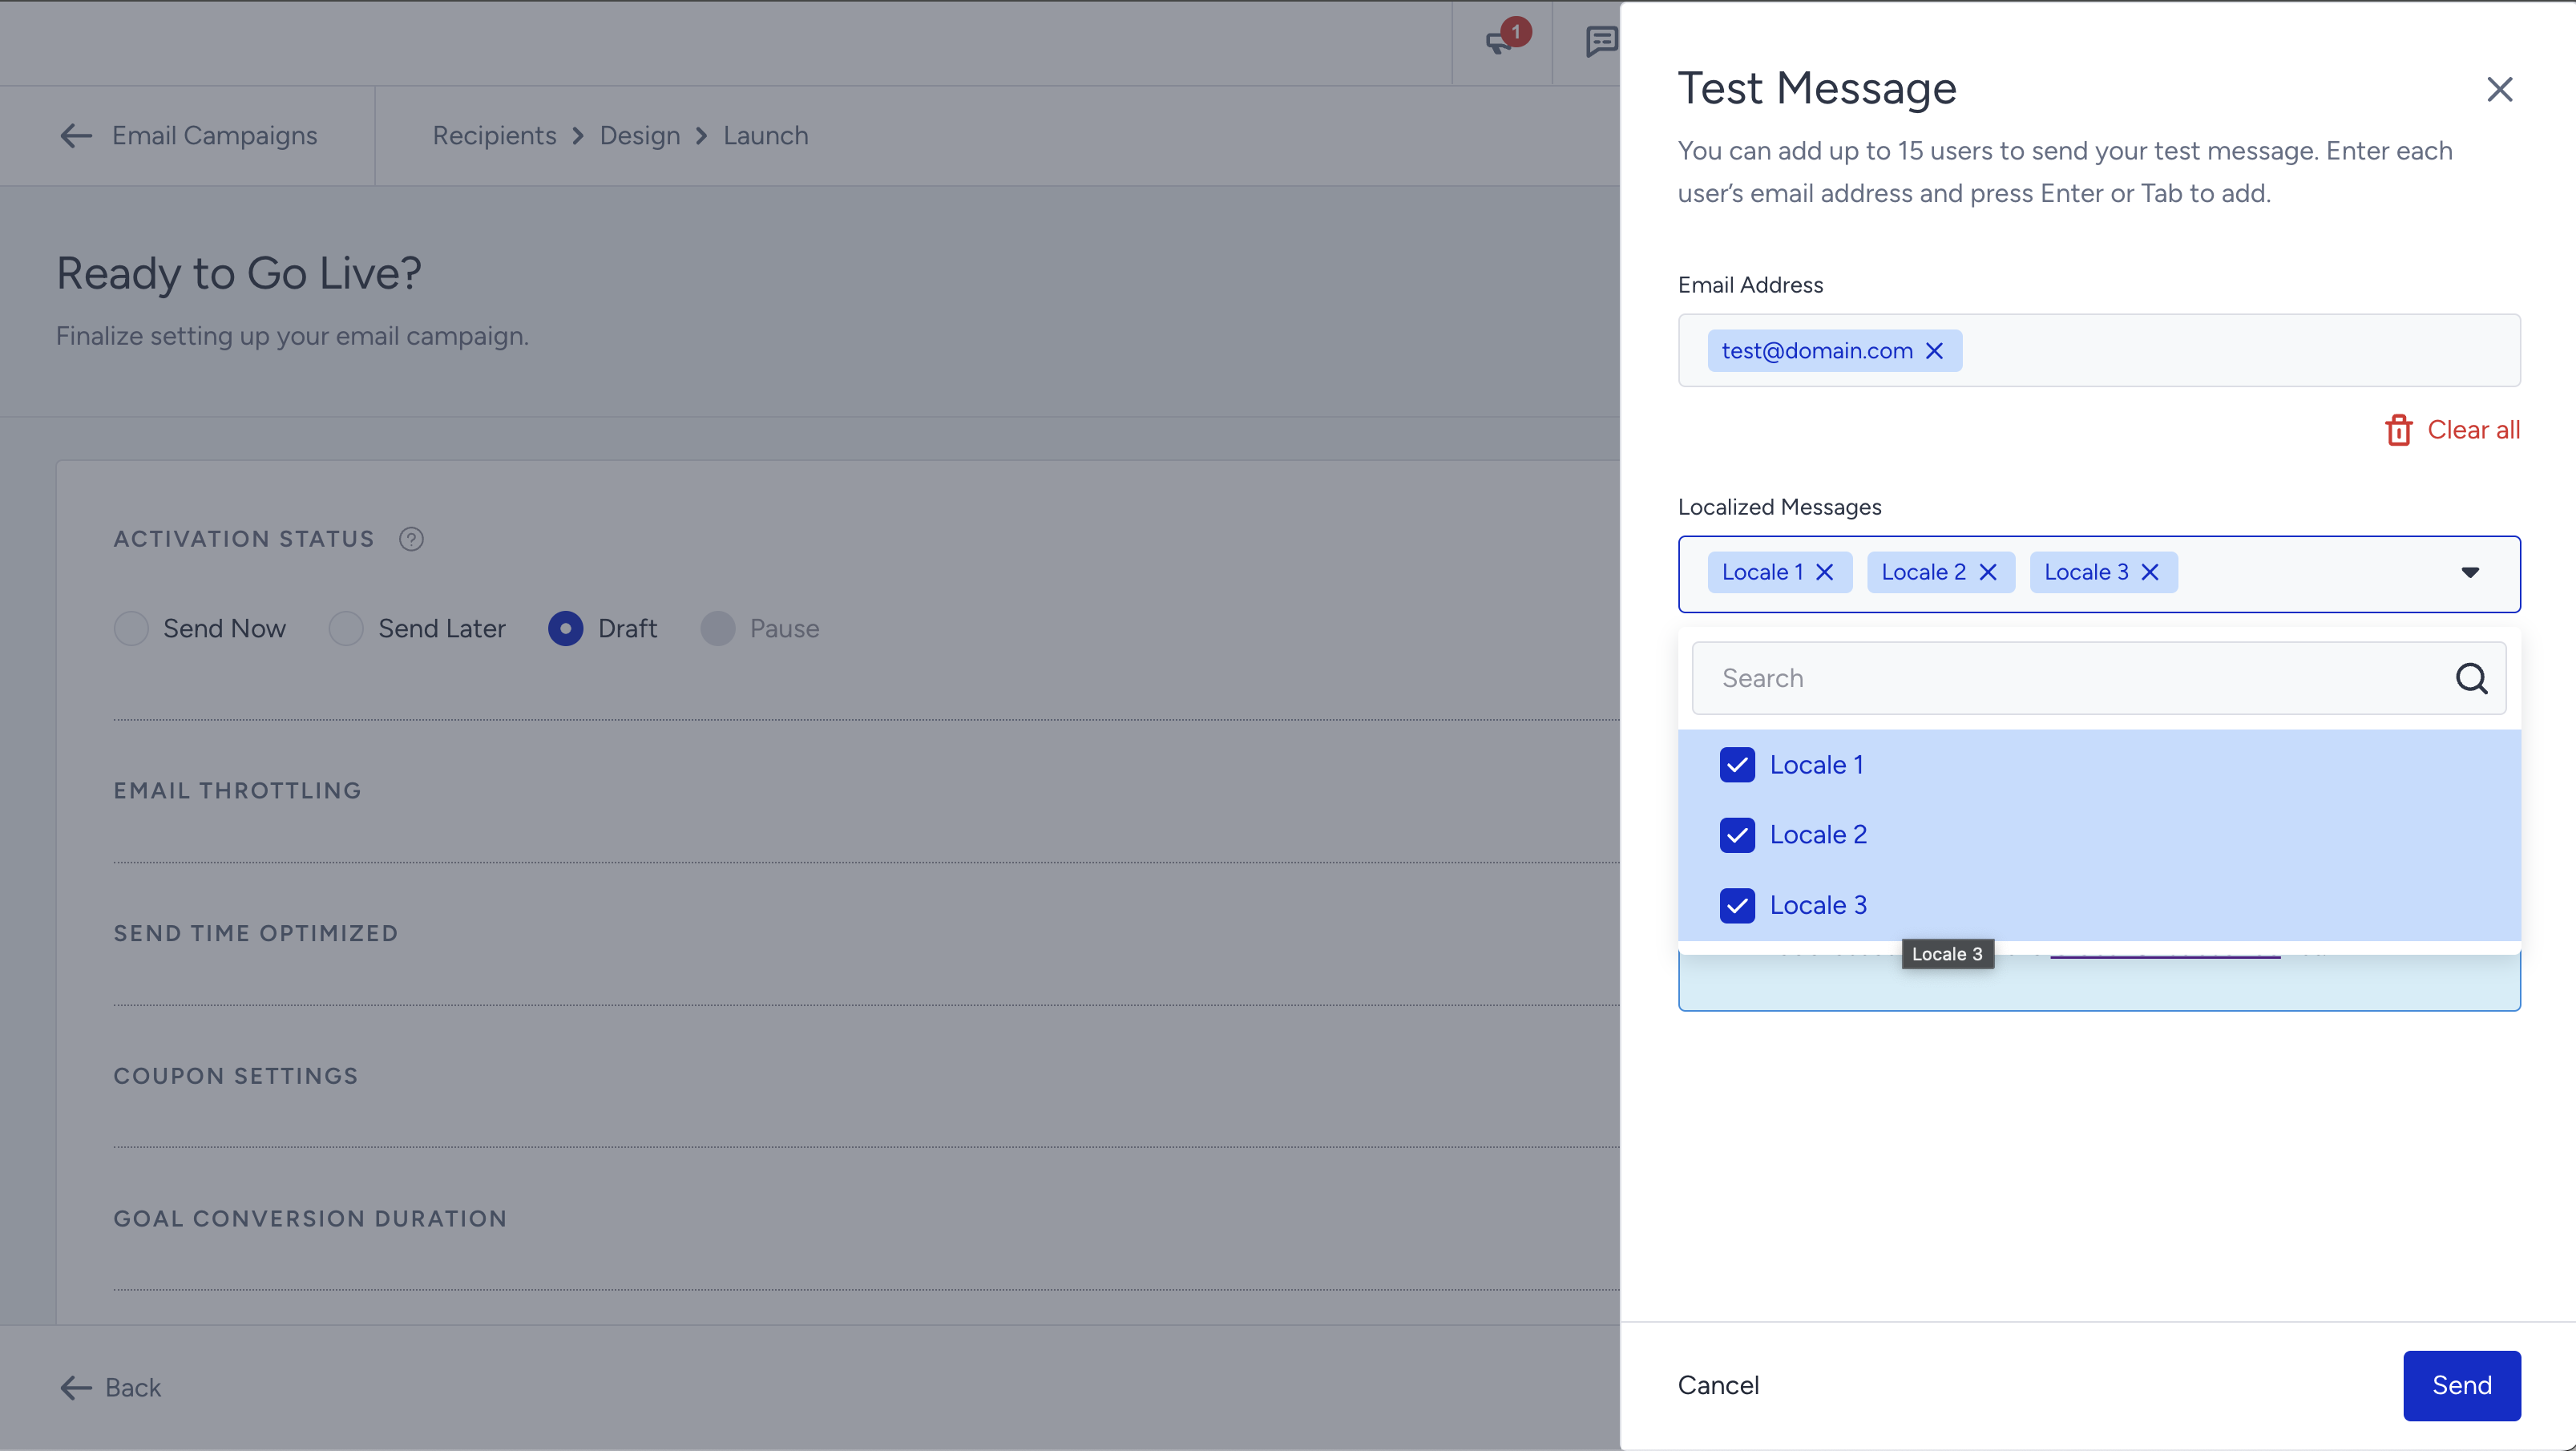
How can you launch your localization campaign?
After testing your localization campaign and making sure that it looks correct, you can launch your localization campaign.
Change the activation status to Send Now to send it immediately, or Send Later to schedule it for a future date and time.
Make sure to resolve the warnings in the Before You Launch section before launching your email campaign.
(1).png)
After launching your localization campaign, the system will start delivering the emails to the recipients. Those who do not have the attributes matching with the selected locale(s) will not receive any of the localization campaigns and will be logged as system drops in the analytics. For example, you launch a campaign with two locales (e.g. English and Spanish). Your user is in the recipients list but does not have English or Spanish language attributes, you will be dropped.