Text-only emails provide a personal touch and make your communication more direct and genuine. Unlike typical HTML emails, the text-only emails resemble the messages sent from personal inboxes with fewer branded elements and design features.
The text-only marketing emails are effective for various reasons.
Personal touch: These emails mimic the appearance of personal emails and make the recipients feel like they are receiving a message from a real person. The simplicity of text-only emails can help build trust.
Higher deliverability: Text-only emails are less likely to be flagged as spam. This increases the chances of reaching the recipient’s inbox. They also load faster without heavy graphics or HTML elements and are accessible even on slower internet connections.
Improved readability: Text-only emails do not have flashy images or complex layouts and are easy to read. This helps recipients focus more on the message, often leading to higher engagement rates.
Better accessibility: These emails are more compatible with screen readers, smartwatches, and other assistive technologies. This way, a wider audience can read them. Text-only emails also look good on any device, be it a desktop, tablet, or smartphone
Low production costs: It requires less time and resources to create text-only emails.
Flexible use cases: Text-only emails are suitable for various purposes, such as welcome messages, apologies, feedback requests, regular updates, etc.
Overall, text-only emails are a powerful tool in marketing due to their simplicity, sincerity, and ability to foster genuine connections with recipients.
To create a text-only email:
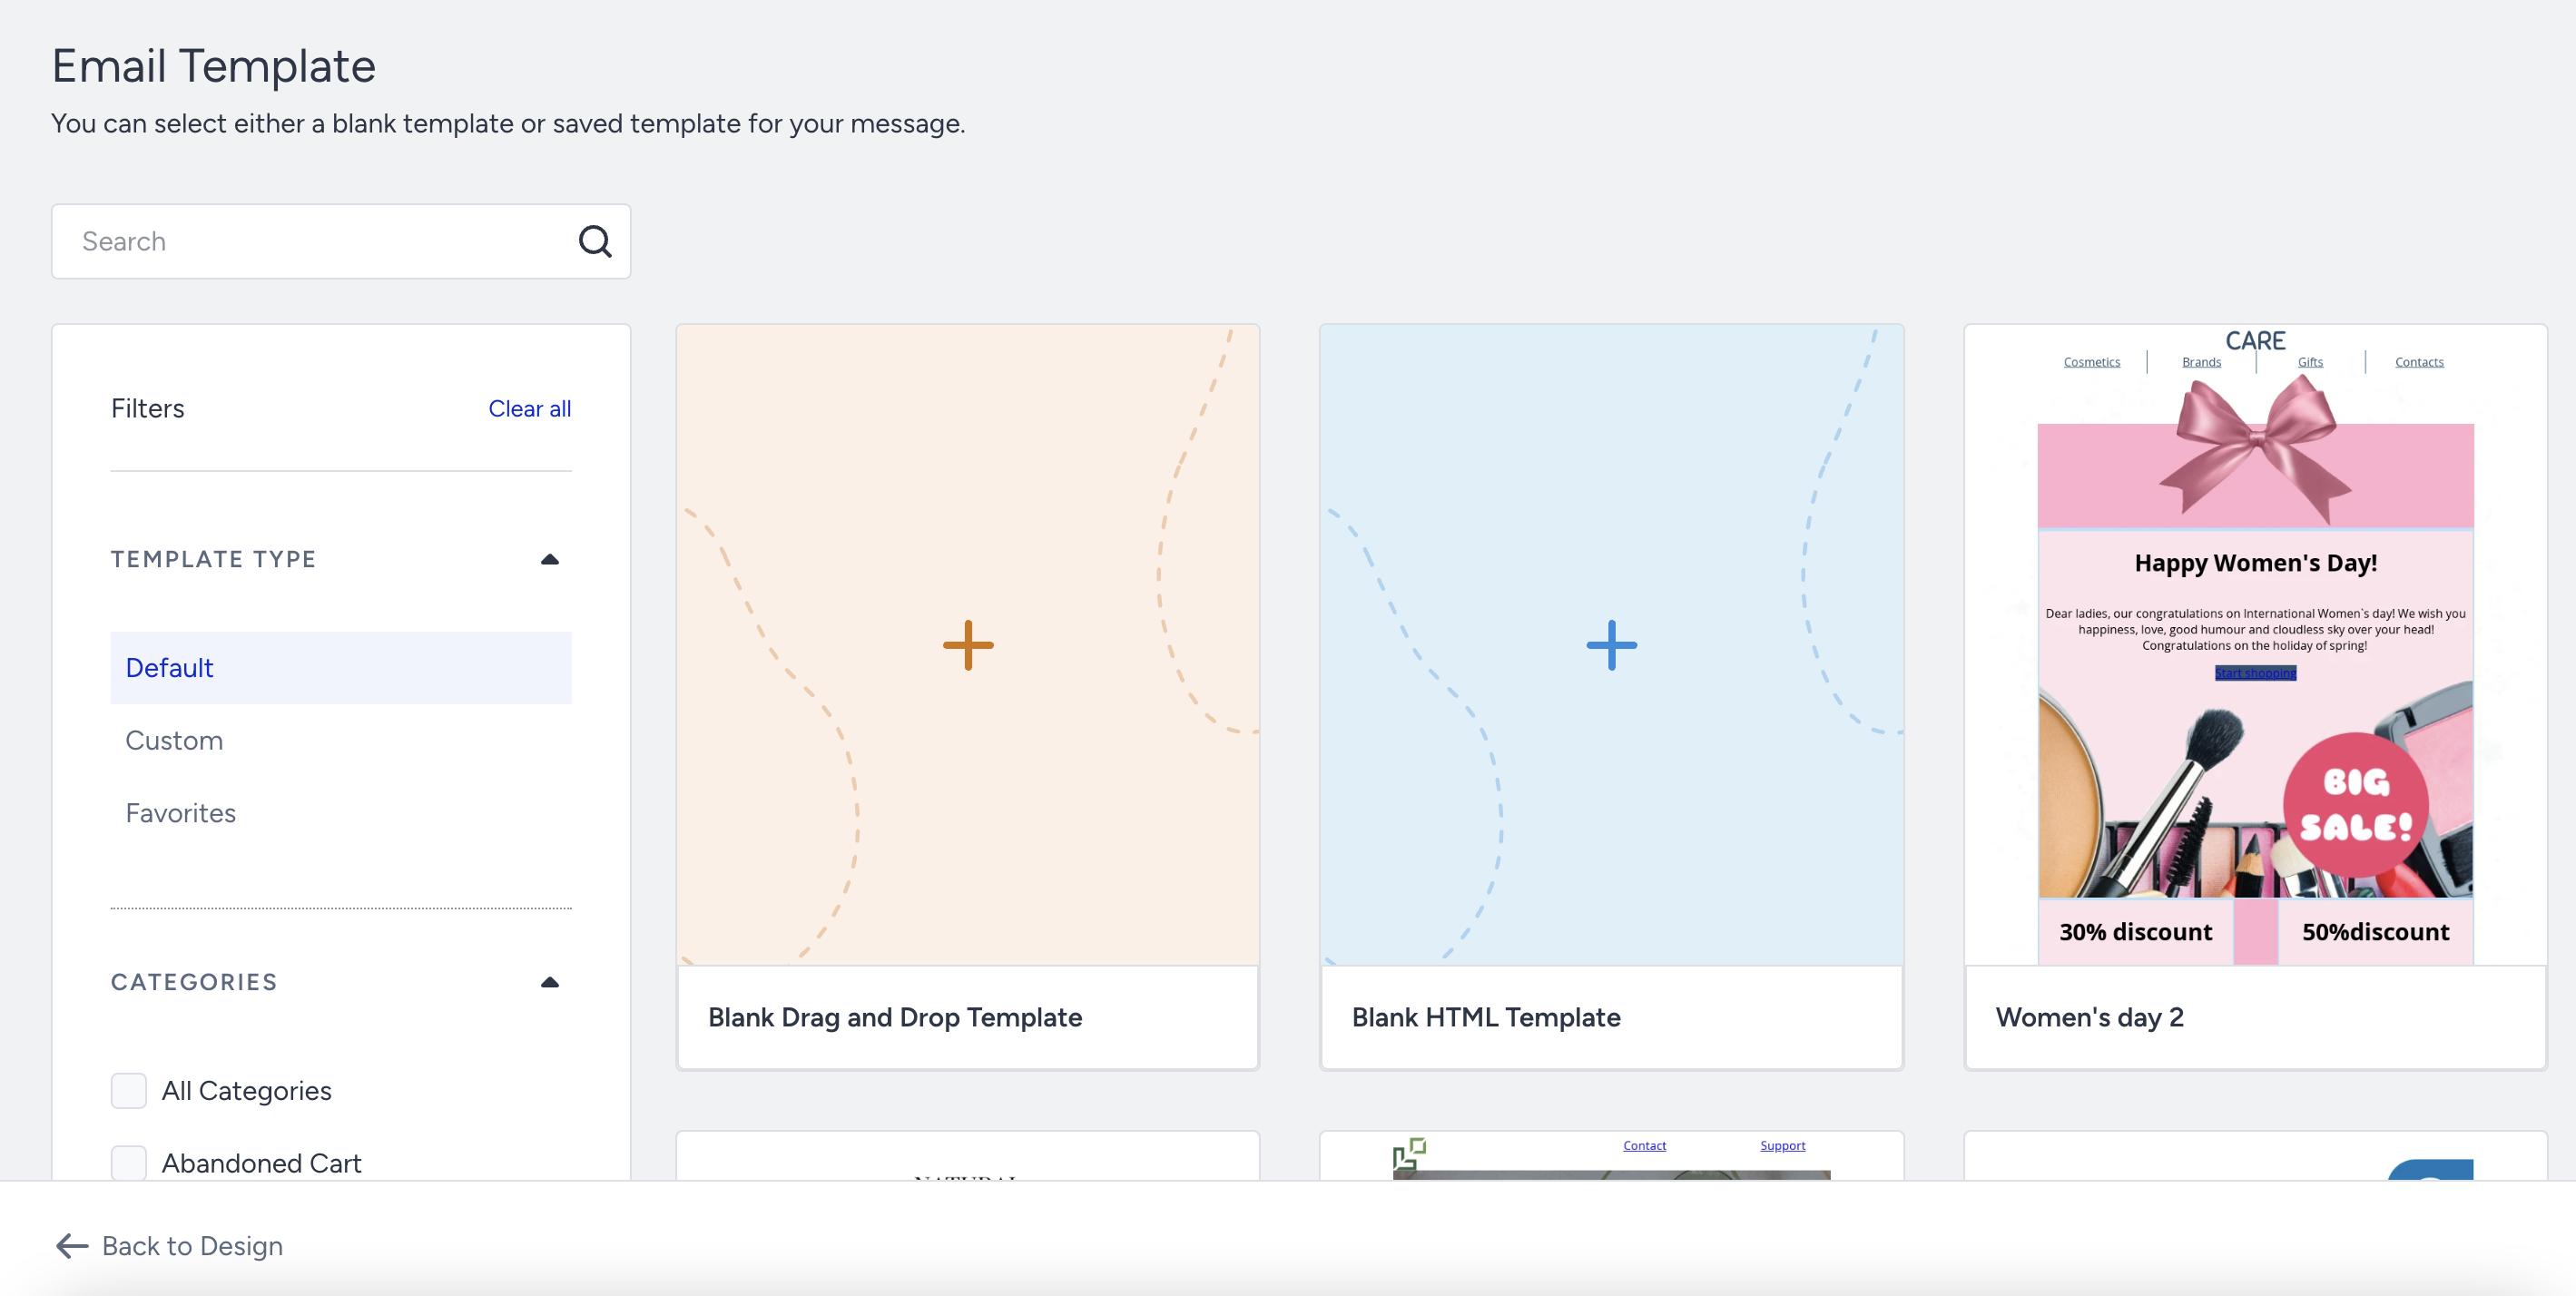
Go to the Design step of your email campaign and click the Select Template option.
Select a blank template under Default Templates.
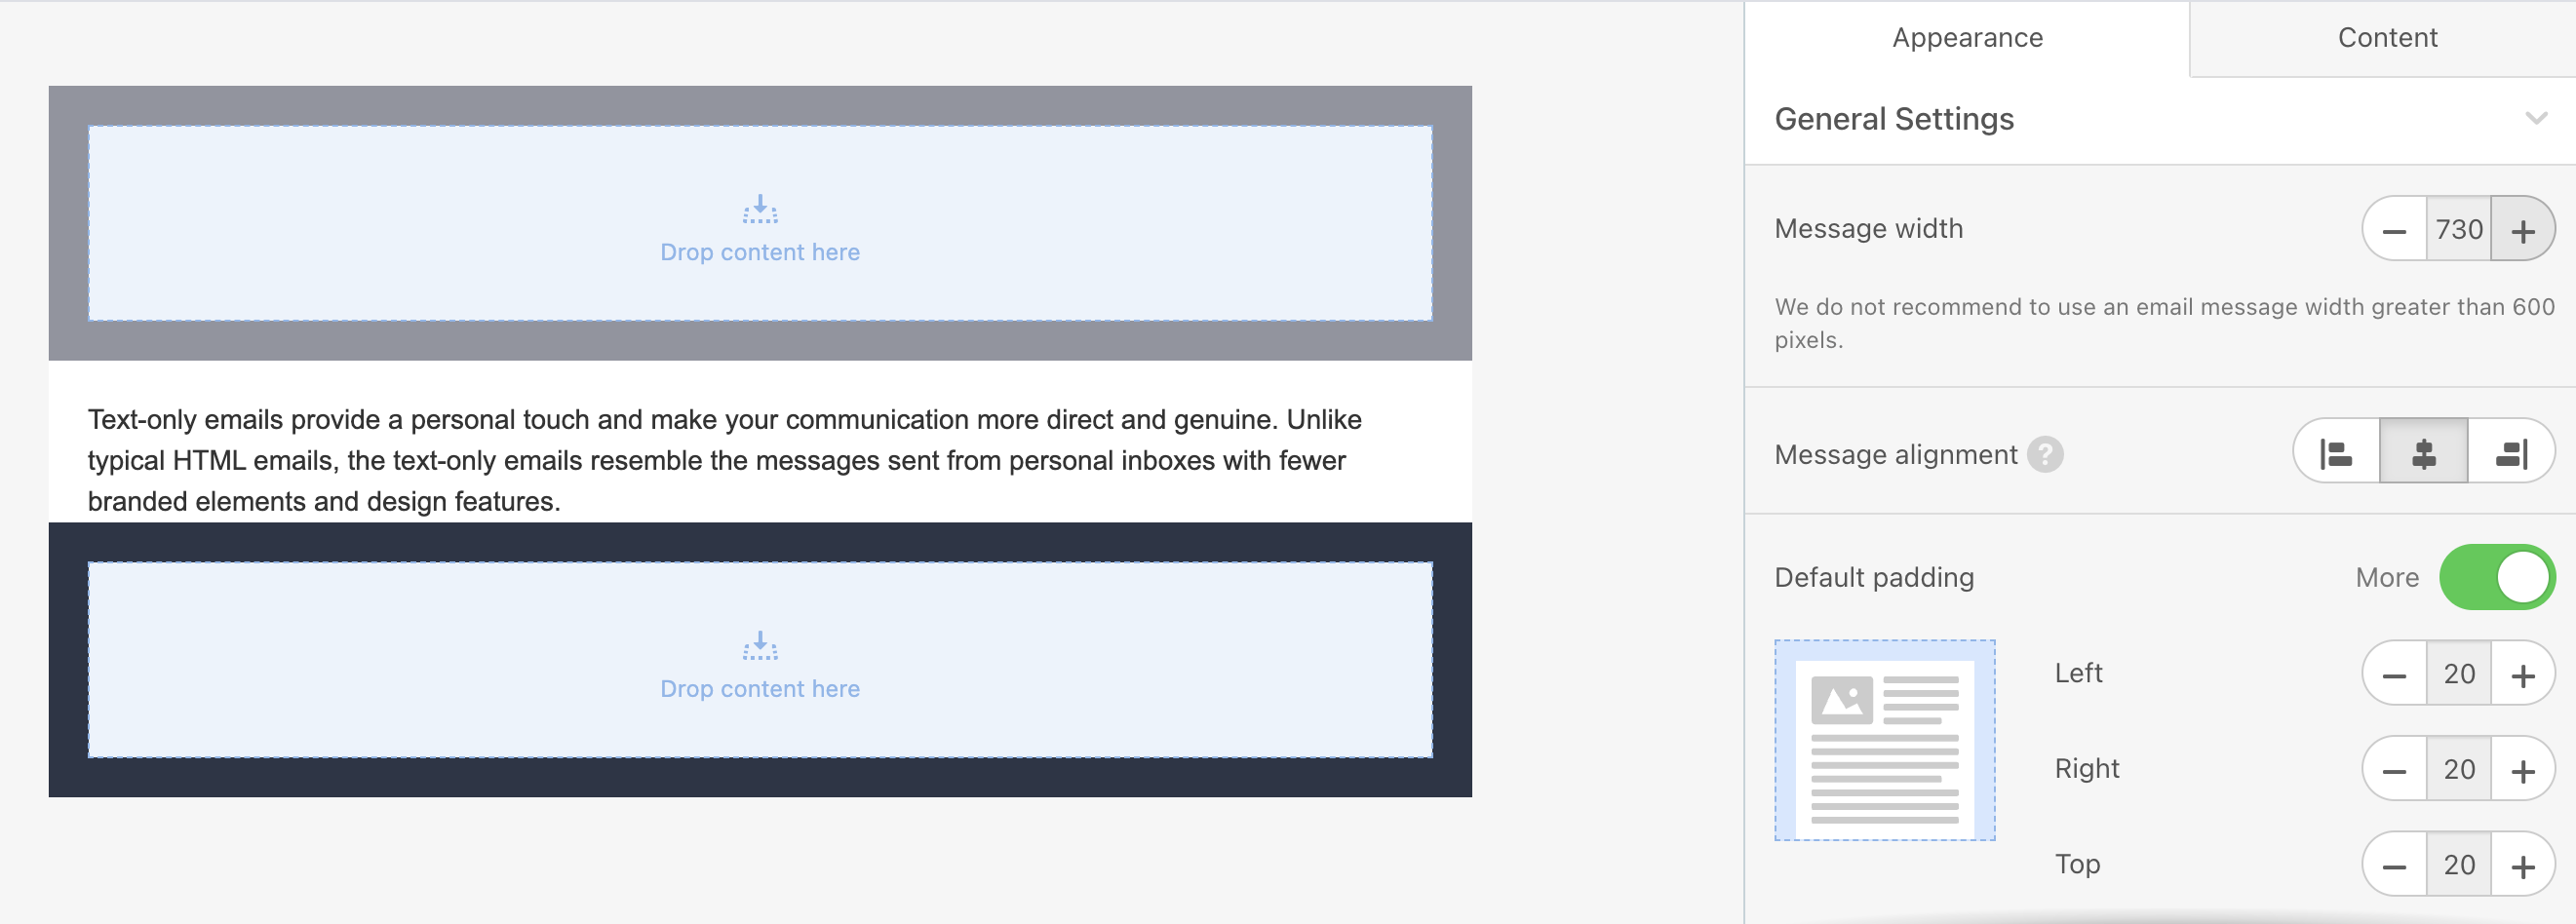
In the structure, click the Text element and add your text.
To adjust the width of your text box, go to Appearance > General Settings > Message width. You can also change the padding settings of the text block.
To test your message, click the Test Message button at the top of the page, add your email address and check the authorization box.
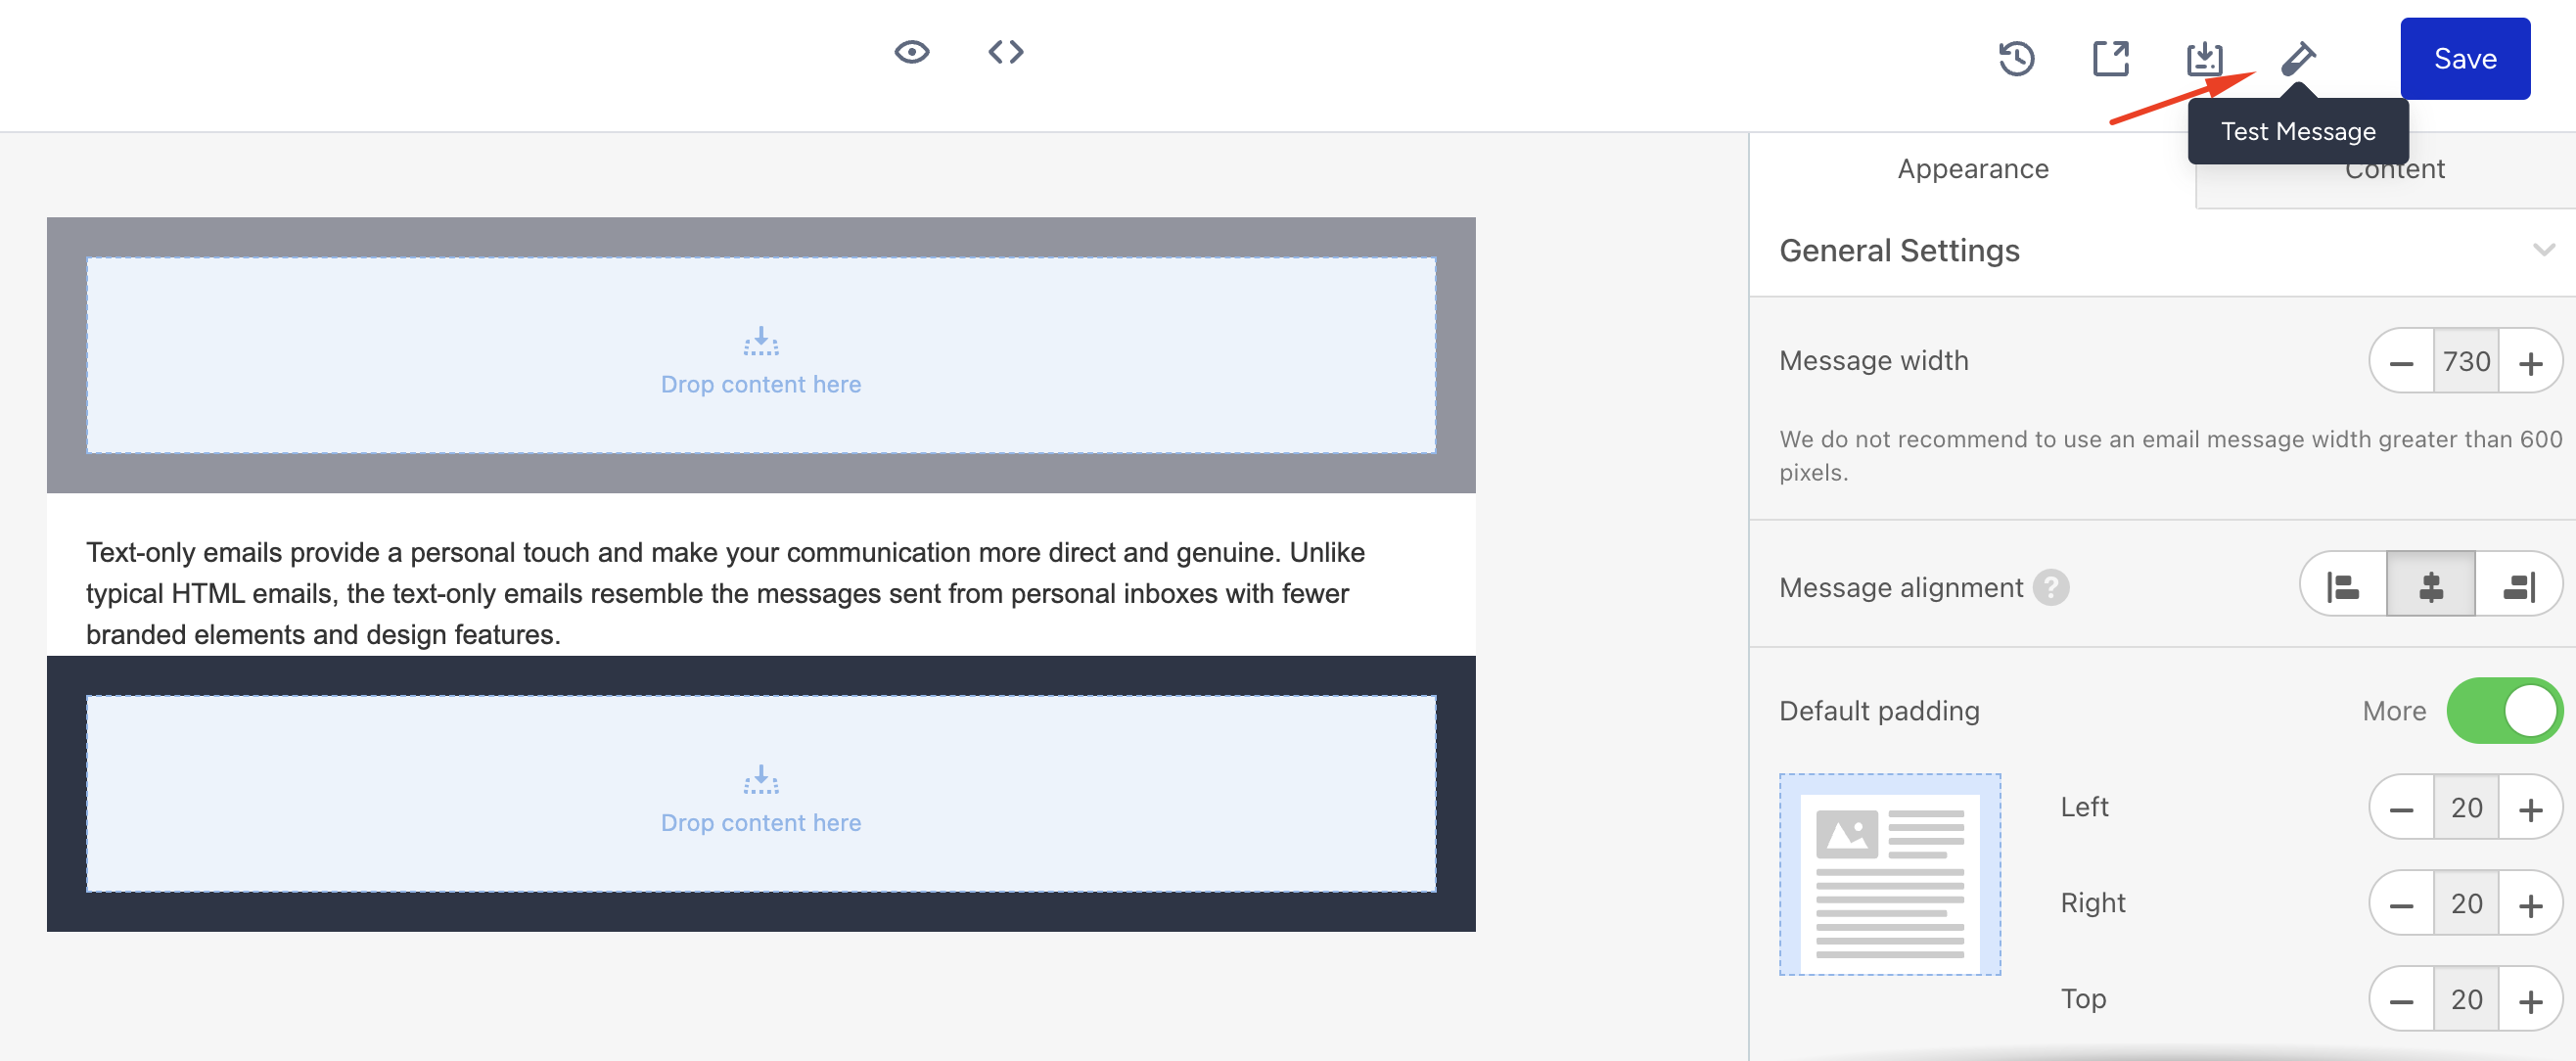
Once you test your message, save this step and proceed with your campaign setting as usual.