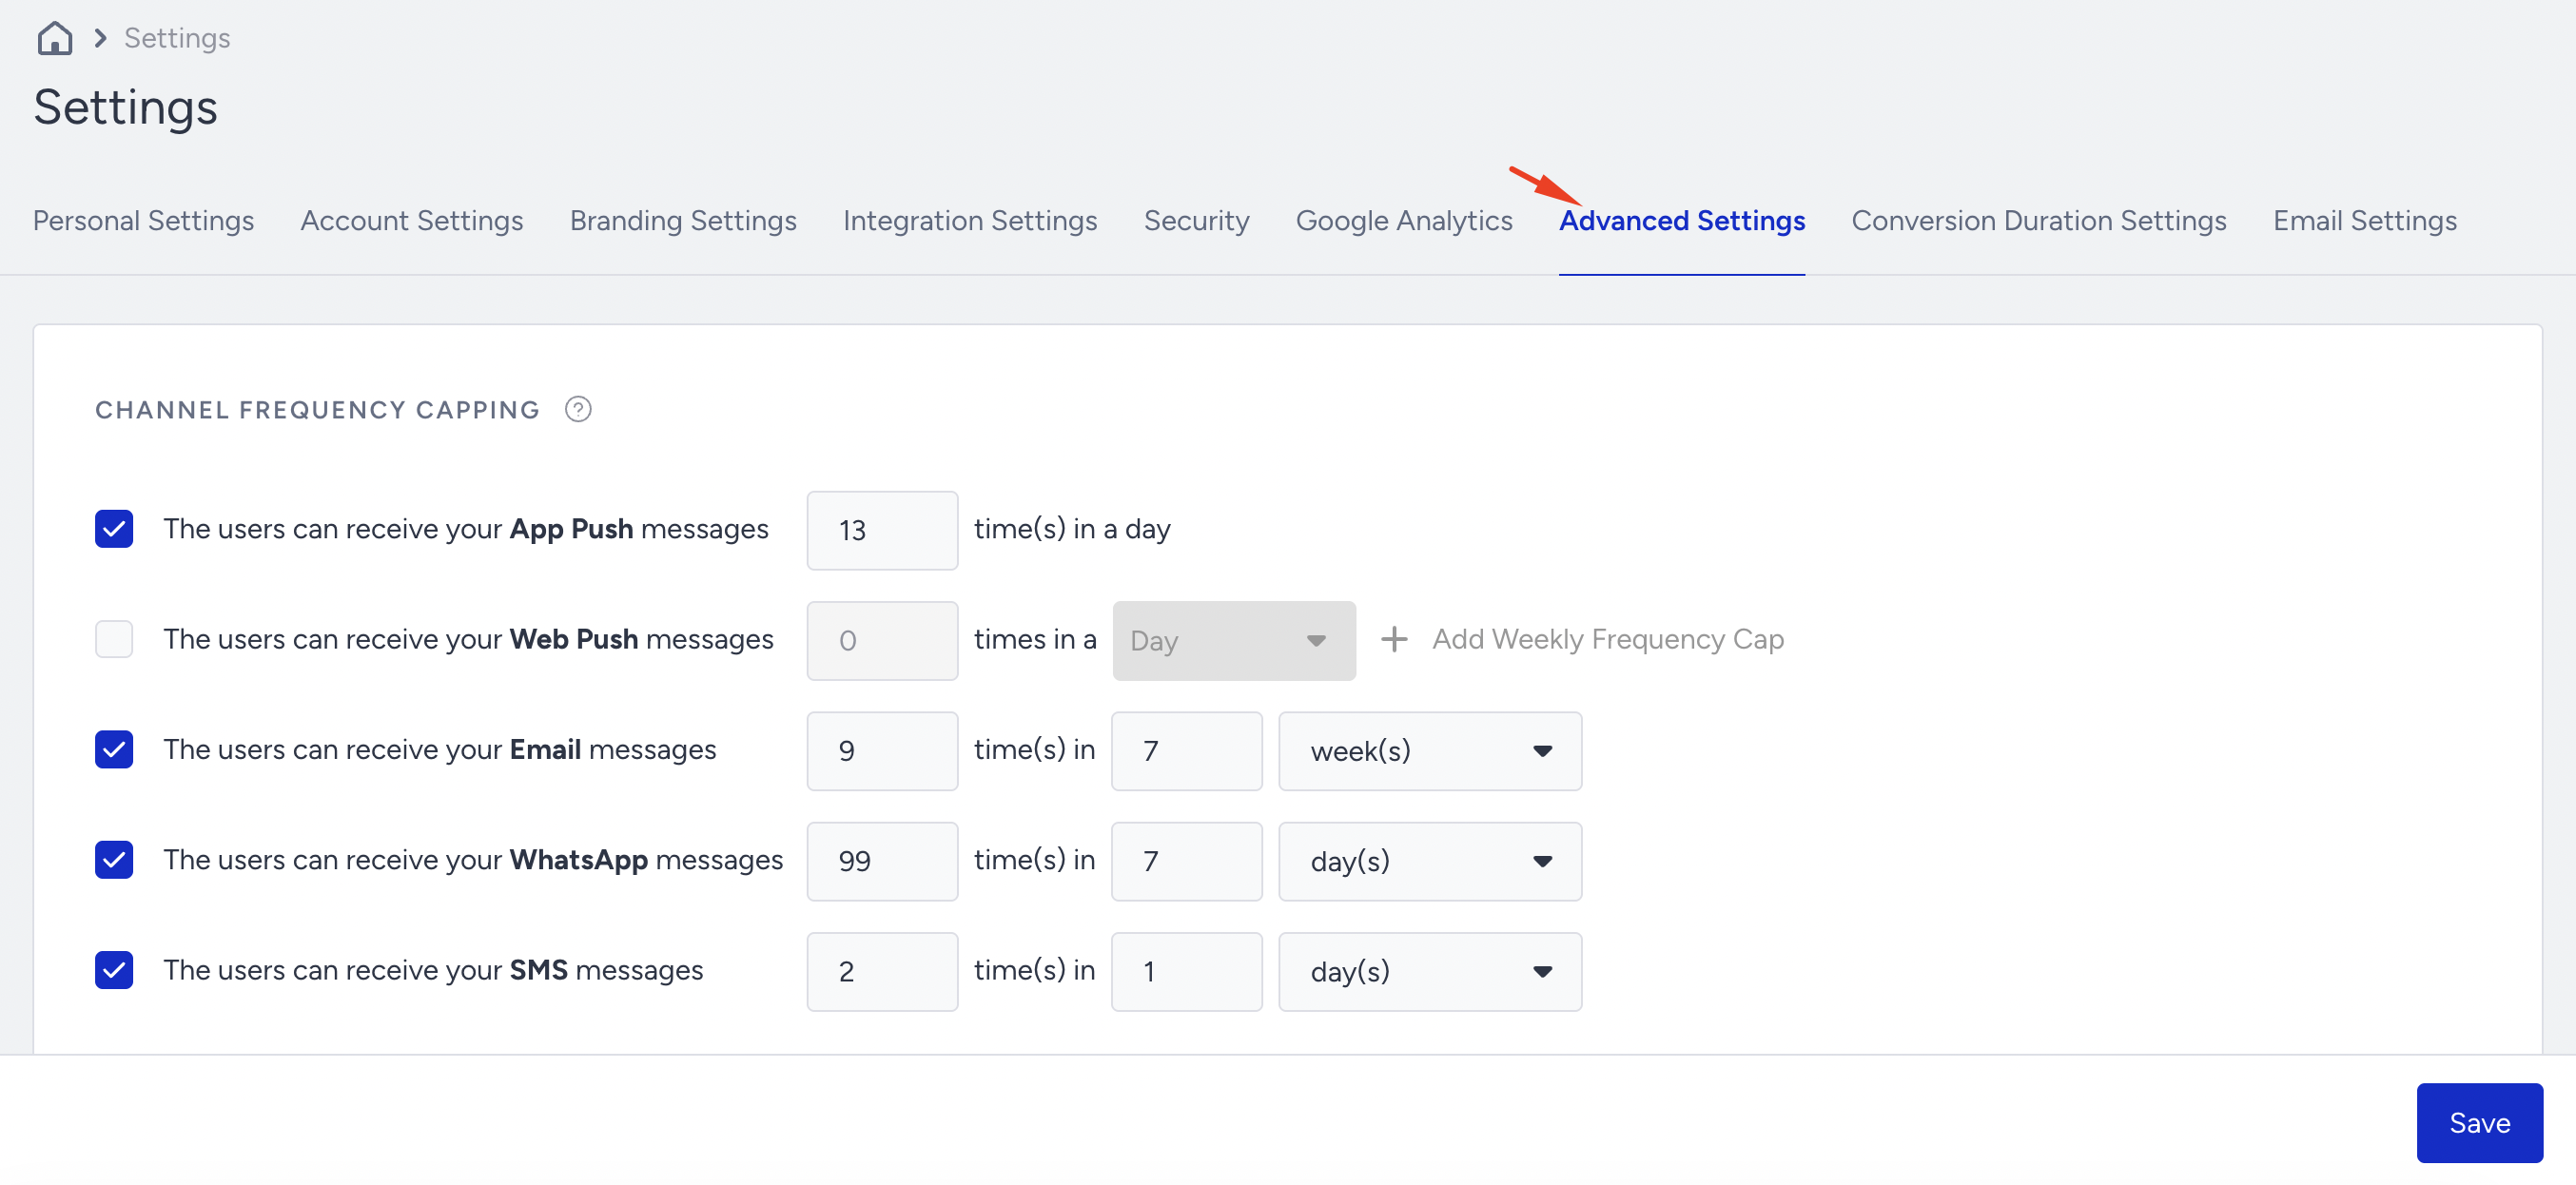
The Advanced Settings page contains product-specific settings, some of which are applied to all products where applicable. To navigate to this page, click your username > Settings > Inone Settings > Advanced Settings.
Channel Frequency Capping
Channel Frequency Capping allows you to manage the number of messages users receive within a specified period for each messaging channel.
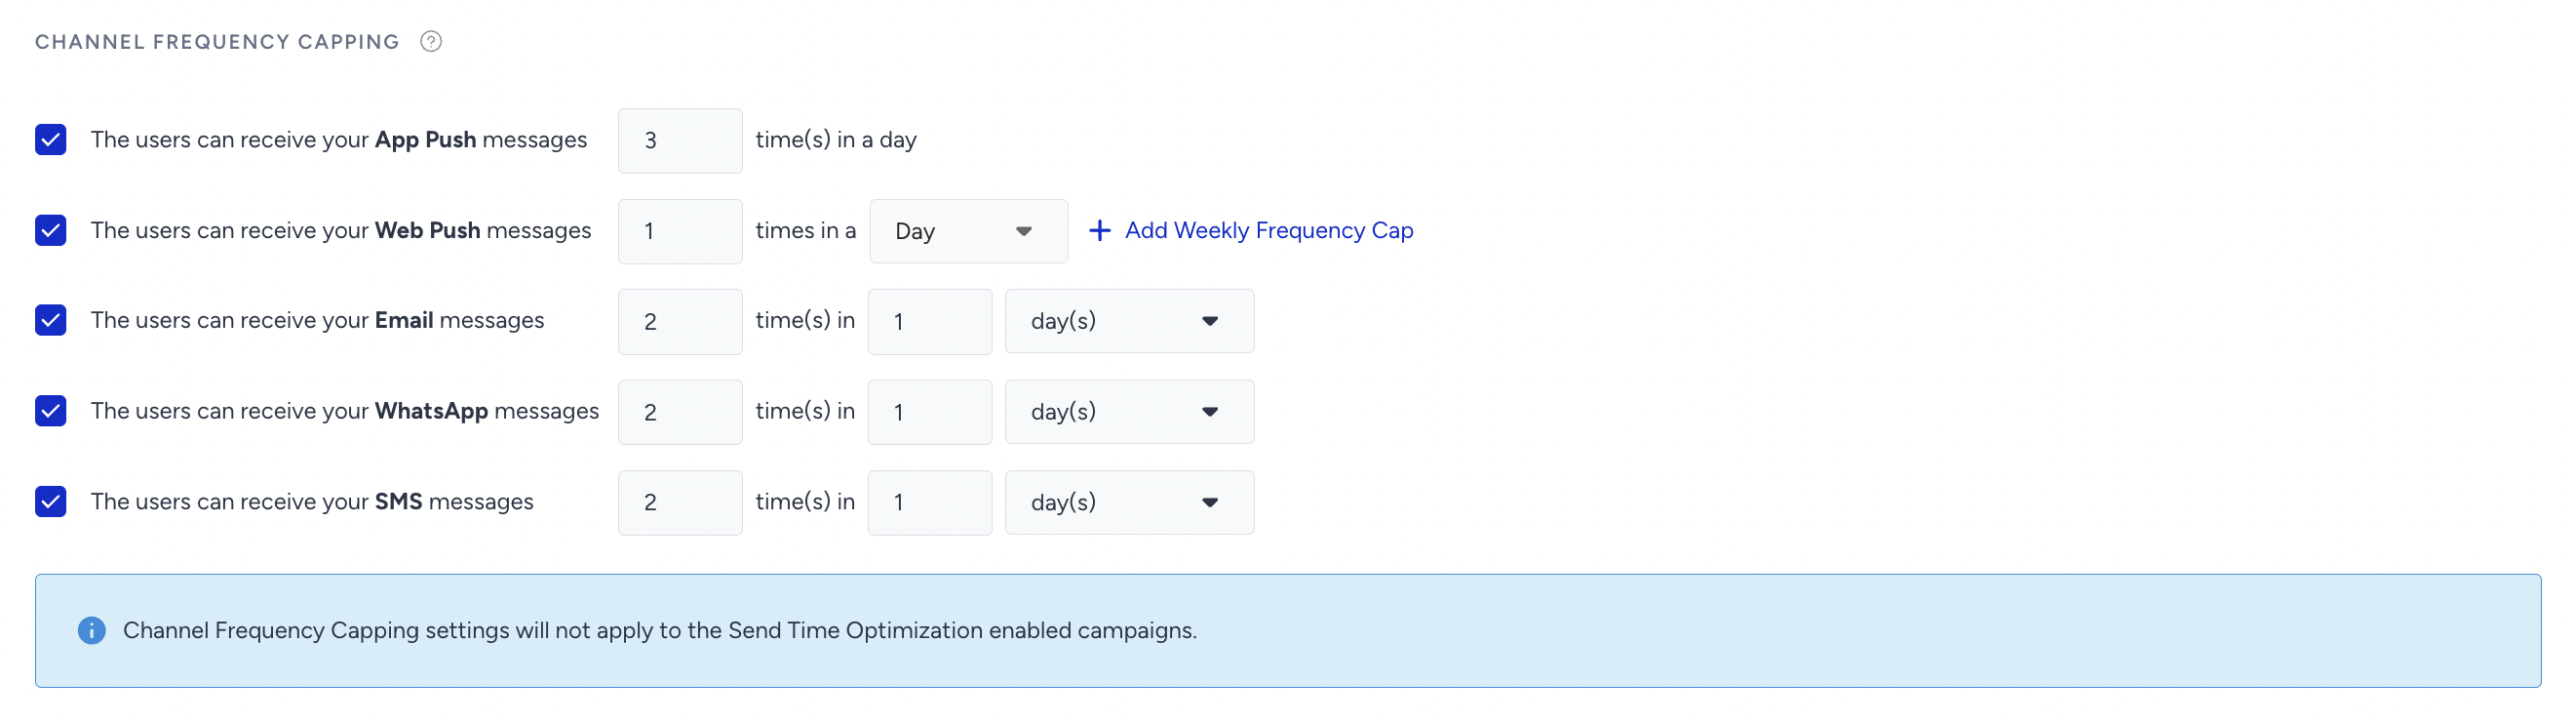
You can configure frequency capping for the following channels:
To configure channel frequency capping, select the respective channel box and enter the desired values. For example, you can configure "The users can receive your Email messages 2 times in 1 day."
Channel frequency capping is also applied to the channels in Architect journeys. You can use the Bypass Channel Frequency Capping option in the respective channel if you want to send messages through these channels in journeys regardless of the configured frequency capping.
If the Multiple Frequency Capping feature is available in your current plan, you can set the Channel Frequency Capping daily and weekly for Web Push. Daily and weekly options are available, and you can use them together.
Channel Tracking Parameters
Tracking Parameters is a centralized solution for managing tracking parameters across all messaging channels. It allows marketers to define a standard set of UTM parameters globally, ensuring consistent tracking across Standalone Email, Architect Email, Architect SMS, Transactional Journey Email, Standalone SMS, and Transactional Journey SMS (i.e., Email and SMS, including their transactional/journey versions). Each messaging channel (such as Email, SMS, etc.) can automatically inherit these parameters from the Channel Tracking Parameters settings.
The Tracking Parameters offer:
Unified tracking setup
Automatic inheritance of parameters at the campaign level
Flexibility to override or customize per campaign
Real-time URL Preview updates
Support for Custom Tracking Parameters with and without UTM prefix
To enable the tracking parameters, follow these steps:
Messaging and Architect messaging channel values can be defined separately. When you create a new parameter, you must fill in both values for messaging and Architect messaging channels.
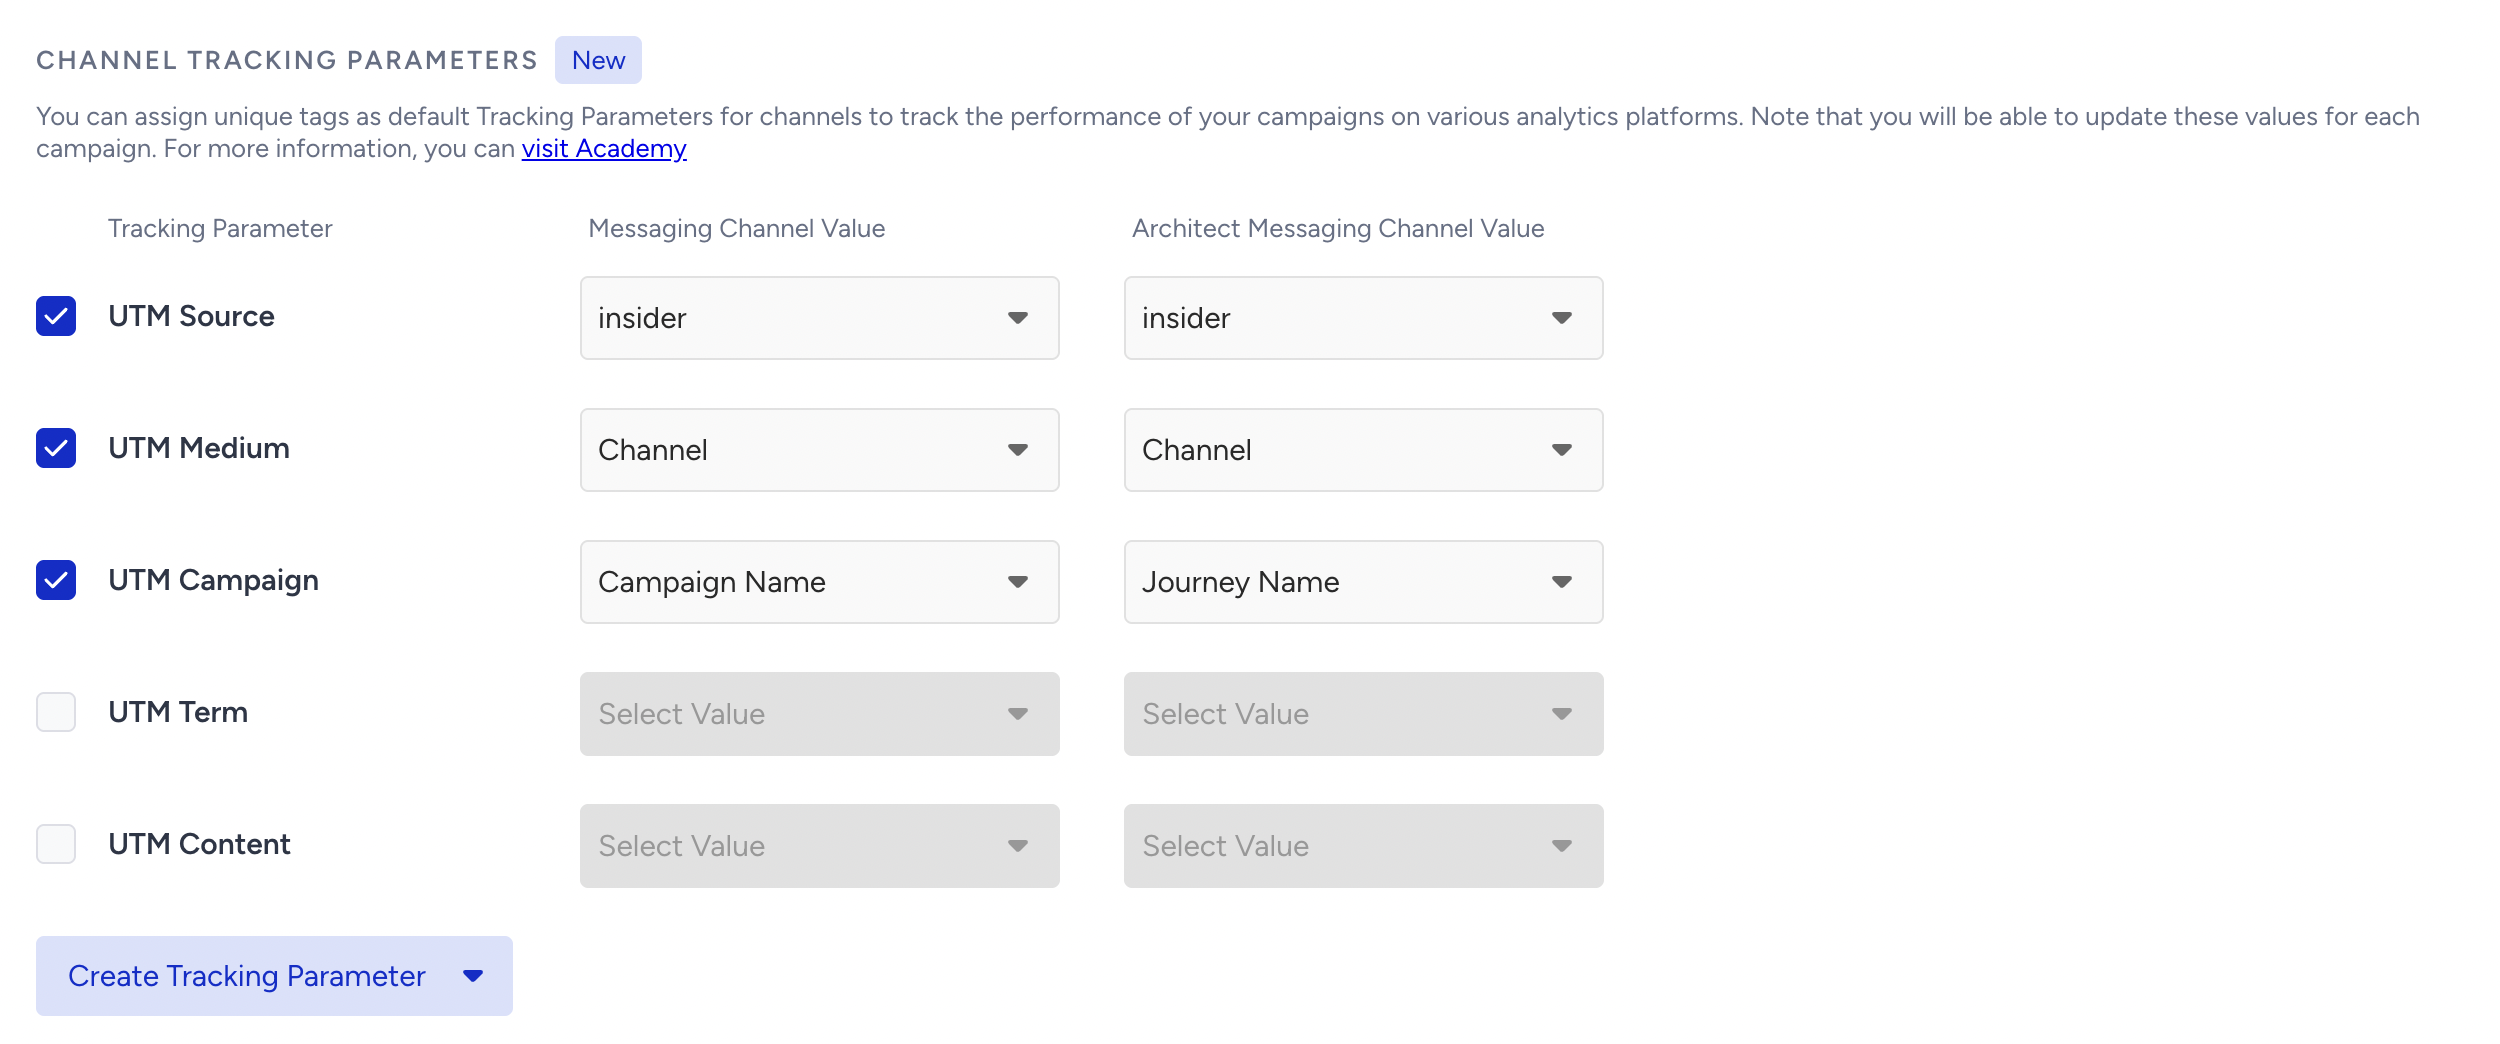
You can use the default user and campaign attributes, as well as custom user attributes, in the value section of messaging and the Architect messaging channel.
To create custom tracking parameters with/without UTM, click the "Create Tracking Parameter" button. These custom values are saved after creation and can be found under the “Custom Values” section of the Value part of the messaging and the Architect messaging channel.
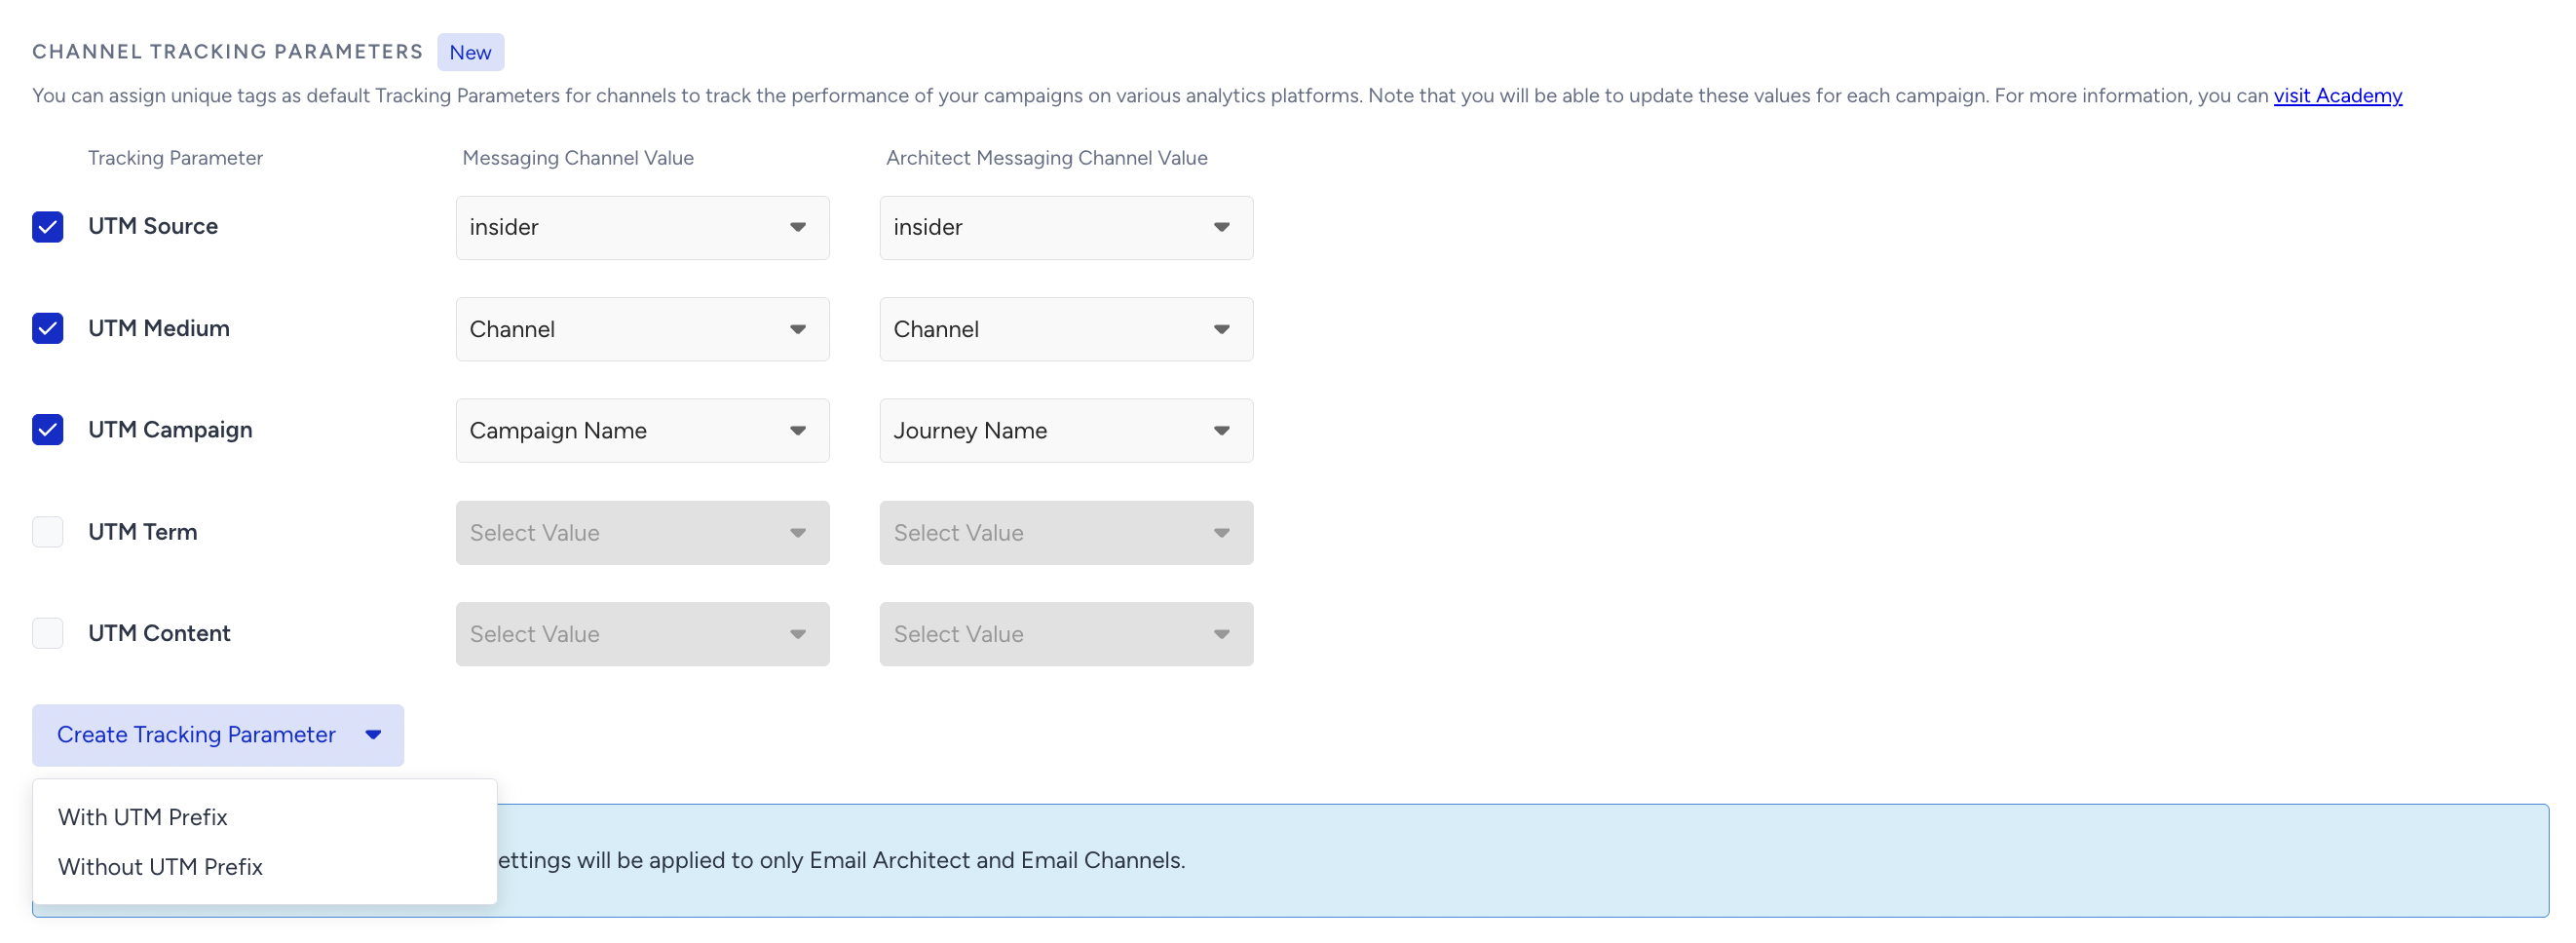
When the Automatically update the Tracking Parameters toggle is on in each channel's settings, changes made in Advanced Settings are automatically applied to that channel, and the channel's parameter fields become read-only while the toggle is on.
All channel tracking parameters defined here are inherited by default when creating a new messaging campaign or Architect channel.
The label can be up to 40 characters. The value can be up to 150 characters.
After making changes to tracking parameters, click Save to save your changes.
Notification Display
Notification Display helps you control how many on-page campaigns a user can see within a specified hourly time frame.
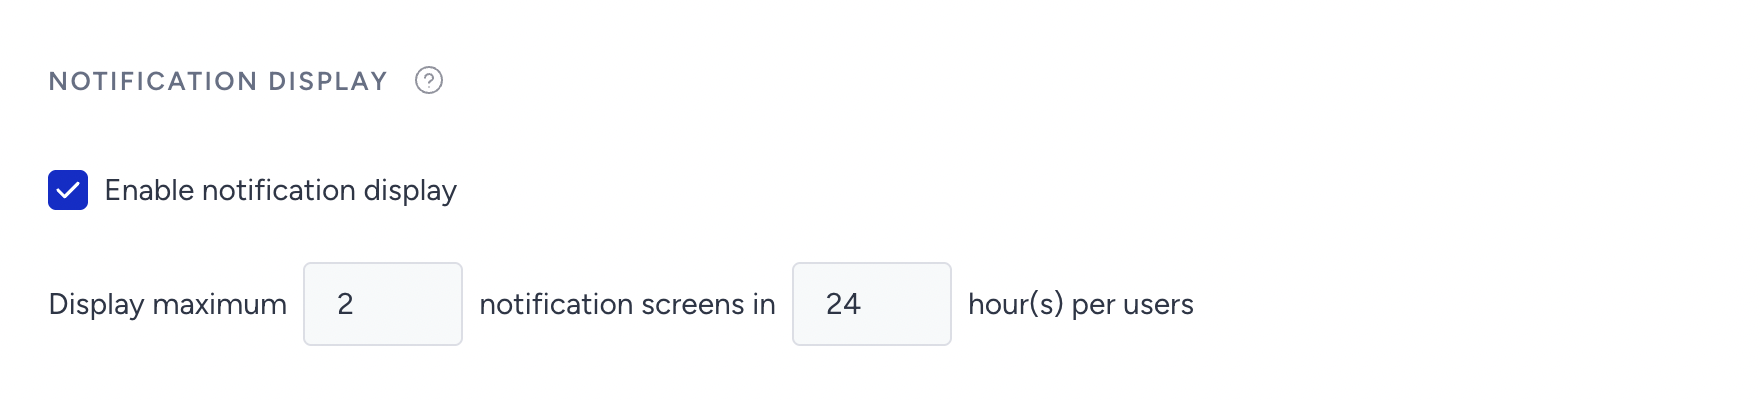
This setting applies to all on-page templates, but it does not affect campaigns with bounce triggers, custom configurations, inline campaigns, or Social Proof.
You can enable this feature if you have multiple on-page campaigns that could appear on the same page. Once enabled, it lets you define the maximum number of campaign views per user per hour. For example, if you have an email collection on page load and another on exit intent, you can limit users to seeing only one of them within the same hour.
If the number of eligible campaigns exceeds the display limit, the system will show campaigns based on their priority ranking. For instance, if you have 5 eligible campaigns and set the display limit to 3 within an hour, only the top 3 prioritized campaigns will be shown. You can manage this order using the Priority setting under Advanced Settings in the Launch step of your campaign.
Test Module
When testing your campaigns to ensure they function correctly, you use test links specific to each campaign.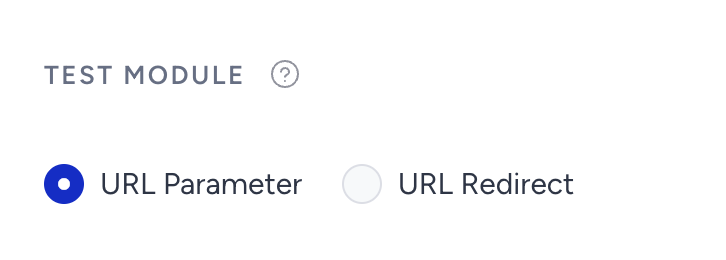
These test links include parameters that let you see the campaign even when it is not launched. URL Parameters keep these test parameters in the link, while URL Redirect redirects you to your website URL with no test parameters. You can use this feature if your website does not support certain test parameters and characters.
Coupon Security
You can utilize our coupon security system to restrict users to a single coupon code per IP address.
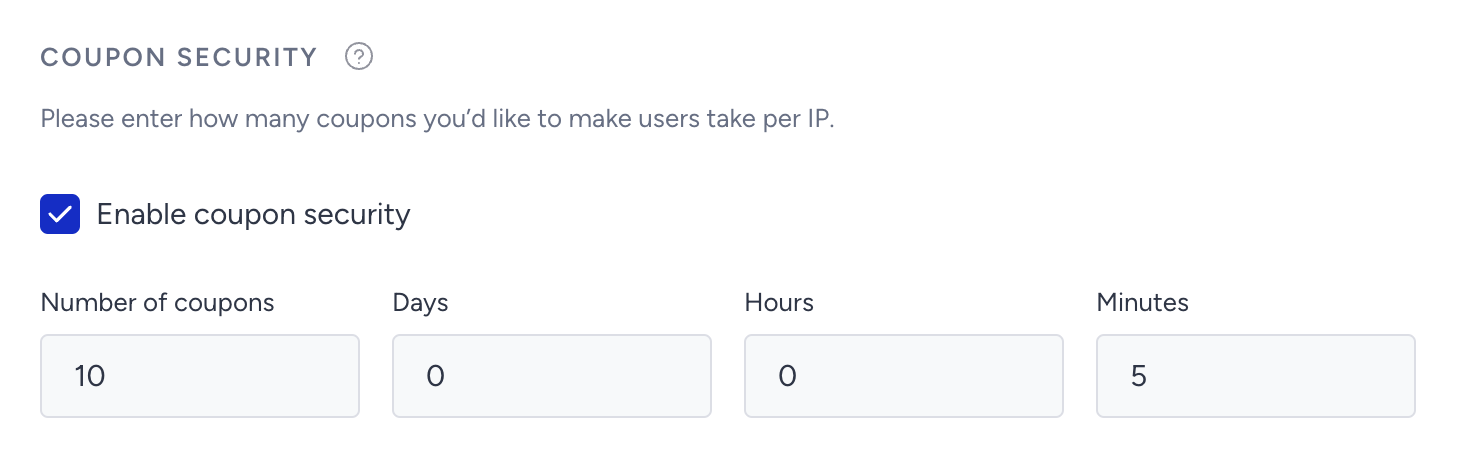
Once activated, this option lets you set the maximum number of coupon codes a user can receive when using the same IP address. It also limits the maximum number of coupon codes to 10.
Exit Intent Settings
Configure how our exit intent technology works on your website.
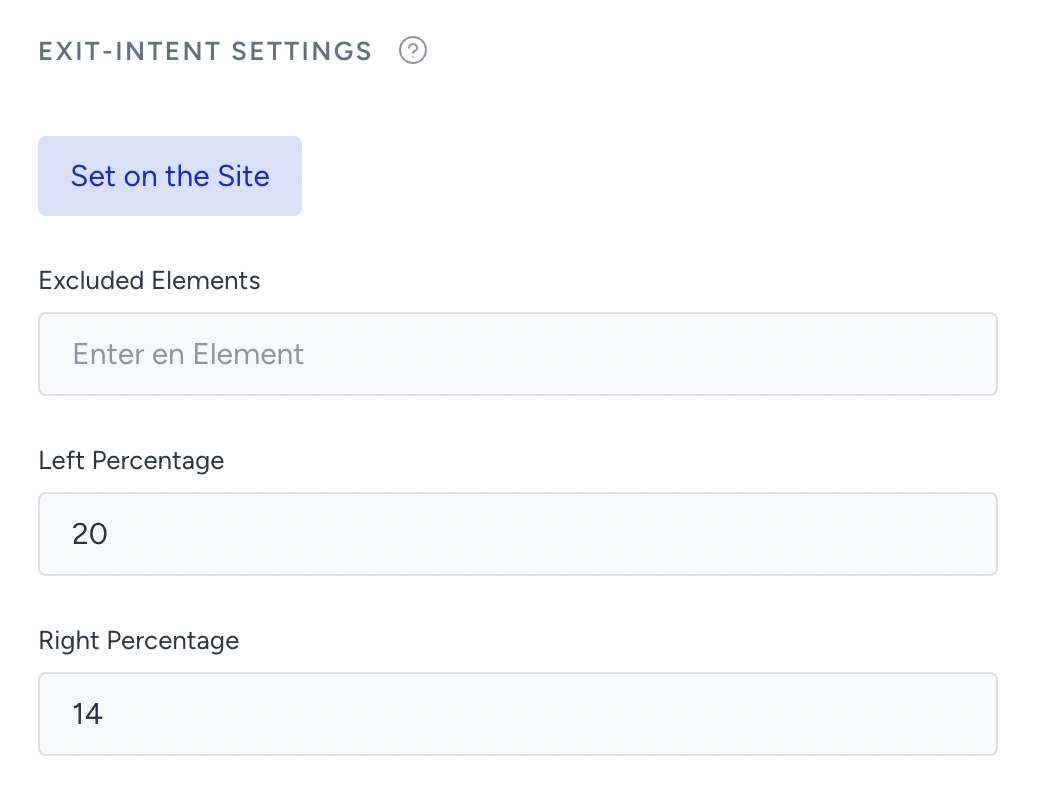
This feature enables you to set a range for the exit-intent area or exclude certain elements from that range.
Social Proof Settings
You can count each view from users as a unique view.
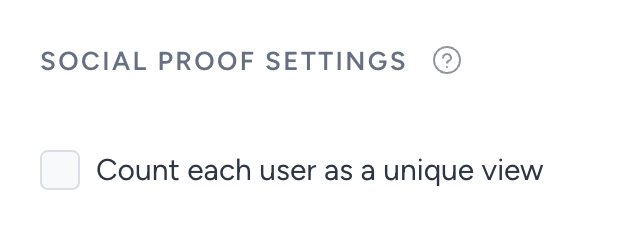
If you enable this feature, each user who sees a product page will be counted as a unique view. This means if the same user visits the same product page, the daily view of this product will not increase. If this feature is disabled, each time a user visits a product page, it will be counted as a view.
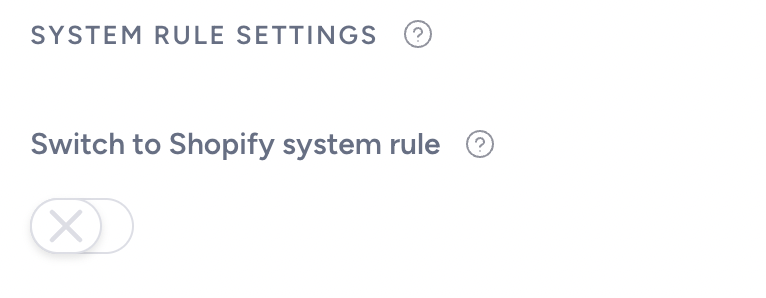
System Rules Settings
If you enable the Shopify toggle, it automatically creates or changes Shopify versions of system rules if integrated.
Browser Storage Settings
These settings help you configure when a user is assigned a variant of a campaign, how long conversions are logged for a campaign, and when a user will see a campaign after joining or closing it.
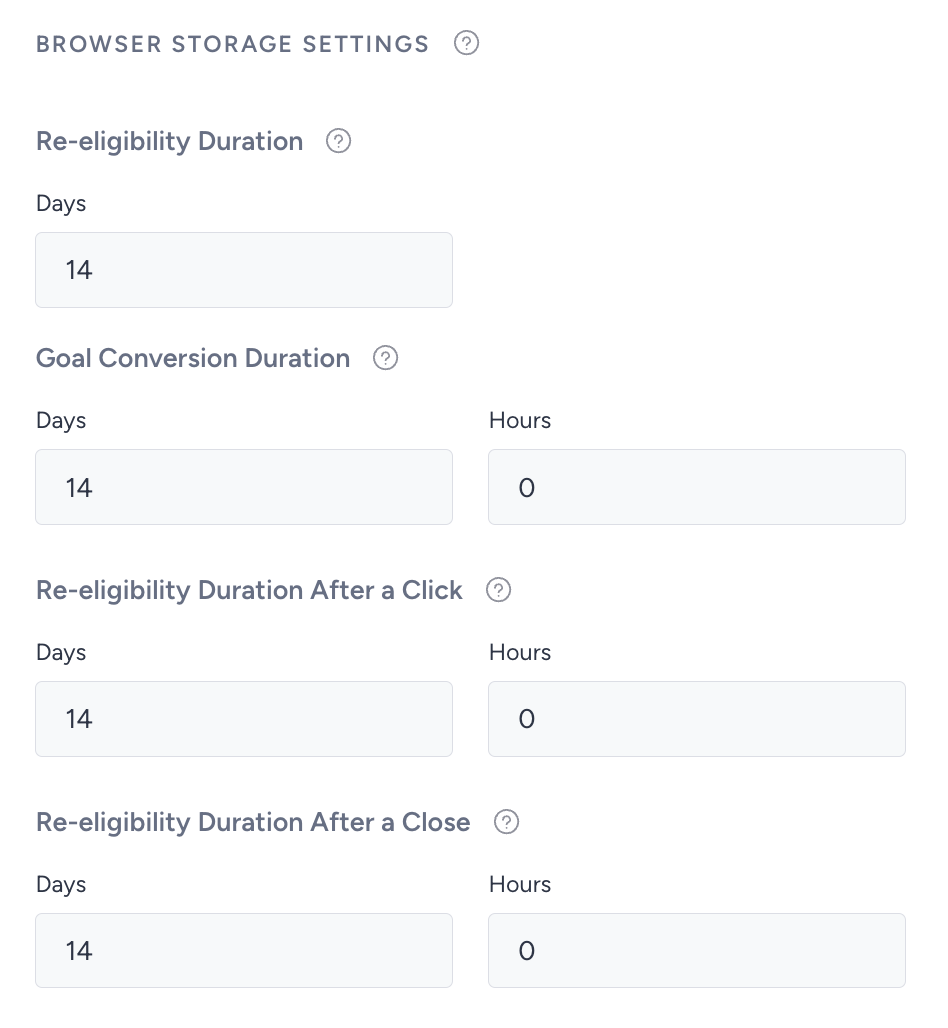
Re-eligibility Duration
This is the time period after which a user will be assigned to a variation group of the respective campaign. Let’s say it is 14 days. When a user first sees the campaign, they are assigned to a variation group. After 14 days, this user is randomly assigned a campaign variation based on the traffic allocation.
Goal Conversion Duration
This time interval begins after a user first sees a campaign. All conversions this user makes during this period are attributed to this campaign. Take, for example, a 14-day Goal Conversion Duration campaign. A user sees a campaign on January 1st, and this period starts. All purchases this user makes within this interval are logged as conversions for this campaign until January 15th. After this date, no purchase made by this user is attributed to this campaign unless there is an impression or a join from this user. If the same user sees the campaign in 6 months, a 14-day window starts again for all purchases this user makes to be saved for this campaign.
Re-eligibility Duration After a Click
You can set the duration after which a user is eligible to see a variation group again when they click a link or a button.
Re-eligibility Duration After a Close
You can set the duration after which a user becomes eligible to see a variation group again after closing it.
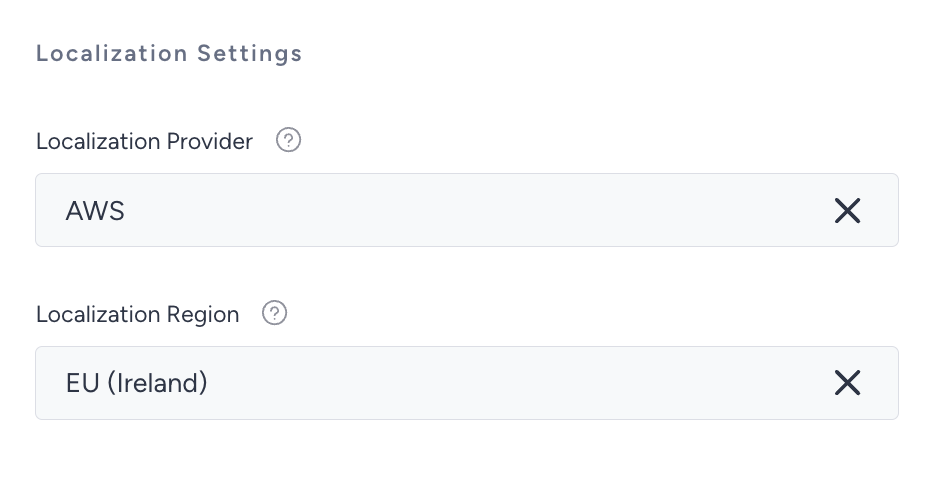
Localization Settings
Under Localization Settings, you can select the Localization provider and region from the given options.