The Opt-in Clickthrough Rate (CTR) for Web Push notifications depends on various factors, including how and when the opt-in prompt is presented, the content of your notifications, the Quieter Permission UI applied by browsers to the website and visitors, and other considerations.
The parameters affecting opt-in are numerous and complex, so there is no single formula for achieving better results. Similar to optimizing campaign results, you should experiment with various options and build a strategy based on the outcomes. To optimize your opt-in rates, consider the following suggestions:
Adjust the opt-in timing
Imagine visiting a website and immediately encountering a pop-up about an ongoing campaign, another to accept cookies, or a lead collection template asking for your email. Additionally, the browser's opt-in prompt appears, prompting you to subscribe to Web Push notifications. It would not be a great experience.
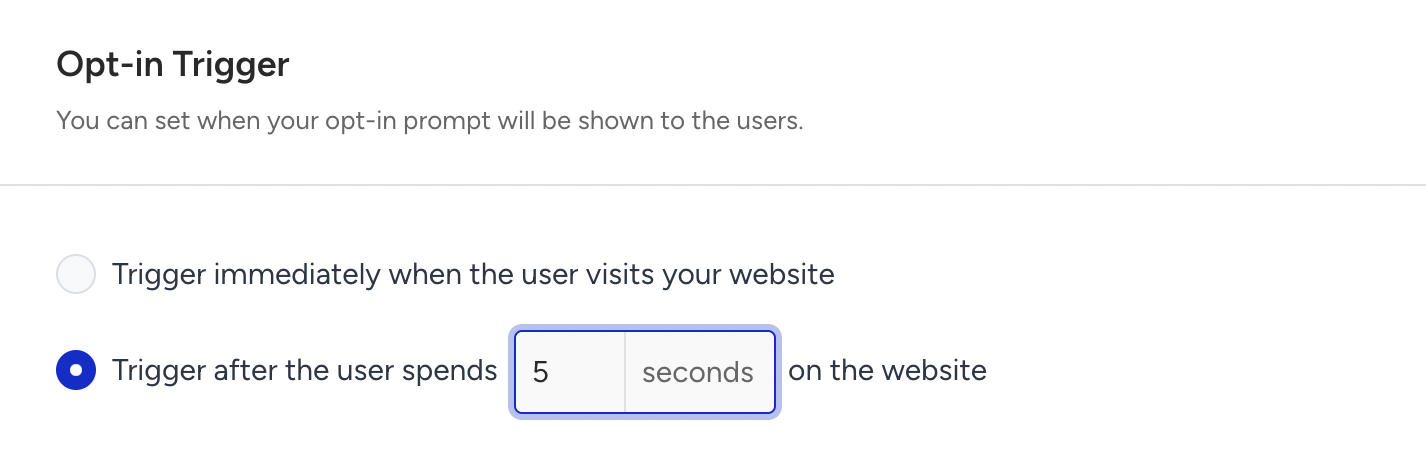
Before asking for opt-in, ensuring your visitor is genuinely interested in your website might help increase opt-in CTR. Adding a short delay before triggering the opt-in prompt can be an effective strategy. A delay of up to 10 seconds is suggested.
To implement this, go to your Web Push Opt-in Settings and set a delay for the opt-in trigger. Compare the results to your previous opt-in rate and adjust accordingly.
Adjust the opt-in location
There is no single answer to the question, “Where should I ask users to subscribe to my notifications?” The goal is to target users who are genuinely interested in your content, and to do so after they’ve had a chance to examine what you offer. Targeting users who land on your website randomly might result in a lower opt-in CTR. However, suppose you set the opt-in to trigger only on certain pages, such as the Product Detail page on an ecommerce site. In that case, you can assume the visitor is already interested in your content and might be more likely to opt in to your notifications. To do so,
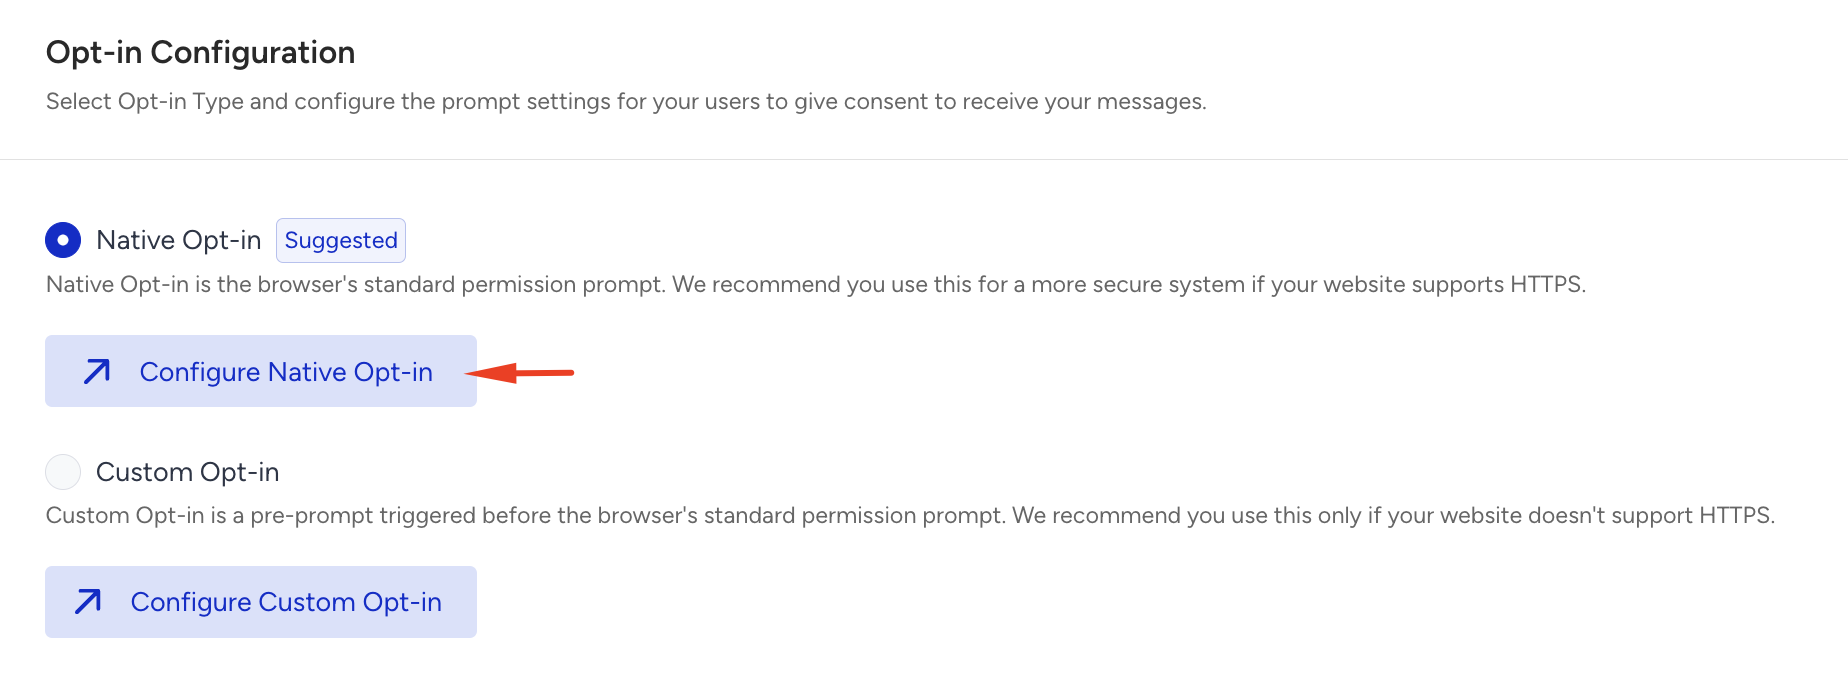
Go to your Web Push Opt-in Settings page and click the Configure button.
Scroll down in the General Settings tab and enable the Enable Trigger by Custom Rule checkbox.
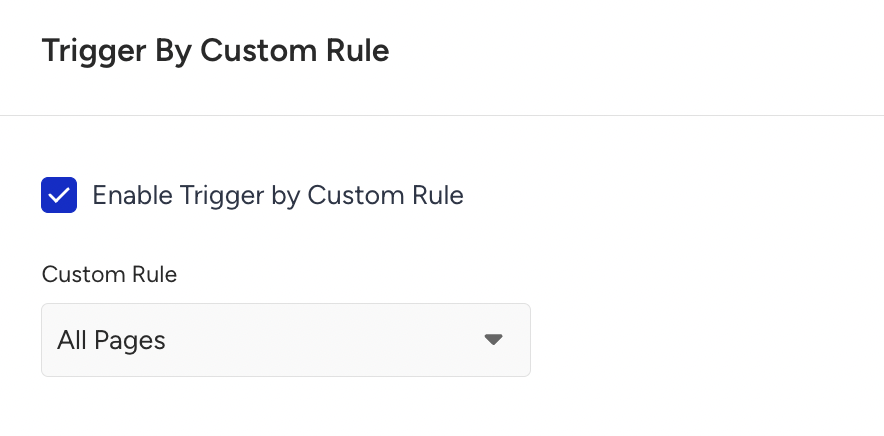
You can either pick a default page or a previously created custom rule for more complex scenarios. Remember to check the opt-in CTR and Subscriber Increase/Decrease results compared to earlier settings.
This requires integrating the related System Rules.
Adjust the way of introducing the opt-in
Keeping things simple might help increase your subscribers, but could result in a lower opt-in CTR. Moreover, subscribers acquired this way might not remain subscribers forever. Therefore, it's essential to strike a balance between increasing your opt-in CTR and acquiring engaged subscribers who knowingly opt in to receive your notifications. To find this balance, continue to experiment. Here are some suggested ideas to ask for opt-in with style:
Use Opt-in Box Template
Opt-in Box templates can transform a one-step opt-in process into a two-step process, with the first step being customizable. Using this customizable first step wisely can help you engage with your customers and provide them with a compelling reason to subscribe to your notifications. While Opt-in Box templates can surely increase your Opt-in CTR, they might also reduce your overall subscription increase.
If your opt-in CTR and subscription rates are already high, you might not need to try this approach. However, if your opt-in CTR has significantly dropped compared to earlier periods, your website may be heavily affected by browsers' Quieter Permission UI, which blocks the native prompt from being visible to end-users. In this case, trying out opt-in box templates and comparing the results with previous months is worth considering.
As suggested earlier, you can also set a delay for the box template to trigger. This delay ensures visitors have enough time to engage with your content before being prompted to opt in, potentially increasing the likelihood they will subscribe.
Now, the visitor understands why they should allow notifications and what benefits they will receive by accepting them. If your website is heavily influenced by the Quieter Permission UI, using an opt-in box template is preferable to a blocked native opt-in.
Following through on the promises made to prevent future unsubscriptions is crucial. Providing an honest explanation of why users should accept notifications, choosing colors that match your website UI to build trust, and setting appropriate CTA texts for the buttons are all crucial steps in creating an effective soft prompt.
Use Opt-in Overlay
If the two-step Opt-in Box doesn't deliver the results you expected and you prefer a one-step opt-in, you can still use the Opt-in Overlay to explain why customers should subscribe to your notifications. The opt-in overlay can help customers focus on the triggered prompt and take conscious action.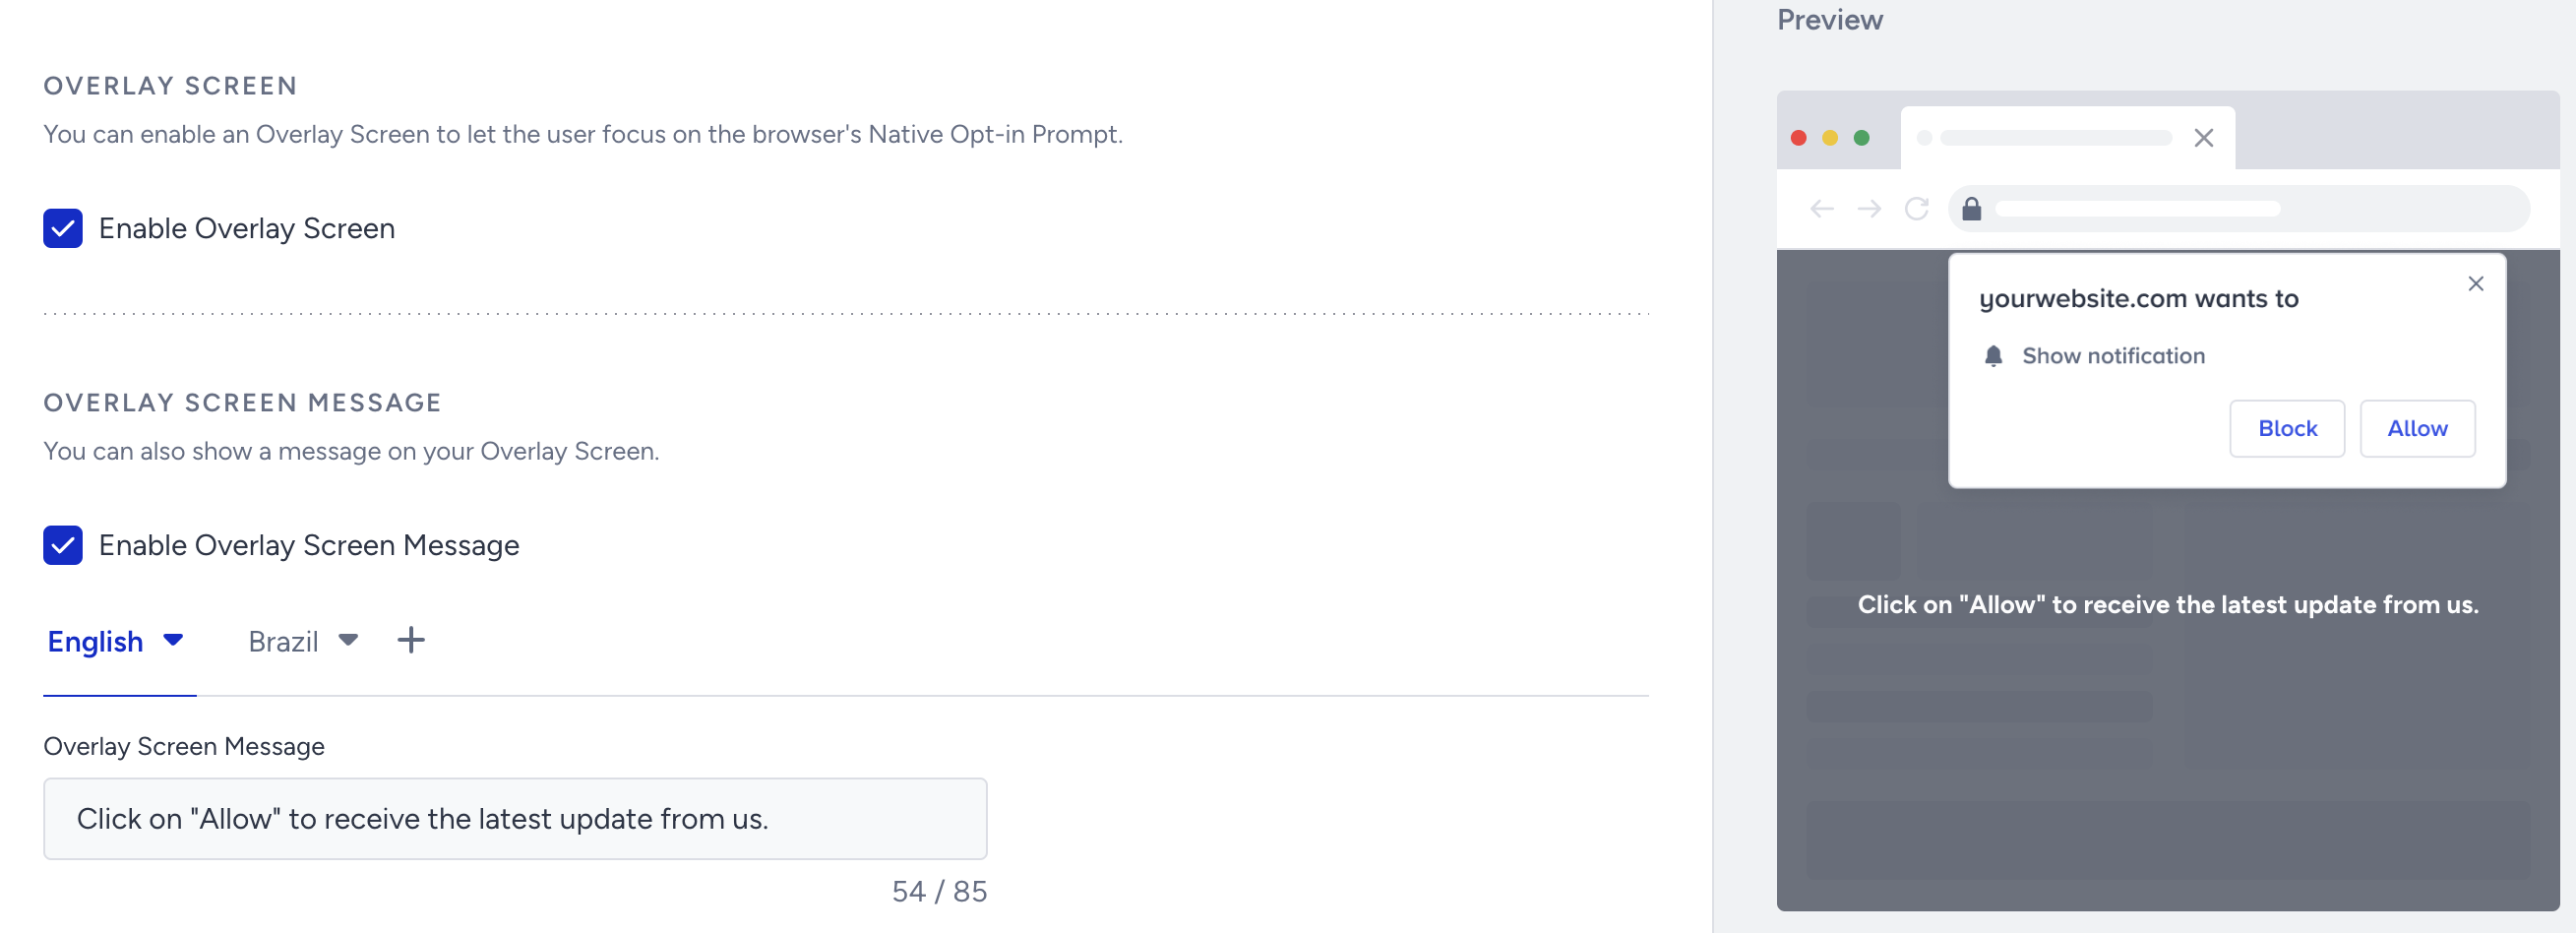
Try this method for a while, triggering the opt-in with a delay or on a specific page for a better user experience. As always, compare the results with your previous opt-in CTR and subscriber metrics to gauge effectiveness.