This page lists what you prepare in Databricks and what you enter in Insider One to create a Databricks authentication. For instructions on how to create, use, and manage authentications, refer to Authentications.
Before you begin
You must have a Databricks account with account admin privileges.
Ensure you have access to the catalog, schema, and tables that contain the user and event data you want to sync with Insider One.
The Insider One Databricks connector supports AWS, Azure, and Google Cloud platforms.
You need a Service Principal with OAuth in your Databricks workspace. To create one, refer to Create a Service Principal.
Create a Service Principal
In your Databricks workspace, click your user profile in the top right and select Settings.
Go to Identity and access > Service Principals and click Manage.
Select Add new, enter a name, and select Consumer access, Databricks SQL access, and Workspace access. Then click the Add service principal button.
To create an OAuth Secret Pair, go to the Secrets tab on the Service Principal page, click Generate secret, and copy the Secret and the Client ID shown in the dialog. The Client ID is in UUID format, for example:
63fc7e90-a8a2-4639-afd8-36ef6bb67cfa.
These values are shown only once. Save them securely before closing the dialog.
Grant catalog permissions
Your Service Principal needs catalog permissions to query your Databricks data.
In the Databricks sidebar, click Catalog and find your schema.
Open the Permissions tab and click Grant.
In the Principals box, enter your Service Principal name.
Select the Data Editor preset, or manually assign the following permissions:
USE SCHEMA
EXECUTE
READ VOLUME
SELECT
USE CATALOG
Grant SQL warehouse permissions
If your Service Principal does not have access to compute resources, grant it permissions on the SQL warehouse.
In the Databricks sidebar, click Compute, then go to the SQL Warehouses page.
Locate your existing warehouse, or create a new one if needed.
Open the menu next to the warehouse name and select Permissions. If you do not see this option, contact your Databricks account admin.
In the Permissions panel, enter your Service Principal name, set the permission level to Can use, and click Add to save.
Get the Server Hostname and HTTP Path
Copy the Server Hostname and the HTTP Path from the connection details of your SQL warehouse in Databricks.
Enter the authentication details
Open the Databricks authentication form as described in the Create an authentication section of Authentications.
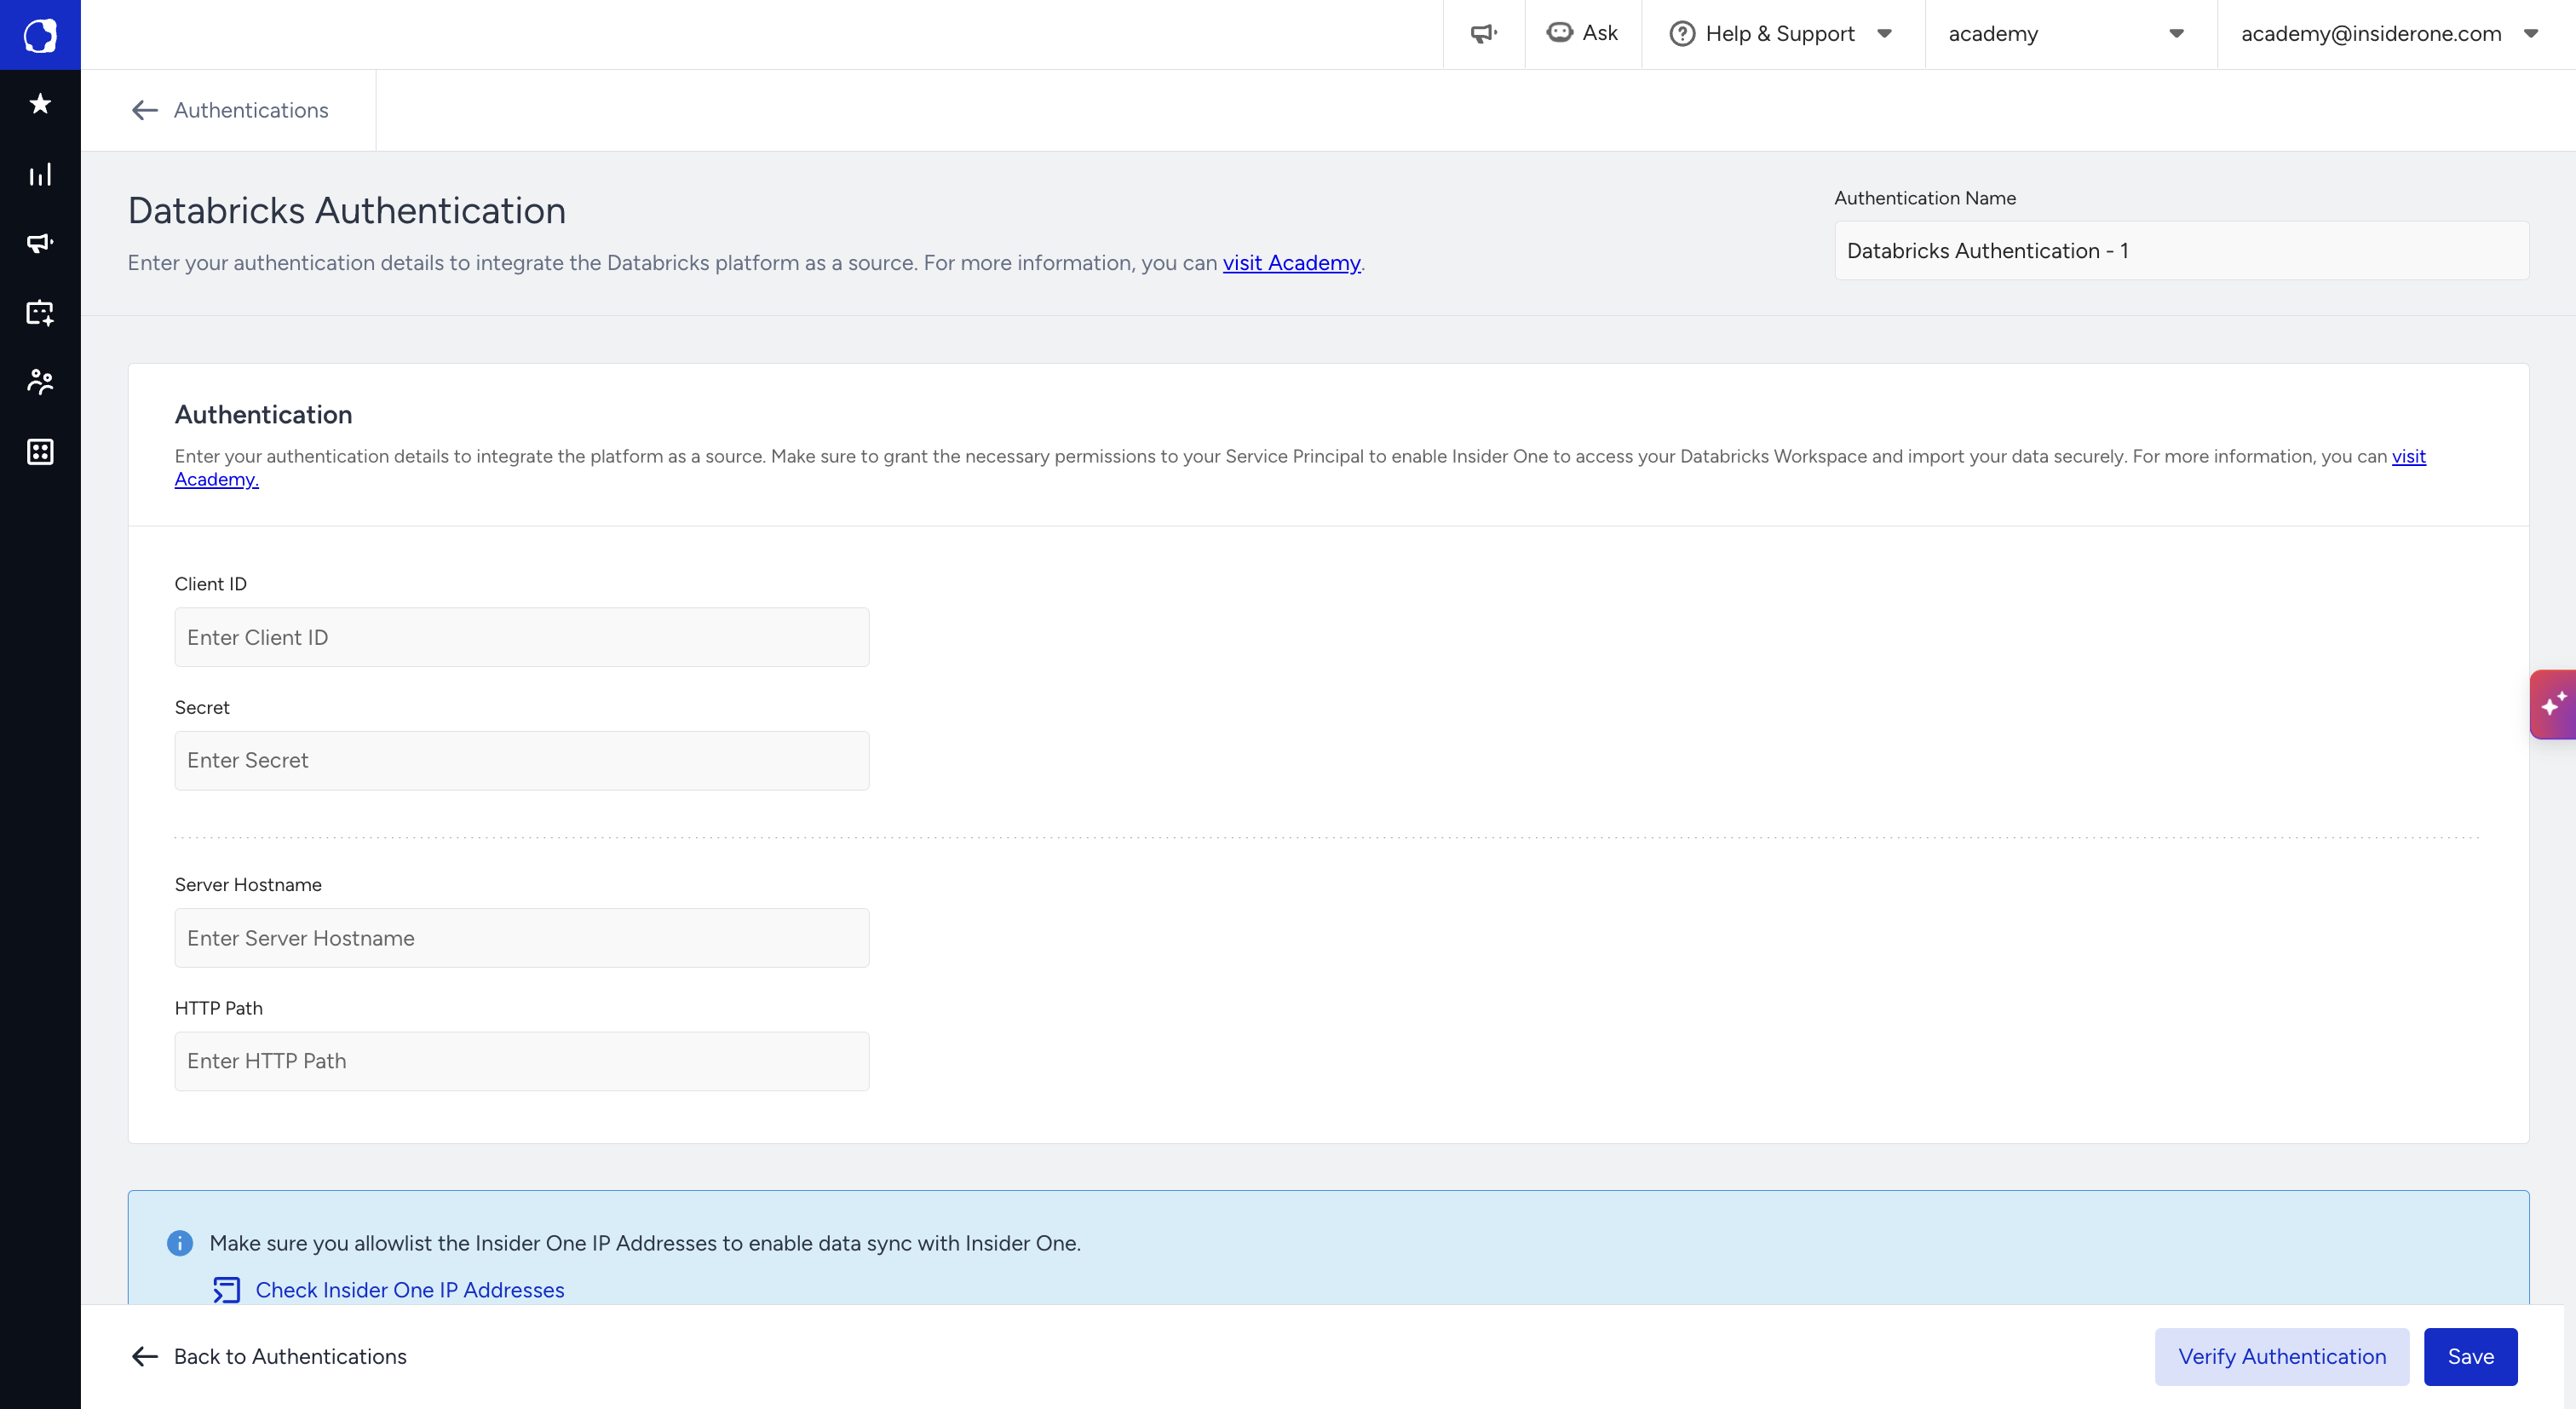
Enter your authentication details to integrate the platform as a source.
Grant the necessary permissions to your Service Principal so Insider One can access your Databricks workspace and import your data securely.
The following table lists the fields to complete.
Field | What to enter |
|---|---|
Client ID | The Client ID of your Service Principal. |
Secret | The Secret of your Service Principal. |
Server Hostname | The Server Hostname of your SQL warehouse. |
HTTP Path | The HTTP Path of your SQL warehouse. |
Allowlist the Insider One IP addresses
The form ends with this information box: "Make sure you allowlist the Insider One IP Addresses to enable data sync with Insider One." To see the addresses, click Check Insider One IP Addresses.
Verify and save the authentication
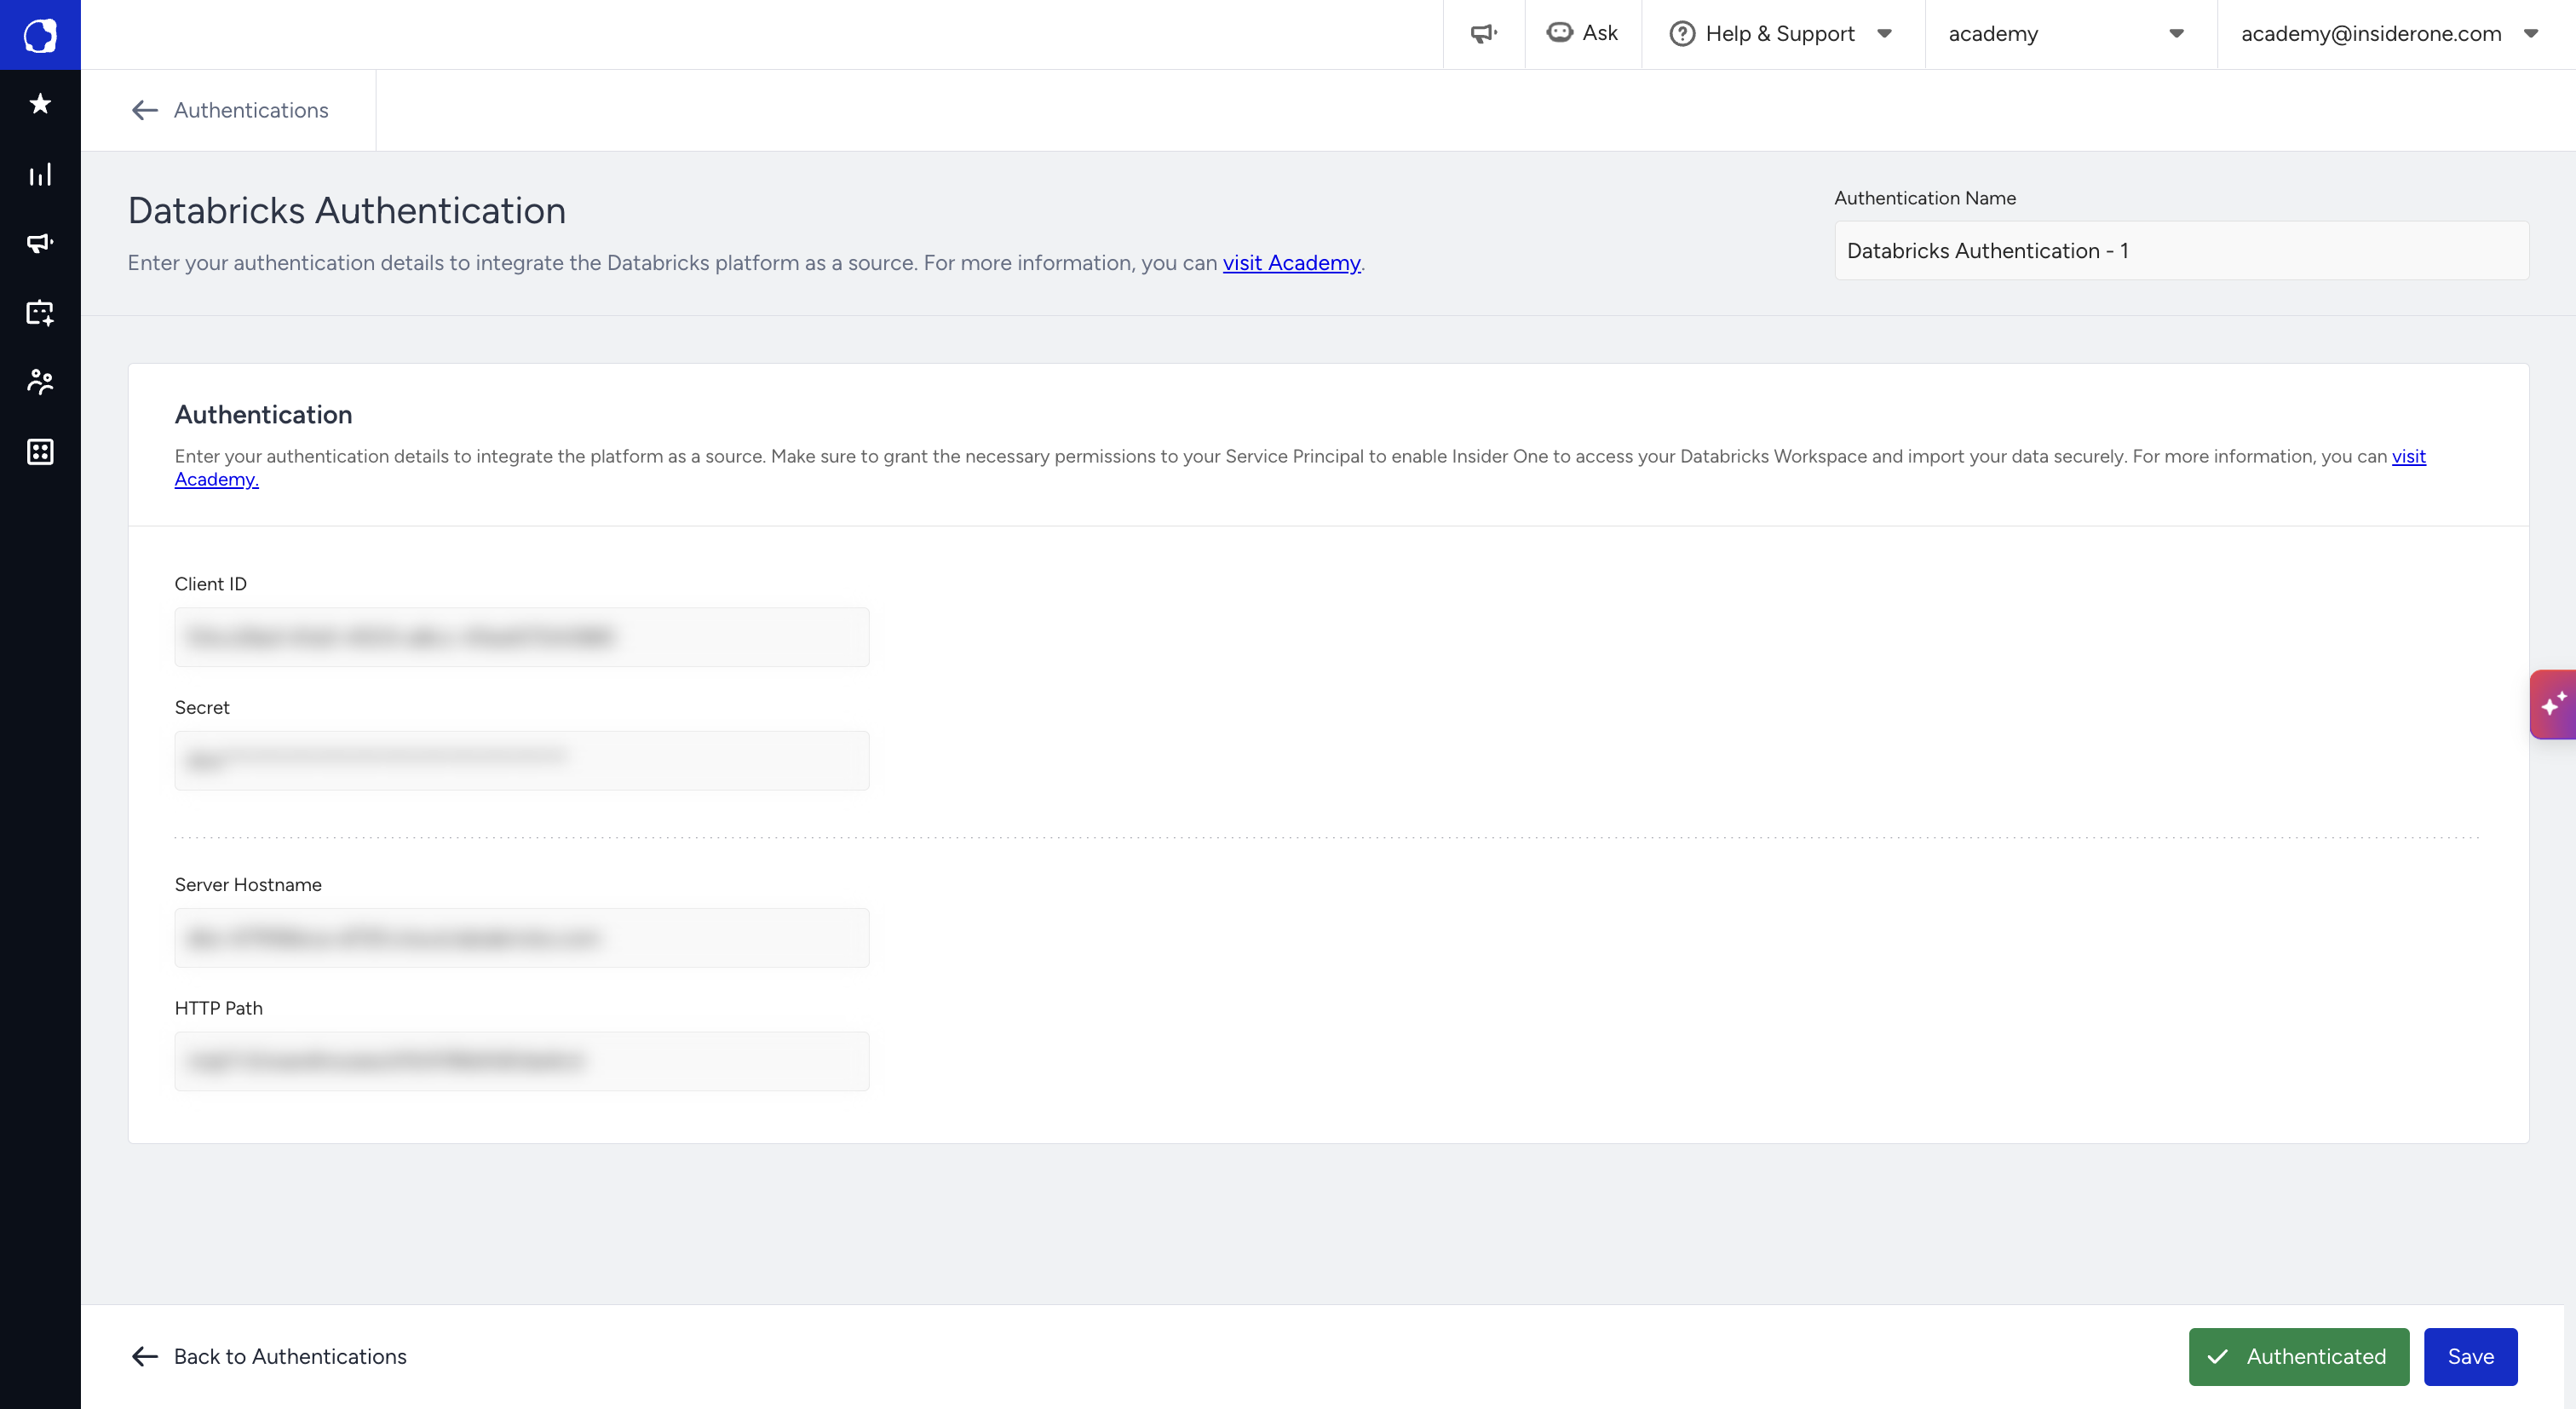
Click Verify Authentication. After a successful verification, the button turns into a green Authenticated label with a check mark.
Click Save.