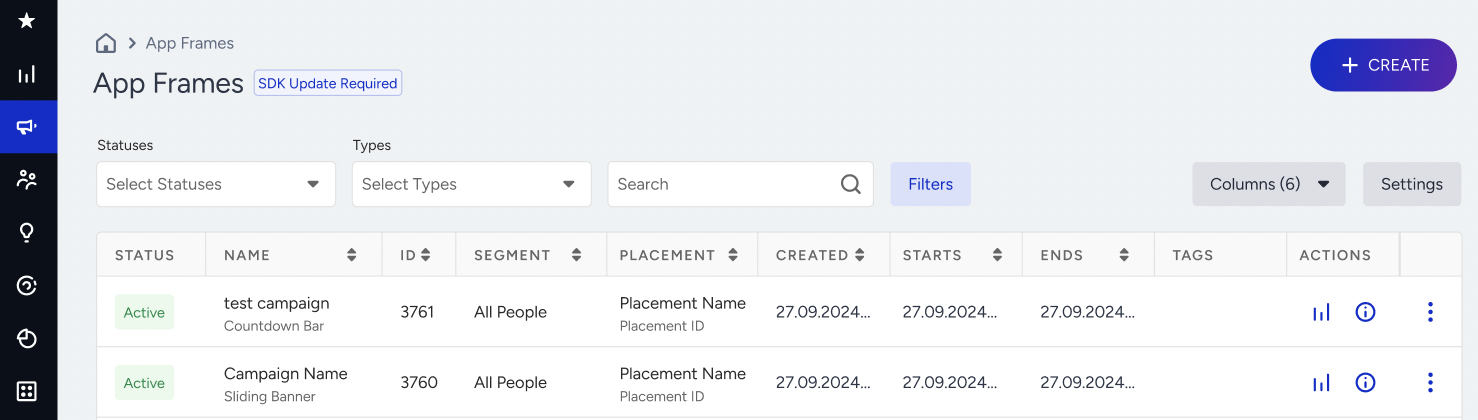
To reach App Frames, navigate to Campaigns > Optimization > App Frames. You will land on the listing page where each campaign's status, name, segment, placement, dates, and tags are displayed. You can filter campaigns by status, type, placement, tag, and group. If your SDK version is below the minimum required version, an SDK update warning appears next to the page title.
To create a campaign, you will complete:
Design
On the Design step, follow these steps:
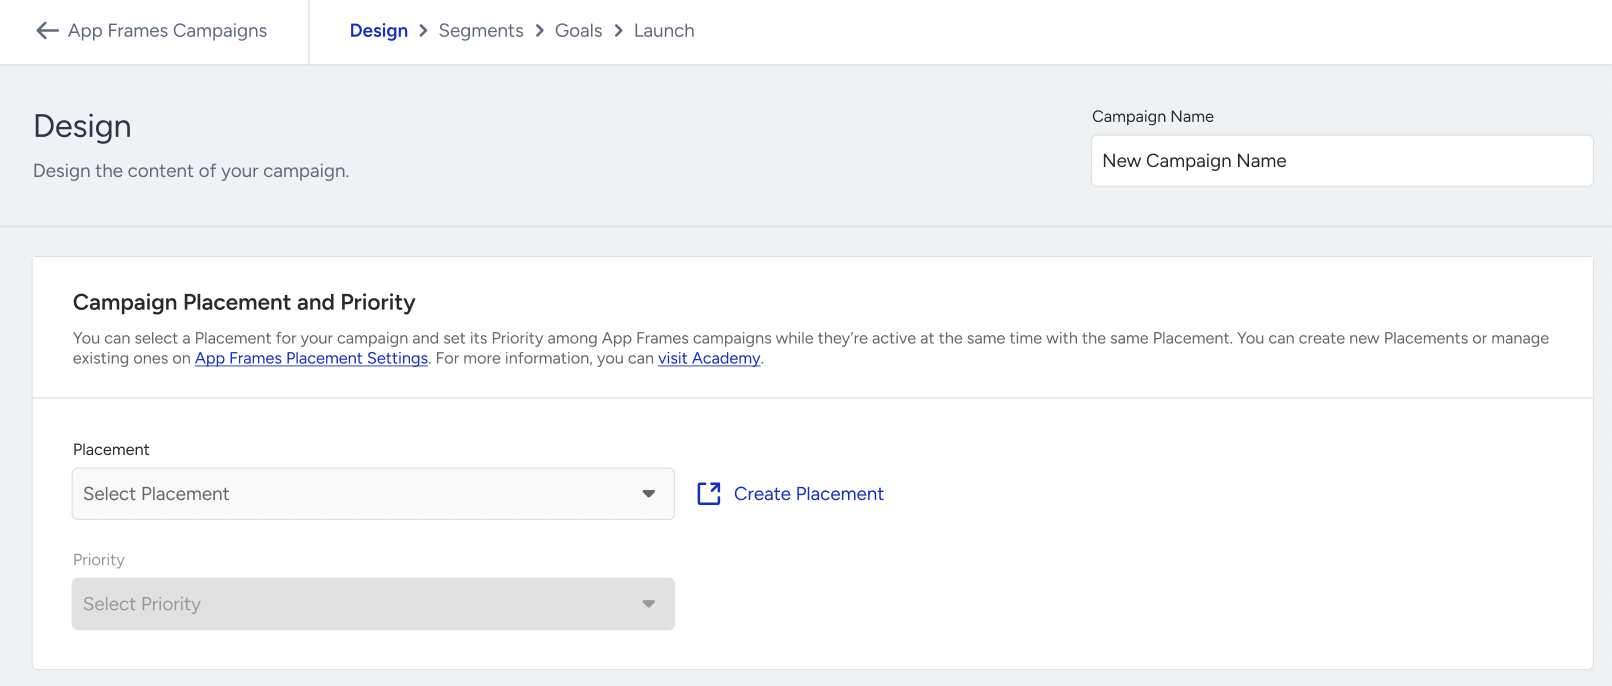
1. Select the placement where the campaign will be displayed.
A placement is the slot where content appears within the app. Each placement must be defined in the application code by the development team during the SDK integration. Placements are managed through Settings > Mobile App Settings > App Frames Placement.
The placement list displays each placement's status (Active or Passive), name, ID, creation date, and last updated date. Beneath the placement name, the panel also shows the number of active campaigns that are currently assigned to it. When creating a placement, you provide a name and a Placement ID. This ID must exactly match the Placement ID defined in the application's code.
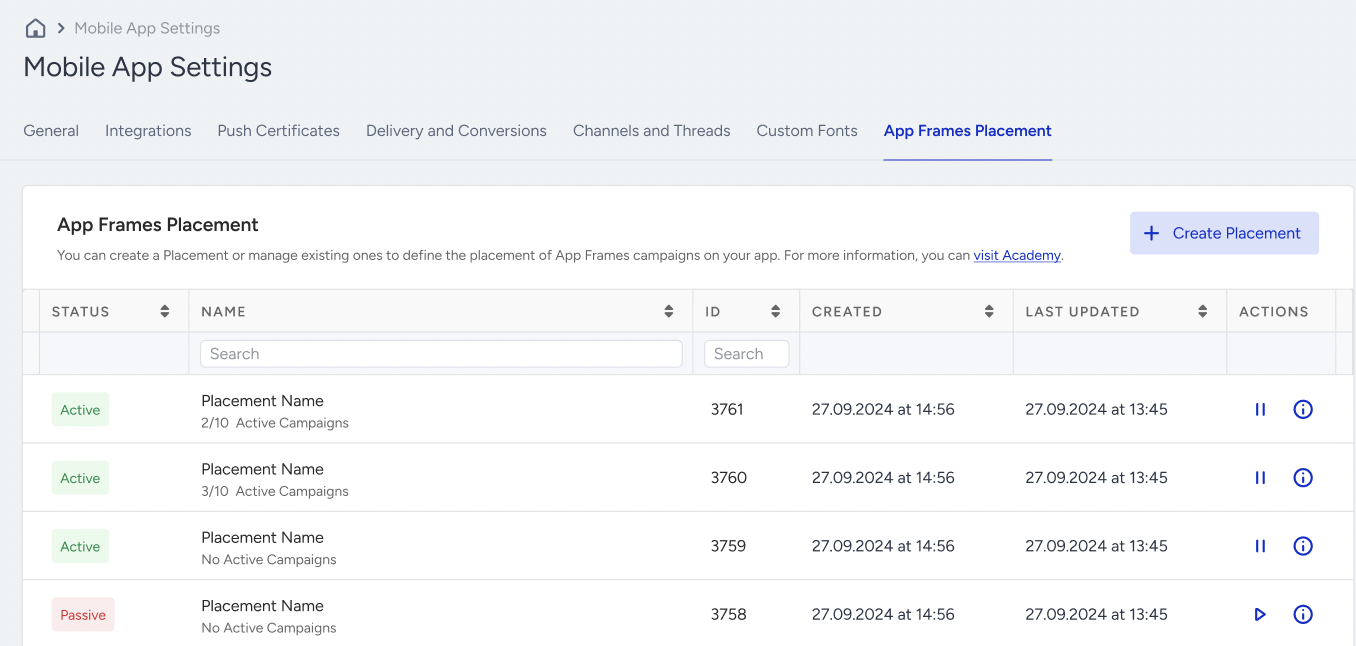
If an active placement is paused, the panel first lists all active campaigns assigned to that placement. Once confirmed, all of those campaigns are moved to the Passive state together with the placement. Reactivating the placement does not automatically reactivate its campaigns. You must restart each campaign individually.
2. Assign a priority level: high, medium, or low. Priority determines which campaign is displayed when multiple campaigns are assigned to the same placement.
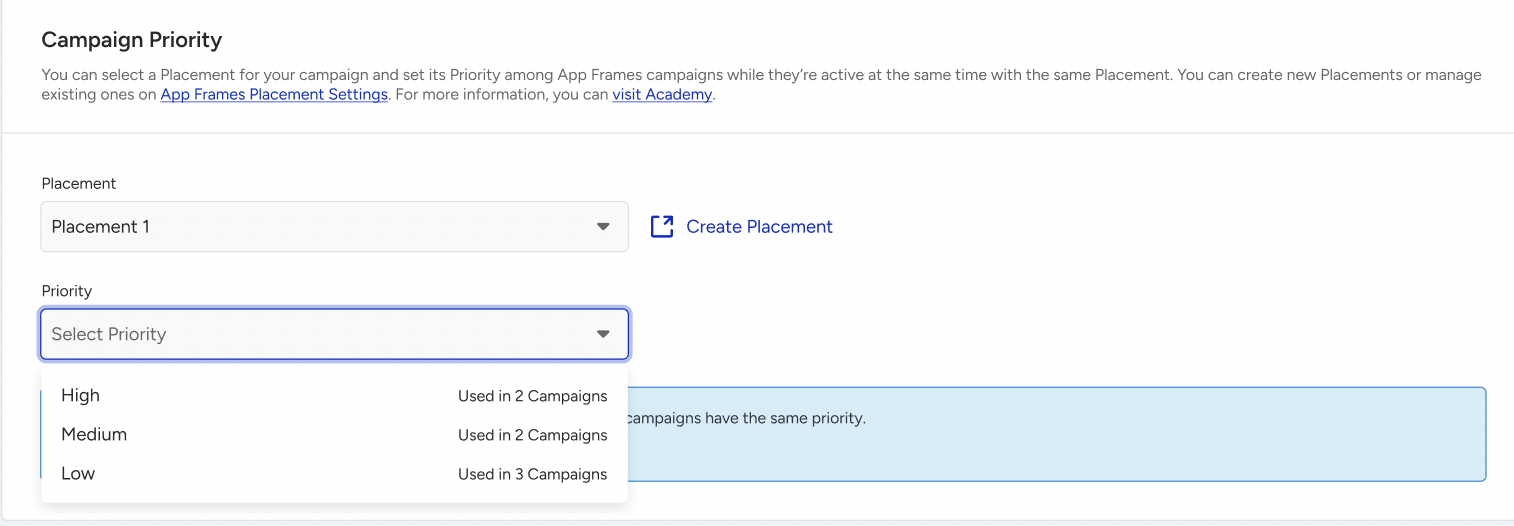
The placement dropdown also shows the number of active campaigns each placement contains, and the number of campaigns within that placement that use each priority level.
3. Next, create your variant. Each variant has a name and a traffic allocation percentage, and the total allocation across all variants must equal 100%.
You can use Countdown Bar and Sliding Banner templates in your app frame.
You can design your variant using the action builder, building content with Layout, Image, Text, Button, Countdown, and Coupon Code elements. You can customize each element's styling, spacing, fonts, colors, and deep link behavior.
You can duplicate or delete a variant.
4. Coupon preferences allow the campaign to remain active until all coupon codes across every variant have either been exhausted or expired.
.png)
Segments
Segments help you group your users to show your campaign. You can select one or more user groups, or display your campaign to all your users, and exclude your dynamic segments.
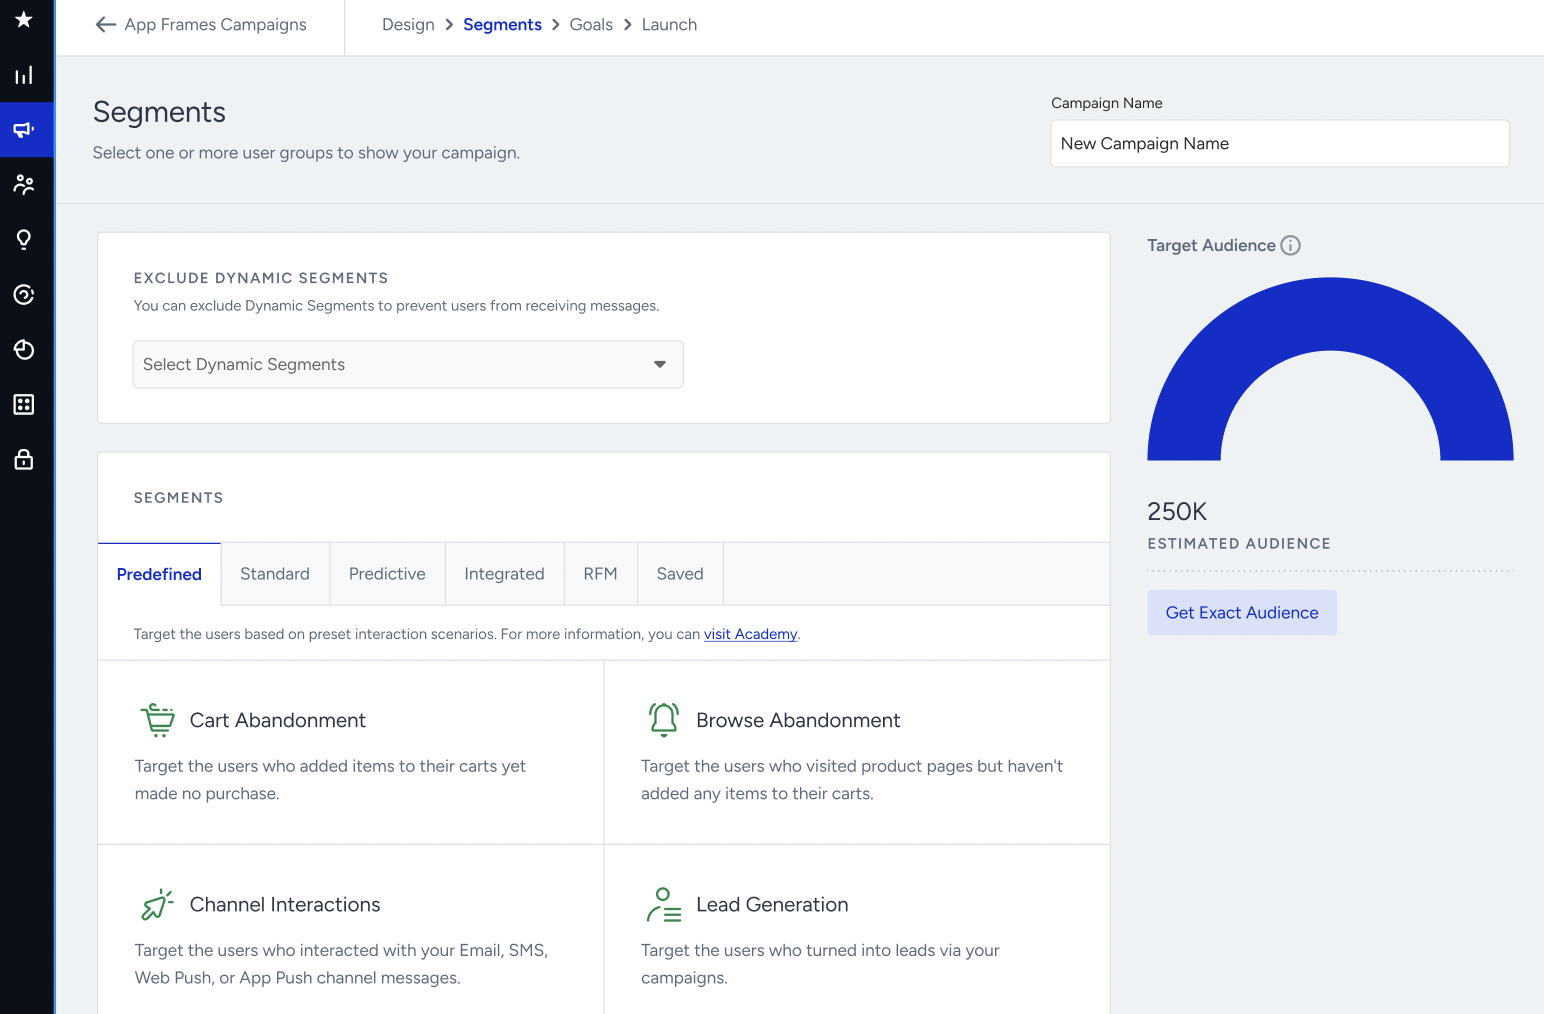
The available segments you can use in your App Frames are:
Predefined Segments: Target your users with ease based on pre-built use cases.
Standard Segments: Target your users based on their existing attributes or previous interactions.
Integrated Segments: Target your users based on their third-party segmentations.
Predictive Segments: Target your users with AI-backed predictions based on their behaviors and personal interests.
RFM Segments: Target your users based on their shopping recency, frequency, and monetary value.
Saved Segments: Target your users based on your previously used and saved segments.
Goals
Goals help you track the performance of your campaign. On this page, you can set goals and conversion durations. Both View-Through and Click-Through conversions are duration-based.
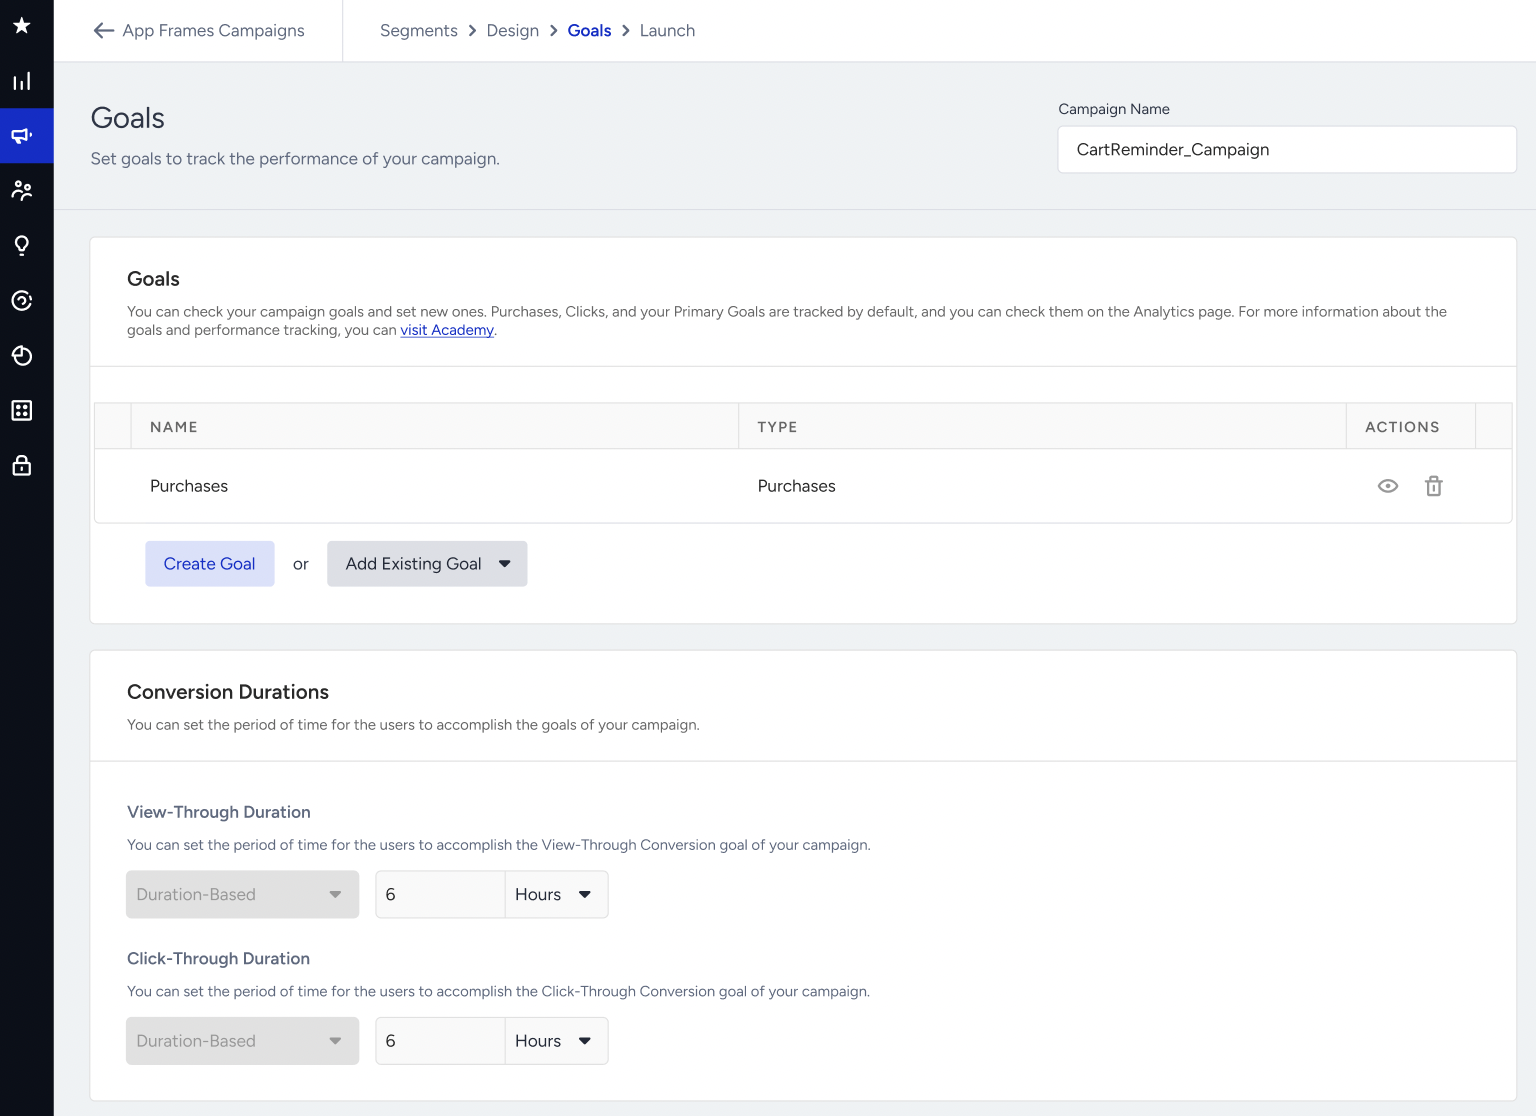
You can track your campaign goals, set new ones, or add the existing goals to this campaign.
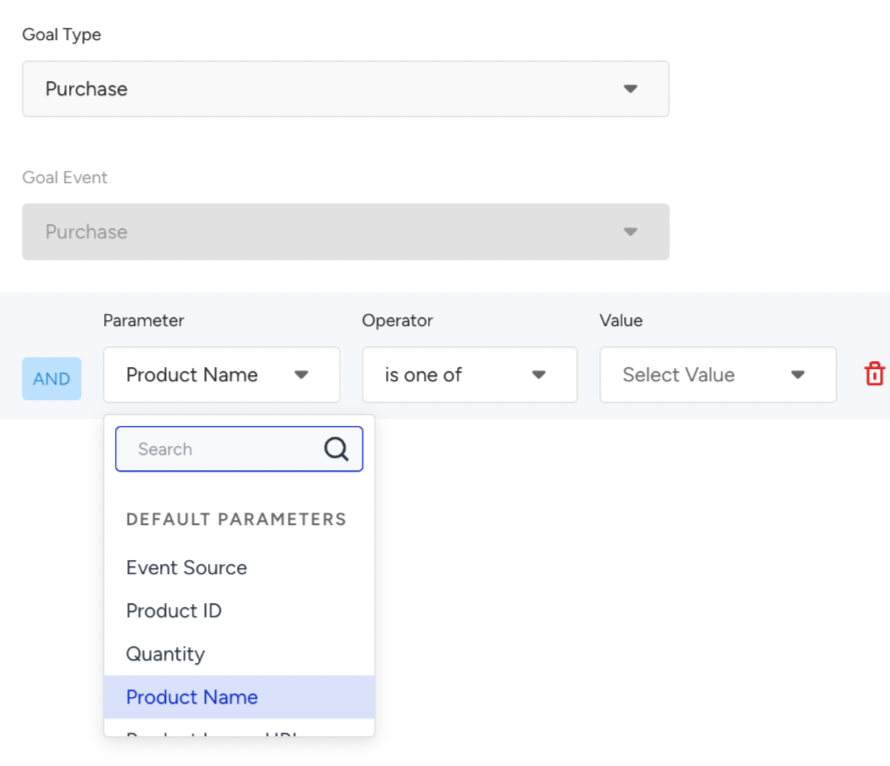
To create a new goal, click the Create Goal button, enter a goal name, and select your goal type as Purchase or Campaign.
If the goal type is Purchase, the Goal Event is selected as Purchase by default. To specify the types of purchases you want to track, use the Purchase event's event parameters.
Launch
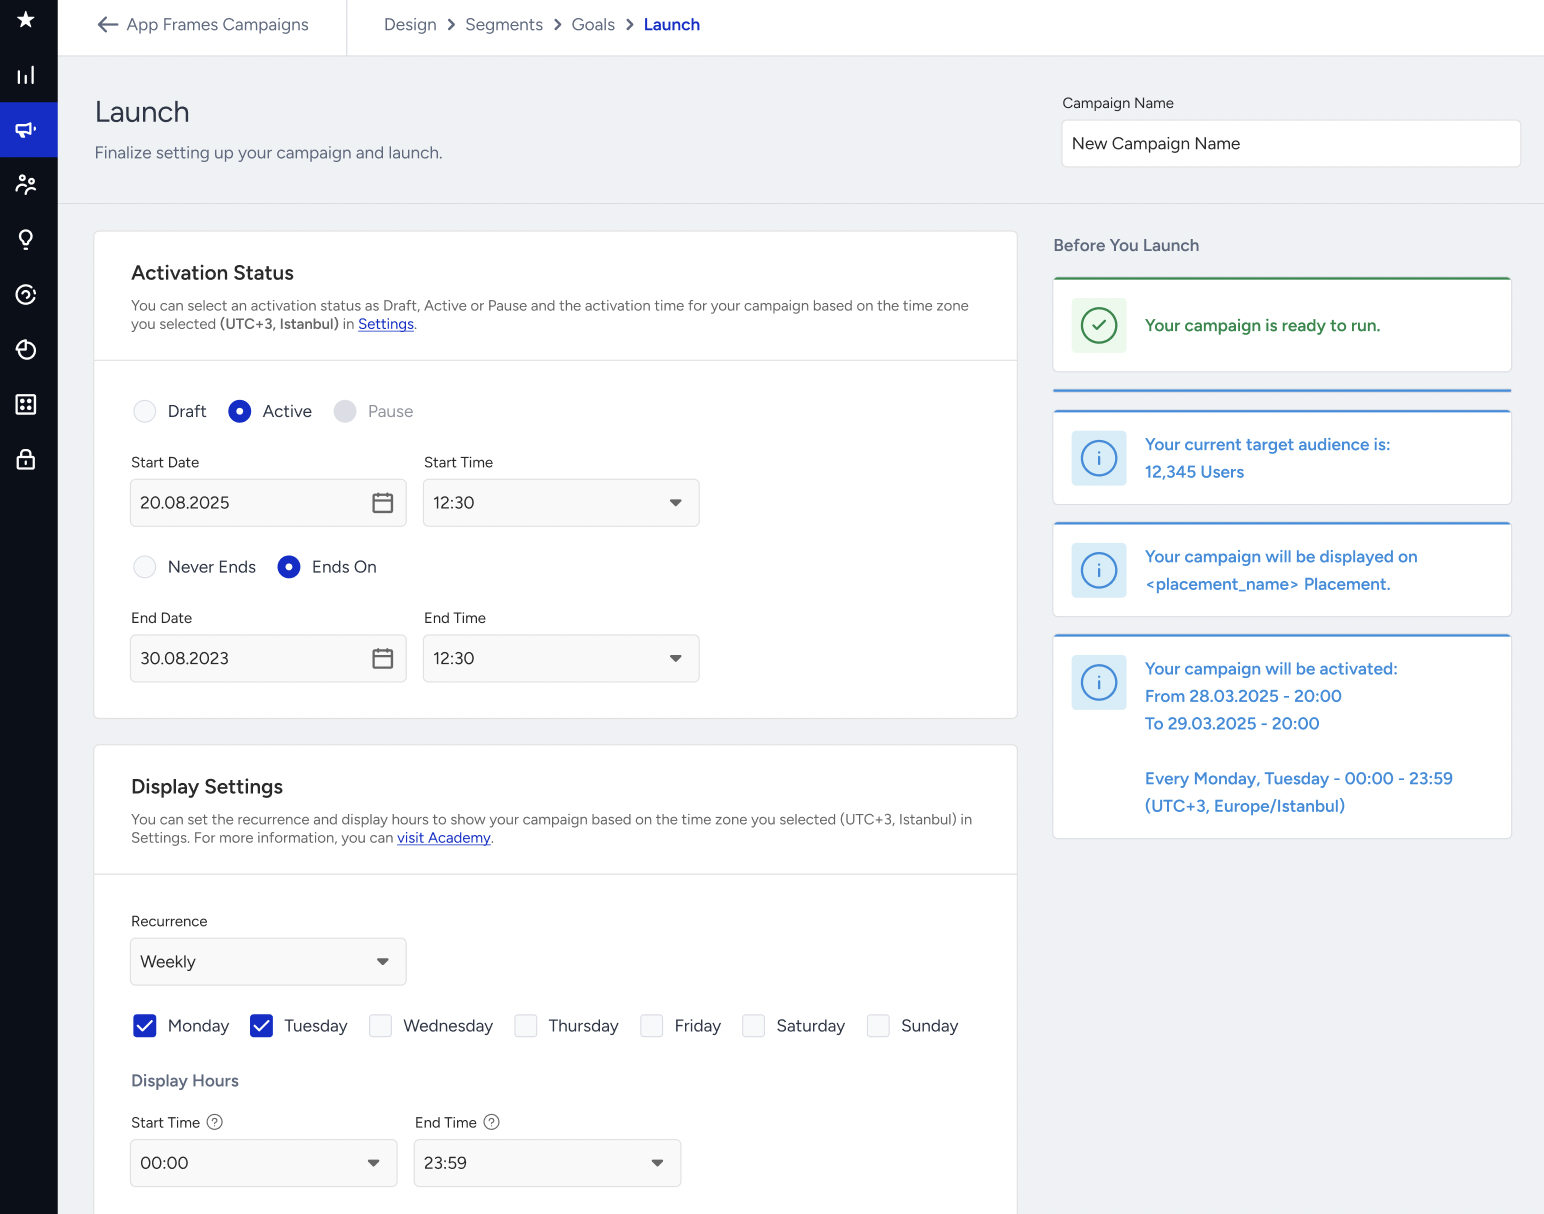
Launch helps you configure the Activation Status, Activation Date & Time, Display Settings, Campaign Group Access, Campaign Tags, and Webhook Callback for your campaign.
A Before You Launch panel on the right continuously validates the campaign and indicates whether it is ready to be launched. If any required configuration is missing, the panel lists the issues and provides links to the relevant setup step.
Analytics
Refer to App Frames Campaign-Level Analytics for campaign performance.