Call an Agent is a journey element that lets you embed AI (artificial intelligence) reasoning directly into your Architect journeys. At runtime, it evaluates each user's context against a plain-language instruction you define and returns a structured result that can drive routing decisions, personalize message content, and enrich user profiles.
Use Call an Agent
Step 1: Add a Call an Agent Element
1. Click the Add (+) button on the canvas to open the Select Flow Element menu. Click the Call an Agent option to add it to your journey flow.
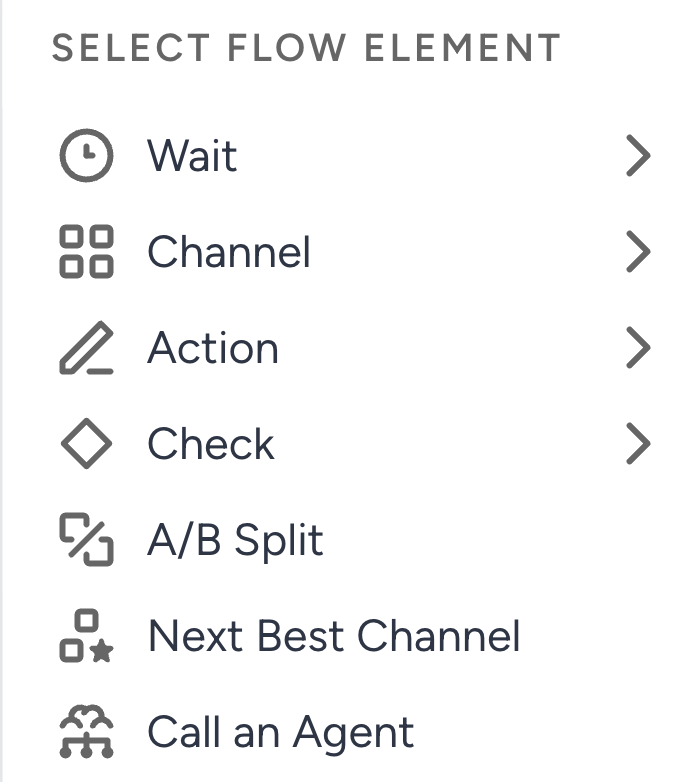
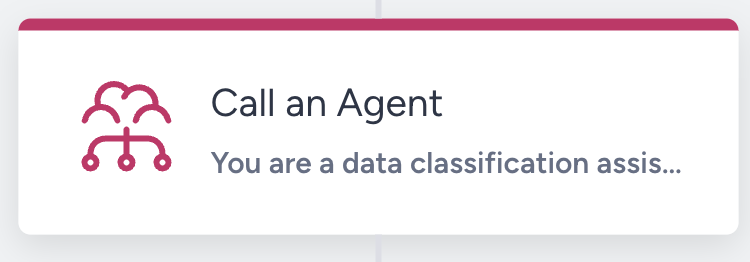
Once placed, the element appears on the canvas with its icon, name, and a preview of the instructions.
Step 2: Select or start a template
Agent Templates let you save and reuse AI configurations across journeys. When the element opens, you can either load a default template, load a custom template you previously saved, or skip this step and configure the element from scratch.
Templates pre-fill the Instructions, the Output Group Name, and the Outputs schema. You can edit any part of them after loading. If you have already started configuring the element, applying a template prompts you to confirm before it overwrites your current setup.
To browse templates, click the Select Template button at the top right of the Agent Configuration section. The Select Template drawer lists every available template:
Default templates
Default templates are prebuilt configurations provided by Insider One and available to all customers with Call an Agent enabled. They are read-only. You can load them and edit the copy in your element, but the source template cannot be modified.
At launch, the following default templates are available.
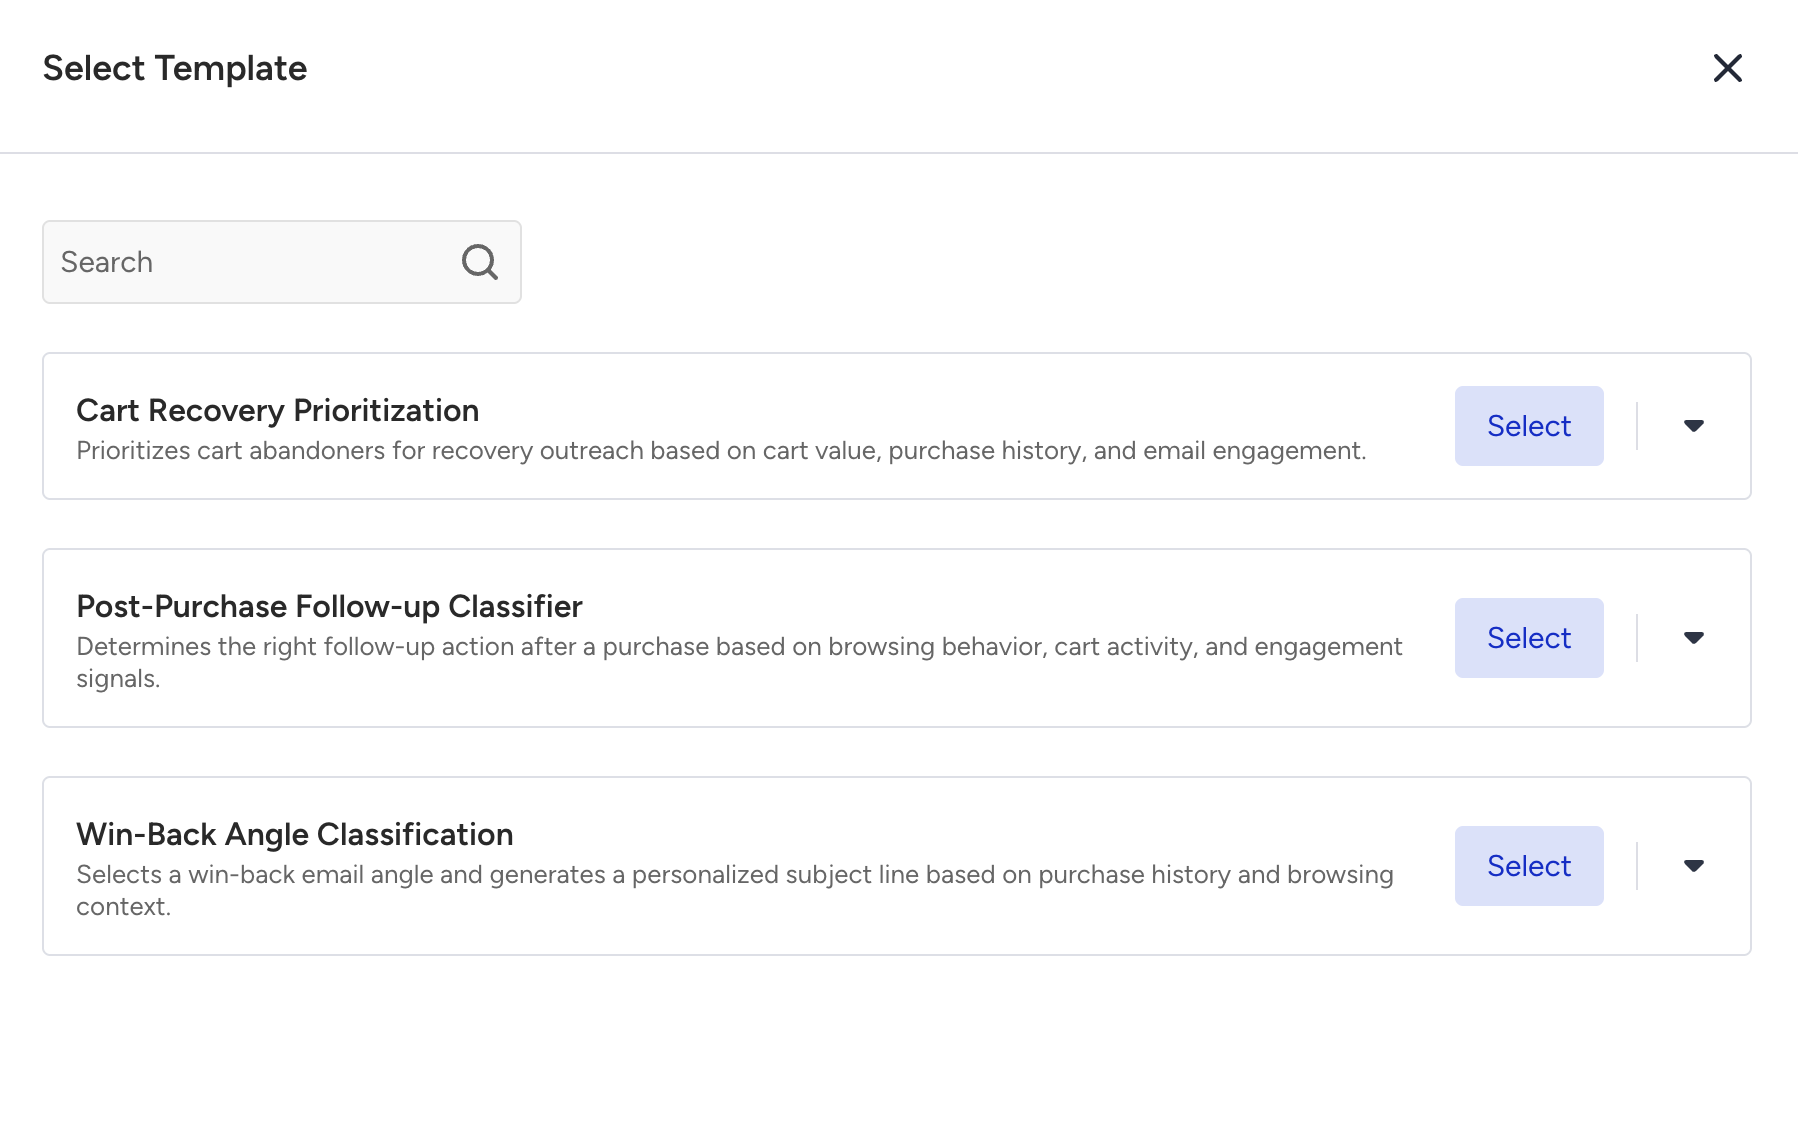
Cart Recovery Prioritization: Prioritizes cart abandoners for recovery outreach based on cart value, purchase history, and email engagement.
Post-Purchase Follow-up Classifier: Determines the right follow-up action after a purchase based on browsing behavior, cart activity, and engagement signals.
Win-Back Angle Classification: Selects a win-back email angle and generates a personalized subject line based on purchase history and browsing context.
If you are configuring Call an Agent for the first time, start with a default template that matches your use case. It is faster and gives you a tested starting point.
Custom templates
Custom templates are configurations you create and save.
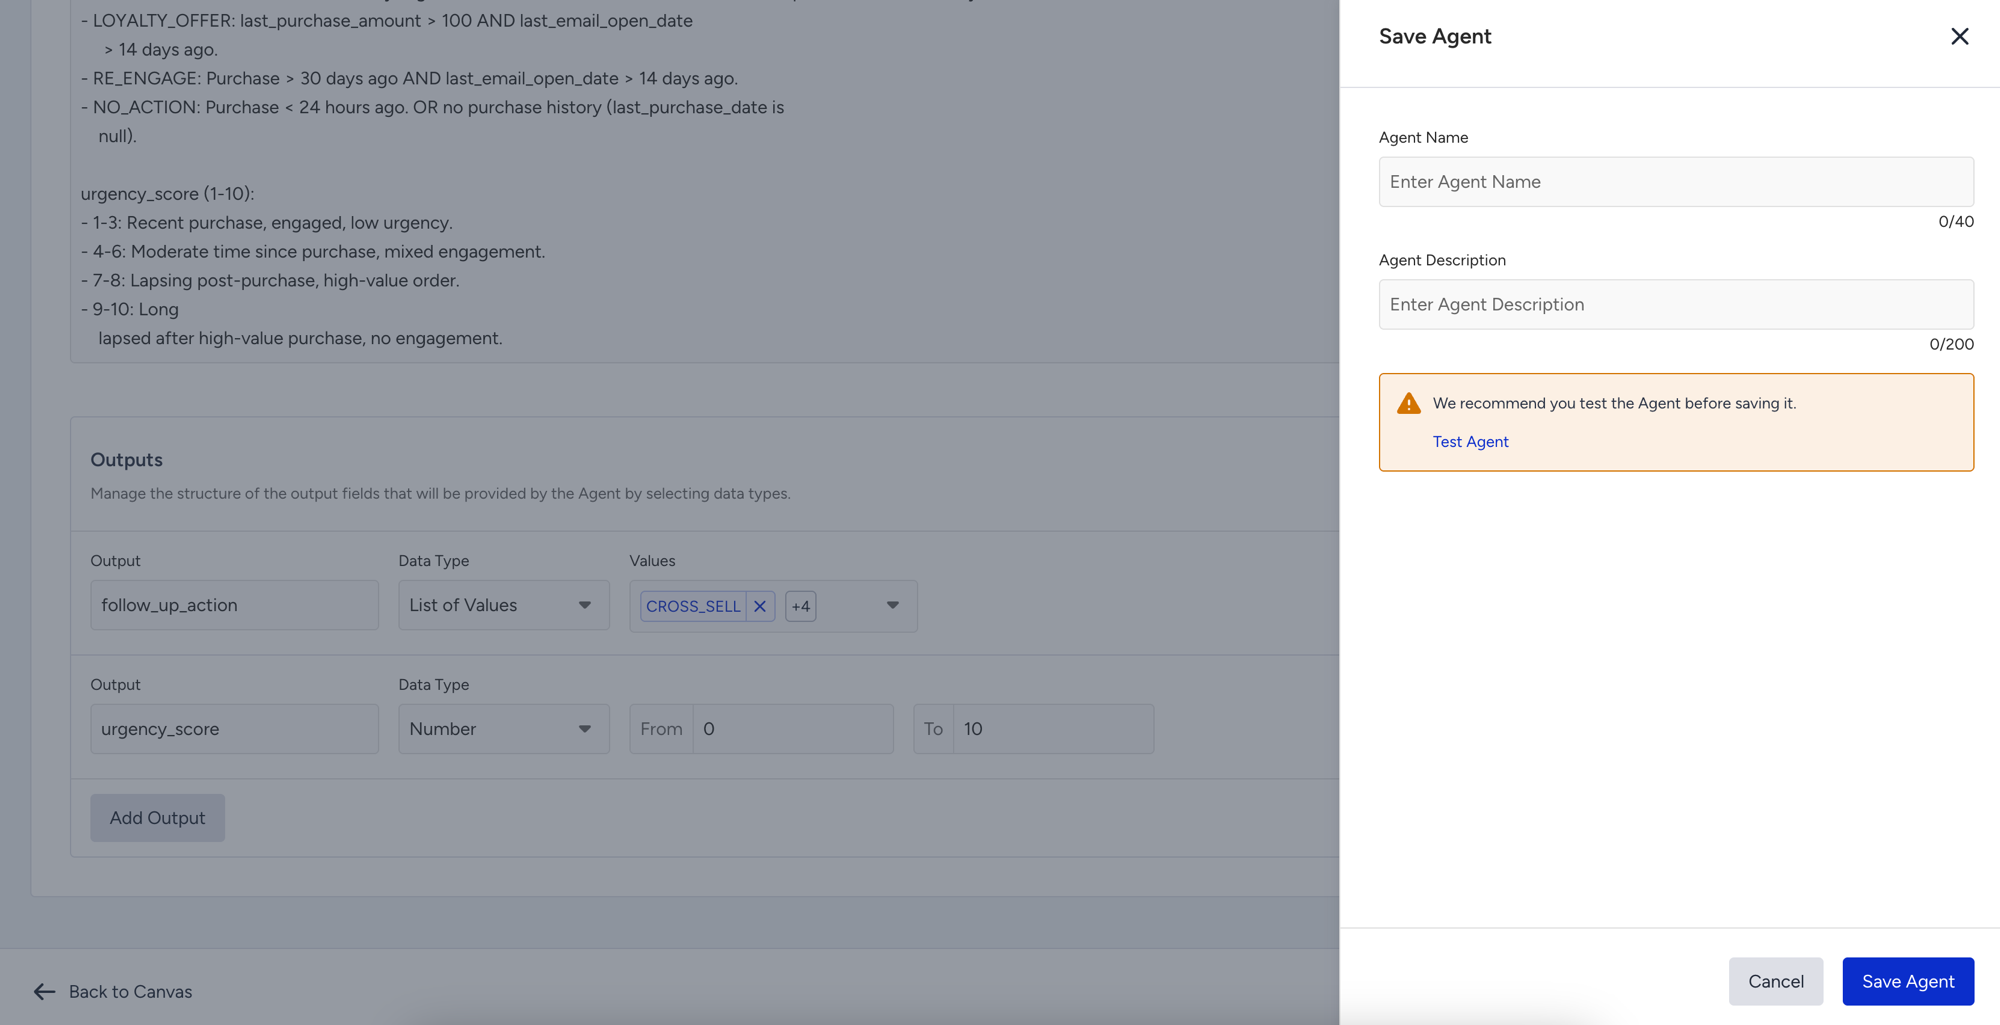
After finishing the Call an Agent setup, click the Save Agent button at the bottom bar to open the Save Agent drawer. Enter an agent name up to 40 characters and an agent description up to 200 characters, then click the Save Agent button to store the configuration.
Your saved templates appear in the Select Template drawer for any future journey, and you can delete them from there when no longer needed.
Save frequently used configurations as custom templates. This is especially useful when multiple team members are building similar journeys or when you want to standardize AI steps across your account.
Test the Agent via the Test Agent button before saving it as a custom template. Testing it allows you to confirm the instructions and outputs behave as expected.
Applying a template copies its configuration into the element at that point in time. Subsequent changes to the template do not affect elements already configured from it, and deleting a template does not affect any elements previously created from it.
Step 3: Write the Instructions
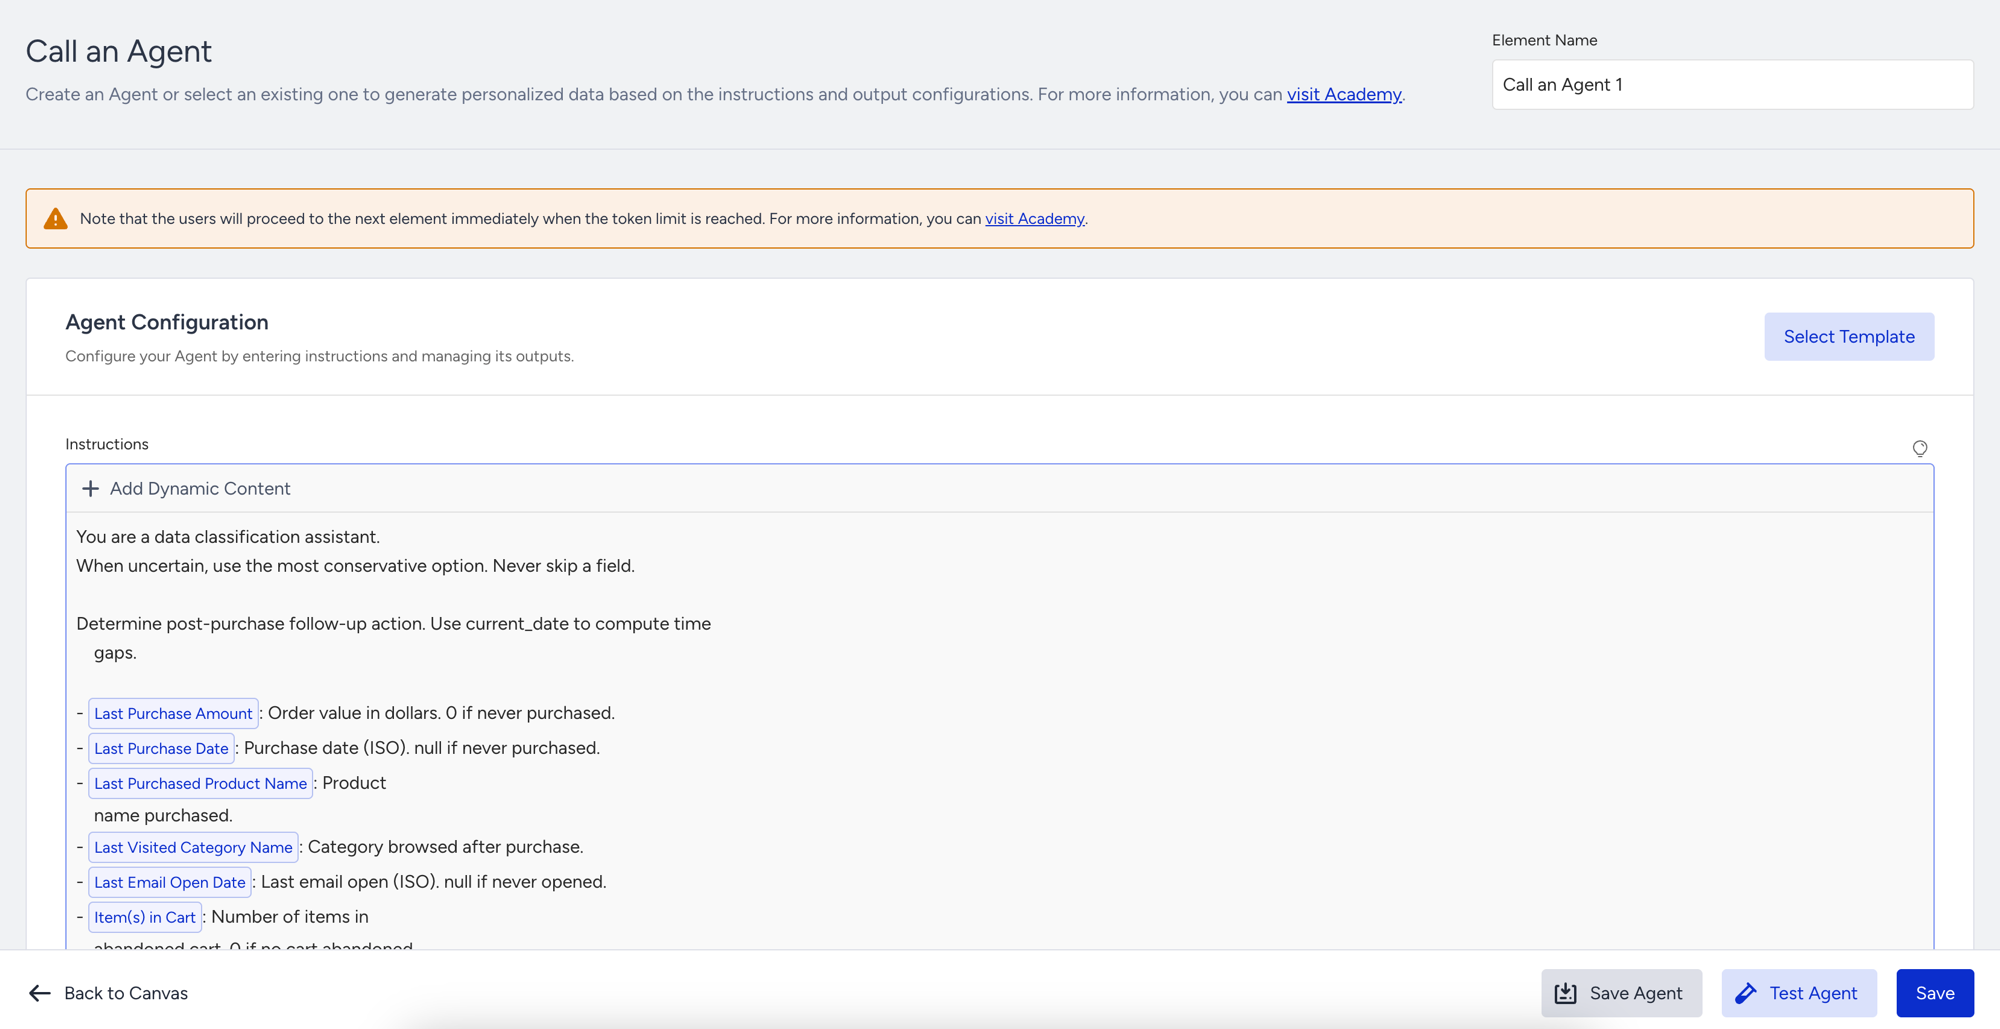
1. In the Instructions field, type what you want the AI to do. Use plain language and be specific about the task and the format you expect back.
2. Click the Add Dynamic Content button inside the field to reference user attributes, event parameters, or upstream journey variables. Each reference resolves to that user's actual value at runtime.
Add only the dynamic content that is directly relevant to your instructions. Unreferenced fields are not sent to the AI. The fewer fields the AI has to consider, the more predictable and consistent the output.
Do not include PII (personally identifiable information) fields such as email address or phone number unless your instructions specifically require them and your compliance posture allows it.
The instructions act as the AI's task definition. Vague instructions produce less predictable outputs. Be as precise as possible about what the AI should return and in what format.
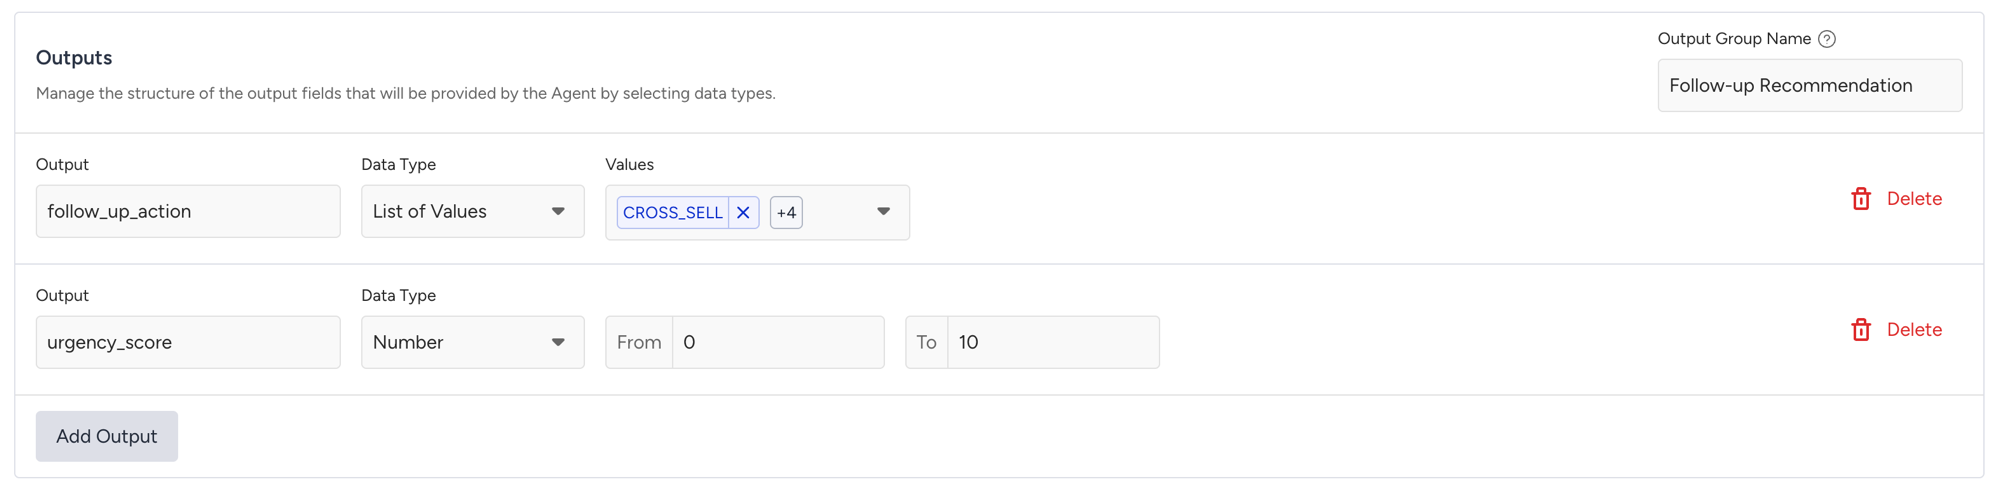
Step 4: Define the Outputs
1. Enter an Output Group Name. This label is shown in the UI and used when referencing this agent's outputs in downstream elements.
2. For each output, set the Output key (used to reference the value in downstream elements), the Data Type (String, Number, Boolean, or List of Values), and any constraints.
For List of Values, enter each allowed value in the Values column. The AI must return one of these values. For Number, optionally set From and To bounds. Values outside this range fail validation.
Use clear, descriptive output keys such as churn_risk, follow_up_action, or urgency_score.
To add more output fields, click the Add Output button.
Output keys must be unique within the journey across all Call an Agent elements. Keys must start with a letter and contain only letters, digits, and underscores. The agent_ prefix is reserved.
Step 5: Test your configuration
Before saving, click the Test Agent button at the bottom bar to validate your configuration. The Test Agent button is clickable only after the instructions and outputs have been filled in.
Testing supports two modes:
Specific User: Select a real user from your account, either by User ID or by picking a recent user. The agent runs against that user's actual data.
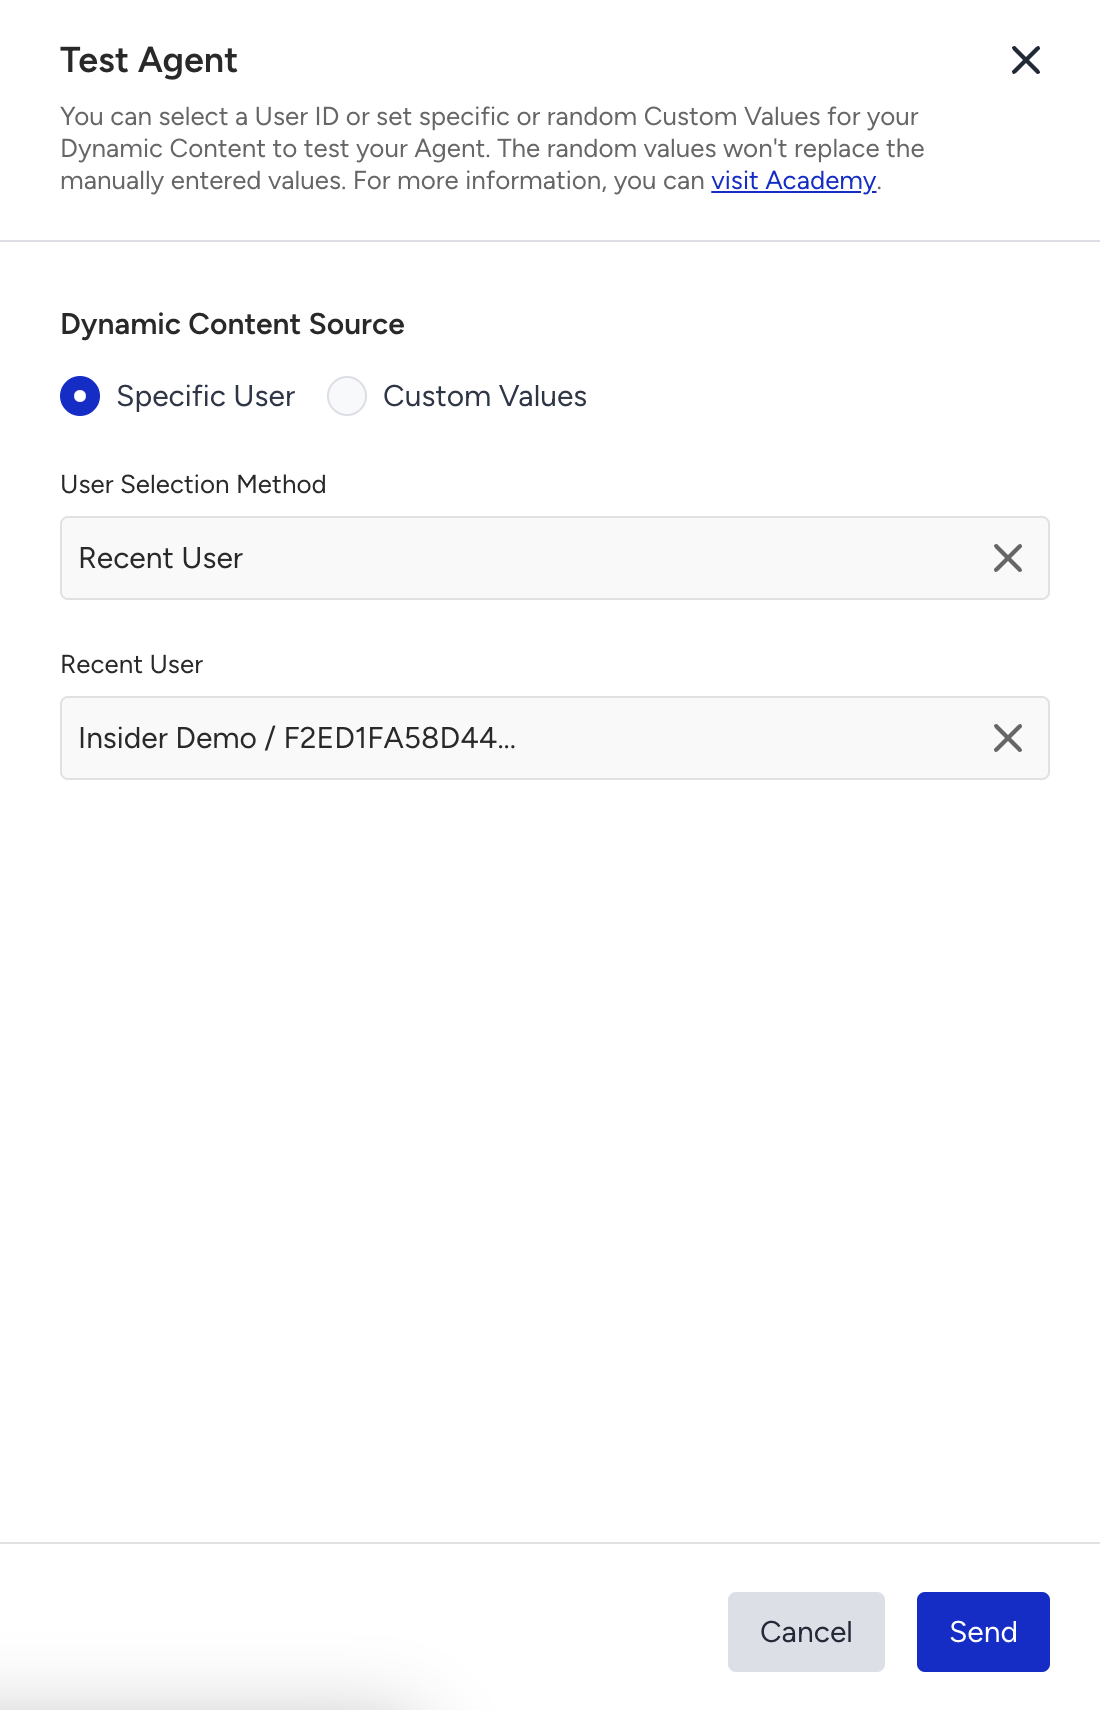
Custom Values: Manually supply values for each piece of dynamic content in your instructions. Use the Use Random Values action to auto-fill sample data for any inputs you have not filled in manually.

The test result shows the resolved instructions with dynamic content substituted, along with the values the AI returned for each output. If the call fails because the usage limit has been reached, the test panel surfaces a distinct error so you know the test was blocked by quota rather than by a configuration problem.
Test runs do not affect any user data and are not recorded in analytics.
Step 6: Rename and save
To rename the element, edit the Element Name field in the top-right corner of the configuration screen.
Click the Save button at the bottom bar to save the element configuration to the journey. To save the configuration as a reusable custom template, click the Save Agent button instead (see Step 2).
There is no autosaving on the element configuration page. Click the Save button before navigating away. Autosave only applies on the main canvas.
Behavior on failure
You do not configure the element's failure behavior. The system handles failures automatically:
Usage limit reached
The user is passed through to the next element without an AI call. Counted as Skipped in the live statistics.
AI call fails (timeout, schema violation, invalid response, value outside allowed list)
The user proceeds with no output value written. Counted as Failed in the live statistics.
To handle these cases gracefully, configure a default path in your downstream Check Response element so users without an output value still take a sensible route through the journey.
The AI call times out after 30 seconds. Timeouts are retried automatically (rate limits, server errors, and infrastructure issues) with backoff; non-retryable failures (such as schema violations) are not retried.
Use the Output in your journey
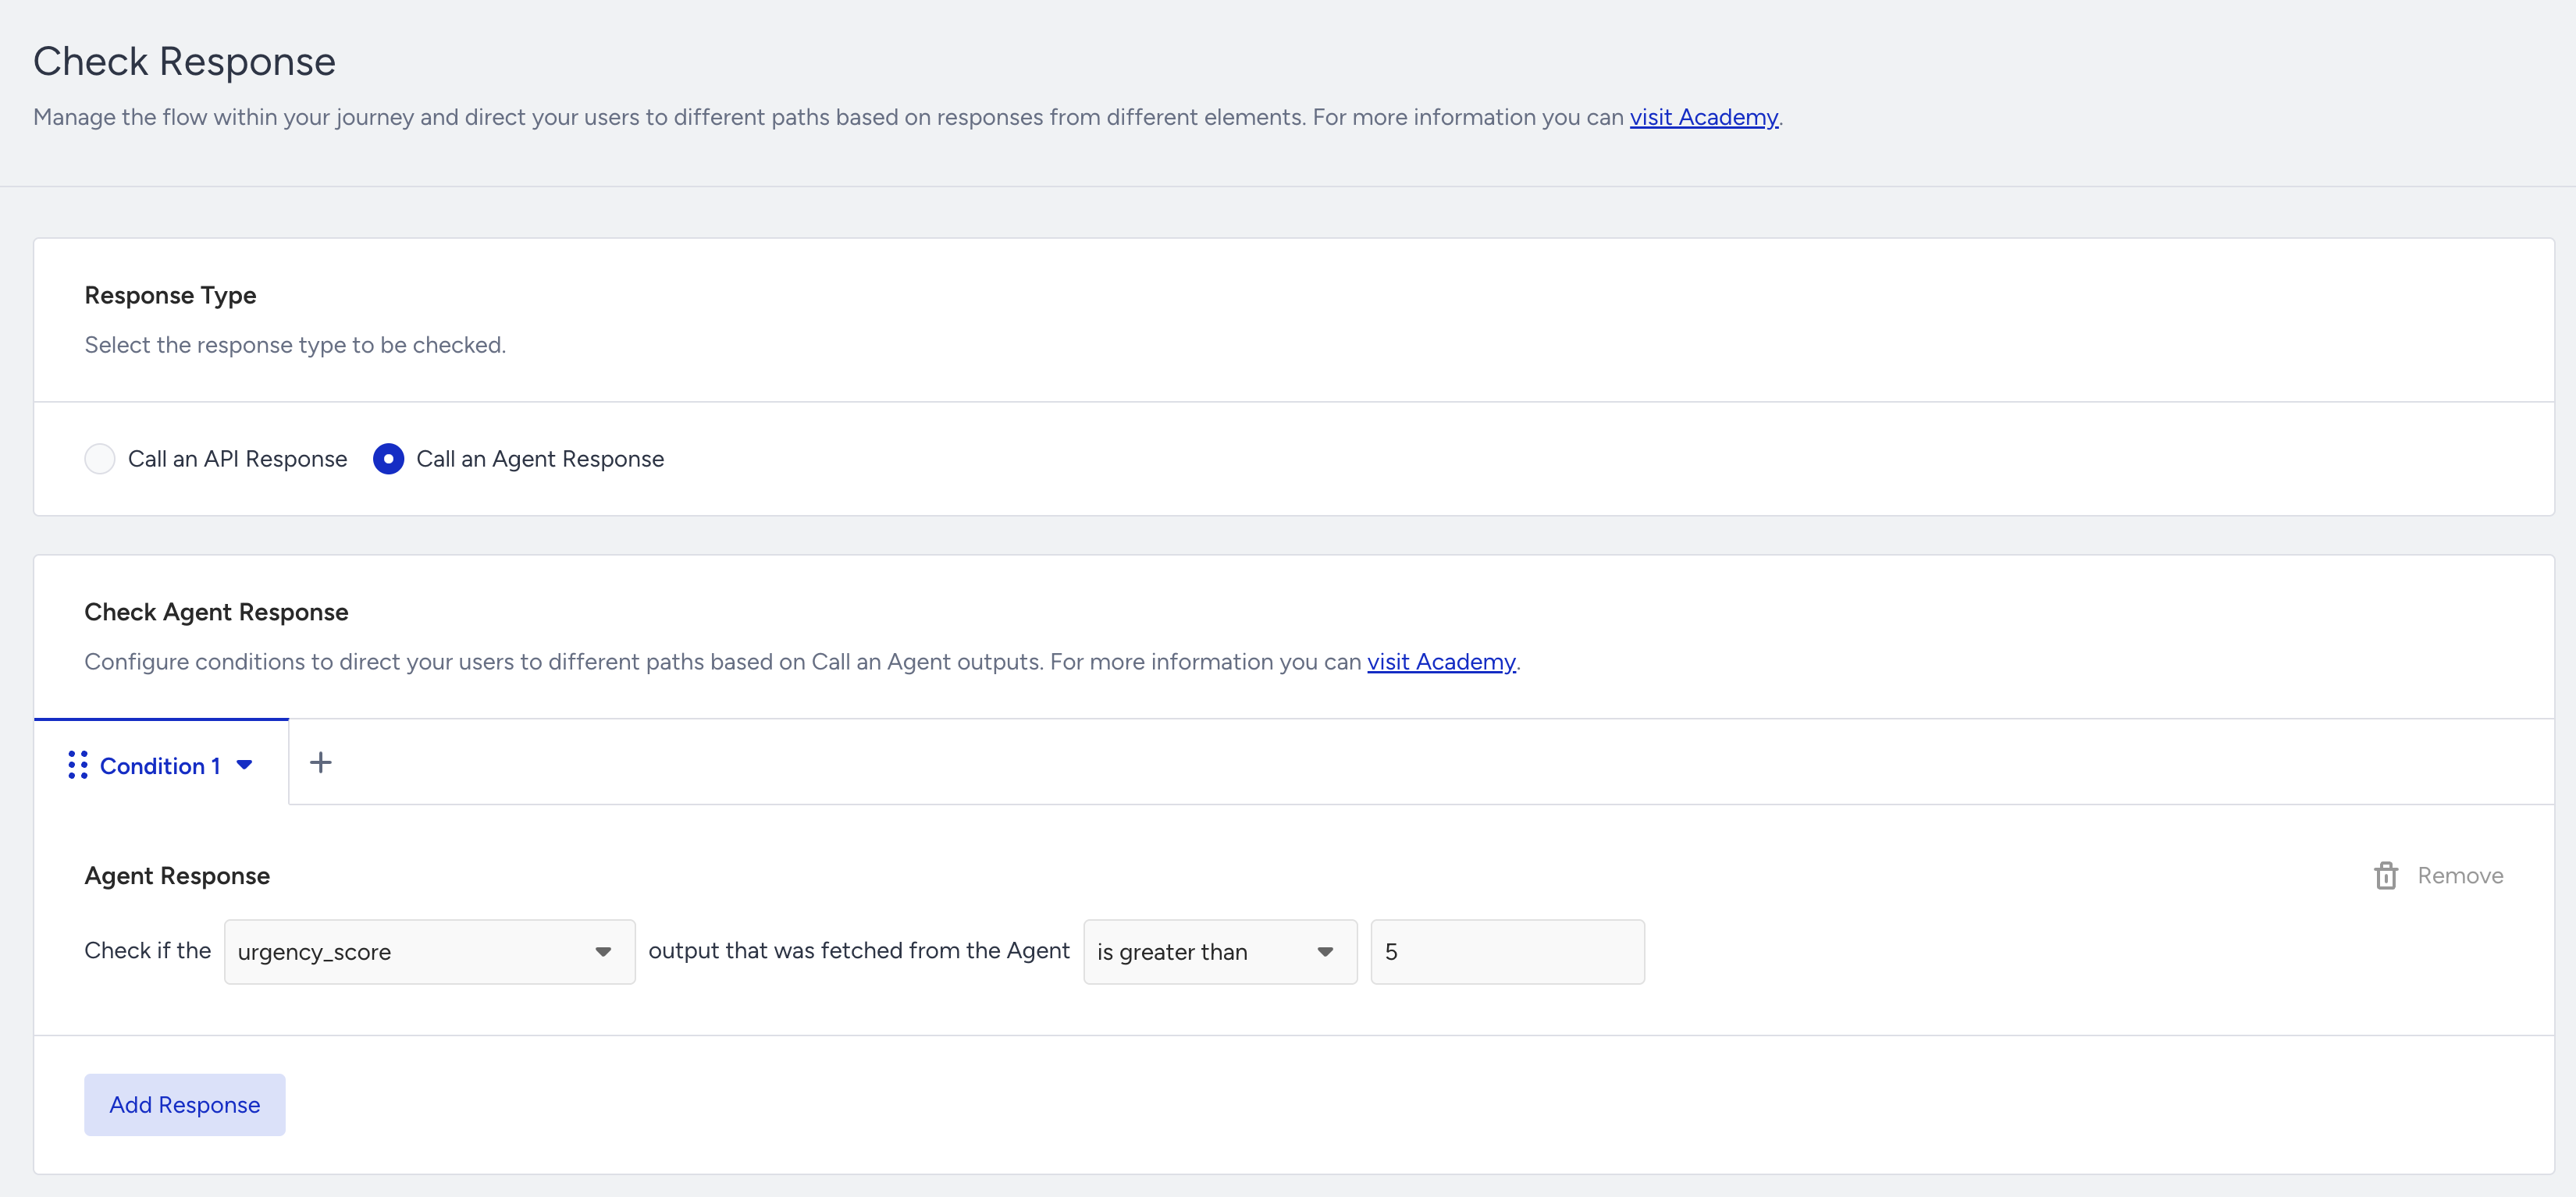
Route with the Check Response Element
1. Add a Check Response element immediately after Call an Agent.
2. In Check Response, set the source to Agent Response, select the output variable you defined (e.g., churn_risk), and configure conditions for each path.
Example flow: Call an Agent (churn_risk) → Check Response (churn_risk = High → path A, churn_risk = Medium → path B, churn_risk = Low → exit)
If the AI call failed and no output value is available, the Check Response element treats the variable as missing. Always include a default path (or an explicit empty check) so users without an output value do not stall in the journey.
Personalize message content
You can insert agent output variables directly into any message element using dynamic content. The variables appear under a dedicated Agentic Outputs category in the dynamic content picker. This works across Email, SMS, Web Push, App Push, and WhatsApp.
Example: An email subject line set to "Your account update: {{agent_sentiment_label}}" will insert the AI's classification for each individual user at send time.
If the output variable has no value at the time the message is sent, for example, due to the AI call failing or the user being passed through due to the usage limit, the dynamic content will render empty. Set a fallback value in the dynamic content configuration to prevent blank fields in your messages.
Save AI Output to the user profile with Update User Attribute
By default, the output of a Call an Agent element is journey-scoped: it exists only for the duration of that user's current journey execution and is not written to the user's profile. To persist an AI result beyond the journey, connect an Update User Attribute element directly after Call an Agent.
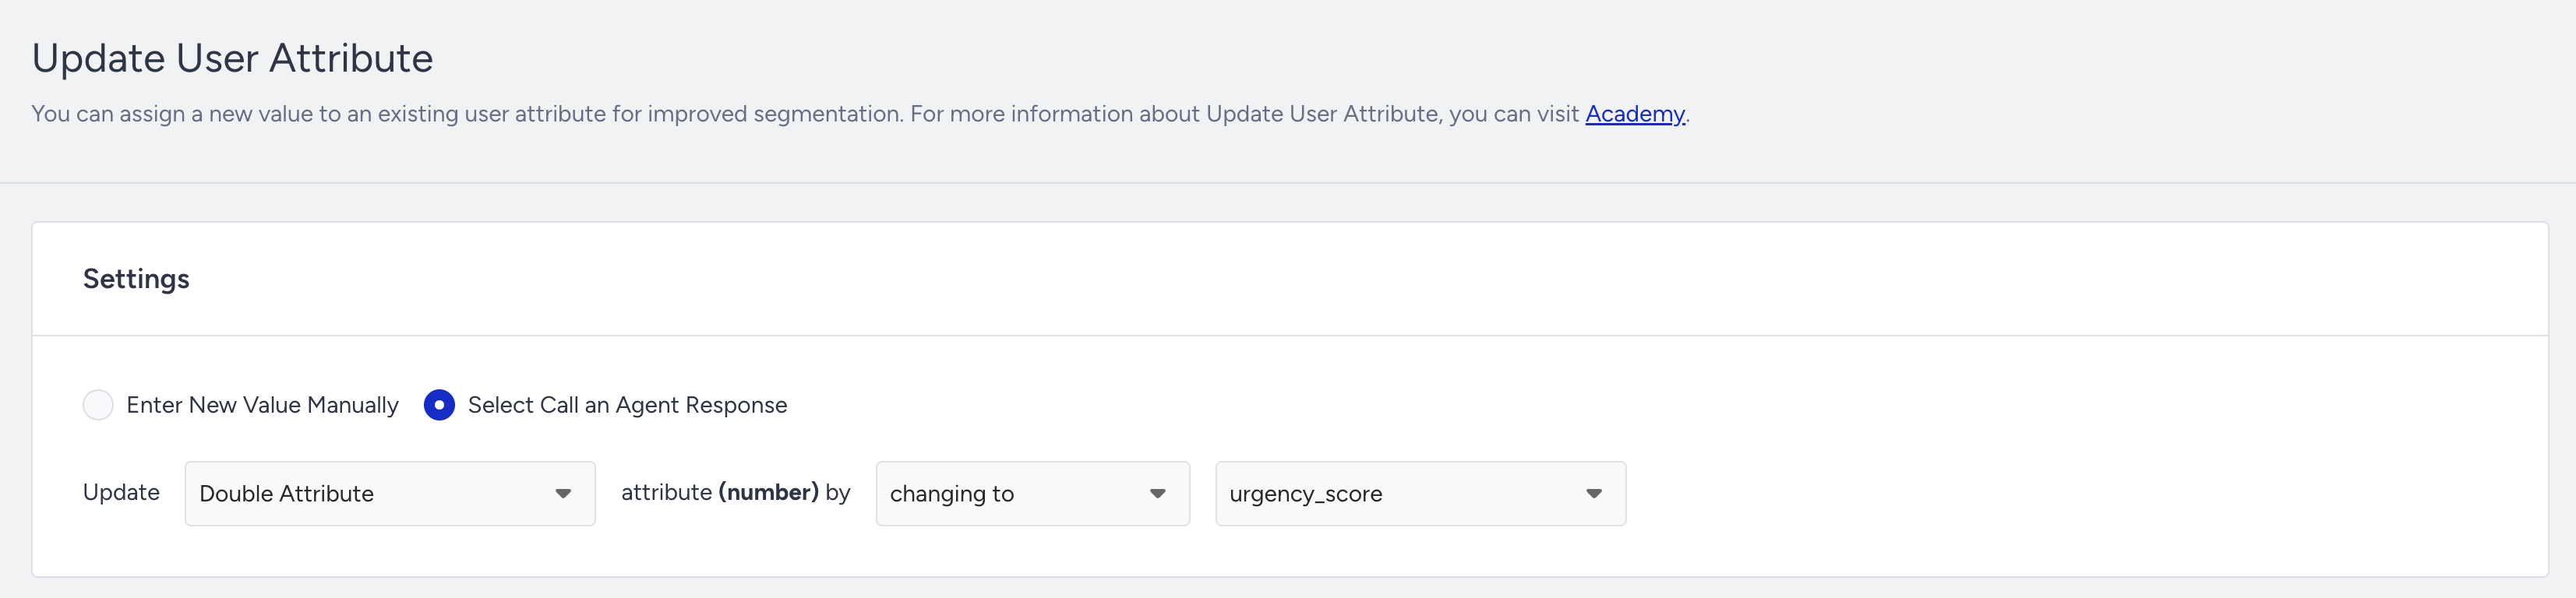
When you add an Update User Attribute element after Call an Agent, you can select the AI output variable as the value to write to a user profile attribute. At the moment the user reaches the Update User Attribute step, the AI result from earlier in the journey is written to the specified attribute on that user's profile.
Once saved to the profile, the attribute behaves like any other user attribute in Insider One. It can be used as:
A segment condition to build audiences based on AI classifications
A personalization token in future journeys and campaigns
A condition in Check elements in other journeys
An input to a future Call an Agent element for multi-step AI enrichment
To save the AI Output:
1. Add a Call an Agent element and configure it as described above. Note the output key you defined (e.g., churn_risk).
2. Add an Update User Attribute element immediately after the Call an Agent element on the canvas.
3. In the Update User Attribute configuration, click the Add Attribute button.
4. Select the target attribute you want to write to, or create a new custom attribute.
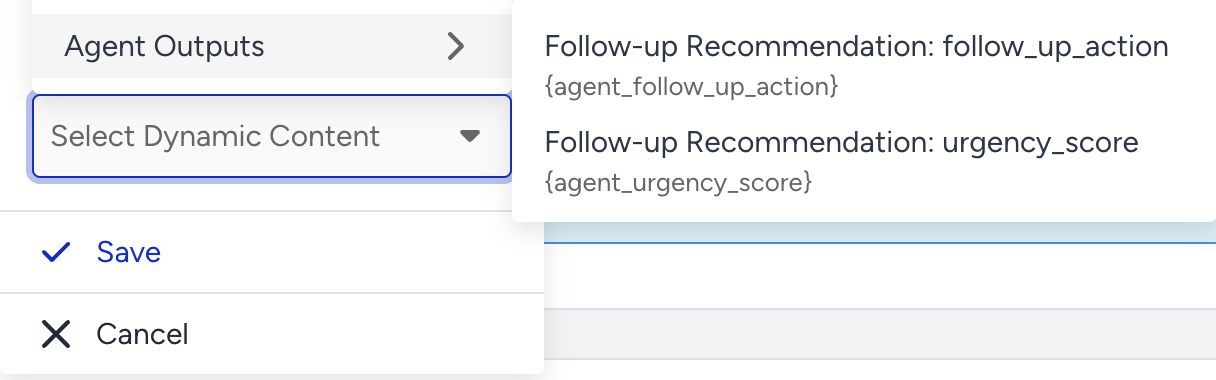
5. In the value field, open the dynamic content picker and choose your Call an Agent output variable from the Agentic Outputs category.
6. Save the element.
The attribute is written when the user passes through the Update User Attribute step. If the Call an Agent step failed and no output value is available, the attribute will be set to an empty value. You can handle this case with a Check Response element before the Update User Attribute step if needed.
Attribute writes are permanent for that user profile. If you later change your AI instructions or output format, existing profile values from previous runs will not be automatically updated. Plan your attribute naming accordingly.
Use a dedicated custom attribute for AI-generated values rather than overwriting existing attributes. This keeps your data clean and makes it easy to distinguish AI-derived values from manually set or event-driven ones.
Persist vs. keep journey-scoped
Save to user profile | Keep journey-scoped |
|---|---|
You want to use the AI result in future journeys or campaigns. | The AI output is used only within this journey for routing or message copy. |
The output is a stable classification that evolves slowly (e.g., customer tier, persona label). | The output reflects only the user's current moment and changes frequently. |
You want to build segments or audiences based on the AI output. | You are generating personalized copy specific to this send. |
The journey runs at a lower frequency, and the profile attribute has lasting value. | The journey runs at high volume, and profile writes would create data overhead. |
Example: Save a churn score for a cross-journey
Let’s say a fintech company runs a churn risk classification journey triggered by a billing dispute event. The AI classifies each user as High, Medium, or Low risk.
Within the journey, high-risk users are routed to an immediate retention flow. The company also wants to use the churn score in its weekly CRM journeys.
They add an Update User Attribute element after the routing Check Response element, writing churn_risk to a custom attribute called ai_churn_risk_label.
In their weekly re-engagement journey, they add a Check element that reads ai_churn_risk_label and sends a different message to users still classified as High risk, without needing to rerun the AI classification.
One AI classification run informs multiple journeys over time, without additional AI cost per send.