Update User Attribute is an action element type that lets you perform actions on users. It assigns a predefined value to the selected attribute for each user who comes to this element in the journey.

Read more on default events and attributes.
This guide explains the following concepts:
You can use this action element to update a user's existing default or custom attributes, except for opt-in attributes, which can be updated only when the user updates them.
When a user reaches the Update User Attribute element in the journey, it updates the value of the specified attribute in the database. If this attribute does not have a value, it gets the predefined value.
Use cases
- You can assign values based on users' preferences and past behaviors. For example, if a user watched “horror” movies more than three times in the last 2 months, you can update this user’s movie genre preference as “horror”. In this case, genre is an attribute, and horror is the attribute value.
- You can score users based on actions such as clicking an email, visiting a product page, adding items to the cart, or making a purchase. You can use these scores as campaign or journey segments.
- You can assign attribute values to users who have not purchased before and share this data with your call center via Call an API to take action on your end.
Requirements
You should have the required attribute created for your account. If you want to create an attribute, contact the Insider One team for further information.
Use Update User Attribute
Once you complete the requirements for this action element, you can use it in your journeys following these steps:
1. Click the + (plus) button on the canvas and select Action > Update User Attribute.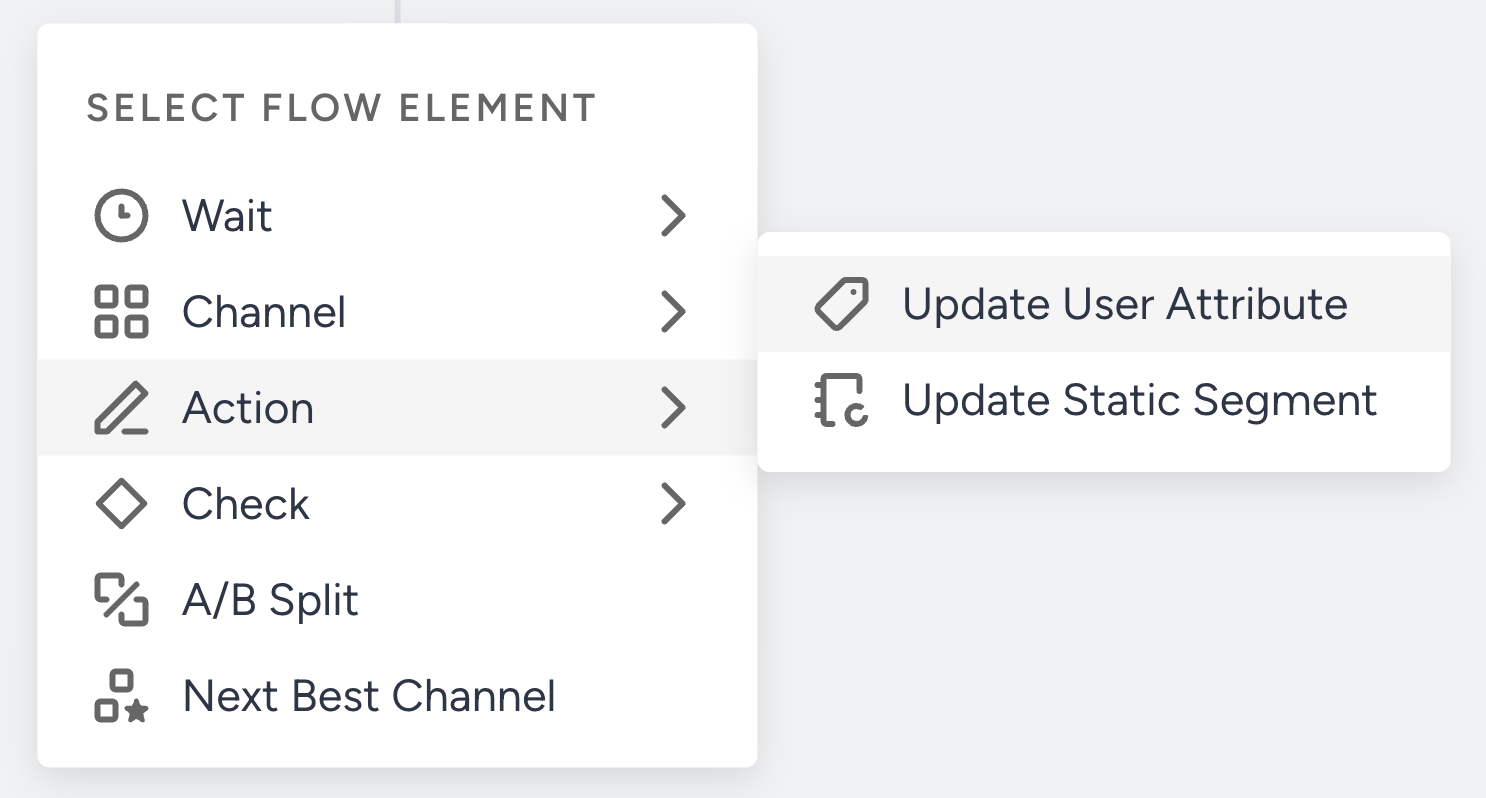
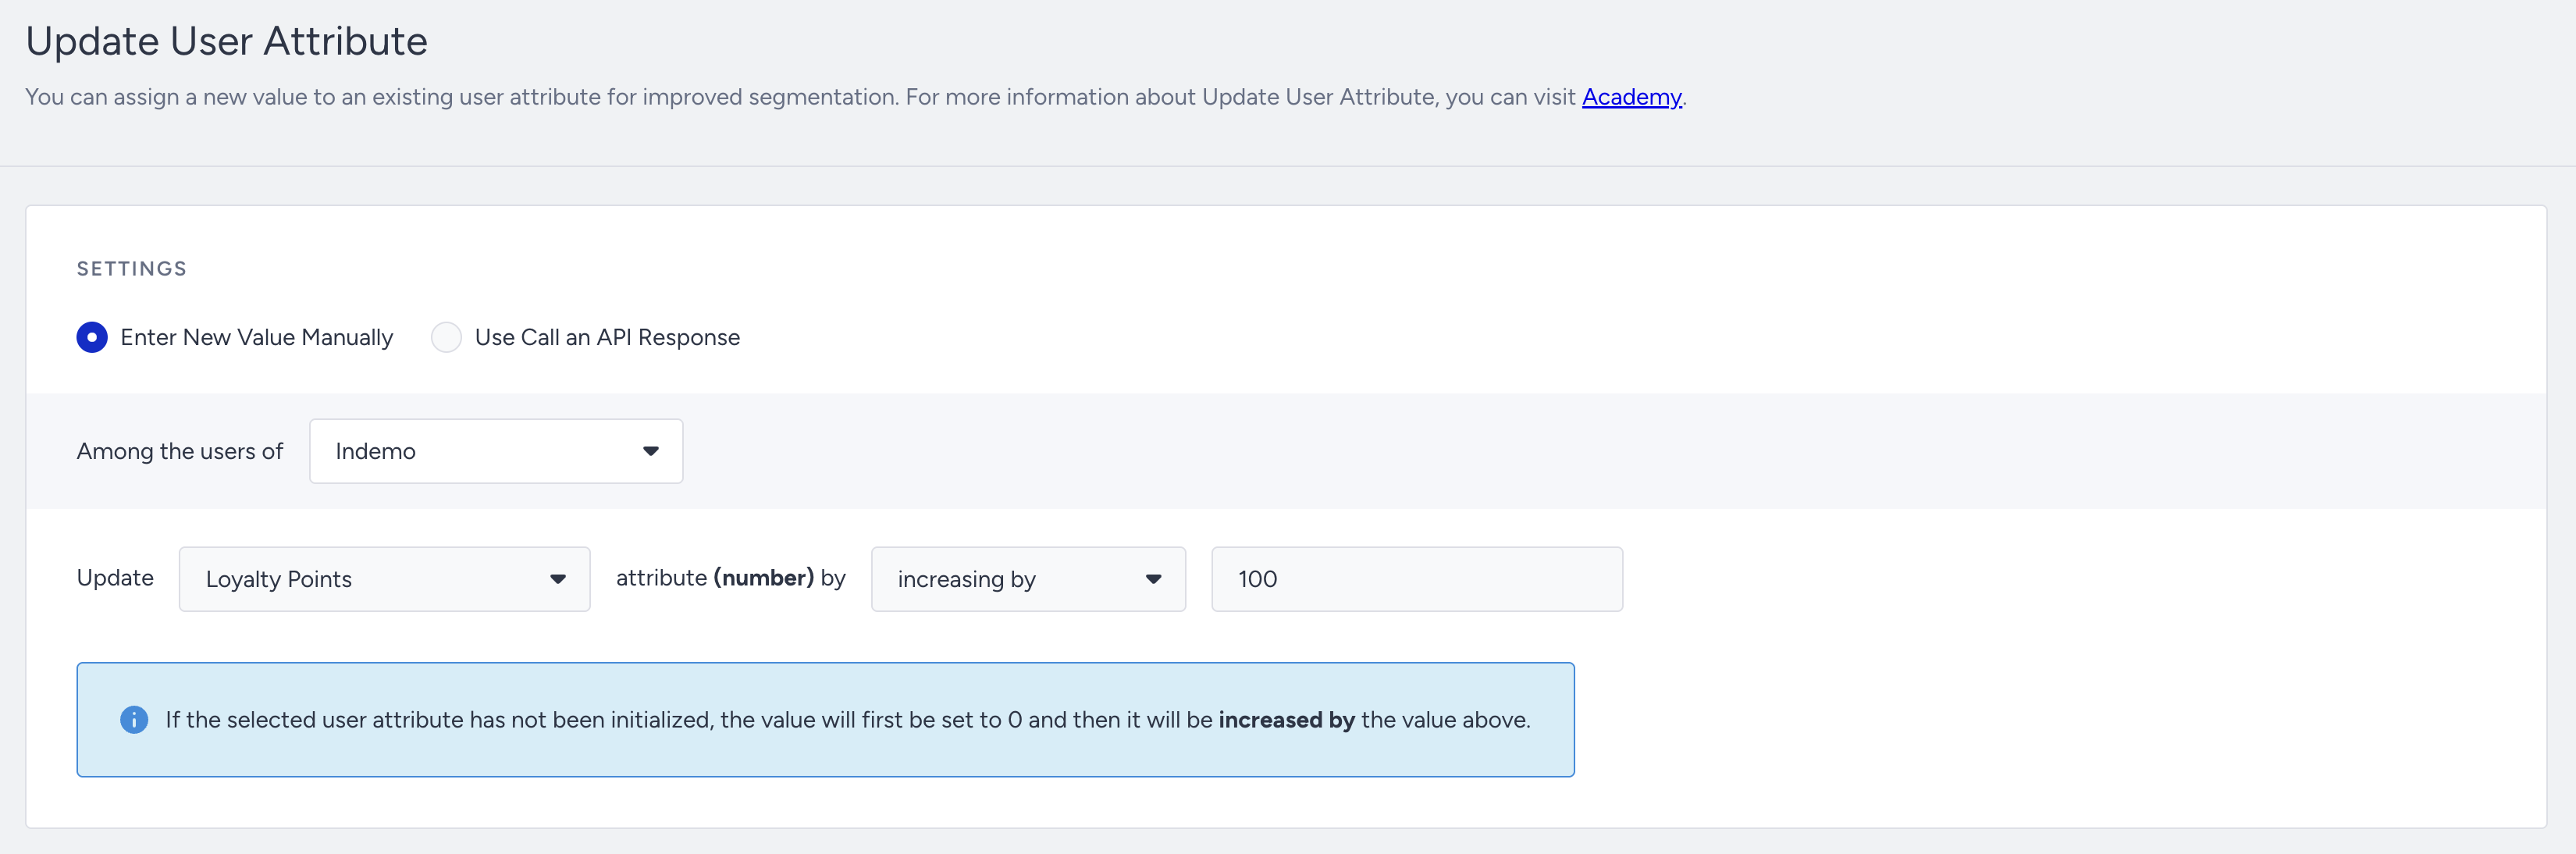
2. Click the Update User Attribute element to start editing it.
3. Select the attribute that you want to update in the dropdown.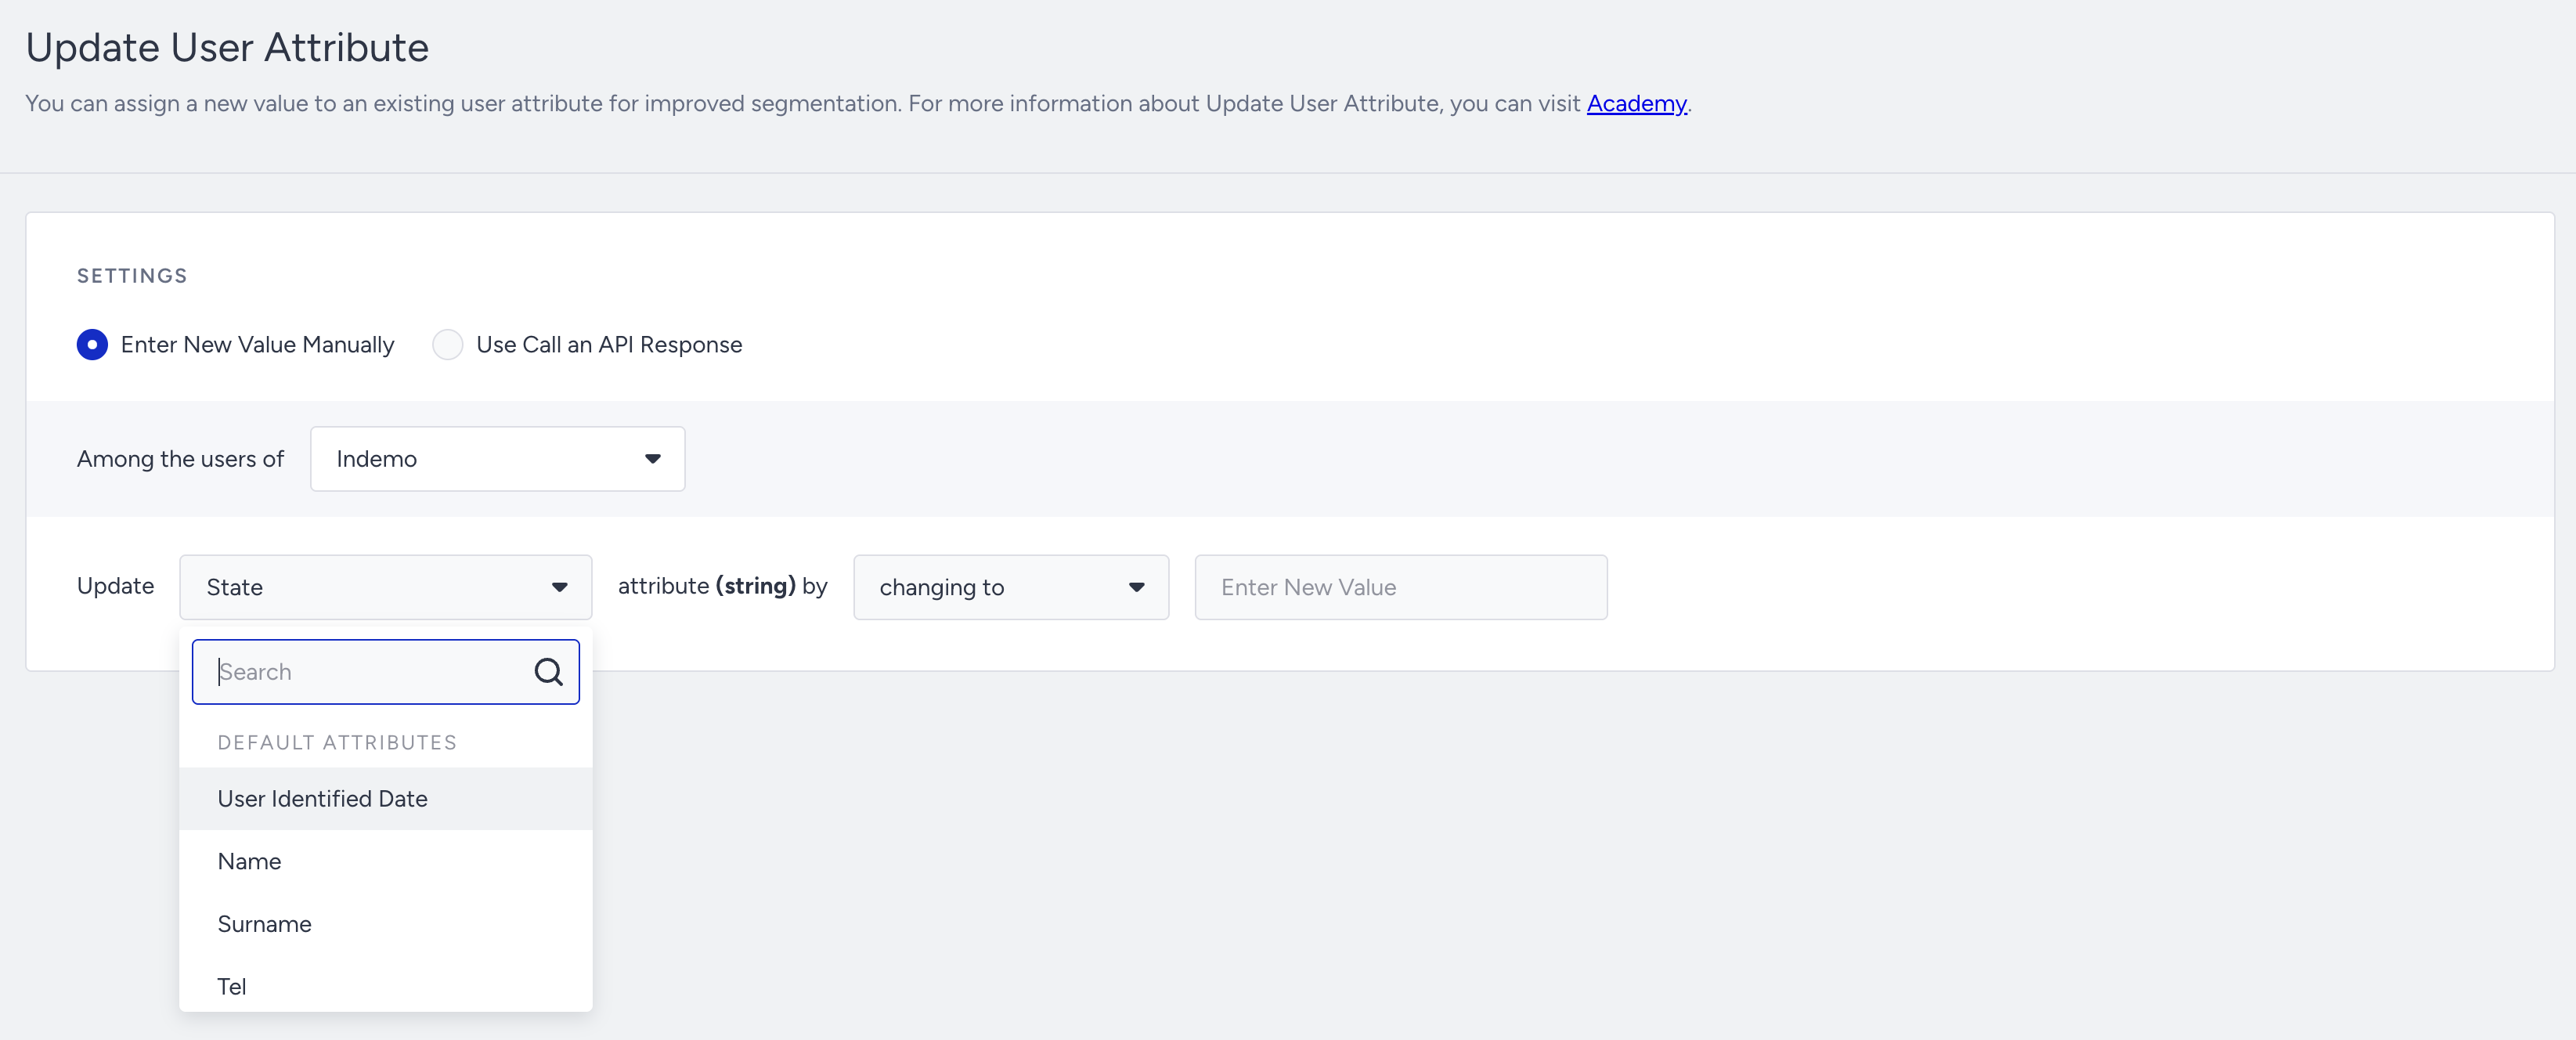
4. Select an action operator: setting to, increasing by, or decreasing by.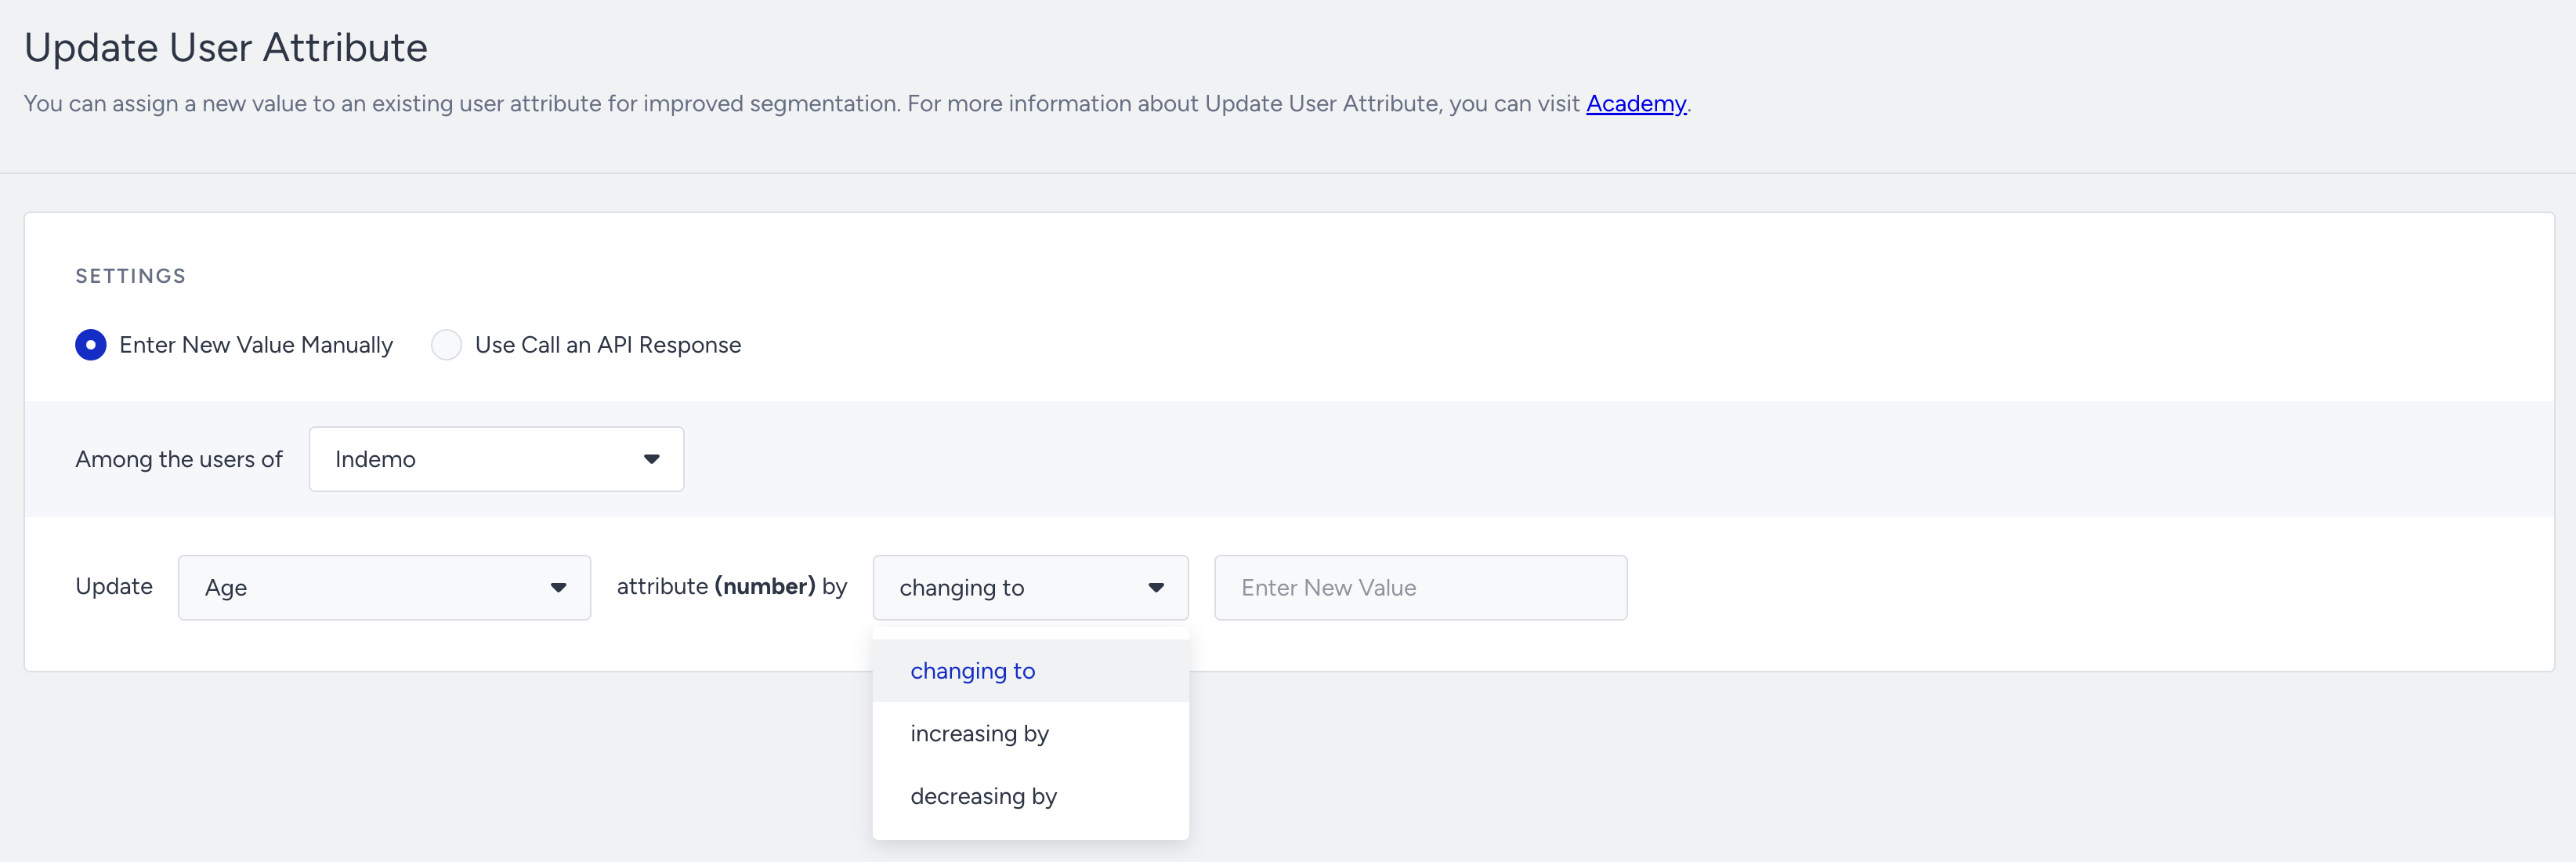
5. Enter a value for the attribute.
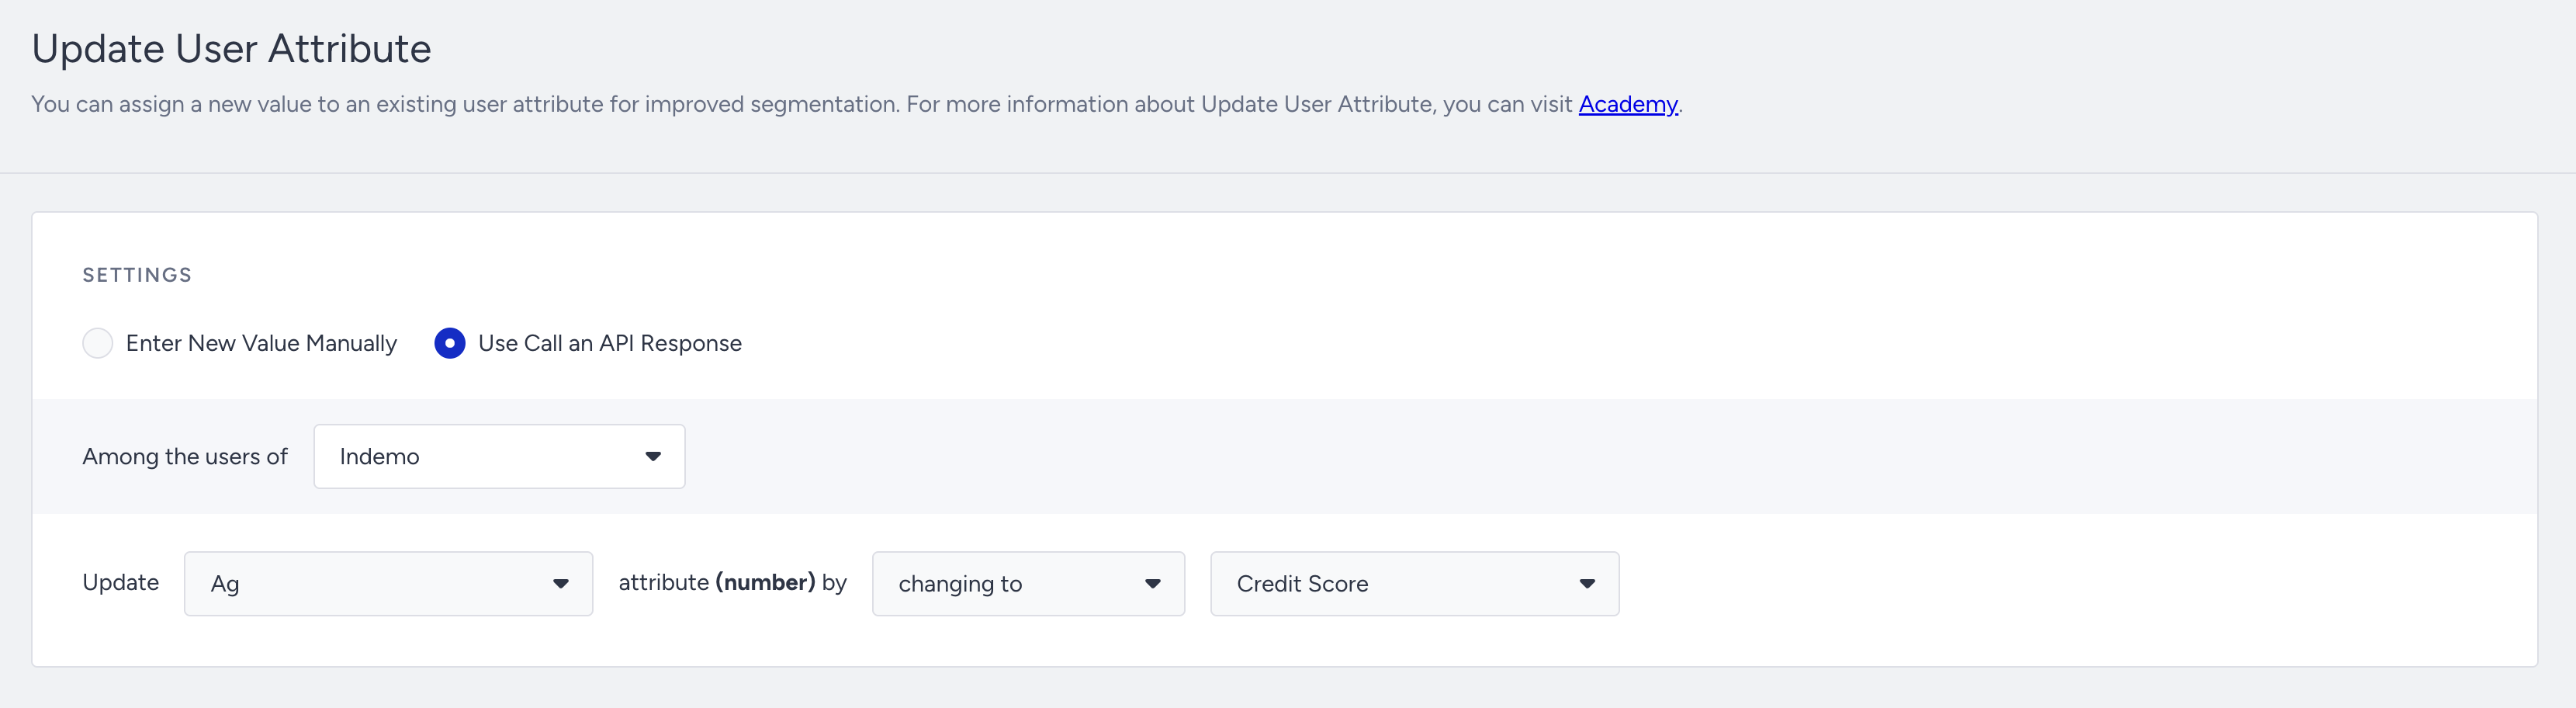
6. If you enabled response variables in a previous Call an API element, the “User Call an API Response” option becomes available in the Update User Attribute element.
When you select this option, you can map API response variables to user attributes. For further details, refer to Fetch Data through Call an API.
7. Save the element to save your changes.
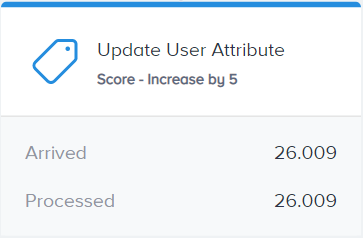
Analytics
After you launch your journey, you can see Arrived and Processed figures on the Update User Attribute element on the canvas. For further details, refer to Live Statistics.