Link branding allows you to customize URLs to match your brand instead of using generic link shorteners. This process usually involves using your domain name for the links.
Link branding aims to:
- Make your links look professional and consistent with your brand to enhance brand recognition
- Make your links look trustworthy to increase trust for users to click on them
- Boost click-through rates and overall marketing performance to improve marketing effectiveness
This article explains how the link branding setup process works and the following steps to complete the setup process:
To start the link branding setup, select Use Custom Branded Link in the Branded Link Management step.
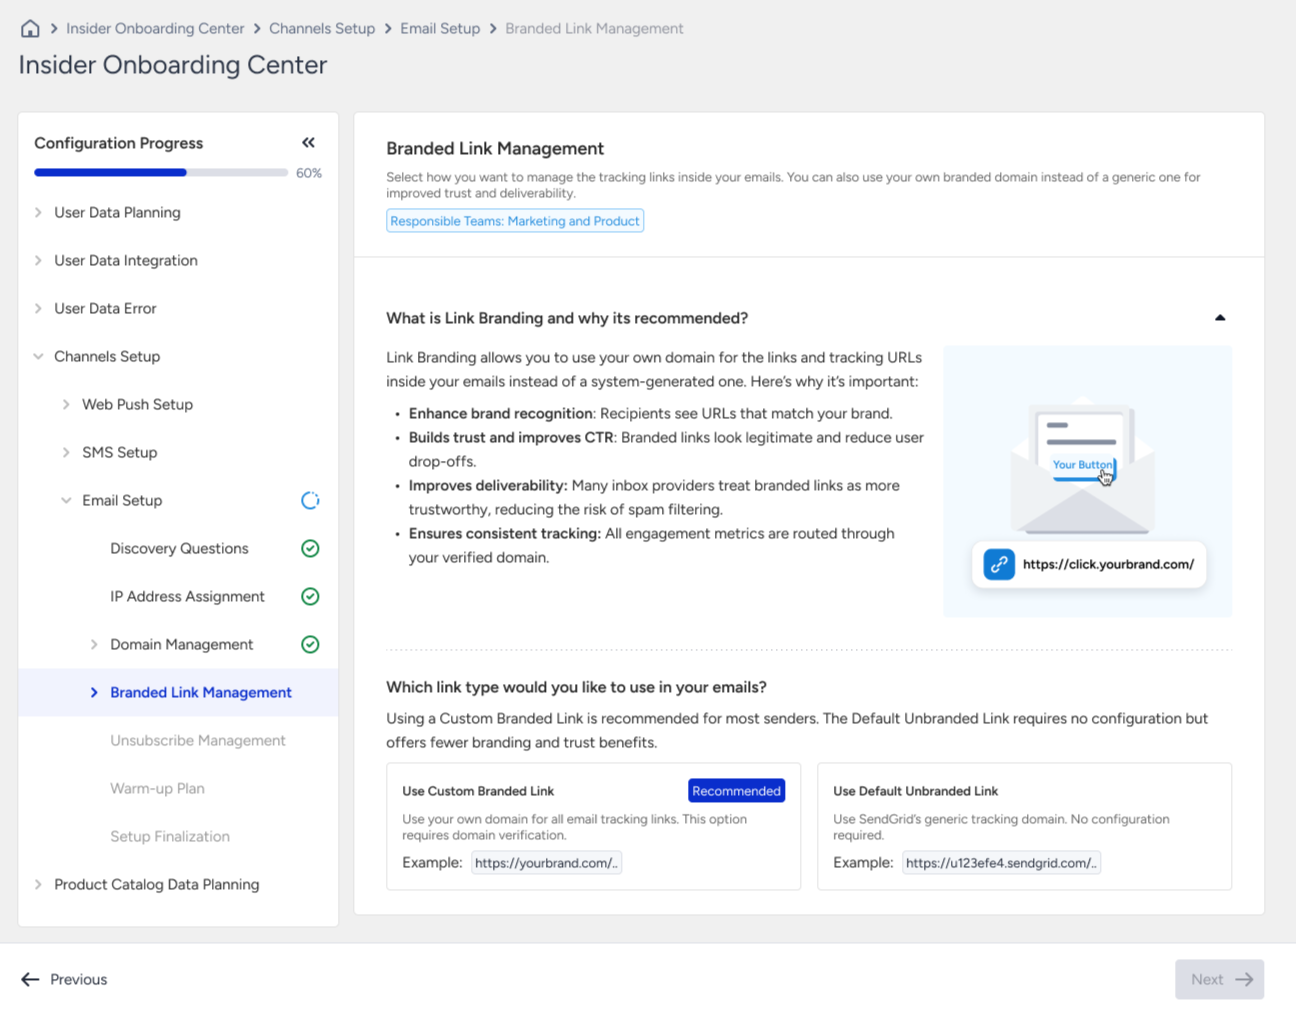
Custom branded link (link branding)
Use your own domain for all email tracking links. Example: https://click.yourbrand.com/Default unbranded link
Use SendGrid’s generic tracking domain. Example: https://u123efe4.sendgrid.com/
1. Add branded link
In the first step of Branded Link Management, define your branded domain and the custom subdomain you want to add to your branded link.
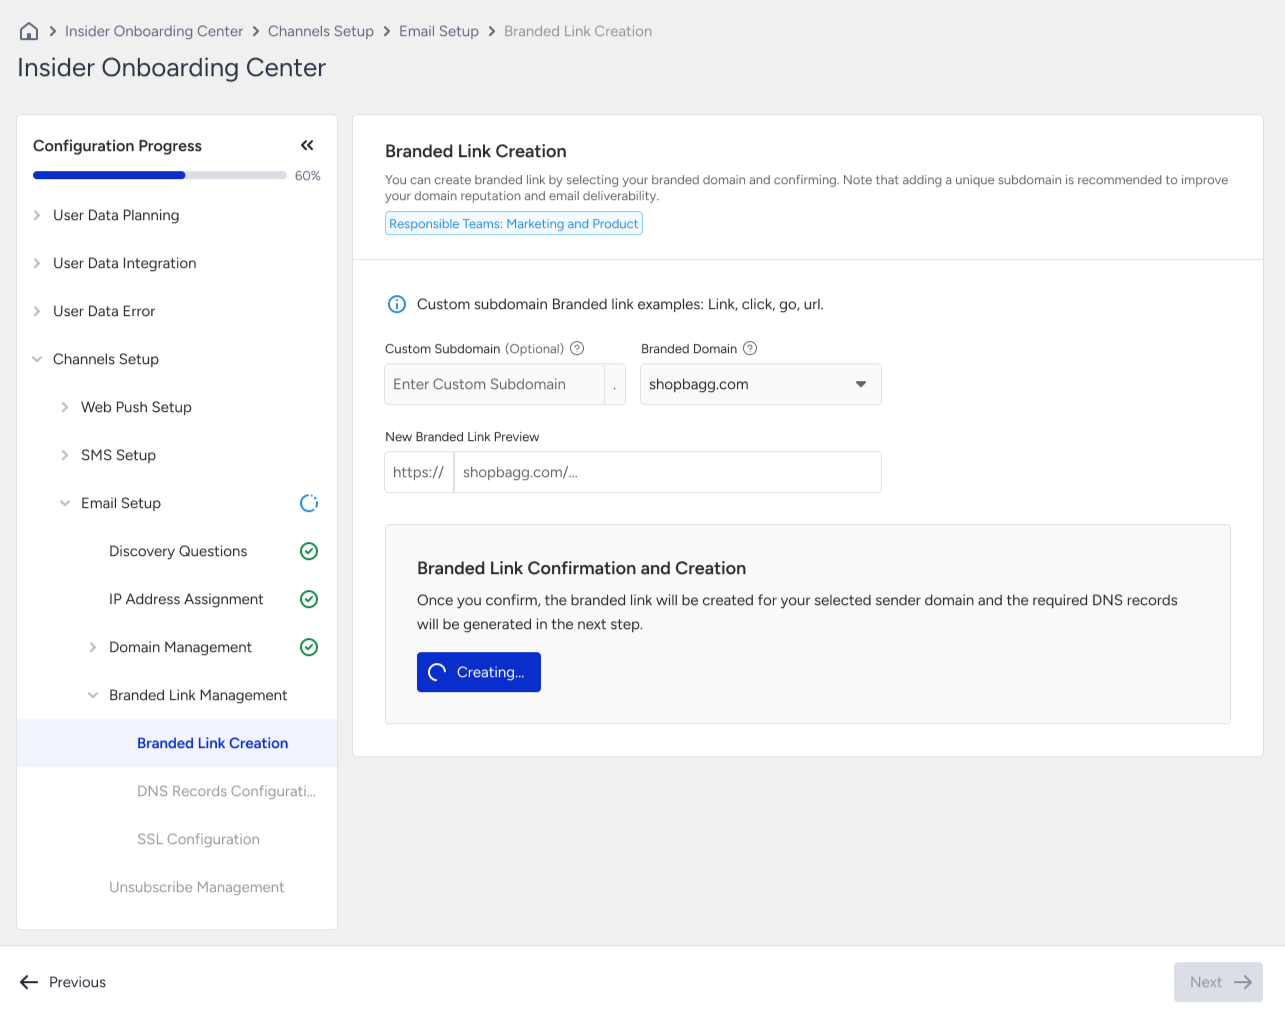
To create your branded link:
1. Select the domain you want to use in your branded link.
2. Add your custom subdomain (optional).
3. Click the Confirm and Create button.
2. Configure DNS records
The second step of link branding setup is to configure the DNS records for your branded domain. DNS records are used to prove that you own the domain you want to use for link branding. By adding the DNS records provided in this step, you authorize Insider One to generate and serve tracking links on behalf of your domain.
| Type | Host | Value |
|---|---|---|
| CNAME | yourdomain.com | sendgrid.net |
| CNAME | url123.your-domain.com | 24584.sendgrid.net |
Suggested reading: Automatic DNS Records Configuration
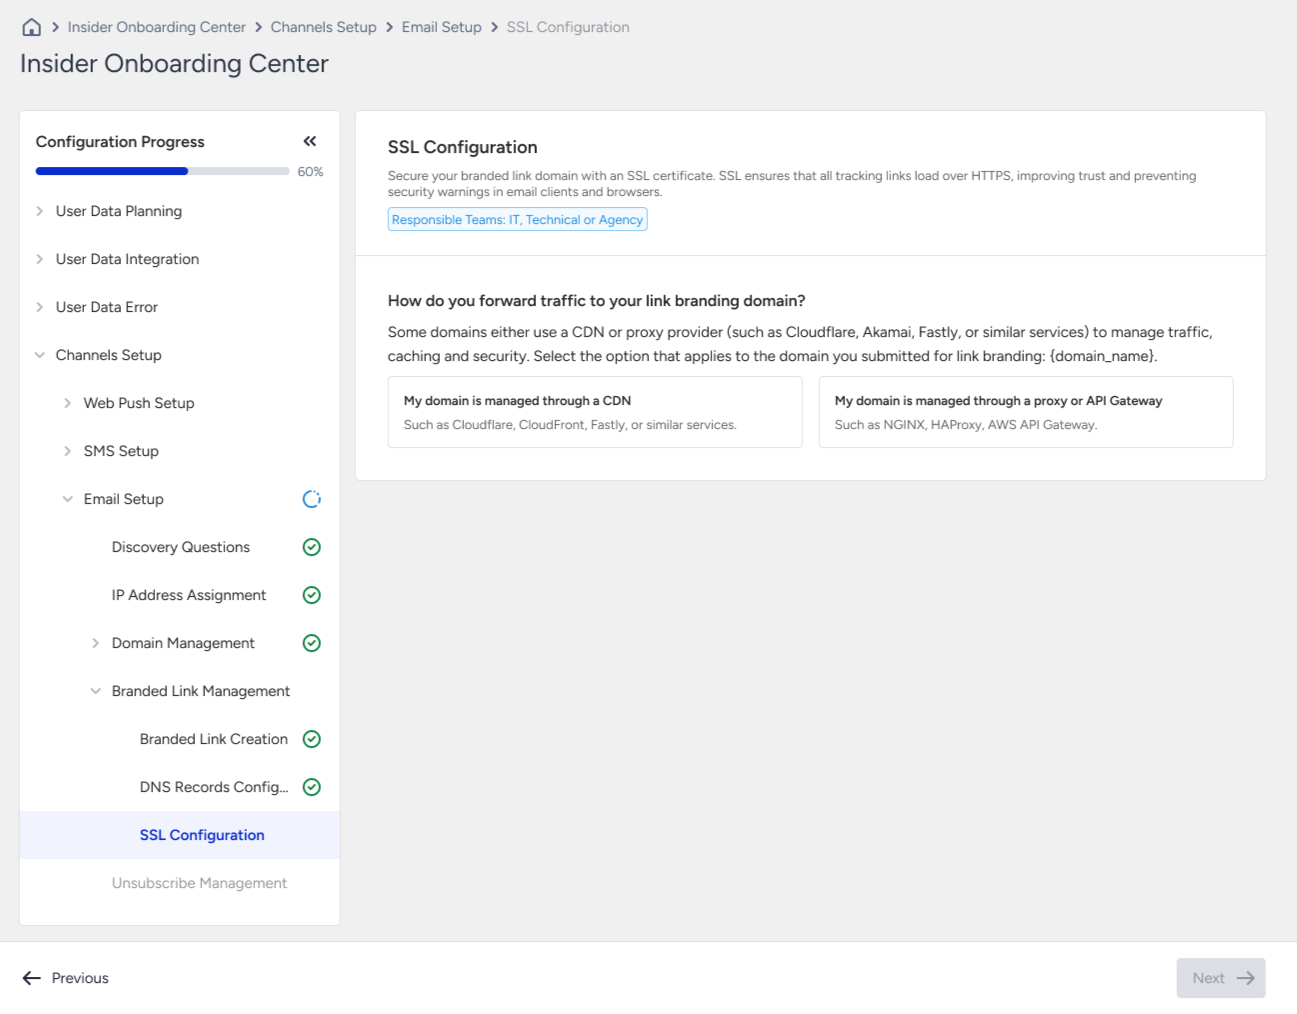
3. SSL configuration
In the SSL Configuration step, you will secure your branded link domain with an SSL certificate. SSL ensures that all tracking links load over HTTPS, improving trust and preventing security warnings in email clients and browsers.
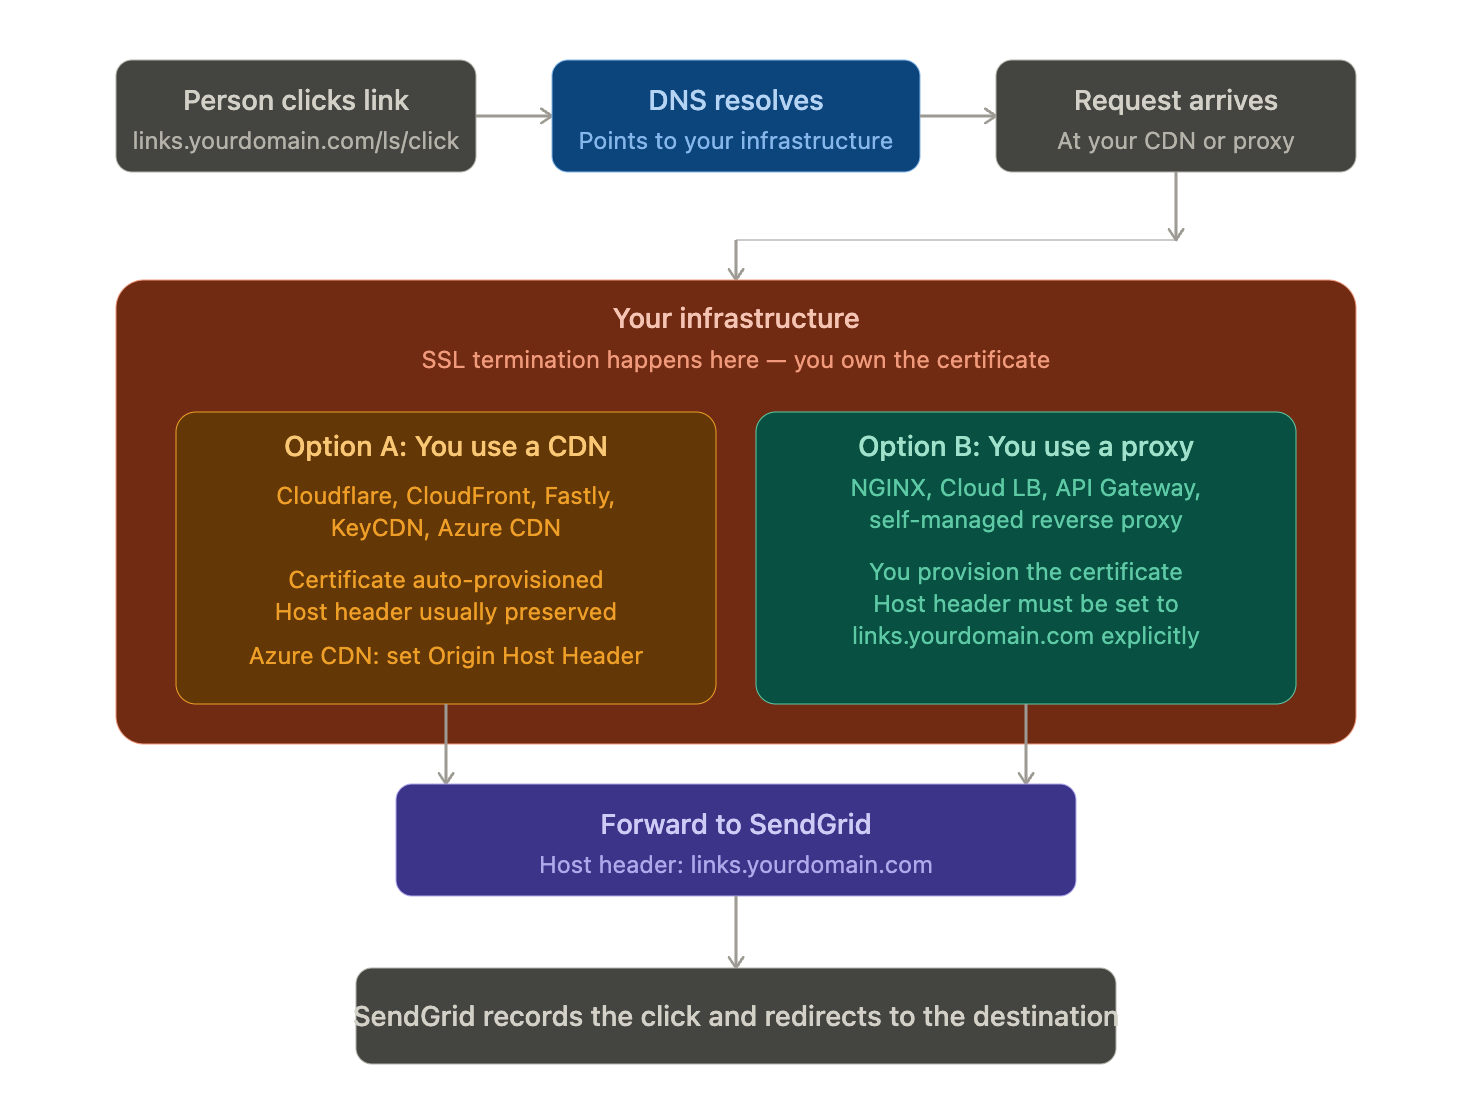
Some domains either use a CDN or proxy provider (such as Cloudflare, Akamai, Fastly, or similar services) to manage traffic, caching, and security. While configuring SSL for your branded link, you need to select how you manage your domain routing:
- The domain is managed through a CDN.
- The domain is managed through a proxy or an API Gateway.
The diagram below shows a case where SSL termination occurs on a customer-managed infrastructure, not in SendGrid. The Host header must carry the branded domain when forwarding to sendgrid.net.
If your domain is managed through a CDN
1. Check your SSL certificate
Your SSL must cover the exact branded link you plan to use. You can meet this requirement in two ways:
- Using a wildcard certificate (e.g., *.yourdomain.com) for single-level subdomains
- Using a specific certificate issued directly for your branded link domain
If your certificate does not cover the branded link domain, you must purchase it or generate a new certificate that includes this domain. You can follow the documentation for some common providers:
2. Forward all requests to SendGrid
Configure your CDN to forward all traffic from your branded link to sendgrid.net. If you use Azure CDN, set your branded domain as the Origin Host Header in your CDN profile.
You can follow the documents for some common providers:
3. Update your DNS record
Update the CNAME record and its respective CNAME value in your DNS host provider for your branded link domain. Once configured, return to this page and click the Check SSL button to complete your SSL setup check.
| Type | Host | Value |
|---|---|---|
| CNAME | http://url123.yourdomain.com | URL to your CDN |
If your domain is managed through a proxy or API Gateway
1. Check your SSL certificate
Your SSL must cover the exact branded link you plan to use. You can meet this requirement in two ways:
- Using a wildcard certificate (e.g., *.yourdomain.com) for single-level subdomains
- Using a specific certificate issued directly for your branded link domain
If your certificate does not cover the branded link domain, you must purchase it or generate a new certificate that includes this domain. You can follow the documentation for some common providers:
2. Forward all requests to SendGrid
Configure your proxy/API Gateway to forward all traffic from your branded link to sendgrid.net.
- In case of a Proxy, follow SendGrid’s custom SSL proxy steps.
- In case of an API Gateway, forward the request to sendgrid.net and use your branded domain as the HTTP host header.
You can also refer to NGINX.
- For Google Cloud Platform setups, see the Advanced: Google Cloud Setup for Link Branding SSL guide.
3. Update your DNS record
Update the CNAME record and its respective CNAME value in your DNS host provider for your branded link domain. Once configured, return to this page and click the Check SSL button to complete your SSL setup check.
| Type | Host | Value |
|---|---|---|
| CNAME | http://url123.yourdomain.com | URL to your Proxy or API Gateway |
Verify SSL setup
After configuring SSL for either CDN, Proxy, or API Gateway, you will need to verify your SSL setup. Below, you will see the Check SSL Setup section as Pending. To verify your setup, click the Check SSL button.
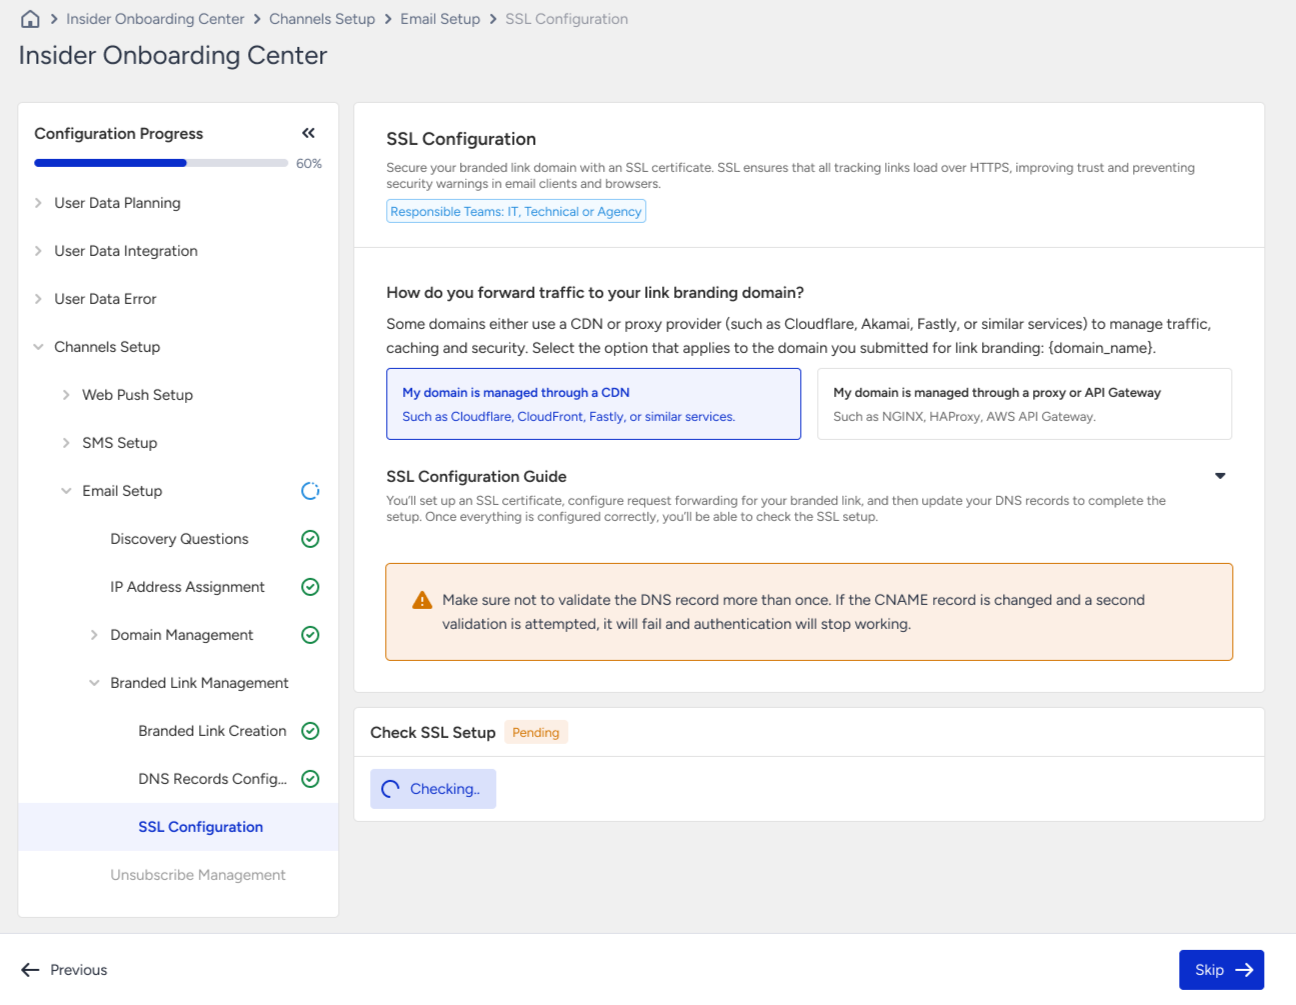
If verified, your link branding setup is complete. If the verification fails, you can contact the Insider One team for support.
If you want to manually test your SSL setup, you can run the following command:
openssl s_client -showcerts -connect url{rand-id}.{yourdomain}.com:443
// or
openssl s_client -showcerts -connect {subdomain}.{yourdomain}.com:443
You will receive a public certificate as a response with the following response:
(1)(1).png)
Once you verify everything on your end, you can contact the Insider One team for verification. Once the setup is verified on Insider One's end, your next email will have your custom domain in the links instead of sendgrid.net.