The data export feature allows you to efficiently export large volumes of your Insider One event data directly to your Azure Blob Storage container.
In this guide, you will find answers to the following questions:
Requirements
After completing these prerequisites, you can proceed to configure the integration and start sending your data to Azure Blob Storage.
A Microsoft Azure Storage Account where you intend to store your data.
A Blob Service Container created within that Storage Account.
The Connection String for the Storage Account (found under Access Keys), with permissions that allow creating objects in the container you will use to retrieve the data.
Create an Azure Storage account
Navigate to the Azure Portal.
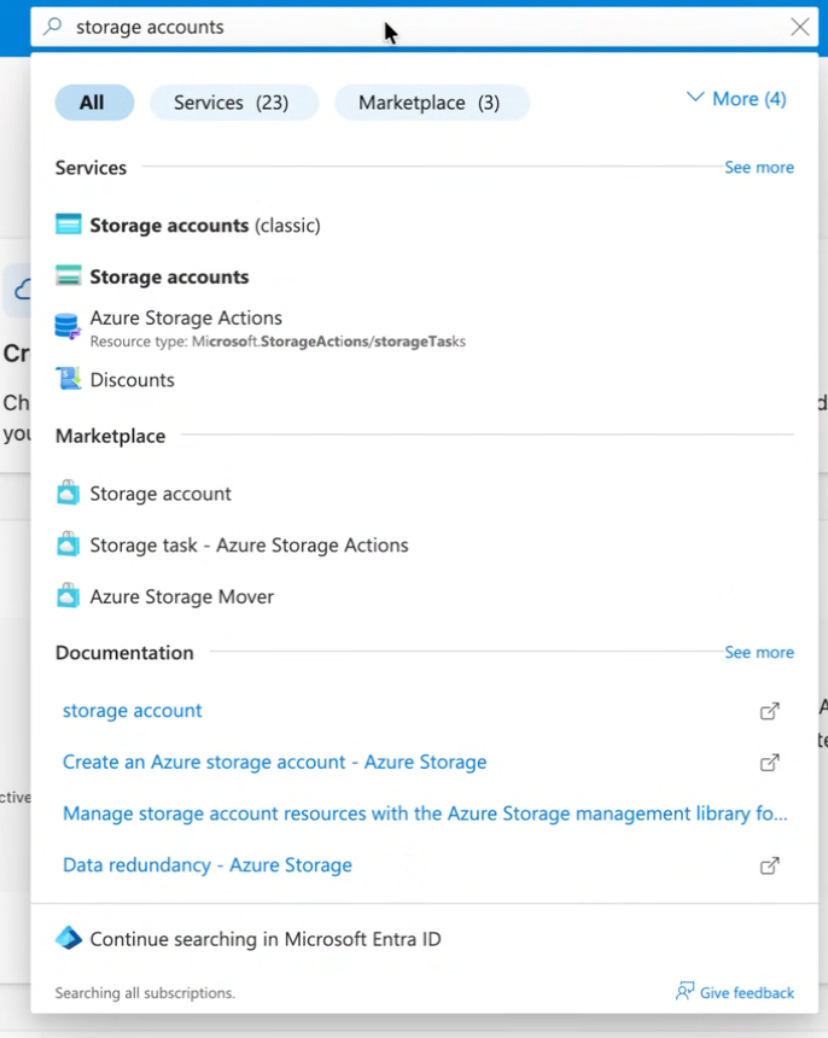
Search for Storage accounts.
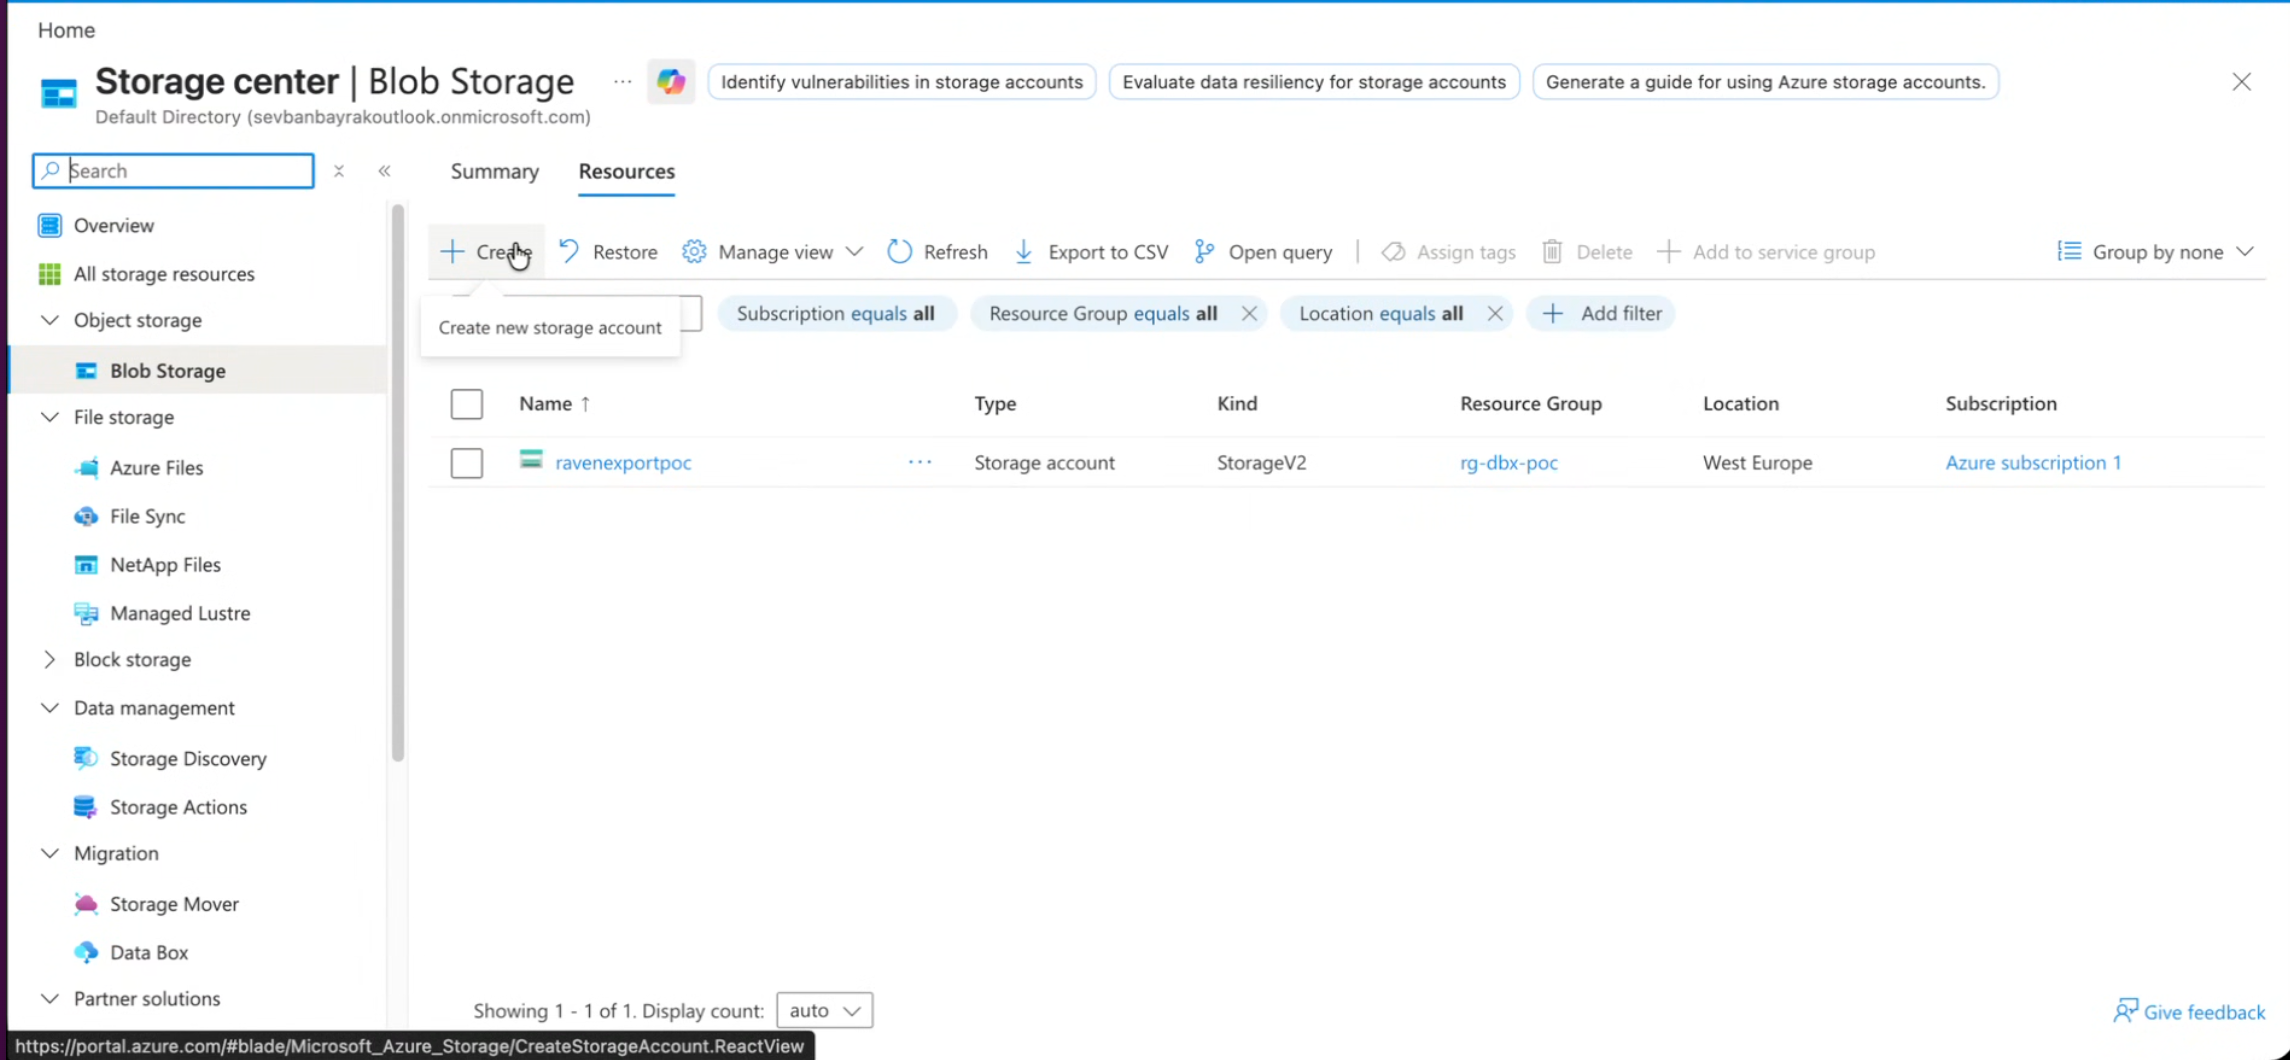
Open the Resources tab and create a new Storage Account.
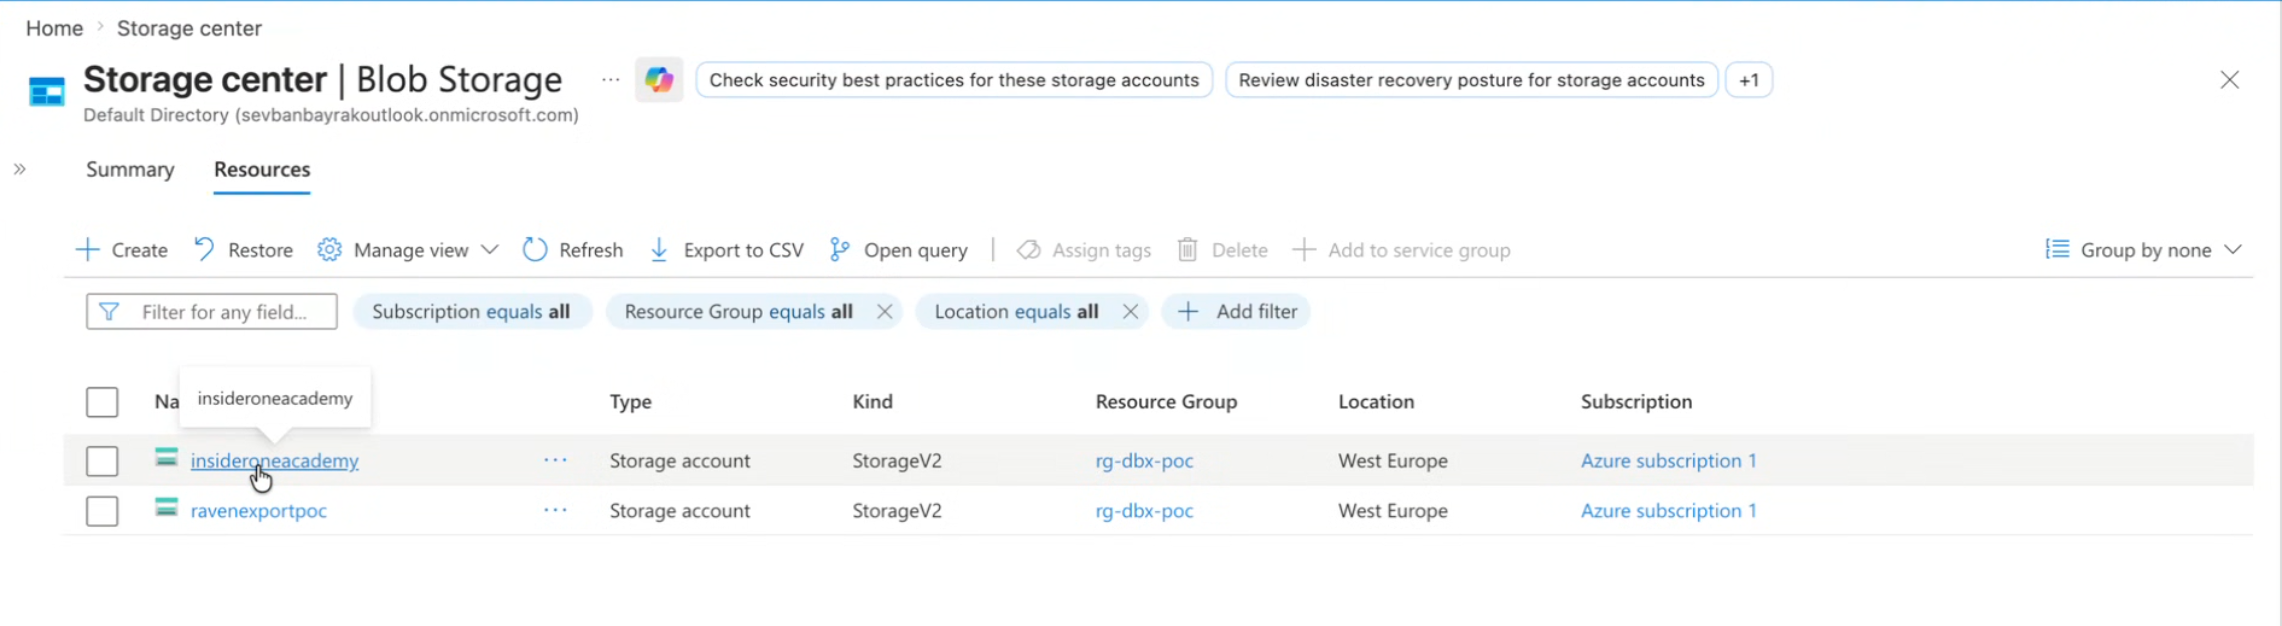
Once the Storage Account is created, return to the Resources tab and select the Storage Account you just created.
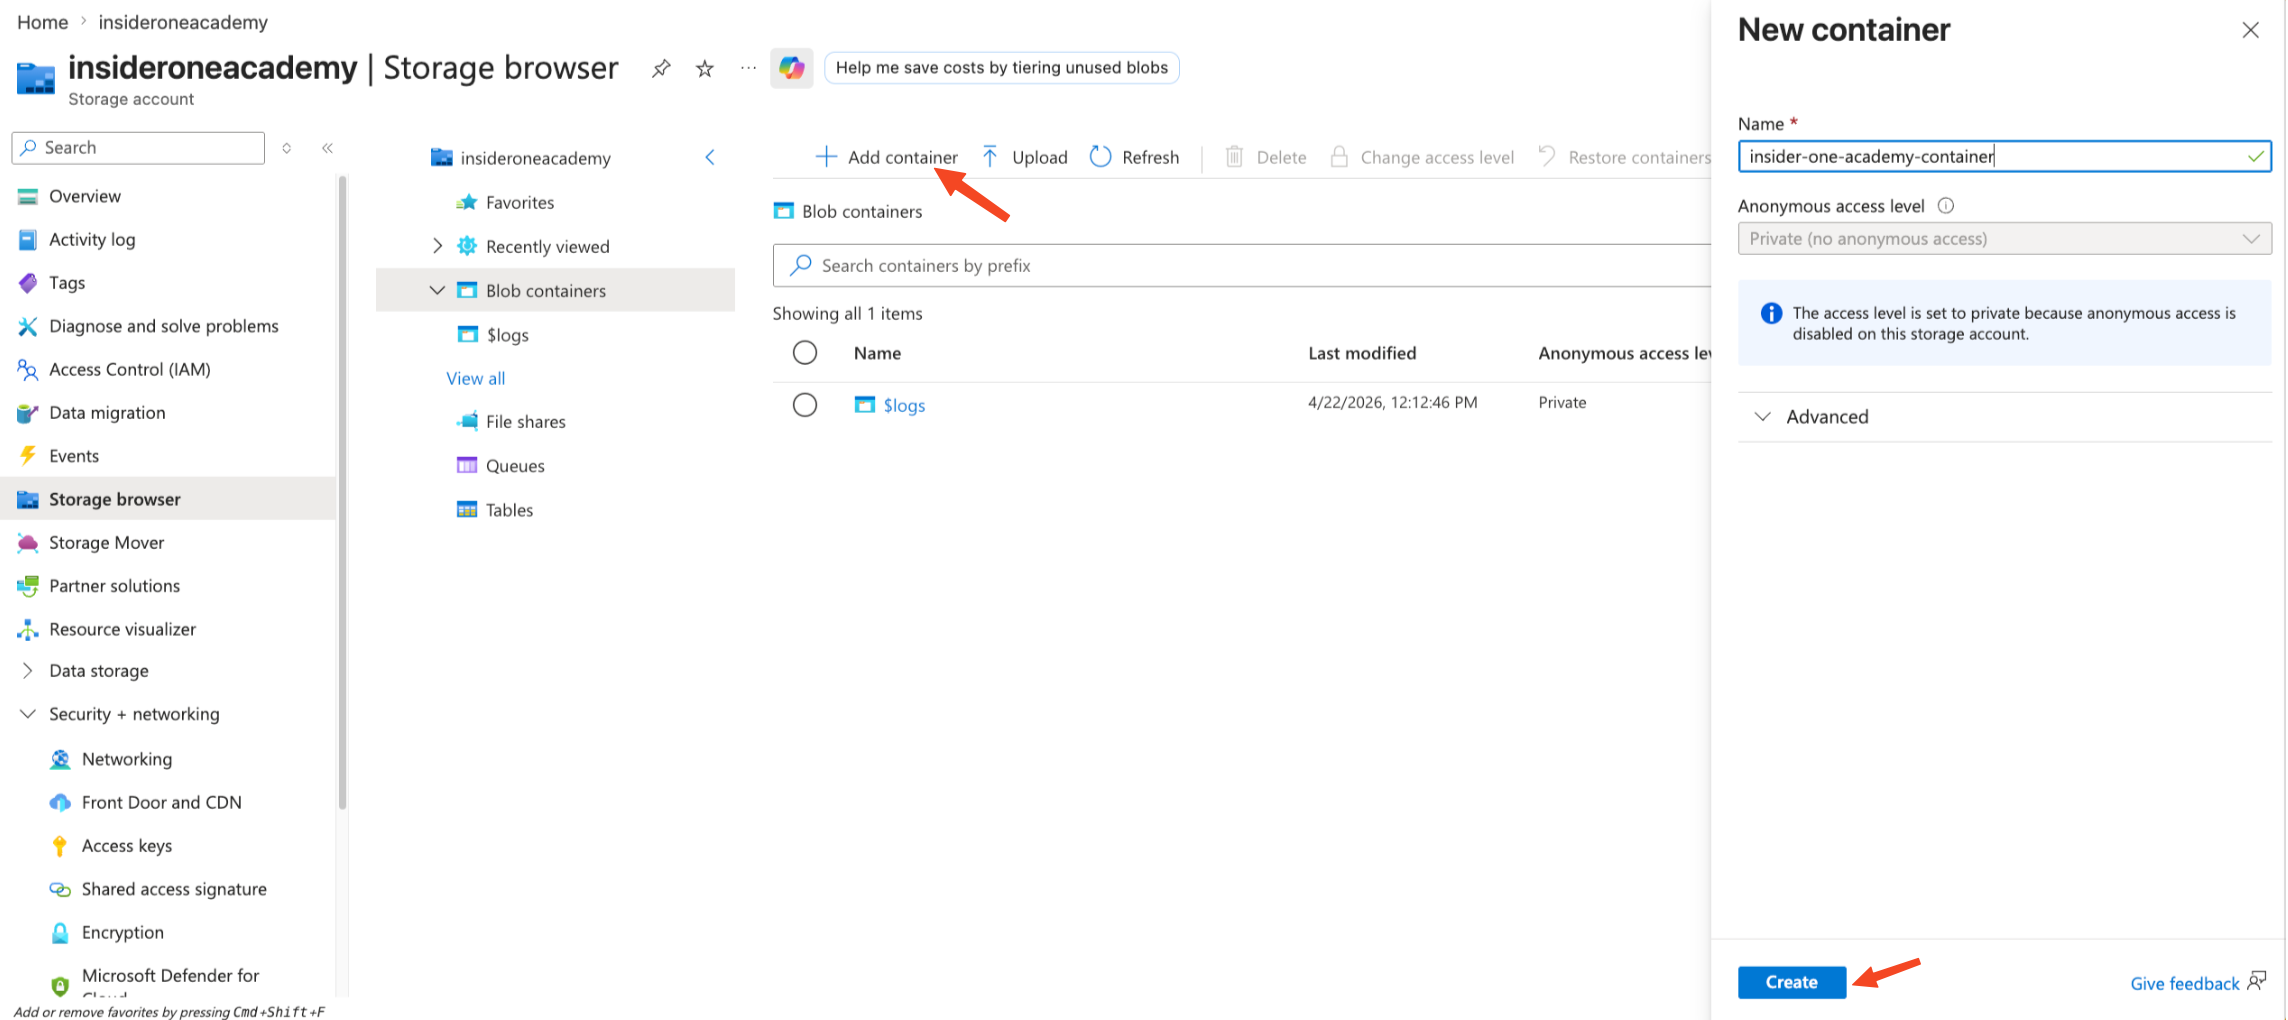
To create a container. Navigate to Storage Browser > Blob Containers and click + Add Container.
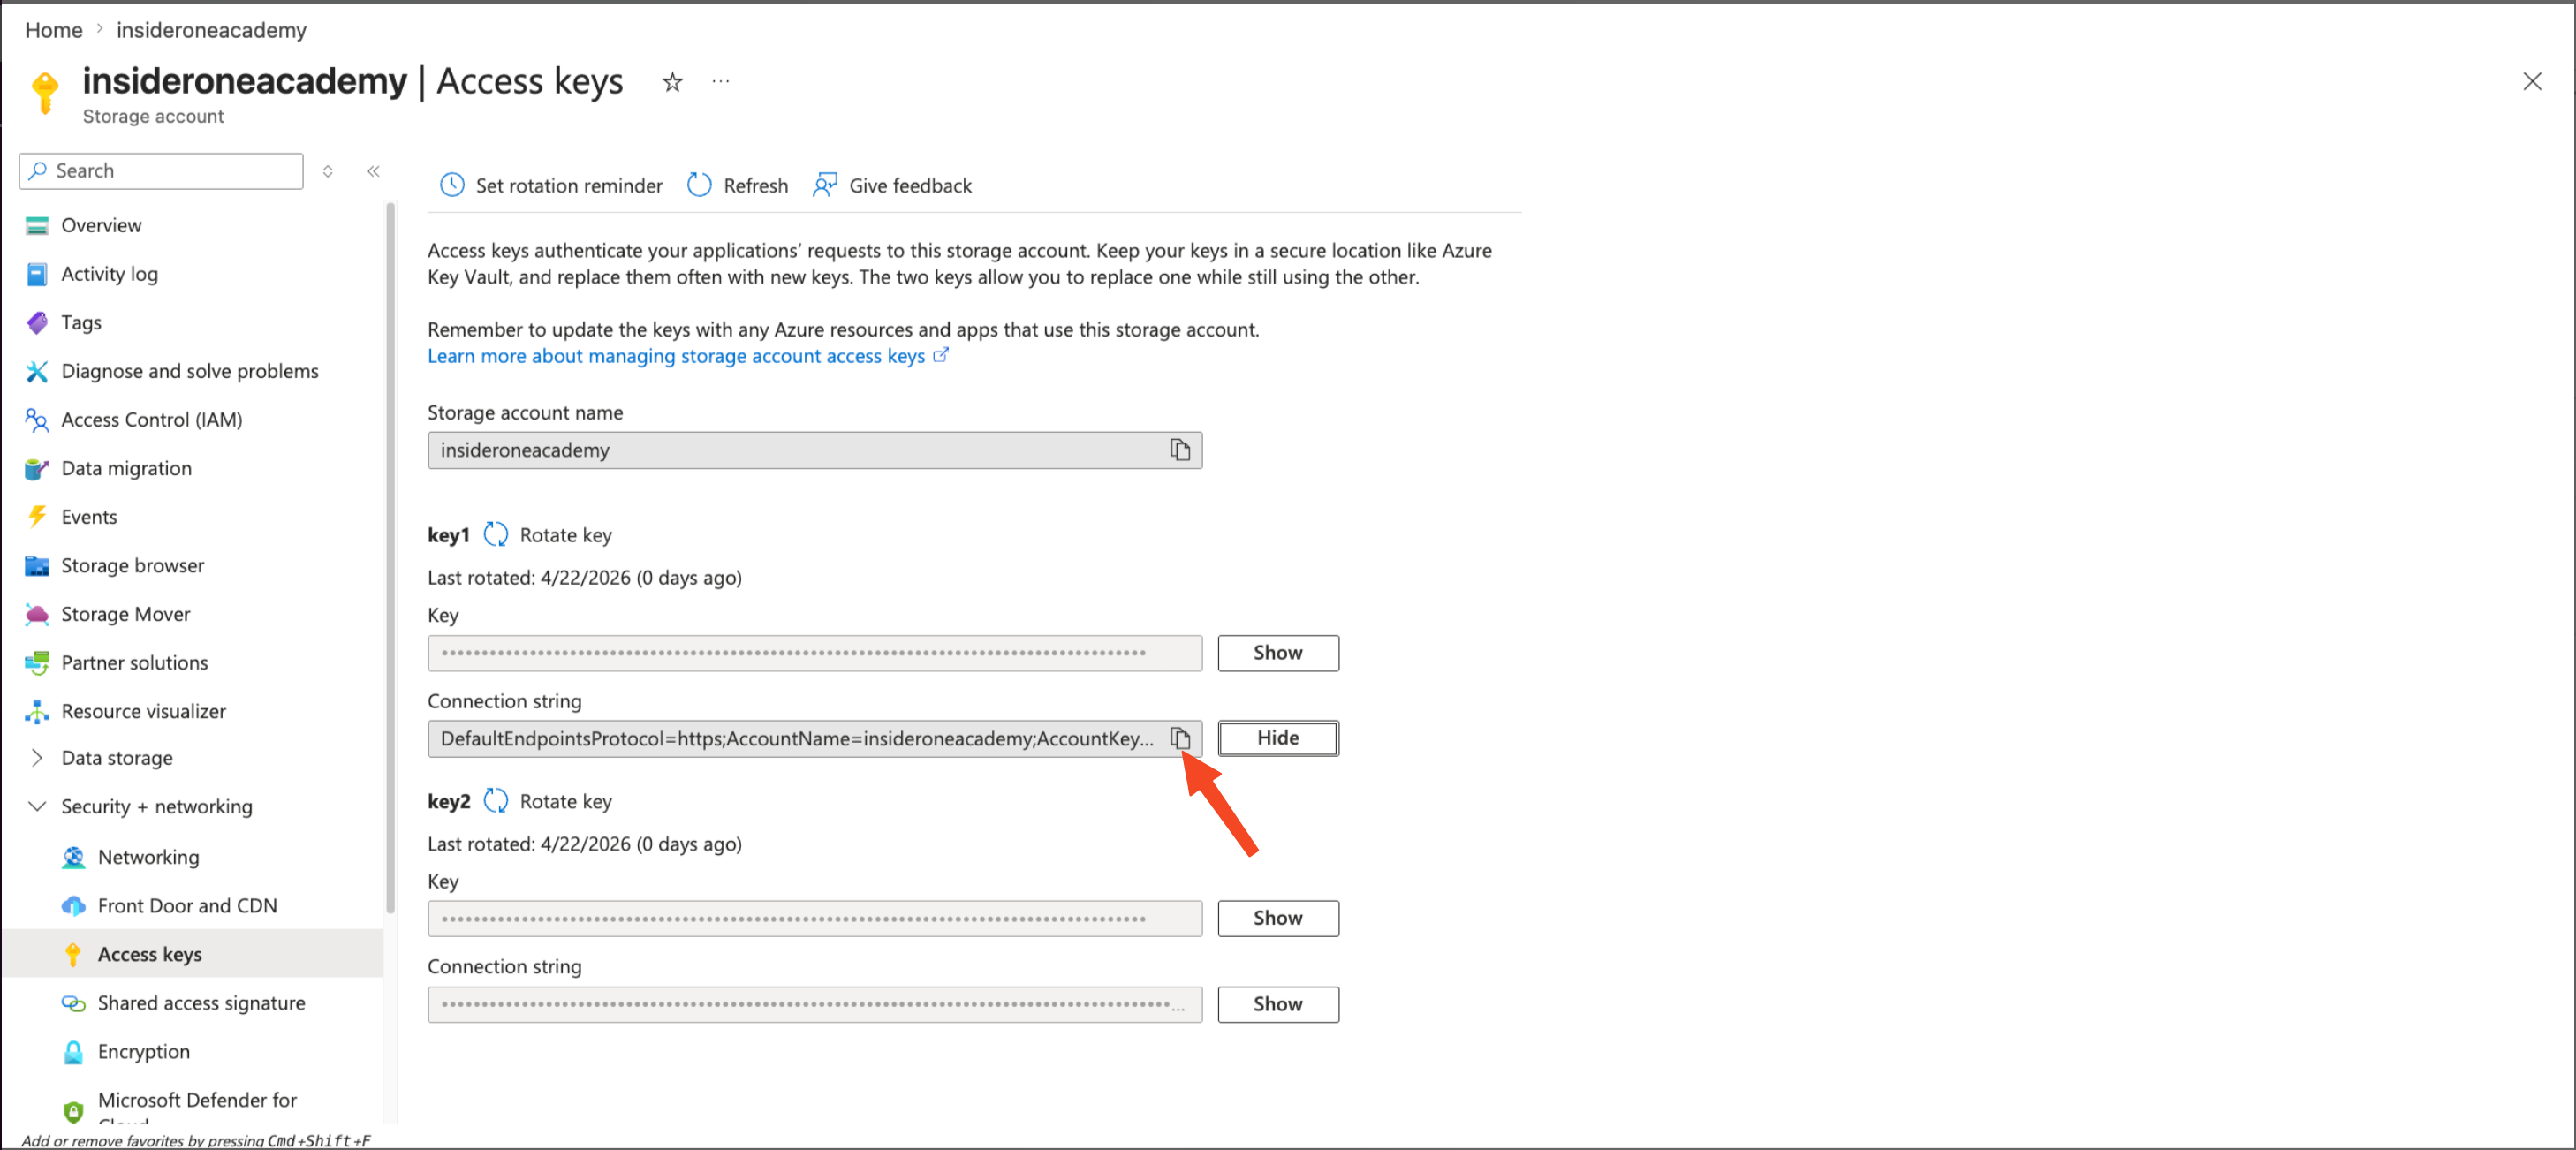
After the container is created, go to Security + networking > Access keys and copy the Connection String.
How can I launch the integration?
Navigate to InOne > Components > Integrations > External Platform Integrations.
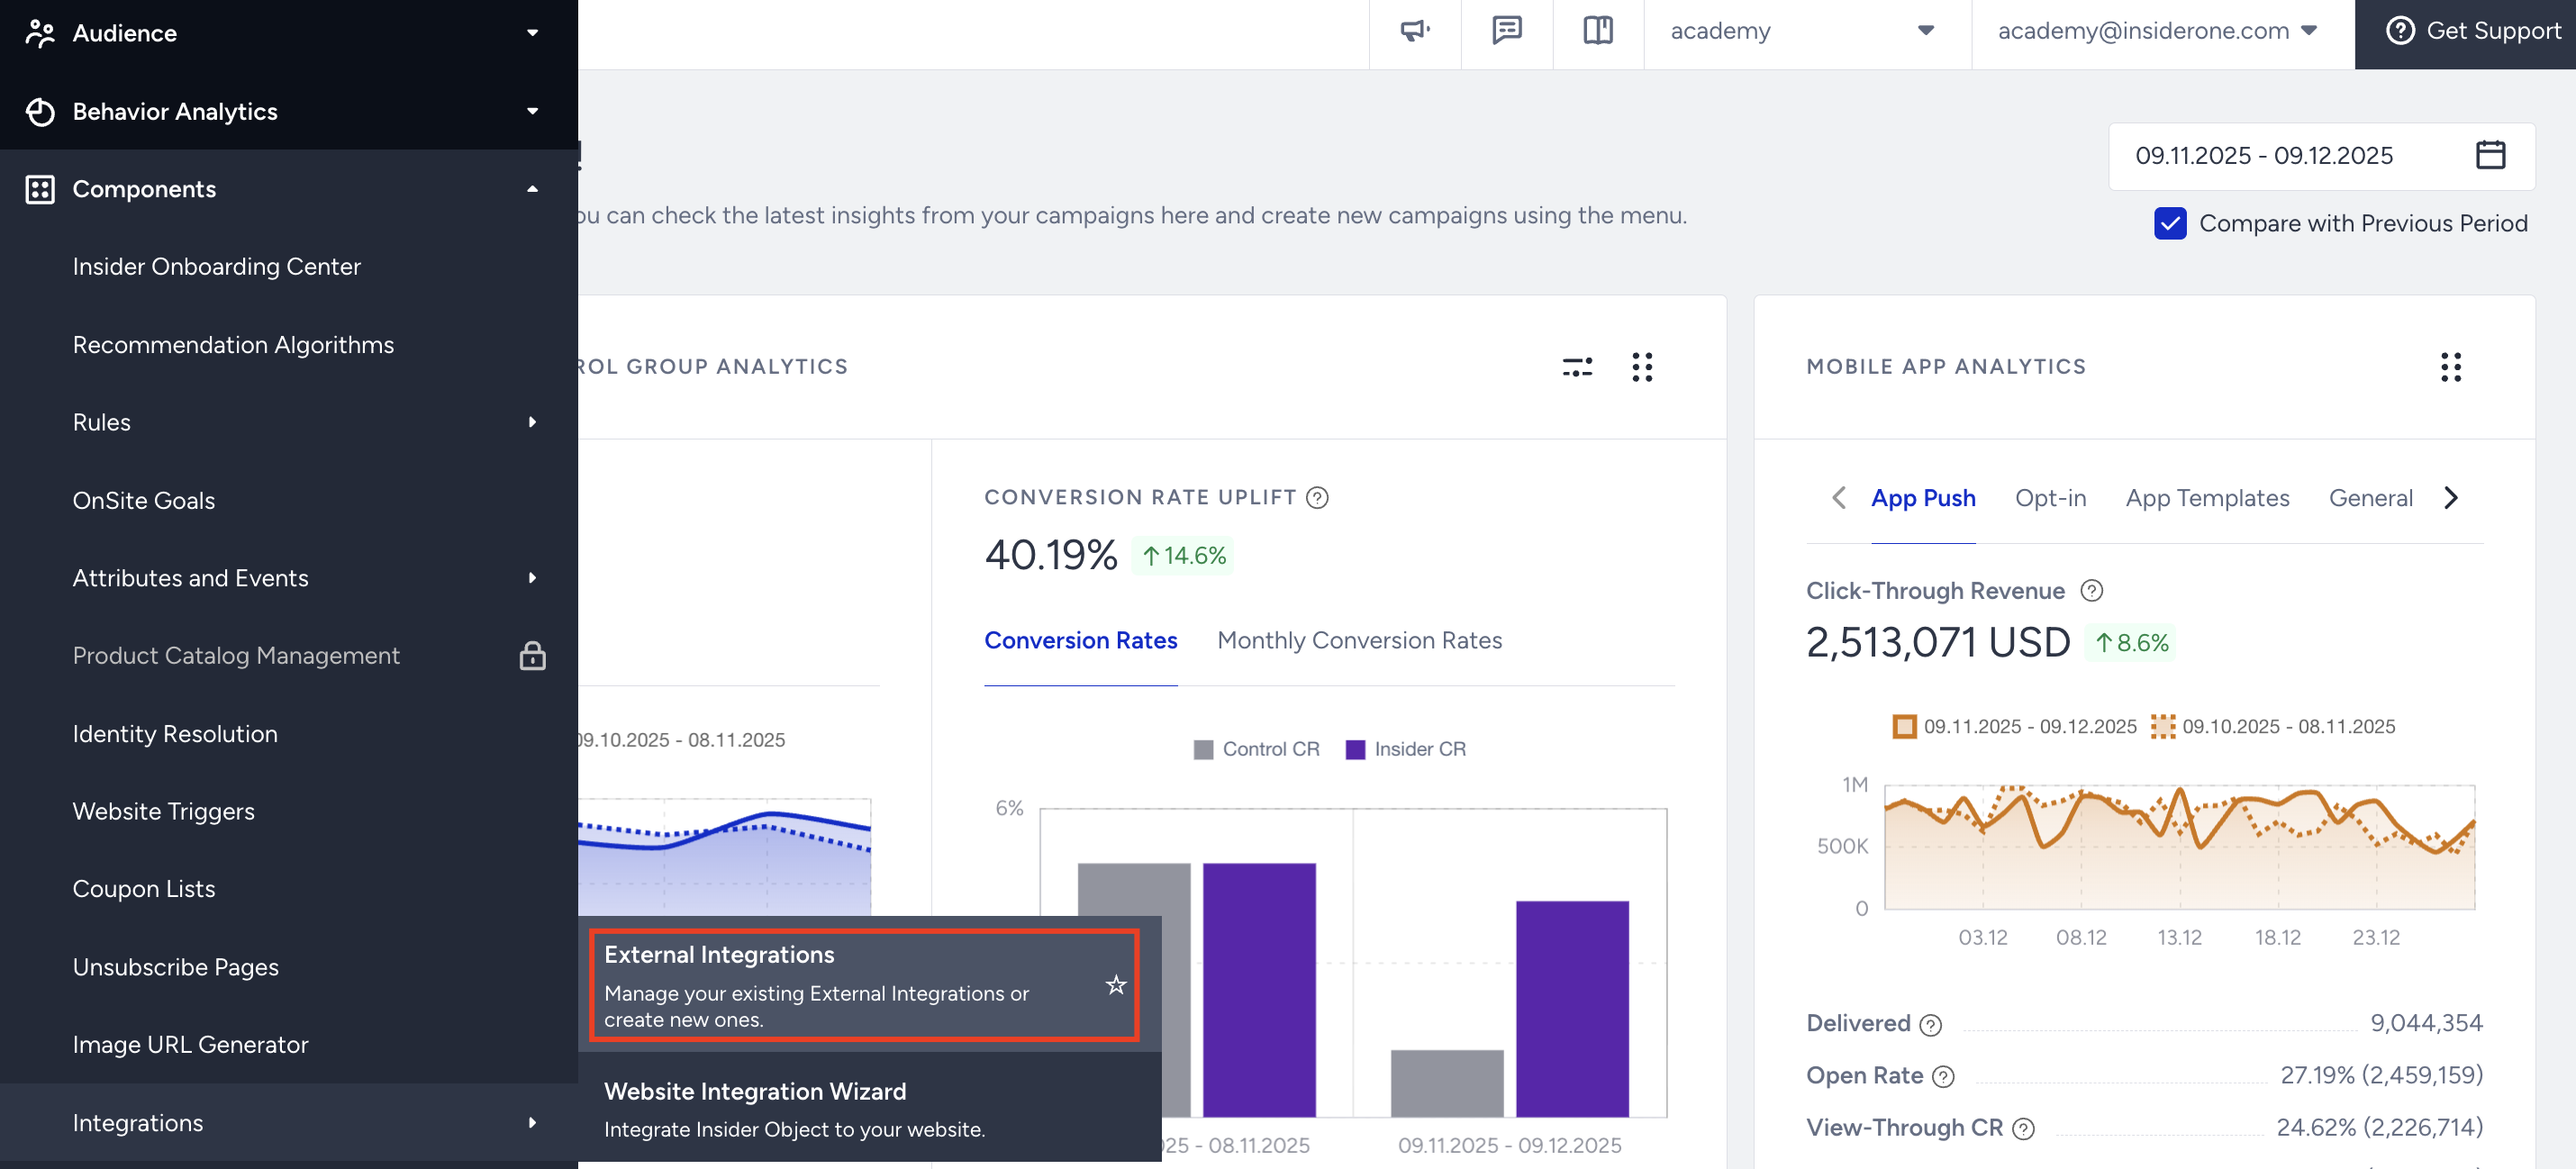
Search for the Microsoft Azure Blob Storage integration and select it.

In the Authentication step, provide the following:
- Connection String: Paste the Connection String you copied from your Storage Account.- Container Name: Enter the name of the container you created.
- Blob Path Prefix (Optional): Enter a prefix to organize your data within the container. If left empty, data will be written to the container root.
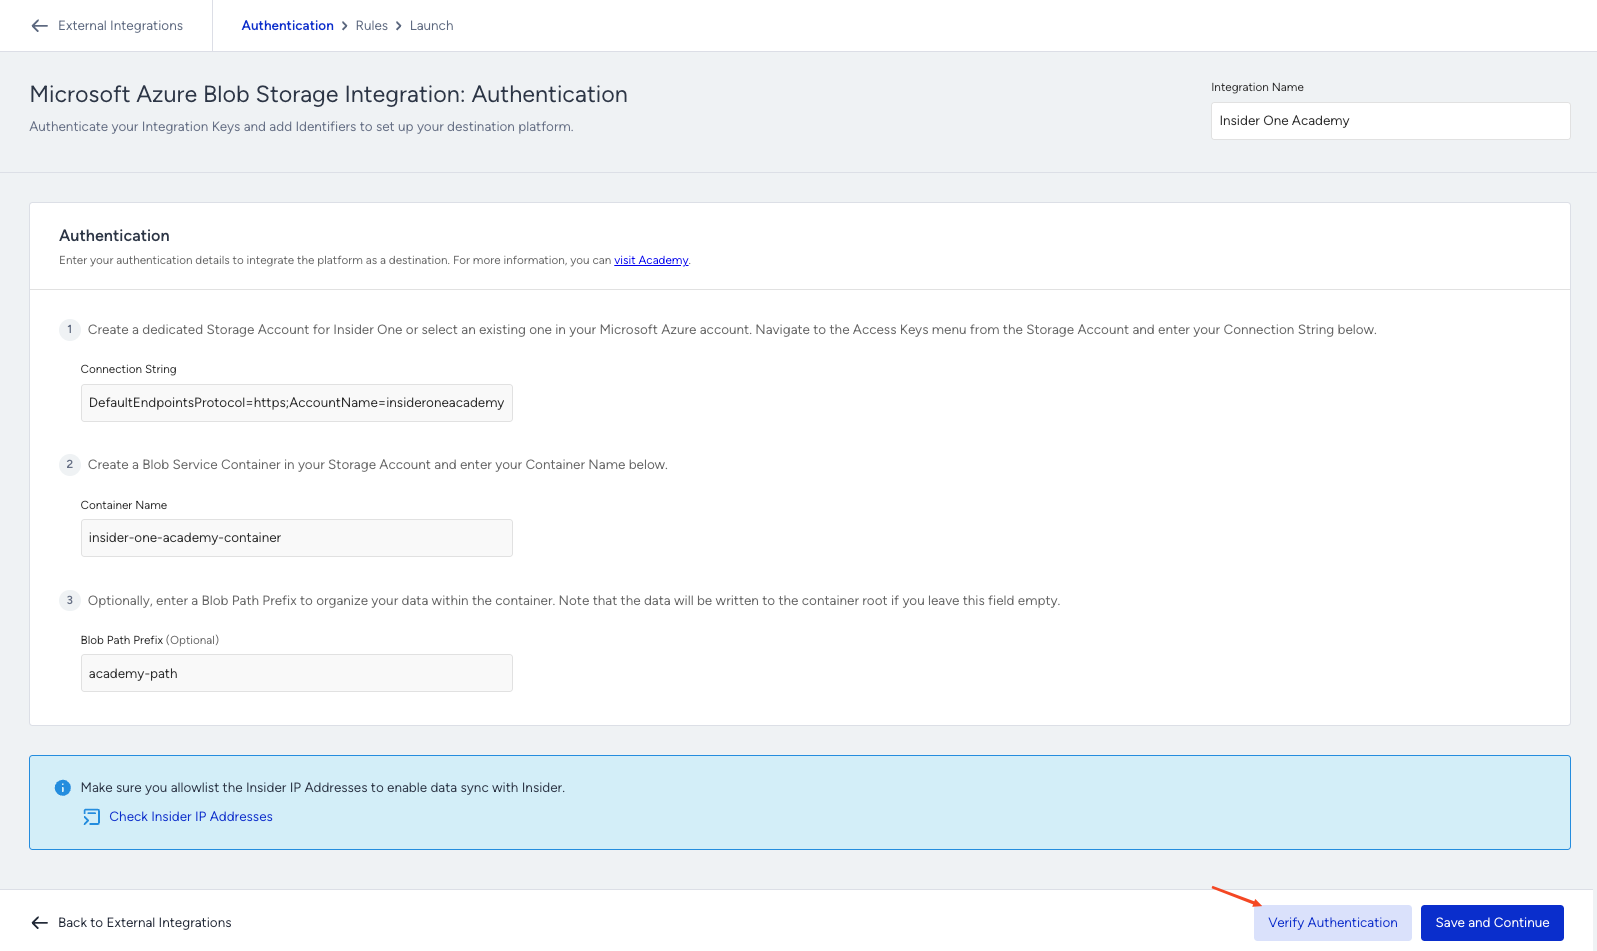
Click Verify Authentication to validate the credentials. If you encounter an issue, a message at the top of the page will explain the authentication error in detail. Once the credentials are validated, click Save and Continue.
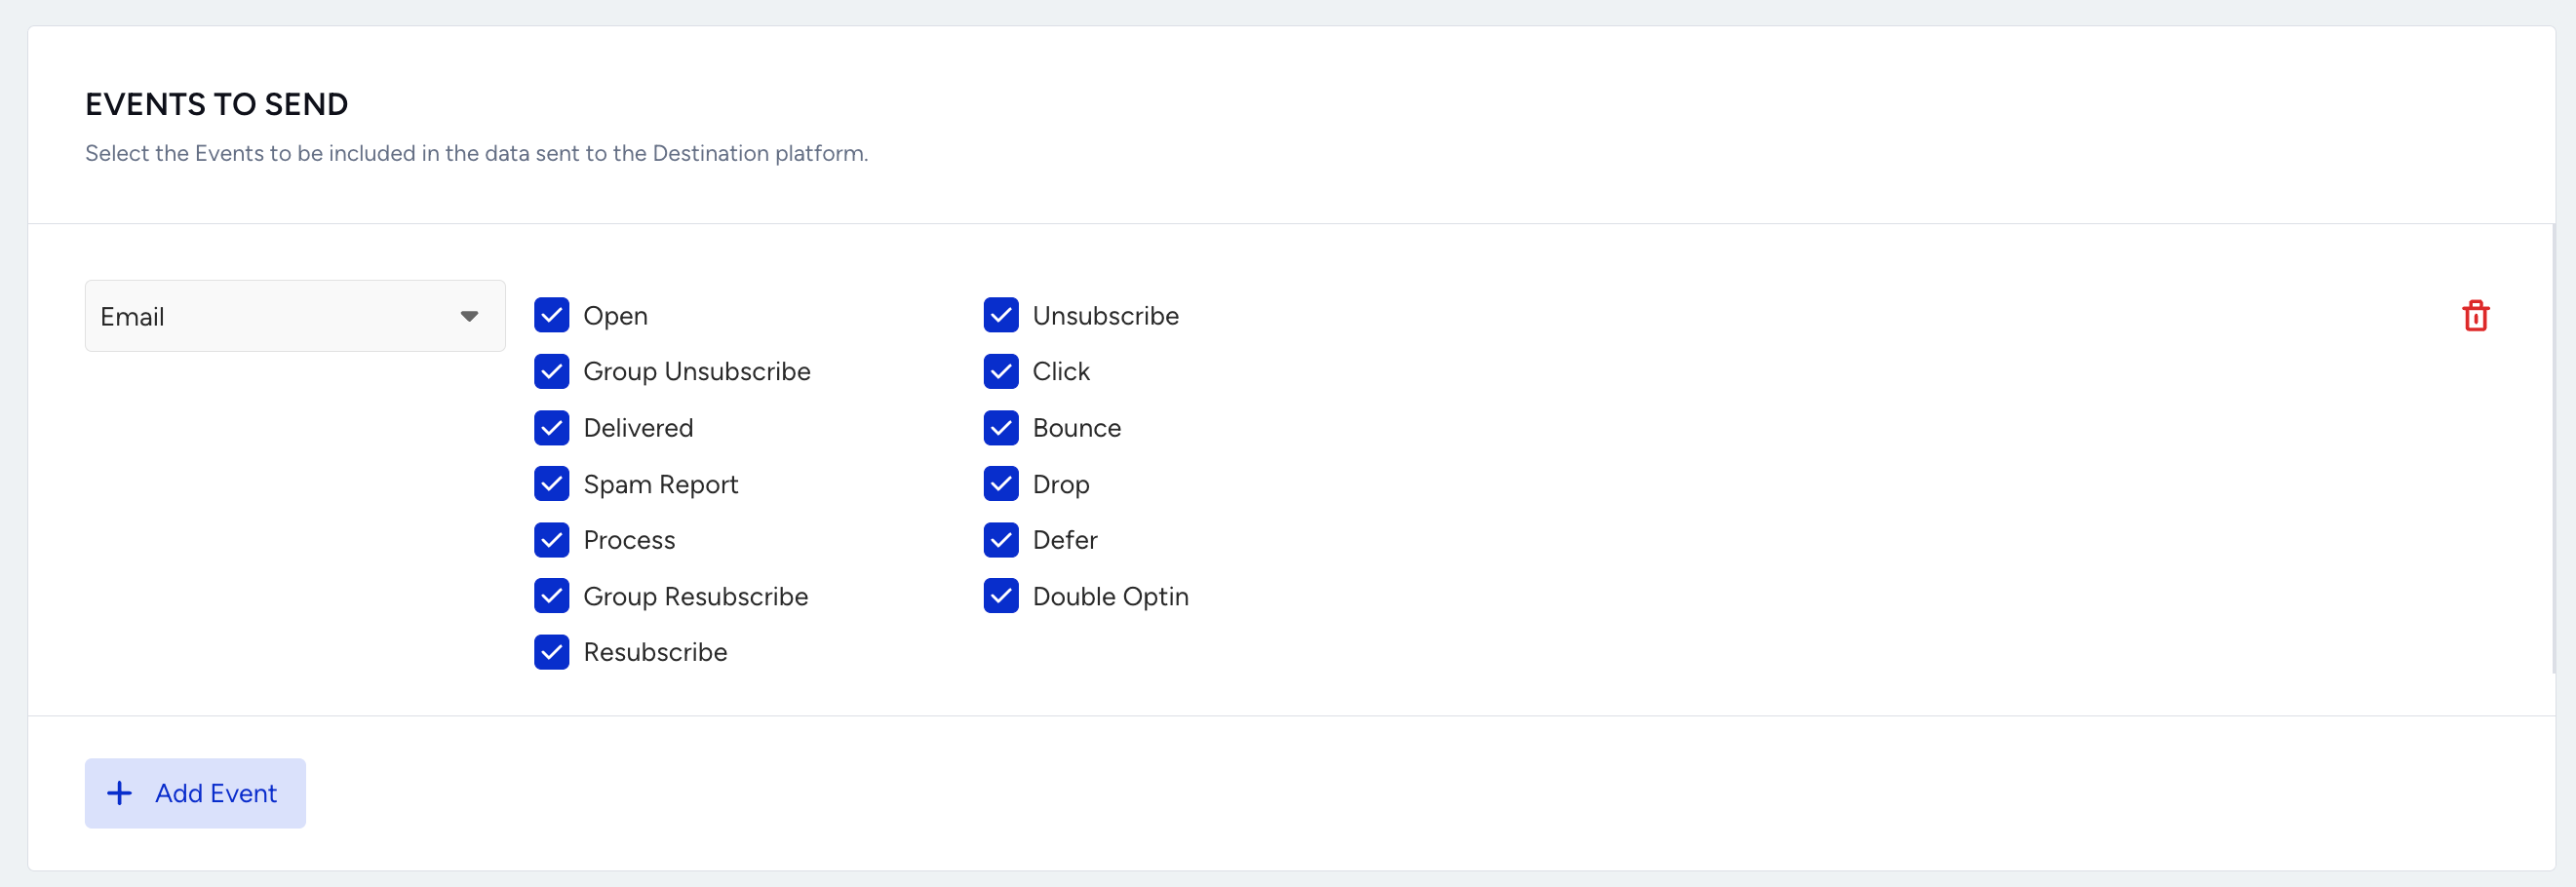
In the configure step, select one or more events to trigger your integration in the tabs.
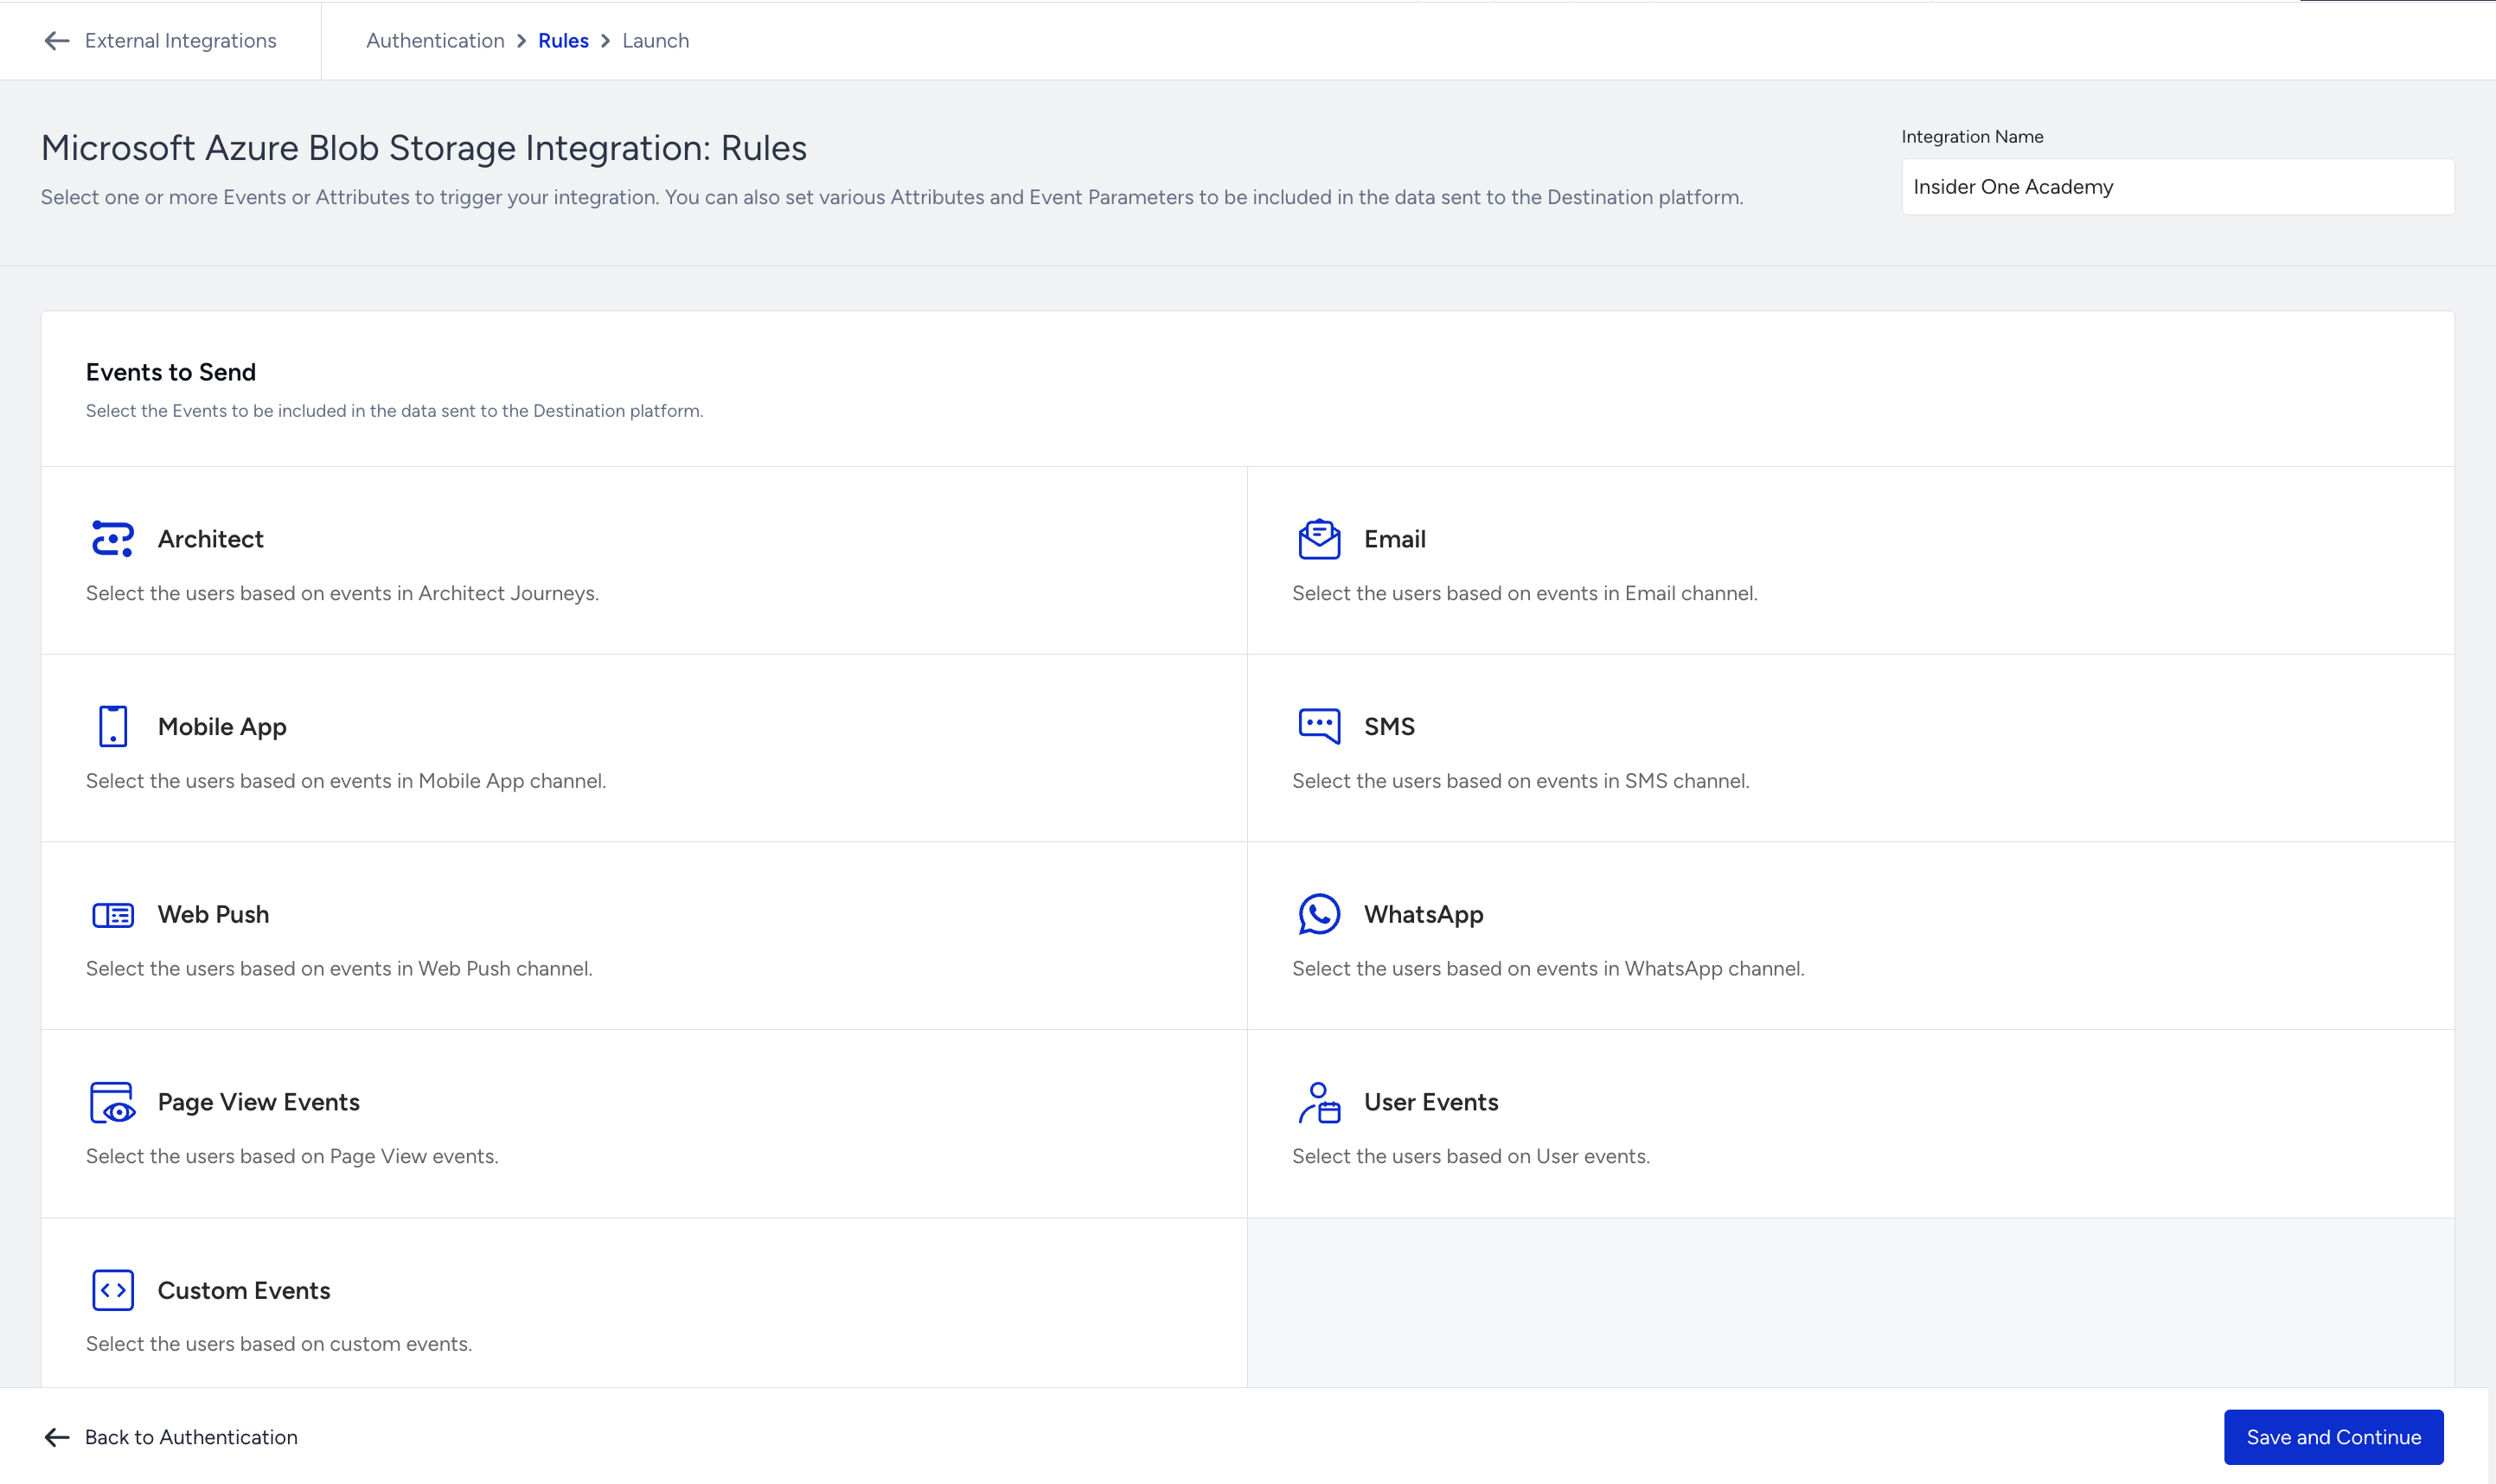
After you select the first event type you want to trigger the data collection, you can see the events based on the type and select or deselect the ones you want to collect. You can also add other event types via the same section.
To select the journey event’s name parameter, you need to use journey_campaign_name as the event parameter’s key.
The Event Parameter section will be enabled after you select an event. You can select your events’ parameters through the dropdown that you want to send to your storage.
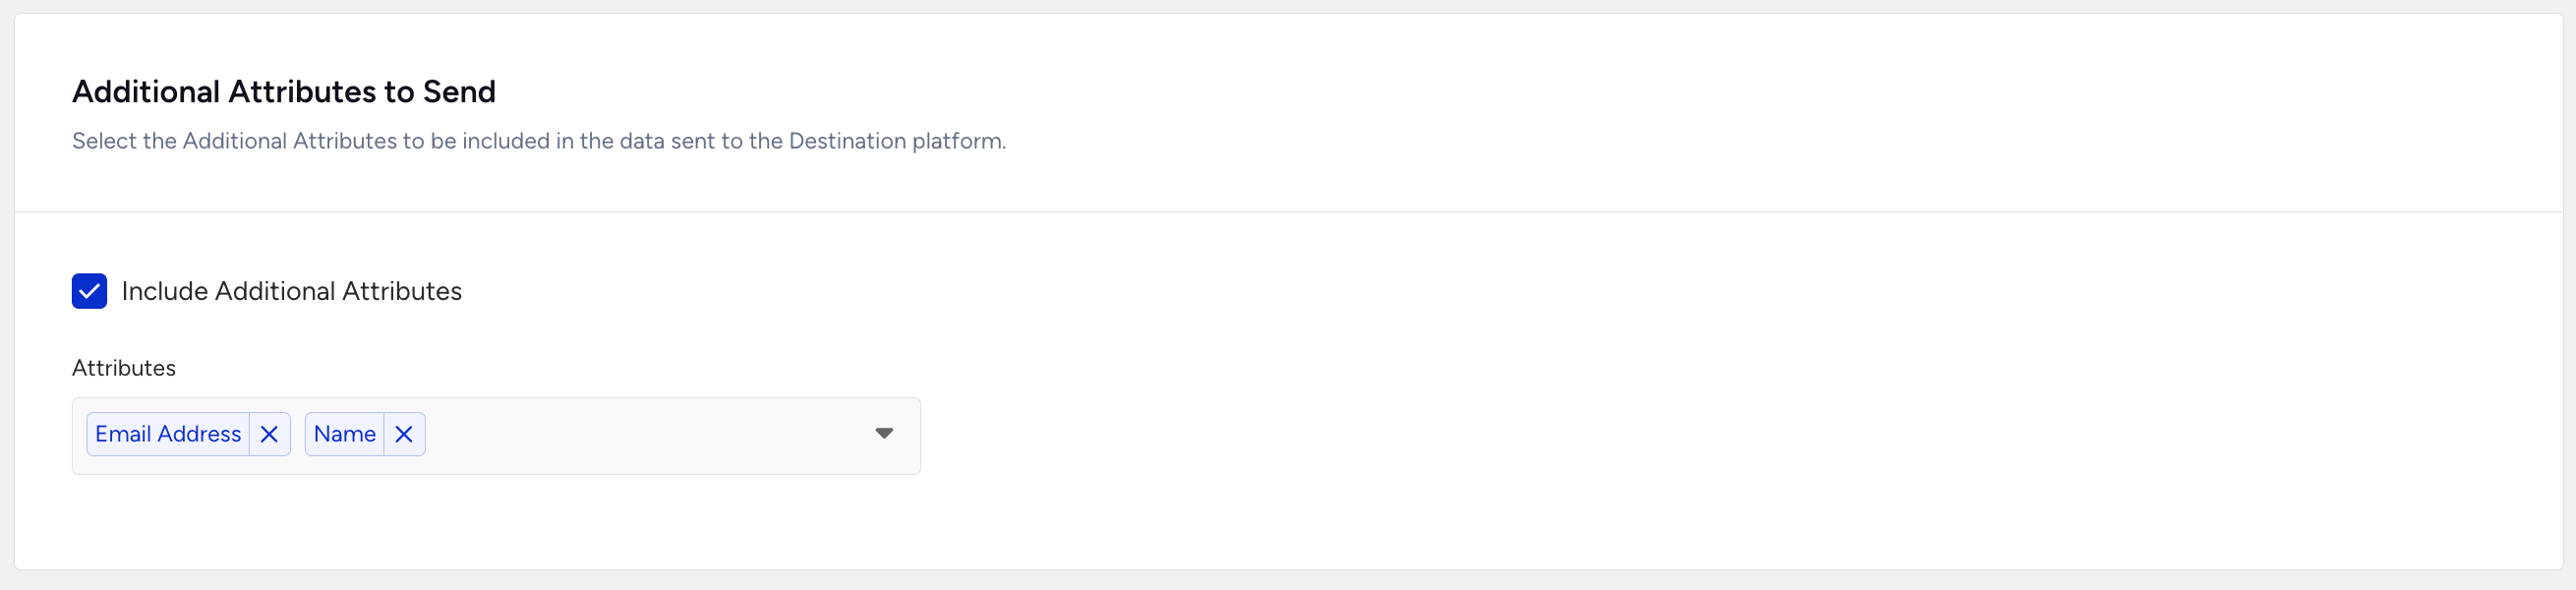
You can select additional attributes to include in the data sent to your storage destination. Use this step to enrich your event data with extra details.
For example, when sending an email open event, you can also include the email address. This helps you identify which users opened specific email campaigns.
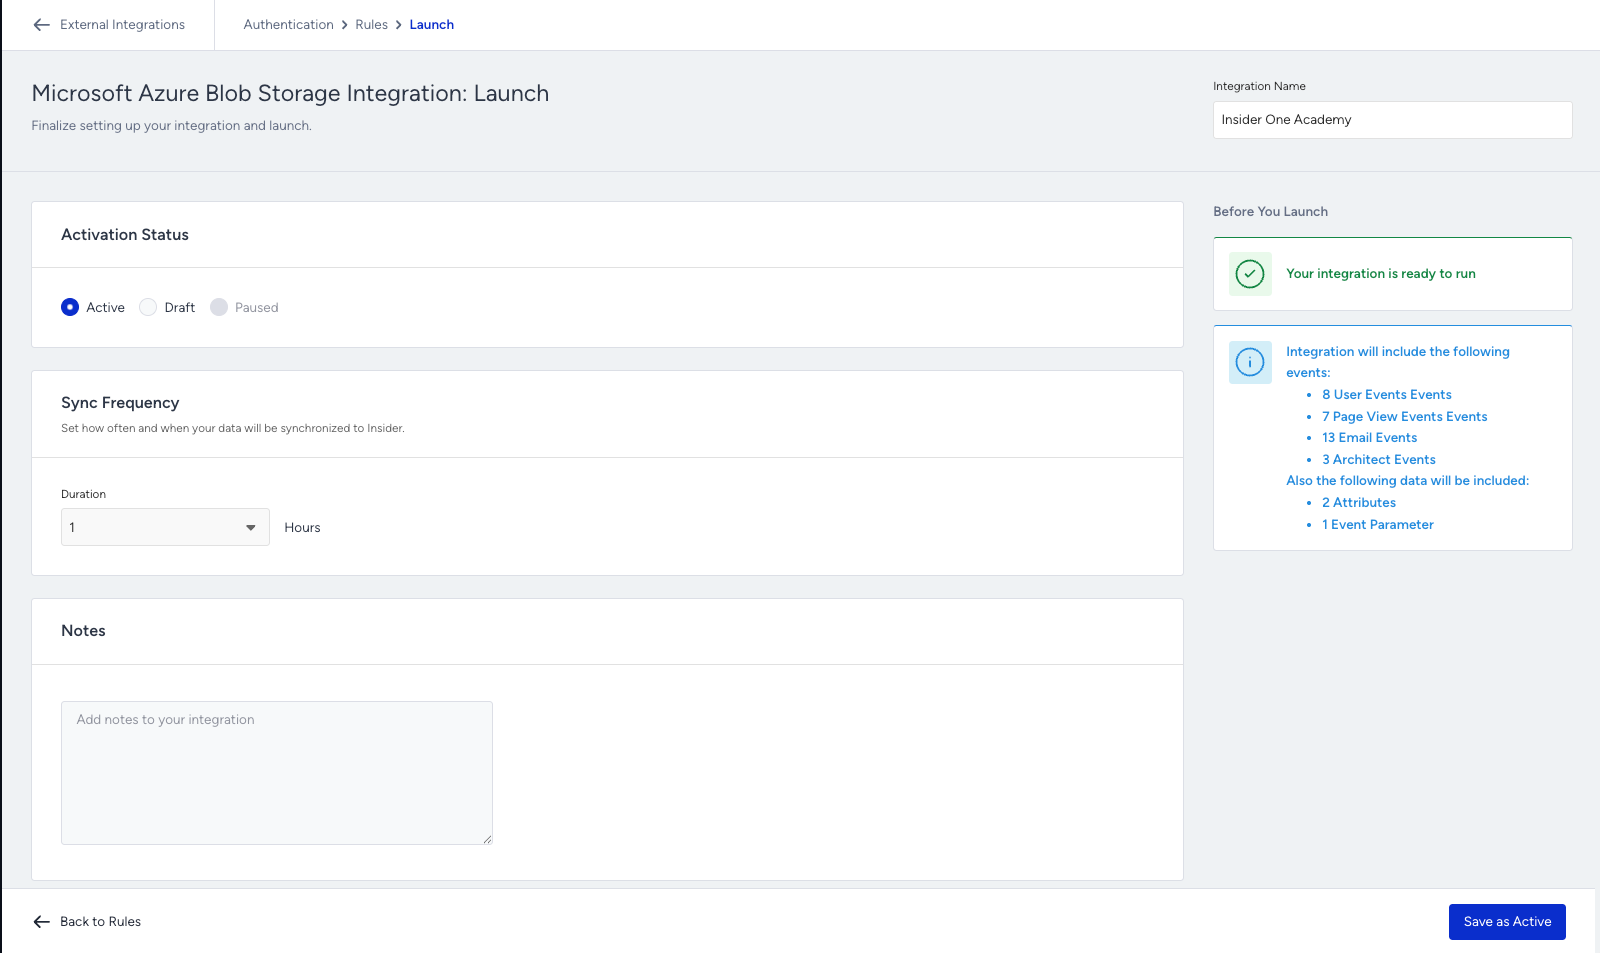
In the Launch step, you can adjust your sync frequency and activate your campaign. Once the campaign is activated, after the first sync, you will see a CSV file in your specified container.
For an additional layer of security, restrict your Microsoft Azure Blob Storage bucket so that Insider One's credentials only work when requests come from Insider One's egress IPs. Even if the service account key were exposed, it could not be used from any other network.
Refer to Insider One IP Allowlist for Destinations for the list of IPs to allowlist.
Anonymous user events are also included in the CSV file.
If a user is created and then deleted within the sync period, their data will still appear in the CSV.
When creating a new Microsoft Azure Blob Storage integration or editing the current one, Insider One performs an automated test to verify the integration works correctly by placing a test file in the specified containes.
If the provided credentials lack permissions to delete objects, the test file cannot be removed and will remain in the bucket after the test.
This is a one-time occurrence during the activation of the Microsoft Azure Blob Storage integration. You can manually delete the test file if needed.
If your Microsoft Azure Blob Storage integration encounters a Credential Error, the integration will stop immediately and no new data will be delivered while the error persists. It’s also important to note that after you resolve the error, the file names sent to storage may change, as they will follow the current timestamp sequence from the moment the integration resumes.
What are the Azure Blob Storage integration details?
Integration Type
Event Export. This integration involves exporting event data.
File Format
{account_name}_{exporttype}_{integration_id}_{start_unix}_{end_unix}.csv
{account_name}: The name of the account in the InOne panel used for the integration.
{export_type}: Indicates the type of export (e.g., events).
{integration_id}: Integration id
{start_date}: Start date of the exported data range.
{end_date}: End date of the exported data range.
start_date and end_date → Unix timestamp. These mark the boundaries of the UCD entry-time window the file covers; they are not aligned to clock hours, and they are not based on event timestamps.
The exported file will be in CSV (Comma-Separated Values) format. You can see an example file below:
Export Periods
Specify the intervals at which data will be exported.
You can choose export periods of 1, 2, 4, 6, 12, or 24 hours based on your reporting or analysis needs.
The Raw Export logs events based on their actual timestamp, regardless of when they are recorded in the User Content Database (UCD). In contrast, the Azure Blob Export captures events within specific intervals, like the past hour, according to their UCD entry time.
For example, the event counts displayed on the Metadata Analytics page represent all transmissions sent to UCD. Sending the same event 100 times results in only one entry in the database, but shows a transmission count of 100 on the page, while Raw Export will show only 1.The Azure Blob Export file will likewise contain 1 row, since both export the stored record.
If an event was timestamped three days ago but sent today, it will appear in Azure Blob Export, like the last hour, based on the current transmission timeframe.
You can create up to 5 total destination integrations across Amazon S3 Export, Google Cloud Storage (GCS) and Microsoft Azure Blob. This is a shared, dynamic limit. For example, you might use all 5 for S3, or split between S3, GCS and Azure as needed. If you reach the total limit, you must remove an existing integration before adding a new one.
Export windows are anchored to the integration's last successful run, not to clock hours. If the integration falls behind (for example after being paused or after a credential error is resolved), the next runs produce multiple catch-up files, one per missed window, until the integration is up to date.
Pause Azure Blob integration
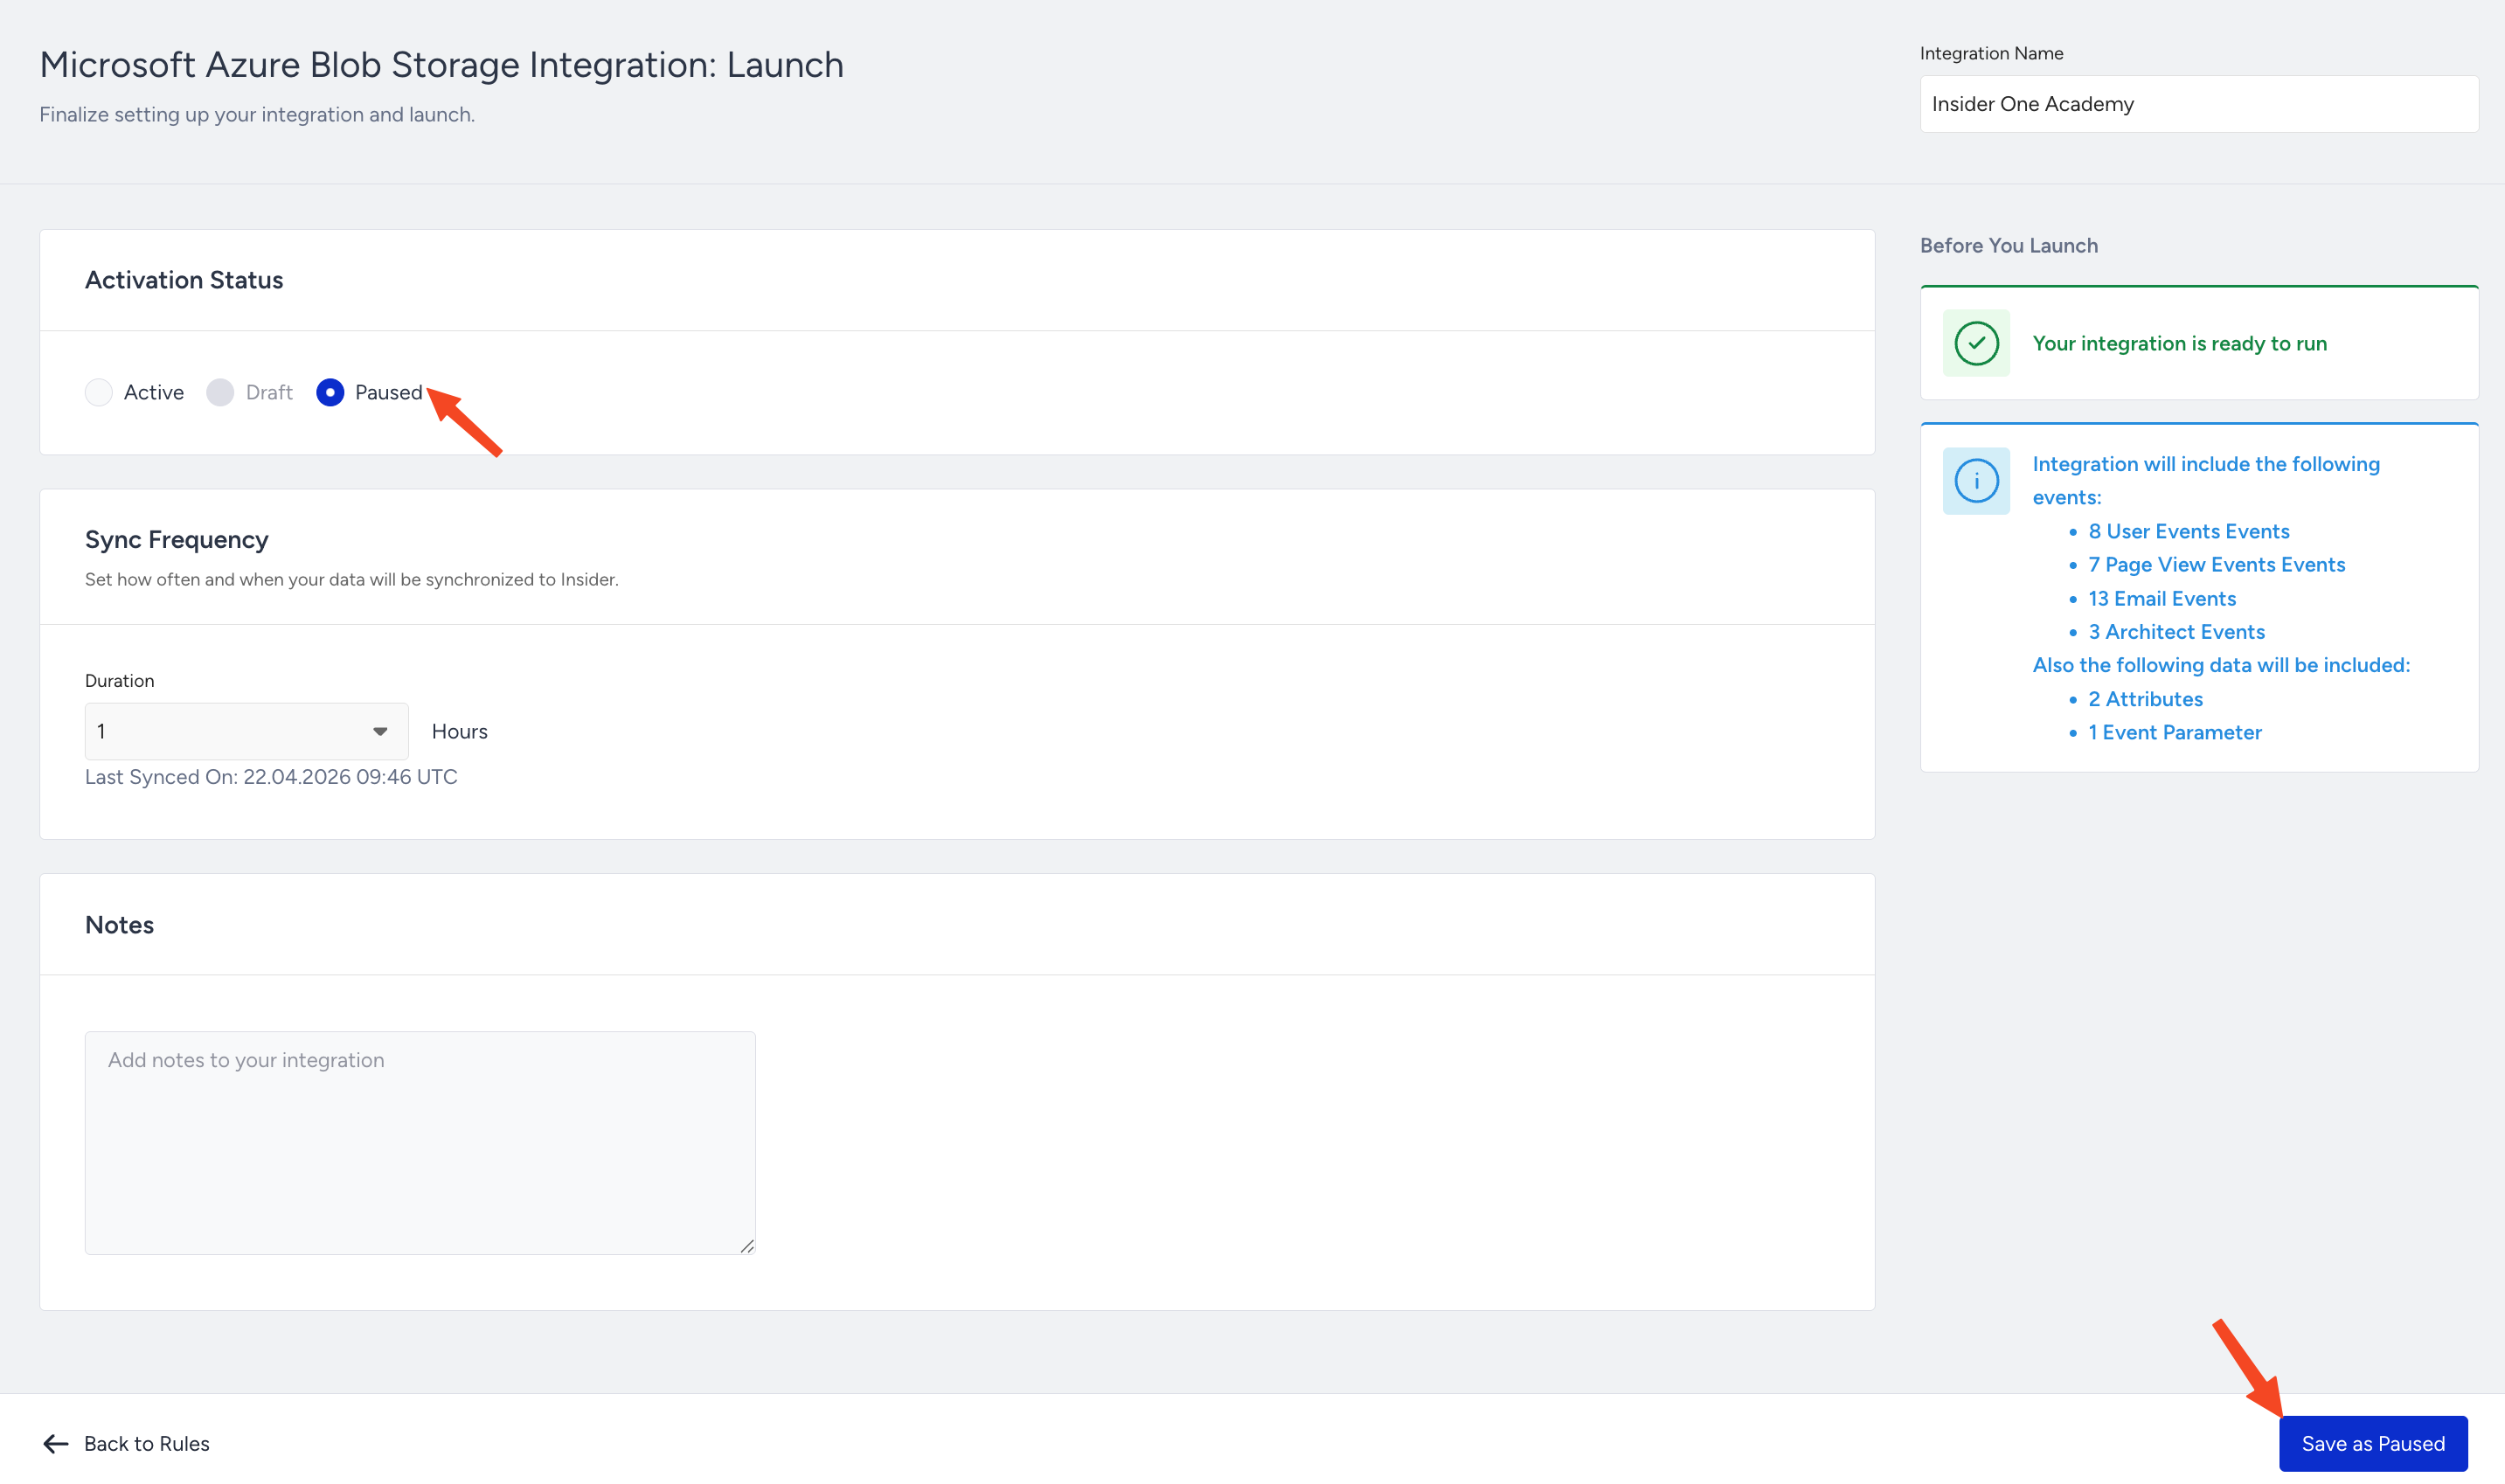
To pause your Azure Blob integration,
Go to the Launch step of your Azure Blob Integration on InOne.
Select Activation Status as Paused and Save as Paused.
FAQ
Q: Does this integration support historical data export?
A: No. Historical data export is not supported. Only data generated after activation will be exported at the selected frequency.
Q: Why don't the metrics in my export CSV files match the metrics I see in the UI (e.g., User Profiles > Channel Interactions) or statistics APIs (e.g., Get App Push Statistics)?
A: A one-to-one match is not expected, for two reasons:
Different time basis. Each export file covers a window based on when events were recorded in the User Content Database (UCD entry time), not on the event's own timestamp. An event that happened three days ago but was sent to Insider One today will appear in today's export file. The UI and statistics APIs, in contrast, filter by the event's actual timestamp.
The timestamp column inside the CSV still shows the event's actual time; only, which file an event lands in is decided by the UCD entry time.
Stored rows vs. transmission counts. The export contains the rows stored in the database: sending the same event 100 times results in one stored row, and therefore one row in the CSV. UI analytics, such as Metadata Analytics or campaign statistics, count transmissions (100).
To validate counts on an event-time basis, use the export options that filter by actual event timestamp instead, such as Raw Export.